RSS
 

Archive for the ‘Photography’ Category

How to Avoid Blurry Photos of Kids

29 Nov

One of the most frequent questions that I see on the Digital Photography School Facebook Group is some variety of this: “Help! Every photo of my kid is blurry! What am I doing wrong?!” If you’ve found yourself wondering the same thing, I’ll walk you through five things that you can do to help you avoid taking blurry photos of kids.

photographing-kids

1. Mind Your Aperture

When it comes to photographing children and experiencing blur, many issues can be solved by either stopping down or opening up your aperture. That said, if you’re relatively new to photography, it can be difficult to know which direction you need to go.

sharp-kid-photos

If you’re currently shooting with a large aperture and notice some issues. Like an aperture of f/1.4 or f/1.8 and only part of your child’s face is in focus, or only one of several children in the image is in focus even when they’re fairly close together. Then, you might want to try stopping down (making it smaller) your aperture (in other words, make the number larger like f/4 or f/5.6).

If you’re currently shooting with an aperture of f/5.6 or greater (like f/8 or f/11) and you notice a lot of camera shake or motion blur, you may want to try opening up your aperture (make the number smaller like f/4 or f/2.8) if you can. That will allow in more light, which can help create a better balance between the aperture and shutter speed.

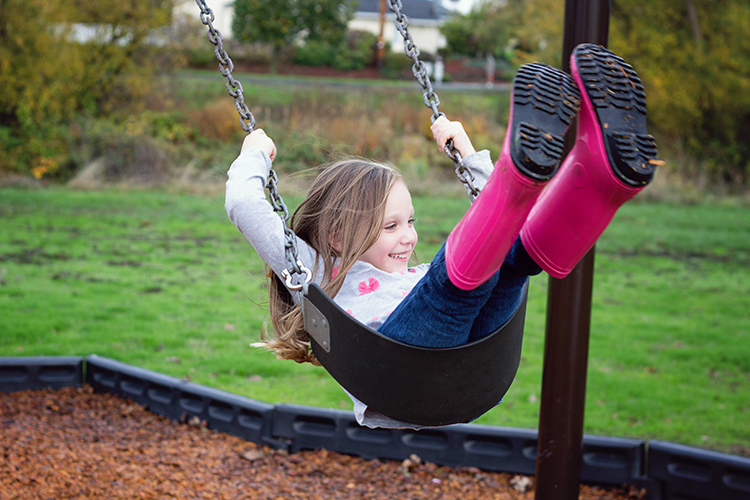
2. Utilize Shutter Priority Mode

photograph-moving-kids

If you’re using one of your camera’s shooting modes and are currently photographing kids that are moving, you may want to try shooting in Shutter Priority Mode with your shutter speed set at 1/500th or even faster. By using Shutter Priority Mode, you’ll set the shutter speed, and your camera will select the other settings to balance out the shutter speed that you’ve selected.

Keep in mind that you can still select your ISO in Shutter Priority Mode. You will definitely want to watch your exposure make sure you’re making adjustments to your ISO (or set it to auto). Often, leaving your ISO at 100 in Shutter Priority Mode with a fast shutter speed can result in very dark, or even black images.

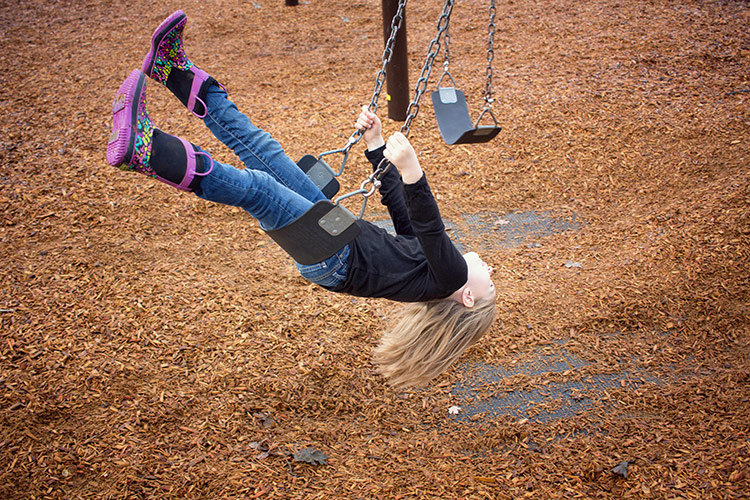
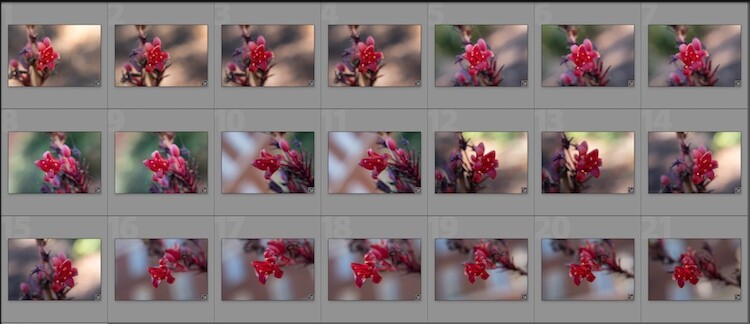
3.Use Burst Mode Selectively

photos-moving-kids

In the photography world, the practice of “spray and pray” where you take a series of images using burst mode and hope that one of them turns out, has received a lot of negative attention lately. Certainly, we shouldn’t use burst mode through the entirety of every session, but there are some instances when it comes in handy photographing kids.

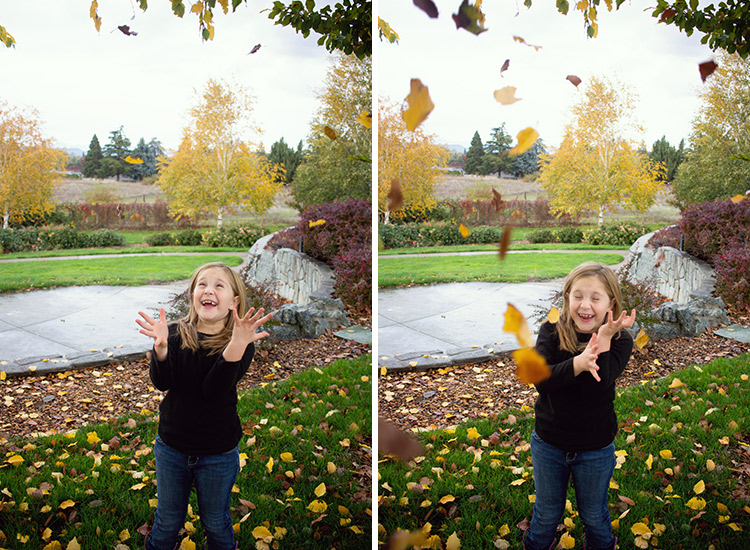
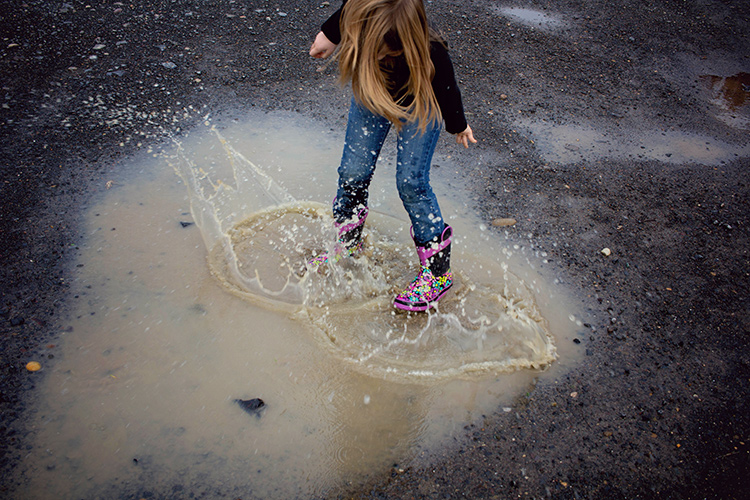
The other day, we took my girls to the park. They were having a blast tossing piles of leaves into the air and letting them fall down onto their heads. In that instance, I chose to use burst mode because it allowed me to capture an event in which the action/movement changed very quickly, as did their expressions.

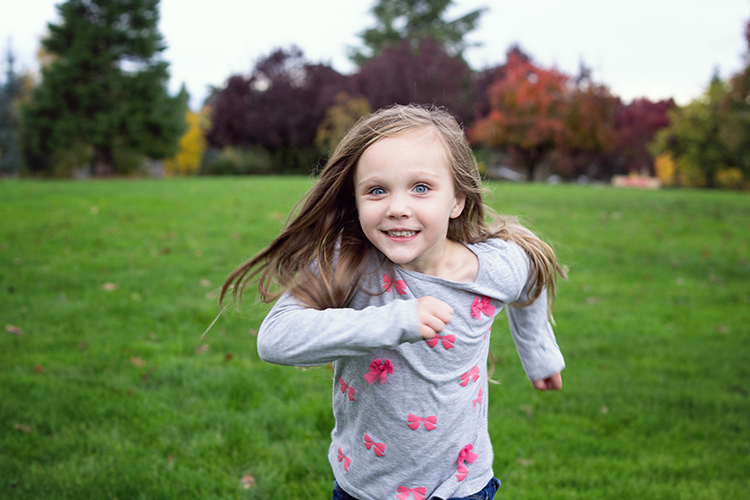
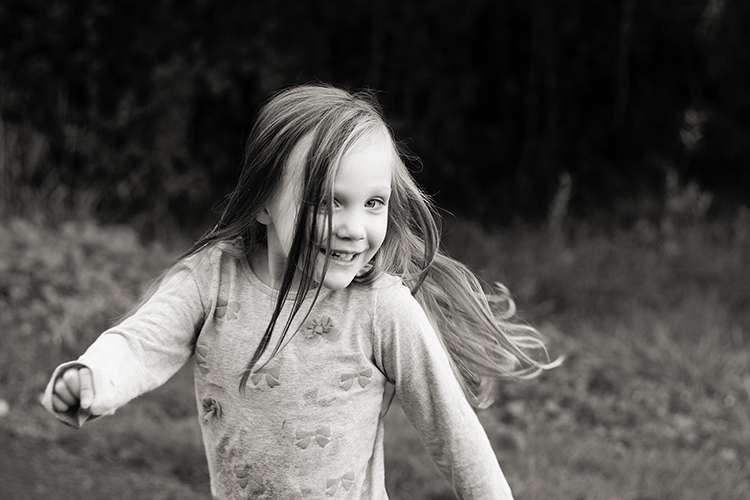
I sometimes use burst mode in a short series of images to capture kids twirling, running, or any time they’re moving very quickly for a limited period of time. It’s never a bad idea to practice capturing those same events without using burst mode. But when I know that my opportunity to capture a particular event is limited (a child attempting a goal in a soccer game for example), I choose to use burst mode to my advantage.

4. Don’t Be Afraid of Autofocus

sharp-images-moving-kids

Somewhere along the way, a rumor was started that you’re not a “real” photographer unless you shoot in full Manual Mode all the time. I don’t know how that particular rumor got started or why it has taken such a hold on the photography world, but it’s garbage.

If you’re trying to photograph really active kids, please don’t be afraid to use autofocus! It will make life so much easier! If you’re already using autofocus but are still experiencing problems, there are two other things to try adjusting. First of all, it has been my experience that selecting a single focus point for my camera yields far more in-focus images than allowing the camera to auto-select one. If you have the ability to select a focus point for your camera, you may want to try selecting a single point (start with the center point if you’re unsure where to begin) for your camera, and see if the focus improves.

moving-kid-photo2

Focus modes

Another option when it comes to autofocus is to change the autofocus mode. If you’re trying to photograph moving children, and your autofocus mode is currently set to One Shot (Canon) or AF-S (Nikon), try switching to continuous autofocus mode – Al Servo (Canon) or AF-C (Nikon).  One Shot mode is designed to focus on objects that are largely inanimate, and consequently it’s not the best choice when you’re photographing quickly moving children.

When you switch to Al Servo, you’re selecting continuous autofocus. In continuous autofocus mode, you can push down the shutter halfway and let the camera focus, but the camera will continue to track that subject and recompose focus (even as the subject moves) until you depress the shutter button all the way.

moving-kid-photo-2

Some camera models also have a hybrid setting called AI Focus (AF-A for Nikon), which is designed to fluctuate between an object that starts out as stationary but then begins to move. I have been less satisfied with the images I’ve captured in AI Focus than other modes. But each camera model works a little differently, so it’s certainly worth experimenting with the hybrid autofocus mode if your camera has that option.

5. Use a Flash (Sparingly)

fix-blurry-photos

Though I prefer to shoot without a flash whenever possible, there are certainly instances in which using a flash can help to freeze the action, and help you avoid blurry images. When it comes to using a flash, my best advice is to use it sparingly.  Balance it with the available/ambient light (use only the strength of flash you absolutely need), and diffuse or bounce the flash whenever possible in order to create an image that looks crafted rather than like a snapshot.

Photographing children can certainly be a test of patience. These five tips will help you eliminate the blur, and begin to capture photographs of your children that you’ll treasure for years to come! Do you have any other tips? Please share them, and your images of kids in the comments below.

googletag.cmd.push(function() {
tablet_slots.push( googletag.defineSlot( “/1005424/_dPSv4_tab-all-article-bottom_(300×250)”, [300, 250], “pb-ad-78623” ).addService( googletag.pubads() ) ); } );

googletag.cmd.push(function() {
mobile_slots.push( googletag.defineSlot( “/1005424/_dPSv4_mob-all-article-bottom_(300×250)”, [300, 250], “pb-ad-78158” ).addService( googletag.pubads() ) ); } );

The post How to Avoid Blurry Photos of Kids by Meredith Clark appeared first on Digital Photography School.


Digital Photography School

 
Comments Off on How to Avoid Blurry Photos of Kids

Posted in Photography


Review and Field Tests of the new Canon 5D Mark IV – Is it Worth Upgrading?

28 Nov

Canon recently announced the new incarnation of its 5D lineup, the Canon 5D Mark IV. I myself have owned the 5D Classic (Mark I), and I currently own the Mark III. Personally, I don’t have any plans to upgrade as I went another way instead, choosing to shift to the Fuji X-series as they are smaller and lighter for traveling. However, I am eyeing the new X-T2!

For those of you considering an upgrade on your Canon camera body, here are some reviews and field tests I found for the 5D Mark IV. Whether you’re going from an APS-C camera up to full frame, or just looking to upgrade from an older 5D model, do your own testing and decide if it’s the right move for you.

The Camera Store Guys

This store is in Calgary, AB, Canada – a mere four hours drive from my city. Not the place you’d expect world class camera reviews to come from – but these guys really do some great tests, in real-world situations and they produce some great videos that are totally impartial. If they find a flaw or sticky bit, they will tell you about it. I like that.

Let’s see what they had to say about the Canon 5D Mark IV:

Hmmm, interesting! Watch to the end where Chris sums up his thoughts on the 5D Mark IV they may surprise you. He’s very honest about it.

PhotoRec TV – Comparison of three cameras

The Canon 5D Mark IV, 5D Mark III and the Sony A7RII

Toby from PhotoRec TV has some notes for you comparing three different cameras including the 5D Mark IV’s predecessor, and the Sony A7RII full frame camera. He talks about what’s new and improved from the Mark III and how it compares to the Sony.

Dphog discusses the new dual-pixel RAW capability

This is a new introduction by Canon, dual-pixel RAW format. What does that mean? Quoted from Canon’s UK site:

Using the Dual Pixel RAW Optimizer in Digital Photo Professional software, users can make use of the Dual Pixel data recorded with the Dual Pixel RAW image for micro-adjustments of the position of maximum sharpness using the depth information contained within the file.

Is it worth it? Would you use this feature?

Pye from SLR Lounge shot a wedding with the Mark IV

Pye has done quite a few articles for us here on dPS, so you may be familiar with him. He took this camera to a wedding shoot and put it to work. He pushed the limits on it in many areas and tested ISO, dynamic range, the new dual-pixel RAW and some of the great new focus features.

Conclusion

So are you considering buying the Canon 5D Mark IV? If so you can price them out here:

  • On Amazon.com
  • On B&H Photo’s site

I would be remiss if I didn’t mention there have been some reported issues with the 5D Mark IV. So do some research and due diligence if you are thinking about buying this camera.

Have you tried one of these cameras out yet? Give us your thoughts in the comments below.

googletag.cmd.push(function() {
tablet_slots.push( googletag.defineSlot( “/1005424/_dPSv4_tab-all-article-bottom_(300×250)”, [300, 250], “pb-ad-78623” ).addService( googletag.pubads() ) ); } );

googletag.cmd.push(function() {
mobile_slots.push( googletag.defineSlot( “/1005424/_dPSv4_mob-all-article-bottom_(300×250)”, [300, 250], “pb-ad-78158” ).addService( googletag.pubads() ) ); } );

The post Review and Field Tests of the new Canon 5D Mark IV – Is it Worth Upgrading? by Darlene Hildebrandt appeared first on Digital Photography School.


Digital Photography School

 
Comments Off on Review and Field Tests of the new Canon 5D Mark IV – Is it Worth Upgrading?

Posted in Photography


How to Use Light Painting to Take Incredible Car Photos

28 Nov

Whether you drive a beat up station wagon from the 80s or a finely tuned Porsche, light painting is an excellent way to photograph your car and truly make it shine! Light painting results in incredibly unique and impressive images. With a bit of persistence and creativity, you can create pictures that look like commercial photoshoots – even without heavy editing.

A photo of a car taken using the light painting style

The reason that a light painted picture looks so incredible is because the light is literally wrapping around the subject. Normally, we see objects lit from only one angle, often the sun, which can get a bit dull at times. In addition, there will be cool reflections on the body of the car that trace the path of your light, giving the shot a highly commercial look.

Getting started

What’s the first step? Clean the car! Light makes every speck of dirt and grime become immediately visible. Unless you are going for a grungy style, you’ll want to make sure the car is squeaky clean.

Since light painting involves leaving the shutter of the camera open for some time, you will need to wait until it is dark outside. If you try light painting during the day, you will get a completely white image as the sensor collects all the sunlight.

Alternatively, if you have room in your garage, you could park your car in there and cover all windows so that there is no ambient light.

Your light source

One of the cool things about light painting is that you don’t need to invest thousands or even hundreds of dollars in equipment to get started. Literally, any light source can be used, whether it is a professional video light or simply a flashlight app on your mobile phone.

For my example picture, I will be using an LEDGo Portable Video Light, which is a small but powerful light that I can hold in my hand.

video-light-for-light-painting-1

video-light-for-light-painting-2

One drawback of this type of light source is that it throws light everywhere, including back at the camera. If possible, you will want to find some way to shield the light so that it is directed only at your subject. Professional light painting lights, like the Westcott Ice Light, have flaps that prevent the light from spilling everywhere.

A light painted car where the light source is visible

In this example, the light source was seen by the camera, which created a unique halo effect around the car.

A light painted car with the light source not visible in the final image

In this image, the light was shielded from the camera and pointed only at the car, so that the light path isn’t visible.

Setting up the shot

Perhaps the most important piece of equipment you will need for light painting is a sturdy tripod. This is because you will be taking a picture that lasts for many seconds. A tripod that shifts over the course of the picture, or that is blown around by wind, will result in some serious frustration and blurry images.

You don’t need a special or expensive lens for light painting – any lens will do! When you are setting up your tripod, remember how zoom influences a picture. Shooting from close with a wide angle lens will make the car look fatter. Shooting from a distance with a bit of zoom will lessen the distortion.

Behind the scenes of light painting car photography

Behind the scenes of the setup. There is some light filtering in from the left from a streetlight, but I can use my camera settings to reduce the effect of that ambient light.

Exposure settings

The first goal will be to get a base exposure. This requires that you go full manual on the settings. If you leave the camera on auto, it will try to compensate for the low light and may pop up the flash.

To make an image with a black background like the one in my example, you will want your base exposure to be very dark. If you want more of the surroundings to be visible, you can make your base exposure lighter. Be aware, however, that will mean that you are more likely to show up in the final image as you walk around the car with your light.

  1. First, select a low ISO so the sensor doesn’t collect much light from the surrounding area. As an added benefit, using a low ISO will also result in a very high-quality image.
  2. Next, you will want to choose a fairly narrow aperture. This will keep a large portion of the image in focus. It will also help to make the image darker, as needed.
  3. Last, choose a shutter speed that gives you a bit of time to paint the car. For my purpose, I chose 25 seconds.

As you can see below, this base image is nearly completely dark. This is perfect. Now the final image will only be what I paint with my light.

The base exposure for a light painting car image

The base exposure for my image was ISO 100, f/9, 25 seconds.

Let there be light (painting)

Now we’re ready to start painting!

You can either have a friend press the shutter button, or you can put the camera on a short timer so that you can start light painting immediately after the shutter releases.

There will inevitably be a bit of trial and error as you try to find the right angles at which to paint the car. Pay close attention to how the light is reflecting in the body of the car and try to find ways to make it look flattering. Typically this involves moving the light at a uniform level so that there is a clean and crisp line of light reflected on the car.

light-painting-example

Chances are you’ll have to throw away a lot of images because parts of the car weren’t lit well enough, or the reflections looked messy. Don’t let this discourage you. The more you practice, the more you will get a feel for how to move the light.

Don’t forget to play a little bit. Waving your light around in circles, for example, can make some cool light trails and some memorable images.

A light painted car with light trails

A light painted car with light trails

How come you don’t show up in the final image?

A camera can only see objects that have light shining on them. When you aim the light source away from yourself and keep moving the entire time the picture is being taken, you simply won’t be in one place long enough for the camera to record your image.

If you do see yourself faintly in the final image, this can be due to one of three things:

  • You might have been caught in the light reflecting off of the car (or accidentally lit yourself up).
  • There might be too much ambient light. Try adjusting the settings to make your base exposure a bit darker.
  • You stood still in one place for too long, keep moving.

Typically, these ghostly appearances can be fixed easily enough with Photoshop later on, though you may want to adjust some settings to save yourself some time in the editing room.

Controlling the power of your light

If you find that your light isn’t having so much of an effect on the final image, there are two ways to control this.

To effectively make your light more powerful, you can choose a wider aperture (lower f-stop number) or raise the ISO. Either of these options will make the camera more sensitive to all light, including the light in your hand. Be aware that these changes will also affect your base exposure for the ambient light conditions. So you may also need to change the length of the shutter speed in order to keep the image properly dark.

If all else fails, your last option might be to simply to purchase a more powerful light. Yes, it is possible to do light painting with a small flashlight, but if you are serious about light painting, it might be a good idea to upgrade to something with a bit more power and control.

Making some final edits

Often, light painted pictures look pretty awesome right out of the camera. By pulling the picture into an editing program like Lightroom, you can make some simple tweaks to complete the image.

The original, straight from camera image of a light painted car

This is the image straight from the camera. It has a really unique look, even before we do any edits. You can see that my feet were caught in the reflected light and will need to be edited out.

It’s a good idea to shoot your light painting images in RAW. Shooting in RAW as opposed to JPG gives you some extra flexibility when it comes time to edit.

General adjustments

First, you’ll want to find a nice looking white balance. Light painted cars often look very sleek with a steely, cold white balance, but you can experiment to find a nice balance for the car you are working with.

As I mentioned earlier, it’s important to make sure the car is clean before you photograph it. Any minor imperfections or dirty spots that might still be visible can be removed using the spot healing tool in Photoshop or similar editing programs. You may also want to use this tool to reduce or remove bright and distracting glare reflecting off the car. I used this method to remove a harsh reflection in the example picture just above the front wheel.

Selective adjustments

Next, you may want to take some time to selectively lighten or darken parts of the image. In the course of your light painting, it is possible that you might have spilled some light into an area of the picture that you wanted to leave dark. You can control this by using gradients or adjustment brushes to precisely control the amount of light on different areas of the image.

For my picture, I wanted the light to quickly fall off around the car. I was able to emphasize this by using gradients and a vignette to darken the edges of the image.

The final edited image of a light painted car

As you can see, the final image isn’t drastically different than what came out of the camera! This final image in a combination of two of the images, borrowing some features from both shots.

Get out there and start light painting

Light painting is a very fun, simple and rewarding style of photography. It doesn’t take any special equipment to get some incredible and truly creative results that will amaze your friends. Give it a try and share your light painted car images in the comments below.

googletag.cmd.push(function() {
tablet_slots.push( googletag.defineSlot( “/1005424/_dPSv4_tab-all-article-bottom_(300×250)”, [300, 250], “pb-ad-78623” ).addService( googletag.pubads() ) ); } );

googletag.cmd.push(function() {
mobile_slots.push( googletag.defineSlot( “/1005424/_dPSv4_mob-all-article-bottom_(300×250)”, [300, 250], “pb-ad-78158” ).addService( googletag.pubads() ) ); } );

The post How to Use Light Painting to Take Incredible Car Photos by Frank Myrland appeared first on Digital Photography School.


Digital Photography School

 
Comments Off on How to Use Light Painting to Take Incredible Car Photos

Posted in Photography


21 Smoking Hot Images of Fire

24 Nov

Where there is smoke . . .

Olli Henze

By Olli Henze

There’s fire!

Fire is a tricky thing to photograph. It comes in many forms; campfire, match, bonfire, fire spinning, sparklers, candles, etc. It can also make for some stunning images. Check these images of fire out and see if you agree.

Jan

By Jan

Shawn Kent

By Shawn Kent

Emilio Küffer

By Emilio Küffer

Darkday

By darkday

Annie Roi

By Annie Roi

Darkday

By darkday

José Carlos Da Silva Encarnação

By José Carlos da Silva Encarnação

Marcos André

By Marcos André

Wil Molenkamp

By Wil Molenkamp

Vineet Radhakrishnan

By Vineet Radhakrishnan

Der LichtKlicker

By der LichtKlicker

Umberto Salvagnin

By Umberto Salvagnin

Chuck Grimmett

By Chuck Grimmett

Shan Sheehan

By Shan Sheehan

Fábio Pinheiro

By Fábio Pinheiro

Courtney Carmody

By Courtney Carmody

Andy Miccone

By Andy Miccone

Compassrose_04

By compassrose_04

Victor

By Victor

Adrian Kingsley-Hughes

By Adrian Kingsley-Hughes

Serge Melki

By Serge Melki

googletag.cmd.push(function() {
tablet_slots.push( googletag.defineSlot( “/1005424/_dPSv4_tab-all-article-bottom_(300×250)”, [300, 250], “pb-ad-78623” ).addService( googletag.pubads() ) ); } );

googletag.cmd.push(function() {
mobile_slots.push( googletag.defineSlot( “/1005424/_dPSv4_mob-all-article-bottom_(300×250)”, [300, 250], “pb-ad-78158” ).addService( googletag.pubads() ) ); } );

The post 21 Smoking Hot Images of Fire by Darlene Hildebrandt appeared first on Digital Photography School.


Digital Photography School

 
Comments Off on 21 Smoking Hot Images of Fire

Posted in Photography


Weekly Photography Challenge – Fire

24 Nov

First, check out these stunning images of fire!

Now if that hasn’t got you melting already, how about this one?

Neil Howard

By Neil Howard

Weekly Photography Challenge – Fire

Fire comes in many forms:

  • Campfire
  • Bonfire
  • Match flame
  • Candles
  • Sparklers
  • Volcano
  • Forest fire (not a good thing!)
  • Fire spinning (if you attempt this please take the proper precautions and read this first)
  • Fire poi and other fire spinning type artists
  • Fire breathing dragons (if you find one let me know!)
  • A lighter
  • Burner on a gas stove
  • A torch or welder’s flame (make sure to use welder’s goggle to view and shoot with if you do this!)
Dwiforr

By dwiforr

So your challenge this week is to SAFELY find and photograph some fire. It could be as simple as a few sparklers from the dollar store, or more elaborate. But please put your safety, and the safety of the people and properties around you first. Only do what is safe.

Share your images below:

Simply upload your shot into the comment field (look for the little camera icon in the Disqus comments section) and they’ll get embedded for us all to see or if you’d prefer, upload them to your favorite photo-sharing site and leave the link to them. Show me your best images in this week’s challenge. Sometimes it takes a while for an image to appear so be patient and try not to post the same image twice.

Share in the dPS Facebook Group

You can also share your images on the dPS Facebook group as the challenge is posted there each week as well.

Lisa Ouellette

By Lisa Ouellette

Nan Palmero

By Nan Palmero

Paul Hudson

By Paul Hudson

Aotaro

By aotaro

googletag.cmd.push(function() {
tablet_slots.push( googletag.defineSlot( “/1005424/_dPSv4_tab-all-article-bottom_(300×250)”, [300, 250], “pb-ad-78623” ).addService( googletag.pubads() ) ); } );

googletag.cmd.push(function() {
mobile_slots.push( googletag.defineSlot( “/1005424/_dPSv4_mob-all-article-bottom_(300×250)”, [300, 250], “pb-ad-78158” ).addService( googletag.pubads() ) ); } );

The post Weekly Photography Challenge – Fire by Darlene Hildebrandt appeared first on Digital Photography School.


Digital Photography School

 
Comments Off on Weekly Photography Challenge – Fire

Posted in Photography


How I Processed This Photo Using Only Lightroom

24 Nov

An advantage of using the Raw format is that it gives you a tremendous amount of freedom when it comes to processing. This, combined with Lightroom’s powerful processing engine, opens up lots of possibilities for the creative photographer. I’d like to show you how I processed a Raw file using only Lightroom.

Photoshop users will also be able to follow along with most of it, as Adobe Camera Raw shares many of Lightroom’s sliders and functions. This is the original Raw file, as it came out of the camera.

Lightroom processing

And here’s the finished result after post-processing.

Lightroom processing

The story behind the image

As you can see there’s quite a difference between the before and after images. But before we look at how I achieved this in Lightroom I’d like to share the back story of the photo. This is important because it guided the way that I decided to process it.

I took the photo in a blacksmith’s forge in the English town of Spalding earlier this year. The forge is remarkable because they use working practices that date back over a hundred years. It’s open to the public and they have demonstrations where you can take photos. The forge is small and you can get quite close to the blacksmith, which allows you to take intimate portraits like this one.

The light was coming from windows in front of the blacksmith and behind him, as well as from the hot piece of metal he is hammering. There was also overhead fluorescent lighting. The end result is that the light is fairly flat and boring, which is something I wanted to change in Lightroom.

A blacksmith’s forge should be lit by a combination of cool natural light and the fiery orange glow from the fires, not fluorescent light. I wanted mysterious shadows in the photo, not every detail visible. Points like these are important because they help you work with a destination in mind, rather than aimlessly pushing sliders around to see what happens.

lightroom-before-after

First steps – color corrections

The first steps involve getting the colors right, as this affects the look of the photo and everything you do from this point forward. The most important setting is in the Camera Calibration panel. A lot of people gloss over this panel as if it’s not so important. This isn’t helped by its placement at the bottom of the right-hand side in Lightroom’s Develop module.

When I took the photo I had the color profile set to Velvia, which gives high contrast and strong, saturated colors on my Fujifilm X-T1. It doesn’t matter what your color profile settings are on your camera if you’re shooting Raw as you can change them in Lightroom. I wanted softer, more subtle colors, so I changed the setting to Classic Chrome.

Note: This setting is only available on some Fujifilm cameras. The settings you see in the Camera Calibration panel depend on your camera model.

Next, I went to the Basic panel and set the White Balance to Auto. This tells Lightroom to decide how to set the color temperature to give the image neutral colors. How successful Lightroom is at this depends on the content of your photo. If you have mixed lighting sources, as this photo does, even Lightroom’s powerful algorithms aren’t going to give you anything other than an educated guess. It’s not possible to get rid of all color casts with mixed lighting.

Regardless, Auto White Balance gave me a good starting point. This is what the photo looks like so far. You can see it’s already quite different from the starting image which was quite orange.

Lightroom processing

Auto White Balance applied.

Tonal adjustments

The next step was to start making the transition from an image that is too bright to one that is dark and moody.

I did this by setting the Exposure slider to -1.0. This made the shadows too dark, so I brightened them by setting the Shadows slider to +25. I also set Clarity to +31 to bring out the gritty textures in the scene. See my settings below:

Lightroom processing

As you can see now that the image is darker the blacksmith’s face is lit by the glow from the hot metal he is working with. This was lost in the original.

Lightroom processing

Tonal adjustments and Clarity applied.

Cropping to remove distractions

Now I can see that the photo has a major problem. There is too much empty space on the right-hand side, and the blue plastic is a major distraction. In hindsight, the composition would have been better if I had placed the blacksmith in the center of the frame. However, we can compensate for that by cropping the image.

I activated the Crop Overlay (keyboard shortcut R), set the Aspect to 4×5 / 8×10, and cropped the image. This cuts out the distractions on the right-hand side and brings the attention back to the blacksmith.

Lightroom processing

Lightroom processing

This is the result after the image has been cropped.

Refining the image with local adjustments

So far the adjustments made have all been global. That is that Lightroom applies them equally to the entire image. Now it’s time to refine the tonal values with some local adjustments.

I started by adding a slight vignette using the Post-Crop Vignetting tool in the Effects panel. This darkened the corners slightly.

Lightroom processing

Next, I decided that I wanted to make the background even darker. This is going back to the earlier decision to make the image dark and moody as if the blacksmith is working in a much darker environment.

I added three Graduated filters to darken the edges. The screenshots below show the placement of the filters and the settings used.

Lightroom processing

Graduated Filter #1 applied on the upper left of the image.

Lightroom processing

Graduated Filter #2 applied on the right side of the image.

Lightroom processing

Graduated Filter #3 applied on the lower right corner of the image.

Then I used an Adjustment Brush and moved the Shadows slider right to make the blacksmith’s hair lighter and bring out the detail.

Lightroom processing

Adjustment Brush applied to his hair to bring out detail.

This is what the image looks like now with these adjustments.

Lightroom processing

After local adjustments have been applied.

Split toning for color grading

Lightroom processing
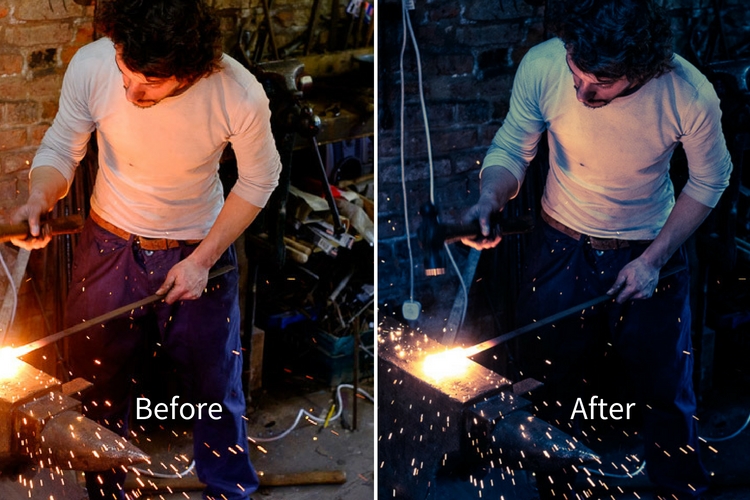
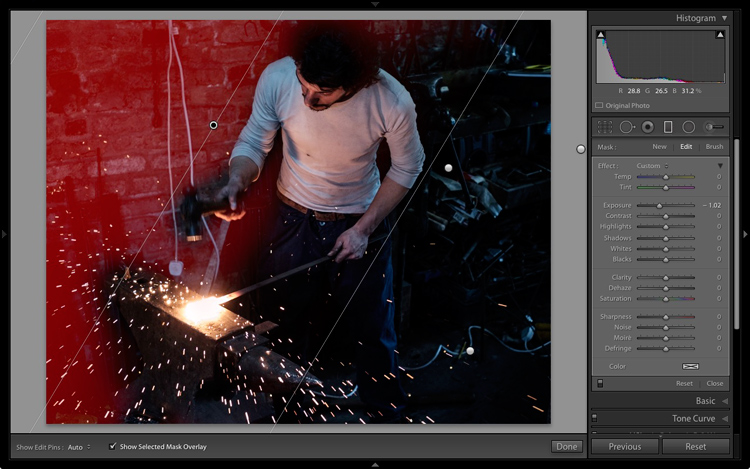
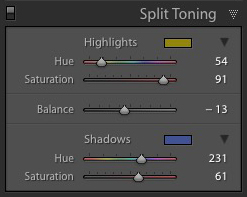
Finally, I decided that the mood could be further enhanced with a split tone applied: blue to the shadows and an orange tone in the highlights.

The idea was to emphasize the difference in color temperature between the orange light from the hot metal and sparks, and the background, which in my imagination is lit by daylight (but in reality was also lit by fluorescent light). I did that in the Split Toning panel with these settings.

Here is the final result.

Lightroom processing

Final image after split toning applied.

Final thoughts

As you can see, even though the final image looks remarkably different from the starting Raw file, the steps involved in the processing were quite simple. It didn’t take long to get from the starting point to the end photo. This is mostly because I had a firm idea of what I wanted as the end result before I started processing the file.

If you have any questions or thoughts to share about the processing I did on this image then please let me know in the comments.


If you’d like to learn more about processing your photos in Lightroom then please check out my ebook Mastering Lightroom: Book Two – The Develop Module.

googletag.cmd.push(function() {
tablet_slots.push( googletag.defineSlot( “/1005424/_dPSv4_tab-all-article-bottom_(300×250)”, [300, 250], “pb-ad-78623” ).addService( googletag.pubads() ) ); } );

googletag.cmd.push(function() {
mobile_slots.push( googletag.defineSlot( “/1005424/_dPSv4_mob-all-article-bottom_(300×250)”, [300, 250], “pb-ad-78158” ).addService( googletag.pubads() ) ); } );

The post How I Processed This Photo Using Only Lightroom by Andrew S. Gibson appeared first on Digital Photography School.


Digital Photography School

 
Comments Off on How I Processed This Photo Using Only Lightroom

Posted in Photography


8 Advanced Street Photography Tips to Get You to the Next Level

23 Nov

In photography, teaching and learning can only get you so far. At some point, you will get to a skill level where it’s up to you to put in the time and effort to continue improving. However, dedication and self-learning aside, here are some advanced street photography tips that I think can help you significantly improve your skill level in this area.

Grand Central Woman, NYC

1. Use your eyes instead of the viewfinder

When photographing, it is very common for people to look straight into the viewfinder and forget about the world around them, but this can make street photography tougher. Your vision through the viewfinder is hindered significantly, and that can hurt your ability to capture spontaneous moments. You need to see everything that is happening around you. This will help you to anticipate the special moments that are about to occur in front of your camera.

Your eyes are the real viewfinder, and you will be able to notice much more if you use them. Scan the area and look for subjects that are both near and far. Wait until you notice something with your eyes, then put your viewfinder to your eye to capture the moment. If you start with your head in the viewfinder, by the time the moment happens, your ability to notice it will be a half-second too slow.

2. Embrace spontaneity

Suits, SoHo, NYC

This was one of the early tips that Garry Winogrand received in his photography education that set him on a path to become one of the most renowned photographers of all time. You should certainly spend a lot of time thinking about your work and what you like to shoot, but when you are out there going through the motions, embrace your gut feelings. Instead of worrying about every little detail and thinking about if you are doing a good job or not, put that all aside and have fun.

There is no need to worry about what other people will think. If you feel like there might be a chance for a good photograph, then go for it, no matter how weird the image may be. Don’t let your brain talk you out of it. That gut feeling exists for a reason, so use it to your advantage. If you use your instincts and shoot confidently, that will show in your photographs. They will feel more real and more you. Of course, you will probably take more bad photographs as well, but the good ones will be that much better. Trust your gut.

Keep in mind that some people may take this suggestion too far and machine-gun fire their camera every time they have an inkling that there’s a good photograph. That’s taking this tip too far. Turn off continuous shooting and make sure that you are able to recognize and capture tha moment with a shot or two.

3. Think about how your photos are going to age

Cellphone Fashion Shoot, Soho, NYC.

It is important to think about your work in a historical context. Think about classic photographs and what makes them special. Simple old photographs of window displays and fashions look incredible, but those photographs might have seemed very ordinary back then. If you could go back in time to photograph, what you might see as interesting then would probably be much different than what most photographers were shooting at that time.

What about your life and area is going to be interesting in the future? What is going to change? Are people still going to be staring at their cell phones every second with huge headphones on and completely disconnected from reality? Who knows, maybe?

Try not to take anything for granted, and if you notice yourself disregarding something, then think about why you feel that way. Occasionally, these situations can make the best photographs.

4. Create themes and consistency in your photography

Cellphones, Greene Street, SoHo, New York

The more you shoot, the more you will notice that you are attracted to certain types of photographs. Find these consistencies when you are editing and embrace them. Over time, these ideas can blossom into full-fledged projects and books.

Group these images together into collections, and think about the type of photographs that you would like to add to them. Then the next time you come across a moment that fits into that category, you will be quick to notice and capture it. Each individual photograph is a piece of art, but a collection of photographs is its own work of art. Play with the order of your photographs and the meaning that comes out with different sequences of them.

Consistency does not mean that you can’t photograph different types of subject matter or in both color and black and white. You can be very diverse in how you shoot, and you can change and evolve as you go along, but you can still group these consistencies into projects that fit well together.

5. Repetition

Lower East Side, New York.

The real key to improving your photography is through repetition. It is necessary to photograph frequently to keep your eyes sharp and your hand-eye coordination ready. Your instincts will improve. The more often you do it, the better you will be. Keep the rust away. Even the best photographers need to continually photograph to keep their skills up.

The more you learn to enjoy the act of photographing, the easier it will be to walk out the door to shoot more. Photography shouldn’t be about feeling inspired or uninspired. You do not need to feel inspired to photograph if you enjoy the act of walking. Create a plan for how often you will photograph, just like the gym, and stick to it. Over time, it will become routine and your enjoyment for it will continue to grow.

There is no need to worry about coming back with good photographs. That is going to happen, and you shouldn’t feel sad if you didn’t get anything good in a session. The good photographs will come, but if you feel frustrated too often, then that will affect how you photograph. Just enjoy the process of being out in the world doing something you love. The more you enjoy that, the better you will be.

6. Photograph where you live

Brooklyn Home, NYC.

No matter where you live, whether it’s in the middle of a big city or in a small suburb, use that as a backdrop for a project. That is the area that you frequent the most, and know the best. Go to places that you think would be incredibly boring for photographs and figure out how to get a good photograph there. Don’t take things for granted. Absolutely anything can make a good and beautiful photograph. All it takes is dedication.

7. Emotion and gesture

Jerry Delakas, Astor Place Newsman.

As photographers, our job is to pass on an idea or an emotion to the viewers of our work. How you do that is something for you to figure out. Search for feeling and emotion when you are shooting. Aim to create evocative photographs.

If you are photographing people, it is important to capture them when they are portraying an emotion. This can be shown in a facial expression, what they are doing, or the gesture of their body. Sometimes, you will capture a unique looking person with no emotion or gesture and that will ruin the photograph. Other times, you will capture someone that you did not think would be a good subject, but the emotion shown on their face make the entire photograph. When you photograph people, this emotion is vital to focus on.

8. Zone focusing

Lower East Side, New York City

Zone focusing is the toughest technical skill to learn in street photography, but it is very important to learn. At first, you will screw up a lot of photographs, but over time it becomes a more accurate way of obtaining sharp photographs.

Zone focusing works particularly well in busy areas, but it can be used any time once you get good at it. I tend to zone focus 60% of the time and autofocus the rest. If your subject isn’t moving and you have time to autofocus, it is always good to do that as it will guarantee perfect focus. But the rest of the time zone focusing can be the way to go.

What is zone focusing and how is it done?

This strategy of zone focusing is basically just using manual focus your camera and guessing the distance to subjects. Because of this, you will need a distance meter on either your lens or in your camera. You then want to turn your camera (or lens) to manual focus. Set the focus at a certain distance away from the camera. I prefer 8-10 feet, although I will do a smaller distance if I’m in a really busy area where people are closer together. Next, figure out how far that distance is away from your camera, and now you know that everything at that distance away from you will be sharp.

Zone focusing can be done well at very large apertures, even f/2, but it becomes much more difficult to do well. This focusing strategy works much better with apertures of f/16, f/11, and f/8 and a wide-angle lens such as 35mm. That will ensure there is a large depth of field in your image (make sure to also raise your ISO to achieve this and still keep an adequately fast shutter speed). Thus, there will be a significant area both in front and behind of the spot that you are focused on that will all be in sharp focus. This helps for situations where you miscalculate the distance when the perfect moment happens and it’s not exactly where are focused, and when you have multiple subjects at different distances that you want to be relatively sharp.

This is why it is always good to start off zone focusing in bright sunlight with a wide-angle lens. This will allow you to shoot at f/11 or f/16 so that a lot of your image will be sharp and you will barely have to worry. Set your focus to 8 or 10 feet away and pay attention to your subjects more than your focusing. It is a very freeing feeling, and the extra time you save not having to focus will aid you in catching those spontaneous and instantaneous moments that appear before you.

Conclusion

If you want even more street photography tips, check out: The Ultimate Guide to Street Photography (you can even download it as a PDF).

What things to you practice to up your street photography game? Please share your comments and images in the section below.


If you’d like to learn more about Street Photography, then please check out my ebook The Essentials of Street Photography.

googletag.cmd.push(function() {
tablet_slots.push( googletag.defineSlot( “/1005424/_dPSv4_tab-all-article-bottom_(300×250)”, [300, 250], “pb-ad-78623” ).addService( googletag.pubads() ) ); } );

googletag.cmd.push(function() {
mobile_slots.push( googletag.defineSlot( “/1005424/_dPSv4_mob-all-article-bottom_(300×250)”, [300, 250], “pb-ad-78158” ).addService( googletag.pubads() ) ); } );

The post 8 Advanced Street Photography Tips to Get You to the Next Level by James Maher appeared first on Digital Photography School.


Digital Photography School

 
Comments Off on 8 Advanced Street Photography Tips to Get You to the Next Level

Posted in Photography


How to Make a Pinhole Camera with a DSLR Body Cap

23 Nov

Pinhole photography is a lensless form of photography. Essentially, the pinhole camera is a lightproof box with a tiny aperture and a photosensitive material positioned inside. Light passes through the aperture and projects an inverted image onto the interior of the box where the photosensitive material is fixed. You can make a pinhole camera out of practically anything, and the results are unique and often surprising.

digital-pinhole-13

Analog ideas in a digital world

Modifying your DSLR camera’s body cap to create a pinhole effect is a simple project that allows for real-time adjustments that the analog process doesn’t. As long as you can spare a body cap you can do this. The lens emulates the distinctive vignette and softness of a pinhole photograph in a fraction of the time and is great for adding an abstract or surreal quality to an image. While the digital technique isn’t the same as a classic biscuit-tin camera, your home-made lens makes for a dynamic approach to a nostalgic analog process. Plus, the unpredictability of the results adds an interesting twist to your digital practice.

digital-pinhole-15

You will need:

  • A DSLR camera
  • One body cap that fits the body of the camera you are going to use
  • One drill and a drill bit
  • A needle
  • Aluminum foil
  • Sticky tape
  • Blu-Tack

Method

Mark out the center of the body cap and make an indent by pressing the tip of the drill bit into the center mark. It’s important to make a hole in the center of the body cap or you won’t get the full effect. Drill a 1/4″ or 6.35mm hole in the center of the cap. Make sure the hole is clear of any swarf (chips) or sharp ridges left behind by the drill.

digital-pinhole-06

digital-pinhole-07

Cut a small piece of aluminum foil to fit inside the edges of the cap.

digital-pinhole-08

Tape the foil onto the inside of the cap, keeping the sheet taut.

digital-pinhole-10

To create an outline of the drilled hole, gently press the foil into the body cap with your finger,

digital-pinhole-11

digital-pinhole-09

Now, have a look at the outline of the drilled hole. With a small sewing needle, prick a tiny hole in the center of the outline.

digital-pinhole-12

The smaller the aperture, the sharper the photograph, so use the very tip of the needle to make a hole. Make sure no foil hangs over the newly pricked hole as this could compromise image quality.

Shooting with your pinhole camera

Before attaching the cap onto the camera body, be sure to thoroughly clean the body cap of dust and residue. Keep a bit of Blu-Tack with you to cover the hole when the camera isn’t in use.

The tiny aperture in our pinhole lens allows significantly less light to hit the sensor than a conventional lens, so exposures must be longer to compensate. When I’m out in the field, I set my ISO to 500 so the sensor will be more sensitive to the light that does reach it, without too much digital noise in the image. I also set my camera to aperture priority (A on Nikon and Sony, and Av for Canon and Pentax) so that I can adjust the exposure easily, and the shutter speed will adjust automatically.

In dark, indoor conditions, my shutter speed settings can go as low as 8 seconds. On bright days outdoors I photograph at 1/30 of a second but shutter speeds of up to 1/8000th of a second can be used to photograph bright subjects like the sun. At first, it will feel a bit trial-and-error, but half the fun is in the experimentation and you will quickly get a feel for it. Tripods are handy, but in-camera movement can have some neat results too, so don’t be afraid to experiment.

digital-pinhole-01

digital-pinhole-02

Also due to the small aperture of the pinhole lens, dust specks are more visible than images taken with a conventional lens. Don’t panic, it’s not the sign of a dirty sensor! Use Photoshop or a similar program to remove spots via the Spot Healing Tool. While you’re at it, give the colors in your image a bit of a boost with the Curves tool to make your images really pop, or convert an image to black and white for a traditional analog feel.

Conclusion

This project is quick, easy and fun, but it also yields fascinating and unexpected results. Much like its analog counterpart, I found that this method requires the user to relax and enjoy the experimental process and hone in on their photographic senses, rather than pouring over the details.

I found that my best images were the ones I took spontaneously, often having to quickly guess the appropriate exposure and shoot from the hip. Also, I was compelled by the new perspective that the combination of camera movement, long exposure, the limited field of view, and minimal technical adjustment delivered. 

Have fun and share your results in the comments below.

digital-pinhole-04

This photograph of leafy branches was taken with a 2 second exposure on an overcast day. The soft focus of our modified lens and the moment of the branches lends a painterly quality to the image.

digital-pinhole-14


digital-pinhole-16

digital-pinhole-03

digital-pinhole-05

googletag.cmd.push(function() {
tablet_slots.push( googletag.defineSlot( “/1005424/_dPSv4_tab-all-article-bottom_(300×250)”, [300, 250], “pb-ad-78623” ).addService( googletag.pubads() ) ); } );

googletag.cmd.push(function() {
mobile_slots.push( googletag.defineSlot( “/1005424/_dPSv4_mob-all-article-bottom_(300×250)”, [300, 250], “pb-ad-78158” ).addService( googletag.pubads() ) ); } );

The post How to Make a Pinhole Camera with a DSLR Body Cap by Megan Kennedy appeared first on Digital Photography School.


Digital Photography School

 
Comments Off on How to Make a Pinhole Camera with a DSLR Body Cap

Posted in Photography


4 Tips to Supercharge your Lightroom Workflow

23 Nov

In this article, we’re going to look at four tips to help you supercharge your Lightroom workflow and post-processing. Then you can spend more time doing what you love, photography!

The issue

Going through several hundred pictures after a photo session can seem so daunting and time-consuming that it becomes more of a chore than an enjoyable and creative part of the photography process. It’s those late nights staring at a collection of pictures on your computer monitor, sipping the last drops from your cold mochaccino long after the whipped cream has melted away, that can suck all the fun out of photography. It can make you want to up-end your workstation, chuck your gear in the trash, and look up the price of desert island real estate so you never have to edit another picture again.

Fortunately, most image editing programs have some type of photo management built-in to help streamline your editing. Lightroom has a set of tools that have been honed over many years of iterative development to really assist you when it comes to trimming precious time from your post-processing workflow. There are four specific techniques that can help you, and those just getting started in the field. Together they can save you time and maybe bring back the artistic spark that may have been lost over the years.

You can help me save time in Lightroom? Tell me more!

Can you help me save time post-processing in Lightroom? Tell me more!

#1 – Create your own presets

Most people know that Lightroom has a fairly extensive offering of built-in presets, and you can even buy additional sets like the ones we offer here at dPS. But as useful as those are, they might not meet your specific needs as a photographer. If you’re like me you, tend to use presets as a starting point and then tweak your images ad nauseam, but sometimes even getting to that starting point can be tricky.

Enter the wonderful world of user-created presets! Lightroom lets you save any combination of adjustments in the Develop module as a Preset that you can apply to any photo at any time. I find this really handy when doing my initial photo imports. I like the RAW files from my Nikon D750 to have a little bit of added vim and vigor right off the bat. So upon import, I usually apply a preset I made called “Nikon RAW Import” that adjusts black, white, and shadow levels along with a few other parameters. It gives me a nice starting point for almost any image and is a great way to save time when editing.

supercharge-lightroom-workflow-custom-presets

How to save your own presets

To create your own presets go to the Develop module and change the value of your sliders, adjust your tone curve, dial in your preferred level of sharpening and noise reduction, and you’re 90% finished. After you have an initial set of edits created go to the Develop menu and choose “New Preset.” Select the parameters you would like to include in the Preset and then click “Create.”

Your Preset is now ready to go and you can apply it with one click to any image, or to a batch of images. Do so by selecting them (from the thumbnails) in the Develop module, right-click on them, and choosing “Develop Settings > User Presets > [Your Preset name].” You can also apply it to all your photos on import by going to the right-hand side of the Import screen under the “Apply During Import” option. Where is says “Develop Settings” pull that menu down and find your preset from the list.

supercharge-lightroom-workflow-preset-import

As a bonus, you can even share your Presets with others by navigating to the folder on your hard drive in which they are stored (“Preferences” menu > Presets > Show Lightroom Presets Folder), copying the file with your Preset data, and sharing it with anyone you choose.

Read more here: How to Create Your Own Lightroom Presets

#2 – Sync edits across multiple photos

Photographers are going crazy over this! You can save all sorts of time in your Lightroom workflow by using this one weird trick! I know that sounds like a cheesy click-bait title from a sidebar you might see on a used car website, but in this case, it’s really true.

On many photo sessions you will end up with dozens of images that are relatively similar and thus can often benefit from the same types of adjustments. Let’s say you shoot a wedding and have 20 really nice images of the groomsmen getting ready and adjusting their superhero-themed vests in the church office. You could easily spend 5 or 10 minutes adjusting the white balance, black levels, highlights, color saturation, and noise reduction. You finally get one of the photos looking, as Goldilocks might say, “Juuuuust right,” and then realize you still have nine more to go. At which point you start looking up how much your 70-200mm lens might sell for on Craigslist because you know this is going to be another one of those editing sessions that involves way more late nights and cups of coffee than you had initially planned.

supercharge-lightroom-workflow-sync-button

How to sync your processing settings

But wait, there’s hope! To instantly sync the edits from the first photo to all the rest which are similar, select the initial image in the filmstrip view at the bottom of the Develop panel. Then hold down the [shift] key while selecting all the rest and click the “Sync…” button in the lower-right corner of your screen.

You can pick and choose which edits you want to sync, and with the click of a button, all the other images are instantly edited just like the first one. BAM! Time saved: infinite. You’re welcome.

Alternatively, you could use the Copy/Paste function to copy edits from one picture to the next, but that only works with a single photo at a time. I have found the Sync option to be far more useful, you may as well.

Using the Sync option saved my bacon on this photo shoot. I had so many pictures to edit that synchronizing the changes made things go much faster.

Using the Sync option saved my bacon on this photo shoot. I had so many pictures to edit that synchronizing the changes made things go much faster.

#3 – Use the White Balance Eyedropper

When I first started out with digital photography I was the kind of person who wanted to do everything myself. Auto mode? No thank you camera, I’ll set the exposure myself. Autofocus? I don’t think so. Automobile? Not me, I prefer to walk!

Over time, I learned to let go of some of these tendencies with one glaring exception. Setting the white balance on my RAW files in post-production, stuck with me far too long.

Setting the proper white balance is the foundation for almost any photo editing. If you fiddle with the Temp and Tint sliders long enough you can usually get a good result. The trouble is that takes a long time, especially when working with hundreds of images. It can take a lot of trial and error, and guesswork to dial in just the right white balance. Unless you let Lightroom do most of the heavy lifting for you.

White Balance got you down? The Eyedropper is here to help.

White Balance got you down? The Eyedropper is here to help.

Using the eyedropper

Nestled quietly on the left-hand side of the Basic panel in the Develop module is a strange icon. It looks like a medieval dagger or possibly a light saber that can’t decide whether it’s meant for a Jedi or a Sith. It’s actually an eyedropper. Using on it can help you out immensely when it comes to finding the proper white balance for a RAW file.

Click the icon and find a spot on your photo that is slightly gray (neutral). Not totally pure white mind you, but a little off-white to give Lightroom a reference point as it calculates the value of how the rest of the colors in the image should look. What it does is neutralizes any color cast or shift in that area. A half second later and voilà! Your picture is now properly white balanced, but if it doesn’t look quite right you can tweak it with the sliders. Using the eyedropper isn’t a surefire guaranteed method, but it almost always gets you right on the mark or very close to it.

One click and...bam! Instant white balance.

One click and…bam! Instant white balance.

#4 – Flag/Reject when culling images

I was just talking with a friend recently who takes a lot of pictures of his kids with his DSLR. He told me that one of the hardest things for him to do is go through his images and remove the bad ones. His solution was to simply not delete any at all.

If this sounds like you, whether you’re professional or amateur, and you just can’t quite bring yourself to tap the [Delete] key when browsing through your photo library – Lightroom is here to help.

You might do a family portrait session and get 20 pictures with just mom and dad, 50 that you took in burst mode with the kids sitting on their lap. Then a couple hundred from when the family invited their pet ferret to join the shoot. Some of your images would be easy to discard due to being out of focus, poorly composed, or overly pernicious polecats deciding to climb atop dad’s carefully crafted coiffure. But what about the rest? The ones that are all pretty good while also being quite similar?

So many photos, so little time...

So many photos, so little time…

How to flag images in Lightroom

As you scan through your library in Lightroom, you can use the arrow keys to move from one image to the next, and the P and X keys to mark images as keepers or rejects. Tap P (pick) on a picture to adorn it with a  white flag, and tap X to mark it with the Tiny Black Flag of Shame denoting a rejected image.

A Flagged picture is one that you have highlighted as particularly good, while a Rejected picture is not worth your consideration. Marking an image as Rejected does not delete it so you can always go back and look at it later. But it serves as a signal to you as you are culling, that you don’t need to consider it. You can also use the filter bar at the bottom of the screen to show only those images that are Flagged, Unflagged, or Rejected by clicking on their respective icons. If you accidentally mark an image incorrectly, press the U key to remove the Flag/Rejected status.

Filter them

You can also use the filter bar at the bottom of the screen to show only those images that are Flagged, Unflagged, or Rejected by clicking on their respective icons. If you accidentally mark an image incorrectly, press the U (unflag) key to remove the Flag/Rejected status.

Once you mark your images as Flagged or Rejected, use the filter icons to choose which photos to display.

Once you mark your images as Flagged or Rejected, use the filter icons to choose which photos to display.

Using the Flag/Rejected markings has significantly decreased my editing time, and will likely dramatically lower yours as well. In a similar fashion you can use the number keys 1-5 to mark images with one to five stars, and numbers 6-9 to label images with different colors. I find these less handy than simply using the Flag/Rejected method when doing the initial culling, but far more useful when deciding, for instance, which images are the Best of the Best and worth printing, sharing, or showing to clients.

Over to you

I hope these tips have been helpful. Certainly, there are many more options for helping your Lightroom workflow go a little smoother that we simply don’t have the space to cover in one article. What are your favorite tips? Please share your ideas, tricks, and shortcuts in the comments below!

googletag.cmd.push(function() {
tablet_slots.push( googletag.defineSlot( “/1005424/_dPSv4_tab-all-article-bottom_(300×250)”, [300, 250], “pb-ad-78623” ).addService( googletag.pubads() ) ); } );

googletag.cmd.push(function() {
mobile_slots.push( googletag.defineSlot( “/1005424/_dPSv4_mob-all-article-bottom_(300×250)”, [300, 250], “pb-ad-78158” ).addService( googletag.pubads() ) ); } );

The post 4 Tips to Supercharge your Lightroom Workflow by Simon Ringsmuth appeared first on Digital Photography School.


Digital Photography School

 
Comments Off on 4 Tips to Supercharge your Lightroom Workflow

Posted in Photography


Review and Field Test of the New SpiderLight Holster

23 Nov

Since 2010, Spider Holster has produce camera carrying systems which are intended to create a more innovative method for carrying your camera with you while working. Their carry systems are designed to offer a convenient and comfortable way to access your camera quickly while still managing to store it securely within easy reach when not in use.

SpiderLight Holster Close Up

Recently, Spider Holsters has launched a brand new Kickstarter campaign for the latest addition to their line of quick-draw type camera carry systems; the SpiderLight Holster. The SpiderLight is intended specifically for those shooters who carry a mirrorless or smaller SLR camera setup. Being a recent convert to a mirrorless camera system myself, I was excited to try out this newest offering from Spider and see if I would truly “Ditch the strap” in favor of this inventive way of carrying my camera while in the field.

First Impressions of the SpiderLight Holster

My cameras are more like extensions of myself than just pieces of metal and plastic. I love my cameras. So naturally I was, shall we say, somewhat hesitant to place their welfare in the hands of a new type of carry system instead of my heavy-duty leather camera strap. All those fears were genuinely soothed as soon as I handled the SpiderLight Holster for the first time. The product is solid, beefy, and extremely substantial. More so than I expected it to be based on the product photos from Spider Holster’s website.

SpiderLight Holster_Plate_2.jpg


The construction of the SpiderLight is all stainless steel and aluminum, subdued in a professional-looking matte finish. The holster itself is constructed of aluminum with a stainless steel insert to prevent wear with the belt clip on the back, being made from spring steel. The camera plate is crafted from heavy aluminum as well, while the Spider pin (the part that slides into the holster) is CNC machined stainless steel.

SpiderLight Holster Plate

SpiderLight Holster Release

All the screws were tight and the entire mechanism moved smoothly with no burrs or imperfections appearing to be found. Even the markings on the product are etched into the metal instead of being painted onto the surface. The belt clip itself is substantial and provides a heartily robust grip to a wide range of belt widths.

Real World Use

The majority of my work focuses on wilderness and adventure photography with a little bit of everything else thrown into the mix. I spend lots of time in the outdoors chasing light so I was extremely curious to see how well the SpiderLight would perform during hiking and fast movements. I tested the mechanism using my main camera body, the Sony A7r Mk1 fitted with Zeiss Vario-Tessar 24-70mm F4.

SpiderLight Holster 3

Functionally, the SpiderLight is deceptively simple. There is a steel peg that slides into a groove on the holster in such a way that the camera hangs inverted from the holster. However, looking more closely reveals evidence of some fairly impressive engineering at work.

A well placed two-stage locking switch secures the camera in one of two ways depending on your needs. This switch is invaluable. It locks the camera in place until the user disengages it with a subtle flick. More importantly, it can be completely disengaged to facilitate quick retrieval of your camera.

SpiderLight Holster 4

SpiderLight Holster 5

I was extremely surprised at just how versatile the SpiderLight could be in practice. I walked, jogged, bent down, and did all the epic things photographers do without any real encumbrance caused by the device. The only adversity I encountered was to remember the camera was by my hip when passing through doorways. After a little practice, I completely forgot that I carried the camera at my side. It worked, for lack of a better word, beautifully.

SpiderLight Holster 2

SpiderLight Holster 1

Using a tripod with the SpiderLight Holster

The SpiderLight still allows for the attachment of your own tripod’s quick-release plate, so it does not interfere with your normal workflow if you find yourself shooting with a tripod. It’s not guaranteed that the holster will work with your specific tripod, though. Notice I have to mount mine backward. Still, the function was not hindered in any way by the Spider.

SpiderLight Holster Tripod 1

SpiderLight Holster Tripod 2

One caveat

The only possible reservation I have with the SpiderLight is that even with a lightweight camera kit (Sony A7r and 24-70mm Zeiss) the one-sided weight distribution sometimes sags the pants. I wouldn’t consider wearing the system without a sturdy belt. This wasn’t something that deterred me from using the holster but it is definitely a point of consideration. If you carry a heavier camera I would highly recommend the Spider Holster Pro.

Final Thoughts

The SpiderLight Holster works great for use with a lightweight kit such as mirrorless cameras and smaller DSLRs. From the perspective of a first time user, the SpiderLight performed admirably, in spite of my reservations. The overall build is sturdy enough for heavy-duty use and the complete concept works well. If you are considering the idea of trying the SpiderLight or any other of the products in Spider Holster line you won’t be disappointed.

That being said, give yourself enough time to get to know the holster. Some will love it, some not so much. One of the biggest obstacles I faced was learning to actually trust the holster to securely carry my camera. In my case, breaking 10 years of absolute camera strap reliance takes some time. Still, you never know until you try it and it very well could become your favorite method of carrying your camera.

googletag.cmd.push(function() {
tablet_slots.push( googletag.defineSlot( “/1005424/_dPSv4_tab-all-article-bottom_(300×250)”, [300, 250], “pb-ad-78623” ).addService( googletag.pubads() ) ); } );

googletag.cmd.push(function() {
mobile_slots.push( googletag.defineSlot( “/1005424/_dPSv4_mob-all-article-bottom_(300×250)”, [300, 250], “pb-ad-78158” ).addService( googletag.pubads() ) ); } );

The post Review and Field Test of the New SpiderLight Holster by Adam Welch appeared first on Digital Photography School.


Digital Photography School

 
Comments Off on Review and Field Test of the New SpiderLight Holster

Posted in Photography