Category: Photography

  • 9 Tips for Creating Great Street Portraits

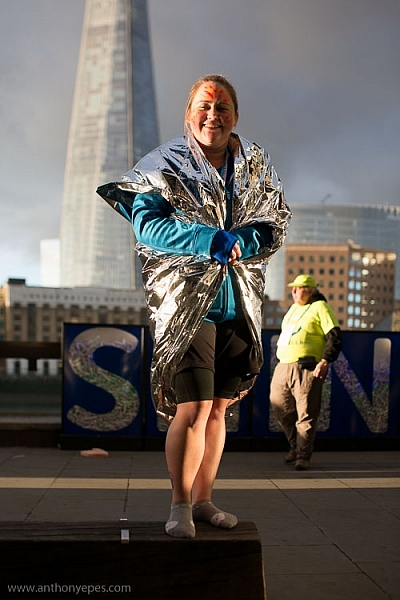
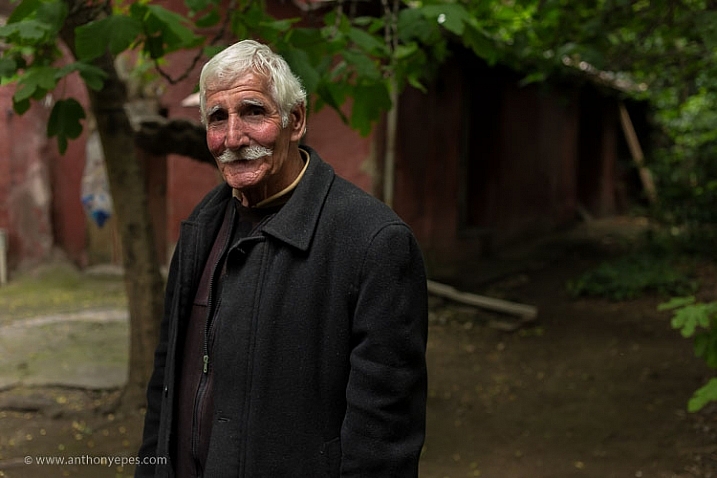
    I love taking street portraits. Whether the people you are photographing are posing or just going about their day-to-day life, humans are the most captivating, strange and interesting of subjects.

    9-tips-for-creating-great-street-portraits-01

    Most of my portraits taken out on the street are shot with the permission of the subject. That’s my style. I love looking for people who intrigue me. I often signal them with a smile and gesture of my camera, then watch for their reaction. But I also shoot unposed portraits and life on the street, whatever catches my eye.

    I know from my workshops that a lot of people find photographing strangers difficult and even, sometimes, terrifying. What is important to remember though, is that most people like to be noticed. It’s a compliment to be seen and thought of as interesting. But if they don’t like it, then the worst that can happen is that you have to delete the photo. Simple. Plus the more you do this, the easier it gets.
    9-tips-for-creating-great-street-portraits-02

    Here are some tips for creating interesting and evocative street portraits:

    #1 – Simplicity

    “The one guiding idea was to strip away the visual noise of the street so that the people emerge in a different and hopefully more surprising way.” Eamonn Doyle

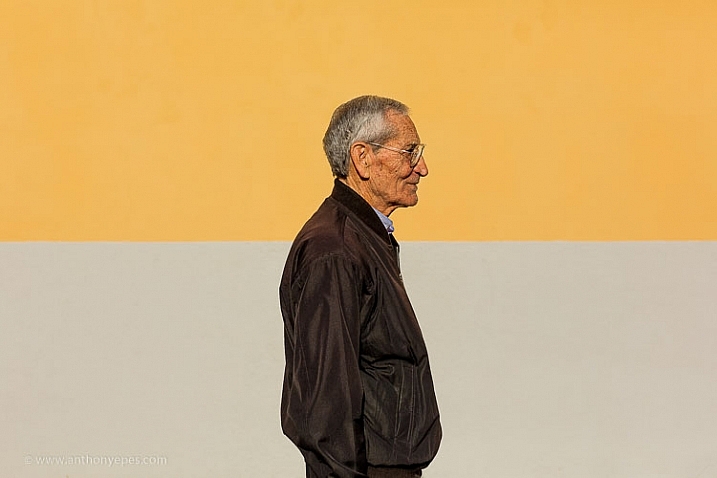
    I am a lover of simplicity in my composition and when it comes to street portraits, simplicity really is your friend. One thing that ruins so many portraits is a busy, complicated background. A background that’s too busy will make your image look flat because your camera can’t capture the depth that your eye can. You have to create depth yourself with your composition. A busy background will swallow up your subject and distract your eye.

    One of my favourite types of backgrounds for street portraits is something clean, colourful, and strong, like the image below. The line in the middle creates a really strong balancing element for the subject. The strength of the colours and line contrast nicely with this older man, who with that slight smile looks like he knows a thing or two about life.
    7-tips-for-creating-great-street-portraits-03

    #2 – Break the world down into elements

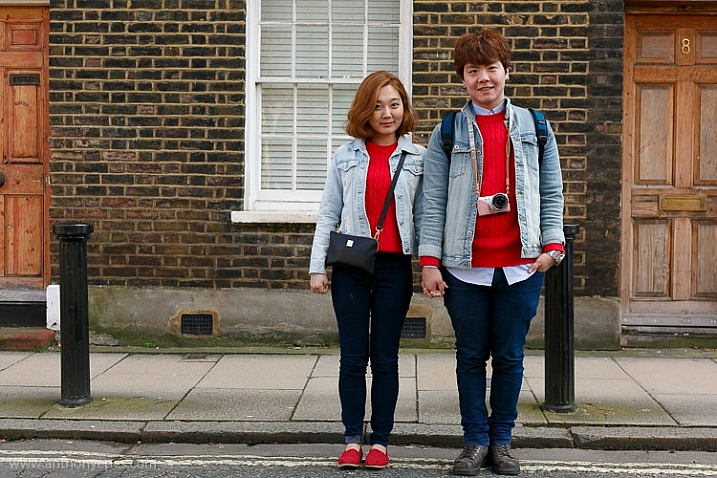
    You can simplify the purpose of composition into the idea that you are simply breaking down the world into elements and organizing them in an interesting way.

    I find it really helpful to look at composition with this in mind – that all you are doing is organizing the world’s elements. It helps because our eyes make things very complicated for us photographically as we see everything in 3D. Not only do we see and sense hundreds of thousands of pieces of visual information every minute from all around us, but our senses can pick up on things happening behind us as well.
    street-portrait-tips-6

    To break this visual overload created by your eyes when you are bringing the world into your frame, start by breaking down what you see around you into elements – an interesting mural, strong lines on the road, beautiful shadows, etc. Then build your composition up from there. You only need one or two interesting elements to make a photo. Ones that work together and say something through their balance, shape, or placement.

    An example

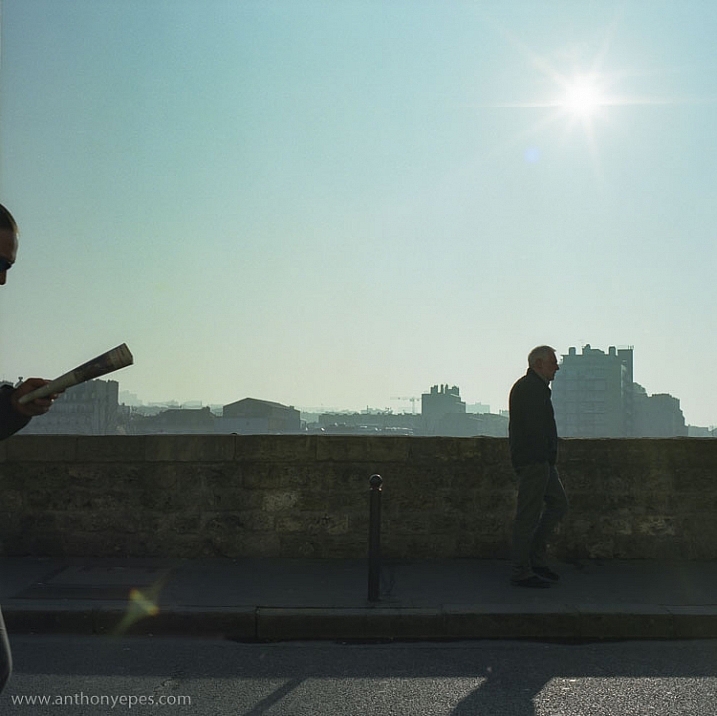
    This photo below is super simple. Very little going on, but I like it. What do you think makes it work? There are a couple of strong elements here that make it an interesting photo. Firstly it’s the hand holding the newspaper with a glimpse of the face reading. Then the man farther ahead walking.

    Now these two men, combined with that strong line of the wall, makes it look to me like a conveyor belt. You know that it’s morning, partly because of the sun, and then the newspaper, that’s the kind of thing you do on the way to work right? So now you have a little story, perhaps about the repetitiveness and the monotony of the human experience?
    street-portrait-tips-2

    I don’t always see a story in an image when I am shooting; often that comes after when I’m looking at my photos and sharing them. But what I do concentrate on is looking for interesting elements and figuring out how to place them together to make an interesting composition.

    #3 – It’s all in the eyes

    “The face is a picture of the mind as the eyes are its interpreter.” Marcus Tullius Cicero

    When you are starting out taking photos of people it can be a scary experience. So much so that you often rush too much – perhaps in an effort to get it done as quickly as possible and to not offend or upset anyone. But the more you shoot street portraits, and the more effort you make to relax into the experience, the more you can work on revealing the deeper emotions of your subject.

    When you take a more relaxed and patient approach you give people the space to unfold and reveal their thoughts and feelings through their bodies, faces and, most powerfully, their eyes. Eyes tell you how the subject is feeling, and often thinking.
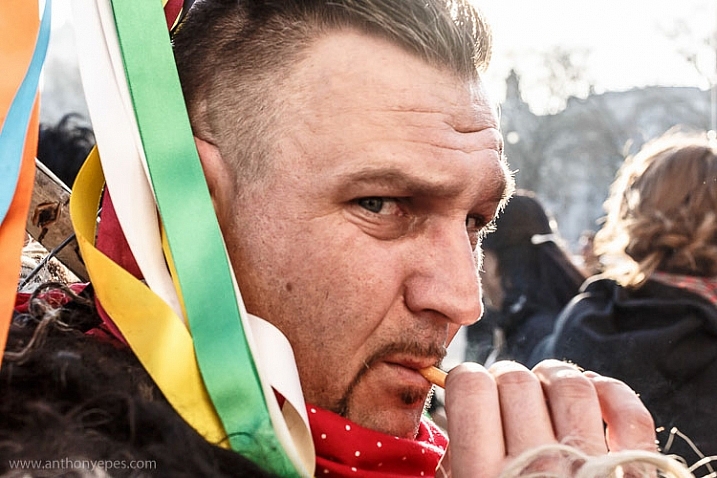
    7-tips-for-creating-great-street-portraits-07

    This is where having a camera is an advantage. As humans we don’t usually look into someone’s eyes for long periods of time. It’s too powerful! It takes the interaction with that human to another level. If you have a camera between you and your subject though, it acts as a sort of safe barrier. So you can then spend time observing them, seeing what their face is doing, looking into their eyes, and seeing how they really feel.
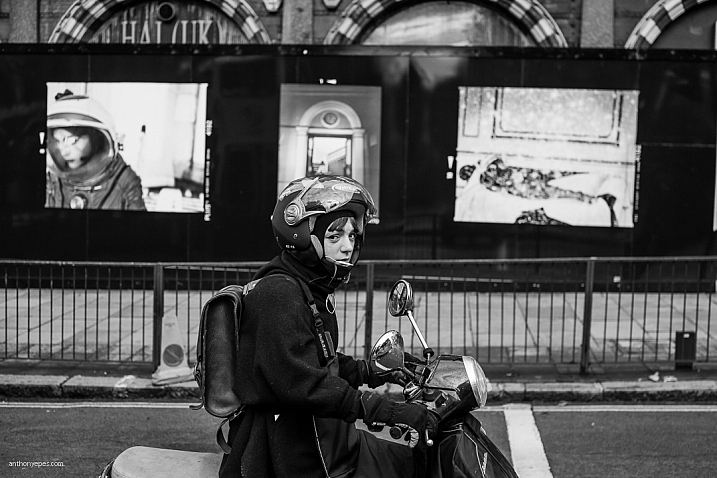
    7-tips-for-creating-great-street-portraits-13

    #4 – Be patient humans do funny things

    “You don’t have to enhance reality. There is nothing stranger than truth.” Annie Leibovitz
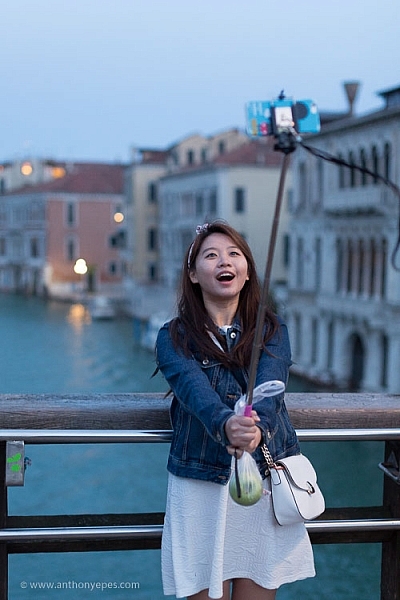
    9-tips-for-creating-great-street-portraits-09

    street-portrait-tips-23

    For me taking photos of people on the street is all about opening yourself up to, and noticing the comedy of being human, as Elliot Erwitt calls it.

    “You can find pictures anywhere. It’s simply a matter of noticing things and organizing them. You just have to care about what’s around you and have a concern with humanity and the human comedy.” Elliott Erwitt

    #5 – Find a great background and wait

    There is a tradition in street photography that you find an interesting location; a background, a road, or sign, and then you wait for someone or something to happen in front of it. It requires patience, which is a very good thing to develop. I’ve noticed that patience is something that beginners often lack. Possibly because we live in a world that is so used to immediate gratification that we expect good shots to come in abundance.

    It rarely works like that. I therefore like this idea of finding something interesting out on the street – some elements, or a place that fascinates you, then waiting for something to happen. It’s a great way to train your eye, and perfect your timing. Plus, when you continually gaze at one place you become very familiar, very intimate with it. You’ll notice things that initially you didn’t see.
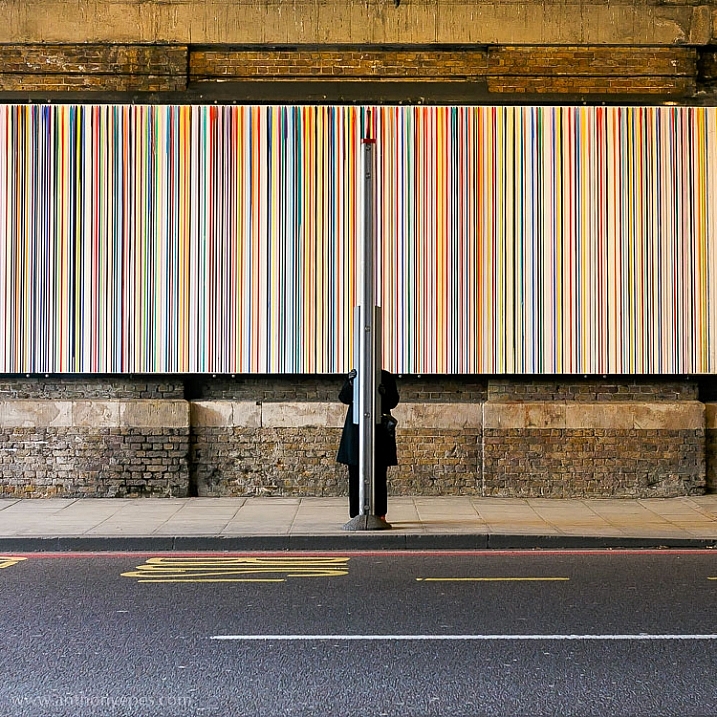
    street-portrait-tips-8

    #6 – Use colour

    “I paint because colour is a significant language to me.” Georgia O’Keeffe.

    Colour is also a significant language for me and I have always preferred shooting colour over black and white. I love the feeling you can communicate with colour and I think it moves me as much as light. So for me it’s an integral part of my style.

    Street photography is often dominated by black and white photography. Although what I am doing is often not strict street photography (however, Bruce Gilden, controversial street photographer extraordinaire, did say “If you can smell the street by looking at the photo, it’s a street photograph.”).
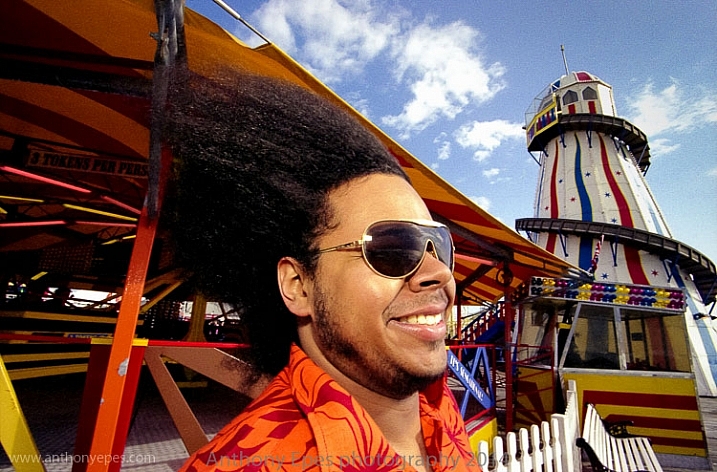
    street-portrait-tips-26

    Whether you use colour or black and white, do what excites you the most. The more excited you are by your subject and what you are creating, the more you’ll imbue your photos will feeling and depth.

    Colours communicate different feelings and ideas (e.g., yellow is warm and happy, green is peaceful, red signals confidence and aliveness). I love to use them to contribute to the story that I am telling with my images.
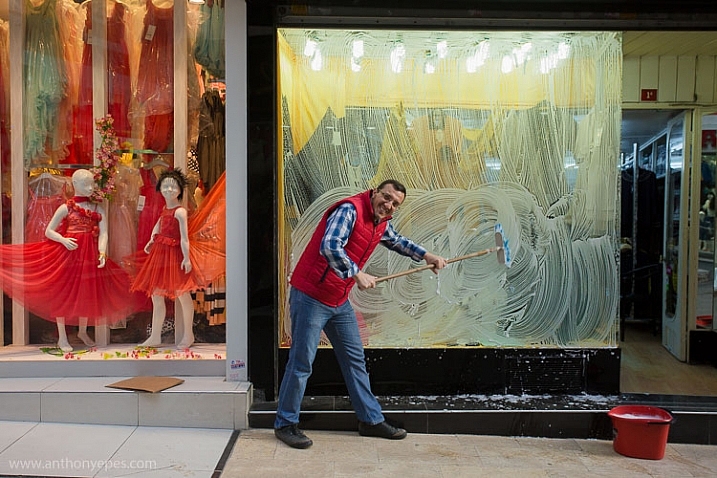
    street-portrait-tips-14

    #7 – Your camera is your licence to be curious

    “I love that having a camera basically gives you a license to go up to anyone and ask them what they’re doing and why.” Andrew Hinderaker

    Most people are perfectly happy to be photographed. That’s the key when you’re going out and about. My mantra when taking photos of strangers is – be confident (this comes with practice), friendly, curious, and ethical. In other words, I prefer to photograph people who are okay with the experience. I don’t generally photograph kids and the obviously vulnerable, etc. That’s my ethical line. For me photography is an exchange and I respect everyone whom I photograph.
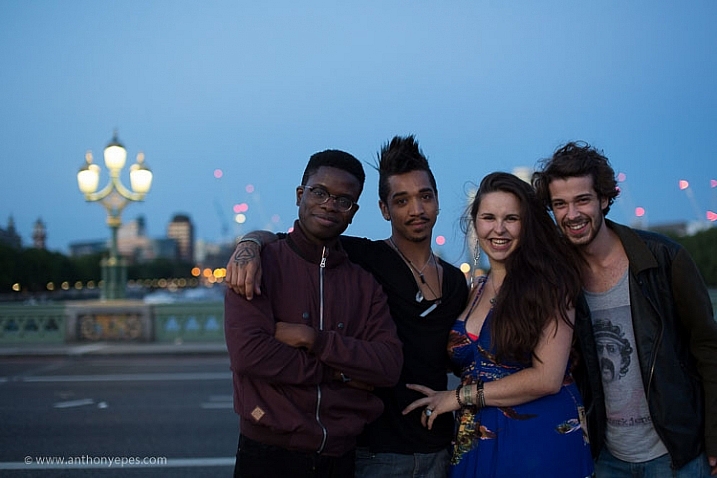
    7-tips-for-creating-great-street-portraits-10

    Humans are built to want to connect with other humans, and photography is a powerful form of connection when you use it as such. When you are taking someone’s photo you are basically saying – I see you, you interest me. And for most people that’s a wonderful compliment.

    For me the portrait above is about two things, the light and the couple smiling. The warmth of their smiles match the warmth of the light, as well as the lush, summery background of grass and trees. I took this photo by just smiling at the couple and gesturing with my camera. Of course the fact that it was a beautiful summer’s evening and we were in the park helped. People who are relaxing and enjoying themselves are, of course, easier subjects to approach.

    #8 – The power of the gesture

    The more closely you watch humans the more you see how they reveal themselves in so many ways. This was a photo I took for a project I was doing on people’s bellies. Each photo was totally different because the way that people presented their bellies and the gestures they made, showed so much about their personalities, what they felt about themselves, and their bodies.
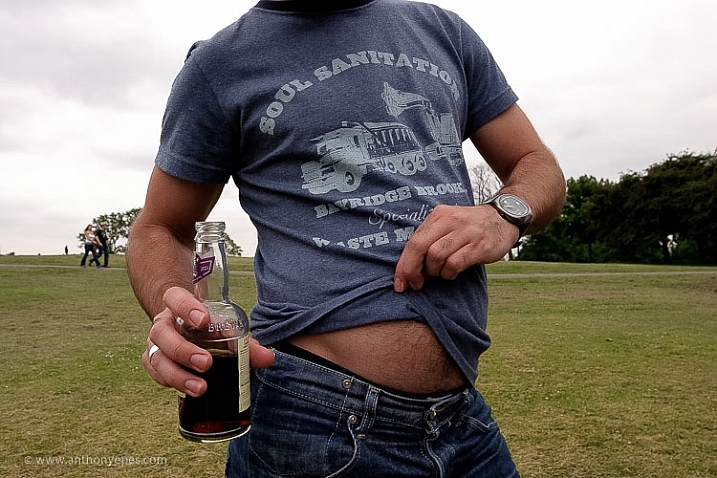
    street-portrait-tips-18

    Keep watch of people’s gestures. Along with the eyes, hands are very revealing of people’s feelings and thoughts (and apparently hands are easier to read than eyes if you want to tell if someone is lying).

    #9 – The key to original, interesting photos is to be yourself

    “I’m photographing myself out there. Not myself physically, but mentally. It’s my take on the world.” Bruce Gilden

    A lot of people in workshops worry about how over-photographed the world seems now and will they ever have anything interesting or original to contribute? Hasn’t it all been done before? Well, this is the wrong way to think about it. Of course the world is very photographed now. Especially places that I visit, London, Paris, Venice, Istanbul, etc.

    But the world isn’t a staid thing – it’s an ever-changing, ever moving, organism. Nothing stays the same. Having humans moving around the world makes the possibilities for original and interesting photos infinite.
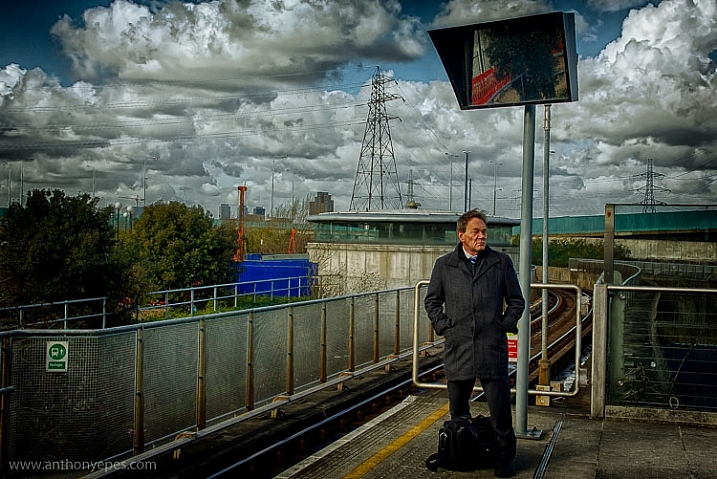
    street-portrait-tips-4

    More importantly though, photography is an expression of who you are. When you start out perhaps you’ll take photos like everyone else. But the more you do it, the more you’ll create something unique and original that’s a total expression of who you are – your passions, experience, style, and way of seeing the world. This creates the unique and interesting photographs that you are aiming for. It’s just like famous jazz musician Miles Davis says:

    “Sometimes you have to play a long time to be able to play like yourself.”

    Conclusion

    I’d love to know what you think. What do you do to create interesting street portraits? Comment below, I’d love to hear your ideas!


    Taking street portraits and exploring the street life of cities with your camera is an exhilarating experience. Learn how to conquer your fears of street photography and to create compelling compositions with Anthony’s popular street photography workshops in some of the most vibrant cities Europe.

    googletag.cmd.push(function() {
    tablet_slots.push( googletag.defineSlot( “/1005424/_dPSv4_tab-all-article-bottom_(300×250)”, [300, 250], “pb-ad-78623” ).addService( googletag.pubads() ) ); } );

    googletag.cmd.push(function() {
    mobile_slots.push( googletag.defineSlot( “/1005424/_dPSv4_mob-all-article-bottom_(300×250)”, [300, 250], “pb-ad-78158” ).addService( googletag.pubads() ) ); } );

    The post 9 Tips for Creating Great Street Portraits by Anthony Epes appeared first on Digital Photography School.
    Digital Photography School

  • How to Save and Use Stackable Lightroom Presets

    Lightroom presets are basically post-processing shortcuts that can save you tons of time and really speed up your editing workflow. They allow you to save a particular set of edits and apply them later with a single click. Presets can either be a final solution or a great starting point from where you can further tweak and perfect your images.

    Processed Image featured

    Making development presets is incredibly easy and effective working in Adobe Lightroom CC. It even gives you the option to import presets made by others into your own library. Chances are, if you’re a seasoned photographer, you have used presets at some point.

    But are you really getting the most from the huge range of editing control that presets can give you? In this article, you will learn just how versatile your Lightroom preset options can be and how you can essentially stack multiple presets to achieve the exact result you want.

    The Basics

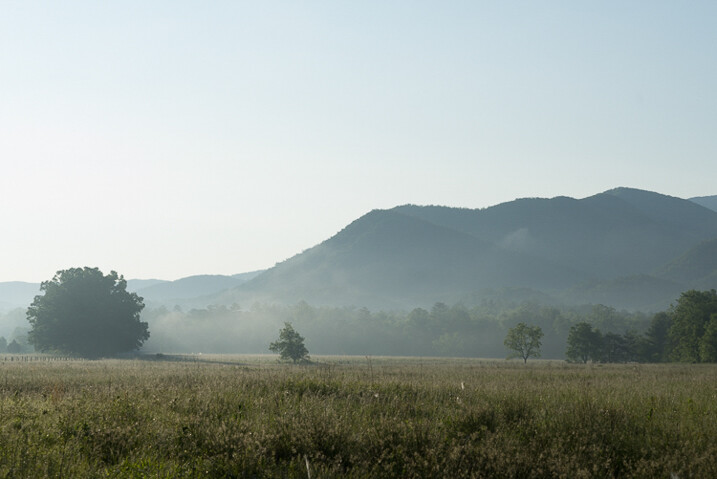
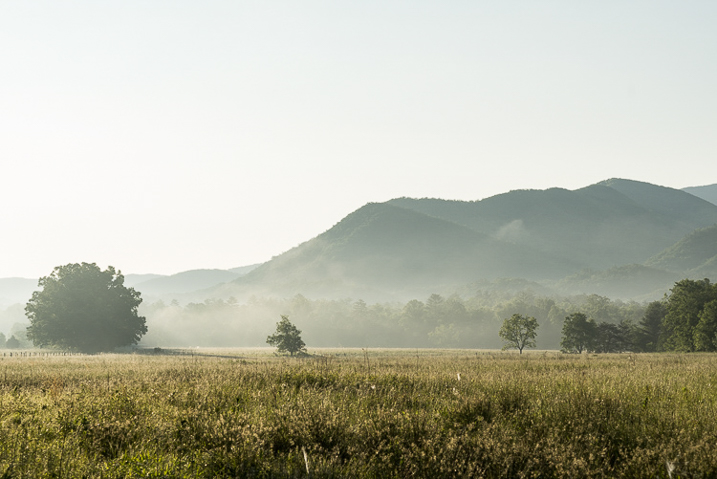
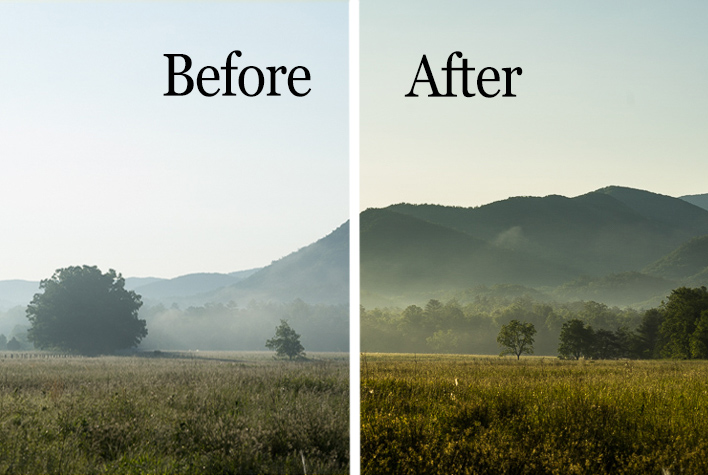
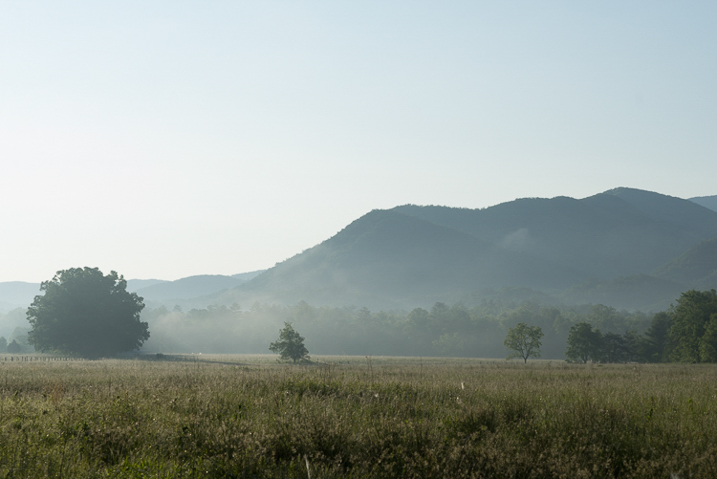
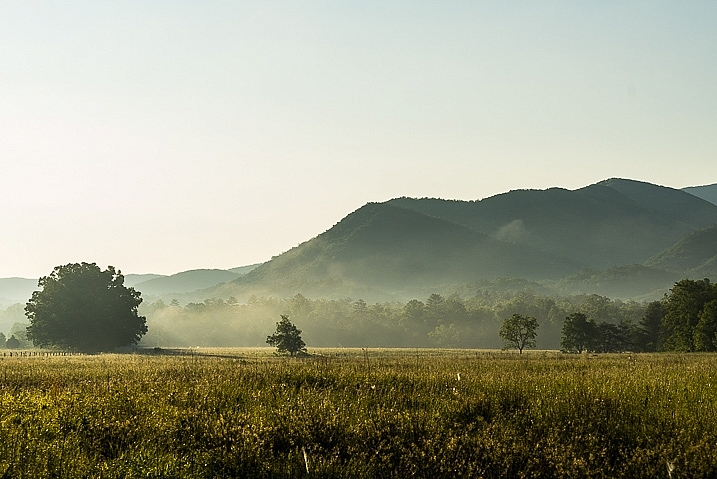
    Just as a refresher, let’s go over the steps for creating and saving presets in Lightroom. Here is a original RAW file of a mountain meadow in the early morning mist.

    RAW Image

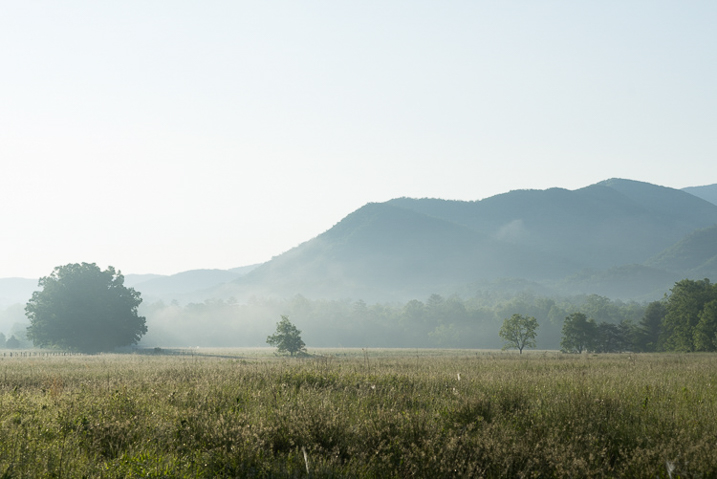
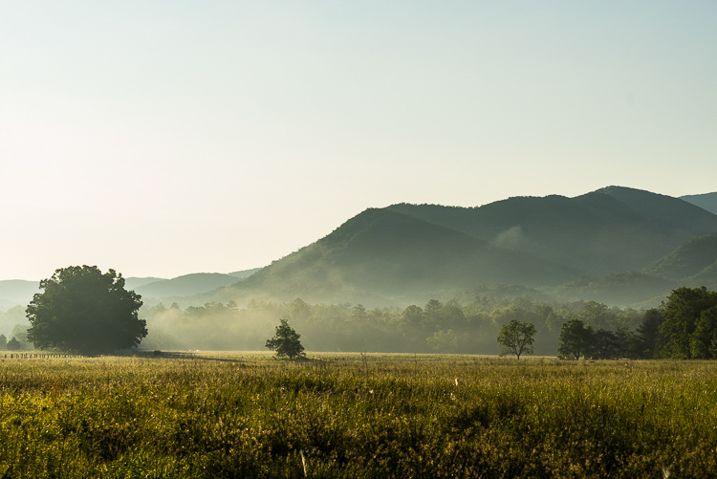
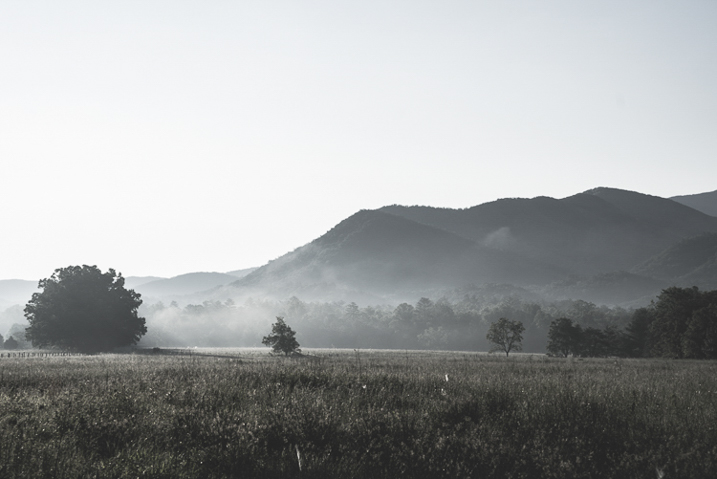
    I applied some basic edits to the RAW file which consist of contrast, clarity, whites and shadows, warming, and then finally sharpening to get the following result:

    Processed Image

    How to save a Preset

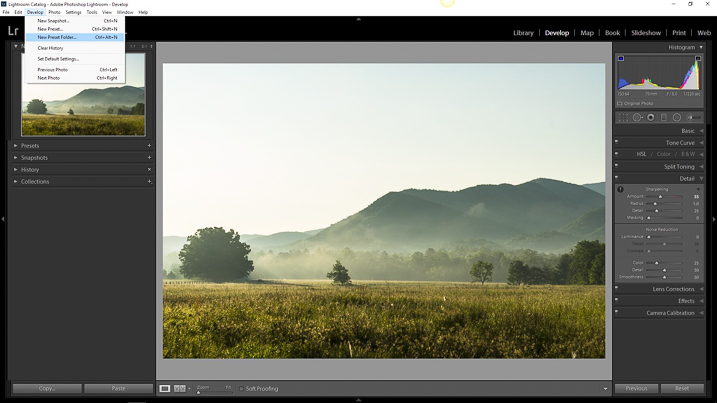
    It’s looking decent. Hmmm, if you feel these edits might work for some similar images later, why not make a preset to save some clicking next time? To do this, you must first create a folder to house your presets. Click the Develop dropdown at top left or use the keyboard shortcut Ctrl+Alt+N (Command+Option+N for Mac).

    Preset Folder

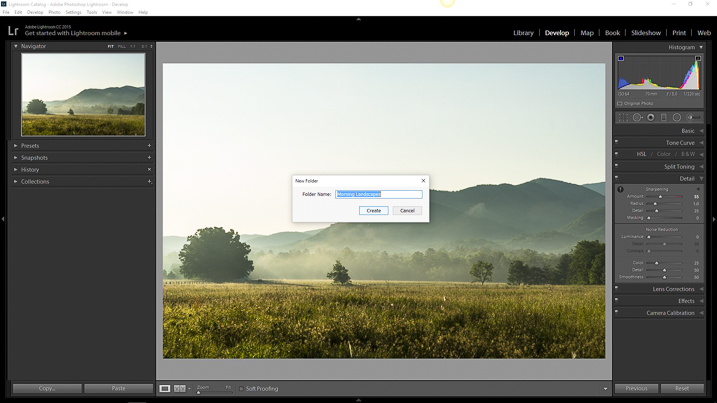
    Then name your freshly minted folder so you can easily locate it later.

    Preset Folder Naming

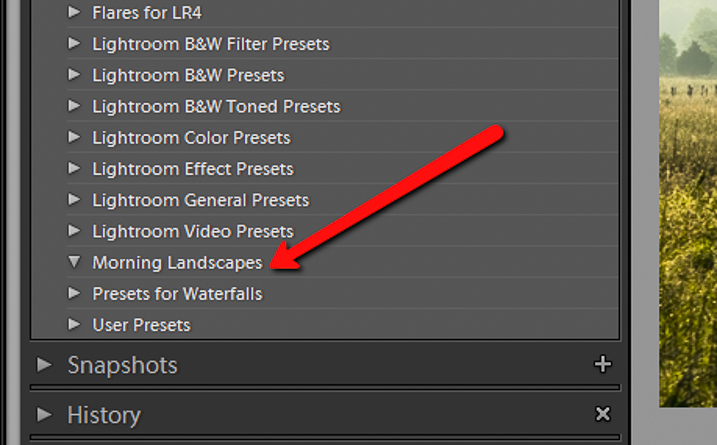
    Now you will see your brand new folder appear under the Presets drop down menu.

    Preset Folder Location

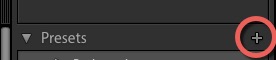
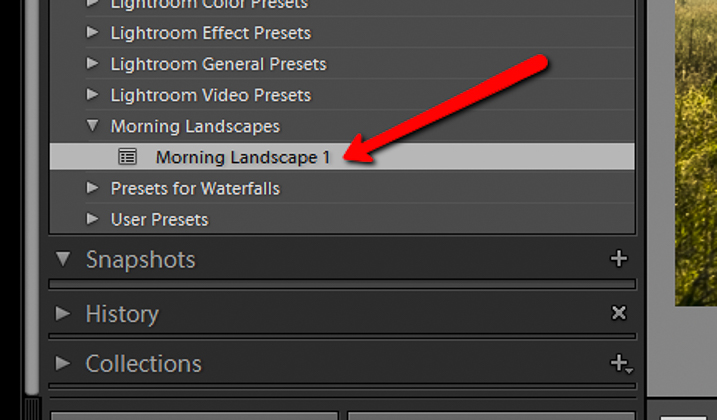
    Since you now have a destination for your preset you can go about actually saving the preset itself. To do this, simply go back to the Develop drop down and select New Preset. You can also use the keyboard shortcut Ctrl+Shift+N (Command+Option+N for Mac) or just click the + symbol next to the Presets menu on the left panel (see below). A fairly large dialog box will appear bring along with it a host of options for saving your preset. First things first, come up with a name for your preset and then select the folder you made earlier as the destination.

    Save preset

    If you leave the Check All option selected, all the edits you made with any of the sliders and filter tools will be saved. Click on Create at the bottom right of the dialog box and viola! You will see your newly created preset appear in the folder to the left.

    Preset Location

    Preset conflicts

    In most Lightroom preset tutorials that would be all you would do. But this isn’t most tutorials. In order to have full control over your presets you have to go a little deeper and that hinges on just how far you are willing to venture down the post-processing rabbit hole.

    Here is the final image from which I saved the Morning Landscape 1 preset with the Check All settings applied.

    morning_landscape_preset


    If I attempt to apply another preset, all of the current settings will be changed to whatever values the new preset dictates. Here is the same image after clicking another preset from my preset library.

    Preset Conflict

    The problem that arises when you try to combine multiple presets is that you can’t do it without the processing values conflicting and overriding one another. Or can you? Well, yes and no.

    Remember, that dialog box asking which edits you wanted to save that appeared earlier while you were making the preset? That dialog box is the key to being able to stack multiple editing presets so you can apply different adjustments without them overriding one another. Let me show you how.

    Stacking Lightroom Presets

    It comes down to which edits you choose to save when creating your preset. Instead of selecting to save each and every adjustment, you can select only the ones you want. This way, you can avoid conflicting edits when you apply multiple presets. That means you can have a preset folder for various Clarity edits, a folder for Contrast and Exposure, a folder for Vignettes, or virtually any combination of any adjustment in Lightroom. Here’s how it’s done.

    How to do it

    I’ve created a folder called Clarity and Sharpness. This will be where I keep the Sharpness and Clarity (and even Dehaze) adjustments. I then created a folder for Exposure and Contrast and another for warming and cooling effects aptly titled Warming and Cooling.

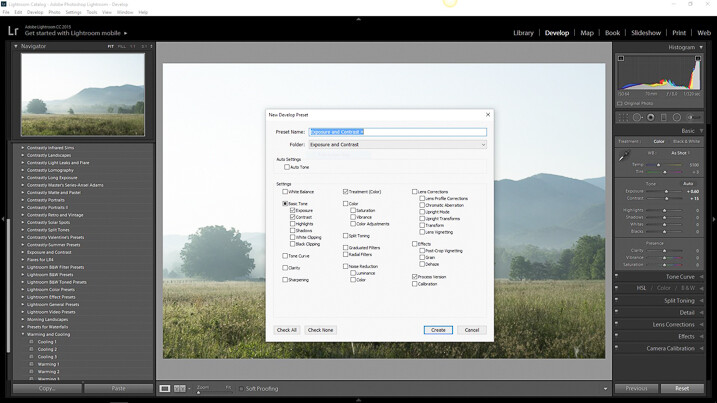
    Each one of these folders contains presets related to their respective edits to varying degrees of intensity. When saving for the Clarity and Sharpness folder click the uncheck all box and then select ONLY the Clarity, Sharpness, and Dehaze boxes. This way, any other edits will be left as they are and only these settings will change once you apply your presets.

    Do this with the presets you save for the Exposure and Contrast and Warming and Cooling folders except only check the respective edit boxes to save for each.

    Exposure and Contrast Selection

    For Exposure and Contrast, select only the relevant boxes as seen here.

    Calrity and Sharpness Selection

    Do the same for the Clarity and Sharpness folder.

    Saving separate presets which only affect certain aspects of your processing will allow a huge range of preset adjustments to be applied without affecting all the other unrelated edits from another preset. Essentially letting you stack one preset on top of another.

    Applying the new presets

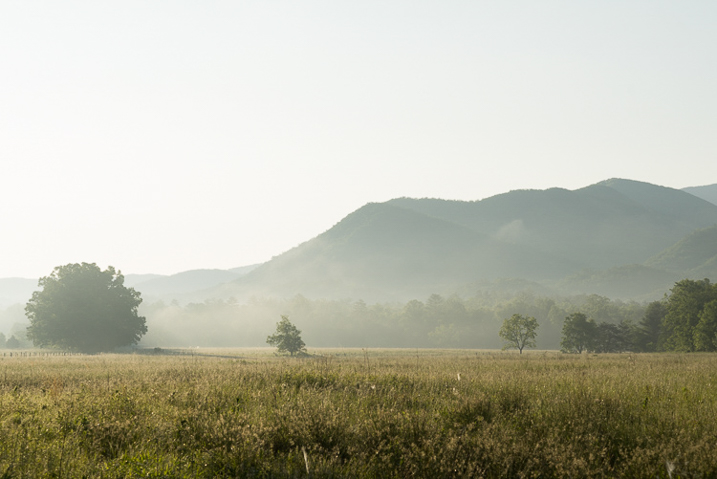
    Let’s look at an example. Here is the RAW image again to which we will now apply our selective presets one by one.

    RAW Image

    RAW image.

    First I will apply the Exposure and Contrast + preset.

    Exposure and Contrast +

    Next, I will add the Warming 2 preset.

    Warming 2

    And lastly, I will Sharpen and Clarify the photo with my Clarity and Sharpness Dehaze ++ preset.

    Clarity and Sharpness Dehaze 2

    Conclusion

    By saving your presets in a way which targets only specific edits, you essentially enable yourself to allow the presets to work together. This way, quickly editing your photos becomes much more controllable and streamlined because you can apply different presets in tandem without disrupting the edits applied by each.

    This advanced knowledge of creating, saving, and applying Lightroom presets can remove a lot of the headache from your post-processing conundrums. It can give you, for lack of a better word, limitless combinations of adjustment possibilities. What might have taken you an hour’s worth of post-processing can now be reduced to only three or four clicks of your mouse.

    While presets might not be a one and done method for editing your photos they can still give you a wonderful starting point to base your more in-depth editing. By being able to apply multiple presets to one image you will have even more of a head start in your processing workflow. Work smarter – not harder.

    How do you use Lightroom presets? Please share in the comments below.

    googletag.cmd.push(function() {
    tablet_slots.push( googletag.defineSlot( “/1005424/_dPSv4_tab-all-article-bottom_(300×250)”, [300, 250], “pb-ad-78623” ).addService( googletag.pubads() ) ); } );

    googletag.cmd.push(function() {
    mobile_slots.push( googletag.defineSlot( “/1005424/_dPSv4_mob-all-article-bottom_(300×250)”, [300, 250], “pb-ad-78158” ).addService( googletag.pubads() ) ); } );

    The post How to Save and Use Stackable Lightroom Presets by Adam Welch appeared first on Digital Photography School.

    Digital Photography School

  • 5 Tried and True Landscape Photography Tips used by the Pros

    Have you ever found yourself wondering how do the professionals (pros) consistently turn out amazing photos day after day, year after year and what are some of their secrets? So besides knowing their camera like their best friend, what are some of the things that the pros do? Here are some tried and true landscape photography tips used by the pros.

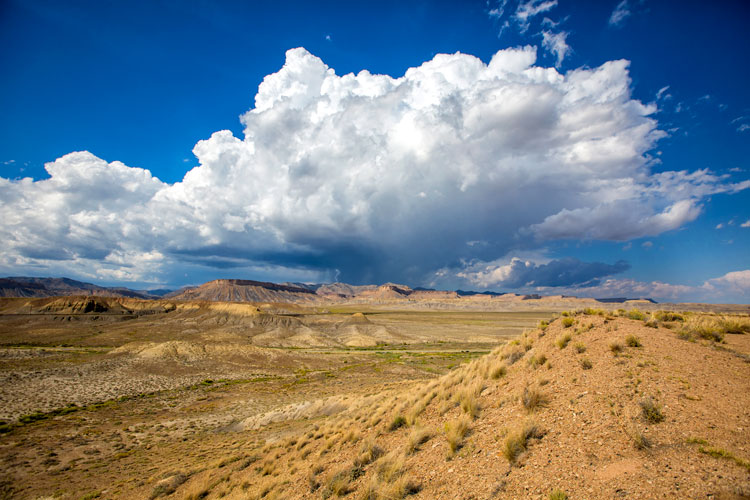
    DesertStorm Landscape Photography Tips used by the Pros

    1. Experimentation

    Experimenting is one of the best ways to shake yourself up out of the doldrums and yes even pros use it to get their creative juices flowing.

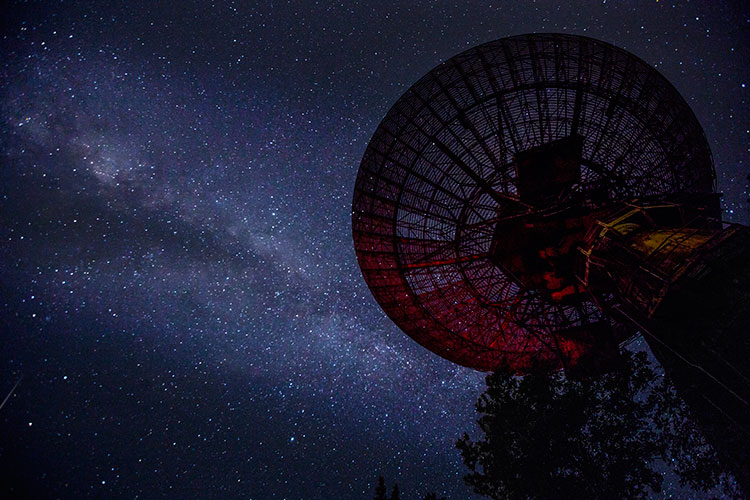
    Try photographing something totally outside your comfort zone or even a different subcategory within your preferred genre. If landscape photography is your thing, you are probably already a master of the golden hours (sunrise and sunset). So experimentation can start with shooting a nightscape or even a long exposure in the middle of the day.

    Note: I would highly advise against experimenting at someone’s wedding!

    Night Sky Landscape Photography Tips used by the Pros

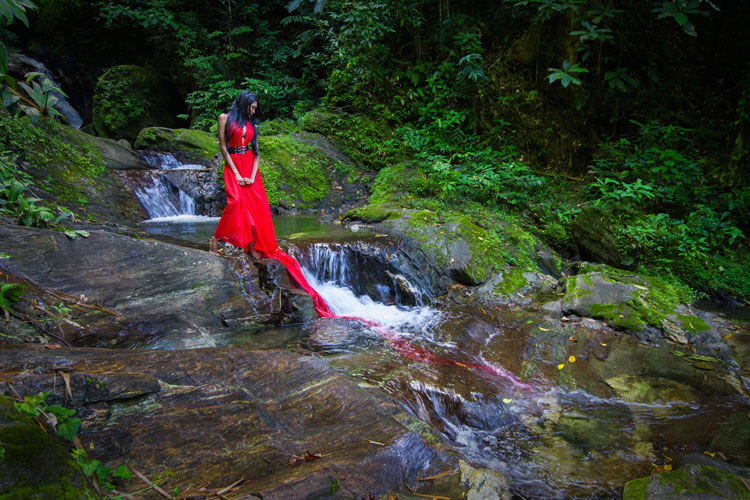
    How about introducing a human element into your landscape and allowing them to be a part of the story? Experimenting keeps you on the learning path and when you learn, you grow as a photographer. It is about challenging yourself to do something different and pushing your boundaries.

    Landscape Model Landscape Photography Tips used by the Pros

    2. Making it your own

    Many places on your photography list have already been captured hundreds of times. That thought can make you throw your hands up in the air and decide you may as well just recreate it. Before you think of recreating, try to showcase it differently. What else can you do? Is there another foreground element you can add or take away? One of the things that make pro’s work stand out from the rest, is their perspective and ability to make a place seem like you are seeing it for the first time.

    Maracas Bay, Trinidad - landscape photography tips from the pros

    While it’s not always easy to create something unique and new, your originality is one of the things that will set you apart. Can you get a different angle, add or detract an element when composing, or shoot it differently (e.g. with light trails or multiple exposures)? How about getting off the trail and the popular view areas and charting your own course to find another perspective? There is no problem in finding inspiration in someone else’s work, but at all times keep in mind that you want your work to stand out

    There is no problem in finding inspiration in someone else’s work. But keep in mind that you want your work to stand out, as your own.

    Guardians - landscape photography tips from the pros

    3. Tell a story

    Someone said that “being a good photographer does not necessarily translate into being a good storyteller.” Being able to evoke the emotions of your audience should always be a goal, though. Keep in mind that the purpose of your photo story is to interest, instruct, or amuse your audience.

    Decide how you want the image to affect them and then how to achieve that goal. Is your story going to be in black and white or infrared? Is it going to be realistic or abstract? Pros use different styles of photography to keep producing interesting stories consistently.

    Boat Friends - landscape photography tips from pros

    4. Less can be more

    In landscape photography, being more selective with the views you present tells a more effective story, so pros understand the power of good composition (a vast topic all on its own). One of the rules of good composition is that your image should contain just enough detail. In landscape photography you do not have the luxury of physically moving things around, so you must arrange the elements of an image by changing your position. This also helps with finding the most flattering view, or one that tells a different story.

    Ocean Sunrise landscape photography tips from pros

    Choosing the important elements in your photo to highlight helps you decide what to include in the frame and what to leave out. Make your subject dominate by accentuating it with one or few related elements, remembering to declutter as much as you can. As a general rule, if an element in your image doesn’t enhance the subject, it may be detracting from it.

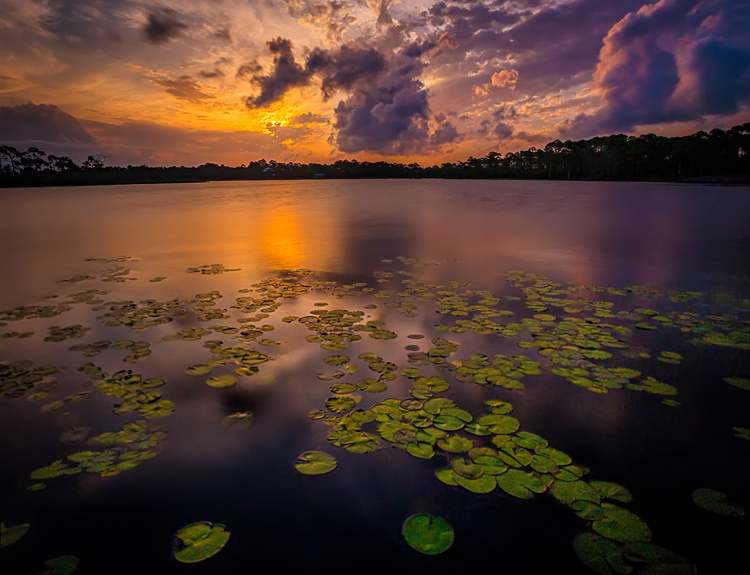
    Lily Pond - landscape photography tips from pros

     5. Know your post-processing

    Ideally, you want to get the shot right in-camera and eliminate or minimize your post-processing. With so many features and settings on DSLRs now, it is possible to produce the image you want. If this does not materialize, then you need the ability to do basic adjustments. These include changes to color and contrast, exposure adjustments, straightening, and cropping.

    Check out these dPS articles for tips on processing:

    • How Cropping in Post-Production Can Improve Composition
    • 4 Key Lightroom Sliders That Will Supercharge Your Photos
    • How to Enhance Urban Night Photographs Using Luminosity Masks in Photoshop
    • 3 Fun Ways to Enhance Your Landscape Images in Photoshop

    Glass Bottomed Boat -  landscape photography tips from pros

    Pros know the importance of post-processing. That is one of the main reasons they shoot in RAW to capture all the uncompressed image data, which leads to higher quality images in the end.

    Post-processing can also add that unique element of you. Decide if the shot you took is what you wanted to achieve or you can choose to adjust elements until you get the image you want to present. Digital photography has made it easier to post-process than the dark rooms of yesteryear but it also makes it easier to  go overboard easily. So determine your vision for the final image and learn to execute it properly so you produce an image that represents you.

    South Beach -  landscape photography tips from pros

    Conclusion

    These are just a few of the things to keep in the back of your mind when you are creating images. Staying consistent means staying creative or constantly challenging yourself to try something different or learn something new. When you get to your location, think about how you can make the image your own. There is nothing more amazing than producing a piece that someone can identify as yours even before they confirm you did it. Share with us how else you stay consistent when shooting.

    When you get to your location, think about how you can make the image your own. There is nothing more amazing than producing a piece that someone can identify as yours even before they confirm you did it. Share with us how else you stay consistent when shooting and any other landscape photography tips you have learned.

    googletag.cmd.push(function() {
    tablet_slots.push( googletag.defineSlot( “/1005424/_dPSv4_tab-all-article-bottom_(300×250)”, [300, 250], “pb-ad-78623” ).addService( googletag.pubads() ) ); } );

    googletag.cmd.push(function() {
    mobile_slots.push( googletag.defineSlot( “/1005424/_dPSv4_mob-all-article-bottom_(300×250)”, [300, 250], “pb-ad-78158” ).addService( googletag.pubads() ) ); } );

    The post 5 Tried and True Landscape Photography Tips used by the Pros by Nisha Ramroop appeared first on Digital Photography School.

    Digital Photography School

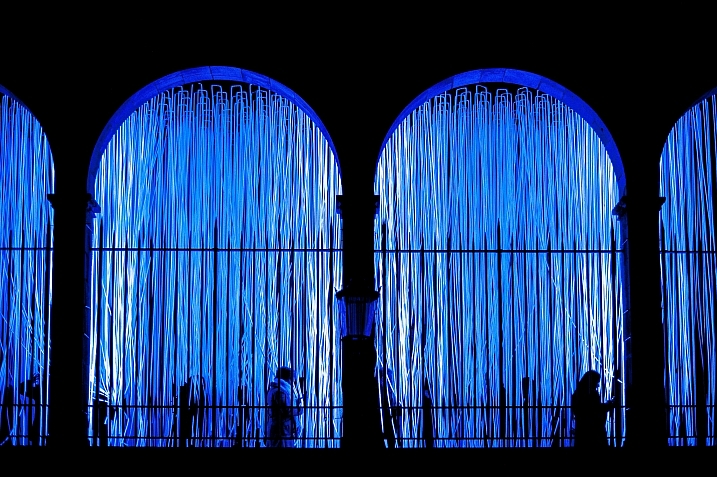
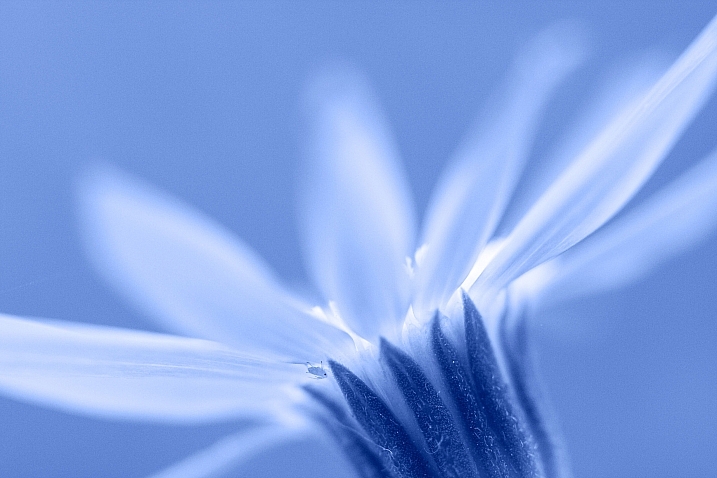
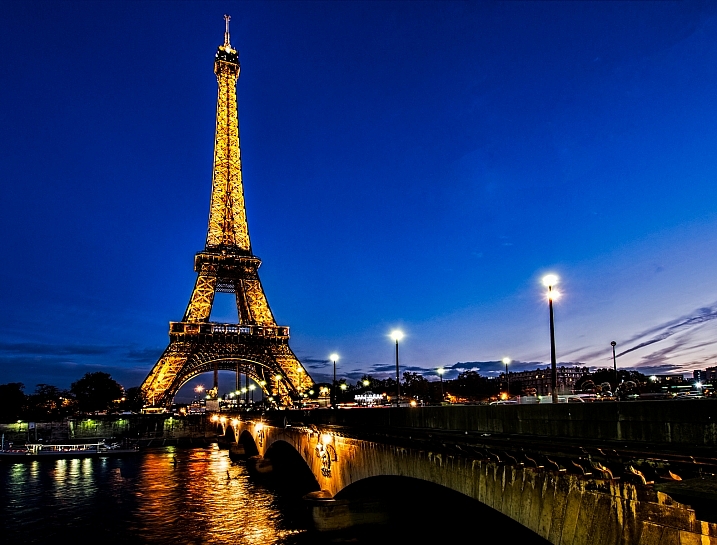
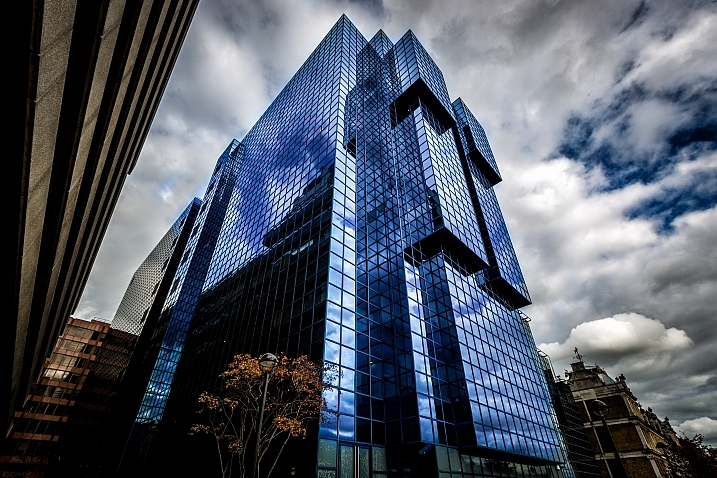
  • Weekly Photography Challenge – Blue

    Color is an important element of composition in photography. Cool colors have a very different feeling then do warm colors. See how the color blue appears in some images here.

    Tim Green

    By Tim Green

    Weekly Photography Challenge – Blue

    This week we challenge you to find and photography some subjects which are blue. Then photograph it in a compelling way. Remember to consider lighting, composition, and center of interest to create a unique image.

    Neil Tackaberry

    By Neil Tackaberry

    Di_Chap

    By Di_Chap

    Alvaro

    By Alvaro

    Darlene Hildebrandt

    By Darlene Hildebrandt

    Share your images below:

    Simply upload your shot into the comment field (look for the little camera icon in the Disqus comments section) and they’ll get embedded for us all to see or if you’d prefer, upload them to your favorite photo-sharing site and leave the link to them. Show me your best images in this week’s challenge. Sometimes it takes a while for an image to appear so be patient and try not to post the same image twice.

    Share in the dPS Facebook Group

    You can also share your images on the dPS Facebook group as the challenge is posted there each week as well.

    googletag.cmd.push(function() {
    tablet_slots.push( googletag.defineSlot( “/1005424/_dPSv4_tab-all-article-bottom_(300×250)”, [300, 250], “pb-ad-78623” ).addService( googletag.pubads() ) ); } );

    googletag.cmd.push(function() {
    mobile_slots.push( googletag.defineSlot( “/1005424/_dPSv4_mob-all-article-bottom_(300×250)”, [300, 250], “pb-ad-78158” ).addService( googletag.pubads() ) ); } );

    The post Weekly Photography Challenge – Blue by Darlene Hildebrandt appeared first on Digital Photography School.

    Digital Photography School

  • 18 Tranquil Images of Blue to Cool Your Thoughts

    Different colors evoke different emotions and have a different feeling to them. Warm colors like red, orange and yellow feel alive and vibrant. Cool colors like purple, green and blue feel calming and relaxing.

    Here is an image collection of various different photographers use of the color blue. View each and see how they make you feel. Do these blue images have a calming effect on you? I feel more relaxed just looking them.

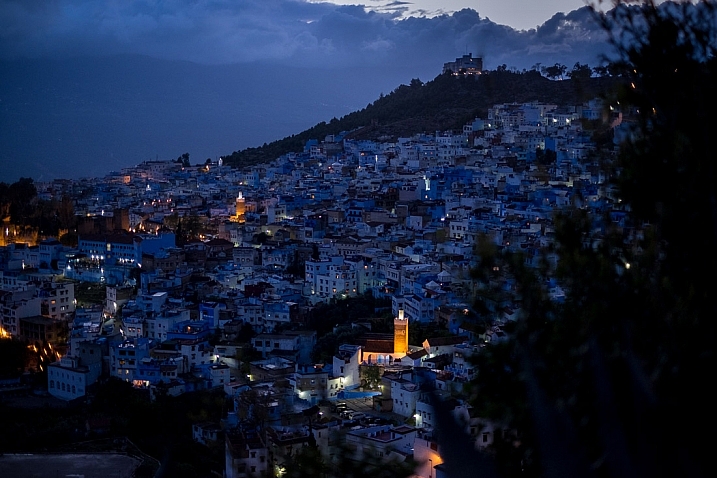
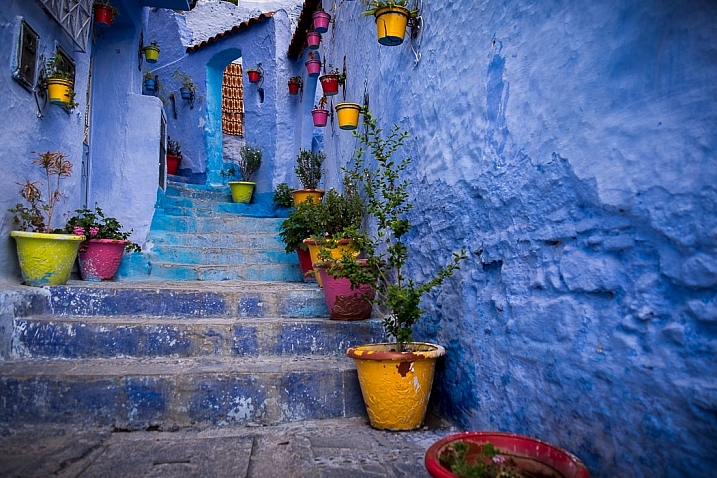
    I’ll start off with three of my images from the “blue” city of Chefchaouen in Morocco.

    morocco-2016-0610-1100px

    morocco-2016-0649-1100px

    morocco-2016-0678-1100px

    Andy

    By Andy

    Nick Klein

    By Nick Klein

    Matt Bradley

    By Matt Bradley

    Xavier

    By Xavier

    Pablo Fernández

    By Pablo Fernández

    Maarten Takens

    By Maarten Takens

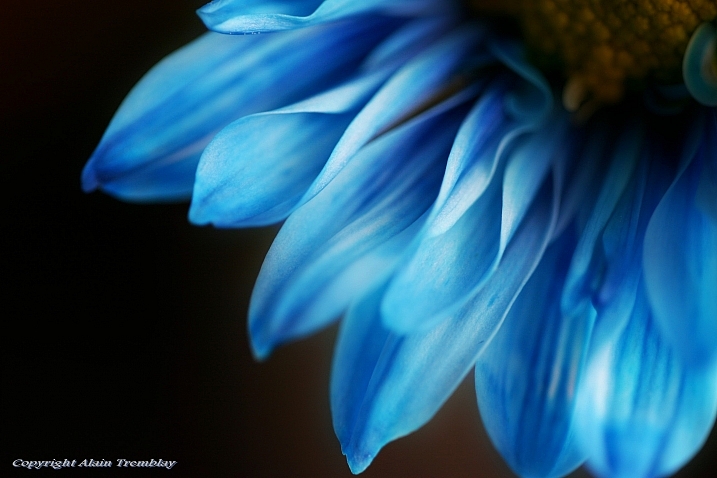
    Alain Tremblay

    By alain tremblay

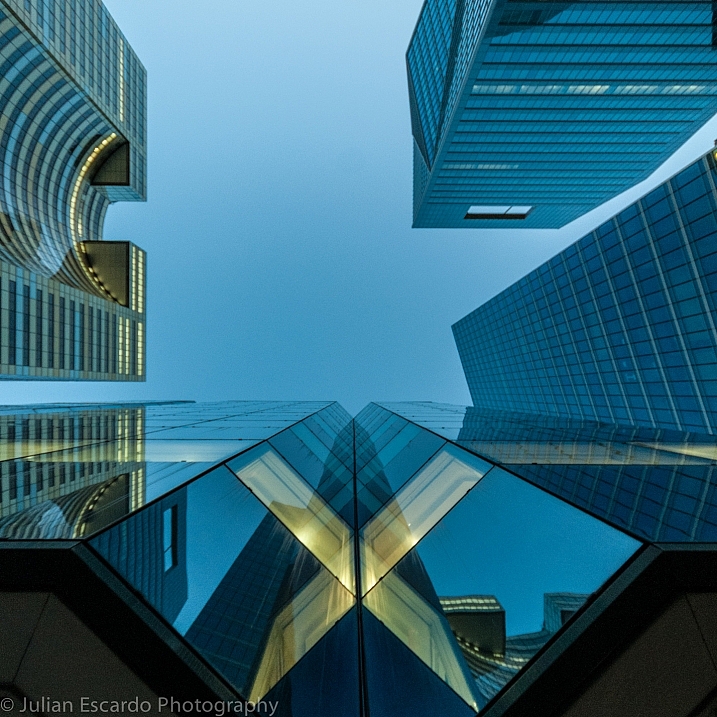
    Julian E...

    By Julian E…

    Martin Fisch

    By Martin Fisch

    Geir Tønnessen

    By geir tønnessen

    Modes Rodríguez

    By Modes Rodríguez

    Mirai Takahashi

    By Mirai Takahashi

    Genji Arakaki

    By Genji Arakaki

    Hansel And Regrettal

    By Hansel and Regrettal

    Davide D'Amico

    By Davide D’Amico

    googletag.cmd.push(function() {
    tablet_slots.push( googletag.defineSlot( “/1005424/_dPSv4_tab-all-article-bottom_(300×250)”, [300, 250], “pb-ad-78623” ).addService( googletag.pubads() ) ); } );

    googletag.cmd.push(function() {
    mobile_slots.push( googletag.defineSlot( “/1005424/_dPSv4_mob-all-article-bottom_(300×250)”, [300, 250], “pb-ad-78158” ).addService( googletag.pubads() ) ); } );

    The post 18 Tranquil Images of Blue to Cool Your Thoughts by Darlene Hildebrandt appeared first on Digital Photography School.

    Digital Photography School

  • What is a Stop? The Common Currency of Exposure Explained

    What are stops? Are they the same as f-stops? How are they measured? Are they the same for different exposure controls? Are they still useful now?

    These are common questions for those just starting out in photography. They are good questions, and the exposure concepts surrounding them can be confusing. You have probably been told that a stop is a “doubling of light,” which of course is true. That is helpful, but it doesn’t show how stops really works and how they tie your exposure controls together.

    WesternLake

    What I want to show you in this article is how the concept of a stop acts as a common currency in exposure, and allows you to take complete control of it. Rather than being confusing, stops are really a simplification tool. Without stops, we’d have a hard time controlling our exposure between the three controls; aperture, shutter speed, and ISO.

    Introduction

    I’m using the term “common currency” to describe stops. To see what I mean, think about the barter system before we had money. If you sold chickens, I sold apples, and someone else sold bricks, how would we all trade? And what if the person selling the bricks didn’t value your chickens as much as I did? It was a mess, which is why the concept of money was developed. Now we all value our goods using money and we exchange money with each transaction. This has proven to be a remarkably useful tool, which is why it has stuck around for a few thousand years.

    Similarly, in photography we faced trade-offs when it came to exposure. For example, how could we value a change in the size of the aperture versus lengthening the time of shutter speed? And then how would we value the sensitivity of the digital sensor (or film in the old days) as compared to these other two adjustments? It isn’t apples to apples. The concept of stops is how we square everything up.

    CameraBack

    Understanding this is a necessary precondition to mastering your camera and controlling the exposure process. Hopefully this will help you grasp your exposure controls better. First, we’ll take a brief looks at each of them and show you how they are measured in stops. After that, we’ll get into how to use them together.

    Shutter Speed

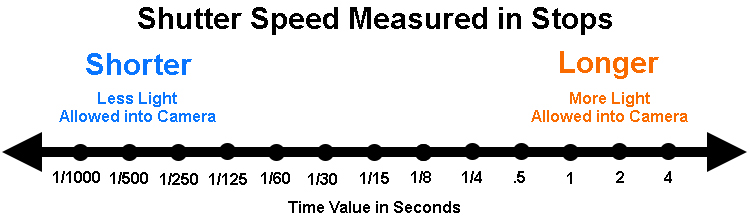
    Your shutter speed is a measurement of time. As you probably already know, when you open up the shutter, the camera is gathering light. The longer you allow the camera to gather light, the higher the exposure value. Most shutter speeds you use will be a fraction of a second, but here are the common values for shutter speed you will see when you look through your viewfinder or at your LCD:

    Shutter Speeds measured in stops

    The segments in this chart are 1-stop increments. Again, a stop is a doubling of light. Remember that shutter speed is a measurement of time, so a doubling of the time your shutter is open is the same thing as a doubling of light. Therefore, for example, a move from 1/250th of a second to 1/125 is a one stop change. You have doubled the time the shutter is open so you have also doubled the exposure value.

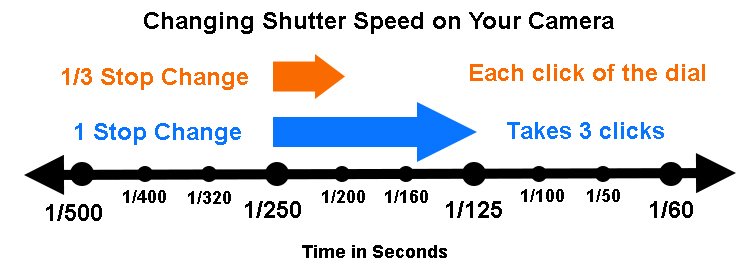
    Something that might confuse you is that your camera doesn’t change settings (each click of your dial) in 1-stop increments. Most cameras are set to move in 1/3 stop increments. So rather than moving from 1/250 to 1/125, each click of the dial on your camera will only move part of the way there. It will take three clicks to move a full stop. It looks something like this:

    Changes to Shutter speed in thirds of stops

    The point is to understand that we are taking a time measurement and converting it into a stop. Each doubling of the amount of time the shutter is open equals a stop. Conversely, you reduce by a stop every time you cut the shutter speed in half. We’ll be able to use that stop in connection with the other controls in a bit.

    Aperture

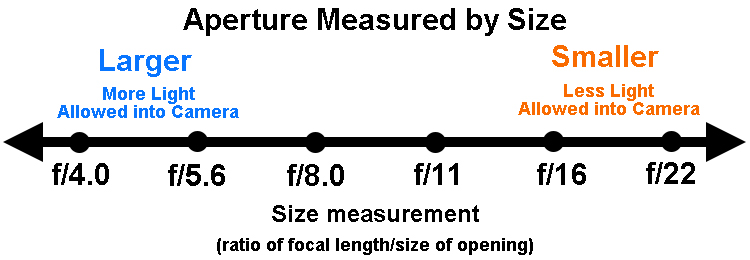
    Now let’s look at this in the concept of aperture. As you probably know, the aperture is the hole in the lens that lets light through into the camera, and it is adjustable. Making it larger lets more light into the camera; making it smaller lets less light in. To change your exposure value using the aperture control, you are changing the size of the aperture.

    Aperture measurements can be confusing. To begin with, the measurement is actually of the size of the aperture compared to the focal length (The F-number of a lens is the ratio of its focal length divided by the diameter of the aperture.). That makes it a ratio or reciprocal figure, which means that the larger the aperture the smaller the measurement, and vice versa. Secondly, different lenses have different maximum and minimum aperture values. With that in mind, here are common aperture values:

    Aperture values in full stop increments

    Again, remember that your camera is probably set up to change values in 1/3 stop increments. So, for example, you camera won’t go directly from f/5.6 to f/8.0. Instead, it will probably go from f/5.6 > f/6.3 > f/7.1 > f/8.0 as you click the dial.

    I’m ignoring the concept of depth of field here because it isn’t important for purposes of this discussion. All we care about now is converting these measurements into stops. So, on that front, what we have done here is convert a size measurement into a stop. That means we can easily compare it to shutter speed changes as we saw above. We’ll also be able to compare it to changes in ISO, which we’ll talk about next.

    ISO

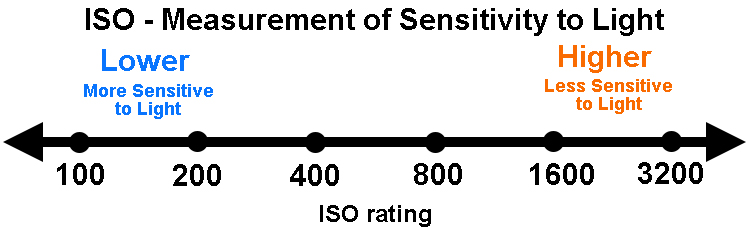
    Finally, we get to ISO, the third exposure control. This is a measure of the sensitivity of your camera’s digital sensor to light. Making it more sensitive to light increases exposure but leads to increased digital noise in your pictures. Conversely, decreasing the ISO lowers the exposure value but also decreases digital noise. Here is a chart showing common ISO values in one stop increments:

    ISO values in full stop increments

    As you can see from the chart above, the ability to change ISO is pretty limited. Whereas there are 18 stops within the range of common shutter speeds, there are only seven in ISO. There are cameras with ISO values that go higher (such as ISO 12,800 and even 25,600), but they lead to pretty dramatic digital noise. This limited range though does show why increases are important.

    In any case, as you can see what has been done is create a system where we have taken a measurement of sensitivity to light and converted it into stops. Each doubling in sensitivity doubles the exposure value, which equals a stop. What’s great is that (unlike the aperture measurements) ISO is simple. It is easy to understand that an ISO of 200 is double that of ISO 100.

    Putting it all together

    Now that we have covered the concept of stops for each of the three exposure controls, we are ready to talk about them together.

    The key thing to understand here is that a stop, is a stop, is a stop. By that I mean that a stop of shutter speed exposure, equals a stop of aperture, equals a stop of ISO. In other words, lengthening your shutter speed by one stop is the exact same thing as opening your aperture by one stop. And that is exactly the same thing is changing the ISO by one stop. The measurements all equate.

    Why does this matter? Because you will face the need to change your exposure values all the time. This will allow you to take complete control over the exposure process. For example, when you want to increase your depth of field you know you need to make the aperture smaller. But that will cause your picture to be underexposed. By using stops, however, you can increase the exposure by the exact same amount using either the shutter speed or ISO.

    An example of using stops

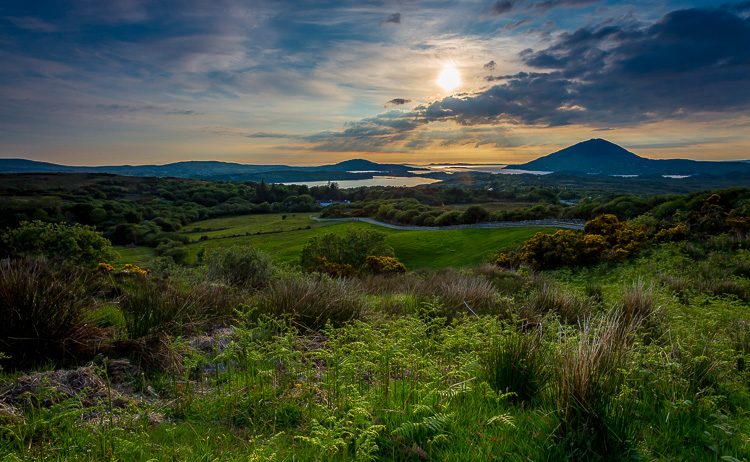
    If this seems confusing, an example should help make it clearer. Let’s say you are out shooting a landscape scene and you hold up your camera and set up a correct exposure. It is 1/500th of a second at f/5.6, with an ISO of 100.

    That’s just fine, except that remember that this is a landscape photo. You want a much deeper depth of field than f/5.6 is going to allow, so let’s move that to something like f/11. You know that this is a 2-stop decrease (check the charts above for confirmation).

    Landscape shot at 1/125 of a second at f/11.

    Landscape shot at 1/125 of a second at f/11.

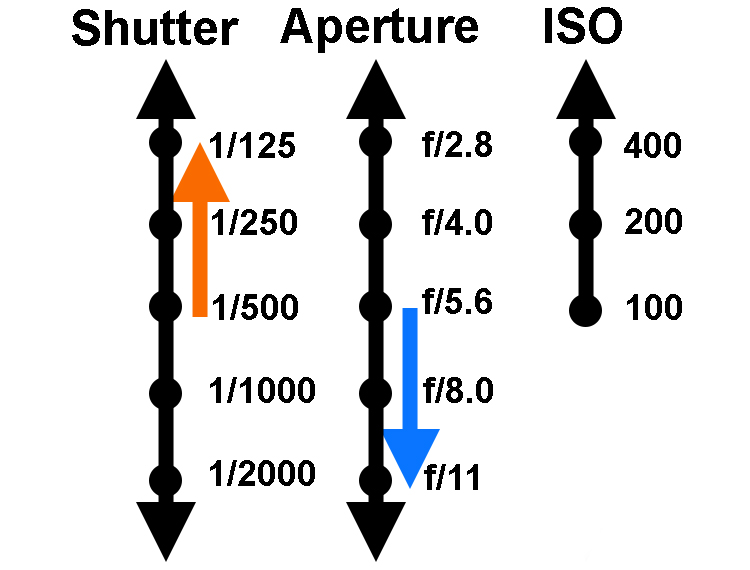
    If you made no other change, your photo would be very underexposed. But you now know that you can just increase (lengthen) your shutter speed by the same amount (two stops) to offset this move. In other words, since we have converted all these exposure changes to stops, we have a common currency that we can interchange freely. A 2-stop shutter speed increase takes you to 1/125th. In other words, you started at 1/500, twice that is 1/250, and doubling that again is 1/125 (again, check the chart above to see).

    You could also change ISO if you wanted (to ISO 400), but you probably don’t want to do that to keep noise to a minimum. Your new settings of 1/125, f/11, ISO 100 are much better for this situation.

    For those who do better with visuals, here is how the two offsetting moves appear:

    Two-Stop-Move

    Another example

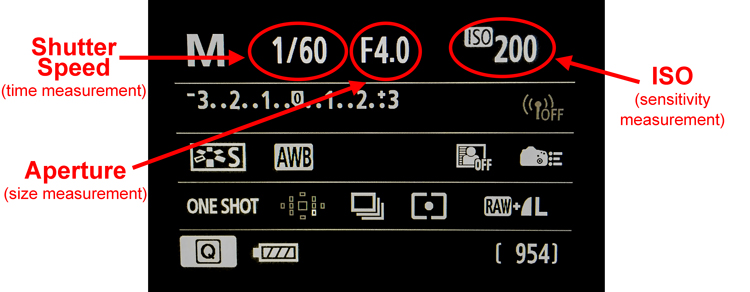
    Let’s walk through another example to make sure you’ve got it. Let’s say you are photographing a friend or a family member and your camera settings are at 1/40, f/16, ISO 200. The camera’s meter says you have a correct exposure. Take a look at the shutter speed and aperture settings and you’ll see a few problems though.

    First, the aperture is too small for this situation. You don’t need a small aperture like f/16. Not only do you not need the small aperture, which costs you light, but you actually don’t want the deep depth of field that f/16 gives you. You’d rather have an extremely shallow depth of field to blur out the background. Secondly, a shutter speed of 1/40 is probably a too slow for this situation. This shutter speed could lead to a lack of sharpness due to the camera shaking slightly or your subject moving while the shutter is open.

    The good news is that both your problems can be solved by making changes to the shutter speed and aperture. You can use a stop as the common currency to make sure they offset and your exposure stays the same. You decide to open up the aperture all the way to f/4. That’s a 4-stop increase. Check the chart above, and you’ll see it goes like this; you start at f/16> f/11 > f/8 > f/5.6, and the fourth stop takes you to f/4.0.

    Now that you’ve made that change you have the depth of field situation fixed. If you made no other change, your picture would be quite overexposed though. But that’s okay, this just allows you to shorten your shutter speed which you wanted to do that anyway avoid any possible camera shake or subject movement. Now you know you can shorten the shutter speed by four stops to offset the change you just made to the aperture. Starting at 1/40, moving fours stop gets you: 1/40th > 1/80th > 1/160th > 1/320th, and finally to 1/640th. That’s much better.

    Shot at 1/620 second with aperture of f/4.0.

    Shot at 1/640th of a second with an aperture of f/4.0.

    Using stops to master exposure controls

    Hopefully you see the utility of the concept of stops. It acts as a common currency so that all changes in exposure equate. One click of the dial that controls your shutter speed equates to one click of the aperture control. And that equals one click of the control for your ISO settings (if you can adjust your ISO in 1/3 stops). It all works out, and that is extremely important in the exposure process.

    So many times you want to change one exposure control but keep the overall exposure setting the same. You may want to stop down the aperture to increase the depth of field, lower the ISO to reduce digital noise, or shorten the shutter speed to avoid any camera shake. Using stops you can do this with confidence.

    Why can’t you just rely on the camera to do all this for you? In other words, why couldn’t you just use Aperture Priority mode, set the aperture you want, and then watch as they camera sets the right shutter speed? You can just change the aperture and ISO settings until the camera sets the shutter speed you want. And, yes, you can do it that way. But even so, you should understand the process so that you know what is going on under the hood. In addition, if you ever use neutral density filters or find yourself in a situation where you camera cannot meter light properly, you’ll know how to do it for yourself.

    googletag.cmd.push(function() {
    tablet_slots.push( googletag.defineSlot( “/1005424/_dPSv4_tab-all-article-bottom_(300×250)”, [300, 250], “pb-ad-78623” ).addService( googletag.pubads() ) ); } );

    googletag.cmd.push(function() {
    mobile_slots.push( googletag.defineSlot( “/1005424/_dPSv4_mob-all-article-bottom_(300×250)”, [300, 250], “pb-ad-78158” ).addService( googletag.pubads() ) ); } );

    The post What is a Stop? The Common Currency of Exposure Explained by Jim Hamel appeared first on Digital Photography School.

    Digital Photography School

  • Add Motion to Your Fall Photography to Help it Stand Out

    This tutorial brought to you by The New York Institute of Photography. NYIP is the largest and longest running online photography school in the world. Offering ten online photography classes to choose from, the school makes learning photography fun and accessible to aspiring artists on a global scale. Whether you are interested in a new career or are in pursuit of a hobby, NYIP students get the personal attention they need to achieve their goals. They have access to professional photographers as their teachers and mentors to guide them through the course and help them improve.

    NYIP is a paid partner of dPS.

    Motion fall photography01

    If you are gearing up to capture foliage photos this fall, you may want to brainstorm some ways to adjust your typical compositional style in an effort to produce more unique shots within such a commonly photographed category. How to add some motion to your fall photography will help it stand out.

    Add motion to fall photography

    One interesting way to update a lackluster landscape is to display some motion in your image. People are more likely to be drawn to your pictures if you can effectively incite some feeling that may be attached to the subject you are shooting. Considering the topic of the changing seasons, including some motion is a fun way to invoke that feelings associate with a shift from summer to fall.

    Motion fall photography02

    Bulb

    Many photographers, new and experienced alike, overlook the BULB mode feature on their cameras. Some aren’t entirely sure what it does and therefore tend to skip past it altogether while adjusting their shutter speeds. This year, take a closer look at this functionality and explore its potential for adding some spark to your seasonal shots.

    When working in BULB mode, you will be able to use shutter speeds that are several minutes long. For example, by keeping the shutter open for a mere few seconds, you will have just the right amount of time to move your camera during the actual exposure, allowing you to create a dreamy effect many others are only able to achieve on a computer with the help of post-production tools.

    Motion fall photography03

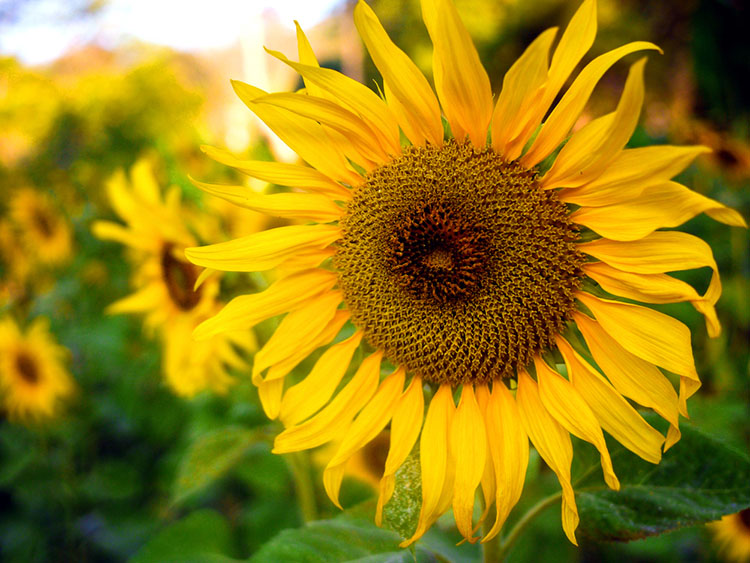
    In practice, let’s say you are trying to capture a shot of two different sunflowers growing several feet away from each other in a field. Rather than stepping back to include both flowers in a static, motionless frame, this is a great opportunity to slow your shutter speed and get creative with some movement. To capture a fluid, wistful effect while including both plants in the shot, simply focus on one flower first, start your exposure, and then quickly move the camera to the second flower while the shutter is still open.

    Motion fall photography04

    Capture falling leaves

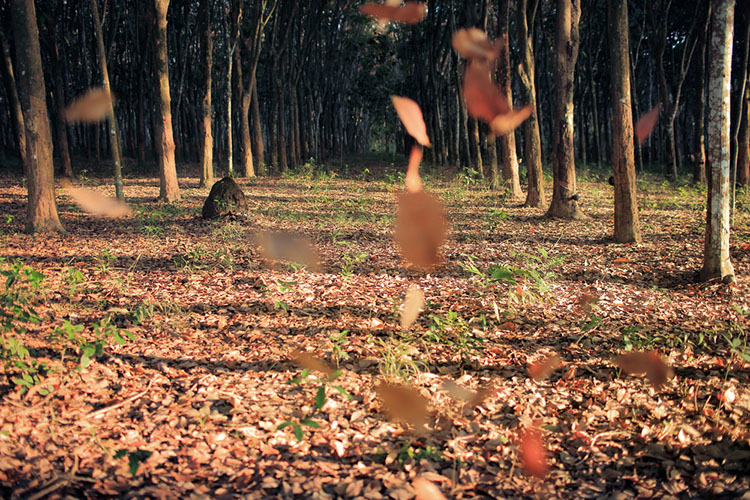
    Falling leaves are another perfect subject to explore when experimenting with slower shutter speeds. This autumn, try heading to a local park or hiking trail on a windy day to try out these new techniques. Find a tree with some pretty foliage that you’d like to use as your subject. Set up your gear and wait for the right moment to capture the natural motion of the outdoors.

    As a gust of wind blows a handful of leaves from the nearby tree, get creative with the ways in which you can capture that windy motion. One method could be to try zooming in and out mid-exposure. Another could be to get into manual focus mode. Start capturing your shot in focus, then abruptly twist out of focus at the end of the exposure. You could even physically start moving your camera while the shutter is still open.

    Motion fall photography05

    Fall décor

    If you’re interested in capturing some similarly unique shots of Halloween decorations, you can employ the same aforementioned techniques in an effort to add a dragging, spooky motion effect to candles or outdoor lights. Again, with open shutter exposure of a few seconds, you can create a look much more compelling than an otherwise stationary image of a home’s exterior décor. When experimenting with creative compositions such as these, you can toss the typical rulebook aside and just focus on trying to produce something innovative and exciting.

    Motion fall photography06

    Moving water

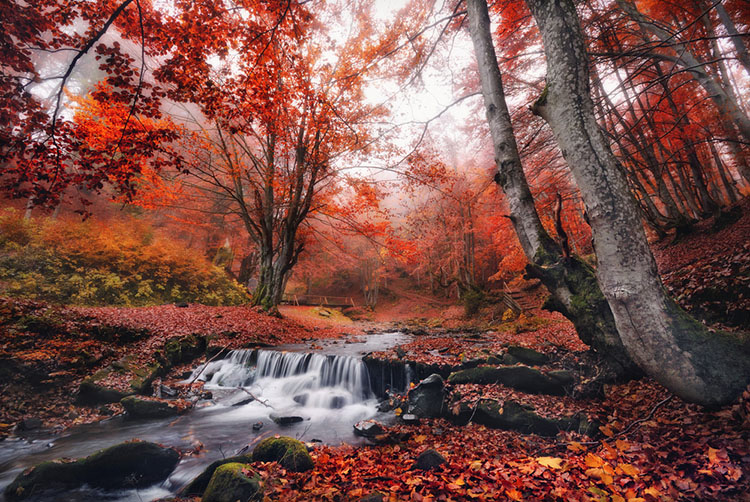
    If you’re traveling to a hiking trail in search of captivating foliage shots, make sure to keep your eye out for any opportunity to capture images of water as well. At a speed like 1/30th of a second, you can transform an ordinary waterfall shot into a compelling silky cascade with a flourishing fall backdrop. If you can’t locate a waterfall and are instead working with a more slower-moving subject like a stream or brook, you might want to try a speed a bit slower, such as 1/15th or 1/4th. In general, we recommend you try fluctuating between speeds of around ¼ and 1/60 until you find one that you’re comfortable with. Make sure to experiment with the exposure time to find your favorite water effects.

    Motion fall photography07

    Getting Started

    Before you head out to try these new techniques this year, here’s a checklist of some last minute tips you might want to keep in mind.

    Keep the camera steady

    When you’re working with such slow exposure times, your shot is prone to be affected by even the slightest jostle of your camera. You might want to consider packing a tripod. If you don’t own one (or lugging one along isn’t practical for your excursion) try to find something outdoors like a boulder as a means for stabilizing your camera before you get started. If you can’t locate a helpful natural prop, you could also try using the 2-second timer and propping the camera up on your gear bag.

    Waterfalls

    When shooting waterfalls, if you want to capture a more even exposure without the often inevitable inclusion of heavy, distracting shadows, try to head out very early in the morning. If this doesn’t work with your schedule, a cloudy day is your next best option for avoiding this.

    Raise the ISO

    If you’re trying to photograph fall décor indoors but the exposure is repeatedly too dark, try cranking your ISO (and using a simple noise reduction software).

    Blur the background

    If you’re trying to focus on a foreground subject but struggling to effectively blur the background, try using the widest possible aperture, and the longest focal length of your lens. Slowly move your subject further and further away from the background as you capture your shot.

    Motion fall photography08

    By effectively employing these tips and displaying the motion of your subjects, you’ll be able to capture the essence of autumn in a uniquely captivating way.

    This tutorial has been brought to you by The New York Institute of Photography. NYIP is the largest and longest running online photography school in the world. Offering ten online photography classes to choose from, the school makes learning photography fun and accessible to aspiring artists on a global scale. Whether you are interested in a new career or are in pursuit of a hobby, NYIP students get the personal attention they need to achieve their goals. They have access to professional photographers as their teachers and mentors to guide them through the course and help them improve.

    NYIP is a paid partner of dPS.

    Jacob Boller is the School Director at The New York Institute of Photography and has been in his role for the past decade. Jacob first fell in love with photography taking wildlife photos with his Grandfather and still uses that same Olympus 35mm from time to time. Jacob is honored to be the Director at NYIP, the largest and longest running online photography school in the world, and is proud that via the NYIP Online Learning Center, course updates are made as fast as the camera technology develops.

    googletag.cmd.push(function() {
    tablet_slots.push( googletag.defineSlot( “/1005424/_dPSv4_tab-all-article-bottom_(300×250)”, [300, 250], “pb-ad-78623” ).addService( googletag.pubads() ) ); } );

    googletag.cmd.push(function() {
    mobile_slots.push( googletag.defineSlot( “/1005424/_dPSv4_mob-all-article-bottom_(300×250)”, [300, 250], “pb-ad-78158” ).addService( googletag.pubads() ) ); } );

    The post Add Motion to Your Fall Photography to Help it Stand Out by Jacob Boller appeared first on Digital Photography School.

    Digital Photography School

  • Avoid These 5 Common Mistakes in Black and White Photography

    Black and white photography has been around for nearly 180 years, ever since Louis Daguerre introduced the daguerreotype process to the world. It is still hugely popular despite the rise and ease of color photography. And yet, whenever I look at other people’s black and white photos, I see the same mistakes over and over. Are you making any of these? Let’s find out!

    Black & white photography mistakes

    Mistake #1: Shooting in JPEG format

    Ouch! This is a big one. It’s the single worse thing you could do.

    The difference between RAW and JPEG

    To understand why, you need to appreciate the difference between Raw files and JPEGs. Raw files contain all the information captured by your camera’s sensor. A Raw file is not a finished picture file. It has to be processed (using software like Lightroom or Adobe Camera Raw) and converted to a JPEG or TIFF file in order to be usable.

    You can think of a Raw file as the equivalent of a negative (as in from film photography). You can’t send a Raw file to a photo library or a magazine any more than you could send a negative. You need to process the Raw file (or scan and process the negative) first.

    JPEG files are created by the camera. It takes the information captured by the sensor, processes it (much like you would do with a Raw file in Lightroom, but according to the camera’s built-in parameters), compresses it, discards the unused information, and saves it as JPEG. They don’t necessarily need processing in software like Photoshop or Lightroom, although most can be improved by doing so.

    Advantages of shooting RAW

    Using the Raw format gives you the following advantages.

    • Control: You process the file yourself, rather than letting the camera do it. You can process it to your taste from a stylistic point of view. Using Raw lets you interpret the file as many ways as you want. Using JPEG means the file gets interpreted one way only – the way the camera does it.
    • More data: The Raw file contains much more information than a JPEG, especially in the highlights and shadows, that you can draw out when you process the file. The extra information helps prevent banding in areas of smooth continuous tone like clear skies.

    Black & white photography mistakes

    Black & white photography mistakes

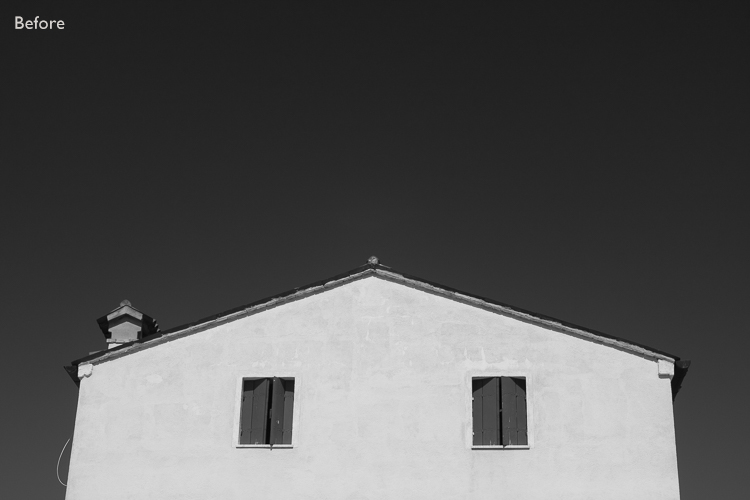
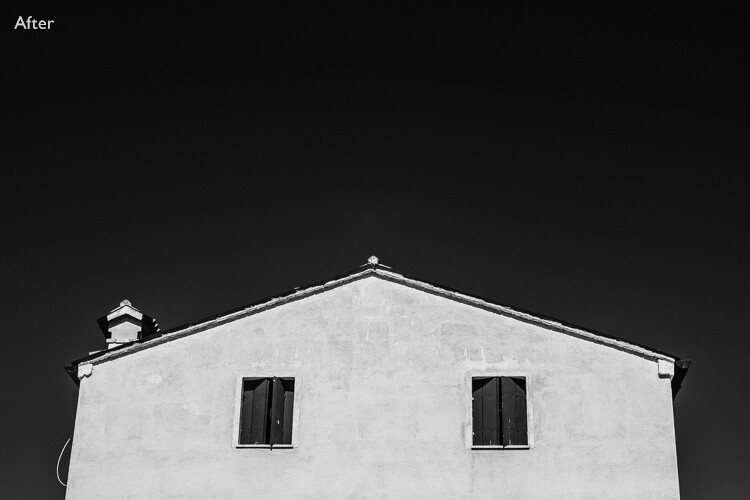
    Using Raw helps you get from the before image shown above to the processed version here. With Raw, you can increase contrast and make the sky darker without introducing banding in the sky or halos along the edges of buildings. You can’t do this with JPEG files.

    More advantages of shooting RAW

    • Adjust sharpness: JPEG files created by your camera are sharpened. The sharpening limits the amount you can change tonal values before introducing halos and artefacts. Yes, you can turn JPEG sharpening off in-camera – but how many people bother?
    • RAW format keeps the color info: Raw files contain all the color information captured by the sensor, so you can create a color version of the photo in Lightroom, Photoshop, etc., as well.
    Black & white photography mistakes

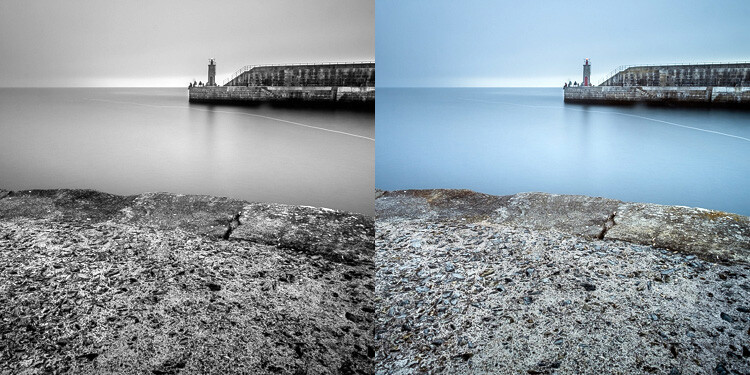
    Using Raw let me create both a color and black and white version of the same image in Lightroom, without any loss of image quality.

    • Improvements: The software gets better every year. The version of Lightroom or Photoshop you use in five or 10 years time will be much better than the current one. With Raw, you can take advantage of these new improved tools and reprocess your images in the future.

    So please, don’t use the JPEG format any more for black and white photography. There are, however, advantages to using your camera’s monochrome mode, as discussed in my article Mastering Monochrome Mode.

    Mistake #2: Trying to save photos by making them black and white

    Black and white is not a method for rescuing poorly crafted color photos. If your photo is bad in color, it will be bad in black and white too (although there are always photos that work better in black and white for compositional reasons).

    There is nowhere to hide in black and white. In color, if the lighting or composition isn’t as good as it could be, the emotional impact of the colors in the photo may rescue the image (or, depending on how you look at it, cover up its shortcomings). Black and white images rely on factors like tonal contrast, textural detail, line and strong composition to work.

    That’s why some photographers consider black and white to be a kind of higher art form than color photography.

    Black & white photography mistakes

    The texture in this photo is essential to make it work in black and white.

    Mistake #3: Not processing the photos properly

    Before digital cameras and Lightroom came along, many pro photographers used a professional printer to print their images. Creating top quality black and white prints in the darkroom is hard, and it was often outsourced to professionals.

    This was a beneficial arrangement that let photographers concentrate full-time on photography and left printing to the specialists. Perhaps the best known pro printer in the UK is Robin Bell, who has worked with big names such as David Bailey, Terry O’Neil, and Eve Arnold.

    Nowadays it is much easier to create beautiful black and white images in programs like Lightroom, Photoshop, or Silver Efex Pro 2, than it is to master the chemical darkroom process. But, sadly, many photographers don’t get to grips with the basics. The result is that their black and white photos are not nearly as good as they could be.

    Take the time to learn how to use your software properly and your photos will get better.

    Black & white photography mistakes

    Black & white photography mistakes

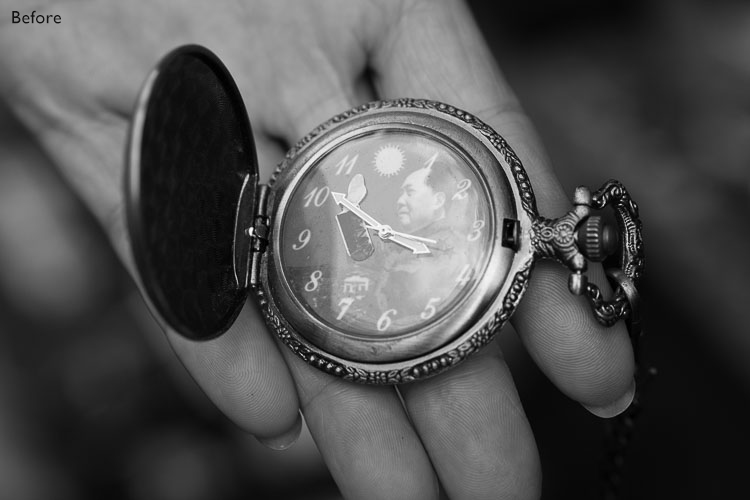
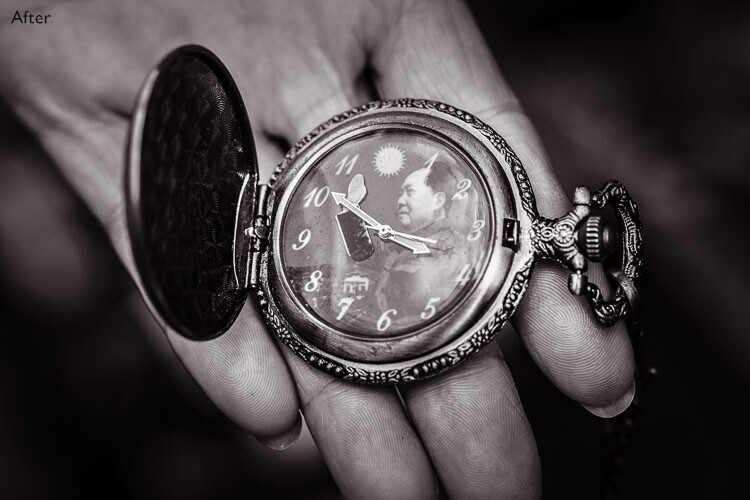
    This before and after example shows the photo how it looked straight out of the camera compared to the final version, processed in Lightroom. Learn how to get from one to the other in order to get the most out of your black and white images.

    Mistake #4: Not shooting in the best light

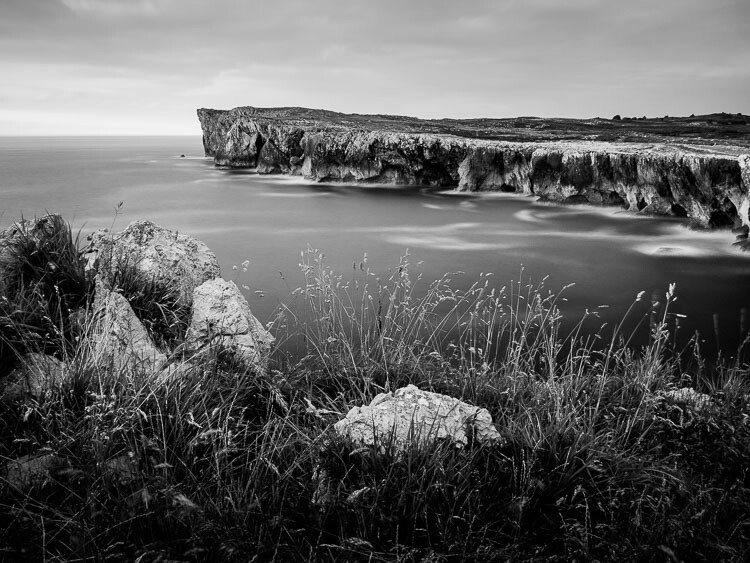
    One of the advantages of black and white is that you can often shoot in lighting conditions not suitable for color photography. For example, on a cloudy day you can create beautiful black and white seascapes with a tripod and neutral density filters (this is called long exposure photography). Yet, in color, you would really need to shoot close to dawn or sunset to make the most of the scene.

    But what some people do is use black and white to shoot in lighting conditions that are simply unsuitable for the subject. Using black and white isn’t the solution. The important skill is in matching the light to the subject. This takes a while to learn but it’s very important. Don’t be lazy just because it’s black and white.

    Black & white photography mistakes

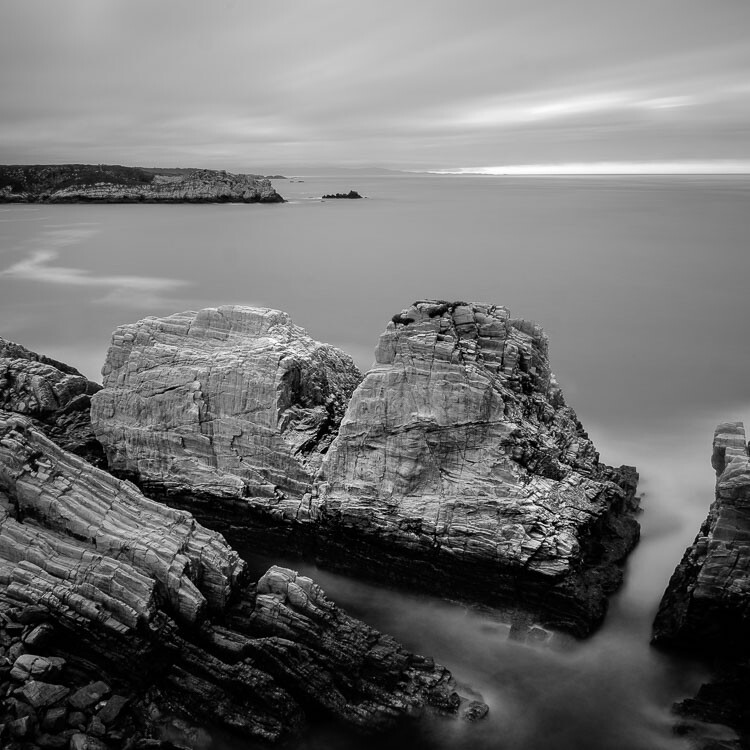
    A long exposure photo made on a cloudy day. The light suits the subject – it wouldn’t have worked in sunny weather.

    Mistake #5: Not having a strong composition

    Black and white is a true test of your compositional skills. The best monochrome images use visual elements like tonal contrast, texture, line, shape, pattern, and negative space. The emotional power of color can mask poor composition. But in black and white there is nowhere to hide. You have to learn how to use these building blocks of composition effectively.

    That starts with learning how to see them. For example, you can’t use lines in your compositions if you haven’t trained yourself to see straight, diagonal, or curved lines in the scene.

    The good news is that once you understand the fundamentals of composition in black and white, you will instinctively apply them to your color photos as well.

    Black & white photography mistakes

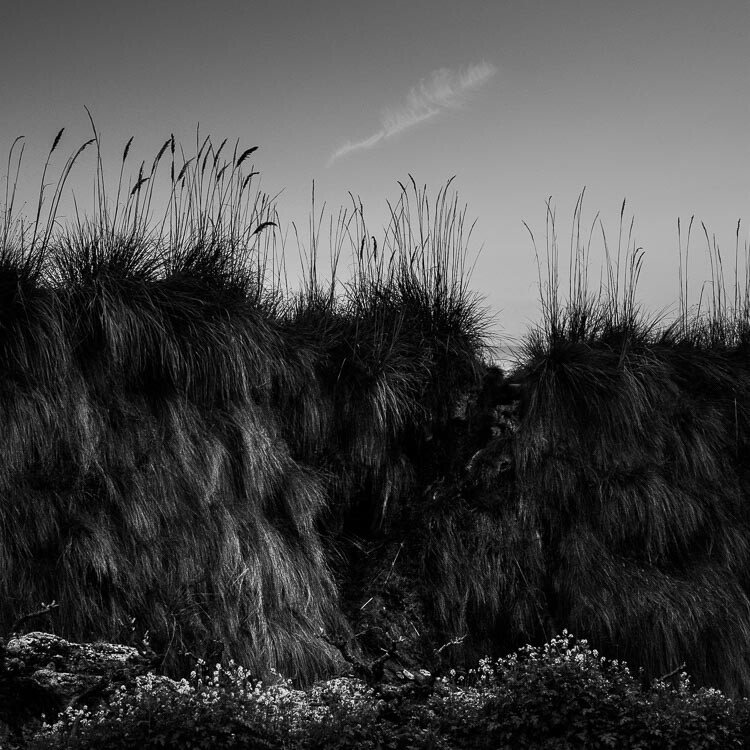
    I took a lot of care with the composition of this landscape photo. It has foreground interest and plenty of texture – important elements in black and white landscapes.

    Have you made any of these mistakes?

    Can you think of any other mistakes that photographers make when working in black and white? Please share your thoughts in the comments below.


    If you’d like to learn more about black and white photography then please check out my ebook Mastering Lightroom: Book Three – Black & White.

    googletag.cmd.push(function() {
    tablet_slots.push( googletag.defineSlot( “/1005424/_dPSv4_tab-all-article-bottom_(300×250)”, [300, 250], “pb-ad-78623” ).addService( googletag.pubads() ) ); } );

    googletag.cmd.push(function() {
    mobile_slots.push( googletag.defineSlot( “/1005424/_dPSv4_mob-all-article-bottom_(300×250)”, [300, 250], “pb-ad-78158” ).addService( googletag.pubads() ) ); } );

    The post Avoid These 5 Common Mistakes in Black and White Photography by Andrew S. Gibson appeared first on Digital Photography School.

    Digital Photography School

  • Step by Step How to Clean Camera Gear so it Stays in Good Shape

    You may be very aware that photography equipment is not cheap. If you’re not, you’re in for a rude awakening! Camera bodies can cost thousands of dollars and it’s not uncommon for a lens to be even more expensive than a body! Sometimes it’s very tempting to baby your equipment; treat it with extra caution and wrap it up in cotton wool so as no harm will come to it. But with the right care and maintenance, your equipment will last and continue to perform for many years, no matter what, and without the babying!

    DANS4206-2

    Being a professional photographer myself, my equipment is often subject to some not-so-camera-friendly circumstances. Rain, snow, dust, and even champagne (!) are not uncommon encounters for my equipment. Even though I generally take the right precautions (for example, I use rain covers on for my cameras and lenses if it’s raining) there are times when the conditions are just unavoidable and my equipment gets a little dirty. It’s going to happen. But because I care for my equipment (even though it may look like I don’t!), it keeps on performing and hasn’t let me down. So I thought that I would share some of my tips to help you do care and maintenance on your gear, too.

    Supplies needed

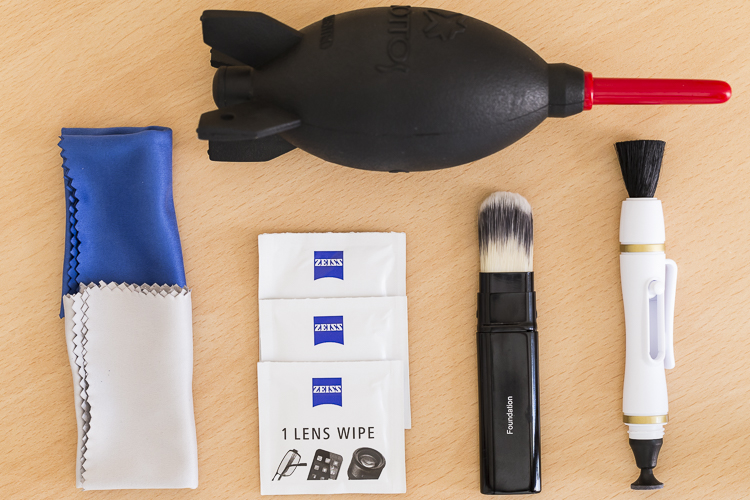
    The good news about caring for your equipment is that it’s relatively cheap to buy what you need. With so few things in photography being cheap, this comes as a nice relief! Here is a list of what I use to care for my gear.

    From a camera store (camera specific tools)

    An overview of essential cleaning items.

    An overview of some essential cleaning items.

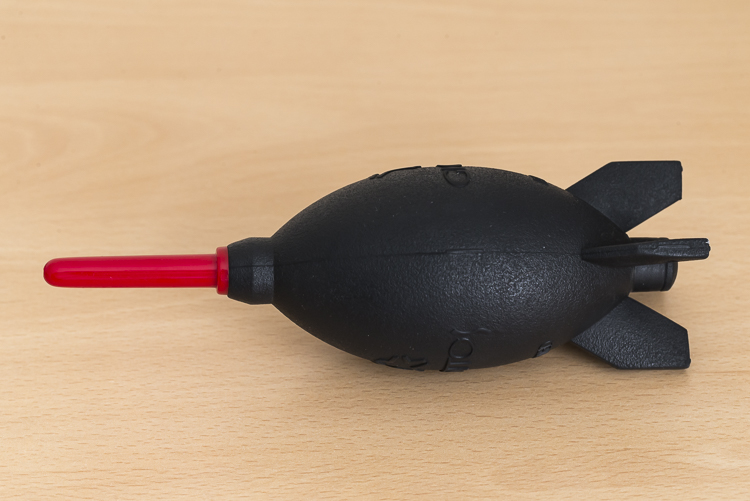
    • Rocket blower: I use this a lot! Squeezing it blasts out a puff of air to blow away any dust.

    DANS4199

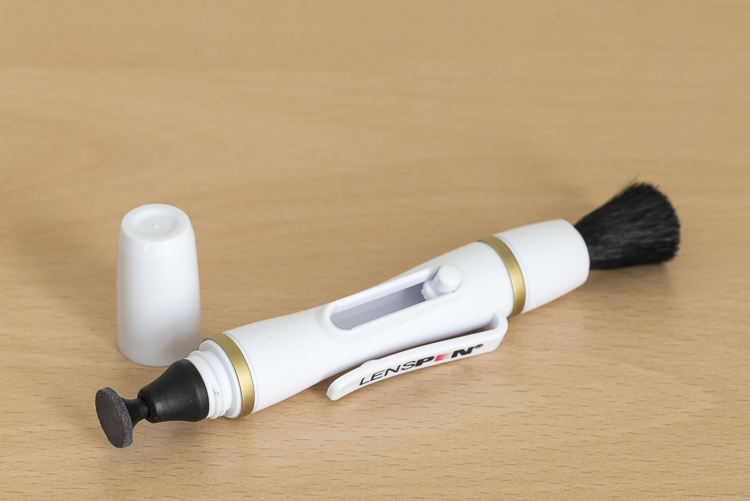
    • LensPen: I have just added one of these to my kit. At one end there’s a small soft, cleaning tip. At the other, is a retractable brush. I haven’t yet used it extensively but have been impressed with it so far. However, the cleaning tip is quite small so it’s not something I use on my larger lenses, such as a 400mm f/2.8; it would take forever.
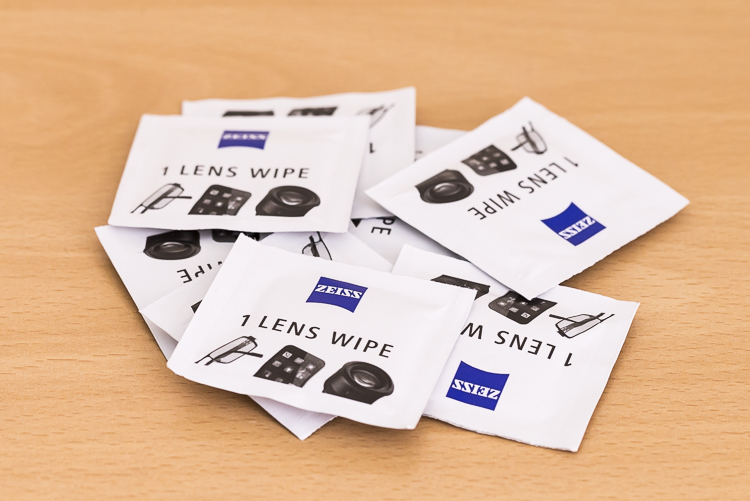
    • Pre-moistened lens wipes: I love these things. These are almost like the refresher towelettes you can get at KFC, but for lenses. They’re pre-moistened with a lens cleaning solution that quickly evaporates from the lens. They’re also dirt cheap. I use the Zeiss brand ones (only ones I’m aware of) which for a pack of 200, cost about $ 13.90USD. (Note: also available by Hoodman especially for camera lenses)

    DANS8686

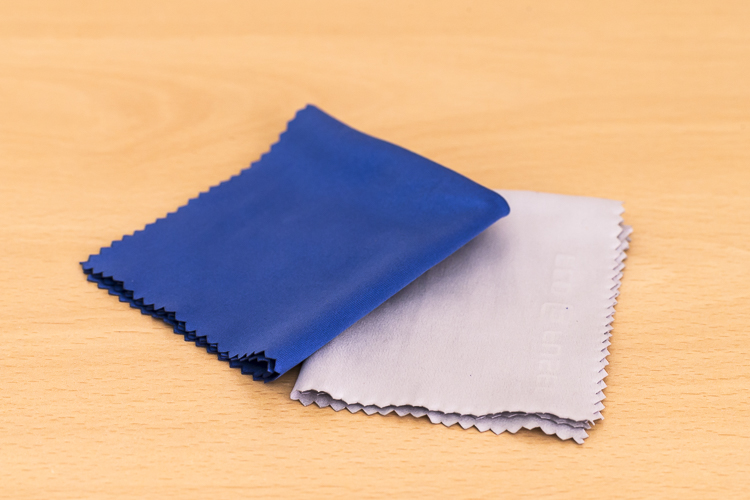
    • Microfibre cleaning cloths: Another cheap must have. I like to have several of these. I reserve one just to buff lenses after using the wipes, and another just for cleaning the lenses without any product at all. I avoid using the same one across many devices, for example, using the same clothing to clean my iPhone screen, then using it to clean my lenses.

    DANS8688

    From a regular store (non-camera tools):

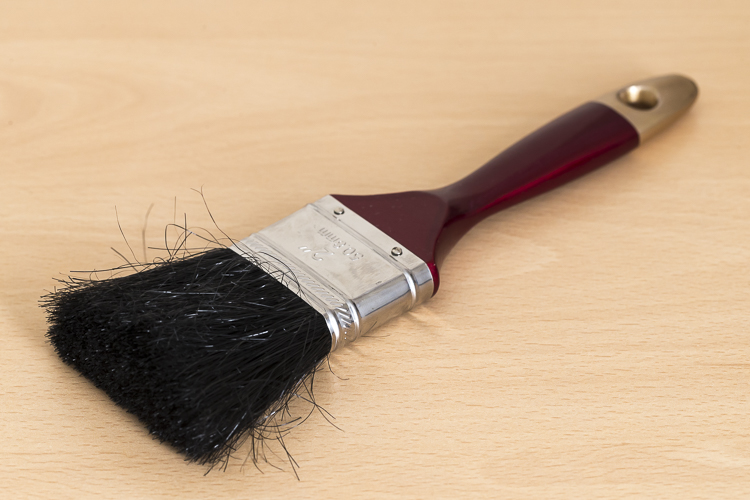
    • A paint brush: These are very handy at removing dust from the surface of camera bodies and lens barrels. Again, buy this brand new. You don’t want this to be super soft either, as it’s just being used on the outside of the cameras and lenses and not on anything that needs to be protected.

    DANS4195

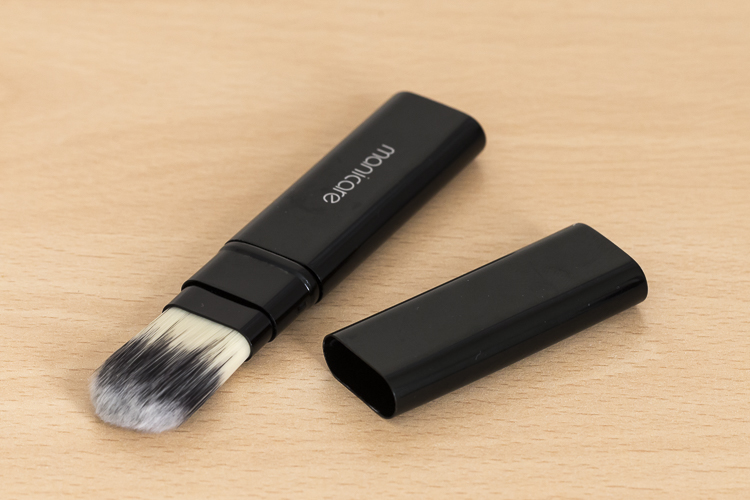
    • Make-up brush: this is something that people often have a laugh at when they see it in my bag. But then think, “Hey that’s a good idea”. If you want to add one to your kit, make sure you buy one brand new. You don’t want your partner’s blush going all over your lens. Generally, the more expensive brushes are better as their bristles are much softer. The one I have is also retractable, which is ideal as it protects the brush.

    DANS4193

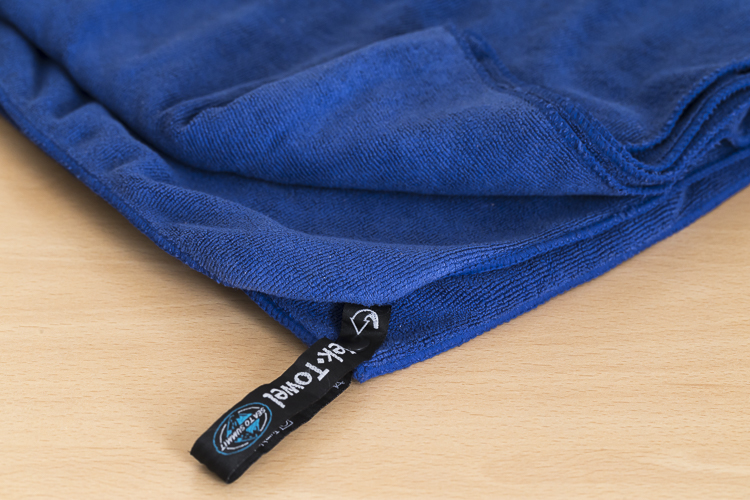
    • Teck Towel: I got a Tek Towel for my birthday years ago and decided to give it a go cleaning my gear. It works brilliantly, but a clean towel will work just as well.

    DANS4197

    • Zip-Lock Bag: This is where I store my cleaning gear, to keep it clean and as dust free as possible!

    With these items, I am able to keep my lenses and camera bodies looking (almost) like new. Here’s my workflow when it comes to cleaning time.

    Lenses

    Step 1. Use the Rocket Blower

    The first step is to remove any larger bits of dust, etc., from the lens. For this, I use the rocket blower. Squeezing it blows air out of the tip and will blow away larger, loose bits of dust, etc. It’s important not to use a cloth for this step as this can drag dust over the lens and scratch it. This is why the Rocket Blower is very useful.

    Step 2. Use the LensPen

    DANS4194

    Hopefully, the blower was able to remove all the dust. However, there are times when some little specs remain. To remove these, I use the brush on the end of the LensPen. Doing a quick flick of the brush around the lens should do the trick. There shouldn’t be a need to apply much if any pressure at all. This should remove all the dust from the surface of the lens. You may need to do a quick repeat with the blower, though. If you don’t have a LensPen, using a makeup brush works just as well.

    If you don’t have a LensPen, using a makeup brush works just as well.

    Step 3. Clean the glass

    Your lens should now be free of dust and other debris. If there are some marks surface on the lens, this is when to give it a little clean. First off, use the cleaning end of the LensPen. It is very soft and doesn’t damage the glass at all so it is ideal for this. Using a circular motion, work your way around the lens until all the marks have been removed. This may take several passes to achieve. It’s important to not be tempted to push on the lens too hard. Just keep going around in a circular fashion until it’s satisfied. Give the blower another quick go over, too if necessary.If you don’t have a LensPen using a

    If you don’t have a LensPen using a clean micro fibre cloth will also do the job. Just use the same circular motion and again, repeating the motion is preferred over applying more pressure.

    Step 4. Get rid of stubborn marks

    After Step 3, I am normally done cleaning the lens. Step four is completely optional, but sometimes, there is some muck on the lens that just will not budge; no matter how many times it’s gone over. This is when to use the pre-moistened lens tissues.

    Using the same circular motion, I work my way around the lens until it’s been completely gone over (I normally go over it two or three times). Then I get a microfibre cloth (generally, a different one that I use just for this purpose) and give the lens a bit of a buff using the same circular motion. I’ll go over it a few times.

    I favour these tissues over sprays because I don’t like the idea of having a bottle of liquid inside my camera bag. If it breaks, it can leak into my gear and cause major damage. I also quite like their single-use quality.

    For me, using cleaning solutions is an absolute last resort and not something I do each and every time I clean my gear. I also don’t breathe on my lenses (you know, to fog them up to make it easier to wipe off grime) if I can avoid it. If you’re like me and quite a coffee drinker, your breath can be slightly acidic and with repeated use, it can wear down the coatings on your lens. At least that’s what Nikon mentioned a while back in an article I read (ps, I’m a Canon guy).

    Step 5. Don’t forget the lens cap

    The front element is now clean. But for me, the process is still not yet finished. Before placing the lens cap back on, I have a quick look at it – there could be grit and dust on it that is about to put back on my newly cleaned lens. Giving it a quick once over with the blower and a paint brush will keep it and the lens cleaner.

    Step 6. Clean the rear element

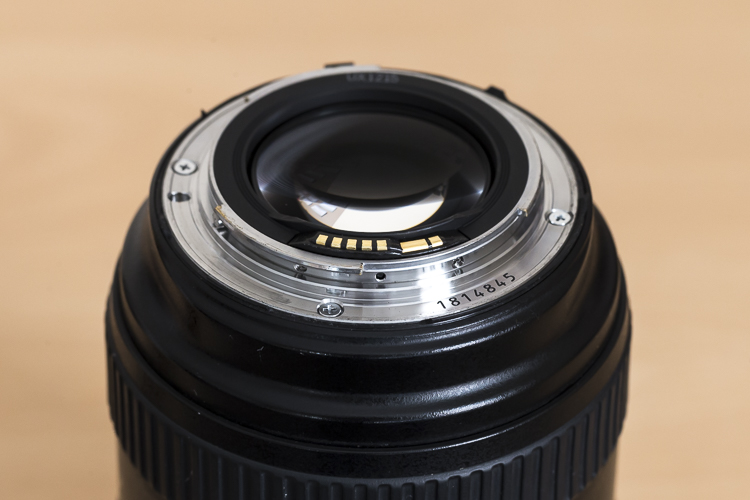
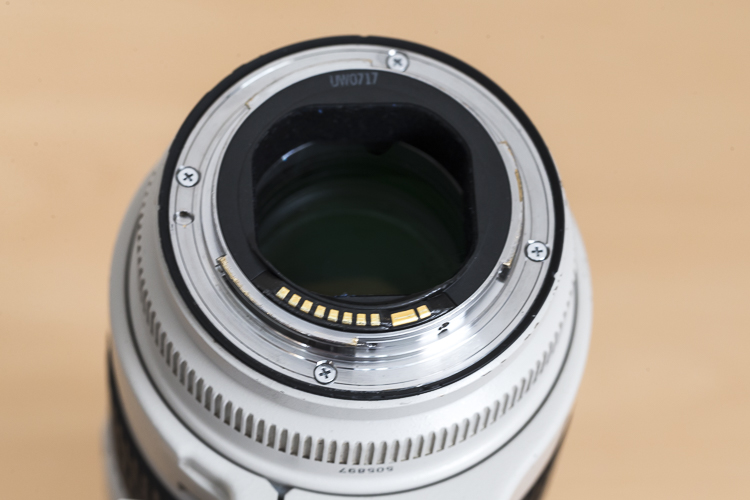
    Now it’s time to have a quick look at the rear element – the bit that goes inside your camera. This shouldn’t be too messy; after all, it stays inside the camera. But dust can fall on it, especially when changing lenses and this dust, while it may not show up in pictures, can definitely make its way on to the sensor. I give it a quick once over with the Rocket Blower making sure the bottom of the lens is facing down. Doing so will stop any dust from falling back on it.  Some rear elements are further recessed into the lens than others. With lenses that have the rear element much closer, I also may give it a quick wipe with a micro fibre cloth or LensPen to clean it up.

    DANS4207

    Notice with this lens, the rear element is very close to the surface. Also, those gold bars are the lens contacts.

    Occasionally, I’ll also give the mount a clean up too, as well as the lens contacts. For this, I just use a Tek Towel, although any clean towel will do. Carefully wipe around the mount and go over it a couple of times. A small amount of alcohol on a cotton tip can be used to clean the contacts. Cleaning the contacts every now and then can help to prevent errors between the camera and lens caused by a build up of grime.

    Now it’s time to give the rear cap a quick go over. Remove any dust with the blower and put it back on the lens.

    With this lens the rear elements sits deeper in the lens barrel.

    With this lens, the rear element is recessed deeper into the lens barrel.

    Step 6. Clean the outside of the lens

    Now that the elements (both front and rear) and the lens mount are clean, it’s time to give the outside a quick go over. For this, I whisk away any dust with the paint brush and wipe the whole surface area with the Tek Towel. If I’ve been at the beach (salt in the air), or my lens has had a shower, I’ll dampen the towel in fresh water to remove any salt or champagne, etc.

    This step, while very quick and simple, has proven to be quite helpful in picking up some things that may need my attention. For example, a while back I was cleaning my 70-200mm lens and I noticed that the end of the barrel was a little loose. I took it into Canon it was fixed in 10 minutes and cost nothing. Prevention is the best remedy.

    Camera

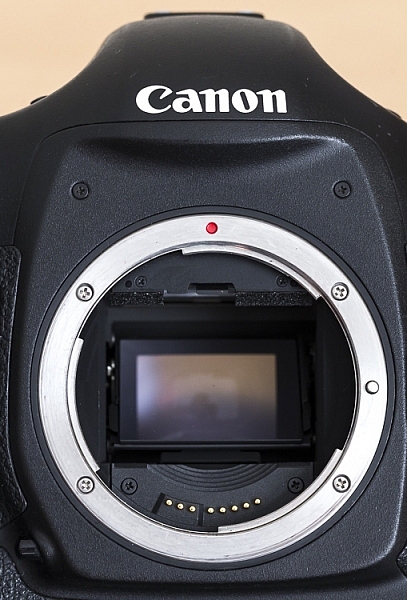
    Here is a view of one of my camera bodies without its body cap. Care should be taken when cleaning around the lens mount so as to avoid dust/dirt etc from falling in. It's good practice to do this with the lens mount facing down.

    Here is a view of one of my camera bodies without its body cap. Care should be taken when cleaning around the lens mount as to avoid dust, dirt, etc., from falling inside. It’s good practice to do this with the lens mount facing down.

    Cleaning the camera is MUCH easier and quicker than the lenses. First off, I start by giving the outside a once over with the paint brush, followed by a thorough wipe down with the towel. I make sure the screens and the viewfinder are all nice and clean, too. As with lenses, I make sure that the mount and the contacts on the body are clean using the same steps and dampen the towel in fresh water if I’ve been at the beach.

    While I have the body cap off, I’ll also blow out any dust that may be in the camera with the blower. With this step, I am much more cautious as I don’t want to blow into the body too much. Again, I also have the camera mount facing down to prevent dust from re-entering. This step can help reduce the amount of particles inside the camera which may eventually find their way onto the sensor.

    Sensor

    For me, this is where the cleaning process stops. I don’t do my own sensor cleaning as I much prefer it be done by the right people. Some people like to do their own sensor cleaning, and that’s completely fine. This is just something I like to give to professionals because if anything goes wrong, I can blame them.

    Filters

    Cheap-UV-Filters-202px.jpgYou may have noticed that I haven’t mentioned anything about UV filters. The reason for that is simply I don’t use them. I am yet to be convinced that they will actually save a lens from breaking if being dropped and have the view that if a lens is going to break from a fall, it will break; filter or no filter. I always use lens hoods which not only help to reduce lens flare but also provide some protection from objects falling on to the front element. However, if you’re in an extremely dusty environment, for example, then the use of a UV filter could be a smart investment.

    Conclusion

    So that’s it for my gear cleaning process. This isn’t something I do after each and every shoot, but I do try to get to it at least once a month or after shoots where my gear has been a little abused by the elements. It may seem that there are a lot of steps involved, but it really doesn’t take that long to do it. It’s even quite therapeutic when you get into it.

    How do you clean your gear? Do you have any other tools you use? What’s your procedure and how often do you do it? Please share in the comments below.

    googletag.cmd.push(function() {
    tablet_slots.push( googletag.defineSlot( “/1005424/_dPSv4_tab-all-article-bottom_(300×250)”, [300, 250], “pb-ad-78623” ).addService( googletag.pubads() ) ); } );

    googletag.cmd.push(function() {
    mobile_slots.push( googletag.defineSlot( “/1005424/_dPSv4_mob-all-article-bottom_(300×250)”, [300, 250], “pb-ad-78158” ).addService( googletag.pubads() ) ); } );

    The post Step by Step How to Clean Camera Gear so it Stays in Good Shape by Daniel Smith appeared first on Digital Photography School.

    Digital Photography School

  • How to Connect With Your Photography Followers Through Instagram Stories

    Recently Instagram released on of their biggest updates this year, Instagram Stories. It was met with both love and hate and I’ve found it interesting to see how it has been used since its release. Regardless of what you feel about this “Snapchat-copy”, it could be a great tool to connect with your Instagram audience. Here are my best tips on how you can benefit from Instagram Stories and improve your reach!

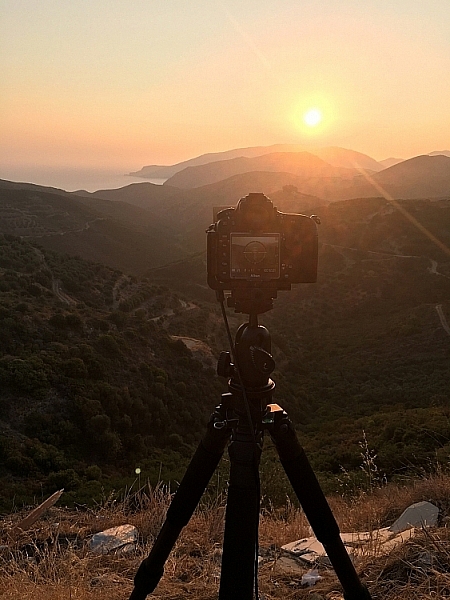
    IMG_0193

    During a recent trip to Greece I was able to interact with my followers through Instagram Stories

    What is Instagram Stories?

    Instagram Stories is Instagram’s latest feature which allows you to share pictures and videos that, similar to Snapchat, will disappear after 24 hours.  This lets you share images with your followers that you don’t want in your feed. Instagram itself describes their new feature like this:

    With Instagram Stories, you don’t have to worry about overposting. Instead, you can share as much as you want throughout the day — with as much creativity as you want. You can bring your story to life in new ways with text and drawing tools. The photos and videos will disappear after 24 hours and won’t appear on your profile grid or in your feed.

    Why should you use Instagram Stories?

    The big question is then; why should you use Instagram Stories? Perhaps you already use Snapchat to share your day-to-day stuff, why do it another place?

    Personally, I wasn’t on Snapchat until a few months ago but after enough nagging from friends and clients, I decided to finally jump on board. Talking to the phone and taking pictures of my travels felt a bit strange, to begin with, but I soon got used to it. However, I did feel like the time it would take to build a new audience, on a new platform, might not be worth it.

    Instagram, however, is where I have the majority of my followers. With Instagram Stories I’m now able to do the exact same as I did for a while on Snapchat but with a much larger reach. Already I’ve received hundreds of emails and Direct Messages from people letting me know how much they enjoy my stories.

    instagram-stories

    Obviously, if you have a greater following on Snapchat than Instagram you might not want to ditch Snapchat completely. Uploading images and videos from Snapchat to Instagram Direct is rather easy, though, so you can be present at both.

    I’ve found Instagram Stories to be an excellent way to connect with my audience and get to know them better. The reach and engagement in my feed have also increased slightly (I haven’t done any extended research so this increase might not be related). Instagram Stories is also a great way for your audience to get to know you better.

    What should you share on Instagram Stories?

    Since the release of Instagram Stories, I’ve paid attention to how photographers use it. What surprised me is how poorly they exploit this new tool. Sorry, but what you had to dinner or a picture of your dog laying on your lap isn’t interesting to most of us. The fact is if you start by uploading that type of content most people won’t come back and look at your stories even though you start creating more interesting content later.

    If you wish to benefit from this tool and connect better with your audience you should be more aware of what you upload. If you just want to send pictures of your food perhaps it’s better to stay with Snapchat and send those images directly to your friends.

    Here are some examples of interesting content to share with your audience:

    Behind the Scenes

    IMG_0439

    When you’re out traveling or photographing, uploading images and videos from behind the scenes is something many people will find interesting. I love to see behind the scenes images from the photographers I follow and I enjoy seeing how the image turns out later on.

    This can be done with both video and images. Perhaps you even could talk a little about the place you’re at or the subject you’re photographing.

    Tips and Tricks

    You don’t need to be an expert to share tips and tricks with your followers. In fact, it’s often interesting to see how beginners process their images or choose their settings.

    I’ve gotten a lot of positive feedback on my short tutorials, tips, and tricks that I share on Instagram Stories. Many people have said that they don’t follow anyone else’s stories but mine due to this.

    Gear talk

    Another interesting thing you could talk about is your equipment. “What camera do you use” is one of the questions I get asked the most, so going through your camera bag every now and then is a good way to answer these questions, while also creating interesting and engaging content.

    IMG_0402

    I got much positive engagement when sharing my first impressions of the NiSi filter system

    Q&A Sessions

    Unfortunately, when you grow a large following online you don’t always have the time to reply to all the questions you receive through email or through social media platforms. Many of these questions take time to answer, so a good and efficient way of replying to as many as possible, is through Instagram Stories. When I receive questions now I answer them through videos in my story. This saves me a lot of time but my followers still get most of their questions answered.

    Since Instagram Stories is still a rather new feature there’s still much to be taken from it. There are many  ways to benefit from this tool but this is how I’ve found it to be most beneficial.

    Have you started using Instagram Stories yet? What do you think about this new feature?

    googletag.cmd.push(function() {
    tablet_slots.push( googletag.defineSlot( “/1005424/_dPSv4_tab-all-article-bottom_(300×250)”, [300, 250], “pb-ad-78623” ).addService( googletag.pubads() ) ); } );

    googletag.cmd.push(function() {
    mobile_slots.push( googletag.defineSlot( “/1005424/_dPSv4_mob-all-article-bottom_(300×250)”, [300, 250], “pb-ad-78158” ).addService( googletag.pubads() ) ); } );

    The post How to Connect With Your Photography Followers Through Instagram Stories by Christian Hoiberg appeared first on Digital Photography School.
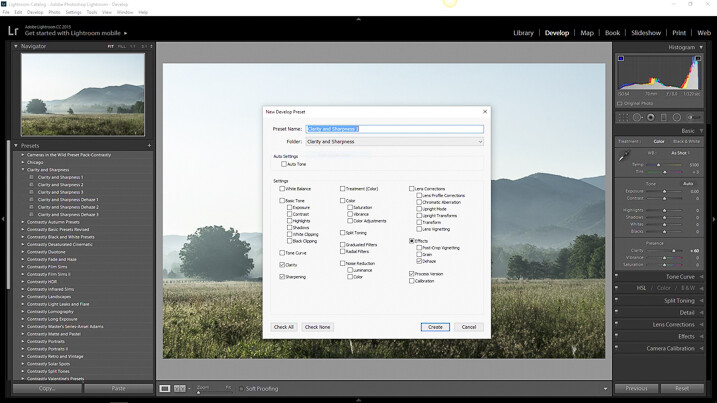

    Digital Photography School