RSS
 

Archive for the ‘Photography’ Category

How to Create and Use Smart Collections in Lightroom

11 Jan

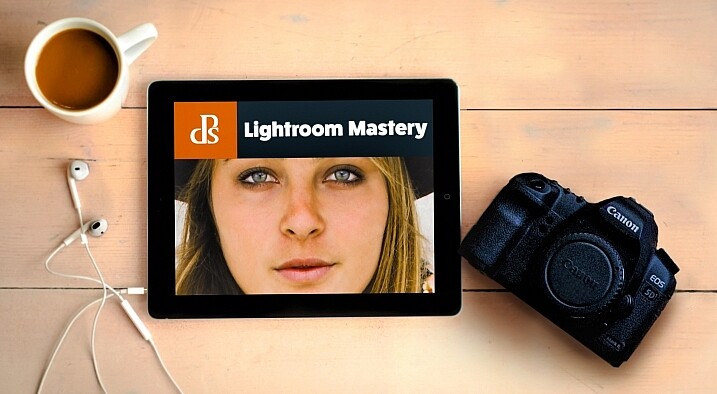
Collections are one of Lightroom’s most powerful features, giving you a way to bring images from many folders together. Generally speaking, they’re just like boxes you sort your physical stuff into. Nothing goes in unless you put it there, and nothing comes out unless you take it out. What if I told you there was another far more powerful type of collection that can sift through all your photo information and build a collection automatically based on a subset of that information? Well, there is, it’s called a Smart Collection.

Using Smart Collections

You’ll find the easiest way to get to grips with Smart Collections is to begin with a few simple ones and then expand to more complex ones. Let’s start with a couple simple ones.

Creating a Smart Collection

You can create a Smart Collection in a number of ways. First, you can click on the little ‘+’ in the Collections panel header, situated in the Left Panel of the Library Module.

Creating and using smart collections in lightroom

From the flyout menu, choose Create Smart Collection.

Creating and using smart collections in lightroom png 2

This brings up the default Smart Collection panel (below).

Creating and using smart collections in lightroom 3

Begin by giving the Smart Collection a name. If you don’t, you’ll end up with a list with Smart Collection, Smart Collection 1, Smart Collection 2, and so forth. Use a name that describes what the collection will contain. For example, you could call this one “3 Stars or Above”. Below this you can choose to add the Smart Collection to a Collection Set (which needs to be created in advance). You could add it to the Smart Collections set, which is a default set created by Lightroom.

Adding the rules

The next part is the key to creating the Smart Collection. It’s the rules section that defines what will be in the collection. In the Match flyout, you’ve three options:

  1. All: Every rule must match for a photo to be included.
  2. Any: As long as a photo matches one of the rules, it’s included in the collection.
  3. None: As long as a photo doesn’t match a rule, it’s included.

If you’re trying to narrow down to a limited set of photos, you’ll most likely be using the All option. As your first Smart Collection is a simple one, set the Rating to 3 stars, with “is greater than or equal to” applied in the pull-down menu. There are other options in the list including; is, is not, is greater than, is less than, is less than or equal to, is in the range. These all allow you to refine what appears in the collection. Click Create to make the collection.

Creating and using smart collections in lightroom 4

The newly created collection will appear in the Smart Collections set, already selected, and the Grid View will show all matching photos. If you change the rating of one of the images visible to be a 2-star photo, it would automatically drop out of the collection. Why? Because it no longer matches the collection rules (3 or more stars).

Creating and using smart collections in lightroom 5

Adding more criteria

Let’s start to narrow down the images you’re seeing. You can either double click on the collection to edit it or create a new one. I’ve double clicked for this example to edit. At the end of the Rating line is a + icon (outlined in red below) which you can click to add another rule. As soon as you do, a minus (-) icon appears, allowing you to remove this rule at any stage. There must always be at least one rule, though.

Creating and using smart collections in lightroom 6

Let’s narrow down the collection to show only more recent 3-star images.

The new rule has Rating selected by default. You can change this by clicking Rating and choosing from the possible rule options in the pull-down menu. To get recent images, you need to choose Capture Date from the Date menu.

You’ll notice there’s a different set of options for dates in the figure below. As you want recent dates, choose “in the last” from the list. Next, you enter a number, then choose from days, weeks, months and years. For speed, enter 30 with the default “days” option. See below:

Creating and using smart collections in lightroom 7

Next, change the name to reflect the new options and click Save. The collection will now display only the most recent photos (taken in the last 30 days) with 3 stars.

Creating and using smart collections in lightroom 8

Smart Collection uses

Right now, what you’ve just created could be done using the Filter Bar, so what use is a Smart Collection? Well, they’re great for helping you complete workflow tasks such as:

  • Add Copyright:  Create a Smart Collection with the rule “Copyright Status”, the option “is” and the choice ‘”unknown”. If you use Metadata Presets, generally you’ll have one that sets the copyright information and sets the Copyright Status to “copyrighted”. Add this preset to the files in the Smart Collection to add that information.
  • Add Keywords:  To sort images not keyworded. From the Other Metadata menu, choose Keywords, then set the option to “are empty”. Use this to add keywords to an image. Just remember that as soon as you hit enter in the keywords panel, the image will drop out of the Smart Collection.
  • Event work:  For event work, you’re generally delivering most of the image, except blinks or out of focus shots. Usually, this work is edited quickly. Create a Smart Collection with the rules; Capture Date, is in the last, 1 days, and Pick Flag, is, unflagged. Now run through and reject the duds using the shortcut key X. Export the rest for your client.
  • Labels for workflow stages:  Labels can be used to imply a status with your photos. For example, you could use red to mean “selected, but needs editing”, yellow to mean “processing” and green for “final image”. By creating smart collections for each stage, you can see what needs to be done with each image. Combined with setting a date, you can keep on top on what needs doing!
  • Adding Captions:  Coupled with a recent date range, you can create a Smart Collection with “Other Metadata>Caption” and “is empty”. This shows recent images in need of a caption. Couple with ratings, etc., to narrow down which images need to be worked on.

Advanced Rules

The Any, All and None route does allow a great selection of options, but it’s missing a trick. What if you need 4-5 rules for sure (All), but also need one or two rules that are more like an Any set? That can’t be done using the method you’ve seen so far.

Rejoice . . . There is a way! It’s a little bit hidden, but if you hold down the Alt/Option key, the + icon turns into a number (#) sign. You can click the # to create a subset of new rules. These allow; Any of the Following, All of the Following and None of the Following – so you can mix in options as well.

Creating and using smart collections in lightroom 9

For example, you could specify an “Any of the following” are true and have two options for File Type, one for JPEG, and one for TIFF. This means all the other rules must apply, but either JPEG or TIFF will also apply. (note I’ve changed to 60 days here for a better set of photos to match for the example).

Creating and using smart collections in lightroom 10

The Smart Collection now shows both TIFF and JPEG images with 2-star or higher ratings, taken in the last 60 days.

Creating and using smart collections in lightroom 11

Other options you could use are red or yellow labels, or even non-continuous date ranges. Alternatively you could use the option to exclude information. For instance, you could have a date range of “in the last 1 year” and using “None of the following” could have “in the last 1 month” to exclude the most recent month. Combined with ratings/flags or stars, this could help locate older material still in need of editing.

Finally

As you can see, Smart Collections are a great tool in your file management arsenal, helping you drill down to specific sets of photos easily.

googletag.cmd.push(function() {
tablet_slots.push( googletag.defineSlot( “/1005424/_dPSv4_tab-all-article-bottom_(300×250)”, [300, 250], “pb-ad-78623” ).addService( googletag.pubads() ) ); } );

googletag.cmd.push(function() {
mobile_slots.push( googletag.defineSlot( “/1005424/_dPSv4_mob-all-article-bottom_(300×250)”, [300, 250], “pb-ad-78158” ).addService( googletag.pubads() ) ); } );

The post How to Create and Use Smart Collections in Lightroom by Sean McCormack appeared first on Digital Photography School.


Digital Photography School

 
Comments Off on How to Create and Use Smart Collections in Lightroom

Posted in Photography


4 Reasons Why You Should Photograph Concrete

11 Jan

When people ask me if I have a favorite subject to photograph, they are often surprised by my response. See, I really enjoy photographing abstract urban environments, and most of all, I love photographing concrete. Yep, that’s right! Plain old concrete.

As the most common urban material, concrete shapes buildings, lines pathways, forms pipes, columns, bridges, and driveways. Anywhere you look you’ll see concrete, it’s as endless in variety as the reasons I love photographing it. You could say that car parks are a wonderland for me.

concrete-photography-03

This slab of concrete takes on the appearance of a Rorschach test.

However, concrete is often overlooked for more obvious or eye-catching subjects. If you google “urban photography” there are thousands of beautiful photographs of skyscrapers and streets, urban patterns, and underground train lines. But rarely do you see photographs of just concrete itself.

And why would you bother? A photograph of a concrete bollard sounds pretty boring, right? Wrong! Here are a few reasons why concrete can be a photographic wonderland if you simply take the time to look.

concrete-photography-14

The strikingly bold mark on this slab of concrete is the remnant of a red car that got a bit too close.

concrete-photography-01

1 – Concrete is a time capsule

Concrete is popular in construction because it builds durable, long-lasting structures that will not rust, rot or burn. In short, it stands the test of time. This means that concrete construction will invariably wear the markings of the surrounding environment and the people who consciously or unconsciously interact with it.

It is a time capsule and photographing it means documenting the story of what makes up an urban environment. From the freshly laid feature wall, to the roughly poured foundations of an underground car park, or names etched into pathways and paint scratches from cars, it all tells a story.

concrete-photography-13

concrete-photography-15

concrete-photography-11

concrete-photography-16

concrete-photography-17

2 – Abstract expressionism

If  photography is like painting with light, then concrete is a sturdy urban canvas. Another reason I enjoy photographing concrete so much is it has parallels to abstract expressionism. Abstract art, mostly characterized by painting, focuses on the process, the medium, the shape and the color within the frame of the canvas. Through their paintings, abstract expressionists create a visual arena documenting an artist’s movements, thinking and process without relying on the depiction of figurative imagery. Like abstract art, concrete lays bare the visual results of spontaneity, time and the limitations of physics. The lack of figurative references also allows the viewer to explore the image in greater depth, lending their own meaning to the work – which creates a deeper connection with the audience.

Like abstract art, concrete lays bare the visual results of spontaneity, time and the limitations of physics. The lack of figurative references also allows the viewer to explore the image in greater depth, lending their own meaning to the work – which creates a deeper connection with the audience.

concrete-photography-08

concrete-photography-05

concrete-photography-18

The lack of figurative references creates the appearance of an almost alien landscape

3 – Minimalist beauty

Concrete itself is like an abstract expressionist’s canvas, but the act of photographing such a bold subject is actually very minimalist. Photography, when you drill down to the basics, is about light, shade, surface, tone and line. Photographing concrete surfaces doesn’t seek to depart from this, but rather, emphasize it.

Photographing a seemingly menial subject like concrete not only draws attention to its beauty but hearkens back to the simple elegance of photography by documenting the incidental and intentional brushstrokes of the urban environment.

concrete-photography-09

concrete-photography-02

4 – Variety!

No two panels of concrete are the same. Concrete acts as a canvas for a myriad of air bubbles, paint, scratches, graffiti, wear, watermarks, leftover adhesive, etc. Concrete itself forms waves and arches as it is poured. Finishing effects vary too, depending on the type of concrete and the pouring technique. Any portion of concrete maps out the history of that particular time and place with hypnotizing whorls and abrasive texture.

The familiarity of the subject is no deterrent either. Often, as I’m photographing a wall or pathway, passers-by do a double-take, trying to see what it is that I’m photographing. It’s something they may never have considered photograph-worthy before, and it interests them. The beauty is already there, waiting for someone to draw attention to it. Viewers often remark that they never knew concrete could be so beautiful until now!

concrete-photography-10

concrete-photography-12

Conclusion

Concrete is an incredibly variable and dynamic subject, and whats more, it keeps still! As an almost constant presence in history, the use of concrete has evolved with humans to shape our environment. Concrete is a time capsule of intricate details and hidden stories that illustrate the way we interact with the world.

It’s an often overlooked, but delightfully accessible subject, always ready for a photographer to take notice. Next time you are out and about with a camera, take time to look at what concrete has to offer. You may surprise yourself with how fascinating the canvas of the urban landscape can be!

concrete-photography-04

googletag.cmd.push(function() {
tablet_slots.push( googletag.defineSlot( “/1005424/_dPSv4_tab-all-article-bottom_(300×250)”, [300, 250], “pb-ad-78623” ).addService( googletag.pubads() ) ); } );

googletag.cmd.push(function() {
mobile_slots.push( googletag.defineSlot( “/1005424/_dPSv4_mob-all-article-bottom_(300×250)”, [300, 250], “pb-ad-78158” ).addService( googletag.pubads() ) ); } );

The post 4 Reasons Why You Should Photograph Concrete by Megan Kennedy appeared first on Digital Photography School.


Digital Photography School

 
Comments Off on 4 Reasons Why You Should Photograph Concrete

Posted in Photography


5 Tips for Creating Romantic Portraits of Couples

11 Jan

When I hear the word romantic, what comes to mind is a dreamy, poetic, passionate image, full of unspoken affection and sometimes, a touch of mystery. However, when it comes to romantic portraits of couples, I don’t want romantic to translate as cheesy or cliche. I think I would want something a little bit more artistic but definitely leaning more on the natural side.

romantic photography of couples

I photograph weddings and often do an engagement shoot with the couple beforehand. For many of my couples, it’s their first time being photographed together in an intimate way where they are expected to be super affectionate and loving towards each other in public. I would feel very awkward if I were in their places. As part of my job, I aim to make the whole experience pain-free for them, hopefully, fun too, and still end up with some super romantic shots without being too corny, cliche or cheesy.

The warm-up

The first 15-20 minutes of the shoot is always a warm-up. I do give them some suggestions which you can find here; Tips for Taking More Natural Engagement Portraits. I then tell the couple I’m just going to start taking photos and that there is no pressure for anything to be perfect. Instead, we will have a warm-up to get used to the camera, to feeling really silly about it all and that they can laugh as much as they like at themselves and how silly they may feel.

They are given permission to feel awkward and laugh at themselves. I encourage them to be themselves and help them throw off any self-conscious feelings. I tell them to just laugh it all off, not to mind passers-by, and to ignore any stares. After all, they will never see those people again.

romantic portraits of couples

I take plenty of shots during the warm-up for them to get used to me but I’m always intentional in what I’m looking for – that fleeting glance at each other, the split-second expression, a warm squeeze and cuddle they allow themselves to have. It’s the in-between moments that are crucial to capture. It’s that moment when they start to relax into each other’s arms after the first few seconds of feeling rather tense or self-conscious.

I also talk to them a lot and give them directions as clearly as I possibly can. Reminding them that on the wedding day they will hardly see me at all so for the engagement shoot I ask them to indulge the camera. I thank them for being very amenable having me pretty much in their face during the entire photo session.

Here are my five tips for creating romantic portraits of couples.

#1 – Find or make the perfect light

romantic portraits of couples

romantic portraits of couples

Romantic light is a poetic light that evokes that cocooning feeling. Early morning and late afternoon light is soft and dream,y so if possible schedule your shoot during those windows. I try and avoid flat light or harsh overhead light which tends to kill any romantic ambience.

By flat light, I mean a light source which is directly in front of them so that it eliminates gradations of shadows and tones of light fall-off on the sides of their faces. Look for directional light, usually coming from the side or at an angle. To achieve this, position your couple in relation to the light, or move around yourself so that you are in the best place to capture the directional light.

romantic portraits of couples

If there is no such light, especially if the location is quite dark or the lights are all overhead, I tend to use my flash. Remember to bounce it so that there is directional light coming from the flash.  The important thing is to avoid flatness and create an atmosphere of light and shadow.

Window light is one of the best natural directional light sources available. However, don’t make your couple face the window as that becomes flat light on their faces. Instead, position them at an angle or sideways where there is some light on one side of their face and the other side has shadows.

#2 – Consider the location, background, or scenery

romantic portraits of couples

The location or setting has a lot to do with how romantic a picture turns out. Sunsets, although in danger of being cliche, especially sunset silhouettes, produce strong and striking images.

Don’t forget that you can leverage location and all the elements within the setting and not completely rely on light alone. For example, what season of the year is it? If it’s autumn, take advantage of the changing colors of the leaves, use the outfits of the season that make your couple feel warm and cozy – long boots, scarfs, hats.

If it’s winter use the whiteness of the snow or the bleak bare branches of the trees to create a romantic story for your couple. Go to a cafe and take pictures of your couple having a nice hot chocolate with marshmallows by the crackling fire to keep warm. If it’s summer, find the early and late light to avoid the harshness of the midday sun or use props such as parasols, flowers, balloons, kites to celebrate the warmth of the sunshine.

romantic portraits of couples

When you are shooting in the city, wait until that light hits the buildings or some iconic landmarks, or in the country, feature the soft rolling hills or vastness of the landscape. If you are shooting in the spring, look for cherry blossoms, maybe the first bud of the season, the first crack of ice or the last of the frost. The goal is to put your couples in context and leverage that to create their romantic story.

romantic portraits of couples

#3 – Hide and use layering in your shots

romantic portraits of couples

In this article on creative ways to improve your photography, I have written about layering. Layering is a great tool for romantic images. It lets you hide behind something and makes you invisible. The great thing about it is that it puts the viewer of the photo in your place as if they are just passing by and happen to catch a glimpse of the couple.

Layering is one of my favorite tricks and can even be done without you hiding from the couple. You can shoot in a completely open space and still utilize layering. Just grab something, put it in front of your lens and pretend that the camera is peeking through a gap. Layering can be as simple as that. I often pick up a leaf and use it as a layer between the camera and the couple. A bit of fabric, cellophane wrapped around the lens, a prism dangled in front of the lens to create a sun flare all add layers…the possibilities are endless.

romantic portraits of couples

#4 – Encourage contact between the couple

romantic portraits of couples

romantic portraits of couples

To me, the epitome of romantic photographs is when it evokes total privacy – there is no one there other than the couple. In normal portrait situations, I would want a connection between the viewer and the subject. Eye contact with the camera is great for that. It draws the viewer in and invites them to have a conversation with the image. However, for romantic portraits, I prefer no eye contact, except between the couple alone.

There is no one there sharing the moment with them; it is their very own special private time. The goal is to capture the scene as if it were true and real. There must be a strong connection between the couple, whether that be looking directly into each other’s eyes, hands touching, or whispering in each other’s ears, but absolutely no contact with anyone else. This is my personal opinion of course and I’m sure it’s different for other photographers.

romantic portraits of couples

#5 – Write a story in pictures

A picture that tells no story has no soul. With practically a limitless number of photos you can take with a digital camera, you can write a novel. Go to a session with a story in mind – a beginning, a middle, and an end. That is the way I approach every engagement shoot and wedding that I photograph.

These don’t have to be very specific pictures, that would depend on where you are. Rather, it’s more of a mindset. What would be your opening scene in a novel? Is your couple walking hand in hand, having a coffee, whispering sweet nothings, or reading a book? What happens in the middle of the story? Are they shopping in a market, admiring some landmarks, doing an activity they both love?

romantic portraits of couples

How does the story end? Do they walk away from you into a tunnel or cinema? Or do they sit and relax, put their feet up on a bench after a long day? Do they kiss? Or do they have a dramatic ending like a silhouette or looking out into the horizon with the sun fading or the moon rising?

Each couple has their own unique story. When you meet them you will get a feel of their personalities, their likes, and dislikes. Soon, you will be able to piece that story together and it will be like no other.

romantic portraits of couples

I hope you find the above tips helpful. Do share other tips for capturing romantic portraits of couples in the comment section below.

googletag.cmd.push(function() {
tablet_slots.push( googletag.defineSlot( “/1005424/_dPSv4_tab-all-article-bottom_(300×250)”, [300, 250], “pb-ad-78623” ).addService( googletag.pubads() ) ); } );

googletag.cmd.push(function() {
mobile_slots.push( googletag.defineSlot( “/1005424/_dPSv4_mob-all-article-bottom_(300×250)”, [300, 250], “pb-ad-78158” ).addService( googletag.pubads() ) ); } );

The post 5 Tips for Creating Romantic Portraits of Couples by Lily Sawyer appeared first on Digital Photography School.


Digital Photography School

 
Comments Off on 5 Tips for Creating Romantic Portraits of Couples

Posted in Photography


Review of the New Sigma 500mm F4 DG HSM OS Sport Lens

10 Jan

The Sigma 500mm F4 is a big lens. I shoot with bigger lenses because I need the longer focal lengths when I’m on the wild horse ranges but this is a really big lens – the biggest I’ve ever used, actually. It’s a big ticket item too, as my dPS editor Darlene gently reminded me. Be extra careful.

Sigma has their lens safely back and I didn’t trip, fall, drop or dunk it so I guess it’s okay to share now that I’m very hard on my gear. This lens withstood two weeks with me and emerged unscathed. Bonus points to Sigma. This lens is built like a tank.

Sigma 500mm F4 Sport Lens Review 7

Finch on feeder, Chicago Botanic Garden, Glencoe, IL
Canon 5DIII, Sigma 500mm F4, ISO 6400, 1/1000th, f/8, monopod with a gimbal head.

What I really wanted to know when I tested this lens

When I tossed my name in the hat as a reviewer for this lens, what I really wanted to know was if a large 500mm prime lens is a practical focal length for the rigors of photographing horses, birds, and wildlife? How is it to shoot using support, rather than hand held as I normally do? Is the autofocus responsive? Does the lens make ultra sharp images?

I tested it in as many situations as possible in the limited time that I had it, starting with a few birding trips to the Chicago Botanic Garden. Birding was followed by visits to the Lincoln Park Zoo to get up close with the lions and tigers. I wrapped everything up by using it for the “at liberty” portion of an equine portrait session with four polo ponies. I love my results. Read on to find out why.

Sigma 500mm F4 Sport Lens Review 5

Striding goose, Chicago Botanic Garden, Glencoe, IL
Canon 5DIII, Sigma 500mm F4, ISO 400, 1/1000th, f/6.7, monopod with a gimbal head.

A few technical specs

  • Weight/Size: 7.3 pounds (3.3 kg), approximately 5.7″ wide x 15″ long (144.8 x 380.3 mm)
  • Focal length: Fixed 500mm prime, the lens does not extend further when focusing.
  • Maximum aperture: F/4.
  • Filter: Rear drop-in, 46mm.
  • Mount: Available for Canon, Nikon, and Sigma
  • Recommended uses: Nature, wildlife, sports and action
  • Price: $ 5999 USD
  • Release date: December 2016, shipping January 2017.

You can read more detailed specifications here.

Shop for the Sigma 500mm F4 for Canon or for Nikon mount at B&H Photo Video.

Sigma 500mm F4 Sport Lens Review 11

Detail of Sigma 500mm drop-in rear filter slot.

Supporting the lens

When photographing animals, birds, and wildlife, your typical gear is probably similar to mine. I mostly use the affordable Canon EF 100-400mm f/4.5-5.6L IS II USM lens with either the Canon 7D Mark II or Canon 5D Mark III. If I’m a bit further from my subject, I add a Canon Extender EF 1.4X III. Normally I shoot handheld.

Sigma 500mm F4 Sport Lens Review 9

Comparison of my 100-400mm lens with the Sigma 500mm F4.

Sigma 500mm F4 Sport Lens Review 10

Comparison of my extended 100-400mm with the Sigma 500mm F4.

The Sigma 500mm lens with my Canon 5D Mark III (which also has an L-bracket on it) weighed approximately 10 pounds. That’s about three pounds more than my typical gear. It initially seemed possible to hand hold but fatigue and a resulting loss of sharpness set in quickly. My solution was to use a quick release plate to attach the foot of the Sigma 500mm F4 DG HSM OS Sport lens to my heavy-duty Feisol monopod with a Jobu gimbal head.

This combination supported the weight of the lens/camera combination while allowing me to position the lens exactly where I wanted it. It wasn’t as flexible as hand holding, but far more so than using a tripod.

Sigma 500mm F4 Sport Lens Review 6

Backward glancing goose, Chicago Botanic Garden, Glencoe, IL
Canon 5DIII, Sigma 500mm F4, ISO 400, 1/1000th, f/6.7, monopod with a gimbal head.

Using support, I was able to shoot for a lot longer without fatigue – and without the shaky shots that come from fatigued hands. I also found the gimbal/monopod combination very portable and easy to maneuver when using this lens.

I would recommend using a sturdy tripod (rather than a monopod) to anyone setting up in a blind, with the intention of waiting for wildlife to approach a known watering hole or feeding spot. Over time, balancing this lens and camera combination on a monopod did take its toll on my shoulders. You wouldn’t want to miss a shot that you’d been waiting hours for, because your body was too fatigued from supporting your gear on a monopod, so use a tripod in that situation.

Sigma 500mm F4 Sport Lens Review 14

Horse profile with fence, Somewhere in Suburbia, IL
Canon 5DIII, Sigma 500mm F4, ISO 500, 1/1000th, f/8, monopod with a gimbal head.

Sigma 500mm F4 Sport Lens Review 15

Profile of two horses with fence, Somewhere in Suburbia, IL
Canon 5DIII, Sigma 500mm F4, ISO 500, 1/500th, f/8, monopod with a gimbal head.

Sigma 500mm F4 Sport Lens Review 17

Three “guilty” horses II, Somewhere in Suburbia, IL
Canon 5DIII, Sigma 500mm F4, ISO 500, 1/500th, f/8, monopod with a gimbal head.

Performance in adverse weather

Illinois in the fall is mainly cool. It’s rainy sometimes but more dry than humid. It is also often very windy. I did not have a chance to test the Sigma 500mm F4 DG HSM OS Sport lens in rainy conditions but it shot flawlessly in the cold (the coldest temperature tested was about 30 degrees Fahrenheit, -1 celsius). Wind was more of a factor because of the large profile of the lens. Some gusts would really grab it and that movement caused a loss of sharpness.

Of course, this isn’t an issue specific to this lens – any larger, longer focal length lens will be affected by gusty winds. Solutions would be to shoot in a more protected area, to use higher-than-normal shutter speeds, or to wait for a less windy day to shoot (which is what I would have done if I wasn’t reviewing the lens in a limited timed frame).

Sigma 500mm F4 Sport Lens Review 8

Japanese Macaque (Snow Monkey), Lincoln Park Zoo, Chicago, IL
Canon 7DII, Sigma 500mm F4, ISO 800, 1/100th, f/10, monopod with a gimbal head.

Autofocus performance

The autofocus on the Sigma 500mm F4 DG HSM OS Sport lens is flawless.

First, you can turn the annoying autofocus beep off with a simple switch right on the barrel of the lens. Turning the autofocus beep off is essential when photographing wildlife since the noise can make your subjects anxious. Thumbs up to Sigma for putting this feature in such an accessible location.

Sigma 500mm F4 Sport Lens Review 13

Detail of Sigma 500mm F4 option switches.

There are also settings for autofocus, manual focus, and manual override. The point of the manual override mode is to have the lens in auto but be able to easily switch it into manual by grabbing the focusing ring. Because I could manually override the autofocus at any time, even when the lens was in auto mode, that’s the mode I preferred to use.

Stabilization

I tested the Sigma 500mm F4 DG HSM OS Sport lens with and without the stabilization turned on. There are two options; OS1 for handheld photography, and OS2 for panning and tracking. While using my monopod and gimbal head, I didn’t see a noticeable difference in sharpness between OS1 and OS2. There was, however, a noticeable difference in sharpness when OS was turned to the off position. Ultimately I switched it to OS1 and left it there.

More convenience at your fingertips

In addition to the stabilization, beep, and autofocus options there is a “focus limiter.” This switch allows you to choose within which range you need the lens to focus. For example, if you know you aren’t focusing on anything close to you, you can set the lens to focus only from 10 meters to infinity. Setting this limiter allows the lens to focus a smidge faster and that gives you a better chance of sharply capturing fleeting moments.

My favorite feature

Sigma 500mm F4 Sport Lens Review 12

Detail of the Sigma 500mm F4 Recall Button.

Perhaps my favorite feature is the group of four rubber buttons circling the front of the lens.

To use them, find a location you want to have as a primary focusing point, hold down one of the buttons and hit the set button on the lens barrel. This action programs the lens to focus on the specific point you selected. The focus lock on that point is based on distance so if you move, you need to reset your buttons.

If you are stationary, sitting in a blind photographing birds or wild animals, this is an amazing feature. You can essentially compose four different shots in four different locations by assigning one of these buttons to each location. When a bird lands in one of your four locations, press the button for that focus point, press the shutter and grab your shot. I tested this with some of the spunkier zoo inhabitants and it worked like a charm.

Again, the advantage here is that this is a little faster than asking the lens to refocus. That millisecond is a precious advantage when photographing wildlife.

Sigma 500mm F4 Sport Lens Review 4

Approaching lion, Lincoln Park Zoo, Chicago, IL
Canon 7DII, Sigma 500mm F4, ISO 1000, 1/640th, f/8, monopod with a gimbal head.

Image quality

Image quality is a subjective thing but without it, state-of-the-art features and well-placed buttons don’t mean a thing. I was blown away by the images I produced with this lens.

Straight out of camera the colors rendered beautifully. They were soft, nuanced and creamy. Backgrounds blurred softly away creating a clean canvas for wildlife compositions. The separation between elements was also phenomenal. I had a lot of fun experimenting with “layering,” like the series of four monochrome equine images above and the zebra image below.

Sigma 500mm F4 Sport Lens Review 3

Layered zebras, Lincoln Park Zoo, Chicago, IL
Canon 7DII, Sigma 500mm F4, ISO 2500, 1/640th, f/8, monopod with a gimbal head.

Images made with this lens are tack sharp. Details of eyes, fur, and feathers are crisp and well-structured. There is no visible distortion and only very minimal vignetting. For wildlife images, I prefer the  range of f/8 to f/11 but I didn’t find any unusable apertures. I could have happily shot at f/4 if the circumstance called for it.

Because I was so happy with the quality, all of the wildlife and bird images included in this review were very minimally processed in Lightroom CC. I sharpened the RAW files, adjusted the white balance, and made a few targeted adjustments to enhance details.

Transporting and carrying the lens

While the weight and length of Sigma’s 500mm F4 lens aren’t unusual for this lens category (the Canon version is almost exactly the same weight and dimensions, and also $ 3000 more!) it is a factor when using it. First, you need to be careful about how you carry a large lens like this to prevent damaging your camera’s lens mount. During a typical shoot you might normally hold your camera by its grip, and let the weight of the lens hang off of the camera body. With a lens this large, that isn’t recommended. Instead, make it a habit of holding onto a lens of this size by the foot, and support the camera’s weight with your other hand. You can also cradle the lens like a baby, which I did often (I didn’t sing it any lullabies, though).

You also need to consider carefully the logistics of hiking to your destination with such a large lens. Investing in a special large lens backpack like this one might be a solution for ease of carrying. Lastly, if you have weight and bag restrictions when you travel, you’ll have to find a workaround for that.

Sigma-500mm-F4-Sport-Lens-Review-2.jpg

Baby zebra portrait, Lincoln Park Zoo, Chicago, IL Canon 7DII, Sigma 500mm F4, ISO 1600, 1/640th, f/8, monopod with a gimbal head.

Sigma 500mm F4 Sport Lens Review 1

Zebra with turned head, Lincoln Park Zoo, Chicago, IL
Canon 7DII, Sigma 500mm F4, ISO 2000, 1/640th, f/8, monopod with a gimbal head.

Bottom line

This lens performed very well for me. Images were sharp and overall quality was excellent. For me, because I am often hiking (or recently, biking!) to locate and then keep up with very mobile herds of wild horses, the size and weight of the lens were a bit difficult to manage. Horses are also unpredictable and I often need a shorter focal length to capture all of their behaviors as their curiosity overcomes them and they start to approach me.

If you’re like me, I’d recommend the Canon 100-400mm I mentioned earlier in this review. For an affordable option with an even longer focal length, try Sigma’s own 150-600mm that weighs in at around 4 pounds for under $ 1000.

I would recommend the Sigma 500mm F4 DG HSM OS Sport lens for a birder, or any type of wildlife photographer that stations herself in a blind, and waits for the animals to come into view. If you’re that photographer, sign up at B&H to be notified when this lens will ship (here for Canon mount, or click here for Nikon) to ensure you get one of the first copies. You won’t be disappointed.

googletag.cmd.push(function() {
tablet_slots.push( googletag.defineSlot( “/1005424/_dPSv4_tab-all-article-bottom_(300×250)”, [300, 250], “pb-ad-78623” ).addService( googletag.pubads() ) ); } );

googletag.cmd.push(function() {
mobile_slots.push( googletag.defineSlot( “/1005424/_dPSv4_mob-all-article-bottom_(300×250)”, [300, 250], “pb-ad-78158” ).addService( googletag.pubads() ) ); } );

The post Review of the New Sigma 500mm F4 DG HSM OS Sport Lens by Lara Joy Brynildssen appeared first on Digital Photography School.


Digital Photography School

 
Comments Off on Review of the New Sigma 500mm F4 DG HSM OS Sport Lens

Posted in Photography


The Pros and Cons of Black and White Versus Color for Street and Travel Photography

10 Jan

The question of whether to shoot street and travel photos in black or white or color is an eternal one that isn’t going to go away. But one of the interesting things about digital photography is that it lets you decide whether to process a photo in black and white or color after the photo has been taken. Unlike film photography, there’s no need to commit to one or the other until you open the photo in Lightroom.

The Pros and Cons of Black & White Versus Color for Street and Travel Photography
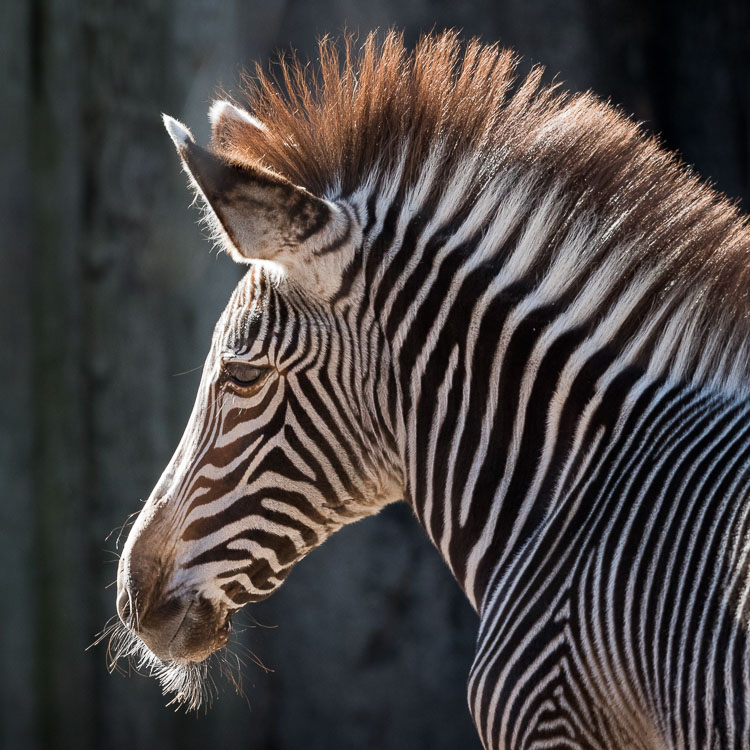
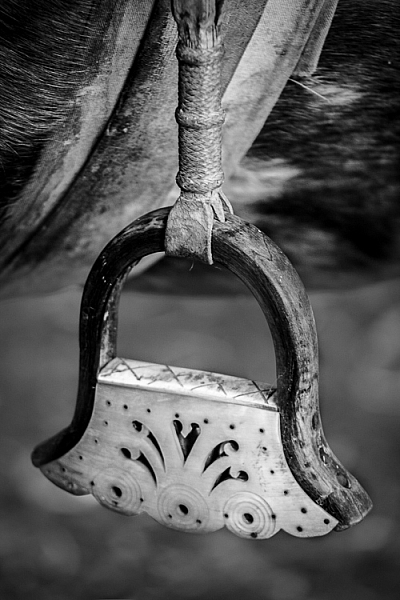
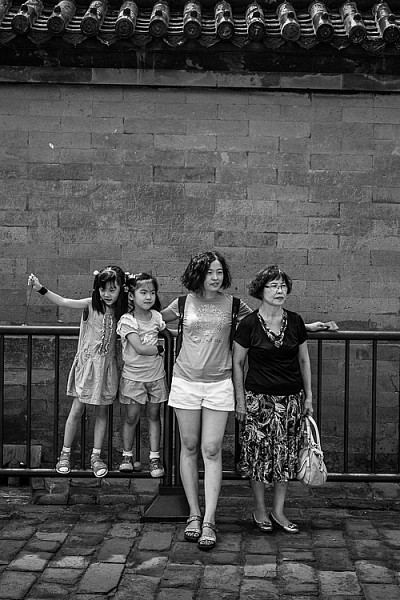
But is that a mistake? I think it is because black and white photography and color photography are two different mediums. If you are working in color, then you need to pay attention to the colors in the scene and how to use them to create an interesting composition. But in black and white, you need to pay more attention to textures, contrasts, and shapes in order to create a strong composition.


That’s on top of the task of capturing the expressive moments that the best street and travel photos reveal.

There’s a lot to think about, and as black and white and color photography require different mindsets, it’s a good idea to make the decision about which you are going to shoot before you press the shutter button.

Having said that, it is also helpful to think about the following factors when you are processing photos. It may be that you were working in color, but realize afterward that a particular image would work very well in black and white. The same considerations apply, except that you have more time to think about it.

3 Reasons for working in black and white

1. To capture character

Many street and travel photographers, street photographers especially, chose to work in black and white. If your aim is to make a candid portrait that captures something of the person’s character or soul, then black and white is an excellent choice. There is something timeless about black and white that helps reveal character.

That’s why I shot the following photo in black and white.

The Pros and Cons of Black & White Versus Color for Street and Travel Photography

2. To simplify the composition

Black and white is a form of simplification. Skilled street photographers learn to create images that are uncluttered and that contain as few distractions as possible. Color can be extremely distracting, and sometimes it’s easier to ignore color completely and work in black and white.

For example, let’s say you make a portrait of somebody on the street, but there is a red poster on a wall behind them. In a color photo, that’s likely to be very distracting. But convert it to black and white and the distraction goes away. The viewer’s attention goes back to the person, where it belongs.

If you are working in an area with lots of potentially distracting colors, working in black and white may be the way to go. For example, this scene in Bolivia was quite colorful, and I felt that black and white removed the distractions of those colors.

The Pros and Cons of Black & White Versus Color for Street and Travel Photography

3. To evoke atmosphere

Color photos can be tremendously evocative, but so can black and white ones. I think it’s because a black and white image leaves something for the imagination, or perhaps because we associate it with photos taken in the past. So, if you are working somewhere with lots of old buildings, then black and white photos can be a tremendously moody way of capturing the atmosphere of that place.

I chose black and white for this photo, taken in the Argentina, because the stirrup is handmade, and looks ancient, as if it were made many years ago.

The Pros and Cons of Black & White Versus Color for Street and Travel Photography

3 Reasons for working in color

Color is very powerful and used wisely it can elevate your images to another level. Yet, if it is not used thoughtfully, it can take away from the impact of your photos.

1. The colors of the location are part of its character

For example, last year I visited Beijing and noticed that red is a very common color in that city. It denotes power and wealth and has an important part in Chinese culture. I realized that it is possible to create a series of interesting photos with red as the dominant color.

For example, this photo (below), taken in the Forbidden City in Beijing, makes use of the striking contrast between the red walls and the yellow tiles (matched by the boy’s shorts).

The Pros and Cons of Black & White Versus Color for Street and Travel Photography

2. The light is beautiful

Color photos are at their strongest when the light is beautiful. This is usually during the golden hour close to sunset, or early morning just after sunrise. The light at these times is warm and golden, and tremendously evocative. This could be a good time to work in color.

I took this photo close to sunset. The light was soft and its warmth helped lift the scene.

The Pros and Cons of Black & White Versus Color for Street and Travel Photography

3. You are shooting at dusk

Dusk and early evening are good times to work in color as it gives you the opportunity to work with the natural color contrast between the orange light cast by tungsten light bulbs and the natural blue color of the ambient light.

This photo below was taken in the early evening. The hat and t-shirt of the man in the foreground are colored blue by the ambient light outside, while the rest of the scene is lit by artificial light. I retained the orange color in post-processing to keep the atmosphere.

Color vs black and white in street and travel photography

Commit

The process of deciding to shoot in black and white or color involves assessing the scene and the situation, and deciding which one to use, taking into account the reasons listed in this article and your personal preferences. The key is then to commit to the process. Work the subject and do your best to create the most powerful images possible.

If you’re working in color, think about the colors present in the scene and how you can use them effectively. Your mind will engage and start looking more deeply at the colors around you.

If you’re working in black and white, look for interesting textures, tonal contrast, and shapes. Again, once you commit your mind will start looking for compositions that work well in monochrome.

Your turn

What do you think? Do you prefer to make street and travel photos in black and white or color? Let us know in the comments.


If you enjoyed this article and would like to learn more about street and travel photography then please check out my ebook The Candid Portrait.

googletag.cmd.push(function() {
tablet_slots.push( googletag.defineSlot( “/1005424/_dPSv4_tab-all-article-bottom_(300×250)”, [300, 250], “pb-ad-78623” ).addService( googletag.pubads() ) ); } );

googletag.cmd.push(function() {
mobile_slots.push( googletag.defineSlot( “/1005424/_dPSv4_mob-all-article-bottom_(300×250)”, [300, 250], “pb-ad-78158” ).addService( googletag.pubads() ) ); } );

The post The Pros and Cons of Black and White Versus Color for Street and Travel Photography by Andrew S. Gibson appeared first on Digital Photography School.


Digital Photography School

 
Comments Off on The Pros and Cons of Black and White Versus Color for Street and Travel Photography

Posted in Photography


3 Reasons to do Headshots with Natural Light

10 Jan

I love natural light. I’ve probably said this before, but I prefer it to using studio lights. There’s something soft and beautiful about using the light generated by Mother Nature that makes it perfect for every occasion. I use natural light every chance I get. I even use it for my headshot sessions. You may be surprised by this but I’ve got some great reasons why. Read on to find out more.

Shoot Headshots with Natural Light

I have a 9-foot window in my studio. It’s perfect for natural light photography.

#1 – Natural light flatters every skin tone

From pale milk-white skin to dark chocolate brown, natural light makes everyone look beautiful. No matter the skin tone or the facial features natural light enhances everyone. Now I’m not talking about direct sunlight at midday. That type of light is too harsh. It washes out skin tones and creates harsh shadows. Set up your shoot in open shade. Use the side of a building or under a tree. You can even set up a canopy and shoot underneath. You will love the results, just be creative in how you use it.

Shoot Headshots with Natural Light

While the lighting behind this young woman isn’t natural. The light on her face comes from my 9-foot window. She used this shot in her modeling portfolio.

#2 – Natural light is cheap

If you are just starting out as a photographer, natural light doesn’t cost a whole lot to use. You can create beautiful head shots without fancy studio equipment. It’s a way to get your foot in the door. You might also be unique in your area. Think about branding and how being a natural light photographer might be a way to capture attention from potential clients. You could be the trendy alternative to the typical studio headshot.

Shoot Headshots with Natural Light

Taken outdoors against an old building. My client was looking for relaxed looking headshots for her LinkedIn profile.

#3 – Shooting outdoors is less intimidating

Think about all those giant light stands and softboxes. For someone who may be a little nervous about having their portrait taken, shooting outdoors can take off some of the pressure.

I find that generally, clients who are self-conscious or uncomfortable in front of the camera will relax more easily when I take them outdoors for a session. We chat for a while and generally need to walk a short distance to a location. It gives me a chance to take some of the pressure off them. The client starts to feel more comfortable and the overall look of the headshot is much better.

Shoot Headshots with Natural Light

While not your classic headshot pose, my client was relaxed and comfortable. She looks confident.

Professionals need to exude confidence in their images. They won’t be successful in their business if they look nervous or uncomfortable in their marketing materials.

As photographers, we have to visually communicate our client’s abilities

Remember headshots are all about creating an image. We are a part of the branding process for a company or a freelancer. You are helping to promote an actor or build a brand for a home stager. Your images should help attract potential business. It’s your job to tell people all about your client and their amazing abilities.

Shoot Headshots with Natural Light

As a real estate agent my client wanted a photo that associated her with the local area.

You can do this by taking beautiful and bright images that promote your client as a capable and highly skilled professional. Try using natural light in your headshot jobs. I think you will be pleased with the results. Also, remember that if you are offering a service that seems unique from all the others you can think about charging a little more for your highly specialized product.

Natural light is a great tool. I highly recommend utilizing it whenever you can. Please share your natural light headshots or any questions you may have, in the comments section below.

portrait_headshot

googletag.cmd.push(function() {
tablet_slots.push( googletag.defineSlot( “/1005424/_dPSv4_tab-all-article-bottom_(300×250)”, [300, 250], “pb-ad-78623” ).addService( googletag.pubads() ) ); } );

googletag.cmd.push(function() {
mobile_slots.push( googletag.defineSlot( “/1005424/_dPSv4_mob-all-article-bottom_(300×250)”, [300, 250], “pb-ad-78158” ).addService( googletag.pubads() ) ); } );

The post 3 Reasons to do Headshots with Natural Light by Erin Fitzgibbon appeared first on Digital Photography School.


Digital Photography School

 
Comments Off on 3 Reasons to do Headshots with Natural Light

Posted in Photography


18 of the Most Popular Portrait Articles on dPS in 2016

04 Jan

Earlier this week we shared some other popular articles from 2016. Check those out here:

  • Top Gear Related Articles of 2016
  • 15 of the Most Popular Landscape Photography Articles of 2016

To continue on with the best of, let’s take a look at portrait articles. Here are some of the most-read to help you with your portrait photography.

18 of the Most Popular Portrait Articles on dPS in 2016

  1. 11 Steps for Basic Portrait Editing in Lightroom; A Beginner’s Guide
  2. How to Avoid Fake Smiles in Your People Photography
  3. Good Crop Bad Crop; How to Crop Portraits
  4. How to Make Colors Pop in Your Portraits; Without Using Photoshop
  5. 24 Portrait Lighting Setups [Cheat Sheet]
  6. How to Pose and Angle the Body for Better Portraits
  7. How to Create Awesome Portrait Lighting with a Paper Bag an Elastic Band and a Chocolate Donut
  8. 5 Tips for Taking Better Portraits in Nature
  9. How to Use Portrait Angles More Creatively: A Visual Guide
  10. How to Find Great Backgrounds for Outdoor Portraits
  11. 5 Secrets for Finding Great Indoor Portrait Locations
  12. 10 Tips for Doing Your First Family Portrait Session
  13. How to Do a One Light Portrait Setup and Use it as Your Back-up Plan
  14. Tips for Taking Candid Portraits of People
  15. Comparing a 24mm Versus 50mm Lens for Photographing People
  16. 8 Tips to Help Make People Comfortable for Their Portrait Session
  17. Photographing People: To do Styled Portraits or Not?
  18. 10 Tips to Help You Create Unique Storytelling People Photos
portraits_makingtheshot_1200x628px

You can also look at our ebook by dPS author Gina Milicia – Portraits Making the Shot. Or grab the entire portrait collection by Gina including hours of video training for 76% off(until 31st Dec only!). Click here for the ebook or here for the bundle.


googletag.cmd.push(function() {
tablet_slots.push( googletag.defineSlot( “/1005424/_dPSv4_tab-all-article-bottom_(300×250)”, [300, 250], “pb-ad-78623” ).addService( googletag.pubads() ) ); } );

googletag.cmd.push(function() {
mobile_slots.push( googletag.defineSlot( “/1005424/_dPSv4_mob-all-article-bottom_(300×250)”, [300, 250], “pb-ad-78158” ).addService( googletag.pubads() ) ); } );

The post 18 of the Most Popular Portrait Articles on dPS in 2016 by Darlene Hildebrandt appeared first on Digital Photography School.


Digital Photography School

 
Comments Off on 18 of the Most Popular Portrait Articles on dPS in 2016

Posted in Photography


Some of the Best Beginner Photography Tips of 2016

04 Jan

Earlier this week we shared some other popular articles from 2016. Check those out here:

  • Top Gear Related Articles of 2016
  • 15 of the Most Popular Landscape Photography Articles of 2016
  • 18 of the Most Popular Portrait Articles on dPS in 2016

Now it’s time to take a look at some photography basics. These are some of the best beginner photography tips we ran on dPS in 2016. If you just got your camera recently, or even for Christmas, these will be a good place for you to dig in and get started.

some-of-the-best-beginner-photography-tips-of-2016

  • How To Find Your Lens’ Sweet Spot: A Beginner’s Guide to Sharper Images
  • How to Understand the Mysteries of ISO for Beginners
  • Beginner’s Guide to Water Droplet Photography
  • Histograms for Beginners
  • How to Photograph Sun Flares: 14 Tips for Beginners
  • A Beginner’s Guide to Doing Black and White Photography
  • 5 Tips for Getting Started with Wildlife Photography for Beginners
  • 13 Snow Photography Tips: A Beginner’s Guide
  • Beginner’s Guide to Doing DSLR Video Clips
  • An Exercise to Learn and Practice Shutter Speed at Home
  • 12 Common Newbie Photography Mistakes to Avoid
  • 10 Things Nobody Tells Photography Newbies
  • Common Photography Mistakes Newbies Make and How to Avoid Them
  • Camera Modes Explained for Newbies
  • How to Overcome 6 Common Newbie Photography Fears
  • How to Use Exposure Compensation to Take Control of Your Exposure
  • How to Use the Zone System to Learn about Metering and Exposure Compensation
  • Do These 5 Quick Exercises to Learn What Your New Camera Can Do
  • Your Next Purchases After You Get a New Camera


nutsbolts_1200x628px

You can also check out our ebook for beginners: Photo Nuts and Bolts.

OR our online course Photo Nuts and Bolts here.

day-05-nut and bolts

That’s a lot of reading for you. Tomorrow I’ll dig up some post-processing tips if you think you’re ready to tackle that subject.

googletag.cmd.push(function() {
tablet_slots.push( googletag.defineSlot( “/1005424/_dPSv4_tab-all-article-bottom_(300×250)”, [300, 250], “pb-ad-78623” ).addService( googletag.pubads() ) ); } );

googletag.cmd.push(function() {
mobile_slots.push( googletag.defineSlot( “/1005424/_dPSv4_mob-all-article-bottom_(300×250)”, [300, 250], “pb-ad-78158” ).addService( googletag.pubads() ) ); } );

The post Some of the Best Beginner Photography Tips of 2016 by Darlene Hildebrandt appeared first on Digital Photography School.


Digital Photography School

 
Comments Off on Some of the Best Beginner Photography Tips of 2016

Posted in Photography


Most-Read Post-Processing Articles of 2016

04 Jan

This week we have shared some other popular articles from 2016. Check those out here:

  • Top Gear Related Articles of 2016
  • 15 of the Most Popular Landscape Photography Articles of 2016
  • 18 of the Most Popular Portrait Articles on dPS in 2016
  • Some of the Best Beginner Photography Tips of 2016

most-read-post-processing-articles-of-2016-on-dps

Now, I’m going to shift gears to talk about post-processing. From 2016 here are some of the most-read articles on post-processing including Lightroom, Photoshop, and other options.

Lightroom

lightroom-logo-1024x1024

  • Lightroom Quick Post-Processing Tips for Landscape Photography
  • 11 Steps for Basic Portrait Editing in Lightroom; A Beginner’s Guide
  • 5 Lightroom Develop Module Secrets Revealed
  • 4 Steps to Make Your Images Pop in Lightroom
  • Total Beginner’s Guide to Lightroom; Step by Step
  • 13 Steps for Editing Street Photography in Lightroom from Start to Finish
  • How to Make Your Photos Shine Using Clarity, Sharpening, and Dehaze in Lightroom
  • 4 Key Lightroom Sliders That Will Supercharge Your Photos
  • 5 Tips for Using the Lightroom Adjustment Brush Tool
  • The 6 Most Important Things You Need to Know about Lightroom’s Develop Module
  • Step by Step How to Make a Moody Desaturated Image in Lightroom
  • Understanding the HSL Panel in Lightroom for Beginners
  • Step by Step How to Use HDR Merge in Lightroom
  • 4 Batch Processing Techniques to Speed Up Your Workflow in Lightroom
  • Solving the Biggest Newbie Confusions with Lightroom by Phil Steele
  • How to Use Lightroom’s Transform and Crop Tools to Improve Composition
  • How to Size and Export Images from Lightroom for Facebook and Print
lightroom-presets.jpg

Have a look at our dPS Lightroom preset packs here.

Or our Lightroom Mastery online course.

Or our Lightroom Mastery online course.

Photoshop

  • adobe_photoshop_cs6_icon-svgHow to Create a Silky Water Effect in Post-Processing without Using Filters or a Tripod
  • How to Cut Out the Subject From the Background in Photoshop
  • How to Enhance Urban Night Photographs Using Luminosity Masks in Photoshop
  • How to Create a Dramatic Cinematic Style Portrait Using Photoshop Color Grading
  • Getting Started with Layer Masks in Photoshop; a Beginner’s Tutorial
  • How to Enhance Portraits Using Gray Layers to Dodge and Burn in Photoshop
  • How to Create Bokeh In-camera and Using Photoshop
  • 3 Quick Photoshop Edits You Need to Know
  • 2 Simple Methods for Adding Color to Your Images Using Photoshop
  • How to Make a Little Planet Using Photoshop
  • How to Use Adobe Camera Raw and Photoshop to Make Your Landscape Images Pop
  • How to Blend in Adjustments Using Layer Masking in Photoshop
  • How to Use the Channel Mixer in Photoshop to Change Colors in Your Images
  • 3 Methods for Converting to Black and White Using Photoshop

Both (ACR) or Other

  • An Overview of Google’s Nik Collection Filters for Post-Processing
  • 4 Quick Ways to Add a Vignette to Your Images in Post-Processing
  • Lightroom CC and Photoshop CC Keyboard Shortcut Cheat Sheets
  • Software Review: Macphun Creative Kit 2016
  • The 5 Best Google Nik Color Efex Pro 4 Filters and How They Can Amplify Your Images
  • Top 5 Nik Collection Filters to Improve Your Landscape Photos
  • How to Sharpen Your Photos using Lightroom and Nik Efex

We also had a good discussion about whether or not you should process your photos here: To Process or Not To Process? Let’s Discuss.

googletag.cmd.push(function() {
tablet_slots.push( googletag.defineSlot( “/1005424/_dPSv4_tab-all-article-bottom_(300×250)”, [300, 250], “pb-ad-78623” ).addService( googletag.pubads() ) ); } );

googletag.cmd.push(function() {
mobile_slots.push( googletag.defineSlot( “/1005424/_dPSv4_mob-all-article-bottom_(300×250)”, [300, 250], “pb-ad-78158” ).addService( googletag.pubads() ) ); } );

The post Most-Read Post-Processing Articles of 2016 by Darlene Hildebrandt appeared first on Digital Photography School.


Digital Photography School

 
Comments Off on Most-Read Post-Processing Articles of 2016

Posted in Photography


Happy New Year 2017 from the dPS Team

04 Jan

The team at dPS including myself, all the writers, management, web guys, customer support, and everyone that makes dPS run – would all like to wish you a Happy New Year!

Jeff Krause

By Jeff Krause

We’re honored to provide you with quality photography articles, tips and tricks and informative review and tutorials each and every day.

Here’s to a new year full of education, inspiration, entertainment and hopefully a little photography! ? 
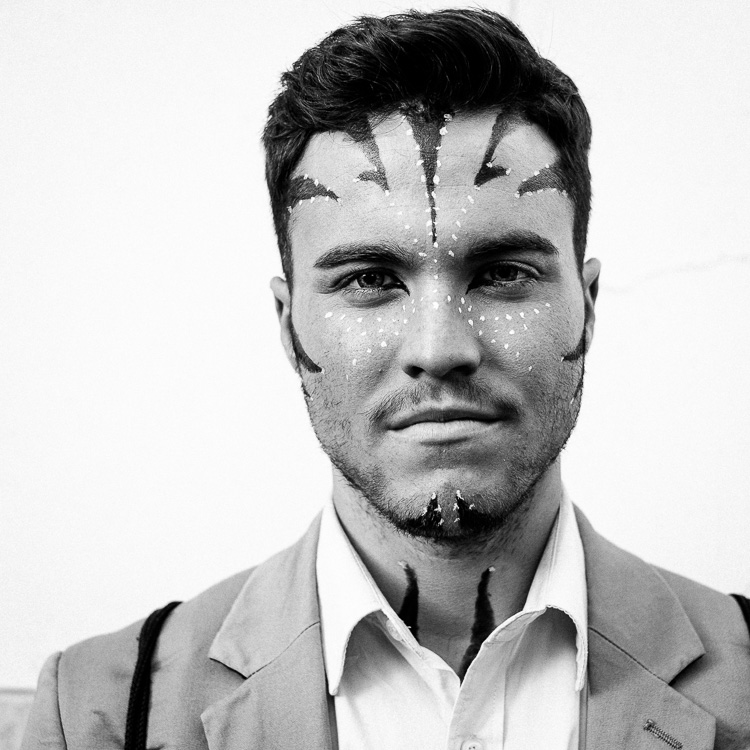
See you on the flip side.

Cheers, the dPS Team

happy-new-year-2017

googletag.cmd.push(function() {
tablet_slots.push( googletag.defineSlot( “/1005424/_dPSv4_tab-all-article-bottom_(300×250)”, [300, 250], “pb-ad-78623” ).addService( googletag.pubads() ) ); } );

googletag.cmd.push(function() {
mobile_slots.push( googletag.defineSlot( “/1005424/_dPSv4_mob-all-article-bottom_(300×250)”, [300, 250], “pb-ad-78158” ).addService( googletag.pubads() ) ); } );

The post Happy New Year 2017 from the dPS Team by Darlene Hildebrandt appeared first on Digital Photography School.


Digital Photography School

 
Comments Off on Happy New Year 2017 from the dPS Team

Posted in Photography