RSS
 

Archive for the ‘Photography’ Category

The Myths and Realities of Becoming a Professional Photographer

19 Jan

As a professional photographer, I think the number one mistake for aspiring pros is to fall for certain myths about the craft and career. In this article, we’ll look at some of the myths and realities of being a professional photographer. If you’re on the fence about taking the leap it may help you decide.

professional photography myths

But first a little story

My heart was beating fast as I approached the school. My dad was holding my hand when I started to put my foot down on the ground. Despite my protests, my dad quickly dropped me in class and left in a flash. I wasn’t his problem anymore.

Bad move. I started screaming.

The teacher, as wise and as calm as she could, tried to calm me down. She made the mistake of putting her hands near my face. I opened my mouth just like you see in the movie jaws and WHAM I bit her hands and pressed as hard as I could. I bit her so bad you would think an enraged dog bit her.

The moral of the story

What, you may ask, does that have to do with professional photography? In a sense, everything, because that episode taught me about one thing I would like to talk about today – setting expectations.

You see, I had absolutely no idea what I was getting into both as a 5-year-old heading to school for the first time and starting out as a professional photographer. They both caused me trouble. If you do not plan, you plan to fail, but it’s hard to plan when you have absolutely no idea what to expect!

professional photography myths

Here are a few myths that I believed about professional photography and how reality slapped me hard. Hopefully, these will help you avoid the same mistakes I made.

Myth #1 – Being a professional photographer = validation

I don’t know where the idea comes from, but it seems like for everyone that picks up the camera, the pinnacle of achievement seems to become a professional photographer. It’s almost like a necessary evolution. At first, you have a camera, people start complimenting your work, then you decide to become a pro. It was too late for me to realize it, but I would have been perfectly happy as an amateur.

At the end of the day what really matters is the images, if you can get a few bucks for them, great! But becoming a pro will not magically validate you or your images. I expected to feel better about my images and myself when money started rolling in, but that never really happened.

Myth #2 – You get to spend all your time shooting

pro-photography-myths-1

This is most likely the biggest myth of all time in regards professional photography. People sell it to you like all you will be doing is shooting all day, every day. But that is far from the truth because you will spend more time seeking work than actually working.

You don’t spend most of your time shooting, you spend it marketing, attending events, networking, putting yourself out there. Whatever time you get in front of the camera, you’ll spend two to three times as much simply editing as well.

If you believe photography is hard, it is actually the easy part. The hard part comes after; selling your work. It’s a sobering truth that probably hits every photographer, writer, painter, etc., that the product or service is only the first and easiest part of the process, the hardest effort comes afterward.

professional photographer myths

But you say, “I believe that I am good photographer, and people will realize how much better I am than Joe Shmoe.” I understand the feeling, and you are probably better than Joe, but that brings us to the next myth.

Myth #3 – Being good is enough

I call this myth the “best product fallacy”. Just because you are good doesn’t mean anything. Van Gogh was good yet he died in obscurity. Talent is not enough, the world has millions of talented photographers, painters, actors and more that are eating dust.They had a social experiment where they put one of the

There was a social experiment where they put one of the world’s highest paid musicians in a subway station, playing a million dollar violin by the way. Did the world recognize his talents, did they put their wallets out begging him to take their money? No. Nobody really cared. Watch the video below.

We’ll get back to this later but for now, just know it doesn’t matter that you’re a good photographer. Don’t get me wrong, you’d better be good at what you do, but that does not in any way shape or form guarantee you success by itself. Talent is just not enough.

Myth #4 – You’ll be rich and famous

If everything you see is success story after success story, doesn’t it follow that if you try it too, you might become rich and famous? Even more, won’t you just blaze through it because you are talented? Many photographers make a living telling you how to be a professional, so of course, they will sell you a dream. It’s like many guys on YouTube, you’ve probably seen a few.

professional photographer myths

They try and sell you a dream. But the reality for all the photographers that I know, is that it’s an income that pays the bills. And they sure aren’t well-known outside their local area. Sure there are superstar photographers in the world but that is what they are, stars. Just like the Hollywood stars, for every well-known one, there are others just making a living.

The things is that not everyone can be a superstar photographer (depending on who you ask, a superstar makes more than $ 40,000 a year) because when it comes to wealth distribution there is inherent inequality. There will always be a group that makes more than the rest combined. For example, there’s about 20% of the countries that have 80% of the wealth, about 20% of actors make 80% of the wealth, about 10% of the companies that make 90% of the wealth: Companies like Apple, Google, Microsoft, Samsung, etc., take the lion’s share.

Only the top elite will ever reach that level

Same for photography, there’s a group that earns more than all others combined (and if you really want to go deep, a group within that group that earns more than the others combined again, Terry Richardson, who earned 58 million in one year, is probably in that group ).

professional photographer myths

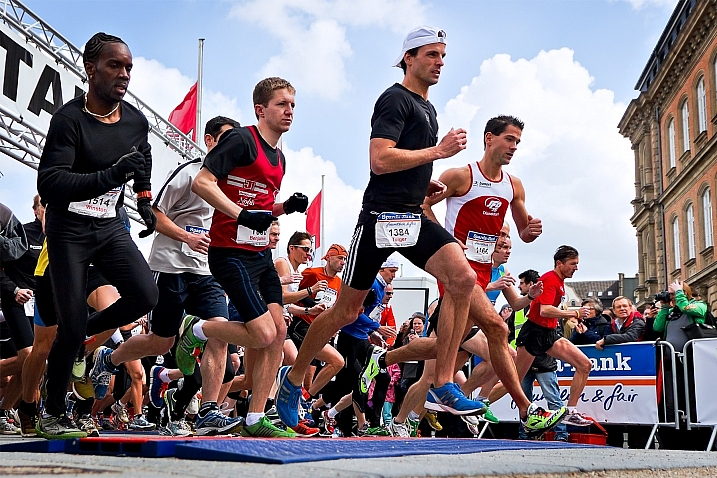
The worse part is that many of them make it sound easy because they want to teach you how to become a professional photographer. I’m not saying you can’t become rich and famous. What I am saying is, that when you are on your quest for fame and fortune know that there’s only a few that can make it to the very top. It’s a bit like football, not everyone can be an NFL player. That should put in perspective the amount of effort required.

Count the costs

A few years ears ago I had to rent a U-Haul truck to move from my apartment to my wife’s parents’ house with our baby in tow. The reason was that I had failed to understand that professional photography was as much about marketing and selling as it was photography. It almost cost me my marriage as well.

So, count the costs. If you want to build a house, add up the costs, if you want to be a pro, count the costs. It’s not just about shooting, see the sacrifices and the long and hard road ahead.

professional photographer myths

Also, understand the nature of the beast. You will usually see success stories but never those who have failed…and there’s more of the latter than the former. Take it from me, I cried many times because things were not working.

What now?

This article is by no means meant to discourage you from becoming a professional photographer, just the opposite. It is meant to empower you to avoid unnecessary pitfalls due to unrealistic expectations. That episode at 5-years old would not have happened if only my dad prepared me for exactly what was going to happen. I would not have needed to move out to my in-laws’ if I had known what to expect going pro.

If you want to become a pro, by all means, go for it, just be realistic about it. You’ll need to learn a whole other field (business, marketing, etc.) above and beyond photography. Coming back to Joshua Bell (the violinist), he didn’t change, his skills didn’t change, the only difference between him and countless other metro violinists is his marketing. So the wisest thing you can do is to learn about marketing, running a business, and how to sell your work. This is probably the single most important piece of advice I could ever give you, because trust me, your images won’t sell themselves.

professional photographer myths

Conclusion

I love being a professional photographer, I wouldn’t do anything else, it’s in my blood. But making a living from photography is harder than many would lead you to believe. It’s not just about being talented, it’s about selling yourself, and more of your time will be spent doing the latter than the former.

I believe people make mistakes so that not only they can learn from them, but others can benefit as well. So, take it from me, I had to move in with my wife’s parents, I was on the brink of divorce and had many teary nights. Count the costs, and learn how to sell.

Be yourself, stay focused, and keep on shooting.

googletag.cmd.push(function() {
tablet_slots.push( googletag.defineSlot( “/1005424/_dPSv4_tab-all-article-bottom_(300×250)”, [300, 250], “pb-ad-78623” ).addService( googletag.pubads() ) ); } );

googletag.cmd.push(function() {
mobile_slots.push( googletag.defineSlot( “/1005424/_dPSv4_mob-all-article-bottom_(300×250)”, [300, 250], “pb-ad-78158” ).addService( googletag.pubads() ) ); } );

The post The Myths and Realities of Becoming a Professional Photographer by Olivier Duong appeared first on Digital Photography School.


Digital Photography School

 
Comments Off on The Myths and Realities of Becoming a Professional Photographer

Posted in Photography


Mom Photographer’s Best Helpers: Review of the Peak Design Everyday Bags

14 Jan

I bet at least one bag from the Peak Design Everyday series is on maaany wishlists this year. And if it’s still not, there are good chances you’ll want to add another item to yours after reading this review. Wondering what made me sound as if I’m earning commission from the bag producer? Watch the video below to get a Continue Reading

The post Mom Photographer’s Best Helpers: Review of the Peak Design Everyday Bags appeared first on Photodoto.


Photodoto

 
Comments Off on Mom Photographer’s Best Helpers: Review of the Peak Design Everyday Bags

Posted in Photography


Lighting 103: Introduction

13 Jan

Abstract: Our flashes are calibrated to produce white light. But in the real world, white light is a rarity.

Sara Lando (your mollusk portraitist from Lighting 102) gives a thumbs up while spending a week assisting for photographer Gregory Heisler (seen squinting through camera).

She was assisting Greg for a week of shooting and teaching at Gulf Photo Plus in Dubai. Sara learned a ton of stuff, duly reported on in a three-part series that to this day remains one of the most popular pieces ever written on this site.

Many of the things she learned while following Greg around had little to do with photography: his work ethic, thought process, etc. (Seriously, read the series.) But the week also changed the way Sara thought about light, her most important takeaway being this:

"White light is a lie."
Read more »
Strobist

 
Comments Off on Lighting 103: Introduction

Posted in Photography


Initial impressions of the Manfrotto Spectra LED Light 500S

12 Jan

I wanted a small portable LED for video work primarily to either pop on the hot shoe of my camera or use on a light stand off camera. I also really like the white light emitted from a LED source. So I purchased the Manfrotto Spectra LED 500s.

Manfrotto Spectra LED 500S

The portable Manfrotto Spectra LED 500S

Why did I purchase it?

LEDs are becoming more popular in photographers’ studios where continuous lighting is used. The main advantages of LEDs are they don’t get hot, unlike tungsten or incandescent lights. Another important factor is that LEDs use less power (watts) per unit of light generated (lumens). So they are extremely eco-friendly.

In this article, I will describe my initial impressions of using the Manfrotto Spectra 500s light for photography. I haven’t had it for long enough to give it a more comprehensive review.

Most of my work is location based, so portability is essential and plays an important role when choosing my photography gear. Nothing irks me more than going to a shoot and feeling like some poor-beast-of-burden overloaded with camera equipment!

I could have purchased a cheaper similar model off Amazon. However, I sourced online with a local company that had it in stock. I got this particular model at a discounted price and more importantly if I had any problems with the light I could easily return it with minimum fuss. Plus, I have built a trust with the brand over the years.

Disclaimer: I bought this Manfrotto Spectra light. I wasn’t sponsored to write this article. The opinions expressed in this article are mine alone.

What’s in the box?

manfrotto-spectra-light-box

The Manfrotto Spectra LED 500s box

The unit itself is really compact and measures 3.7 x 4.4 x 1.7″ (including the on/off knob). It has one power switch which also acts as a variable dimmer, very cool. It is daylight balanced at 5600 Kelvin. Also included with each light is a set of filters, including one ¼ CTO, one ½ CTO, and one opal diffuser. It also comes with a ball head shoe mount.

Manfrotto Spectra LED 500s in the box

The Manfrotto Spectra LED 500s light comes with 2 CTO gels and one opal diffuser. It also comes with a ball head adapter for mounting on a hotshoe or tripod.

I did find this mini ball head adapter a bit clunky to use. I had to fiddle with the lever to release the tension to get it to move and then lock it back in place. Not ideal when you’re on a shoot, time is of the essence, and you just want your equipment to work effortlessly.

This unit is slim and very compact, as you can see in comparison to my Sony RX100 camera (below).

Manfrotto Spectra LED 500s Sony RX100

Side by side size comparison of the Manfrotto Spectra 500s LED Light with the Sony RX100.

Manfrotto Spectra LED 500s size

The Manfrotto Spectra LED 500s is quite compact and slim.

How is it powered?

This little unit, the 500S is the smallest in the range of five models by Manfrotto. The S stands for spot, as a beam of light emits at a 30-degree angle. It produces 300 lux at one meter. The Spectra 500s takes four Alkaline AA batteries. It is simple to use, turn the knob to switch it on. It is also dimmable which makes really useful to control the amount of light being powered.

Rechargeable AA and Lithium-Ion AA batteries can be used as well. It can also be powered by an AC adaptor (ADAPTOR12V0.5A) to use through the mains. I can’t see myself bothering with this but the option is there. You can also purchase an adaptor (Manfrotto  L7.2V-Battery Adapter) which mounts at the back of the spectra unit and uses Sony L-Type batteries. Again, another alternative.

 Manfrotto Spectra LED 500s

The Manfrotto Spectra LED 500s on full power at one meter.

lighter-cto-gel

Here, the the 1/4 CTO gel has been applied over the light.

 Manfrotto Spectra 500s LED

The Manfrotto Spectra 500s LED light with a CTO gel.

 Manfrotto Spectra 500s LED opal diffuser

The Manfrotto Spectra 500s LED light with the opal diffuser.

LED versus flash lighting?

To see how using speedlights fared against this little LED I did a quick test. I didn’t set out to pitch one light source over the other, as that would be like comparing apples to oranges. I only wanted to get a comparison to see the results.

The speedlight is way more powerful, I know that. For the shot below, I used a speedlight with a shoot through umbrella, which was about two feet away from the subject at an angle of 45 degrees. The power on the flash was only at 1/8th power. I kept the ISO the same at 200 for both. Shutter speed was at 1/60 second and the aperture was f/7.1.

In contrast to the Spectra light, I had the light switched to full power and I had to get really close, 10-12 inches away from the object. The camera settings were 1/15th of a second at f/5.6. I didn’t put a diffuser on the Spectra light as a result, there is a harsh shadow under the air blower.

speedlight versus Manfrotto Spectra 500S LED

This was shot using flash with a speedlight.

Manfrotto Spectra 500s LED

This was shot using the Manfrotto Spectra 500s LED light.

What to look for when choosing LED lights

First, CRI (color rendering Index) is important when choosing an LED light. The closer it is to 100, the more ideal it is. Less than 90 is considered not great. The Manfrotto Spectra LEDs claim >90. What does this really mean? Natural light is classified as having a CRI of 100, the best possible.

Secondly, make sure the LED is flicker free.

Pros of LED lights

  • Extremely portable
  • Lightweight and compact, even with the batteries
  • Easy to use
  • Don’t overheat
  • Can be used for both video and photography
  • Great for small product shots
  • Handy in low light conditions
  • As it is a portable continuous light source, this makes LED lights ideal for beginners to learn about how light affects the subject/model
spectra-light-unde-pendant-shade

I put the Spectra light inside this pendant shade. This is where the LED light could come in handy by mimicking other light sources to create atmosphere or mood in your shot.

spectra-light-in-shade

I just placed the Spectra LED LIight under this shade to see how effective it could be to mimic another light source to add atmosphere in your shot.

Cons

  • A little pricey, unless you get a discounted price
  • The white light may not be appealing to some – but the gels included compensate for that
  • The mini ball head adaptor is clunky and fiddly to use – not a deal breaker but annoying nonetheless
  • Not powerful enough in some situations where there is a lot of ambient light to balance against.

Conclusion

As I stated at the beginning of this article I set out to describe my initial impressions so far to date. As this is a very recent purchase, I have yet to test it out fully. But so far I give it 3.5 stars out of five. This may seem a bit harsh but I took a half star away for each of the following:

  • The mini ball head adapter is quite cumbersome to use.
  • It’s fairly expensive compared to other similar less expensive models.
  • This light is not really powerful enough in certain situations and other cheaper models are more powerful.

In terms of photography use, LEDs are terrific and so easy to use. The Manfrotto Spectra 500S is the smallest but not as powerful as its siblings in the Spectra range. That said, I won’t be putting away my speedlights just yet.

So, if you are new to LEDs lights and you would like to test them out for your photography. Check out my article here on how to use an inexpensive LED flashlight to take shots.

Do you use LED lights in your photography? Please leave a comment below, and tell us more.

googletag.cmd.push(function() {
tablet_slots.push( googletag.defineSlot( “/1005424/_dPSv4_tab-all-article-bottom_(300×250)”, [300, 250], “pb-ad-78623” ).addService( googletag.pubads() ) ); } );

googletag.cmd.push(function() {
mobile_slots.push( googletag.defineSlot( “/1005424/_dPSv4_mob-all-article-bottom_(300×250)”, [300, 250], “pb-ad-78158” ).addService( googletag.pubads() ) ); } );

The post Initial impressions of the Manfrotto Spectra LED Light 500S by Sarah Hipwell appeared first on Digital Photography School.


Digital Photography School

 
Comments Off on Initial impressions of the Manfrotto Spectra LED Light 500S

Posted in Photography


How to Swap Colors in Photoshop – Two Methods Explained

12 Jan

Color swapping in Photoshop is both a fun thing to do and a very handy tool for product photographers with clients in need of options. It’s not a hard technique and it only takes a try or two to get it right. This article outlines two methods for how to swap colors in Photoshop.

final-side-by-side-color-swap


The first is a quick method and the second tends to do a better job. I’ll be using this the image below from my review of the Lowe Pro Photo Sport 100/200 AW bag. This demonstration was created with Photoshop CC 2017.

The Quick Method

This method is a quick color swap that may or may not cover your needs. If your subject has nice, solid colors without very much tonal difference, you can likely use this method by itself. Go ahead and open your file in Photoshop and let’s get started!

How to Swap Colors in Photoshop - Two Methods Explained

Sample Image

Step #1 Create a Hue/Saturation Adjustment Layer

Click on the “Create New Adjustment Layer” button on the bottom of the Layers panel and choose “Hue/Saturation”.

How to Swap Colors in Photoshop - Two Methods Explained

Choose Hue-Saturation

In the Properties window that pops up, there is a little hand with a pointer finger in the upper left side of the box. Click that.

How to Swap Colors in Photoshop - Two Methods Explained

This is where my method deviates from some others. As you can see in the image above, there is an option to hold Cmd/Ctrl as you drag the mouse, and change the Hue straight away.

This is a tempting method, for sure. But it won’t always get you as close to your desired results as if you follow the rest of these instructions. For instance, I used that method to try to change the orange pack to blue and this was the result.

How to Swap Colors in Photoshop - Two Methods Explained

Not what I wanted. So….

Step #2 – Select a color range

After you click that little finger and hover over your source color (the orange bag), click there to select the color. Your screen will change depending on which color you pick, but more or less it will look a little like this.

How to Swap Colors in Photoshop - Two Methods Explained

I chose a dark spot so my saturation for all orange dropped and now there is a little slider in the color bands at the bottom of the properties box. You will be using those bands and the saturation slider to refine your selection.

Step #3 – Adjust to get all the color

To know you have the right colors you want to work with, move the Saturation slider all the way down, essentially turning off the source color. If that doesn’t get all the color you want, move the little white bands on the color slider on the bottom until it captures all your source color.

How to Swap Colors in Photoshop - Two Methods Explained4

Move Saturation to -100, and adjust the bands (bottom green arrow) left or right, or apart, until there is no more of the selected color showing.

Can you see how that lighter gray box on the sliders at the bottom is larger (they were moved farther apart) in this image compared to the one above? That is to make sure I gobbled up all the orange, including some reds and yellows. Fiddle with this option to capture all your source color.

Step #4 – swap the color for a new one

Now that you know you have the right source color, jack up the Saturation slider then move the Hue slider until you get a color you like.

How to Swap Colors in Photoshop - Two Methods Explained

If you’re looking for quick and easy, you are essentially done! Save the file with a new name and you’re good to go.

But wait! Things aren’t as good as they could be with this method. For one thing, there is now a slight tint to the entire image as the mask was applied to the entire image. Let’s clean that up a little.

Method #2 for swapping colors

Method #2 picks up where Method #1 left off and continues:

Step #5 – Apply a layer mask

In this step, you want to apply a mask to the Hue/Saturation adjustment layer (seen on the right side of the layer) just to the backpack so it doesn’t tint the whole image. Click on the layer mask and the information panel will change to show mask options.

How to Swap Colors in Photoshop - Two Methods Explained

Choose “Color Range…” from the “Refine” options at the bottom.

How to Swap Colors in Photoshop - Two Methods Explained

This should bring up a mask with the color range you have already selected and changed in the steps above. Your mask should show the area of color you are swapping as white, like so:

How to Swap Colors in Photoshop - Two Methods Explained

Click OK to apply the layer mask.

Step #6 – Refine the layer mask

Now you need to refine the layer mask just a little as Photoshop is not always perfect. Take a look close in my example and you can see some orange peeking through.

How to Swap Colors in Photoshop - Two Methods Explained

To eliminate this effect, click on “Select and Mask”, once again in the “Refine” options area.

How to Swap Colors in Photoshop - Two Methods Explained

Choose to use the “Marching Ants” View to make it easy to find the missing areas.

How to Swap Colors in Photoshop - Two Methods Explained

Then in the upper left corner, choose the Brush Tool and make sure the “add” feature (+) is selected. Lastly, choose a radius size to make the selecting easy. In this case, I used 365.

How to Swap Colors in Photoshop - Two Methods Explained

Now paint all over the area you want to change to the new color. It’s okay to go slightly over the edges to ensure all of the color is changed. If you are making drastic changes or if your background color will interfere, you may need to be more careful with your painting.

How to Swap Colors in Photoshop - Two Methods Explained

Zooming in, you can see that I missed some edges here and there and overlapped a little too much. Take your time and make it look good.

How to Swap Colors in Photoshop - Two Methods Explained

You can also see in the image above that there is still an orange cast on the armrest of the chair. To make the scene complete, I’ll swap that color as well.

Click OK when you are finished painting in the area to swap. You’re just about done!

Step #7 – Layer blend mode

Depending on what you’re swapping and the textures and colors involved, you may be able to get a slightly better result by choosing a different blend mode option for this layer. Click the word “Normal” above your layer and play around with the different layer blend mode choices.

How to Swap Colors in Photoshop - Two Methods Explained

You’re done!

From here, you can fiddle until your heart is content. Try new blending modes and opacities. Refine your masks. Then sit back and enjoy your handy work!

final-side-by-side-color-swap


Cautions

  1. Watch out for white objects when there is a lot of white in the scene. These can be tricky.
  2. For that matter, watch out for the color you want to swap appearing anywhere else in the image. You’ll need to remove the mask from those areas manually (Step #6 but use the “minus” option).

googletag.cmd.push(function() {
tablet_slots.push( googletag.defineSlot( “/1005424/_dPSv4_tab-all-article-bottom_(300×250)”, [300, 250], “pb-ad-78623” ).addService( googletag.pubads() ) ); } );

googletag.cmd.push(function() {
mobile_slots.push( googletag.defineSlot( “/1005424/_dPSv4_mob-all-article-bottom_(300×250)”, [300, 250], “pb-ad-78158” ).addService( googletag.pubads() ) ); } );

The post How to Swap Colors in Photoshop – Two Methods Explained by Peter West Carey appeared first on Digital Photography School.


Digital Photography School

 
Comments Off on How to Swap Colors in Photoshop – Two Methods Explained

Posted in Photography


How to Prepare a Photography Exhibit of Your Work

12 Jan

There is nothing like having your work displayed up on a wall for everyone to see. Even better, is seeing little round red stickers underneath to indicate that the work has been sold. For most artists, that is their driving force and anyone who makes images that are intended for walls and display. However, where and how to go about having a photography exhibition can be harder than you think. It can also be a very expensive exercise.

This article will help answer a lot of the questions that you may have when it comes to exhibiting your work.

photography exhibit tips

If I were to have an exhibition now this image would be in it.

Why do a photography exhibit?

Artists have been exhibiting their work for centuries, now is no different. The reasons for doing an exhibit can vary from artist to artist. Before the internet, it was one of the best ways to showcase your work to everyone. However, artists used them to make money. They would invite special clients or benefactors to the openings in the hope they would buy one or a few pieces.

Selling artwork is harder these days, so if your sole reason for exhibiting is to sell some, then you may be very disappointed. However, if your goal is to put your work up on a wall to show people what you are capable of, then it can be very rewarding. Having all your best work up for everyone to look at can feel like quite an achievement.

Another reason many artists exhibit is to be able to put the exhibitions down on their artists CV. The CV or Curriculum Vitae is a list of all their exhibitions, plus education and a few other things, similar to a resume. It is what galleries look at when seeing if they will have a show with an artist.

leannecole-exhibiting-your-artwork-31

This image would be ideal if I decided to have an exhibition of just my macro work.

Costs and Budgeting

Exhibitions are not cheap and before you decide to have one there are many things you need to take into consideration. What sort of space will you exhibit in and how much will it cost? What other expenses will there be? How many images will you prepare for the exhibit and what will the reproduction outlays cost? Should you have a solo exhibition or start with group shows? These are all questions you need to think about.

Group or Solo

Solo shows are fantastic and ultimately what every artist wants, to have their own show. But they are also very expensive and you have no one to share the expenses with. Having said that, most artists build up to solo shows and often have had some success in group shows first.

For most photographers, group shows are a good way to get your feet wet and start building your artist’s CV. Find some friends who are also interested in exhibiting. Apply together to galleries to see if you can get an exhibition. Many galleries advertise for artists to participate in group shows they are holding, so look out for them and apply.

leannecole-exhibiting-your-artwork-39

This framed image was in a group show for street photography.

Where to exhibit

This could be an endless list, but the most common places are galleries that specialize in the work that you want to show. However, there are other places, like cafes or restaurants, that like to have exhibitions which feature different artwork on their walls. There are benefits and disadvantages to each.

Cafes, Restaurants, and Foyers

These are often free for holding an exhibition. They don’t always have schedules so you could possibly have your work up for longer than you could in a gallery. These types of venues may not want a commission from the sale of work, though they may want you to handle all the sales, so you would need to leave contact information. They usually won’t take any responsibility for your art pieces, so be aware of that (loss or damage is not covered).

leannecole-exhibiting-your-artwork-35

This is one of two images that were exhibited in a cafe down near the coast.

With a place like this, you won’t have access to a mailing list and will have to do all the advertising yourself. People can’t generally just wander in to look at the work. All the customers will see your images, but they are there for different reasons, such as to eat, and buying images isn’t one of them. While it isn’t impossible to sell a piece from a cafe exhibit, your audience isn’t there to necessarily buy what you are selling.

Your work will most likely need to be framed for hanging, and you will probably have to install it yourself at the exhibit space.

leannecole-exhibiting-your-artwork-34

This is the other image that was exhibited in the cafe.

Galleries

There are many different types of galleries, and it is up to you to decide which one you think will work for you. They usually start with artist-run spaces, then come staffed galleries which are either non-commercial or commercial.

Artist-Run Spaces

Possibly the cheapest spaces to get are those which are artist-run. You pay less to use the space, but you are expected to do what they call, “sit the exhibition”. That means that when the gallery is open you have to be there to watch your work and manage any sales yourself.

Having to be there the entire time the gallery is open can be time-consuming. Many artists will get together for a group show, split the costs of renting the space, and draw up a roster to sit the exhibition. For artists starting out this can be a much better option. If you want to do this, but don’t know anyone to exhibit with perhaps you can contact the gallery as they may know some artists who are looking for someone to share.

You need to take on most of the expenses in this environment. The cost of the opening is covered and organized by you. You must pay for most of the advertising as well, though some galleries will have a mailing list for you to use.

leannecole-exhibiting-your-artwork-38

Still packed up from when it returned from an exhibition last year.

Staffed Galleries

Staffed galleries are the next level. They cost more, but you are relieved of the burden of having to sit the exhibition. There are two different sorts of galleries, the commercial and non-commercial kind, and they often have different directions.

Non-commercial galleries

These are often smaller galleries that will charge you for renting the space and for their service to sit the photography exhibit for you. They are often the most expensive galleries to hire. Non-commercial galleries will help advertise the opening, but they are generally not interested in helping to promote you and your work further beyond the exhibition and the relationship is short term.

They make their money from you hiring the space, and taking a commission from any work you sell, usually around 30%. It is a good way to start getting work on your CV or finding galleries that do a lot of group shows. See if you can put work into them.

Non-commercial galleries aren’t typically picky about who they choose, as long as the quality of work is good. They are not going to mind if one exhibition is all abstract paintings and the next one is more landscape photographs. It can be a lot easier to get a show with them than the commercial galleries.

leannecole-exhibiting-your-artwork-28

This image was also popular on social media so it would definitely be in the macro exhibition.

Commercial Galleries

These types of galleries are a lot harder to get exhibitions with as they have so many artists to choose from and usually have a particular type of artist in mind that they show. They are more interested in helping you establish yourself as one of their artists, in other words represent you. Commercial galleries will keep some of your work in a stockroom and advertise what you do. They try to get collectors to view what you have done so they can begin collecting and supporting you as well.

Commercial galleries usually have a niche market they represent. If you are a photographer and you send your work to a gallery that only deals with Indigenous art, then they are not going to be interested in your work.

When approaching these galleries you need to do your research and make sure you work fits in with the other artists they represent. At the same time, if they have another who does work that is almost the same as yours, then they are not going to be interested either.

The commercial galleries often cost a lot less for an exhibition, however they are harder to get shows in and they will take a higher commission. Here in Australia that rate is usually around 40%, compared to the 30% that other galleries take.

leannecole-exhibiting-your-artwork-30

Another image that would be used if I were to have an exhibition now.

Submitting your work to galleries

All galleries tend to advertise when it is a good time to submit proposals. While you can send in inquiries at other times, it is best to look for submission dates, times when they are asking people to send in exhibition proposals.

Commissions and pricing your work

All galleries charge a commission and some cafes may as well. You need to consider how much the commission is when you are pricing your work. Make sure you find out how much the commission is when first inquiring about exhibiting in the space.

When it comes to pricing you should be realistic. If you are new to the art world, charging thousands of dollars for your work would be unrealistic. Only established artists can command prices like that. To get an idea look at the space that you will be exhibiting in and see how much previous artists have charged for similar work. If you are happy with the prices you could try charging the same, or similar.

As your reputation grows and more people start buying your work then you can look at charging more.

leannecole-exhibiting-your-artwork-36

This is from an solo show I had in the foyer of a theater company.

Loss due to damage or theft

When you hire a space to show your work you also take on the responsibilities of it as well. The gallery or space is unlikey to cover any damage to your artwork or the theft of it. It is often in the contract or terms of conditions. Make sure you are aware of it, and if you are worried then insurance could be an option.

Insurance

As previously stated most places will not cover your work for damage or being stolen, so insurance is  something that you need to consider when putting your art up anywhere. Do you need to take out insurance on it? Most artists don’t worry about it, but that doesn’t mean you should do the same. Look into it and see how much it will cost and if it is worth it for you

If the work has cost you a lot of money to produce, then you may want to consider getting insurance. Talk to the gallery and see if they have had problems in the past, especially with theft. If the work is going into a high traffic zone, like a walkway, where it can be damaged or someone could walk off with it, then it is worth considering.

It should be done according to the place where you are showing. If it is a café then the staff may not have the time to watch the work at all, especially during busy periods. However, a gallery is going to be in a better position to watch if they have the staff. If you have to man the space yourself, can you watch everything?

To frame or not to frame

leannecole-exhibiting-your-artwork-37

Testing out a framer and had this macro printed on canvas.

Many places will answer the question of framing for you. tThey will either say the work has to be framed or it can be pinned to the wall.

If the work has to be framed then you must decide if that is something you can afford. Getting work custom framed can be very expensive. But what a lot of artists do is make all their work the same size (or use the same size frames and just alter the mat sizes according to the images), then go to somewhere like Ikea and buy cheaper frames. If you do the framing yourself then you can reuse the frames every time you want to do a show.

If you don’t have to frame and can pin the images on the wall, that doesn’t mean you can’t get the work framed. Again, your budget is going to determine that. However, if you choose to pin them on the wall you need to find out what is going to be the best way and if the purpose is to sell your work then pinholes in your photos might not be desirable to potential buyers (it also isn’t as professional looking or finished for the buyer, they can’t just take it home and hang it up).

What size and how many images to exhibit

leannecole-exhibiting-your-artwork-25

If I were to have an exhibition now this would be in it along with the others.

This decision comes down to price and space. How much money you have for the exhibition can only be determined by you. But how many pieces you can make, and the size you can get your work reproduced is going to be determined by your budget.

It is also important to know how much space you have available for the exhibit. If the space is only three meters (10 feet) of wall space, then putting up three images that are one meter (39 inches) across will make it crowded and not allow enough space in between each one. However, if you have 10 meters (33′) of space, and you put up four images that are only 50cm (20 inches) across, that will give you too much space between them.

Consider the space carefully. If you think your work looks great when it is enlarged, then perhaps having fewer large pieces is better. The larger they are the more they will cost.

The same goes for the number of images. You don’t want to completely fill the space you have, as giving each image room will allow them to be shown better. Just because you have paid for the space doesn’t mean you have to fill it up. Consider the size of the frames as well, if you choose to frame.

Editioning

leannecole-exhibiting-your-artwork-33

Trying out different papers to see which one will work best for this image.

Editioning is also referred to Limited Editions and is something to consider with photography. Printmakers have been doing it for centuries. It basically means that you are promising your clients or potential ones that only a certain number of those images (prints) will be available for sale.

Editions can be a good way to make your work more valuable. If you have an image and do an edition of 20, then you need to make sure that the buyer knows what number in the edition they are receiving, for example, 8/20. You need to keep records of it, so you know how many of the image you have sold. Once you have sold the 20 you can’t sell anymore. You made a promise to those that bought the first 20 that you would only sell 20 of them. Be sure of how many you think you might sell from the start, and be realistic.

Another thing you need to be careful about with editioning is to make sure they are all printed exactly the same. They all have to be consistent. If you put up a piece in a show and sell it a few times, people won’t be happy if the image they receive is not the same as the one they saw in the exhibition. You don’t have to get them all printed at the same time, but make sure you use the same printer for all of them and that the printer knows how to replicate them identically.

Medium for printing

What medium you choose for printing is again going to be determined by your budget, but also consider how your work will look the best. Do you want prints in frames? Perhaps canvas will work better for the type of image you are getting printed. Getting work printed on metal is becoming popular now as well, though it is also very expensive and perhaps might only suit some styles of photography.

Whatever you choose, you need to be careful that it shows off your work in the best way possible. Consider getting some images printed in different ways and then deciding which you like the best, and which one will fit into your budget.

leannecole-exhibiting-your-artwork-32

My new printer did lots of tests for me to see which would work the best on what medium.

Curating and choosing which images to exhibit

Choosing which images to put in the exhibit is the hardest part for most people How do you know what images will be the best to show? There is no real way to tell. If you are working with a gallery that has a curator you can likely get a lot of help from them using their experience with the gallery and what sells. If a curator isn’t available you might have to enlist the help of friends, find out what are their favorite pieces. Perhaps your social media sites will help you see which images were popular online.

When it comes to curating the show, there should be a cohesiveness to the work and to the final exhibition. Make sure all the work fits together and flows. Be clear on what your vision for it is. The better it looks on the walls, the more you could sell.

leannecole-exhibiting-your-artwork-29

If I were to have an exhibition now this is another image that would be in it.

Start planning your exhibition

Hopefully this has answered many of the questions you had and explained some of the ways that galleries work. There are many decisions that need to be made and before you start it is good to have a plan of what you want to do, why, and how you will pay for it.

Have you done a photography exhibit before? Please share your experience or post your questions in the comments below.

googletag.cmd.push(function() {
tablet_slots.push( googletag.defineSlot( “/1005424/_dPSv4_tab-all-article-bottom_(300×250)”, [300, 250], “pb-ad-78623” ).addService( googletag.pubads() ) ); } );

googletag.cmd.push(function() {
mobile_slots.push( googletag.defineSlot( “/1005424/_dPSv4_mob-all-article-bottom_(300×250)”, [300, 250], “pb-ad-78158” ).addService( googletag.pubads() ) ); } );

The post How to Prepare a Photography Exhibit of Your Work by Leanne Cole appeared first on Digital Photography School.


Digital Photography School

 
Comments Off on How to Prepare a Photography Exhibit of Your Work

Posted in Photography


10 More Photography Tips to Help Take Your Images to the Next Level

12 Jan

A while back I wrote an article that was quite popular: 10 photography tips to take your photography up a level. In this article, I bring you 10 extra tips from all aspects of photography. Enjoy!

10 More Photography Tips to Help Take Your Images to the Next Level

#1 – What’s more than meets the eye?

Let me ask you something, what would you do? You meet someone attractive, you are head over heels, and then you start actually talking to them. You then uncover the most superficial person you have ever met. That person is all looks and not much else. You would lose interest, right? Because looks by themselves are good enough to make you interested, but if there is nothing sustaining that interest, you’re gone. This is the same thing in Photography,

This is the same thing in photography. A beautiful composition is nice, but what is in your image that is designed to keep the viewer’s attention? What is it about your image that is more than meets the eye? Is it saying something deeper? Is it making a point? Showing a concept? Add meaning to your images to keep the viewer engaged.

#2 – Know your opportunity

I believe there are only four times when you control the image. The first is at the moment of exposure (when you shoot), the second is in post-processing, the third is in sequencing and editing, and the fourth is while printing. So, when shooting, have these things in mind in order to shoot with clarity.

Example, you shoot an image and it is overexposed (because of the camera’s limitation). But it doesn’t end there as you know that you have another opportunity in the post-processing phase to recover details. Or you shoot something with a nice texture but it doesn’t have the effect you want. It doesn’t end there, you know that you can print and blow it up real big to have the effect you seek. Or you shoot an image that can’t stand by itself. Once again it doesn’t end there, you know you have another similar image that can make a diptych.

The point is that making an image is only the first step. There’s a whole process that comes afterward when you can get the effect you desire. So it’s important to know that what you have in the camera is the starting point and not the end.

#3 – Pay attention to this detail (after your background)

10 More Photography Tips to Help Take Your Images to the Next Level

In the first 10 tips article, I suggested that you pay attention to the background first. Now I would like to add another thing to pay attention to before your subject – the corners. You see there is a strong dynamic with the corners, they draw you into the frame, towards the dead center and if you can align some lines there, it’s like surfing a big wave, it just draws your eye even more!

In the image above we have the guy’s hands, the shape of the tree and the shadow on the bottom right corner just pulling you into the image. So, pay attention to your background, watch your corners, and then look at your subject.

#4 – Dennis Rodman-ize it

10 More Photography Tips to Help Take Your Images to the Next Level

Let’s face it, it’s hard to get attention in this ever increasing attention deficit world. Dennis Rodman had been in the NBA for years, but he was receiving few endorsement contracts. He was a good player but didn’t shine enough. Then came the Rodman with the crazy hair and style, even as a kid I knew his name because he simply looked different.

That brings us to photography, you are probably doing something a certain way, so can you Dennis Rodman-ize it? Shoot in a different way that makes your work pop above and beyond what you normally do? For example, landscapes are usually shot with a wide angle, what if you shot landscape abstracts with a telephoto? Or used a special processing technique on your images that gave them a certain look?

#5 – Work on your name

You probably know the wine experiment, where they gave people wine to drink, one was expensive and the other was cheap. Everyone, of course, preferred the expensive wine over the cheap one, even if it was the same wine. Here’s the REAL KICKER, when they scanned the brains of the people who drank the wine, their brain actually made them believe they were drinking expensive wine, and it literally tasted better. Their perception altered their reality.

10 More Photography Tips to Help Take Your Images to the Next Level

With that in mind, work on your images but also on your name or brand. Try to get as much recognition as you can, it will alter people’s perception of your work. I remember a photographer who had decent work, and then that person got famous literally overnight. Let me tell you, even I, knowing all that I know about psychology, now see his work in a better light.

It’s crazy, and probably a bit sad, but that’s just the way it is. The story of Joshua Bell also illustrates this point well. This guy makes $ 1000 per minute playing on a million dollar violin, yet he got a meager $ 32 and a few cents when they had him play anonymously in a metro. Same guy, same skill – different context, different result.

#6 – Get luckier

Let’s not mince words here, luck plays a big role in photography. That Cartier-Bresson shot of the man jumping? That was 100% luck because he couldn’t even see what he was shooting through a hole.

Why is luck such a big deal? Because you DO have to be there at the right moment, and so does your subject, the light, etc. Truth be told, you need the skill and the eye to seize the moment, but if you are not there, the shot won’t be yours.

10 More Photography Tips to Help Take Your Images to the Next Level

So taking into account the luck factor, shoot more often. You’ll get luckier and luckier every time you do. By making more photo opportunities, you’ll be making more images. So if you used to go out once, go out twice, etc.

I mean, who do you think will have a better chance at getting a job? The one that applies for one job, or the one that applies for 10? Skill and creativity are multiplying forces, but it doesn’t matter how skillful you are if you are a couch potato. Sharpen your skills and get out there to get lucky.

#7 – Scramble everything

There was this cool experiment where they gave this guy upside down glasses, so everything was inverted. They wanted to pour him a drink, and he turned the cup upside down (because he believed it was upside down). Imagine the world upside down and how hard it would be to live like that. The kicker? After 10 days he adapted to the upside down vision, and could even ride a bike!

10 More Photography Tips to Help Take Your Images to the Next Level

Sometimes we just get used to how we shoot, we get complacent, that’s normal. So scramble things up. If you normally shoot color, try b/w, if you like portraits try street photography, if you are a film shooter, try digital, etc. It’s like the “Dennis Rodman-ize” tip, but this is more designed to shake you out of complacency rather than to bring attention to your work.

#8 – Revisit your images
10 More Photography Tips to Help Take Your Images to the Next Level

Two photographers can look at the same scene, and yet see two different things. The difference is their knowledge about photography. You probably have some hidden gems in your images that you’ll probably never uncover if you do not revisit your images. You made them, but when you revisit them you do so with new eyes, and you will see them differently.

You will be amazed at what you find. Images that you believed were boring and/or ruined will be seen in a new light. You may ask yourself, “How did I miss that?!? There are quite a few images that I have overlooked, that’s why I have a no-delete policy. Maybe I can’t see what my future self will see or what my future self will be into.

#9 – Let go of preconceptions

10 More Photography Tips to Help Take Your Images to the Next Level

I receive emails daily from photographers around the world. The one thing many seem to struggle with is that they don’t live in a big city. It is understandable, but just because you can’t find the images you have in your mind doesn’t mean they are not there. You just need to let go of your preconceived ideas and be more open to what is in front of you.

Some people tell me they wish they had more money to travel. Evidently, the image in their mind is of travel, but an image doesn’t need to be travel photography to be good, does it? It’s good to have a general idea of what you want, but also to be open to the possibilities.

Some people get hung up on relationship breakups, passing by great, if not better opportunities in front of them. Likewise, seeing what is possible right in front of us allows us to maximize our opportunities as photographers.

#10 – Remember it’s all plastic

10 More Photography Tips to Help Take Your Images to the Next Level

It’s a hard concept to grasp, especially as a beginner, but remember that photography is plastic. Exposure? Plastic. Colors? Plastic. White Balance? Plastic. Sharpness. Who said every image needed to be averagely exposed, with white balance set perfectly by grey card, and super sharp? The first thing I do as a photographer in Lightroom is to clip my blacks. I LOVE clipping my blacks. I never set my white balance with a grey card, I just look at the image and hear what it creatively calls for, then do that.

Photo of a bride and groom? Probably needs to be on the warmer side so that the viewer can get some emotional cues from that. Shot these plastic surgeons? I’ll put my white balance on the cool side to reinforce the surgical cleanliness. Whatever you are doing right now, remember all of it is plastic. Who said images needed to be in a square or rectangle? Who said portraits have to contain faces? Who said colors had to be realistic (see above)? Who said paper and canvas was the only printing options…..you get the gist!

Conclusion

There you have it, 10 more photography tips to help you in your photography journey. I hope you resonate with some of them. Be yourself, stay focused and keep on shooting.

10 More Photography Tips to Help Take Your Images to the Next Level

googletag.cmd.push(function() {
tablet_slots.push( googletag.defineSlot( “/1005424/_dPSv4_tab-all-article-bottom_(300×250)”, [300, 250], “pb-ad-78623” ).addService( googletag.pubads() ) ); } );

googletag.cmd.push(function() {
mobile_slots.push( googletag.defineSlot( “/1005424/_dPSv4_mob-all-article-bottom_(300×250)”, [300, 250], “pb-ad-78158” ).addService( googletag.pubads() ) ); } );

The post 10 More Photography Tips to Help Take Your Images to the Next Level by Olivier Duong appeared first on Digital Photography School.


Digital Photography School

 
Comments Off on 10 More Photography Tips to Help Take Your Images to the Next Level

Posted in Photography


How to Create a Dynamic Zoom Burst Photograph

11 Jan

Who doesn’t love warp speed? In this article, you’ll go hurtling into the future at warp speed nine, and you don’t need any federation star fleet spaceships to do it! A DSLR camera with a zoom lens and a tripod is the only equipment you’re going to need for this exciting technique. There are similarities to light painting by camera rotation, and the zoom burst is indeed another form of kinetic light painting. Let’s take a look at this technique, what it will give to your photos, and how to do it.

zoom burst photo cityscape

In this photo, a friend stood still in front of Marine iCty in Busan.

What does this technique add to your photograph?

Put simply, this gives a still frame a much more dynamic edge. This article will look at how you can apply zoom bursting to architectural photos and is best used in an urban environment. The nature of still frames is of course that they’re a single moment, by changing the focal length during long exposure you can add movement and urgency to your frame. The zoom also produces leading lines within your frame that all lead up to your main subject within the frame.

How to take zoom burst photographs

Taking a zoom burst photo is a simple technique, in fact, you can even do this handheld. The effect is achieved by changing the focal length of your camera lens during a long exposure. Follow these steps:

  1. Choose a scene that has mixed areas of light. You can use a forest with mottled light, or an apartment building where some lights are on and some are off.
  2. The exposure should be between half a second and 2 seconds long.
  3. You can take this photo handheld but it’s better to use a tripod.
  4. Change the focal length of the lens during the exposure. Zooming out tends to work better during the night for longer exposures, and zooming in works better during the day.
zoom burst lights

A photo that uses zoom with no stationary phase. This photo is colorful and abstract.

How to take zoom burst photos that show structures

Now that you know how to make a simple zoom burst, which looks abstract in nature, it’s time to move a step further. Now you are going to see how you can introduce architectural structures into this frame.

1 – Choose the correct location

Not all locations work well for zoom bursts, especially if they’re too cluttered. You need to choose a building that’s well lit and not surrounded by others. There are other options you can look at as well such as Ferris wheels or sculptures. Any location you choose should allow you to zoom into the structure, and then zoom out on the lights that surround it.

zoom burst too many buildings

When there are too many building in the frame, the zoom burst shot can get busy.

2 – Set the camera on a tripod

If this is going to be a long exposure of 25 or 30 seconds, you will have to use a tripod. You need to secure the tripod in position, making sure it doesn’t move about. A lot of tripods let you hook your camera bag to the extendable center, doing so will steady the tripod. Apply the same logic you would use to attain a sharp image. The focal length movement of the lens will prevent you getting maximum sharpness, though.

3 – Select the right lens

The best lens for this type of photo is a super zoom, one that goes from 18mm-300mm. A super-zoom gives you maximum flexibility over composition and allows for more creative photographs. If you don’t have a zoom with this kind of range, you can use a kit lens. The 18-55mm lens works very well for the zoom burst.

4 – Focus the camera using Live View

Now compose your photograph in the position you intend to finish your zoom burst. The final composition will be at the wider or widest end of your lenses focal length. Turn the camera’s Live View function on, and zoom into the central structure you wish to focus on. Use the lens’s manual focus so that the image on the Live View screen is sharp. Keep the camera lens in manual focus to prevent loss of focus during the exposure. Keep a mental note of the focal length where you focused, especially if that isn’t the widest part of the lens.

castle zoom burst photo

In this photo, Nagoya castle was focused on using a zoom. I zoomed into the castle.

5 – Zoom into the target area

Select the area of the scene you want to have as the center of your zoom, this should have been decided already during initial scene composition. Ensure that all your settings remain the same, as this is the final step before you begin the exposure. Set the camera to expose for 25-30 seconds, at f/8 or f/11. You can use a smaller aperture if you need to in order to get a longer exposure.

6 – Carry out the zoom burst

Set the camera to the 2-second timer (or 10 seconds if you want to prepare yourself for the zoom). Hit the shutter button to begin the countdown to the exposure. At the point when the shutter is about to open begin slowly zooming out. As the camera is exposing, continue to zoom out keeping it as smooth as possible to avoid camera shake.

You should be zooming out for between two and five seconds, the longer the zoom is the more pronounced the light trails will be in the image. As you zoom keep an eye on the focal length of the lens so you finish at your composed position.

The ferris wheel is a great subject for zoom bursts. The middle is empty, and there is a ring of light to zoom out.

The Ferris wheel is a great subject for zoom bursts. The middle is empty, and there is a ring of light to zoom out.

7 – Allow the camera to finish the exposure

Once you have finished the zoom remove your hand from the lens, without moving the camera. The camera will continue to expose for 20-25 seconds depending on the exposure time you used. The image will now show zoom burst lights and architectural structures in the same exposure.

8 – Carry out post-processing work on the photo

The result in-camera will look nice, but adding contrast in post-processing is important. The image has “lost” five seconds of exposure time, so adjusting the contrast helps. You can use NIK color efex, which has a filter called pro-contrast and is an excellent choice for this type of photo. The centered position of the zoom can’t be adjusted in camera, though cropping the photo in post-processing allows you to move the zoom to an off-center position.

The bridge lit with many lights is a good subject for a zoom burst.

The bridge lit with many lights is a good subject for a zoom burst.

Where should I go to take zoom bursts?

The best place to take this type of photograph is in a city, one that’s well lit, and has interesting architecture. A Ferris wheel is a great structure to use as it’s circular, which helps with the centered nature of the zoom burst. Other architecture can also work as long as it’s alone and not surrounded by other structures. A cityscape with many buildings can look too busy with too many light streaks in one frame.

You can even take zoom burst photos during the day, but you will need an ND filter to do this. An ND filter that allows you to shoot for 30 seconds will allow you to create a zoom burst using the steps listed above, though the zoom should last longer.

img_2957

I look forward to seeing your photos using this zoom burst technique, please post any images you have in the comments section below.

This is a good example of a lone building with lights on.

This is a good example of a lone building with lights on.

In this photo only zoom is used, there is no stationary phase.

In this photo only zoom was used, there was no stationary phase.

This photo shows how a zoom burst and static phase produces an image.

This photo shows how a zoom burst and static phase produces an image combining light streaks and architecture.

googletag.cmd.push(function() {
tablet_slots.push( googletag.defineSlot( “/1005424/_dPSv4_tab-all-article-bottom_(300×250)”, [300, 250], “pb-ad-78623” ).addService( googletag.pubads() ) ); } );

googletag.cmd.push(function() {
mobile_slots.push( googletag.defineSlot( “/1005424/_dPSv4_mob-all-article-bottom_(300×250)”, [300, 250], “pb-ad-78158” ).addService( googletag.pubads() ) ); } );

The post How to Create a Dynamic Zoom Burst Photograph by Simon Bond appeared first on Digital Photography School.


Digital Photography School

 
Comments Off on How to Create a Dynamic Zoom Burst Photograph

Posted in Photography


19 New Beginning Images for a Fresh Start to the Year

11 Jan

Well, a new year is yet again upon us. It’s a time for a new start, fresh beginnings.

That can make many things to different people. Let’s see what new or beginning means to these 19 photographers with their fresh “new” images.

Smilla4

By smilla4

Robert Voors

By robert voors

Darlene Hildebrandt

By Darlene Hildebrandt

Nico Cavallotto

By Nico Cavallotto

Mark Gunn

By Mark Gunn

Christian Siedler

By Christian Siedler

Zeitfaenger.at

By zeitfaenger.at

Incase

By Incase

Oregon Ducatisti

By oregon ducatisti

?eagan

By ?eagan

Brookhaven National Laboratory

By Brookhaven National Laboratory

Margus Kulden

By Margus Kulden

U.S. Geological Survey

By U.S. Geological Survey

Kala Bernier

By Kala Bernier

Mikael T

By Mikael T

MFer Photography

By MFer Photography

Kylie_Jaxxon

By Kylie_Jaxxon

Samuel John

By Samuel John

Johan Neven

By Johan Neven

googletag.cmd.push(function() {
tablet_slots.push( googletag.defineSlot( “/1005424/_dPSv4_tab-all-article-bottom_(300×250)”, [300, 250], “pb-ad-78623” ).addService( googletag.pubads() ) ); } );

googletag.cmd.push(function() {
mobile_slots.push( googletag.defineSlot( “/1005424/_dPSv4_mob-all-article-bottom_(300×250)”, [300, 250], “pb-ad-78158” ).addService( googletag.pubads() ) ); } );

The post 19 New Beginning Images for a Fresh Start to the Year by Darlene Hildebrandt appeared first on Digital Photography School.


Digital Photography School

 
Comments Off on 19 New Beginning Images for a Fresh Start to the Year

Posted in Photography


Weekly Photography Challenge – New Beginning

11 Jan

As the first photography challenge of 2017, I thought it would be fitting if we go with a theme for new beginnings. Like these 19 images show – there are many ways to interpret that theme.

Francisca Ulloa

By Francisca Ulloa

Shellie

By Shellie

Weekly Photography Challenge – New Beginning

So, however you want to run with this idea is up to you. It could be about babies, kittens, or eggs. Or it could be around a new beginning you want for yourself this year. Maybe even a goal or resolution you want to achieve.

Share your images below:

Simply upload your shot into the comment field (look for the little camera icon in the Disqus comments section) and they’ll get embedded for us all to see or if you’d prefer, upload them to your favorite photo-sharing site and leave the link to them. Show me your best images in this week’s challenge. Sometimes it takes a while for an image to appear so be patient and try not to post the same image twice.

Micolo J

By Micolo J

Andy Reago

By Andy Reago & Chrissy McClarren

Craig Sunter

By Craig Sunter

Elycefeliz

By elycefeliz

Share in the dPS Facebook Group

You can also share your images on the dPS Facebook group as the challenge is posted there each week as well.

googletag.cmd.push(function() {
tablet_slots.push( googletag.defineSlot( “/1005424/_dPSv4_tab-all-article-bottom_(300×250)”, [300, 250], “pb-ad-78623” ).addService( googletag.pubads() ) ); } );

googletag.cmd.push(function() {
mobile_slots.push( googletag.defineSlot( “/1005424/_dPSv4_mob-all-article-bottom_(300×250)”, [300, 250], “pb-ad-78158” ).addService( googletag.pubads() ) ); } );

The post Weekly Photography Challenge – New Beginning by Darlene Hildebrandt appeared first on Digital Photography School.


Digital Photography School

 
Comments Off on Weekly Photography Challenge – New Beginning

Posted in Photography