RSS
 

Archive for the ‘Photography’ Category

A Step by Step Guide to Processing Portraits in Lightroom

03 May

Book covers 2 Every time we ask our readers what post production software they use to edit there portrait photography the most common answer is Lightroom. It’s no surprise either – it’s a powerful tool for editing and organising your photos.

However we know when we talk to our readers about Lightroom that while we all know it’s got amazing power that it can sometimes be overwhelming too. Many of you report knowing you don’t use Lightroom to it’s full potential and wish you had a guide to editing your portraits using the tool.

Today we’re excited to announce our new online course, “Lightroom Mastery: People & Portraits“.

If you’ve ever wanted to discover the secrets professionals use to perfect portraits in Adobe Lightroom, then this course is for you.

And for a limited time, you can access over 4 hours of Lightroom training… that’s 32 step-by-step video modules for a massive 50% off the regular price.

This brand new online course from professional photographer Mike Newton will teach you all the Lightroom secrets the pro’s use to retouch portraits and turn average shots into stunning creations.

Mike is a commercial photographer and has worked with clients ranging from Fortune 500 companies like Bayer and Metlife, technology companies like Uber, and clothing brands like Deckers Outdoor Corporation.

Checkout his intro video below to see what you’ll be learning.

No matter what level of Lightroom user you are, you will walk away from this course with huge improvements in the quality of your portrait edits and the speed of your workflow.

The best part is, Mike makes it super easy to understand.

In this course you’ll learn how to use the very best of Lightroom for photos of people including:

  • The adjustment brush
  • Radial filter
  • Cloning and healing brushes
  • Mike’s very own Lightroom editing workflow for editing portraits
  • Eyes and lip editing techniques
  • Teeth whitening tips
  • Skin editing techniques including blemish removal

Save 50% on this brand new Lightroom Mastery for Portraits Course for a limited time.

PS: as with all dPS products this course comes with a 30 day satisfaction guarantee. If for any reason you don’t find it suits your needs please contact our support team and we’ll arrange a refund.

The post A Step by Step Guide to Processing Portraits in Lightroom by Darren Rowse appeared first on Digital Photography School.


Digital Photography School

 
Comments Off on A Step by Step Guide to Processing Portraits in Lightroom

Posted in Photography


How to Choose the Right Monitor for Photo Editing

03 May

Photographers rarely think twice when it comes to buying expensive camera bodies or high-end lenses, but often seem willing to skimp on a monitor. Why is that? In many cases, it’s because one monitor appears very much like another, especially when purchased over the internet, which is how many of us shop for such things.

This article will help you know what you should look for in a monitor, and show you how to interpret many of the tech specs you’ll see when shopping online. Not so long ago, buying a monitor for photography was an expensive business, but today there is more choice available at every price point.

By Senado Federal

Panel Technology

One of the things you must think about when choosing a monitor is panel technology. The “panel” is the main part of the monitor — the screen. It includes polarizing layers, glass substrates, a liquid crystal (LCD) layer, and a color filter. It’s a high-tech sandwich.

The main difference between monitor technologies lies in the way the liquid crystals are oriented, which fundamentally affects the way your monitor behaves. Here are the main three panel types:

TN (Twisted Nematic) Panels

These type of panels are often favored by gamers for their fast response times, which reduces unwanted ghosting and blurring effects in moving pictures. The biggest downside of TN panels is that their viewing angles are greatly inferior to other panel types. If you move in front of the screen, the color and contrast are liable to shift in appearance. This flaw varies in severity between monitors.

Be aware that, in monitor specs, viewing angle numbers are highly misleading. They’re based on a lenient contrast test, so you should ignore the common claim that a TN panel has 170/160° horizontal and vertical viewing angles. Those figures bear little relevance to what you’ll experience when editing a photo.

Laptops are almost always made with TN panels, which makes them sub-optimal for photo editing in a perfect world. They’re more usable if you can fix your position in front of the screen and maintain a consistent viewing angle.

Macbook Air Notebook

Image from Maxpixel CC license.

IPS (In Plane Switching) Panels

Plane Switching panels are consistent in appearance from almost all probable viewing angles. In this respect, they are far superior to most TN panels and better than VA panels. IPS panels are also favored for their innately high-quality color reproduction. In most regards, a monitor with an IPS panel is better for photo-editing than one with a TN panel.

A drawback of IPS technology is a phenomenon known as “IPS glow”, which is a glowing effect that appears across much of the panel when viewing dark screens in subdued light. The more money you spend on an IPS monitor, the less likely you are to encounter this, but it’s probably fair to say that it’s more problematic for gamers. IPS glow is different to backlight bleeding, where light appears to seep out from the edges of the screen. That, too, is more likely in budget or mid-priced monitors.

There are various sub-categories of IPS panel, including S-IPS, e-IPS, H-IPS, and P-IPS. The basic benefits of an IPS panel apply to all of them, though the different types may vary in areas like color depth or response time. An e-IPS panel, for instance, is usually cheaper because it typically runs a lower color depth (i.e. 6-bit) than other IPS types. We’ll look at color depth anon.

Proprietary technologies that are similar in behaviour to IPS panels are Super PLS (Samsung) and AHVA (AUO).

VA (Vertical Alignment) Panels

These type are not considered as good as IPS in terms of their viewing angles or color reproduction, but better than TN panels in both respects. They are a kind of a happy medium. The technology is relatively rare, but still used by some of the leading manufacturers in a minority of displays (the proper word for monitors).

A VA panel typically has a bigger contrast ratio than an IPS panel, with an ability to display dark tones and blacks very effectively. Big contrast ratios are not always as desirable to photographers as they are to gamers, however, because they make it harder to imitate the dynamic range of a print when soft-proofing.

Standard or wide gamut?

Comparison between wide and standard gamut monitor color

Image courtesy Wiki-Media Commons.

There is no right or wrong answer when deciding whether you should buy a standard or wide-gamut monitor, but there are pros and cons attached to either choice. Let’s look at some of them:

Standard gamut monitor

Pros

  • Cheaper.
  • Wide variety of models available at all price points.
  • Doesn’t need immediate calibration and profiling (an OS monitor profile will truncate the color of a wide-gamut monitor).
  • Won’t display garish colors in non-color-managed programs.
  • Less prone to banding (usually offset by more color depth in wide-gamut).
  • Syncs okay with the output of most photo labs.
  • Smaller gamut might suit wedding or events photographers, for whom a large color gamut is less of a draw.

Cons

  • Not so good for color-managed inkjet printing, since the monitor gamut won’t encompass the color output of the printer
  • Less attractive, especially for landscape fans, who lose significant color particularly in cyans and greens

Wide gamut monitor

Pros

  • Just looks better, especially skies, sea, grass, foliage, etc. More colorful and more nuanced detail in cyans and greens – good choice for landscape shooters.
  • Much better for anyone wanting to soft-proof (preview) the color of an inkjet print, since the monitor gamut will cover the output of most inkjet printers.

Cons

  • More expensive.
  • Ideally requires immediate profiling, otherwise the OS monitor color will severely prune the monitor’s gamut.
  • Colors in non-color-managed environments will appear garish (e.g. Windows desktop).
  • More prone to banding, though this is usually countered by increased color depth.

Rather oddly, I run standard gamut and wide-gamut monitors side-by-side, and the difference in colors is marked. However, with monitors as with many other things, ignorance is bliss, you don’t miss what you never had.

Twin monitors

Image from unsplash CC license.

Aspect ratio, resolution, and screen size

Aspect ratio

You’ll find the cheapest monitors typically have a 16:9 aspect ratio, which is fine for watching movies, but a 16:10 aspect ratio is worth aiming for if you can afford it. The latter allows a little more vertical working space and, as Wiki observes, is a closer fit for the classic 3:2 ratio used in many photos.

Resolution

For many years, a myth circulated that said your photos should have a 72ppi resolution for the web. In fact, as most of us now know, a monitor screen is oblivious to image resolution. This is proven, if proof is still needed, by the fact that Photoshop’s “Save for Web” feature does not attach resolution to images, even though they appear as 72ppi when reopened.

Dot pitch

Image courtesy of Wiki-media Commons.

Although several factors may affect the sharpness of an image on your screen (e.g. contrast, anti-glare filters, viewer-to-screen distance), the central thing that dictates sharpness is the monitor’s pixel density, or dot pitch. A greater pixel density or a finer dot pitch is indicative of a sharper onscreen image, all other things being equal. If you google “dot pitch calculator” or “PPI calculator”, you’ll find an easy means of calculating the pixel density of any screen.

As an example, an average desktop monitor might have a pixel density of around 90-100 ppi, while the 27” 5K iMac with Retina display has a pixel density of 217 ppi. That’s impressive in a big screen.

An extremely dense pixel pitch tends to have a flattering effect on photos, just like every photo looks sharp on a smartphone, but isn’t a necessity for efficient photo editing.

Smartphone photo

Photo from Pixabay, CC0 public domain license.

Screen Size

These days, “bigger is better” seems to be the mantra when it comes to choosing a monitor. Of course, it is pleasant to view your photos on a big screen, but my advice is to buy what you can afford and don’t give precedence to screen size over other important attributes. Also remember that big screens need big resolutions to look as sharp as smaller screens from the same distance, so don’t be deceived by pixel dimensions alone. Scrutinize the pixel density, as outlined above.

Anti-glare Filters

Apart from Apple iMacs, nearly all desktop monitors are equipped with anti-glare filters for the obvious purpose of cutting out distracting reflections. This creates a matte finish to the surface of the screen. The degree to which this affects the sharpness of the screen image varies a lot, ranging from imperceptible to adding a noticeable grainy effect. You might make an analogy with glossy versus matte prints; the glossy print typically looks a little sharper.

An anti-glare filter is not something to be avoided in a monitor (almost impossible, anyway), but it is worth researching how much it affects the image in your desired screen before buying. Ideally, of course, it’s a good idea to get a look at a monitor before investing. Always check negative reviews when buying online.

Screen to print

Photo by Rawpixel CC license.

Color Depth

On to a slightly complicated subject, which we’ll attempt to keep simple. Color depth relates to how many distinct colors a monitor can display.

Theoretically, the more colors a monitor can display, the more smoothly it can reproduce gradual changes in tone and the less prone it is to frustrating “banding” or posterization effects (characterized by ugly pixelated blocks of color).

Most monitors on the market have one of the following two specs:

  1. 8-bit color (native)
  2. 6-bit color + FRC (2 bits)

The second of these uses dithering to create colors that aren’t there, which is theoretically inferior to a monitor that can natively display 8-bit color. A monitor with 6-bit color is more prone to banding problems, as previously described.

Note that calibrating a monitor increases the likelihood of banding, so more color depth offsets this and effectively makes a monitor more adjustable. Laptop screens nearly always use 6-bit color, so should ideally be calibrated conservatively.

You may see 10-bit color in more expensive monitors. This, again, could be genuine 10-bit color depth or 8-bit + FRC. Bear in mind that a 10-bit monitor can only display its 1.07 billion colors if 10-bit is supported by your graphics processor, software and video connection.

Hardware LUT calibration

Hardware LUT calibration is a fancy feature you’ll find in some high-end monitors from Eizo and NEC as well as a few consumer brands.

Monitor Eizo CG277 BK 27 inches

Image courtesy of Wiki-media Commons.

What is an LUT?

An LUT is a lookup table, which maps the input signals from your PC into, typically, 8-bit RGB color output from your LCD monitor.

In a monitor, greater color depth allows for smoother, more nuanced tonal transitions without banding. Like a monitor, an LUT may also vary in its color depth; the more colors it can process, the better the monitor will be at displaying smooth tones and precise color.

The above is true even if the final output is an 8-bit monitor, so a 10, 12, 14, or 16-bit LUT produces better color in an 8-bit monitor than an 8-bit LUT. The difference between a 10-bit and 16-bit LUT may be less appreciable.

Hardware Calibration

The type of hardware calibration under discussion here doesn’t refer to use of a hardware device like a Spyder. Instead of storing an 8-bit LUT in your video card, like most monitors do, expensive graphics monitors usually have a high-bit LUT built-in to their own hardware for more refined calibration. You’ll still use a calibration device to measure your monitor’s color, but the final color reproduction should be superior.

Expensive graphics monitors often allow you to store and switch between calibration profiles, so you can alter calibration settings with the click of a mouse using proprietary software. This is impossible in normal monitors, where calibration data is loaded into the video card LUT on startup and not changeable without recalibrating your monitor.

A Final Word

When choosing a monitor for photography, panel type is king. If you buy the best IPS (or equivalent) monitor you can afford, the other features are frosting on the cake. Good luck!

The post How to Choose the Right Monitor for Photo Editing by Glenn Harper appeared first on Digital Photography School.


Digital Photography School

 
Comments Off on How to Choose the Right Monitor for Photo Editing

Posted in Photography


6 Reasons Why You Should Use a Standard Lens for Street Photography

03 May

Henri-Cartier Bresson is well-known for his use of a 50mm lens, a standard lens on a 35mm film camera. If it’s good enough for Henri, then I guess it’s good enough for most modern street and travel photographers. When I worked at EOS magazine (Canon) we published an article about a photographer who traveled to India with nothing but a standard 50mm f/1.2 lens. His photos were beautiful.

But what is it about the standard lens that’s so appealing to street and travel photographers? I’m glad you asked! Let’s take a look.

Why You Should Use a Standard Lens for Street Photography

What is a standard lens?

A standard lens is a prime lens with a focal length roughly equivalent to the length of the diagonal measurement of the sensor (or film). A standard lens on a full-frame camera would have a focal length of 42mm. It is a lens that produces a field of view that is similar to the human eye or appears natural. 

In practice, the 50mm lens is considered the standard for full-frame cameras (although Pentax makes a 42mm lens). A 35mm or 28mm lens is standard for an APS-C camera, and a 25mm lens is standard for a Micro Four-Thirds camera.

I made all the photos in this article with a Fujinon 35mm f1.4 lens, a standard lens on my Fujifilm X-T1 camera. Standard lenses have lots of benefits. Here are some of them:

My Fuji 35mm f/1.4 standard lens.

1. Standard lenses are relatively small

Standard lenses are easy to design and make. The optical quality is superb. They are not big lenses and don’t require as many raw materials as larger lenses. They are inexpensive to manufacturer and the savings are passed onto the buyer.

But that doesn’t mean you should buy the cheapest standard lens you can find. You also need to take build quality, autofocus performance and weatherproofing into account when buying a standard lens. That $ 100 standard lens may look like a bargain, but you could easily end up wishing you had bought something better.

The small size of standard lenses is good news if you are going to be walking around for hours at a time taking photos. The lighter your kit the more energy you will have for photography.

Smaller lenses are also more unobtrusive when taking photos of people in the street. If you use a telephoto lens and point it towards somebody it’s obvious that you are taking a photo of them. But use a standard lens and you could be taking a photo of a building, the street, or the scene in general. You can take a photo of somebody without pointing the camera directly at them (as long as you’re not too close). You are much more likely to be ignored.

Why You Should Use a Standard Lens for Street Photography

I made this photo in Hangzhou, China with a standard lens. The girls didn’t notice me. It helped that they were totally engrossed in what they were doing.

3. Standard lenses have wide apertures

This is good news if you work in low light or like to use wide apertures for creative effect. If you like bokeh you’ll love using a standard lens. I used a wide aperture on my standard lens to make this photo. I deliberately focused on the dragon’s head and blurred the background.

Why You Should Use a Standard Lens for Street Photography

4. You can focus close to the subject

Most standard lenses are capable of focusing quite closely to the subject. That means you can take close-up photos without having to change lenses or use an extension tube or close-up lens. This ability, combined with the wide aperture, make standard lenses incredibly versatile.

You can step back from the subject and take a photo that includes plenty of the scene. Likewise, you can move in close and take a close-up. You can open up the aperture and create bokeh, or stop it down and get much more of the scene in focus.

The close focusing ability of a standard lens helps you create a variety of images that show both the entire scene to small details and everything in-between. It’s a great tool for building a body of work around your subject. I used my standard lens to create both these images below, taken in the same building in Beijing, China.

Why You Should Use a Standard Lens for Street Photography

5. Standard lenses teach you to see

When you use the same lens for an extended period of time you get to know it really well. You’ll understand how it sees the scene. You’ll know what to expect in terms of perspective and depth of field, and how that changes as you get closer to the subject.

There is nothing wrong with zoom lenses, but they add an extra element to the photo taking process as you have to decide what focal length to use. An 18-55mm kit lens, for example, can be very useful. But there’s also a dramatic difference between the 18mm and 55mm focal lengths in terms of composition and angle of view. Deciding which focal length to use wastes precious time, especially in a situation where something interesting is happening.

For example, in China, I often didn’t have much time to think. Something happened in front of me, like this boy posing for a photo, and I had to react quickly. A prime lens helped me do that as I didn’t have to think about focal length.

Why You Should Use a Standard Lens for Street Photography

With a standard lens (or any prime) you are committed to that focal length. You don’t have the option to zoom in or out. You can only change the framing by moving closer to or farther away from your subject. It simplifies the photo taking process and helps you create photos with simpler, stronger compositions.

6. Standard lenses occupy the middle ground

Telephoto lenses are great for taking photos of people from a distance, but photos taken with them can lack a feeling of intimacy as they are shot from a distance. It’s also harder to stop down and get the background in focus as well.

Wide-angle lenses are a real challenge as they tend to include too much of the background. It’s hard to create a simplified composition with a wide-angle lens, especially in the street where lots of things happen that are outside your control. You also need to get much closer to your subject, and may need to invade their personal space. It’s hard to do this and not have the subject react to you in some way.

Standard lenses occupy a good middle ground between these two extremes. You can get close to your subject without getting too close. You can create simpler and stronger compositions than you can with a wide-angle lens, but can still stop down and keep the background sharp.

This photo is a good example. I was fairly close to this couple. But, I if had been using a wide-angle lens I would have had to get even closer, invading their personal space and changing the dynamic. A photo taken with a telephoto lens would have a greater sense of distance and separation from the couple. In either case, I wouldn’t have made a photo capturing a candid expression like this.

Why You Should Use a Standard Lens for Street Photography

Your turn

What lenses do you like to use for street and travel photography? Are standard lenses part of your kit or do you prefer something else? Let us know in the comments – it will be interesting to see which lenses DPS readers prefer to use.


Andrew is the author of the ebook The Candid Portrait.

The post 6 Reasons Why You Should Use a Standard Lens for Street Photography by Andrew S. Gibson appeared first on Digital Photography School.


Digital Photography School

 
Comments Off on 6 Reasons Why You Should Use a Standard Lens for Street Photography

Posted in Photography


What Bugs You? 19 Images of Creepy Crawly Critters

02 May

With spring comes new life, growth, rebirth. It’s also time for the bugs to show up!

Those creepy crawly, flying, buzzing, annoying insects. But yet some of them are oddly beautiful as well. Let’s see some images of these creatures.

By Allxan.

By Mike Keeling

By Grozzle J

By Dinesh Valke

By Tibor Nagy

By Santanu Sen

By Markus Trienke

By uditha wickramanayaka

By Giuseppe Calsamiglia

By Robert Whyte

By Robert Whyte

By Ziva & Amir

By the_tahoe_guy

By Mike Keeling

By Mike Keeling

By coniferconifer

By Steve Bremer

By Mike Keeling

By John Flannery

The post What Bugs You? 19 Images of Creepy Crawly Critters by Darlene Hildebrandt appeared first on Digital Photography School.


Digital Photography School

 
Comments Off on What Bugs You? 19 Images of Creepy Crawly Critters

Posted in Photography


How to Plan a Successful Sunset Portrait Session

02 May

In this article you will get some solid tips for planning and executing a sunset portrait session. Learn how to take the images that you and your subjects will love.

Planning sunset portrait session 01

Plan ahead for a successful sunset portrait

Many photographers feel overwhelmed when they start photographing portraits, professionally or for fun.

Where should I shoot? How should I pose people? What lens should I use? What settings should I be using? When should I move them to/from a great spot? What should I say to get great emotion?

A plan will give you confidence and help alleviate some of the immediate pressure of decision making. It’s not restrictive because often the best shots are unplanned, but rather something to give you confidence and a direction to fall back on when you aren’t feeling inspired.

Here is our rough plan for all of our sunset shoots, whether it be an engagement, part of a wedding, family portrait, maternity, or outdoor newborn session. Our sunset portrait sessions are always planned approximately one hour before sunset.

This plan’s purpose is twofold – it not only helps you have more confidence and direction, but will also help you make the most of your location and sunset lighting.

Planning sunset portrait session 04

STEP ONE: ARRIVE EARLY TO SCOUT

Plan to arrive at least 20-30 minutes early to scout a new location. You never know what amazing little lane or spot may be just around the corner, so it’s worth taking some extra time to explore. It’s also nice to arrive before your client so that you can make them feel welcome upon their arrival.

STEP TWO: ASSESS THE LOCATION

Start to assess the location by asking the following questions:

Where are some nice shady spots to begin? Shady spots are perfect to start off with while the sun is still bright and harsh.

What is the highest point at the location? If you are at a hilly location, this is where you will be able to capture the final moments of sunset and make the most of the golden light.

Where is the most impressive spot for sunset? This is where you want to end up – so it should be last on your route.

With these questions answered, you can very roughly map out a planned route. This means you’ll always have a direction to head and will be able to lead the clients confidently around the location.

Planning sunset portrait session 07

STEP THREE: SHOOT FOR THE BEST LIGHT

To make the absolute best of the sunset lighting, you can follow the same sort of pattern every shoot (in this order):

  1. Shade shots
  2. Filtered Light shots
  3. Silhouette shots
  4. Sunset shots
  5. Dusk shots

Let’s put your plan into practice, assuming sunset is 6 pm:

4:40 pm – Arrive, scout the area and assess the location.

5:00 pm – Your client arrives and is briefed about the fun time they are going to have!

5:10 pm – SHADE SHOOTING

Get straight into shooting in the nice shady spot you already found. We love to knock out some more formal shots like these here, as usually these are photos clients love, but don’t want big on the walls. Save the more impressive lighting for landscape shots.

Planning sunset portrait session 02

Planning sunset portrait session 03

5:25 pm – FILTERED LIGHT SHOOTING

You can then move on to any shots where you want the sun in the photo, but you can filter the light through the trees. (Read our past article on four different ways to filter sun flare in this article: How to Control Sun Flare in Your Photos). Photos such as these:

Planning sunset portrait session 05

Planning sunset portrait session 06

5:40 pm – SILHOUETTE SHOOTING

Roughly 10-20 minutes before sunset is usually the best time to try a silhouette. As silhouettes require you to shoot at a very low angle, you won’t be able to match up the height of the sun with the clients’ feet if you wait any longer. You can read our article on capturing silhouettes here.

Planning sunset portrait session 08

Planning sunset portrait session 09

Planning sunset portrait session 10

5:50 pm – SUNSET SHOOTING

At this point, the light will be golden – so you want to be at your final spot. Do all you can to make this most of the beautiful soft light – you can even position your clients out in the open if you know how to control sunflare. We try to take a variety of photos at this time – a landscape, waist-up, and close-ups. That way, we can create wall art sets that all have the same sunset colouring.

Planning sunset portrait session 11

Planning sunset portrait session 12

Planning sunset portrait session 13

6:00 pm – DUSK SHOOTING

The sun has set, but you still have a glorious window of 15 minutes where you can capture the gorgeous colours of dusk. Because the sun is no longer emitting harsh light, you can now use the whole other side of the location! Areas that were previously too lit by the sun can now be shot in the soft light of dusk.

Planning sunset portrait session 14

Planning sunset portrait session 15

Planning sunset portrait session 16

6:10 pm – DONE!

This plan is designed to give you some structure if you are lacking confidence and direction for your sunset portrait photo sessions. It will help you get the most from the sunlight, and effectively manage your time during the shoot. Of course, being photographers, we’re all for creativity, so breaking the rules is great once you have more confidence.

Please share your sunset portrait images in the comments below.

Planning sunset portrait session 17

The post How to Plan a Successful Sunset Portrait Session by Alana Orth appeared first on Digital Photography School.


Digital Photography School

 
Comments Off on How to Plan a Successful Sunset Portrait Session

Posted in Photography


How to Start and Finish a Photography Project

02 May

A comment I get a lot on my workshops is how hard it is staying motivated to take photos on a regular basis, especially when your time and attention is being dragged away by all of the other things in life – work, family, living! I find one of the best ways to remain motivated and to have a regular feeling of achievement, is to do a photography project.

photography project

Benefits of doing a photography project

What I love about a photography project is that I have a focus to my shooting. If I manage to grab a few hours on a Saturday afternoon to go out, I know what I’m looking for, I have an instant place to start. I am not faffing around thinking – where should I go today, what should I shoot?

I also find that a project encourages me to do more photography because I am thinking more about my images and the project itself. Even when I am not thinking consciously about it I know that it’s percolating in the back of my mind. I sometimes daydream about my photography project, ideas for it will suddenly pop into my head – all as I am going about my daily life.

How to Start and Finish a Photography Project

Motivation and a sense of accomplishment

Having the focus of a project is an easy way to get myself more involved with my creativity, and that to me is super exciting. The more creative I am, the more involved I am with creating and not just doing (doing is all the other stuff, mending the broken washing machine, writing emails, talking to my accountant), the happier I am. It’s simple.

I also love to have a sense of accomplishment that comes not from a bunch of nice images, but from a collection, a story, something that I can refine and develop. Photography projects also show me where the weak spots are in my work – because I am not just reacting to what’s around me, I am pulling my skills together to create something compelling. That drives me to work on the skills I need to develop.

How to Start and Finish a Photography Project

Now starting – and finishing – a photography project is not always a straightforward process. So here are my tips about how getting a project off the ground, and the ever important issue of getting it finished!

Let’s start with your subject

Picking a subject is, of course, the most important first step. There are endless choices, endless ways to shoot, and endless ideas. For me this is the toughest stage, nailing down the subject and the concept of the project.

I want my subject to be something that is new and exciting to me. I want to put my own stamp on the subject, to say something new and fresh.

How to Start and Finish a Photography Project

Here is what I consider when picking a subject:

1) Passion

Creativity is piercing the mundane to find the marvelous. Bill Moyers

This is the most important criteria for me in picking a project. I need to be super passionate about what I am shooting, not only because that will help me get great shots but also it will keep me motivated to create a good body of work, and finish it.

The world is littered with unfinished projects, don’t let yours be one! So ask yourself this – are you really passionate about your proposed subject? Does it really excite you?

How to Start and Finish a Photography Project

Sometimes it seems like a project idea is amazing, but once you get started you realize it is too difficult to execute or it’s not what you thought it was going to be. No problem, just move on and start again.

2) What do you love outside of photography?

My favorite projects are usually things connected to what I love to do outside of photography. When you combine two passions then there’s brilliant potential.

I love exploring cities – most specifically at dawn when the light is beautiful and the streets are usually quiet and empty. I love the urban landscape – but I don’t really like crowds! So this is why I can go out day after day, year after year, to the same places in my city, or in other cities around the world, and take photos. It’s combining two things I love.

How to Start and Finish a Photography Project

Being in nature and lying on beaches also inspires me – but not as much as the urban landscape. For me nature is all about relaxing – so your subject has to be something you love and you find compelling to photograph.

How will I shoot this project?

Once you have some ideas for a subject, start thinking about how you want to shoot it.

What is your vision? For example – will it be color or b&w, reportage or posed portraits, epic landscapes etc.? Will the photos have a similar look and feel? What do you want the photos to look like?

How to Start and Finish a Photography Project

Gear

Also thinking about your kit – what lenses will you be using? Do you need any special equipment? This kit and equipment issue can be a tricky thing because you can stall on a project forever if you get too focused on gear that you don’t have. I have delayed projects for months because I became fixated on getting certain special equipment together, or having too many challenging arrangements to make, so in the end they never came together.

If you are new to doing projects I advise you to only shoot something you can do with the equipment that you have already. Make it as simple as possible to just get started.

Choose a subject that is accessible

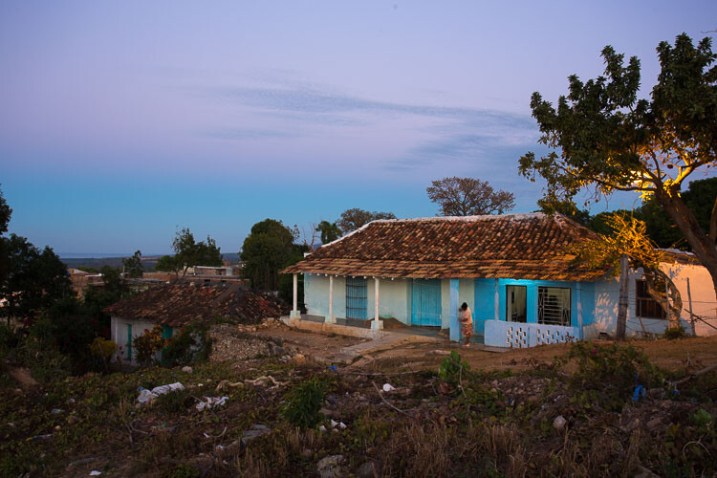
The photos in this article are from a new project I recently started in Cuba. This is not an accessible place for me as I live in London – and I’ll only be shooting there a couple of times a year until I’ve finished my book about Havana. So I also have a project that is closer to home. That way when I am not traveling I have something close by to keep me focused and inspired.

How to Start and Finish a Photography Project

I think a lot of people rely on taking photos when they are outside of their normal day to day life, when they feel more inspired because they are somewhere new and different. Ultimately, though, getting inspired by the world that is immediately around you is much better training for your photography. If you can make something interesting of a scene you see every day, then you can definitely take an interesting photo of anything.

Don’t have too many projects going at once, though. If you are new to doing projects I’d recommend you start with just one.

Consistency is crucial

The more regularly you take photos, the quicker seeing and thinking like a photographer will become part of you. It’s just like going to the gym – regular consistent work results in the biggest overall impact.

How to Start and Finish a Photography Project

Creativity is a habit, and the best creativity is a result of good work habits. That’s it in a nutshell. – Twyla Tharp

Will I realistically have time to shoot this?

All of the points so far have been about refining the possibilities so it makes it easier for you to pick a subject for your project.

Working out the time to do it is a very simple point, but it’s super relevant. Are you going to actually have time to shoot this on a regular basis? You need to keep that creative juice flowing and if you aren’t shooting regularly you will lose your ability to stay inspired and be in the flow with your project.

How to Start and Finish a Photography Project

Keep it realistic – if you only have three or four hours a month, then that’s it. Plan to fit it in easily with your life.

Move out of your comfort zone

Step out of your comfort zone. Comfort zones, where your unrealized dreams are buried, are the enemies of achievement. – Roy T. Bennett

It’s super easy to get in a rut with your photography – shooting similar subjects in similar ways. Telling yourself – this is what I’m good at shooting, or this is what I love doing. While I encourage you to really dive deep into a subject and develop your own style, make sure you are not using it to limit yourself.

How to Start and Finish a Photography Project

Staying where you are comfortable in your photography is not where you are going to find yourself taking stunning, amazing photos. What you’ll be taking are photos that are just like the ones you took yesterday, last week, last year. Photographers need to keep developing and that often means pushing yourself out of your comfort zone.

Don’t park… Arrival is the death of inspiration. Ernst Haas

If you want to do something new, something fresh, something unique – you have to move away from the safety of what you’ve always done, and move toward things you’ve never done before.

For me that’s been things like asking strangers if I can photograph their bellies (scary!), to travelling to new places or accepting commissions for big projects (weirdly it can often be more stressful getting paid to do a very creative job than doing it for yourself. After all, if you come back with a terrible personal project it just sucks for yourself.)

How to Start and Finish a Photography Project

Are you in your zone?

Photography doesn’t always have to be done outside of your comfort zone. Just keep an eye on the things you are choosing to photograph and making sure that you aren’t always playing it safe.

When you ask yourself what you really want to photograph and you come up with something that is both exciting and a little terrifying, that’s great! Then you definitely have something that is going to be interesting for you to explore. The line between being comfortable shooting and being on the edge of your comfort zone is a fine one.

Plan your project – but leave room for spontaneity

I couldn’t find the quote but I’m pretty sure that Napoleon said that you always want to go into battle with a plan, but that you’ll never follow the plan once you’re in battle. It’s the same with photography!

How to Start and Finish a Photography Project

You want and need a plan for how you are going to get this project going. Just don’t be afraid to adapt as the creative forces start working when you are out there shooting. I’ve sometimes had projects totally change shape, even the subject, while I am shooting.

Be open to change and adapt

For example, when I shot my first book, London at Dawn, I thought the book would be all about the workers who are up at 4 am and what they were doing. You know, the market traders, the cleaners, the bus drivers. It seemed like a really cool angle.

When I started shooting, though, not only are people really hard to find at dawn, and are usually inside buildings, and what I discovered was that the light of sunrise and the empty streets were way more interesting to me than tracking down people inside buildings working. I wanted to capture all this quiet and beauty.

How to Start and Finish a Photography Project

Make a project description

I like to have a basic description of my project before I get started which acts as my vision, the essence of my plan. To give you some ideas about how to do this, here are some descriptions of projects that I’ve done:

  • The Homeless World Cup: Create beautiful, colorful portraits of homeless football players that echo the powerful persona of the subjects in sports advertising. Pose subjects in strong and proud postures which, combined with the colorful backgrounds, promote a positive message about the homeless football players and the tournament.
  • Arboreal Dreams: An abstract exploration of trees inspired by my childhood memories of lying on the grass and staring up at trees for hours on end. The look of the photos will be dream-like and surreal, just as my childhood memories are, with the trees morphing into different shapes.
  • The Belly Project: The belly is an under-photographed part of the body (in my opinion) and rarely displayed (unless it’s in perfect condition). It’s often a source of personal dislike. I say free the belly! This project will be shot out on the street in a fun, spontaneous, and candid style. I will approach people with all kinds of bellies – and explore what lies hidden under people’s shirts.

How to Start and Finish a Photography Project

Can you see how in these short descriptions I covered what was interesting to me about the subject, how I wanted to shoot it and the style I would use? This is the kind of thing you want to end up with.

Is it a short term or long term project?

When starting out, I find many people aim to tackle these really big subjects that will take a year or two. That’s totally cool, but it’s really hard to sustain momentum for a two-year project. Even professionals find it difficult – well, I know I do! Life always gets in the way and distracts you from your project.

I think a short term project is the best place to start. Then as you build the skills for completing projects, you can extend yourself.

How to Start and Finish a Photography Project

What are you hoping to achieve with this project? What is the end result you hope to see? To give it to a friend, put it on social media, hang it on your wall, make a book? How many final images will you have?

These all sound quite specific but I find that when I ask these questions they help me to refine why I am doing a photography project, and the more refined I am the easier I find the project is to shoot.

Ultimately, I want to end up with such a good vision for my project that I can almost see the photos before I even step out the door. Of course, things will develop and change but working out these details really helps me when I am out there in the world faced with the actual – so where do I begin?

How to Start and Finish a Photography Project

The power of the deadline

Deadlines are the single best motivation for me to finish a project. To be honest, I rarely feel that I am totally finished. I could go on forever with most projects – there is always more to shoot, there are always more ways to make it better (even if that’s just in my mind). I do, though, like to get to the end and feel a sense of accomplishment, having something to tell the story of the subject I’ve been shooting.

The world is littered with unfinished creative projects of all types. Don’t let yours be one of them! A deadline is an amazing way to help you get it finished. You can pick a time frame – a year, a month, or 6 months. You can also create other deadlines by agreeing to do a project at the same time as a friend. Or by committing to creating a project before Christmas or for an exhibition.

Now – get started!

An idea that is developed and put into action is more important than an idea that exists only as an idea. – Edward de Bono

How to Start and Finish a Photography Project

This is where I get stuck all the time. I often have an amazing concept for a project, and I can see it in my mind. Then I try to get started, and… I procrastinate. This is often because I am waiting for perfect timing – be it the perfect light, perfect models, or a perfect day. All that thinking about perfect ends up feeling totally intimidating. So I have to say to myself – don’t wait for perfect conditions, they don’t exist! Don’t wait for more time, it won´t come.

It won’t be perfect straight out (or maybe even ever!) Perfectionism is the true enemy of creativity. Now think ahead to a few months from now with a finished photo project in your hands that you are showing people. It will feel awesome to know you created something from nothing, a photo project that is all about your passions and creativity. All you have to do now is get started.

Do whatever brings you to life, then. Follow your own fascinations, obsessions, and compulsions. Trust them. Create whatever causes a revolution in your heart. – Elizabeth Gilbert

I’d love to know what you think and if you plan to do a photography project this year, or may you are doing one now. Let me know in the comments below.

The post How to Start and Finish a Photography Project by Anthony Epes appeared first on Digital Photography School.


Digital Photography School

 
Comments Off on How to Start and Finish a Photography Project

Posted in Photography


Weekly Photography Challenge – Insects

02 May

Earlier I share 19 images of bugs for you to use as inspiration.

By wsquared photography & creative

By Craig D

Weekly Photography Challenge – Insects

Time to get outside and find some bugs to photograph. Go macro if you’re so inclined. Here are some articles to help you out:

  • 4 Tips for Photographing Bugs and Insects
  • How to Get Stunning Macro Photos with Your Mobile Phone
  • 10 Tips for Photographing Dragonflies
  • Backyard Macro Photography Safari
  • Behind the Scenes of Marvellous Macro Insect Imagery

By trekchina0907

By LadyDragonflyCC – >;<

By Stefano

Share your images below:

Simply upload your shot into the comment field (look for the little camera icon in the Disqus comments section) and they’ll get embedded for us all to see or if you’d prefer, upload them to your favorite photo-sharing site and leave the link to them. Show me your best images in this week’s challenge. Sometimes it takes a while for an image to appear so be patient and try not to post the same image twice.

Share in the dPS Facebook Group

You can also share your images on the dPS Facebook group as the challenge is posted there each week as well.

The post Weekly Photography Challenge – Insects by Darlene Hildebrandt appeared first on Digital Photography School.


Digital Photography School

 
Comments Off on Weekly Photography Challenge – Insects

Posted in Photography


10 Tips for Advanced Lightroom Users

01 May

If you’ve been using Lightroom for a while maybe you’re ready to take your processing to the next level. Here are 10 tips for advanced Lightroom users and professionals, brought to you by Photos in Color:

Some of the tips they mentioned reference such topics as these:

  • How to Create Your Own Lightroom Presets
  • New Graduated and Radial Filter Features in Lightroom 6
  • How to Understand the Lightroom Tone Curve
  • How to Create an Effective Workflow and Image Organization
  • Four Advantages of Using Lightroom Collections
  • 12 Creative Photography Project Ideas to Get you Motivated
  • How to Experiment with Different Editing Styles to Find Your Own

There’s more, just watch the video and apply to them to your work now.

The post 10 Tips for Advanced Lightroom Users by Darlene Hildebrandt appeared first on Digital Photography School.


Digital Photography School

 
Comments Off on 10 Tips for Advanced Lightroom Users

Posted in Photography


How to Use Monochrome Color in Photography

01 May

Although photography is relativity new in terms of history, color still provides us with the opportunity to convey meaning and draw the eye. Monochromatic pallets take color photography to the next level.

From the origins of color photography, photographers have honed in on the emotional bond humans have with color. First used in prehistoric cave paintings, red ochre is one of the oldest pigments still in use. Blue was popular in Egypt and later in the medieval era to depict the delicate robes of deities. Fast forward to the present and we are surrounded by the same array of colors that impressed our ancestors. The difference now is only that we are able to harness it for our own uses with much greater ease.

How to Use Monochrome Color in Photography

What is monochrome color?

Black and white photography (which renders a photograph in varying degrees of gray) is the dominant example of monochromatic photography. You may be surprised to learn, however, that monochromatic photography is not limited to black and white.

A classic example is sepia, the warm tone that is reminiscent of aging photographs. Over time, sepia slowly claims the tones of black and white images and transforms them into shades of reddish-brown instead.

Basically, any photograph containing only the hues or tones of a specific color are considered monochromatic. A photograph can be organically similar in tone or edited in post-production by adjusting the blending mode of a solid colored layer. Either way, monochromatic photography is about prioritizing color to enhance mood and atmosphere.

How to Use Monochrome Color in Photography

Red

The color red traditionally conveys vigor, love, anger and valor  – all of which are passionate emotions. The blood vessels in our face expand in times of stress making our cheeks flush red. We bleed red blood when we are hurt. When suffering from lack of sleep (or hay fever) we even develop bloodshot eyes. Red has a unique physical relationship with the human body. We are attracted to it because we are so familiar with it in ourselves.

Red also catches our eye so effectively because it triggers an evolutionary response. As humans evolved, we came to understand red as a color that could portend danger. The color which drew the watchful eye of our prehistoric relatives registers as an attention-grabbing color in the modern day. An example of this is red stop signs or signs warning of danger. Photographers can use this evolutionary connection to catch a viewer’s attention quickly and hold it for longer.

How to Use Monochrome Color in Photography

Monochromatic red conveys unease or unrest but also appears more gentle in nature with the change of seasons. It’s boldness contrasts pattern and texture, and blends with darker shades to lend the illusion of voyeurism or intimacy.

How to Use Monochrome Color in Photography

Orange

Sharing properties with yellow and red, orange is a versatile color most often associated with heat, health, and strength. It encourages extroversion and activity. Red, yellow and orange combine to depict flames and desert landscapes. Orange pumpkins carved out at Halloween lend their color to the annual festival. Red squirrels are actually orange, as is the red fox. The tiger, striped with orange lends its reputation of courage to the color itself.

How to Use Monochrome Color in Photography

A monochromatic orange color scheme could indicates sunset to a viewer.

In the color version of the “chicken or the egg” scenario, the color orange is believed to have been named after the fruit, not the other way around. In ancient Egypt, artists used orange mineral pigment for tomb paintings, and medieval artists used the pigment to color manuscripts. Before the late 15th century, Europeans had no specific name for orange, calling it yellow-red instead. Portuguese merchants, trading orange trees to Europe from Asia also imported the Sanskrit word “naranga” which evolved into “orange” in English.

Orange in photography is atmospheric and dense, but like red, it can also indicate danger or the need for caution. Because of its associations with sunsets and autumn, orange is useful for alluding to the time of day or the season. It can lend energy to a photograph, but its warm tones can also emphasize relaxation and warmth, reflecting the warmth of a fire or candle flame.

How to Use Monochrome Color in Photography

Orange can remind the viewer of the sweet fruit that shares the color’s namesake.

Yellow

Yellow is the color of joy, spontaneity, and laughter! As the color of the sun, yellow lends vibrancy to a photograph, creating lightness and a sense of ease. Alongside red, prehistoric cave paintings were decorated with yellow ochre and ancient Egyptians used yellow in elaborate tomb paintings to represent gold. The painter Vincent van Gohn was a great admirer of yellow, describing the color to his sister in a letter saying, “The sun, a light that for lack of a better word I can only call yellow, bright sulfur yellow, pale lemon gold. How beautiful yellow is!”

Our predominantly positive associations with the color yellow mean that photographers can convey scenes of happiness more effectively with color. Although darker yellows can be associated with autumn, lighter tones are associated with spring, renewal, and clarity.

Highly discernible from any background, yellow is useful for safety purposes. Bright yellow high-visibility jackets and reflectors are worn universally as a safety precaution. However, yellow’s vibrancy can prove to be fatiguing on the eyes, which could be the reason why jarring shades of yellow are sometimes associated with unease and anxiety. Try balancing yellow out with negative space or a range of soft yellow tones to avoid over-saturated photographs.

Green

In some cultures, green denotes jealousy and sickness. In others, it represents wealth or a lack of experience. Overall, however, most would agree that the dominant association of green is with nature. Green’s associations with health and growth stem from the life cycle of trees, seeds, fruit, and vegetables. Its ties to nature have even been borrowed by environmental groups who aim to preserve the natural environment.

Some scientists suggest that the calming and centering nature of the color green is due to the composition of the human eye. Our eyes have three types of receptors called cones, each dedicated to a particular wavelength – red, green or blue. Two of the three types of cones have a reasonably high degree of sensitivity to the green wavelength. When color information is relayed to the brain, the majority of that information is about green. This means that we are able to decipher variations in green tones much more effectively than we can for other colors which make the color more dynamic to a viewer.

Often green has been described as having a calming or even hypnotic effect due to its tonal variations. Monochromatic green color allows photographers to create densely rich imagery that appeals to our eyes and our emotions.

Blue

Blue is another color that has strong associations with nature. It is an incredibly changeable color, with perhaps the most diverse connotations. Overwhelmingly selected by many as a favorite color, blue speaks to many with the emotion even a picture cannot fully dictate. Interestingly, the distinction between blue and green as separate colors is not universal. For example, ancient Japanese people used the word “ao” as a blanket term for both green and blue. Modern Japanese has a separate word for green – midori – but the boundaries between the two colors is not as cleat-cut as that of English speakers.

Blue can convey sorrow, depression, harmony, relaxation, or modernity. When fluorescent, it can lend a scene of other-worldly surrealism. It’s a color that is often tied to internal emotion. A monochromatic blue scheme can subtly allude to a subject’s state or emphasize detail.

With the invention of new synthetic pigments in the 18th and 19th centuries, impressionist arts began to observe the color that existed in shadow. It became the favorite color of impressionist painters to convey nature, mood, and atmosphere. Later Picasso, realizing the emotional effect of blue tones, began to paint only in blues and greens after the death of a friend.

Pink

Often associated with young love, spring time, sensitivity, and femininity, pink takes its title from a flower of the same name. Ancient poets of Rome described the color in their verse, and Renaissance artist Raphael depicted baby Jesus presenting a pink flower to his mother Mary.

The luxurious hue of the color pink has perhaps been most stunningly captured by the films of director Wes Anderson. The rich wedding-cake pallet of movies such as The Grand Budapest Hotel are heavy with the atmospheric luxury and manicured design. But Wes Anderson’s color pallet is also somewhat stifling. The constant presence of the color pink becomes claustrophobic for the characters who inhabit the hotel. It’s presence, depicting traditional ideas of femininity is beautiful and smotheringly repetitious.

Because of its strong associations of softness and joy, pink can be used ironically to contrast darker imagery teetering between dark surrealism and a sweet dream.

Purple

Because of its associations with lavender, many cultures have come to view purple as the color of health and relaxation. As an intermediate between blue and red, purple is a color that stimulates contemplation but doesn’t belie a greater sense of sorrow as blue.

As the process for obtaining the color purple was long and laborious. Only royalty, nobles, kings and priests of the Mediterranean and Eastern Europe wore a very rich strain of purple dubbed “Tyrian purple”.  While purple was worn less frequently by Medieval and Renaissance kings and princes, it continued to be worn by professors of Europe’s new universities, hence the association with wisdom.

While purple is readily available nowadays, it can often be a contentious topic of discussion. In my days of retail, I learned from discerning customers that purple is a color you either love or hate. While I consider myself a fence sitter in the matter, I can understand the passion that the color purple stimulates, worn by the wisest and often the most mysterious individuals in history.

Conclusion

So how do you use monochrome color in your photography? Use this information to use color to add mood and feeling to your images. Please share your monochrome images in the comments below.

The post How to Use Monochrome Color in Photography by Megan Kennedy appeared first on Digital Photography School.


Digital Photography School

 
Comments Off on How to Use Monochrome Color in Photography

Posted in Photography


5 Tips for When You Feel Inadequate as a Photographer

01 May

Frustrating isn’t it? No matter what you do, some days you just don’t feel like a photographer. You feel like hanging up the camera for good because you ask yourself, what’s the point of it all? In other words, you feel sorry for yourself because you feel inadequate even calling yourself a photographer. Well, the good news is that you are not alone even if it seems that way.

Go on Facebook and Twitter and all you see are people showing you how great and happy their life is. Seems like every one of these photographers has their stuff together while you, poor soul, do not. The funny thing is, from time to time all of those social media superstars post something that reveals a different picture: Sometimes they are not happy, sometimes they are downright depressed.

5 Tips for When You Feel Inadequate as a Photographer

See, here’s what nobody tells you; feeling down about yourself, your work is an integral part of the creative process.

“I am not a painter.” Guess who wrote that in his diary? Michelangelo. No, not the Ninja Turtle, but one of the best painters that ever lived. It’s crazy to think such an able artist would have so much self-doubt, no? What do you need to DO if you feel so much self-doubt or inadequate that you just want to abandon your camera? Let’s find out.

The impostor syndrome

Ever felt like you are pulling a con on everyone by calling yourself a photographer? Afraid of one day being “found out”? Feel like a total fraud? All of these are symptoms of something called the impostor syndrome. It’s the failure to accept your achievements. And the crazy part? So many suffer from that specific syndrome:

Sometimes I wake up in the morning before going off to a shoot, and I think, I can’t do this.  I’m a fraud. – Kate Winslett (Titanic actress)

I have written eleven books, but each time I think, “uh oh, they’re going to find out now. I’ve run a game on everybody, and they’re going to find me out.” – Maya Angelou (Famous author)

How do you conquer those feelings of being a fraud? I personally have a written list of my accomplishments and also of nice comments people have made. When I feel down, I read them all and the impostor syndrome symptoms usually fade away. BUT, I hear you say, “I don’t have many accomplishments!”

That’s probably not true, learning things like Aperture, Shutter speed, ISO and more are achievements. Making a better picture than you did yesterday is an accomplishment. You have to cut yourself some slack and give yourself credit where it is due. Always remember that when you feel like an impostor, it’s a syndrome, that doesn’t mean it’s true.

The thing about feelings

That leads us to the “thing” about feelings. You see, feelings are not truth, but opinions. Just because you don’t FEEL like a photographer doesn’t mean you aren’t. You can’t control feelings, they come and go on a whim. But what you CAN control, is accepting or rejecting them. The Good Book says, “Guard your heart with all diligence for out of it flows all the issues of life.” Meaning, watch what you tell yourself, it’s what you accept as true that will make the difference.

You just blew something. Feelings calling you a loser start popping up. You can either accept those feelings or chose to reject them. You are either a slave or a master of your feelings. If you start feeling like you are not a photographer, chose to ignore them.

The heart of photography

One thing that might make you feel really bad about yourself is the perceived success of other photographers. Just look at them. Thousands of likes, and popularity. You? Two likes, including one from your family member. You Facebook and you Tweet to only get silence in return. So what?

When feeling down about yourself remember what truly matters in photography is not the likes, the popularity, the accolades, or the gear you own. It’s the images. They are what matters most. Nothing illustrates this more than a quote from the movie Amadeus. Salieri, when he heard a piece of Mozart said, “I was staring through the cage of those meticulous ink strokes at an absolute beauty”.

Nothing illustrates this more than a quote from the movie Amadeus. Salieri, when he heard a piece of Mozart said, “I was staring through the cage of those meticulous ink strokes at an absolute beauty”. Salieri enjoyed financial success and high status while Mozart was often in poverty and rejected…but his music, his music was prodigious! He had fame and fortune…but what he didn’t have was what really mattered the most, Mozart’s skills.

Look, I’m not saying you or I are like Mozarts of photography, but you have to decide what really matters to you in photography. If that’s success in accolades, then go seek that. But if it is a success in making great images that matter to you, then do not feel bad if you do not get the response you seek. Being a good photographer and being popular are two different beasts. One comes from knowing photography, the other how to market yourself. It’s pretty well known that Van Gogh died an unknown artist, but he was a great artist nonetheless.

Change things up

Sometimes feeling down about your work is a function of redundancy. It’s the same old same old, every day. That might be a good time to change things up a bit. If you shoot color, try black and white. If you shoot film, try digital. One tried and true way they shake things up in art school is that they give you a subject to draw. But they want you to draw it upside down so that it shakes up your brain.

Also, try to change your subject matter. If you shoot family stuff, try street photography. If you shot sports, try landscapes. This is one of those things where you cannot know where it leads until you try. You might realize that what you have been shooting up until then was not something you actually liked!

Commit yourself

The brain goes into overdrive when you limit it in certain ways. Hence, commit yourself to certain things for a definite amount of time. Say you have a 15mm lens that’s been gathering dust. Commit to using only that lens for a month.

Or you can commit yourself in another way by simply starting a project. A project forces you to come up with patterns and links between the images. Plus it has the added effect of boosting your self-esteem because a complete project feels more substantial than one-off images. Plus if you make a project that is thematically close to you, you’ll be more connected to it, making it even more probable for you to make better images.

Conclusion

When Michelangelo wrote, “I am no painter.” in his diary, he had two choices – to ditch the brush or to press on. The world knows his work simply because he chose to press on. He moved beyond those feelings of inadequacy and ended up being stronger.

In everything, there are always hurdles of self-doubt. While many see them as negatives, I see them as tests. It’s like a guardian staring you in the face and asking you, “Are you SURE you want to continue? Do you REALLY want to be a photographer?”

So…let me ask you, how bad do YOU want it? Be yourself, stay focused and keep on shooting. Share your tips for getting out over your feelings of inadequacy in the comments below.

The post 5 Tips for When You Feel Inadequate as a Photographer by Olivier Duong appeared first on Digital Photography School.


Digital Photography School

 
Comments Off on 5 Tips for When You Feel Inadequate as a Photographer

Posted in Photography