RSS
 

Archive for the ‘Photography’ Category

Weekly Photography Challenge – Light Painting

14 Oct

Earlier I rounded up a couple videos on how to do two very different styles of light painting. You can see them here. Below are two images of my own where you can see the two different techniques and the results.

In this image, I have light painted the building with a regular flashlight.

This shot is a combination of 3 people doing the light painting to make this happen. One on the building with a flashlight, another on the train tracks with an orange colored wand, and me on the wagon making the funky shape.

Note: the image above was done using some special tools. Read this for more info: Review: Light Painting Brushes – Tools for Creativity.

Weekly Photography Challenge – Light Painting

Before you give up before you even start, assuming this is too hard for you – wait!

Light painting does not have to be hard at all, and I’ll give you some articles to check out that can help you. But you can keep it simple and try a sparkler like this:

Or a cell phone which was used to light up the car in this shot.

If you need more help try these articles:

  • How to do Light Painting with a Piece of Fruit and a Cell Phone
  • Beginner’s Guide to Light Painting
  • Light Painting Part One – the Photography
  • Light Painting Part Two – Photoshop
  • How to Make Unique Portraits Using Light Painting
  • How to do Light Painting Photography Art with Endless Possibilities
  • How to Create Beautiful Light Painting Images With an Illuminated Hoop
  • Fire Spinning with Steel Wool – A Special Effects Tutorial

Share your images below:

Light painted train caboose.

This was created using gloves that glow different colors. My husband did the light painting, it’s the name of his favorite beer in Nicaragua.

The ultimate light painting is fire spinning.

Simply upload your shot into the comment field (look for the little camera icon in the Disqus comments section) and they’ll get embedded for us all to see or if you’d prefer, upload them to your favorite photo-sharing site and leave the link to them. Show me your best images in this week’s challenge. Sometimes it takes a while for an image to appear so be patient and try not to post the same image twice.

Share in the dPS Facebook Group

You can also share your images on the dPS Facebook group as the challenge is posted there each week as well.

The post Weekly Photography Challenge – Light Painting by Darlene Hildebrandt appeared first on Digital Photography School.


Digital Photography School

 
Comments Off on Weekly Photography Challenge – Light Painting

Posted in Photography


Video Tips – Two Light Painting Techniques for you to Try

13 Oct

I personally love night photography and one of my favorite things to do at night is light painting. There are a few ways to do it depending on the look you want. Here are two completely different techniques for you to try out.

Make a Light Spiral

In this first video photographer Jason Rinehart shows us how to create a light painted spiral. So there is no subject you are adding light to, the light itself ends up being the subject. See how he does it here:

Light Paint an Old Barn

In this second video, you see a different approach where a flashlight is used to light paint the subject, in this case, an old barn in Ireland. There is a right and a wrong way to do this, and they give good examples of both.

Have you tried light painting before? Which of the two methods do you like better, or do you enjoy doing both styles? Tell us in the comments below.

The post Video Tips – Two Light Painting Techniques for you to Try by Darlene Hildebrandt appeared first on Digital Photography School.


Digital Photography School

 
Comments Off on Video Tips – Two Light Painting Techniques for you to Try

Posted in Photography


3 Tips to Help You Take Better Autumn Photos

13 Oct

I’ve recently returned from leading a photography workshop in the Alaska Range, south of my home in Fairbanks, Alaska. The trip was timed with the peak of fall colors. My students and I spent dozens of hours over the week, exploring the vibrant colors, and trying really hard to make the weird orange, red, and yellow landscape look the way we wanted it to in our autumn photos.

It occurred to me that autumn, photographically speaking, is weird. It throws our perception of colors through a loop. The world, normally a mix of blues and greens, suddenly shifts to crazy warm tones of yellow, orange, and red.

4 Tips to Help You Take Better Autumn Photos

To effectively photograph autumn colors, you need to refocus not just your camera, but also your brain. The standard compositional “rules” of landscape photography shift quite a bit during the fall. The background, which for much landscape work is the actual subject of the image (think big mountains) becomes the setting rather than the subject in the autumn. Our attention falls to the foreground, where the colors are exploding.

In this article, I’m going to cover three composition types for autumn: details, broad landscapes, and local landscapes. When mixed together, these three types of images will help you tell a compelling visual story of your autumn experience.

#1 – The Details

4 Tips to Help You Take Better Autumn Photos

Photographing details lies in the fuzzy gray area between macro and landscape photography. Sometimes it’s one or the other, sometimes it is a little bit of both. In general, however, I see photographing the details as another part of landscape work. These images tell a small, but important part of the story.

Mentally, details give us a starting point for seeing the way a landscape will come together, and they also play an important role in providing a sense of scale. The small bits of the scene are rarely captured in a big landscape photo, and yet they are a very important part of our experience in the field. The details too should be an important part of the story we are telling our audience.

4 Tips to Help You Take Better Autumn Photos

Lens choice

Close-up work requires a lens capable of a relatively close focus, or a powerful telephoto. I’ve used big 500mm and 600mm for this kind of shot and I’ve used wide angles that have the ability to focus a few inches away from the lens. But most often I use a moderate telephoto with decent macro capabilities. Nothing fancy, just a good lens that lets me get close to the subject.

4 Tips to Help You Take Better Autumn Photos

Whichever you choose, these kinds of images rarely have a great deal of depth. Even photos from a low perspective only show a few inches from front to back. Therefore detail shots are usually about pattern and color. Here are a few things to look at as you compose:

  1. Consider how the lines in the image interact. Do they cross distractingly or guide your eye around the frame in a pleasing way?
  2. Which color dominates? In the autumn, colors like red can be overwhelming and often need to be balanced by cooler greens or blues.
  3. Isolate your subject by cropping out extraneous details, or using a shallow depth of field.
  4. Embrace the autumn colors, but don’t overwhelm your viewer with too much of the same thing. Good images usually show a variety of textures and colors.

#2 – The Local Landscape

4 Tips to Help You Take Better Autumn Photos

When you zoom back a bit from the details, you get local scenes within the landscape. This type of image is rarely shot wide, rather you apply medium to strong telephotos to isolate compelling parts of the scene. I really like these kinds of shots. They allow enough space to apply the elements of both depth and scale, and yet are tight enough that distractions are more easily avoided and make great autumn photos.

4 Tips to Help You Take Better Autumn Photos

This type of shot is particularly suited to autumn photography because the fall colors are by nature, patchy. Using a short to moderate telephoto, you can select the patches of dramatic color that may be surrounded by brown in late autumn or green early in the season.

Consider using focal lengths in the 70-200mm range, and select a part of the landscape that draws your eye. Find lines that guide your image through the frame, not out of it, or look for juxtapositions of color and texture.

#3 – The Grand Scene

4 Tips to Help You Take Better Autumn Photos

I’m going to be honest here. In the fall, when the colors of my home state are going off like fireworks, it is rarely the wide open scenes that draw my eye. However, sometimes the scope and size of the landscape cannot be ignored. It is in those rare moments that I reach for my wide angle lenses.

And yet, my focus often remains close to me. The foreground in the autumn, perhaps even more than other times of the year, is vital. When shooting wide, I will often get low, using my background not as the subject, but as the setting for something bright, flashy and interesting close by.

4 Tips to Help You Take Better Autumn Photos

Use the foreground

I was shooting in late August in Denali National Park. The colors were bright and beautiful, and on one sunny day, the mountains of the Alaska Range, including Denali itself, had emerged from behind the clouds to loom, white and glaciated, over the landscape. It was beautiful, and yet my focus kept falling on the colors in front of me. I didn’t ignore that dramatic backdrop, but I used it as just that, a backdrop.

When shooting wide, don’t forget about the details I noted earlier, nor the patterns of local landscapes. Those two are integral to the wide scene and will help you understand how the elements of the landscape fall together.

4 Tips to Help You Take Better Autumn Photos

I once heard it said that wide-angle landscapes were easy. I disagree entirely, wide angles are the hardest because there is so much space for distraction. Understanding and including compelling foreground subjects, like a splash of fall color will take you a long way toward creating a dynamic wide angle landscape.

Bonus tip – Bring it all together

In a world where most of our images end up on Facebook and Instagram, the art of a photo story is fading. Stand-alone shots get the most attention, the most likes, hearts, or whatever, on social media, but they do a lousy job of telling the whole story. Details, local scenes, and wide landscapes in combination are far superior.

4 Tips to Help You Take Better Autumn Photos

In conclusion, I encourage you to tell the whole story by embracing numerous shots. Use the focal lengths available to you, all of them. Through your lens, explore the fall landscape, and share your autumn photos in the comments section below.

The post 3 Tips to Help You Take Better Autumn Photos by David Shaw appeared first on Digital Photography School.


Digital Photography School

 
Comments Off on 3 Tips to Help You Take Better Autumn Photos

Posted in Photography


How to Make a Little Planet Quickly and Easily in Photoshop

12 Oct

Do you find your panoramas a bit flat? Would you like to create a whole little planet out of a single street or square? Do you want to make fun, eye-catching images in just a few minutes without any new equipment or apps? Then this article is for you!

What is a Little Planet

Maybe you’ve heard about the “tiny planet” or “little planet” effect but don’t know exactly what that is. Maybe you have seen them but don’t know how to do them. Well, let’s start by explaining that a tiny planet is a spherical panorama and is technically called a stereographic projection.

The result of this effect is that your traditional landscape will now be circular and thus look like a planet floating in space, water, or sky depending on the background of the panorama you’re using.

PlanetReggio - How to Make a Little Planet Quick and Easy in Photoshop

Little planets are very trendy since it became possible to capture 360 x 180 degree panoramic shots. However, in this tutorial I’m going to show you how to do them from any straightforward bi-dimensional rectangular photo. I’m using Photoshop for this, but you can do it in most post-processing programs, even the free ones like GIMP.

Subjects for a Little Planet

A landscape or a panorama are the best choices, however you can get interesting results applying this effect to other kind of scenes. For example, I used it in this photo from the interior of a library, see how the spiral lines add depth to the space?

Library How to Make a Little Planet Quick and Easy in Photoshop

Also, if you apply it to a portrait the result is like looking through a peephole.

Clown How to Make a Little Planet Quick and Easy in Photoshop

How to Make a Little Planet

Okay, back to the instructions. First you need to open your image in Photoshop and alter the proportions of your photo so that it becomes a square. To do this go to Menu > Image > Image Size. Once the Image Size pop-up window opens, make sure you deactivate the “constrain proportions” option or else the entire image will resize proportionally. Once you do that, make sure the width and the height values are the same.

Size How to Make a Little Planet Quick and Easy in Photoshop

Now you will see your image distorted, like stretched out. Don’t worry about it, that’s what we were looking for here.

Rotate the Image

Distortion How to Make a Little Planet Quick and Easy in Photoshop

Now that you have your square you need to rotate it. To do it you go to Menu > Image > Image Rotation > 180 degrees.

Rotation

Now you will see the image upside down.

Upsidedown

*Note: if you want your planet to be inside out you skip this step! At the end, I’ll show you the results with and without this rotation.

Apply the Effect

The final stage is to apply the effect. Go to Menu > Filter > Distort > Polar Coordinates. In the pop-up window you will see a preview of your little planet; make sure that the Rectangular to Polar option is marked and click OK.

PolarCoordinates

Voila a Little Planet

There you go, your own little planet! You can rotate the image (like you did in step 2) until you find the orientation that works best for your image. You can also use the clone tool if you need to blend the merging of the borders or iron out any final details. And of course, you can fix contrast and exposure, as you would do with any photo.

Final How to Make a Little Planet Quick and Easy in Photoshop

And here is the one inside out if you skipped the second step and didn’t rotate the image:

Insideout How to Make a Little Planet Quick and Easy in Photoshop

So you see, it was only a matter of three steps. However, to get better results, especially if it’s your first few planets let me give you some tips and tricks:

Tips and Tricks

Use a photo with a wider ratio, like 2:1 and more. If you don’t have that, a landscape (horizontal) photo will still do better than portrait (vertical) one.

StartLandscape How to Make a Little Planet Quick and Easy in Photoshop

Compose your photo with the rule of thirds leaving the top and bottom sections with minimal information and the details in the middle area. In this example, I have the sky on the top, trees in the middle, and ground on the bottom.

Make sure the horizon line is completely straight. If it wasn’t like that in the original shot, it’s very easy to fix. First, pick the ruler tool from the toolbox (if you don’t see it just press and hold the eyedropper and you’ll find it). Then click and drag a straight line from one side to the other. Finally, click on the Straighten Layer button on top.

Ruler How to Make a Little Planet Quick and Easy in Photoshop

The edges will merge better in the planet if the left and right edges of your panorama are similar. When possible, like it would be in the case of a forest, for example, you can copy the left side, flip it and paste it on the right side. That way they will match perfectly.

Edges How to Make a Little Planet Quick and Easy in Photoshop

Your Turn

Now you can create a whole universe of little planets from nature to urban landscapes, the possibilities are endless.

UrbanPlanet

I invite you to share your planets here in the comments section below.

The post How to Make a Little Planet Quickly and Easily in Photoshop by Ana Mireles appeared first on Digital Photography School.


Digital Photography School

 
Comments Off on How to Make a Little Planet Quickly and Easily in Photoshop

Posted in Photography


How to Use Negative Space in People Photography

11 Oct

When it comes to people photography, one of the most common pieces of advice is to “fill the frame” with your subject. In general, this is a good rule of thumb that can dramatically improve your photography right away. However, sometimes rules are meant to be broken, and learning how to use negative space in people photography can also be valuable in delivering a varied and useful gallery of images.

People Photography Negative Space

What is Negative Space?

When you’re photographing people, the subject of your image is always the person (or people) in your frame. Similarly, the negative space of an image is anything other than the subject. It’s the foreground, the background, and the visual “breathing room” all around your subject.

Although it can be counterintuitive, allowing a bit of space around your subject helps draw the viewer’s eye directly to the person you’re photographing. This, in turn, emphasizes their importance in the final image.

How to Use Negative Space in People Photography

How Do You Do Negative Space Well?

So, how do you make sure that your negative space looks intentional and not accidental when you’re photographing people? Here are a few tips that will help get you started combining negative space images and people photography.

Think in Thirds

How to Use Negative Space in People Photography

When creating a negative space image in people photography, aim for your subject to take up one-third of the image, and the negative space to take up roughly two-thirds of the image. Following guideline ensures that your subject is large enough to be seen while also creating a ratio that’s visually pleasing to the eye. You’ll also notice that using this ratio as a general framework for your images allows you to implement the rule of thirds in your negative space images, which further helps to ensure that your images are composed well and are aesthetically pleasing.

Face the Space

Rule of Thirds Photography - How to Use Negative Space in People Photography

If you elect to follow the rule of thirds and compose your subject off center, spend some time experimenting with the direction your subject is facing. Is the image stronger when your subject is facing the negative space or facing away from the negative space? As a general rule, try to pose your subject so they’re looking towards the negative space. This is particularly important if the person you’re photographing is walking, running, or playing sports.

By doing so, our brains are able to imagine the subject traveling through the negative space, which creates a more compelling and believable image. In addition, directing the person you’re photographing to look towards the negative space creates an image that looks more candid, which is a great way of adding diversity to some of your posed session images.

Bring it to the Center

How to Use Negative Space in People Photography

Keep in mind that not all negative space images have to be offset! Try bringing your subject to the center of the frame while simultaneously allowing plenty of “headspace” around them in your image. This technique is similar to the idea of white space in graphic design, rests in musical composition, and high-end clothing stores that leave plenty of space between the clothing on the racks.

By limiting the proportion of the image that causes our mind to “think”, we’re emphasizing the importance of the objects that do exist in the frame, thus increasing their perceived value in our brain.

It’s Not All About Neutrals

White Space in Photography - How to Use Negative Space in People Photography

Negative space images don’t have to be all about neutral backgrounds and bokeh that obscures the background beyond recognition. Whether you’re at a favorite lake or their family’s historic farmhouse, negative space images can be a great way to subtly reference location without making it the star of the show!

Look for backdrops that are relatively uniform in color and/or pattern, which will invoke the same visual feeling of breathing room and rest around your subject, while simultaneously visually cueing your location.

Why Does Negative Space Matter?

Now that you know how to create images of people that utilize negative space, it’s also helpful to understand why negative space images are important and why you should consider incorporating at least a few into every photo session.

Emphasizing Scale

Newborn Photography Scale - How to Use Negative Space in People Photography

Using negative space when you’re photographing people can help to emphasize the size of the person you’re photographing. For example, if you’re photographing a newborn and fill the frame in every image you take, you may have missed the ability to convey just how small newborn babies are relative to their surroundings.

By including varying degrees of negative space in your images, you will be better equipped to emphasize the scale of a newborn. Similarly, you could also consider using negative space images to convey how small a bride and groom are compared to the vast beach they were married on.

Give Your Clients Options

Headspace in Portraits - How to Use Negative Space in People Photography

If any part of your business plan includes offering digital images to your clients, keep in mind that many of your clients will want to post the images you’ve taken on social media. Many of the popular social media platforms are not very conducive to typical “fill the frame” portraits, forcing your client to either cut off the top of their head or cut off their shoulders (leaving them looking rather like a floating head as above).

Similarly, if a client requests a certain image printed on a canvas, images with negative space allow you to accommodate that request without worrying about part of the image getting cut off by the gallery wrap. By including negative space in a few images, you’ll be giving your clients more options and less frustration!

Give Yourself Options

Original shot with negative space on the left.

Not only do images with negative space give your clients flexibility, they give you additional flexibility as the photographer as well!

Want to submit your image for the cover of a local magazine? Many editors want images with plenty of negative space to accommodate headline text. Want to start offering a Christmas Card design to your clients? Negative space images help make that easier. Want to advertise mini sessions on Facebook? Try placing the text in the negative space of one of your favorite images.

Using Negative Space in Photos - How to Use Negative Space in People Photography

The negative space in this image allows room to add a text overlay.

Making an effort to utilize negative space every time you photograph people will give you more ways to use your images.

Wrapping it Up

How to Use Negative Space in People Photography

In a nutshell, using negative space when you’re photographing people can help bring attention to your subject. It can also showcase locations in an unobtrusive way. Negative space also helps emphasize movement and scale, add variety to your images, and offers more flexibility to both you and your client. It’s a great technique you can implement right away and it costs nothing!

The post How to Use Negative Space in People Photography by Meredith Clark appeared first on Digital Photography School.


Digital Photography School

 
Comments Off on How to Use Negative Space in People Photography

Posted in Photography


Getting Your Priorities Straight – A Guide to Selecting Your Shot Priority

11 Oct

A major goal when starting out in photography is to get off Auto mode and onto the semi-automatic Aperture and Shutter Priority modes. Is it daunting at first? It can be, but I promise that wrestling creative control away from your camera and into your hands is one of the first and greatest joys of digital photography.

I teach people that a deeper reason exists for the name priority mode. The obvious one is you’re prioritizing control of shutter speed or aperture and surrendering control of the other. But also, you can teach yourself to base this decision on your shot priority.

Getting Your Priorities Straight – A Guide to Selecting Your Shot Priority

Flag dancers in Liberty Square – Taipei, Taiwan. Shot priority: Freeze motion. Shutter speed: 1/500th.

This article identifies four major shot priorities: to freeze motion, to imply motion, to create a shallow depth of field, and to create a deep depth of field. The goal is to get you to ask which of these is your priority for your next shot and then to select the appropriate mode and settings to achieve that.

Shutter Priority Mode

Shutter priority mode is marked with an “S” on Nikon and Sony cameras and “Tv” on Canon mode dials. Like your eyelid, the shutter opens and closes to expose the camera sensor to light. Through selecting this mode, you can choose how long it opens.

With Shutter Priority mode, you’re prioritizing shutter speed as the crucial element for the image you want to take. Your camera will then select a corresponding aperture to create a correct exposure. It is the mode to use when your priority is either freezing motion or implying motion.

Getting Your Priorities Straight – A Guide to Selecting Your Shot Priority

Traditional dance performance at Haemi Fortress, South Korea. Priority: Freeze motion. Shutter speed: 1/1000.

Priority #1 – To freeze motion

Much of the time when shooting, you require sharp images in crisp focus. Shutter speed is the most critical factor affecting image sharpness; however, requiring image sharpness isn’t a fully-fledged shot priority. Here, we’re talking about freezing fast motion.

Select this mode to freeze action in sports fast-moving water in landscapes, and other fast motion. For example, a runner could be frozen with a shutter speed of 1/500th of a second, whereas motorsports might require 1/2000th or faster.

Getting Your Priorities Straight – A Guide to Selecting Your Shot Priority

For this image of flag dancers in Taipei’s Liberty Square, I selected a shutter speed of 1/800th to freeze the motion. As well as freezing the dancer, the fast shutter speed also froze the flag and ensured the writing was crisp and legible.

Getting Your Priorities Straight – A Guide to Selecting Your Shot Priority

At the ghats by the River Ganges in Varanasi, India’s holiest city, I saw a procession of ladies heading downstairs and a cow heading up towards them. The animal looked ready to charge at them! I had just been shooting a game of cricket so my camera was already set to 1/1000th in Shutter Priority mode. I began shooting as the cow charged at the last two women before veering away. The cow and the women’s facial expressions were frozen, preserving a fleeting moment.

Priority #2 – To imply motion

Using Shutter Priority mode, implying motion is a beautiful effect that you can easily apply to your images. Everything from slight motion blurs to light trails to dreamy water effects are possible with a variety of moving subjects.

Imagine that you’re shooting handheld street photography and you chance upon a pair of dancing street performers. You decide you want people viewing your images later to be able to get a sense of the action, so choose to imply motion as your shot priority. Because a shutter speed of 1/500th would freeze the performers, you could try 1/250th and work down from there until the desired motion blur is achieved.

Getting Your Priorities Straight – A Guide to Selecting Your Shot Priority

While working as a tour photographer in South Korea, I was tasked with capturing tourists prepare green tea leaves. To imply motion, I took a sample shot at 1/50th and then worked down until I achieved this blur. This image was 0.4 seconds – admittedly pushing the acceptable limits of handheld photography – but thanks to my lens’s image stabilization and steady hands, I ended up with this interesting shot.

Now imagine you’re on the rooftop of a tall building at nighttime and you have a tripod. Because of the added stability a tripod allows, you can open up your shutter for significantly longer. Through selecting the right settings, you can achieve crisp backgrounds, blurred subjects, and light trails that build on top of each other.

Getting Your Priorities Straight – A Guide to Selecting Your Shot Priority

A nighttime cityscape of Seoul’s Han River and Namsan Tower featuring blurred white and red light trails. I used a shutter speed of 15 seconds to allow the light from numerous cars to reach my sensor, accumulating into long streaks of light in the final image. No golden rule exists for the number of seconds, so just enjoy experimenting.

Aperture Priority Mode

Aperture Priority mode is marked with an “A” on Nikon and Sony cameras and “Av” on Canon dials. Like an iris in a human eye, aperture represents the hole that opens to expose the camera sensor to light. Through selecting this mode, you can choose how wide or narrow to open the aperture. The lower the f-number, the wider the hole. Controlling aperture is mainly used to affect what is known as depth of field.

You’ve seen portraits where the subject is in crisp focus but the background is beautifully blurry; this is called a shallow depth of field. Also, you’ve seen fantastic landscapes that are in sharp focus throughout the image from front to back; this is a deep depth of field.

Through selecting Aperture Priority mode, you’re marking aperture as the crucial element for the image you want to take. Your camera will then select a corresponding shutter speed to create a correct exposure. It is the mode to use when your priorities are creating either a deep or shallow depth of field.

Getting Your Priorities Straight – A Guide to Selecting Your Shot Priority

Stall owner at the Mother’s Market in Imphal – Manipur, India. Priority: Shallow depth of field. Aperture selected: f/2.0.

Priority #3 – To create a shallow depth of field

As a travel photographer specializing in portraits, creating a shallow depth of field is often my priority. This allows me to have my photo subject (i.e., a person’s face, and more specifically their eyes) in crisp focus, while the background melts away in a dreamlike blur. To achieve this effect, you want to select a low aperture value.

If you’re shooting with a kit lens, the lowest value available to you might be f/3.5. However, with a fixed focal length lens (prime), this will be lower, making this type of lens perfect for portrait photography. Let’s take a look at the two example images below.

Getting Your Priorities Straight – A Guide to Selecting Your Shot Priority

A Hindu lady showing her devotion during the Ganga Aarti ceremony – Varansi, India. When I’m out meeting people and taking portraits, I make sure my Sigma 35mm 1.4 Art lens is on my camera body. The aperture selected for this shot was f/1.4, ensuring a beautifully blurry background.

Getting Your Priorities Straight – A Guide to Selecting Your Shot Priority

A resident of Houtong Cat Village – Northern Taiwan. Aperture selected: f/2.8. This is a great example of shallow depth of field. The front of the cat’s paws are blurred and so is the back of its body. There is just a thin focal plane in sharp focus. The lower the aperture value selected, the thinner this slice of the focal plane becomes. For this shot, I spot focused on the cat’s left eye, ensuring that this was the sharpest spot of the image.

Priority #4 – To create a deep depth of field

By contrast, a deep depth of field enables front to back sharpness throughout an image, making it the shot priority to select for landscape photos. If the lowest aperture values provide the thinnest focal planes and the blurriest backgrounds, then surely the highest aperture values provide the best landscape settings, right? Wrong. Your lens may be capable of f/22 but please don’t select it.

The highest aperture values can create image distortion. I recommend not going above f/16 for landscape photography with a tripod, and not going above f/11 handheld. A solid choice for handheld landscapes is actually f/8 because it provides a mid to deep depth of field while enabling a lower ISO and faster shutter speed for a sharper image.

Getting Your Priorities Straight – A Guide to Selecting Your Shot Priority

Beautiful Itsukushima Shrine at Miyajima, one of “The Three Views of Japan” – Hiroshima Prefecture. A higher aperture value creates a narrower hole through which light reaches your sensor. A deep depth of field is one of the main effects, which in landscape photos creates front to back sharpness. For this image, I selected an aperture of f/7.1 and spot focused on the pool of water in the foreground.

Getting Your Priorities Straight – A Guide to Selecting Your Shot Priority

On the road to “Zero Point”, the end of the road heading north in the Sikkimese Himalayas, and looking back toward Yumthang Valley – Sikkim, India. This is a simple handheld landscape shot, for which I selected f/8 because my shot priority was a deep depth of field.

Conclusion

Remember these four major shot priorities and put them into practice using the Aperture and Shutter priority modes. Don’t forget to share your work and comments below.

The post Getting Your Priorities Straight – A Guide to Selecting Your Shot Priority by Ben McKechnie appeared first on Digital Photography School.


Digital Photography School

 
Comments Off on Getting Your Priorities Straight – A Guide to Selecting Your Shot Priority

Posted in Photography


How to Make Natural-Looking HDR Images with Aurora HDR 2018

11 Oct

Aurora HDR 2018 is tremendously easy, fun software by Macphun, designed for processing HDR (High Dynamic Range) images. If you’ve been following popular contemporary photography for a while, you’ll know that dramatic HDR is no longer in style. It fell out of photography fashion as quickly as wine-lovers stopped drinking merlot. Knowing how to create natural-looking HDR images is a very practical tool to have in your wheelhouse though, so let’s take a look at how to do that with Aurora.

How to Make Natural-Looking HDR Images with Aurora HDR 2018 - ice cave

Realistic & Detailed Aurora HDR 2018 preset.

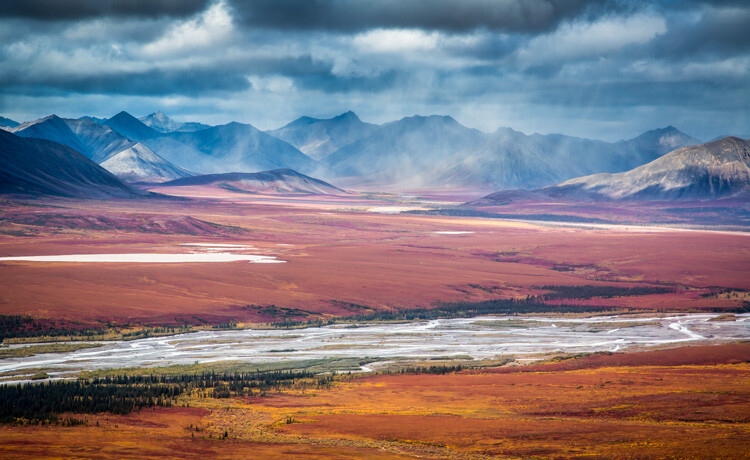
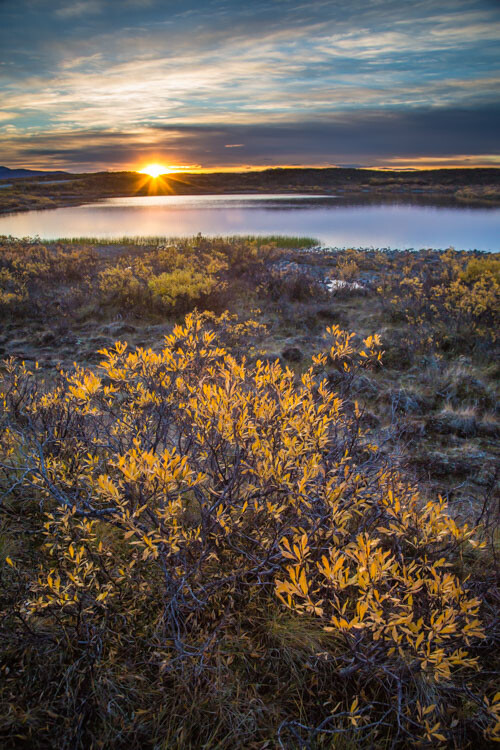
When do you need HDR?

If you’re shooting a location where there are very bright tones, along with very dark shadows, your camera probably won’t be capable of capturing exactly what your eye sees. If you bracket your images as you shoot, you can capture the entire dynamic range of the scene – every tone from very bright to very dark.

What is bracketing?

Bracketing means you shoot multiple images of the same thing, changing the exposure of each individual image. Most photographers choose to shoot between three and five images, though as few as two will work. Sometimes a situation requires seven or more. By bracketing your exposures this way, you generate the raw materials you need to use in Aurora HDR to create a final image that records all of the bright and dark tones your eyes saw.

How to Make Natural-Looking HDR Images with Aurora HDR 2018

My three bracketed images inside Lightroom.

Setting your camera up to bracket

First, attach your camera to your tripod, compose your scene and fine-tune your focus. Now, configure your bracketing. You can set the auto-bracketing feature (AEB) on your camera to shoot multiple images, approximately one to two stops of light apart, depending on the situation. The first image will be very light, or overexposed. The second image will be correctly exposed – or what your camera interprets as correct. The third image will be very dark or underexposed. Many photographers find three images to be effective, especially when they’re striving for a natural-looking HDR look but you can shoot as many as you think you’ll need.

How to Make Natural-Looking HDR Images with Aurora HDR 2018 - back of camera AEB on

Bracketing settings on a Canon camera.

NOTE: If you don’t have a camera with an auto-bracketing feature, don’t worry, you can bracket manually too. Create multiple exposures for each scene using your exposure compensation dial to increase and then decrease your exposure (make sure to use Aperture Priority and only change the shutter speed as altering the aperture will result in images that do not blend properly). It takes a little more time and patience while you are shooting but it’s worth trying if your camera doesn’t have an auto-bracketing feature.

How do you process the brackets?

After your shoot, upload your images to your computer just like you normally would. Aurora HDR runs as stand-alone software but if you’re a Lightroom user, it can be installed as a plug-in too.

Starting in Aurora HDR 2018

Double click the Aurora icon to open the software. Click the Open Image button.

Choose the folder where your images live and select them. Click Open.

How to Make Natural-Looking HDR Images with Aurora HDR 2018 - select files

The Aurora dialog box appears with your selected images. Click the Create HDR button.

Note: Tick off the “Alignment” checkbox if you think there was any movement of the camera between shots. The program will scan the images and attempt to align them. You can also click the little gear icon for additional settings like removing ghosting (subjects that moved from image to image).

How to Make Natural-Looking HDR Images with Aurora HDR 2018

Starting in Lightroom

Go to the folder containing the images you want to process in HDR. Click to select them. Right-click to bring up the menu. Select Export > Aurora HDR 2018 > Open Original Images. The Aurora dialog box appears with your selected images. Click the Create HDR button.

How to Make Natural-Looking HDR Images with Aurora HDR 2018

Note: If you made adjustments to your images in Lightroom, such as lens corrections, cropping, straightening, spot removal or noise reduction, instead of selecting Open Original Images, choose Use .TIFF with Lightroom Adjusters.

Aurora HDR’s Realistic Presets

Part of why I opened this article with the statement that Aurora HDR 2018 is both easy and fun is because of its presets. Along the lower part of the screen, just above the filmstrip, you’ll see a menu called Categories. Click on it to bring up the preset menu, then click on Realistic HDR.

How to Make Natural-Looking HDR Images with Aurora HDR 2018

My four favorite natural-looking Aurora presets live in this folder:

  • Realistic & Detailed
  • Realistic & Balanced
  • Realistic Bright
  • Realistic Neutral

These presets make my images look and feel the way the ice cave looked and felt when I was there. To me, recreating an image faithful to that memory is what natural-looking realistic HDR is all about.

How to Make Natural-Looking HDR Images with Aurora HDR 2018

Choose your favorite

The best way to choose your favorite Realistic HDR preset is to scroll all the way to the left on the filmstrip and then work your way right, clicking each one. As you select each preset, the larger image above the filmstrip will show you a more detailed preview of how each preset affects the look of your image. Once you find your favorite, it might look so perfect that all you might need to do is save it. Or, you might want to personalize the preset before you save. Here are a few tips on how to do that.

Modifying the Opacity

Let’s say that you love the Realistic & Detailed preset but it’s just a touch too much. The first – and easiest – way to modify its effect is to reduce the overall opacity of the preset. To do that, click on that preset in the filmstrip. Slowly shift the slider to the left, reducing the opacity, and lowering the effect (I often find that between 75-80 is the perfect amount). Save the image at this point if you are happy with it.

How to Make Natural-Looking HDR Images with Aurora HDR 2018

Another method of reducing opacity is layer-based. Look to the upper right corner of the Aurora HDR develop panel, just below the histogram. See where it says Layers? The Opacity adjustment slider for that layer is just below that. You can increase it or decrease it (each layer) there as well.

Fine-tuning the preset

If you’d like to use your chosen preset as a starting point, you can easily modify it. On the right-hand panel of the screen, in the editing panel, just below the Layers section, you’ll see a section called Filters. The first one is called HDR Basic which adds clarity, contrast, vibrance, and a bit of saturation. I’m calling this adjustment out specifically because it does so much to your image.

Just for kicks, push the HDR Enhance slider all the way to the right, so that it’s at 100. Your image is now the opposite of what most people consider natural-looking HDR. Next, adjust the slider to zero to get a feel for what this slider does to your image.

How to Make Natural-Looking HDR Images with Aurora HDR 2018

Realistic & Detailed Aurora preset, with HDR Enhance set to 100. Compare this to the lead image of the same ice cave, with the HDR Enhance set at 50. This image is quite a bit more contrasty, with sharper edges throughout.

Most of the Realistic presets are set below 50 for HDR Enhance. If you want to stay in a natural-looking range but your image needs a touch more pizazz, slowly move the HDR Enhance slider to the right until you reach the level that feels right to you.

Additional fine-tuning options

As you work your way through Aurora’s Filters, you’ll see additional options like Color, HDR Structure and Glow. The preset you’ve chosen dictates the setting of each Filter. But again, you can shift each slider individually to give your image more, or less, pop.

How to Make Natural-Looking HDR Images with Aurora HDR 2018

This HDR image was made from three exposures using the Realistic & Bright preset, set at an opacity of 80, with no other changes made.

To learn the effects of each tool, I suggest moving the sliders all the way to the right, so that the effect is at 100 and then doing the opposite, so the effect is at zero. Nine times out of ten I think the Aurora HDR design gurus have chosen the right level, and I leave the preset at its original amount. If you do choose to make a change just remember that if your goal is natural-looking HDR, a little Structure or Saturation can make a big shift in the appearance of your image.

Glow

Glow is an interesting option, giving images an almost Orton-like effect. While it’s a popular style option for many photographers right now, it’s not what I usually call natural-looking. In all four of my favorites, Realistic HDR presets, the Glow setting is set to 0. For ice cave images, 0 is the perfect amount but for some subjects, like this barn, a touch of Glow softened the natural look of this HDR image and made it feel more inviting.

How to Make Natural-Looking HDR Images with Aurora HDR 2018

This HDR image was made from three exposures using the Realistic & Bright preset, set at an opacity of 100, with Glow set at 15. Both are very small changes but compare this image to the one above. This one has a little more of a bright, dreamy feel while still looking natural.

While I probably sound like a broken record at this point, remember to move the slider just a touch to the right if you want your HDR image to have that natural, I-just-stumbled-on-this-gorgeous-vista-and-took-this-amazing-picture sort of look to it.

Top and Bottom Adjustment

The Top and Bottom Adjustment Filter is a “selective adjustment” meaning that, unlike global adjustments, it only affects parts of your image. If you have an image where the sky reads overexposed and is much brighter than the foreground, or conversely, where the foreground is dark and underexposed, adjust the image using this tool.

How to Make Natural-Looking HDR Images with Aurora HDR 2018 - top and bottom adjustments

This HDR image was made with the same three exposures using the Realistic & Balanced preset, at 80% opacity, plus a Top Adjustment of -5 Exposure, +5 Contrast and +15 Vibrance. I added a Bottom Adjustment of +10 Exposure and +5 Warmth. Of the three final HDR images, this one feels the most natural and faithful to the barn itself.

For this final version of the barn, after applying the Realistic & Balanced preset, at 80% opacity, I ultimately decided that the sky was a bit too light and the barn was a little too dark. I added a Top Adjustment of -5 Exposure, +5 Contrast, and +15 Vibrance. I also added a Bottom Adjustment of +10 Exposure and +5 Warmth. These adjustments help to enhance the sky and even out the overall exposure of the image.

Of the three, this version is my favorite. Which is yours?

Saving your image

Once you’ve completed all of your adjustments, it’s time to save your image. If you started in Aurora and want to create a JPEG or TIFF, select File > Export and then select the correct folder and rename the file as appropriate for your workflow.

If you want to create a native Aurora .mpaur2 HDR file, select File > Save and then select the correct folder and rename the file. This format saves the history (and any layers) as well and allows you to continue to go back in and make changes to your image.

How to Make Natural-Looking HDR Images with Aurora HDR 2018

Saving your image to your Lightroom Catalog

If you started in Lightroom, it’s a snap to save your image. After you finish processing your image in Aurora HDR, click the Apply button in the upper right corner of the interface. This saves and also catalogs your image in Lightroom. The new file name will end in AuroraHDR2018-edit.tiff.

How to Make Natural-Looking HDR Images with Aurora HDR 2018

Your Turn

Hopefully, you’ve been following along and processed a few images in Aurora as you were reading this article. Now take a minute to upload your best natural-looking HDR version. Share with the dPS community about how you created it using Aurora as well as any other tips or tricks you’ve discovered.

Disclaimer: Macphun is a dPS advertising partner.

The post How to Make Natural-Looking HDR Images with Aurora HDR 2018 by Lara Joy Brynildssen appeared first on Digital Photography School.


Digital Photography School

 
Comments Off on How to Make Natural-Looking HDR Images with Aurora HDR 2018

Posted in Photography


Review of the Fujinon XF23mm F2 WR Lens

11 Oct

In this review, I’ll take a look at the Fujinon XF23mm F2 WR Lens. If you shoot Fuji and have considered this one – read on to see why I rate it top marks!

Review of the Fujinon XF23mm F2 WR Lens

The Fujinon 23mm f2 lens

First look

With the Fuji XF 23mm F2 WR lens now being offered as a kit with the X-Pro2, and the new X-E3, it’s probably a good time to look at this little wonder if you shoot Fuji. This weather-sealed prime lens is 35mm equivalent field of view in full frame terms and makes a perfect street and general photography lens.

The fast f/2.0 aperture is a stop slower than it’s f/1.4 predecessor, but it’s leaps and bounds faster in the focus department. It also has a much quieter motor, which is important for video and it’s weather resistant.

Quiet motor great for video

As the Fuji X-T2 body has 4k video, and with a firmware update to add 4K video to the X-Pro2 due, this is an essential feature for current users looking to do video. Personally, I’m shooting a lot more video of late, both for my YouTube channel and in the creation of shorts in general, so this feature made the lens enticing for me. The original Fuji X camera is, of course, the X100, which has a built-in 23mm f2 lens. The new 23mm lens is a better design though, making it a great option instead of getting an X100F.

Review of the Fujinon XF23mm F2 WR Lens

For this article, I’m including some “tourist in my own town” style shots as I’ve not had this lens long enough to travel with it – yet!

Review of the Fujinon XF23mm F2 WR Lens

The f/2.0 Trinity

The 23mm is the widest currently in this range, which includes the XF35mm F2 and the XF50mm F2. In the community, they’ve been nicknamed the Fujicrons, as a kind of homage to the Summicron range of f/2 lenses from Leica. This weather sealed range offers great quality lenses in small, light packages, with quiet motors suited to video work as well as stills.

They focus faster than the higher range primes in the Fuji range, such as the 23mm f/1.4, 35mm f/1.4, and the 56mm f/1.2. (It’s not fair to directly compare the 50mm and 56mm as they’re not quite the same, though they are close enough for this purpose). The F2 lenses are also really well priced; You can get two of them for the price of one of the faster primes.

Review of the Fujinon XF23mm F2 WR Lens

Specs of the XF23mm F2

The XF23mm F2 WR lens has 10 elements in six groups which includes two aspherical elements. The original f/1.4 lens has only one. These elements increase the sharpness, a big plus for this small lens. The housing is metal, making this a robust lens in keeping with most of the Fuji range.

The aperture ring runs in 1/3 EV steps and uses nine blades internally which leads to a smoother bokeh. The minimum focusing distance is 22cm (about 9″). The lens comes in at a sprightly 180 grams (0.4 lbs) too. Good news if you’re looking to shoot video on a gimbal or flying on budget airlines with low weight baggage limits! Fi, ally the filter size is 43mm.

Review of the Fujinon XF23mm F2 WR Lens

Comparisons

The first lens people want this lens compared with is the Fuji 23mm f/1.4, because that’s usually the choice they’re trying to make. The XF23mm f/2.0 is a stop slower than then the 23mm f/1.4 but is faster to focus. The additional element makes it sharp, but the original 23mm is quite a sharp lens anyway. Weightwise the f/2.0 is 180g (0.4 lbs) versus the 300g (0.67 lbs) of the f/1.4.

For close focusing the f/2.0 has a minimum focus distance of 22cm (9″) compared to the 28cm (11″) of the f/1.4. In terms of cost, the f/2.0 is half the price of the f/1.4 at $ 449 versus $ 899. The real question to ask yourself is, does the additional stop of light justify spending twice the money? Only you can decide that.

Review of the Fujinon XF23mm F2 WR Lens

The f/2 lens has a slightly wilder field of view than the f/1.4 below.

Review of the Fujinon XF23mm F2 WR Lens

For street work, a lot of people choose the XF27mm f/2.8 pancake lens. This makes your Fuji very pocketable. The lens doesn’t protrude much and is really unobtrusive. It’s the smallest lens Fuji makes. Yes, it is cute. The XF23 is much longer (52mm versus 23mm), but isn’t too obtrusive. Again it’s a faster lens and wider. Both are the same price, so it’s a question of speed and depth in this choice. The 23mm is the superior lens, but if you must have a pancake, the 27mm is the only choice really.

Using the XF23mm F2 Lens

Review of the Fujinon XF23mm F2 WR Lens

I’ve found 23mm to be a great focal length to have with you. In fact, it’s probably the most versatile prime lens you could travel with. There’s no issue with general streets scenes, or even general landscapes. It’s great for shots including people in the scene. While it’s not a typical portrait focal length, it looks great for 3/4 length shots in landscape mode (a vertical composition) or portrait mode at a push.

Review of the Fujinon XF23mm F2 WR Lens

Even with just f/2, you still have the opportunity to shoot handheld evening shots while traveling.

Photos from the lens have nice contrast and are generally sharp, even wide open. The lens focuses quickly, even in low light and I can’t say I’ve particularly noticed many misfires. Couple it with the XF56mm f/1.2 or even the XF50mm f/2.0, and you would have a great two-lens kit that covers most shooting situations.

Review of the Fujinon XF23mm F2 WR Lens

A typical low light situation where fast primes can help.

Pros

  • Lightweight
  • Fast Focus
  • Quiet operation
  • One of Fuji’s less expensive lenses

Cons

  • Not the fastest aperture at this focal length

Verdict

If you absolutely need a faster aperture, don’t get the Fujinon XF23mm F2 WR lens. Otherwise it’s utterly fantastic at what it does. I voted with my cash and got this over the 23mm f/1.4 and it hasn’t disappointed.


The post Review of the Fujinon XF23mm F2 WR Lens by Sean McCormack appeared first on Digital Photography School.


Digital Photography School

 
Comments Off on Review of the Fujinon XF23mm F2 WR Lens

Posted in Photography


How to Make Your Photos More Creative Using Camera Angles

10 Oct

A creative use of camera angles is one of the quickest ways to add interest and variety to your photos.

Even if you don’t know how to use your camera very well, angles are easy! All you have to do is move your camera higher or lower to dramatically change the angle of your photo. It doesn’t matter what camera or what lens you’re using (even your smartphone), you can always make more creative photos by changing the camera or shooting angle.

Five Different Camera Angles

You have five main camera angles to choose from. Each one will add a different perspective, giving your photo the mood or feeling that you want it to have.

#1 – Bird’s Eye View

The highest camera angle is “bird’s eye view.” This is when you get up above the scene and look straight down. This angle is great for looking down and seeing all the details of a scene from above.

A bird’s eye view is an unusual angle because you’re not normally up high looking down on a scene. Any angle that is beyond your usual daily experience will make your photo more interesting to look at.

Bird Eye View How to Make Your Photos More Creative With Angles

I chose a bird’s eye view for this photo of our sleeping baby. By choosing this angle, I was able to look down and frame him with blueberry branches.

Bird Eye View - How to Make Your Photos More Creative With Angles

A bird’s eye view is great for food photography, allowing you to see everything on the dish.

#2 – High Angle

A “high angle” is not quite as extreme as the bird’s eye view. You just need to be a little bit higher than the person or thing that you are photographing.

Think of a high angle as a very normal view of the world for most adults. This is especially true for parents who are always looking down toward their kids.

Even though you experience this angle or perspective a lot throughout the day, it can still be perfect for some of your photos. A high angle is useful for making your subject look smaller or more vulnerable and perhaps making the viewer seem more dominant.

High Angle How to Make Your Photos More Creative With Angles

This high angle allowed me to look down at my son and also work in some interesting background elements.

How to Make Your Photos More Creative With Angles

Since this is a photo of “little sister,” a high angle gives her a smaller more vulnerable appearance.

#3 – Face-to-Face

A face-to-face angle is taken at eye level to your subject. This is a very engaging angle and helps to establish a personal connection between the person in your photo and the person viewing it.

This is a great angle for portraits, though a slightly higher than eye level angle is great for portraits too.

Face to Face How to Make Your Photos More Creative With Angles

When she came in from playtime covered in mud, I knew I had to use an engaging face to face angle.

Face to Face How to Make Your Photos More Creative With Angles

I love this captivating perspective.

#4 – Low Angle

For a low angle, you need to be below eye level. As you get down lower, you make the subject of your photo appear a larger. This may add a larger than life feeling to your photos and is great for emphasizing toughn s, or making things look scary or epic.

Low Angle How to Make Your Photos More Creative With Angles

A low angle is absolutely necessary when photographing sharks. It’s the only way to see their most frightening feature; teeth!

Low Angle 2

This moment was exploding with energy as the kids ran from the bus stop. Dropping down to a lower angle helps to emphasize the energy of the moment as well as bring the buses in the background in line with the kids.

#5 – Bug’s Eye View

Also known as “worm’s eye view,” this angle is just like it sounds. You get down as low as you can and look straight up toward your subject.

Again, this is a very unusual angle. You rarely experience this point of view, so it will add an interesting or creative perspective to your photo.

Bug Eye View How to Make Your Photos More Creative With Angles

I had to lay down on the ground and look up for this photo. It seemed like the perfect angle to capture my son’s first major climb!

Bug Eye View How to Make Your Photos More Creative With Angles

It’s easy to get a bug’s eye view at a playground. Just wait for your kids to start climbing and then look straight up at them.

One Scene – Three Angles

It’s a great idea to capture more than one angle every time you take photos of a moment. It will push your creativity, help you to explore new perspectives and provide you with more views to tell the story.

These next photos demonstrate how I captured one scene from three different angles.

How to Make Your Photos More Creative With Angles

In this first photo a higher angle was used to look down on the scene and see the puddle.

Three 2

A face to face angle is perfect for a muddy faced portrait.

Three How to Make Your Photos More Creative With Angles

This lower angle perspective makes the moment feel a little bigger and emphasizes the excitement she felt after having fun in the mud puddle.

Beyond Everyday Perspectives

Knowing these five camera angles, and practicing them will help you get unstuck anytime you’re uninspired or find that your photos are turning out boring or predictable. To spice up your photos, simply choose the most unusual angle. Once you’ve done that try at least two more angles and figure out which one has best captured the moment.

As you experiment with angles you’ll boost your creativity by breaking out of everyday perspectives. Try capturing a few different angles right now. I would love to see your photos in the comment section below.

The post How to Make Your Photos More Creative Using Camera Angles by Mat Coker appeared first on Digital Photography School.


Digital Photography School

 
Comments Off on How to Make Your Photos More Creative Using Camera Angles

Posted in Photography


How to Use Bulb Mode for Long Exposure Photography

09 Oct

Most DSLR and mirrorless cameras have a feature called Bulb Mode. If you’re like me, you probably saw that in one of the menus or buttons when you first got your camera and have promptly ignored it ever since. Even the name sounds weird, and at first glance, you might think it has more to do gardening than photography. But it’s actually a very useful option that can unlock all sorts of creative possibilities with your camera.

Learning to use Bulb Mode does take a bit of practice though, and it helps to understand how it got its strange name in the first place. But I think you’ll find that the payoff is worth your time.

How to Use Bulb Mode for Long Exposure Photography

Lightning shot using Bulb Mode.

History Lesson

Way back in the early days of photography, long before digital image sensors existed, and autofocusing lenses were little more than science fiction, the act of taking a picture still worked in many ways like it does today. Hidden inside the sealed innards of a camera was a piece of light-sensitive film onto which an image would be projected when the camera’s shutter was opened, thus letting light pass through the lens and onto the film.

It’s the same principle that DSLRs use today. The only major change is how the shutter is constructed and the manner in which the timing is controlled. A hundred years ago there was no such thing as computer-powered cameras or precise mechanical actuators that could open the shutter for a long period of time (typically longer than one second). Instead, the photographer held a small bulb in his or her hand which was attached to the camera’s shutter by a piece of tubing.

Squeezing the bulb opened the camera shutter and releasing the bulb closed it, which meant the timing of the shutter was entirely up to the individual taking the photo. As long as the bulb was squeezed, the shutter would stay open. This method continued to be used on cameras for years to come, and it’s even possible to find bulb-style shutter releases for cameras today.

In short, think of Bulb Mode as Time Travel Mode. It basically makes your camera function like a camera from 100 years ago, when you had to squeeze a bulb to open the shutter, and then release the bulb to close it. The only major difference is that unless you literally have a bulb-style shutter release like the one pictured below, you will press the shutter button to open the shutter and release your finger to close it. Pretty neat, isn’t it?

How to Use Bulb Mode for Long Exposure Photography

Squeeze the bulb to open the shutter on this Pentax 35mm film camera. Release the bulb to close the shutter. Image courtesy of Wikimedia Commons.

Bulb Mode Today

Most modern cameras allow you to set the shutter speed anywhere from 1/4000th of a second and 30 seconds, which gives you an incredible range of creative photographic possibilities. These shutter speeds work in tandem with a camera’s light meter, as well as the ISO and lens aperture, to help you get properly-exposed images with little to no fuss or hassle. With that in mind, the idea of squeezing a bulb to keep the shutter open seems more than a bit anachronistic. Why would anyone want to hold the shutter open manually when you can just dial in a preset value for the shutter speed and not worry about anything else?

The benefit of Bulb Mode is that it lets you keep the shutter open for as long as you want. The timing is not specified by you, the camera, or anything else which means it’s entirely your decision whether to use a fast, slow or extremely slow shutter speed. Using Bulb Mode, it’s possible to leave your shutter open for one, five, 10 minutes or even longer. The only limitation is your camera’s battery and your own degree of patience, which opens the door for some amazing photographic opportunities.

How to Use Bulb Mode for Long Exposure Photography

Finding Bulb Mode

Shooting Mode Dial

Canon mode dial, B is Bulb.

The first step in using Bulb Mode involves figuring out how to access it on your camera, especially if you did not have even known it existed and have never tried to look for it. Because Bulb Mode involves controlling the shutter you might think that you need to first put your camera in Shutter Priority mode, but that’s generally not the case.

For most cameras, you actually need to use Manual Mode and then set your shutter speed to as low as it can go. You will likely see decreasing speeds of 5 seconds (your display may show that as 5″), 10 seconds, and so on, all the way down to 30 seconds at which point one more click of the dial will put your camera into Bulb Mode. If this doesn’t work for you it’s possible your camera simply doesn’t have Bulb Mode (most DSLRs and mirrorless cameras do have it, on some Canons, it is on the Mode dial as B). If you really aren’t certain just Google the brand and the model of your camera along with the words “bulb mode,” which will likely turn up some useful results.

How to Use Bulb Mode for Long Exposure Photography

Instead of showing a shutter speed along with a light meter, my camera’s LCD screen now displays the word “bulb” to indicate that I have entered Bulb Mode.

Understanding Bulb Mode

Once your camera is in Bulb Mode a couple of things go a little haywire and you may think your camera is broken. Before you send it in for service, just know that everything is fine…but different. Right away you’ll notice that your camera’s light meter no longer works, and there is no indication of what exposure settings you should be using to get a properly-exposed image.

This happens because your camera has no idea how long you want to leave your shutter open, and without that information, it doesn’t know whether to indicate if the final image will be overexposed, underexposed, or just right. This can make Bulb Mode positively primitive territory, and if you have ever wanted to know what your photographic forebears had to deal with when taking pictures 100 years ago you now know firsthand.

The best way to figure out which settings to use is to simply start experimenting. The more you use Bulb Mode you will start to figure out what settings like aperture and ISO might be appropriate given the scene you are photographing. However, there are some general tips that can be applied, which I will cover in the next section.

Holding the button

The other weird thing about Bulb Mode, which directly hearkens back to the earliest days of photography, is the manner by which the shutter is controlled. To open the shutter you press the shutter button (a sentence which is most likely eliciting rolled eyes due to how obvious it sounds). However, there’s a catch.

The shutter stays open only while your finger is pressing the shutter button. It’s just like squeezing a pneumatic bulb in the early days of photography. As you might guess by now, the way to close the shutter is to take your finger off the button. It’s a strange feeling, and if you have a DSLR handy I invite you to give it a try right now. Go get your camera, put it in Manual, spin the control dial until you’re in Bulb Mode, and take a picture. I’ll wait.

How to Use Bulb Mode for Long Exposure Photography

Using Bulb Mode

Did you snap a photo? I bet it felt kind of strange to have the shutter open and close only when you pressed and then released, your finger from the button. This, of course, brings up the next logical question of how do you actually use Bulb Mode to get good pictures? While each person will use it in their own way, there are a couple of guidelines to think about if you want to get good results.

Low light

Bulb Mode is most useful when you have little to no ambient light. It is almost worthless in daylight or in a well-lit room (unless of course, you are using really good ND filters to block some of the light) The best time to try it is at night when everything is pitch black except what you are hoping to photograph.

Setting up to use Bulb Mode

It’s important to keep your camera steady with a good tripod. You are typically dealing with really long exposures, and even the vibration from your finger pressing the shutter button can affect the resulting image. So the sturdier your tripod is, the better your images will turn out. If you have a cable release or some kind of remote shutter trigger for your camera, now is a great time to use it. Make sure you have one that either locks or counts the exposure for you (if you’re using the small wireless one that camera with your camera, you may need to click it once to open the shutter in Bulb Mode and click it again to close the shutter).

Note: You cannot use the 2-second self-timer in conjunction with Bulb Mode, it will not work.

Finally, try using a small aperture of f/8 or f/11 and a low ISO setting like 100 or 200 since the shutter speed is the independent variable in most Bulb Mode photography. This isn’t a requirement, but depending on your subject you might need a wider aperture or higher ISO, particularly if you want to shoot images of stars or capture star trails or other astrophotography phenomena.

How to Use Bulb Mode for Long Exposure Photography

I was able to capture a bolt of lightning by holding the shutter open, and the long exposure also shows movement in the clouds too.

When to use Bulb Mode

Now it’s time to experiment and really have fun with Bulb Mode. Everyone will use it in a different way, but here are a couple of ideas to get you started.

  • The next time a thunderstorm rolls in, use Bulb Mode to capture lightning strikes. The longer you leave the shutter open, the more lightning bolts you may be able to capture.
  • Try light painting, and experiment with using different kinds of light on familiar subjects you might already have just laying around.
  • Set up your tripod next to a road and shoot light trails as traffic passes by at the night.
  • For a variation on light trails, get a friend have some fun with fire spinning. Note that safety must always come first in these situations, so be sure to keep yourselves, your gear, and the environment around you safe from damage. The best place is a beach with no one around.
  • You don’t need fireworks either, and you can get great results with different sources of light from flashlights to sparklers to twirling glow sticks.
How to Use Bulb Mode for Long Exposure Photography

Using a long exposure helped me turn this ordinary jar of pasta into a surreal glowing work of art.

Conclusion

These ideas are just scratching the surface of what Bulb Mode can do. The best way to learn is to try it for yourself. If you have any particular tips for using Bulb Mode that you think others would enjoy, or some ideas to try that I didn’t mention here, please leave your thoughts in the comments below!

The post How to Use Bulb Mode for Long Exposure Photography by Simon Ringsmuth appeared first on Digital Photography School.


Digital Photography School

 
Comments Off on How to Use Bulb Mode for Long Exposure Photography

Posted in Photography