RSS
 

Samsung Galaxy Note 9 comes with dual-aperture 12MP dual-cam

10 Aug

At a high-profile launch event in New York, Samsung took the wraps off its much-leaked, next-generation Note device. The Galaxy Note 9 borrows the S9+’s 12MP dual-aperture dual-cam, with OIS in both rear cameras and an emphasis on AI-enhanced shooting modes. It’s roughly the same size as its predecessor, though its 6.4″ Super AMOLED “Infinity Display” is a touch larger than the Note 8’s.

Both rear cameras offer 12MP resolution – a wide-angle camera with F1.5/2.4 variable aperture, and a telephoto camera with F2.4 fixed aperture. An 8MP F1.7 front-facing camera is also on board.

The camera will also alert the user with a notification if it detects that a “flawed” image has been taken

Samsung’s camera app uses an AI-powered Scene Optimizer to identify subjects and sort images into one of 20 categories. The camera will also alert the user with a notification if it detects that a “flawed” image has been taken – too blurry, backlit or marred by a smudged lens.

One of the Note 9’s headline features is the option for massive built-in storage capacity: either 128GB or 512GB. Both options are expandable via MicroSD. The S Pen stylus also gets a revamp, with Bluetooth Low-Energy support which allows it to act as a remote shutter for the camera. A 4000 mAh battery claims all-day performance, with a “Water Carbon Cooling system” and real-time performance adjustments to prevent… well, we know what can happen.

The Samsung Galaxy Note 9 goes on sale August 24th – a 128GB model will cost $ 1000 and the 512GB version will sell for $ 1250.

Articles: Digital Photography Review (dpreview.com)

 
Comments Off on Samsung Galaxy Note 9 comes with dual-aperture 12MP dual-cam

Posted in Uncategorized


Leica releases Elpro 52 close-up lens adapter

10 Aug

Leica has announced the Elpro 52, a new close-up converter lens for select Leica M and TL lenses.

As its name suggests, the Elpro 52 can be screwed onto the front of any Leica M and TL lens that has a 52mm front filter thread. It also comes with stepping ring adapters so it’ll work with 46mm and 49mm front filter threads as well, making it compatible with more than 20 different lenses.

‘The Leica Elpro 52 will expand upon the capabilities of selected Leica M- and TL-Lenses, making them more suitable for macro photography,’ says Leica in the press release. ‘This lens holds true to the standard focusing and aperture settings Leica is known for, and ensures a light-weight and compact style as to not interfere with the lens handling while mounted.’

$ (document).ready(function() { SampleGalleryV2({“containerId”:”embeddedSampleGallery_2064147050″,”galleryId”:”2064147050″,”isEmbeddedWidget”:true,”selectedImageIndex”:0,”isMobile”:false}) });

The lens is available now for $ 395. It comes with the two aforementioned stepping rings and a protective case to house it all.

Articles: Digital Photography Review (dpreview.com)

 
Comments Off on Leica releases Elpro 52 close-up lens adapter

Posted in Uncategorized


Five things to know about the Samsung Galaxy Note 9’s camera

10 Aug

Five things to know about the Samsung Galaxy Note 9’s camera

The Samsung Galaxy Note 9 made its debut today at a high-profile launch event in New York. While we knew not to expect any new camera hardware thanks to numerous leaks, we still found a few interesting new features under the hood.

It has a two stabilized cameras, one of which is dual aperture

First: the hardware. The Note 9 seems to be basically using the S9+’s camera (flipped sideways of course) and that’s not a bad thing. Both lenses are stabilized (a tradition the Note 8 started) and are coupled to a 12MP sensor. The wide-angle camera carries over the F1.5/2.4 dual aperture feature Samsung introduced in the S9+, which isn’t terribly useful in real-world shooting. Based on our experience with the S9+, we expect very nice image quality from the wide-angle camera, and slightly disappointing results from the telephoto side.

It tells you when you took a bad photo

While there’s no new hardware to speak of, the Note 9 camera boasts some new AI. A feature called ‘Flaw detection’ can be toggled on and off in the camera settings menu, and presents the user with an on-screen indication when it detects a photo is too blurry, backlit or a subject is blinking. In our quick test the feature worked as advertised, and the notification isn’t too obtrusive.

It will optimize image settings based on scene detection

Another intelligent feature is Auto Scene Optimization, shortened to just ‘Scene optimizer’ on the menu screen pictured above. Samsung says this mode identifies subject matter and sorts the photo into one of 20 categories automatically. Saturation, white balance, brightness and contrast are adjusted accordingly.

It can automatically correct distorted faces

Here’s one we found in the camera settings menu: automatic distortion correction for faces. We don’t know anything more about it other than the feature can be toggled on and off in the camera settings menu. If the results look natural it could be a nice feature, especially when using the camera’s wide-angle lens with subjects positioned toward the edge of the frame – speaking from personal experience, you can take a really unflattering selfie that way.

It comes with a remote trigger

Now that the S-Pen supports Bluetooth Low Energy it can double as a remote shutter trigger. A single button press will take a photo, and a double button press will switch between cameras. The pen now needs a battery, of course, but Samsung says it charges in under a minute in the phone.

Articles: Digital Photography Review (dpreview.com)

 
Comments Off on Five things to know about the Samsung Galaxy Note 9’s camera

Posted in Uncategorized


Using HDR Photography to Your Advantage

10 Aug

sunset on the water - Using HDR Photography to Your Advantage

Over the years, HDR Photography has become synonymous with over-saturated, over-processed, and unrealistic images. Some hear the term HDR and never give it a second thought because of their perception of what it is. Add to that, all the camera dynamic range improvements and many say that HDR has lost its place for good.

So how exactly can HDR photography still be beneficial to you? How can you use it to your advantage?

Using HDR Photography to Your Advantage

The oversaturated look that has become synonymous with HDR photography. 

What exactly is HDR Photography?

HDR or high dynamic range refers to the difference between extremes – the brightest and darkest areas of your image. In reality, your eyes can adjust for shadows and highlights in the same scene, but a camera cannot (again this has come a long way over the years).

Using HDR Photography to Your Advantage

A more realistic looking HDR image.

Have you ever witnessed a scene that took your breath away, but were unable to capture it as is because you had to choose what your camera captured?

Exposing for the highlights left some of your image too dark or exposing for the shadows left your highlights too light. Or maybe you tried for somewhere in between and ended up with both dark shadows and light highlights?

Well when you want to capture the dynamic range of an area, you sometimes need to take more than one photo. To do that, you need to use bracketing, which is taking multiple images of the same scene at different exposures.

Most cameras now come with auto bracketing modes (AEB) , but you always have the choice to manually adjust your exposures between shots.

house in the trees - Using HDR Photography to Your Advantage

HDR Photography usually involves several bracketed images with a minimum of three images to capture the dynamic range. One image is exposed for the darker areas in your scene, another for the mid-tones and the third for the highlights. When you merge these images, you create an HDR image which reveals more detail than a single shot.

Fun Fact: Did you know that HDR photography has existed since the days of film?

How does this work to your advantage?

If you are not interested in creating mind-bending images with HDR, what’s the point? Well, the main benefit is capturing/revealing any lost details and doing so in a realistic way.

Think of it as extending the tonal range of what your camera reproduces to mimic what your eyes see, as opposed to the graphic style that HDR has become synonymous with.

building ruins - Using HDR Photography to Your Advantage

Subtle HDR also helps reveal textures in an image.

Steps for a Realistic HDR Photo

Truthfully the steps for making a realistic HDR are not drastically different from one that looks overly processed. The key is to know when to stop processing.

1. Selecting a scene

So what kind of shots are right for HDR photography?

Typically these include scenes that have a lot of contrast, for example, landscape and architectural photography. HDR is not recommended for scenes with a moving subject, or for shooting portraits (as it has a reputation for aging faces).

It is fun to experiment with bending the rules though and seeing the results.

old saloon hotel - Using HDR Photography to Your Advantage

2. Capturing your images

To eliminate or minimize movement between your shots, a tripod is an essential tool. This also ensures that each image in your sequence has the same composition.

An HDR image is usually composed of between three to seven bracketed images. Three exposures are sufficient for a more photo-realistic HDR, at two stops (EV) apart. If done manually, this means that your first shot will be metered for the mid-tones of the image (0EV), followed by dialing down your exposure to -2 for your second shot, and lastly where your meter is at +2 for your third shot.

dark image -2 Using HDR Photography to Your Advantage

Bracketed image underexposed (exposure -2).

Using HDR Photography to Your Advantage

Overexposed (exposure +2).

Bracketed image mid-tones (exposure metered at 0).

Use the HDR or Auto Bracketing (AEB) feature of your camera to accomplish this automatically.

Note: If you are shooting into the sun, you may need to do five exposures at one or two stops apart.

3. Processing your images

Processing HDR photography is essentially combining your images and adjusting your tonal mapping for detail. When it comes to processing, you have a choice of software: Photoshop, Photomatix, Lightroom and Aurora HDR to name a few.

Processed bracketed images – reveals more details (warmth boosted).

Again, processing is the place where you can push your HDR too far or end up with a nice photorealistic image.

Usually, HDR software comes with presets that give you a range of looks. If you want your image to be more on the realistic side, you need to take control of the settings. Some of the settings you want to control include; reducing noise, fixing chromatic aberrations and dialing back your tonal adjustments.

Conclusion

The main benefit of HDR photography is recovering detail in your images. Landscape and architectural photographers often use HDR realistically to portray high contrast scenes.

HDR photography is often associated with overcooked images, but when it’s not overdone it can balance out a scene and makes it more appealing to your viewer. Your objective is to post-process just enough to maintain a natural look.

The post Using HDR Photography to Your Advantage appeared first on Digital Photography School.


Digital Photography School

 
Comments Off on Using HDR Photography to Your Advantage

Posted in Photography


Nikon’s 3rd teaser video showcases the ‘Body’ of its upcoming full-frame mirrorless camera

09 Aug

Nikon has released the third teaser for its upcoming full-frame mirrorless camera. Following up on Travel of Light and Mount, the third teaser is called ‘Body: The Evolution of Nikon Quality.’

The video opens up with a few shots of cameras from Nikon’s past as a narrator says ‘all the expertise Nikon has acquired over the past 100 years has been poured into this camera.’ Of course, ‘this camera’ refers to the impending full-frame mirrorless system set to be announced on August 23rd.

A slightly-brightened screenshot from Nikon’s teaser video

After multiple detail shots of older Nikon cameras, the video teases yet another outline of the yet-to-be-seen mirrorless camera. The shot appears almost identical to that seen in the ‘Mount’ teaser video, but this time there seems to be an unrecognizable lens attached to the camera.

A screenshot from Nikon’s ‘Mount’ teaser video — note the absence of the Nikon branding on the viewfinder bump, something we now have a glimpse of in the ‘Body’ teaser.

The teaser also shows Nikon branding on the front of the viewfinder bump, a detail missing from past teaser videos.

Articles: Digital Photography Review (dpreview.com)

 
Comments Off on Nikon’s 3rd teaser video showcases the ‘Body’ of its upcoming full-frame mirrorless camera

Posted in Uncategorized


How to Organize Your Photos by Location in Lightroom

09 Aug

You likely know Adobe Lightroom as a powerful piece of photo-editing software. It’s known as the industry standard for photography post-production, especially when paired with Photoshop. You may also know that its photo management features are pretty impressive. If you so choose, you can use this one piece of software to upload, rename, keyword, review, edit, export and organize your photos.

camper van on the grass - How to Organize Your Photos by Location in Lightroom

How you use Lightroom is entirely up to you, and it’s unlikely that two photographers will use it the same. The way you organize your catalog will depend on many factors, including which genre of photography you choose, who you’re shooting for, and how you have your computer hardware arranged. There is no right or wrong way to organize things, and it will likely change over time.

If you’re a portrait or wedding photographer, you might choose to organize your catalog around sessions or dates. As a landscape and travel photographer, it makes sense for me to organize my photos based on locations. Whether a location is a city, country, or even a continent, it helps me to keep things organized so I can always find what I’m looking for without wasting time searching through thousands of photos.

There are a few different ways to find photos based on location in Lightroom, but they only work if you take a few simple steps when you import them.

Import

Whenever you import photos into Lightroom, try to follow the same steps.

It’s a good idea to create some templates for the Develop and Metadata settings. This makes it easy to apply some standard settings and metadata to every one of your photos. You should at least apply your copyright information to your photos with a metadata preset.

metadata organizing lightroom photos by location

Keywords

The single most important thing you can do to simplify the process of finding photos is keywording. You don’t need to add a long list of keywords, just a few relevant ones that will help you later on when you search.

When organizing by location, I always add the name of the country, region, and specific place name. I’ll also add any other relevant keywords that I may want to search for, such as aerial or long-exposure.

When renaming my images during import I always include the location in the name. Something like “noosa-beach-qld-australia” works well. The words in your filenames become searchable keywords themselves (make sure to use a dash between words). I don’t use dates in my file names, but it’s up to you whether you want to or not.

How to Organize Your Photos by Location in Lightroom

Folders

Using a good folder structure will make your life far easier, especially when you have tens of thousands of images.

To organize your folders by location, you can create a new folder for each specific location or one for each city or country. I have one folder for each country I visit and just keep adding to it. Even if I visit that country again years later, I’ll still keep using that same folder. It makes it far simpler and I know where I can find a photo from anywhere on earth.

It also makes it simpler to find image files on my computer as the folder structure I set up is identical both inside and outside Lightroom. Organizing folders by date or some other number-based system would never work for me.

Collections

Collections are another one of Lightroom’s great features that can help you keep everything organized by location. Where Folders contain every photo from a given location, Collections contain only the photos you choose. Again, I’ll create a new Collection for each country, but I only put the keepers in there.

How to Organize Your Photos by Location in Lightroom

In the past, I’ve done this manually, but I now create a Smart Collection for each location. I only need to add two rules to each Smart Collection: Flag and Keyword. Based on these settings, any photo that I flag that has that keyword is automatically added to the collection.

smart collections - How to Organize Your Photos by Location in Lightroom

Map

As a travel photographer, my favorite Lightroom tool for finding photos based on location is the Map module. One of the first things I’ll do after I’ve finished importing new photos into Lightroom is to add GPS coordinates. There are a couple of ways you can do this.

If you know the coordinates you can add them manually in the Metadata panel. The easiest way is to select all your images (Cmd/Ctrl+A) then go into the Map module, search for the location in the search bar above the map, then drag all your photos onto the right location on the map.

Depending on your camera, your photos may already have GPS coordinates embedded in the file. This is often the case with drone photos or any other GPS-connected camera or device. If not, you can record the GPS coordinates by taking a photo with your phone then grabbing them from that photo’s metadata.

map module - How to Organize Your Photos by Location in Lightroom

Searching for Photos

Now that you’ve imported your photos with location-based keywords and filenames, organized them into location-based Folders and Collections, and geotagged them with GPS coordinates, finding them later is simple.

I use a different approach depending on whether I’m looking for a specific image or a group of images from a specific location.

If it’s a specific image you want, and you know you flagged it, select the Collection associated with that location. If you’re not sure if it’s flagged, select the folder. Then search inside the collection or folder using the Library Filter.

Click on Text, select Any Searchable Field in the first drop-down menu, then Contains All in the next menu, then type your keywords in the search field. The more keywords you add, the more specific the search becomes.

library filter - How to Organize Your Photos by Location in Lightroom

If I’m looking for an image or group of images from a specific location, I like to use the Map module. Select All Photographs in the Catalog panel on the left then go to the Map module and type the location name into the search bar. Any geotagged images in that area will show up on the map.

You can zoom in or out on the map to make your search location more or less specific. Images in the specified location will appear along the filmstrip below the map.

Summary

A little forethought and organization when importing your images are worth the effort. It doesn’t take much time to apply these settings but can save you a lot down the road.

If you’re anything like me and have tens of thousands of photos in your catalog, you’ll be doing yourself a favor, and future you will thank you for your efforts.

The post How to Organize Your Photos by Location in Lightroom appeared first on Digital Photography School.


Digital Photography School

 
Comments Off on How to Organize Your Photos by Location in Lightroom

Posted in Photography


Epson FastFoto FF-680W, world’s fastest personal photo scanner, now available

09 Aug

Epson has launched its new FastFoto FF-680W High-Speed Photo and Document Scanning System, a model it claims is the fastest personal photo scanner currently available. At max speed, the FastFoto FF-680W can scan a photo every second at 300dpi (up to 36 photos per batch).

The FF-680W, which builds upon the existing FF-640 model, supports a variety of media types, including Polaroids, postcards, and panoramic photos, as well as scanning in 300dpi (“easy sharing”), 600dpi TIFF (“archiving”), and 1200dpi (“enlarging”) modes. More than one mode can be used per photo batch. The scanner also supports document scanning with OCR.

Both USB and wireless connectivity is supported. Users can directly share scanned images to Google Drive and Dropbox, capture handwritten notes on the back of an image during a single scan, and perform modest photo restoration and edits using Epson’s ScanSmart software.

The Epson FastFoto FF-680W scanner is available through the company’s website and at select retailers, including Amazon, for $ 599.99 USD.

Articles: Digital Photography Review (dpreview.com)

 
Comments Off on Epson FastFoto FF-680W, world’s fastest personal photo scanner, now available

Posted in Uncategorized


Samsung starts mass producing high-performance 4TB QLC SSDs for consumers

09 Aug

In 2016, Samsung launched a 4TB SSD with a prohibitively expensive $ 1499 price tag. In a statement this week, Samsung revealed that it has started mass producing a less expensive variant, ushering in the industry’s first 4-bit quad-level cell (QLC) 4TB SATA SSDs. The 4TB model will be part of a consumer QLC SSD lineup released later this year alongside 1TB and 2TB capacities.

…its new 1-terabit V-NAND chip enables it to efficiently produce 128GB cards for mobile devices

The three new consumer-tier QLC SSDs will utilize a 2.5″ form factor, making them compatible with a variety of PCs and external enclosures. According to Samsung, these SSDs have a sequential read speed of 540MB/s and write speed of 520MB/s, offering the same performance as 3-bit drives via the use of TurboWrite tech and a 3-bit SSD controller.

In a press release, Samsung executive VP of memory sales and marketing Jaesoo Han said, “Samsung’s new 4-bit SATA SSD will herald a massive move to terabyte-SSDs for consumers.” In addition, the company says its new 1-terabit V-NAND chip enables it to efficiently produce 128GB cards for mobile devices, paving the way for high-performance mobile storage.

Prices and release dates haven’t been revealed yet.

Articles: Digital Photography Review (dpreview.com)

 
Comments Off on Samsung starts mass producing high-performance 4TB QLC SSDs for consumers

Posted in Uncategorized


Tips for Using Flash for Beach Portraits

09 Aug

The beach is a beautiful location for any type of portrait session, however, you might find yourself competing with the sun if it sets behind the ocean. For this, you’ll need the use of reflectors and perhaps even a flash unit. Don’t be intimidated by using flash, it can instantly create beautifully lit portraits where you are able to see the sunset and its incredible colors.

Using Flash for Beach Portraits - family portrait on the beach

Use flash to fill in light during beach sessions.

Manual Mode

While TTL flash mode is okay for most scenes, during your beach portraits, you’ll want to have full control over your flash.

In TTL, the flash meters the light and gives enough power to light the scene, resulting in different flash outputs each time you take a photo. In manual mode (on the flash), however, you are able to set the power of the flash and maintain consistent output while you are photographing your client.

portrait of an elderly couple - Using Flash for Beach Portraits

Manual Mode on your flash can help you get the exact amount of light for different times of the day.

This means that in manual flash mode, you have full control over your flash and its output power. During your session, you can switch from different outputs to get the right mix of fill flash and ambient light so that both your client and background are evenly lit.

Using Flash for Beach Portraits - portrait of a couple

TTL Mode

TTL uses the internal meter on the flash to determine how much power it will fire when you take a photo. This also means that the power output can vary from photo to photo, which makes it less consistent than manual mode.

portrait of young family by the water - Using Flash for Beach Portraits

Use TTL to let your flash meter how much light your scene needs.

However, TTL is a great place to start because you can control the flash compensation but don’t necessarily have to worry about setting the exact power output.

For example, you can have your flash in TTL mode and put it at +1/3 to get an extra boost of light out of your flash. Or you can put it at -1 to tone down the power output (and underexpose the flash as compared to the ambient light).

wedding couple on the beach - Using Flash for Beach Portraits

The photo on the right doesn’t have flash fill. The photo on the left does. Use flash to fill in shadows especially during sunset.

It’s also great to use when you need to photograph quickly or don’t have a lot of time to set up your flash. TTL is especially useful during weddings or portraits with children.

Check the manual for your flash to see how to switch quickly from TTL to manual and back. This can be really useful when you have a mix of moving subjects, like children, and posed portraits, like a couple.

When to use your flash at beach sessions

It all depends on how much ambient light you have and if you are going to be competing with the sun, or lighting your subjects during a sunset. Perhaps you’ll need the flash to act as a fill light.

maternity photo on the beach - Using Flash for Beach Portraits

Competing with the sun is where the flash units are most useful. Midday sun can be harsh on a beach and can cause the backgrounds to wash out. First, get your exposure of the background. Then attach your flash onto your camera, or wireless trigger, and set the power to 1/4 power. Take a few test shots and adjust the flash so that you get the right amount of light that you need.

couple's portrait on the beach - Using Flash for Beach Portraits

Use your flash to fill in shadows and compete with the harsh light of the sun.

Using high-speed sync will allow you to operate the flash at a higher shutter speed. This means that you are able to photograph your clients at 1/300th of a second or faster and still have the flash fire and affect the image.

This option is mainly so that the flash acts as a fill light to the already existing light. Perfect for really bright days or if your clients are in a shady area and the beach is brightly lit.

wedding portrait on the beach - Using Flash for Beach Portraits
In the event that it is overcast, the flash acts as a fill light and can get rid of the high contrast that overcast days create. This helps to avoid washout of the background while still lighting your subjects. Overcast days also create shadows on the face (dark eyes) and a little pop of light can really create a difference.

family photo on the dock - Using Flash for Beach Portraits

Flash can be useful for overcast and cloudy days at the beach.

During sunsets, set your camera around 1/250th to 1/400th (set your flash to high-speed sync if you go over the sync-speed of your camera) shutter speed so that you are able to capture the colors of the sunset. Once you have the right settings for the sunset, set your flash to around 1/16th power and adjust your aperture accordingly as you photograph your clients to let in more light or less light until you have the look you are going for.

family in white on the beach - Using Flash for Beach Portraits
NOTE: It’s important to note that if you are using flash while you’re in the water at the beach, watch out for any reflections that the water might make from the light of the flash. This can create weird reflections on your client’s legs or other parts of their bodies.

Differences between flash positions

On-Camera

At beach sessions, especially during sunset and brightly lit scenes, you will have to position your flash straight at your clients so that it lights the whole scene evenly. Angling the flash will not allow enough light to fall onto the body of your clients and can create a division of light in your photograph.

bridal party photo of the ladies - Using Flash for Beach Portraits

Use the flash on the camera to spread light evenly onto all your subjects.

However, this doesn’t mean that you can experiment with the flash at different positions. Trying different angles will also give you a better look at what will work best for the type of session you’re having.

Use a bounce modifier to diffuse the light and light your clients evenly. You might need to increase the power of your flash so that you can get enough light.

couple at sunset - Using Flash for Beach Portraits

On-camera flash can work well when the sun is setting in the background.

Off-camera

Using your flash off-camera at beach sessions can give you more versatility and can create different types of lighting effects.

For example, a couple walking along the shore is lit with the flash perpendicular to the camera can give you perfect lighting on the couple with shadows that fall off into the background.

wedding couple on the beach - Using Flash for Beach Portraits

Off-camera flash at a 45-degree angle from the camera can give you shadows and more drama to the photo.

This creates more drama within the photo. Also allows you to be further away from the clients during the session while keeping the light the same. For this, you’ll need wireless triggers to remotely trigger the flash and a tripod or assistant to help with moving the light where you want.

wedding portraits by the ocean - Using Flash for Beach Portraits

Experiment with different angles and reflections of the water. Use a modifier to change the light and give you more range.

Using your phone flash or flashlight

Flash units and wireless triggers can be a little costly when you’re first starting out so your phone flash or a flashlight can give you that pop of fill light that you need to get a great photo.

couple in white - Using Flash for Beach Portraits
When you use either, the closer you are to your client, the sharper the light will hit them and be less spread throughout. The farther you are, the more dispersed the light is but it’s also less intense. You could use more than one phone flash or flashlight so you get more light.

Practice makes perfect

Practicing using your flash at the beach during different lighting situations can help you to get an idea of where to start when you do have a client session.

Taking the time to practice will help to get familiar with the power output of your flash and what look you like best. Then when you are at a paid session you aren’t taking too much time trying to get it right.


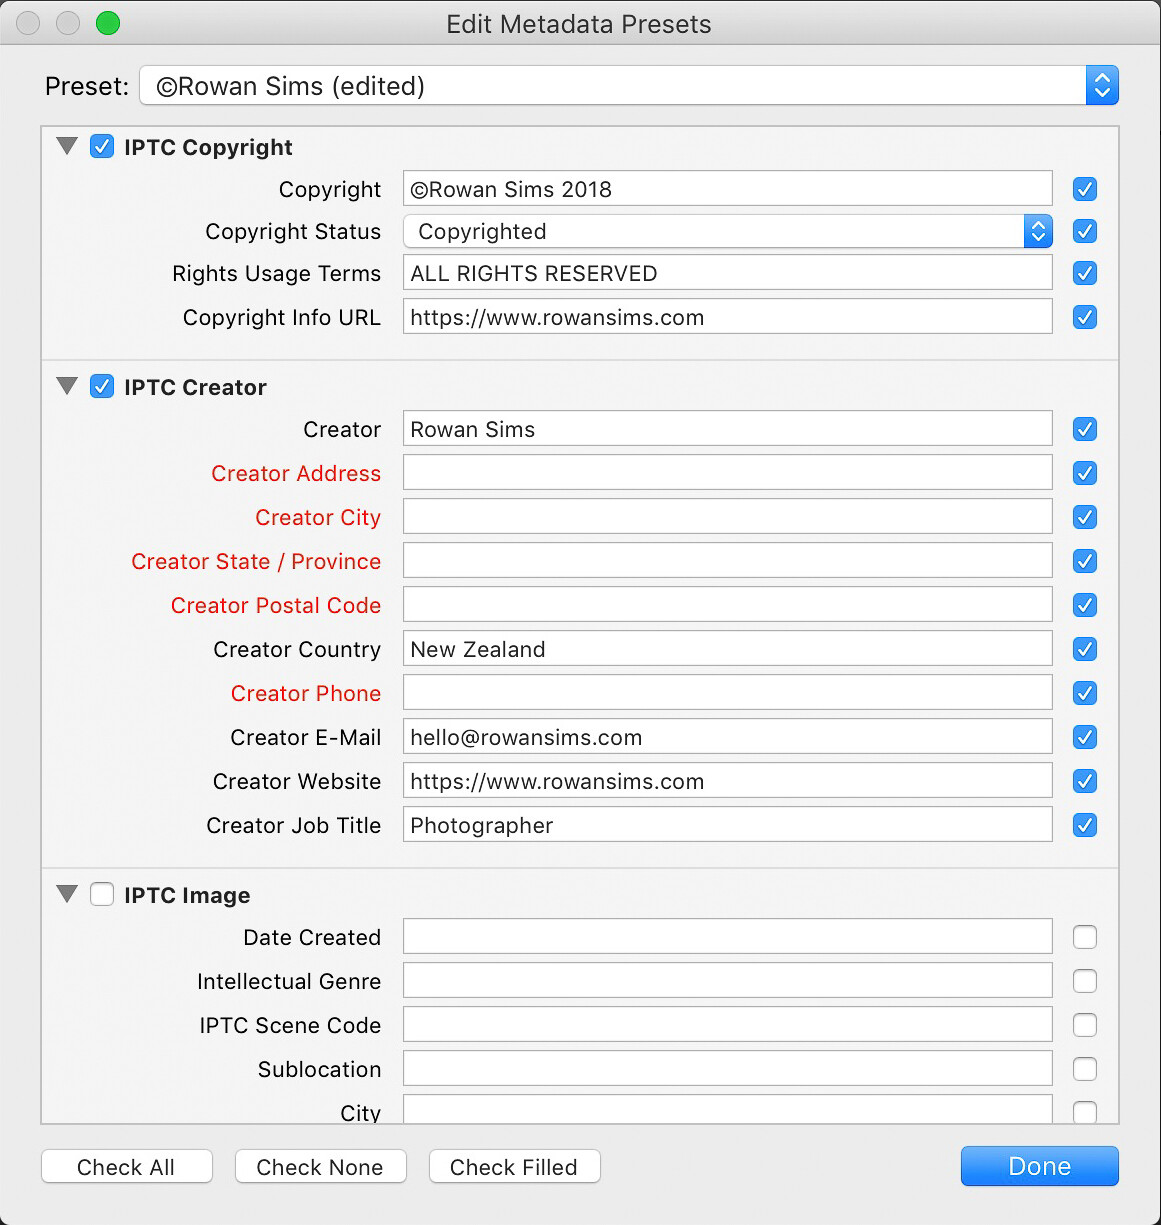
When you’re out practicing, take notes of what power output you used on which photos. Unfortunately, the metadata for flash only lets you know if the flash triggered, not the power output or if you used flash compensation.

With a little time and a lot of practice, you’ll be able to set your flash just by looking at the light.

Large groups like this, the flash is very subtle, however still useful in filling light across the entire frame.

Conclusion

wedding couple

Use flash to fill in on really bright days so the background doesn’t wash out.

Using a flash, whether on the camera or off, can be extremely useful during beach portrait sessions because the light is so harsh and you’ll need some fill light at some point.

At your next session, practice and experiment with different flash power outputs and angles for drama. Use your flash at midday to get rid of shadows or during sunset to be able to capture that beautiful setting sun in the background.

The post Tips for Using Flash for Beach Portraits appeared first on Digital Photography School.


Digital Photography School

 
Comments Off on Tips for Using Flash for Beach Portraits

Posted in Photography


AirSelfie2 pocket-sized camera drone launches with slight improvements

09 Aug

AirSelfie2, an update to the original AirSelfie drone launched in late 2016, is now available for purchase. The new model, which was introduced during CES 2018, improves upon the original AirSelfie by increasing the camera resolution from 5MP to 12MP, including a 16GB integrated microSD card versus the original’s 4GB capacity, and increasing flight time by two minutes.

The AirSelfie2 features an anodized aluminum casing with overall dimensions slightly larger than a smartphone at 3.8″ x 2.8″ x 0.5″ / 9.7cm x 7cm / 1.3cm. The internal 400mAh battery provides up to five minutes of flight time per charge, with four turbo brushless fans providing lift. Users wirelessly control the miniature drone using a mobile app available on iOS and Android; range is vaguely stated as “over 60ft.”

The drone’s camera captures still images and Full HD videos with an 85-degree FOV. The company behind the device, AirSelfie Holdings, promises new features and “experiences” delivered to AirSelfie2 drone owners via future updates. The drone is available from AirSelfie and select online retailers in gold, rose gold, black, and silver colors for $ 200.

Via: Android Police

Articles: Digital Photography Review (dpreview.com)

 
Comments Off on AirSelfie2 pocket-sized camera drone launches with slight improvements

Posted in Uncategorized