Blog

  • The Olympus TOUGH TG-6 Camera Review – A Perfect Adventure Companion?

    The post The Olympus TOUGH TG-6 Camera Review – A Perfect Adventure Companion? appeared first on Digital Photography School. It was authored by Mat Coker.

    olympus-tough-tg-6-review

    The Olympus Tough TG-6 is the perfect camera for the adventurous soul.

    Like a wilderness travel guide, the TG-6 pulls you into the micro world, under the water, and down deeper trails than you would ever take your clunky DSLR down. You can trust the Olympus Tough TG-6 out in the wild because it’s built strong and made for adventure. It’s even tough enough to let your kids use it.

    Moreover, it’s really small, so it doesn’t hinder your adventure for even a moment. And it’s so capable it will inspire adventures you hadn’t planned.

    This review is about what the Olympus Tough TG-6 will let you do as a photographer and how the pictures look.

    TG-6 small size

    An evening adventure used to mean hauling a heavy bag filled with gear. I never knew which gear I would need for sure, so I always brought too much. Eventually, I just stopped going on spontaneous adventures because it became too much of a chore. The Olympus Tough TG-6 replaces all that stuff I used to haul around. Gear is no longer the hindrance it used to be.

    The technical specs

    The reason why so many people are excited about the Olympus Tough TG-6 is the impressive list of technical specs.

    • F2.0 wide-angle lens (the aperture narrows as you zoom)
    • 20 frames per second
    • Underwater modes
    • Microscope mode
    • In-camera focus stacking
    • Scene selection
    • Aperture mode
    • RAW capture
    • 4K video
    • Waterproof
    • Shockproof
    • Dustproof
    • Crushproof
    • Freezeproof

    Of course, the reason this list of specs is so exciting is because of what they’ll let you do with this camera as a photographer.

    “No photographer is as good as the simplest camera.” – Edward Steichen

    When you read camera reviews, you want to know what a camera is capable of and how great the picture quality will be.

    Don’t forget that a camera only has to be so good and then the rest is up to you. The world’s greatest camera isn’t much good in the hands of a person that knows nothing about light, moment, or composition. Look for a camera that meets your general needs, then up your game as a photographer.

    The most famous photographs were made with cameras that we would consider inferior by today’s standards. A beautiful photograph transcends the technology it was made with.

    In the end, it’s not about the technical specs of a camera, but what those technical specs let us do as creative people and photographers.

    The TG-6 has an impressive resume. Let’s see what it can help us do.

    Adventure photography olympus tg-6

    Aperture: f/2.0, Shutter Speed: 1/250 sec, ISO: 3200

    When my first child was born I was just becoming the photographer I had always wanted to be. I couldn’t wait to take him on adventures with me as he grew. Ironically, it was a bag filled with too much gear and too many options that held me back from adventures with my kids. The TG-6 is everything I always wanted and fits in my pocket. It practically pushes us out the door and into the world.

    “My life is shaped by the urgent need to wander and observe, and my camera is my passport.” – Steve McCurry

    What if you could shrink yourself?

    It is captivating to suddenly see the world through a magnifying glass or microscope – to see tiny details blown up big. You may not be able to shrink yourself, but you can enter the micro world with the Olympus Tough TG-6.

    Microscope mode

    With the TG-6, you can get insanely close and discover the mystery and beauty in the fine details of everyday objects. You’ll be exploring the world in a way you haven’t done since science class.

    The micro world offers you an infinite number of things to photograph. Look around you right now. There are so many things that you would never photograph on their own, but you can dive in microscopically to a new world and become enamored with the beauty of fine details.

    insect macro photography

    If you’ve got the courage, the TG-6 will bring you up close and personal with insects.


    The Olympus TOUGH TG-6 Camera Review – A Perfect Adventure Companion?


    The Olympus TOUGH TG-6 Camera Review – A Perfect Adventure Companion?


    macro mode fine detail

    The TG-6 can capture incredibly fine detail that the human eye overlooks.


    The Olympus TOUGH TG-6 Camera Review – A Perfect Adventure Companion?
    The Olympus TOUGH TG-6 Camera Review – A Perfect Adventure Companion?
    The Olympus TOUGH TG-6 Camera Review – A Perfect Adventure Companion?


    Berry macro photography

    F/3.6, 1/100 sec, ISO 800

    The problem with close-up photography

    One of the biggest problems you’re going to run into with close-up photography is a shallow depth of field. You may take a photo of a flower, and nothing more than the edge of a petal is in focus. This is frustrating when you want more of that tiny object to be in focus.

    How “focus bracketing” solves the problem

    One way to deal with this is to take a series of photos at different focus points (focus bracketing), and later combine them in Photoshop in a process called focus stacking. The end result is an image with more depth of field than is possible in a single photo. If you’re a serious macro photographer, this is an amazing option. But it’s a labor-intensive process and you’re not likely going to do it on a whim while on a nature hike.

    But the amazing thing about the Olympus Tough TG-6 is that it can actually do both the focus bracketing and focus stacking for you – all in-camera!

    Let the Olympus Tough TG-6 do the Photoshop work for you

    The photos below illustrate the frustration of such a shallow depth of field in close-up or macro photography. But they also illustrate the power of the TG-6’s in-camera focus stacking.

    Olympus TG-6 focus stacking feature

    The photo on the left is a single exposure with a shallow depth of field, while the photo on the right is the result of several photos with varying focus points stacked together into one image.


    Focus Stacking with the Olympus TG-6

    On the left, only a small portion of the leaf is in focus. But using the focus stacking option on the TG-6, the photo on the right is almost entirely in focus.

    Normally, you need a dedicated macro lens if you want to take close-up, macro, or microscopic photos. That means a financial investment and another lens in your bag. But the TG-6 has this capability built-in. The close-up function is worth the cost of the camera.

    Get in, the water’s nice!

    You’re missing so much fun if you can’t take your camera into, or at least near, the water.

    Generally, an underwater housing is expensive and might limit your access to camera settings. Best case scenario, you invest a lot of money to get your camera into the water. But this is a lot to invest and most people won’t do it on a whim. You’ve got to be sure you want to be in the water a lot to make it worth the investment.

    With the Olympus Tough TG-6, you don’t need to think twice; just get in!

    Having a camera that can get wet means you can get into the splash zone. Don’t photograph puddle-jumping-kids from a distance; get close and get wet!

    Get underwater and explore fish from their world.

    Don’t stand on the shore with dry feet to photograph the sunset; hit the waves.

    The Olympus TOUGH TG-6 Camera Review – A Perfect Adventure Companion?
    The Olympus TOUGH TG-6 Camera Review – A Perfect Adventure Companion?
    The Olympus TOUGH TG-6 Camera Review – A Perfect Adventure Companion?
    The Olympus TOUGH TG-6 Camera Review – A Perfect Adventure Companion?


    Olympus TG-6 underwater mode

    My kids and I discovered a stream filled with salmon. I knew it was the perfect chance to try out the TG-6 underwater.

    A couple of years ago, I stepped into a river with one camera in my hand and one around my neck. I was photographing people back on the shore and kept crouching a little to go for a lower angle. Every time that I crouched down for a great low angle, I was unknowingly dunking the camera around my neck into the water. Goodbye, Fuji x100s.

    The irony is that I had an underwater case for my x100s. But it’s so clumsy to use in the case that it hinders my photography.

    You no longer need to be nervous around the water with your camera – the TG-6 is completely waterproof and pulls you right in.

    A good motivator

    If it hasn’t happened yet, the day will come when you lose your drive and inspiration as a photographer.

    At first, the thought of packing up all your gear and lugging it around will overwhelm you. Especially because you know you won’t even be happy with the pictures you take.

    Then, even just the thought of picking up your camera will depress you.

    You lose your drive, your inspiration, and eventually your will as a photographer.

    You’ve already learned that new gear is not the answer to this depressing dry period you’re going through. But that’s because most gear is the wrong gear for you.

    The TG-6 isn’t just a new camera, it’s a passport to new lands. It’s like slinging on a backpack and heading out to discover the world. It sits there looking at you, hoping you will take it out to play. Photography doesn’t have to feel like a burden anymore.

    TG-6 photography inspiration

    “It’s a dangerous business, going out your door. You step onto the road, and if you don’t keep your feet, there’s no knowing where you might be swept off to.” ~ Bilbo Baggins

    Leave the Olympus TG-6 laying around

    When my camera is in the bag, it never gets used. I prefer to leave it out with the lens cap off and the power button left on so that I’m ready to make a photograph at a moment’s notice.

    But when I leave my cameras lying around, my wife doesn’t like the clutter (even though she loves the photos that result from the clutter).
    Not to mention that leaving expensive cameras around is a hazard with a house full of kids and their rowdy friends.

    The TG-6 has become our dedicated “leave it laying around the house” camera. It’s so small that it doesn’t bother my wife. It’s there when we need it. And, it’s so tough we don’t mind the kids using it.

    I’m capturing many more moments now that I’ve got a dedicated “everyday life camera.”

    Olympus TG-6 capturing candid moments


    Window light candid moments with the Olympus TG-6


    Black and white photography wit hthe Olympus TG-6

    So tough I let the kids use it

    One of the things that first attracted me to the Olympus Tough cameras is that I can let my kids use them. The TG-6 is waterproof, shockproof, dustproof, crushproof and freezeproof. Which means it’s also kid-proof.

    TG-6 great for kids

    I love to look at the photos my kids have taken. It’s inspiring to see what captures their attention enough to take a picture.


    Olympus TG-6 dustproof

    When my kids ask to use the camera while they explore sand dunes and lakes, I have no problem handing them the TG-6 to use.

    Essential modes

    After using the Olympus Tough TG-6 for about a month, I’ve figured out my favorite combination of settings for everyday use; P mode.

    I want a certain amount of control over ISO, aperture and shutter speed because I understand how they affect my photo. But I don’t want to overthink these settings and miss the beauty of the moment.

    In P mode, the camera will choose the shutter speed and aperture for you. All you have to think about is ISO (but you can select auto ISO if you wish).

    With a few minor adjustments in P mode, I can make the TG-6 do exactly what I want it to.

    In the menu, I set the minimum shutter speed to 1/125th. I want the camera to set the shutter speed for me, but I don’t want it to go any slower than this.

    I select auto ISO, but I set the maximum ISO to 1600. I don’t want the ISO to go any higher than that because of the noise issues.

    While it’s balancing the settings out, the TG-6 will always favor a lower ISO and only raise it if it needs to. Eventually, if it’s dark enough, it will go below your minimum shutter speed in order to achieve a good exposure.

    Here’s the best part; in P mode, you have direct access to exposure compensation with the camera dial. Your camera will hardly ever get the exposure just as you want it. So use the exposure compensation feature to brighten or darken the photo before you take the picture.

    There is no full-manual mode on this camera. But if you know what you’re doing, you can still take full control.

    TG-6 exposure compensation feature

    Processing RAW files

    Using Lightroom 6, I am unable to edit the RAW files from the TG-6. However, Olympus provides free editing software called, Olympus Workspace.

    Because of this camera’s smaller sensor size (and difficulty capturing extreme dynamic range), I am not putting much hope in the RAW files. RAW + JPG capture is a great option. Get the best exposure you can in order to have the highest quality JPG file, and keep the RAW file in case of an emergency.

    Even heroes have a weakness

    There are three main weaknesses that I have discovered with the Olympus Tough TG-6.

    Lens Flare

    I love playing with lens flare and I quickly discovered that is almost impossible to do with the TG-6. This is the strangest lens flare that I have ever seen. It’s discouraging, but I’ll have to learn to make compelling photographers without lens flare.

    Oympus TG-6 lens flare

    Noise

    The Olympus Tough TG-6 produces a lot of noise in high ISO, low light photos.

    The following photos are lit with a small-screen TV and/or a lamp.

    High ISO

    This photo was lit with a lamp. you can see the grainy discoloration in the white blanket. The ISO is 3200.

    High ISO noise

    This is a close-up of the white blanket in the previous photo.


    High ISO noise

    This photo is lit with the light from a TV and a small light in the next room over. The ISO was 3200.

    High ISO noise

    Close up of high ISO noise

    You can see the grain and discoloration in his skin.

    The following photos are backlit with dim light from a living room window.

    Bright light high ISO noise

    Again, the ISO was set at 3200. Because the light is brighter, there isn’t as much noise and discoloration. But there is a lack of crispness to the photo.


    High ISO and window light

    But I was shocked to capture this photo with lots of movement at ISO 3200 because it looks so crisp.

    Sharp in bright light

    You’ll have to get used to keeping your ISO at 1600 or lower (you’ll need a steady hand for the slow shutter speed that results).

    But in bright light, with a low ISO, the TG-6 is nice and sharp.

    A sharp photo with low ISO

    So the Olympus Tough TG-6 is weak under extreme lighting conditions, but so are many other cameras. For many of us, high ISO with low noise is the last frontier on the technological side of photography.

    We can strengthen the TG-6 by post-processing the photo with a program such as Lightroom. Keep your ISO to 1600 or lower when possible, and convert to black and white when suitable.

    No control over shutter speed

    At first, I thought it was a problem that there was no shutter speed mode on the TG-6. But then I realized that it wasn’t really necessary. You just have to know how to work around it.

    If you want a quick shutter speed to freeze the action, use sports mode.

    If you want a slow shutter speed to capture motion blur then you need to understand how to force the camera to produce a slow shutter speed.

    Suppose you want to capture a silky waterfall photo. Normally, you need control over your shutter speed to make it go slow enough to capture the motion. But with the TG-6 you don’t have control over the shutter speed.

    Or, do you?

    When you understand ISO and aperture then you do have control over the shutter speed.

    Olympus TG-6 slow shutte speed silky waterfall

    In order to get silky waterfalls, you need a slow shutter speed. You can force your camera to choose a slow shutter speed by lowering your ISO and closing your aperture.

    Choose an ISO of 100. Choose an aperture of f18. This will effectively choke out the light and force the TG-6 to slow down the shutter speed to let more light in. The slow shutter speed will produce a silky waterfall.

    So the lack of control over shutter speed isn’t a big problem.

    Olympus TOUGH TG-6

    The greatest weakness

    As photographers, we can find moments so powerful that lens flare isn’t necessary. And, we can look for moments so strong that the viewer will overlook high ISO noise in the photo. Whatever the shortcomings of our cameras, we as photographers always fall shorter. Whatever their weaknesses, our cameras are just fine. We need to increase our skills and know that, even if there was a perfect camera, it could only be used by an imperfect photographer.

    The power of the Olympus Tough TG-6 is not merely in its technology. The power is in what that technology allows us to do. This is a camera that will nudge you every time you walk by. It’s like a kid who wants to be played with or a dog that wants to be taken out for a run. Come on, just a quick adventure?

    A countless number of moments pass us every day. They become almost infinite in size when we consider their range from wide-angle to microscopic. When you’ve got a camera like the TG-6 in your pocket, it’s not so hard to make those moments hold still.

    Have you used the Olympus Tough TG-6 camera? Would a camera like this make you take more photos? Share your thoughts with us in the comments!

    The post The Olympus TOUGH TG-6 Camera Review – A Perfect Adventure Companion? appeared first on Digital Photography School. It was authored by Mat Coker.


    Digital Photography School

  • Canon EOS-1D X III interview: We speak to the ‘father of the EOS-1’

    We recently had the chance to speak to two senior executives at Canon – Mr. Toshio Matsumoto, Senior Principal Engineer, and Mr. Kazuyuki Suzuki, Chief of Operations, from Canon’s Image Communication Business group. Mr. Matsumoto is known within Canon as the ‘father of the EOS-1’, and is pictured above holding the new Canon EOS-1D X Mark III.

    Our conversation was conducted via an interpreter. As such, responses have been combined, and this interview has been edited lightly for clarity and flow.


    How did you decide which features to update compared to the EOS-1D X Mark II?

    There were a variety of factors. We get a lot of requests from our professional users, and we’re always listening to what they need. Their demands are sometimes very detailed! But we have to listen to their requests. In addition, we have to look at our technology – what kind of technology can meet those demands.

    We then integrate [those pieces of information] and decide internally what we should include in the next model. In this new camera we’ve improved performance [in several areas], such as autofocus, networking and so on, which we’ll explain later in detail.

    What were the main requests from users of the 1D X and 1D X II?

    One important thing was the weight of the camera, and second, autofocus performance. We made sure there is no compromise in the AF performance of the new camera. And number three is network performance, which is very important [for wire services] – how fast you can put images into publication. We thought that there was room for improvement in that aspect of the camera’s performance. Lastly, image quality is of course a big thing. We worked on noise reduction, as well as high sensitivity image performance.

    Also keep in mind that we have put a lot of effort into improving movie shooting performance as well as stills.


    Canon EOS-1D X Mark III – key specifications (what we know so far):

    • All-new CMOS sensor
    • Dual-pixel 525-point CMOS AF with 90/100% coverage horizontally and vertically
    • New Digic Processor
    • 10-bit HEIF file capture (in addition to JPEG and Raw)
    • Max 16fps capture via viewfinder, and 20fps in live view (with AF)
    • Dual CF Express card slots
    • 10-bit, 4:2:2 4K/60 video with C-Log
    • Backlit buttons

    Why did you make the decision to change the memory card type to CFexpress?

    Speed. In terms of read and write speed, these cards are immensely faster than previous solutions. CFexpress is more than twice as fast as CFast. It has more development potential.

    This is the first high-end camera Canon has released since the EOS R. Are your high-end and professional customers asking for a mirrorless solution?

    Of course some professional photographers are asking for a mirrorless solution. But as of now, we also see a lot of demand from photographers asking for DSLRs, specifically [because of] the benefits of an OVF. So this time around we decided to go for a DSLR. Of course we understand that there are huge benefits to mirrorless, and we implemented, or combined as much of that [technology] as we could into the [EOS-1D X Mark III].

    The Canon EOS R is an innovative camera in some respects, but there is a definite gap between the performance and price of most of Canon’s new RF lenses, and the EOS R and RP bodies released to support them. A truly pro-grade R body is coming, but we’ll have to wait a little while longer.

    For example one of the things that we implemented from the mirrorless side was the ability to shoot at 20fps using electronic shutter. And autofocus performance, specifically subject tracking is on par with some of today’s top-notch mirrorless cameras.
    Your professional users have a lot of legacy EF lenses in their collections. Do you have a target timeframe for transitioning those users to RF?

    Obviously that’s a very tough question to answer. We are of course aware of this – a lot of photographers own EF lenses, and they’ve invested a lot in that system. How we look at it is when we work on mirrorless cameras, we always consider how our users can utilize the asset [provided by their] EF lenses. We always keep that in mind when developing new cameras.

    That’s why we have three EF to RF adapters.

    Do you have any idea of how many of your users are adapting EF lenses to EOS R cameras using those adapters?

    I wish we knew that. It’s hard to say, because we do some promotional bundles with free adapters, so that affects the attachment rate. And some users [might buy multiple adapters and] put an adapter on each of their EF lenses.

    In terms of the development of your DSLRs going forward, will you be focusing mostly on high-end users in future?

    I can’t be specific about future plans, but we always listen to our customers to decide which direction we should go in. We don’t necessarily [think in terms of focusing] on just one area – we look at the overall picture before we decide what to focus on.

    How much communication is there between the EF and RF teams within Canon? Are engineering resources shared?

    We don’t have separate teams for mirrorless and DSLR cameras, it’s just one team. Some of the engineers that worked on the EOS R have worked on the EOS-1D X Mark III. And some of the engineers who worked on this camera could be working on the next mirrorless. It’s a combined organization.

    One of my responsibilities is to work on the next generation of EOS cameras. I could be working on mirrorless, or DSLR, or even something else.

    $ (document).ready(function() { SampleGalleryV2({“containerId”:”embeddedSampleGallery_9317094560″,”galleryId”:”9317094560″,”isEmbeddedWidget”:true,”selectedImageIndex”:0,”isMobile”:false}) });

    The EOS-1D X Mark III looks and works the way it does for many reasons, but its DNA dates back to 1986, with the manual-focus T90. Canon built on the T90’s innovative ergonomics in the original EOS-1 (1989) which included a then-unique rear control dial.

    The first digital EOS-1, the appropriately-named 1D, added a rear LCD screen and an integrated vertical grip, and the rest is (more recent history). Impressively, as you can see, some of the design principles laid out in the T90 are still honored by the EOS-1D X Mark III, after more than 30 years.

    I know you were one of the engineers that worked on the T90 and the original EOS-1. What is your thinking on how the heritage of the EOS-1 series should evolve in future models?

    Major principles for the EOS-1 series from the beginning have been durability, reliability, speed and control. A big mission of the EOS-1 series is that the cameras should never miss a shot.

    Some of the controls from the original EOS-1 are still found in the same place on the EOS-1D X Mark III, thirty years later. How did you come up with the original control layout?

    When we were working on the very first EOS-1 camera we made a lot of mockups, and we had a lot of professional photographers handle those mockups and we noted how quickly and smoothly they were able to operate the cameras. One of the things that was most challenging about the EOS-1 originally was the rear control dial. In the development stage, initially, we didn’t [plan on having] a dial on the back.

    What we found through the development process is that when professional photographers in the field were [using our mockups] thinking about exposure control, it wasn’t as smooth without that dial on the back. So we had a number of discussions with those photographers about the design, and we spent a lot of time getting it right. We actually had to delay the launch of the camera in order to implement the perfect solution for exposure control.

    How have the needs of digital photographers affected the design decisions you’ve made in subsequent EOS-1 series cameras?

    One important thing we always kept in mind with the original EOS-1 was that it should work as soon as you take it out of the box. But now [with digital] there’s a monitor on the back, and as we thought about how to utilize that we had to consider various [new] factors, such as the possibility of photographers shooting using live view, and various other things.

    One of the principles that we always keep in mind when designing the controls of the cameras [in this series], for example when implementing the touch-sensitive panels is that we have to make sure that there is no possibility for erroneous control inputs.

    Do you think that in future, when there is a mirrorless solution for professional sports photographers, that it will still look a little like the original EOS-1?

    In terms of form-factor we have no idea at this point. But one thing I can say is that our principal focus on reliability and control will always be the same.

    $ (document).ready(function() { SampleGalleryV2({“containerId”:”embeddedSampleGallery_6401974860″,”galleryId”:”6401974860″,”isEmbeddedWidget”:true,”selectedImageIndex”:0,”isMobile”:false}) });

    The magnesium alloy-bodied Canon EOS-1D X Mark III is a solid camera, built for use in tough conditions. An evolution of the EOS-1D X and 1D X Mark II, the Mark III does bring some new controls and new features to the table – many of which Canon has not yet publicly commented on.

    Obviously one thing that mirrorless cameras allow you to do, which DSLRs do not, is through-the-viewfinder video capture. Are your professional photographers asking for more video features? Or are they mostly still focused on stills capture?

    With this EOS-1D X Mark III our main focus is stills. But we understand that there are a lot of ‘hybrid’ professional photographers that shoot stills and video. One of the things we’re really focused on right now, and we’re putting in a lot of effort, is the question of how and when EVFs will go beyond the capabilities of optical viewfinders.

    As a camera manufacturer making products for a professional customer, what does a DSLR allow you to provide that a mirrorless camera does not?

    At this point in time the biggest difference is the finder. The fact that you can see everything in real time, without any layers in the way. That’s really big for a lot of professional sports photographers. On the other hand, we do see a lot of the younger generation of professionals favoring EVFs, because what you see is what you get. We understand that there is a demand for that benefit of mirrorless cameras. So what we always do is we strive to make a perfect solution out of these different demands.

    Have you been working with photographers on the EOS-1D X Mark III ahead of the Olympics next summer?

    Yes, we’ve started communicating with some of the agencies around solutions for their needs. One of the important things for major events like the Olympics is robotics, of course. When we’re communicating with those photographers and videographers we look at a total solution.


    Editors’ note: Barnaby Britton

    Until I got into the meeting room, I didn’t know I would be speaking to Mr. Matsumoto at PPE. It was a huge and unexpected privilege to meet the person responsible for the development of the original EOS-1, and before that the T90: unarguably two of the most important cameras in terms of modern D/SLR design, and two of my personal favorites.

    As you can see, a lot of the decisions that Canon made in those 1980s models lead to ergonomic details that persist even today, more than 30 years later, and not just in the company’s own DSLR and mirrorless options. The fact that that design philosophy doesn’t look out of date after three decades is testament to just how forward-thinking Mr. Matsumoto and his team were, way back in the pre-digital era.

    Unsurprisingly, Mr. Matsumoto himself was not able to speak in any great detail on-record about the precise specifications of the EOS1-D X III. What we know officially about the camera is what Canon has publicly released. That being said, you’d expect any camera that builds on the strengths of the EOS-1D X Mark III to be well-suited to the needs of Canon’s professional customer base, and I can tell you from handling the Mark III that the upgrades compared to the Mark II appear significant.

    As Mr. Matsumoto says, ever since the original EOS-1 debuted 30 years ago, the focus of the 1-series has been durability, speed, reliability and control. Compared to the film-era EOS-1/1N/1V, the EOS-1D X Mark III is a complex and immeasurably more powerful machine, but its also a much tougher camera, and more usable in a range of different environments.

    I expect that most people reading this are like me – we don’t need 20fps capture. But some professional sports photographers do. And the slow introduction of transformative technologies like Dual CMOS autofocus into Canon’s professional line makes each progressive model more capable, none more so than the new Mark III, which can shoot at this rate in either electronic or mechanical shutter mode.

    It looks like we’ll have to wait a little longer before we see an EOS R model aimed at sports and action shooters

    Mr. Matsumoto describes these autofocus and continuous shooting capabilities as ‘mirrorless’ features, probably in a nod to competitive offerings like the Sony a9 II. And there’s no doubt that they enhance the usability of the EOS-1D X Mark III in some situations. But there’s no getting away from the fact that there is a mirror, getting in the way of the Mark III ever being as versatile a camera for hybrid stills / video use as a Sony a9 II, or a Nikon Z7, or a Panasonic Lumix DC-S1, etc.

    For now though, according to Mr. Matsumoto, Canon is focusing on a mainly stills photography audience with the Mark III. In other words, the kinds of photographers we’ll see on the sidelines of the 2020 Olympic games next summer in Tokyo: many of them agency photographers, shooting stills, using pool equipment. Some people (myself included) had hoped for a truly professional mirrorless camera from Canon for 2020, but it looks like we’ll have to wait a little longer before we see an EOS R model aimed at sports and action shooters.

    That being said, you never know with Canon. The company has a reputation for careful and conservative product development, but it can be imaginative and decisive when it needs to be. As the EOS-1D X Mark III demonstrates, with more than 30 years of (D)SLR development behind him, Mr. Matsumoto and his team is confident that they can still ring the changes in the professional sports / photojournalism market segment, even without a mirrorless product.

    Articles: Digital Photography Review (dpreview.com)

  • Voigtlander’s 75mm F1.5 Vintage Line Nokton lens is now available for $999

    Earlier this year, Voigtlander released details of a 75mm F1.5 Vintage Line Nokton lens for Leica M-mount camera systems. Now, the lens is shipping and effectively replacing the 75mm F1.8 Heliar Classic lens Voigtlander previously offered.

    As noted in our initial coverage, the lens comes in black and silver variations. It features an optical design made of seven elements in six groups including three low-dispersion elements and one aspherical element. The lens is manual focus with a minimum focusing distance of 70cm (2.3ft) and features a clicking aperture ring with a range between F1.5 and F16 using a twelve-blade aperture diaphragm.

    The 75mm F1.5 Nokton weighs in at 350g (12.35oz) and measures in at 63.8mm x 63.3mm (2.5in x 2.5in). Leica Rumors has posted a gallery of sample images (JPEG, straight out of camera) taken with the lens attached to a Leica M10 in an album on Flickr. Below is a gallery of sample images provided by Leica:

    $ (document).ready(function() { SampleGalleryV2({“containerId”:”embeddedSampleGallery_9531386013″,”galleryId”:”9531386013″,”isEmbeddedWidget”:true,”selectedImageIndex”:0,”isMobile”:false}) });

    The lens is available in black and silver models and currently in stock at B&H for $ 999.

    Articles: Digital Photography Review (dpreview.com)

  • Kodak’s film business saw a revenue increase of 21% last quarter, but overall profit is down

    Eastman Kodak has announced that revenue for its film business grew in the last quarter by 21%, offering a rare glimmer of positive news in a generally shrinking market. The growth though is somewhat tempered by the fact that the company made a loss of $ 5 million over all in the same period, and that total revenue was down compared to the same quarter last year.

    Much of the company’s business is tied up in the industrial sector with specialist printing and graphics applications, and a deal with Chinese counterpart Lucky has seen it off-loading a printing plate factory in China while securing licence fees from Lucky for the use of Kodak technology. The deal also ensures that Lucky will provide services to Kodak so it can fulfil its own customer demand.

    It would be nice to think that the uplift in the film business came from a rush in demand from enthusiast and professional stills photographers through sales to Kodak Alaris, but it is likely that it is the movie industry that is driving that growth. A number of recent big-budget films have been shot using Kodak stock including Once Upon A Time In Hollywood, Ad Astra and half of The Irishman – all of which have a run time of between 2 and 3 and a half hours. That’s a lot of film!

    Hopefully this success will spur the company on to produce the 120 version of Ektachrome E100 that we’ve been waiting for since the summer.

    For more information see the Kodak website.

    Press Release:

    Kodak Reports Third-Quarter Revenue of $ 315 Million and Growth in Key Product Areas

    ROCHESTER, N.Y.–Eastman Kodak Company (NYSE: KODK) today reported financial results for the third quarter 2019, including a net loss of $ 5 million on revenues of $ 315 million and growth in key print and film product areas.

    Highlights include:

    GAAP net loss of $ 5 million for the quarter ended September 30, 2019, compared to GAAP net earnings of $ 19 million for the quarter ended September 30, 2018.

    Revenues for Q3 2019 of $ 315 million compared to revenues for Q3 2018 of $ 329 million.

    Operational EBITDA for the quarter of $ 14 million compared to Operational EBITDA of $ 9 million in the prior-year period.

    The Company finalized the establishment of a strategic relationship with Lucky HuaGuang Graphics Co, Ltd in the People’s Republic of China, including the sale of Kodak’s offset printing plates facility in Xiamen, China, a supply agreement to help Kodak fulfill its customer demand, and an IP agreement under which Kodak licenses its plates technology to HuaGuang to expand the market in China. The current quarter Operational EBITDA includes $ 13 million of license revenue received from this transaction.

    Key product lines achieved strong year-over-year growth for the year to date:
    Volume for KODAK SONORA Process Free Plates grew by 22 percent.

    Annuities revenues for the KODAK PROSPER Inkjet Platform grew by 5 percent.
    Revenues for the Company’s film business grew 21 percent year over year for the year to date.

    The Company ended the quarter with a cash balance of $ 225 million.

    “The Company will continue to concentrate on delivering industry-leading solutions to customers in our core print and film businesses,” said Jim Continenza, Kodak’s Executive Chairman. “Looking ahead to 2020, we will focus on generating cash by growing profitable revenue, making smart investments and eliminating unnecessary spending.”

    For the quarter ended September 30, 2019, revenues decreased by approximately $ 14 million compared with the same period in 2018. Kodak ended the quarter with a cash balance of $ 225 million, an increase of $ 27 million from the June 30, 2019 cash balance of $ 198 million when adjusted for the assets associated with Kodak’s offset printing plates facility in Xiamen, China being reported as assets held for sale. The current quarter revenues and Operational EBITDA include $ 13 million of license revenue related to the HuaGuang Graphics Co. Ltd transaction.

    “We have strengthened our financial position by eliminating significant interest costs with the transactions completed earlier in the year,” said David Bullwinkle, Kodak’s CFO. “For the year to date we have delivered growth in SONORA Process Free Plates, PROSPER Inkjet annuities and our film business. We plan to build on those successes and drive further cost efficiencies to help achieve our goal of generating cash.”

    Articles: Digital Photography Review (dpreview.com)

  • AMD teases huge Adobe performance boost with new 3rd-gen Ryzen ‘Threadripper’ CPUs

    American semiconductor company AMD has taken the wraps off its new 3rd-generation Ryzen Threadripper processors. The product line is comprised of the 24-core 3960X and the 32-core 3970x models featuring the company’s 7nm ‘Zen 2’ core architecture, 140/144MB cache, and up 88 PCIe 4.0 lanes.

    In its announcement on Monday, AMD provided some examples of the performance increases consumers can expect from its new Threadrippers, including up to a 47% performance boost in Adobe Premiere. That’s with the 3970X processor model in comparison to the market’s ‘top-end HEDT processor,’ according to AMD.

    The company offers a more detailed look at the technical aspects of its 3rd-generation processors in the video above. Both models will be available to purchase globally starting on November 25. The 3rd-gen Ryzen Threadripper 3960X will be priced at $ 1,399 USD and the 3970X at $ 1,999 USD.

    Articles: Digital Photography Review (dpreview.com)

  • Canon reveals its first two 8K broadcast lenses, the UHD-DIGISUPER 51 and 7×10.7 KAS S

    Canon has taken the wraps off the new UHD-DIGISUPER 51 (SP51x15.5B) and 7×10.7 KAS S, its first two 8K broadcast lenses. The models are compatible with 8K broadcast cameras that feature 1.25″ sensors, according to Canon, which notes that this equipment has become more popular in documentary production and sports coverage.

    The UHD-DIGISUPER 51 8K model is a 51x field zoom lens with what Canon says is the longest focal range in the world at 15.5 – 790mm. An integrated 1.5x extender brings the total telephoto focal length to 1185mm. Canon says this new model offers high-end quality ‘from the center to the periphery of the screen.’

    Joining the zoom lens is Canon’s new 7×10.7 KAS S 8K portable 7x zoom lens with a 10.7 – 75mm focal range. As with the UHD-DIGISUPER model, the 7×10.7 KAS S 8K lens features the ‘same operability’ as its 4K and 2/3″ HDTV lens counterparts, according to the company.

    The 7×10.7 KAS S model will arrive first; customers will be able to special order it starting in January 2020. The UHD-DIGISUPER 51 will likewise be offered as a special order, but not until May 2020. Pricing information hasn’t been revealed at this time.

    Articles: Digital Photography Review (dpreview.com)

  • 10 Ways to Make a Living from Photography

    The post 10 Ways to Make a Living from Photography appeared first on Digital Photography School. It was authored by Kav Dadfar.

    10-ways-to-make-a-living-from-photography

    It has never been harder to make a living from photography than it is in this day and age. But that doesn’t mean the game is over for you as a photographer. There are still plenty of ways to make money from photography if you are willing to make the effort and have a well-thought-out plan. So here are 10 ways to make a living from photography.

    10 Ways to Make a Living from Photography

    Portrait photography

    Portraits can be a great little money earner for any photographer. There is even more opportunity for those photographers in smaller towns. Yes, there may not be as many potential customers but the competition will also be much smaller. From the initial shoot fee to prints (digital or analog) and frames, there is an opportunity to make additional sales on top of just the portrait shoot. So any portrait photographer has a few potential steady income revenues.

    The overheads to start with are also fairly minimal as you can offer location shoots or even set up a small studio in your home to keep you going until you can get a proper space to work.

    10-ways-to-make-a-living-from-photography

    Event photography

    Event photography is another good genre of photography that offers great opportunities for earning money. Events can be anything from birthday parties to trade events or even company events like Christmas parties.

    The advantage of this genre of photography is that there is always going to be a demand for it. So if you can get a good reputation, then word of mouth can spread and get you more and more work.

    10-ways-to-make-a-living-from-photography

    Photojournalism

    Similar to other genres of photography, there is always a steady supply of work for a photojournalist. Being a photojournalist is hard work, both physically and, more importantly, emotionally. But it can also be one of the most rewarding genres of photography as it has the power to change the world.

    If you are willing to make the sacrifices needed and are good at capturing photos that tell stories, then this genre of photography could be for you.

    10 Ways to Make a Living from Photography

    Wedding photography

    A few years ago, weddings would have been one of the top earners in this list of 10 ways to make a living from photography. But like most genres of photography, things have changed.

    Less than a decade ago, an average wedding photographer could command $ 2000 plus per wedding and easily shoot 30-40 weddings a year. Unfortunately, the influx of photographers who undercut each other in price has had a detrimental effect on wedding photography. There are photographers now offering to shoot weddings for a few hundred dollars.

    Nevertheless, wedding photography is still a market that has lots of opportunities to make money.

    10-ways-to-make-a-living-from-photography

    Product and food photography

    As long as people are making things to sell or eat, they will need images of their products to help sell them. Product and food photography is a great source of income and a steady stream of work for any photographer.

    It can be a little mundane for some, but I actually enjoy the process. I really like that I can shoot at my own pace and control every aspect of the shoot. This is not something anyone who works as an outdoor photographer gets to experience. From local restaurants to design companies, there is an endless amount of work available if you can find it.

    10-ways-to-make-a-living-from-photography

    Commercial photography

    Commercial photography can consist of things like:

    • Shooting lifestyle campaigns or adverts for tourist boards and companies.
    • Photographing hotel rooms and venues.
    • It can consist of both interior and exterior shots with or without people.

    I find it works really well combined with my editorial work as I often find myself getting an audience with someone in a position of power in these areas through my various commissions.

    10-ways-to-make-a-living-from-photography

    Editorial photography

    Editorial photography was a great source of revenue for photographers.

    This changed with the introduction of digital photography all those years ago, which led to the slow demise of staff photographers. It is cheaper and easier to use stock images than it is to send a photographer out to photograph a feature. The other benefit of using stock photos for an editor is that they can see exactly what images they are purchasing.

    There are still higher-end magazines like National Geographic and agencies that will commission a photographer for an editorial feature, but they are few and far between.

    10 Ways to Make a Living from Photography

    Stock photography

    Gone are the good old days of being able to make a living solely from stock photography. But all is not lost.

    Assuming you are getting work from one of the other aspects of photography on this list, you will be accumulating a body of images that you can more than likely put with a stock agency. Whilst this won’t make you rich, it could provide a nice additional income. Just make sure to get model release forms where possible, and find the right agency for your style of photography.

    10 Ways to Make a Living from Photography

    Prints

    Selling prints is another good revenue stream, whatever your genre of photography is. Big names aside, most of us photographers are not going to be lucky enough to sell prints for thousands of dollars. But, again, like stock photography, if you have a body of work, you might as well try to earn an income from it.

    10 Ways to Make a Living from Photography

    Sports photography

    Sports photographers will always be in demand as long as our love for the various sporting games continues. If you can get yourself in with a good agency or accreditation and get those awesome shots that are grace the pages of newspapers and websites worldwide the next morning you can make a very good and steady living. To get to that level will take time and a lot of hard work.

    But there are also lots of opportunities at the local level of photographing such as school sports days or even local sporting events. These are much easier to get into and can provide a steady income to supplement your other photography work.

    10-ways-to-make-a-living-from-photography

    10 Ways to Make a Living from Photography: Conclusion

    Whilst many photographers specialize in one specific area of photography these days, most photographers have to be willing to offer a few of these services. I shoot a lot of editorial and food photography and some commercial projects. I then use stock and print sales to increase that revenue stream.

    Whatever genre of photography you specialize in, it’s important to diversify your work. Not only because of the income but also because you might make contacts that will lead to other jobs within your chosen genre.

    Remember to price yourself accordingly and try not to work for free. Always keep in mind that if you don’t respect your work enough to be paid for it, why should someone else?

    Do you have any other ways to make a living from photography that you’d like to add to this list? Share with us in the comments!

    10 Ways to Make a Living from Photography

    The post 10 Ways to Make a Living from Photography appeared first on Digital Photography School. It was authored by Kav Dadfar.


    Digital Photography School

  • 11 Great Songs About Photography (includes link to playlist!)

    The post 11 Great Songs About Photography (includes link to playlist!) appeared first on Digital Photography School. It was authored by Megan Kennedy.

    11-great-songs-about-photography

    As a symbol of memory, art, time and technology, the theme of photography has inspired musicians for decades. Need some photography-based tunes to listen to? Here are 11 great songs about photography – or at least, that feature photographic themes.

    11-great-songs-about-photography

    1. Kodachrome – Paul Simon

    As the lead single from Paul Simon’s third studio album There Goes Rhymin’ Simon (1973), Kodachrome is titled after Kodak’s 35mm film format introduced by Eastman Kodak in 1935.

    Referring to the characteristics of the Kodak film and its effect on visual culture, Simon sings “they give us those nice bright colors, they give us the greens of summers.”

    Interestingly, although the album version of Kodachrome states that “…everything looks worse in black and white,” Simon later went on to perform the song live with the lyrics “…everything looks better in black and white“.

    In an interview with Daniel Levitin for Grammy Magazine in 1997, Simon stated, “I can’t remember which way I originally wrote it, better or worse, but I always change it.”

    2. Picture This – Blondie

    “All I want is a photo in my wallet, a small remembrance of something more solid…”

    Blondie’s Picture This touches on the driving force behind a considerable amount of photography – the desire to preserve memory.

    Blondie’s first two albums were hits in many parts of the world. However, they still hadn’t garnered much attention in America.

    As the band’s first overseas single in 1978, Picture This became Blondie’s breakthrough track in the U.S.

    3. This is not a Photograph – Mission of Burma

    11 Great Songs About Photography (includes link to playlist!)

    Short and to the point, This is Not a Photograph by Mission of Burma is probably a reference to La Trahison des Images (The Treachery of Images) by surrealist René Magritte.

    Magritte’s painting, which pairs the image of a pipe with the phrase “Ceci n’est pas une pipe” (this is not a pipe) illustrates the duality of the artistically-rendered subject matter.

    In addition, the artwork speaks to the intention and power of the artist.

    As the lyrics declare, Mission of Burma’s This is not a Photograph is clearly not a photograph, but it maintains photographic qualities in that it is a marker of a specific moment in time.

    4. Camera – R.E.M

    Pioneers of alternative rock, R.E.M. is known for hits including Losing My Religion, Everybody Hurts, Man on the Moon and The One I Love.

    But before their breakthrough stardom, songs like Camera established the distinctive lyrics and jangly riffs that would mark R.E.M.’s influential approach to music.

    Featured on the 1984 album Reckoning, Camera was written about the death of photographer friend Carol Levy.

    The lyrics “will you be remembered? Will she be remembered?” Refers to memory, and perhaps the power of the camera to still time.

    R.E.M. also has a track titled Photograph – a collaboration with Natalie Merchant.

    The little gem speculates on the story of a photograph found “In stacks between the old joist walls/In a place where time is lost“.

    5. Swap Meet – Nirvana

    11 Great Songs About Photography (includes link to playlist!)

    Forming in 1987, American grunge band Nirvana rose to fame with the success of Smells Like Teen Spirit, About a Girl and Come as You Are.  

    Featured on their 1989 album Bleach, Swap Meet paints a moody picture of a couple that “make a living off of arts and crafts“.

    The song’s chorus illustrates the entanglement of keeping cigarettes (addiction), photographs (memory) and bitterness close to the heart.

    6. Distant Camera – Neil Young

    Released in 2000, Silver & Gold is the 23rd studio album by Neil Young.

    For a Reprise Records promotional piece, Young wrote a comment about each song on the album.

    For Distant Camera, Young wrote “there was one thing I let go on this album. It’s on this song and it still bothers me. There was a misplaced beat and nobody liked it but me and I wanted to leave it in because that’s just the way it had happened originally. But I took it out and to this day, whenever I hear this song I think about that kick drum. And I probably always will. That’s just the way my mind works.”

    Despite Young’s dissatisfaction, Distant Camera is a touching song about love, change, memory and time.

    7. Kamera – Wilco

    11-great-songs-about-photography

    Featured on the 2001 album Yankee Hotel Foxtrot, Kamera is a song by Chicago-based band Wilco.

    In the lyrics, the subject of the song appears to view the camera as a tool to remind them of “which lies I have been hiding, which echoes belong“.

    The camera is presented as a revealer of truths, a property that has been explored extensively over the history of photography.

    8. Seventeen – Ladytron

    Seventeen features on Ladytron’s 2002 album Light & Magic.

    The song itself is made up of a single verse repeated throughout the song;

    “They only want you when you’re seventeen/ when you’re 21, you’re no fun/ they take a Polaroid and let you go/ say they’ll let you know, so come on”.

    Paired with a robotic musical score and voice modulators, Seventeen could well be about the exploitative, youth-obsessed culture of the entertainment and fashion business.

    “They take a Polaroid and let you go” indicates the process undertaken by industry selectors, but it could also refer to a part of a person’s psyche being robbed by the industry itself.

    9. Paparazzi – Lady Gaga

    11 Great Songs About Photography (includes link to playlist!)

    In 2008 Lady Gaga dropped her debut studio album The Fame.

    Released as the album’s fifth and final single, Paparazzi reached top-ten in music charts across the globe.

    On the song, Lady Gaga has said “…there are a few different interpretations…It’s a love song for the cameras, but it’s also a love song about fame or love — can you have both, or can you only have one?”

    Paparazzi alludes to the camera as a tool that drives the trajectory of fame.

    10. Itchin’ on a Photograph – Grouplove

    American alternative rock band Grouplove, formed in 2009 and released their debut album Never Trust a Happy Song in September 2011.

    As the third single off the album, Itchin’ on a Photograph reached number 43 on Australian national radio station Triple J’s Hottest 100.

    The song also reached number 10 in 2012 on Billboard’s Alternative Songs and number 30 on Billboard’s Hot Rock Songs.

    Itchin’ on a Photograph delves into the emotional and physical experience of dwelling on the past.

    Building on a central theme of memory, the photograph itself represents a source of discomfort, but also a stepping stone from which the subject alights.

    11. Taro – alt-J

    11-great-songs-about-photography

    Taro is written by English indie rock band alt-J and features on the 2012 album An Awesome Wave.

    The song is about war photojournalist couple Robert Capa and Gerda Taro.

    In 1934 Endre Erno Friedman met Gerda Pohorylle, a German Jewish refugee. In Paris, the pair invented the name and image of Robert Capa.

    For a while, Friedman and Pohorylle both published their photographic work under the Robert Capa name.

    Pohorylle then took the name Gerda Taro, becoming successful in her own right while Friedman retained the Capa identity.

    Sadly, both Taro and Capa died during conflict.

    In 1937 Taro was killed covering the Republican army retreat at the Battle of Brunete. In 1954, Capa died when he stepped on a land mine in Thai Binh in Indochina.

    Alt-j’s song Taro describes the lives of the two pioneering photographers and their reunification in the afterlife.

    Conclusion

    Photography and music are similar in many ways. Perhaps that’s why the meeting of photographic themes and music creates such compelling listening.

    If you’d like to treat your ears to these songs about photography and many more, you can check out my Photography Songs Spotify playlist here.

    And if I’ve missed your favorite photography-based song, share it in the comments!

    Happy listening!

    The post 11 Great Songs About Photography (includes link to playlist!) appeared first on Digital Photography School. It was authored by Megan Kennedy.


    Digital Photography School

  • 17 Tips for Shooting Better Urban Portraits

    The post 17 Tips for Shooting Better Urban Portraits appeared first on Digital Photography School. It was authored by Matt Murray.

    tips-for-shooting-better-urban-portraits

    Are you interested in doing an urban portrait shoot, but you’re not sure where to start? An outdoor shoot in your local town or city is a great way to be more creative, think on your feet, and come away with some unique images that you can’t get from a shoot in a studio or your local park. However, If you’ve never done one before, you may be a little daunted. In this guide, I run you through my top tips for shooting better urban portraits.

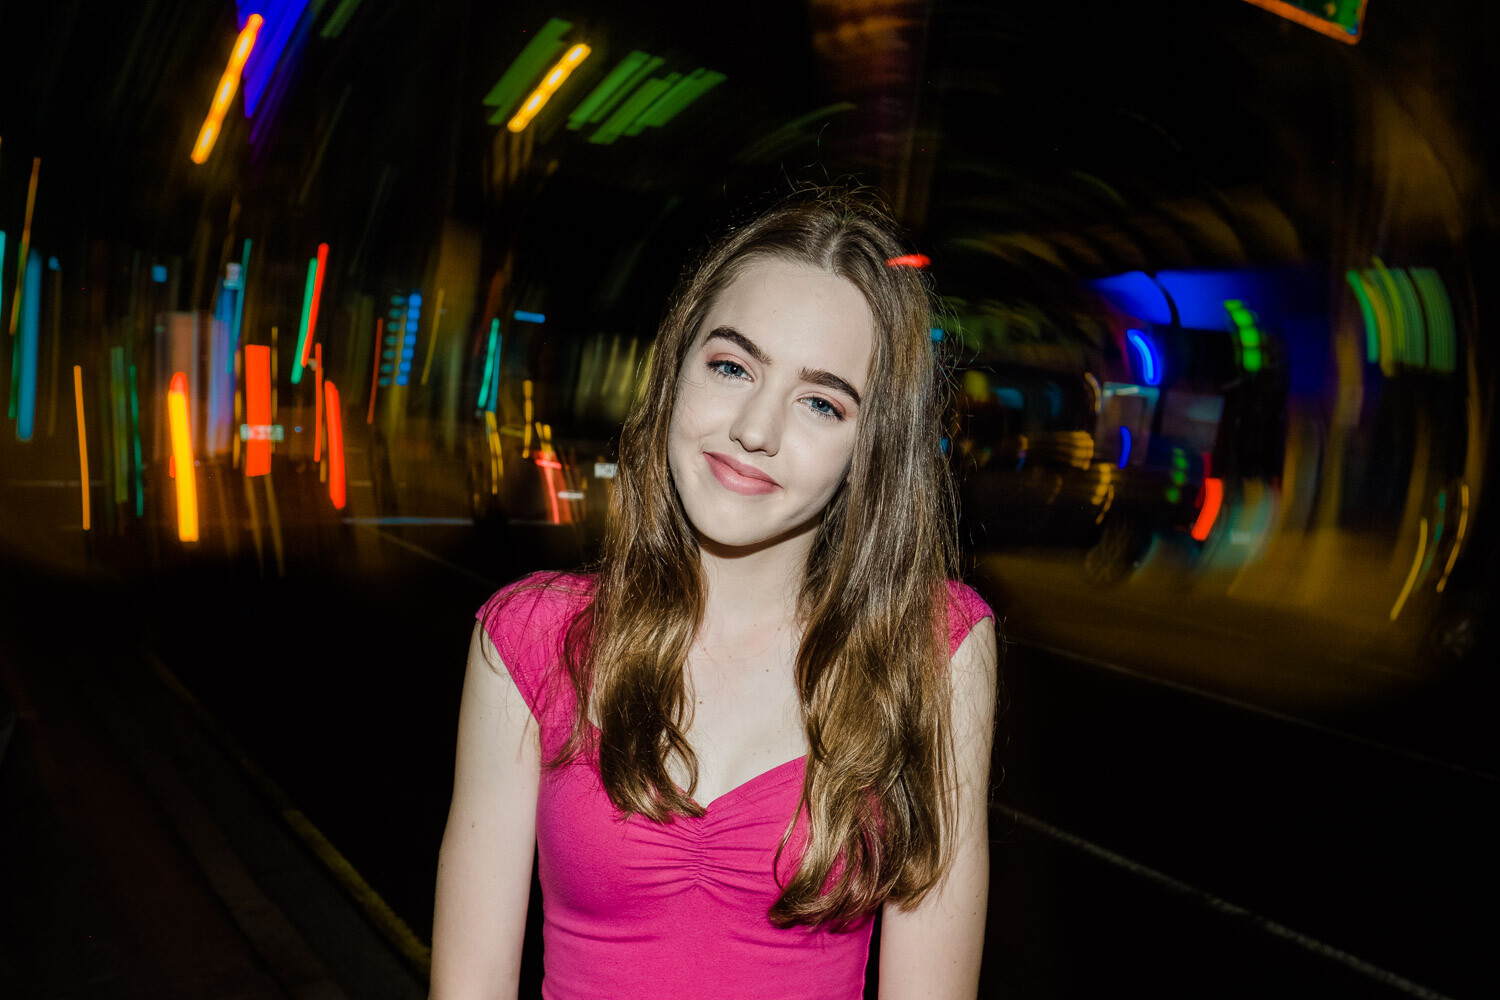
    One way to make sure your talent is relaxed at the start of the shoot is by asking them to smile and getting some fun shots to kick things off.

    1. Have a vision for the images you want to shoot

    Begin with the end in mind. Create a mood board of urban portraits using a free tool such as Pinterest. These could either be your images or inspirational images from other photographers. Keep these in mind as you plan your shoot, as this is the standard you’ll be aiming for.

    2. Location scouting

    Before you plan your shoot, get an idea of the type of urban landscapes in your area. What kind of images could you take here? How could the buildings and street scenes feature in your photographs as a point of interest or as a background texture?

    Every town and city has its unique charms – from heritage buildings to seaside piers to abandoned shopping centers. Find what’s interesting about your area and use it.

    You can find out more about what I look for when scouting locations in my previous dPS article, How to Choose Urban Landscapes for Portrait Photography.

    tips-for-shooting-better-urban-portraits

    There’s always something of interest to shoot. Open up to the creative possibilities in your town.

    3. Find talent for your shoot

    The easiest way to find someone for a shoot is by asking family or friends. This way, the pressure is off, as you have someone familiar to work with that you can test your ideas on. Make sure you ask someone that is not too shy or self-conscious, though; after all, it will involve posing for photographs in a public location.

    If you’re ready to test your urban portrait skills with a model, organize a TFP (time for print) shoot. These have been around since the pre-digital days, when photographers, models, and make-up artists would collaborate and give their time for free in exchange for physical prints of images taken during the shoot. These days, images from TFP shoots are usually digital files shared over the internet.

    Finding people to work with should be relatively easy. Most cities have photographer and model groups on Facebook. Type the name of your area with the words model or photographer and see what comes up. If you have no luck, you can also ask in general photography groups if anyone knows of a TFP-style group you could join.

    Image: In this image, I have lit Alyssa with a video light. Fujifilm X-T3 with a 35mm f1.4 lens.

    In this image, I have lit Alyssa with a video light. Fujifilm X-T3 with a 35mm f1.4 lens.

    4. Ask for expressions of interest

    Once you’ve joined a local Facebook group, have a scan of the posts and see if it’s the kind of community you wish to work with. If you feel comfortable, it’s time to post your expression of interest.

    Create a post introducing yourself and calling for expressions of interest in a TFP urban portrait shoot. Link to examples of your work and your Instagram.

    Let people know specific details about the shoot. This includes the approximate location, proposed days and times, and the types of shots you’re looking to get. You can also link to or share images from your mood board on the post to set an expectation of the kind of shots you’ll take. If you use images on the mood board that are not yours, make sure you credit the photographer and explicitly state whose work it is.

    Finally, ask people to comment on the post or send you a private message, expressing their interest. Also, ask them to link to their Instagram or portfolio.

    tips-for-shooting-better-urban-portraits

    Safety is important on any shoot – never put yourself or your talent in danger to get a shot. I took this image with the model on the footpath.

    5. Arrange details for the shoot

    After you’ve chosen whom you’d like to work with, organize the shoot. Agree on the day, time, and location. Prepare to negotiate regarding which day you can shoot, but not on the time. Always choose the time of day that you know will work best for photography. For me, that’s about an hour before dusk as this provides opportunities for natural light and after-dark images.

    If the model is under 18, check that their parent or guardian is coming along and that they will be able to sign a model release form.

    Ask your model what they’re planning to wear for the shoot. Quite often, they will ask for your advice or provide you with options. Explain that it would be ideal to have two or three different looks. Some people will prefer to have completely different outfits for the first and second half of the shoot (if there is somewhere to change). For others, it means bringing along some fun accessories like glasses, sunglasses, a hat or jacket.

    If you’re arranging a shoot a week or two in advance, don’t forget to stay in touch with your model. Remind them a day or two before the shoot.

    tips-for-shooting-better-urban-portraits

    Sunglasses can be very handy on a shoot – especially when there are neon signs! Anneke, Brisbane. Fujifilm X-T3 with a 56mm f1.2 lens.

    6. Have a plan

    Think back to your location scouting. Have a list of 8-10 places where you’d like to shoot that are within walking distance of each other. Draw a map in your notebook and plan your route and the types of shots at each place. Typically, I only shoot in 6-8 locations, but I like having a couple of options up my sleeve in case some don’t work out.

    Finally, don’t be afraid to throw your plan out the window if a better opportunity presents itself.

    17 Tips for Shooting Better Urban Portraits

    7. Plan your kit

    It’s tempting to take as much kit as you can carry on an urban portrait shoot. However, strike a happy medium between taking enough kit to give you options without having to hire a Sherpa to carry your gear.

    I typically take two camera bodies (Fujifilm X-T3 and X-T2) with prime lenses, with a third lens in my bag. My lenses of choice are usually the Fujinon 16mm f1.4 for wide-angle and environmental portraits, and either the 35mm f1.4 or the 56mm f1.2 lenses for portrait work. With the APS-C crop factor, these work out to 24mm, 52.5mm, and 84mm equivalent lenses in full-frame terms.

    Although I love zoom lenses for family portrait shoots, I only take fast prime lenses on urban portrait shoots.

    Double-check all your camera settings when you pack your gear. Things I check are:

    1. I’ve selected the same JPG film simulation on both cameras,
    2. I have the same auto ISO settings,
    3. JPG + RAW is selected in the image quality settings.
    4. There are spare formatted SD cards and spare batteries in my bag
    5. I have model release forms and a pen.

    8. Get to know whom you’re photographing

    Make sure you turn up early – you won’t make a good impression if your talent is waiting for you and wondering if you are going to turn up or not. Get to know your model and their chaperone. Everyone can be a bit nervous at the start of a shoot, so have a good chat with them before you even think about pulling out a camera.

    9. On the shoot

    Remember, on these kinds of shoots, you don’t need quantity, you need quality. I aim to get a dozen images I’m really happy with. This means potentially shooting in a different way than you usually would. Take your time with directing the model and getting the composition right before taking the shot.

    Make sure you get a variety of shots – close-ups, full length, looking to the camera, looking away. Also, remember to get some different looks by using any accessories the model has brought with them.

    tips-for-shooting-better-urban-portraits

    Make sure you get a variety of shots – not just close-ups.

    10. Be prepared to direct the model

    Directing talent is a skill you will need to learn – especially with younger up-and-coming models with limited experience. There’s no need to be worried if you have no experience doing this yourself. Get yourself the 67 PORTRAIT POSES (PRINTABLE) Guide from DPS to have on your phone (or print them), or have a stash of urban portrait images, ready to flick through to give your talent some ideas on how to pose.

    17 Tips for Shooting Better Urban Portraits

    11. Check your ISO and shutter speed

    As the day moves into night, keep a check on your ISO and make sure you have usable shutter speeds above 1/80th of a second. The most annoying mistake I’ve made on these shoots is looking at the back of the LCD screen, thinking that I’ve captured a sharp image, only to see that the image wasn’t as sharp as I thought on my computer screen later on.

    12. Limit any negative self-talk

    Negative self-talk can affect us all. If you had an idea for an image, but it doesn’t work out on the shoot, move on and forget about it. Many images are still there for the taking.

    13. Carry your own lighting options

    For the first half of an urban portrait shoot, I rely on natural or ambient light. As darkness envelopes the urban landscape, I look to my own lighting options.

    The first option I usually take is a speedlight flash that I can use on-camera, or trigger remotely. Typically, the light from these types of flashes can be harsh, so you may like to use a light modifier such as a mini softbox.

    The second type of lighting that I use on my urban portrait shoots are small LED video lights. These are fantastic, and I love using them. Again, you can use one through a light modifier for a softer effect.

    Image: Using an on-camera flash can lead to some creative effects.

    Using an on-camera flash can lead to some creative effects.

    14. Safety

    Safety should be your number one priority on a shoot like this. Identify any hazards before the shoot and brief your model. The last thing you want is someone getting hurt. Be aware of your surroundings at all times. If you get a bad vibe from an area, it’s best to move on.

    Never leave any of your bags on the ground unattended. A few moments of inattention is all an opportunistic thief needs.

    15. Legal

    Always operate your shoots legally. Research if you need any permits to shoot in your city, look into public liability insurance, and have model releases signed before the shoot.

    16. Limit the shoot time

    Keep the shoot between 60 and 90 minutes; you’ll be amazed at how fast this will go. It’s better to have it run shorter and end on a high than run it longer with everyone exhausted. For younger models, keep it to under 60 minutes.

    tips-for-shooting-better-urban-portraits

    Keep the shoot length to under an hour for younger people – modeling is very tiring!

    17. Editing your images

    I always try and get it right in-camera, with only minor edits made to images afterward. One decision you may have to make is how much you want to clean up the image in post. In the example below, there were a lot of cigarette butts on the ground. I decided to remove these in Photoshop to make a cleaner image.

    17 Tips for Shooting Better Urban Portraits

    tips-for-shooting-better-urban-portraits

    In this image, I removed all the cigarette butts and other debris from the road as I felt it detracted from the image. Sasha, Brisbane, Fujifilm X100F lit by a Godox flash.

    Conclusion

    Urban portrait shoots are a lot of fun and can stretch your creativity as a photographer. They help you to think on your feet and overcome challenges. If you’ve never done one before, there’s no need to feel daunted. Do your research and planning, and it will all fall into place.

    If you have any questions or comments about planning an urban shoot, let us know below.

    The post 17 Tips for Shooting Better Urban Portraits appeared first on Digital Photography School. It was authored by Matt Murray.


    Digital Photography School

  • Nikon Z50 vs Canon EOS M6 Mark II: midrange mirrorless comparison

    Midrange mirrorless comparison – Nikon’s Z50 versus Canon’s EOS M6 Mark II

    Nikon’s Z50 and Canon’s EOS M6 Mark II are both built around APS-C sized sensors, mirrorless lens mounts, come with twin-dial controls and are being launched at similar prices. But as much as they have in common, there are plenty of other aspects separating the two as well.

    We’ve gotten a chance to use them both and have a ton of details for you about how they compare, but not just on specs alone. We’ll take a closer look at how well they’re each work for common photographic use cases.

    Features

    First things first, the Canon comes with noticeably more resolution than the Nikon: in fact, at 32.5MP, the M6 Mark II (along with its DSLR sibling, the EOS 90D) comes with the highest-resolution APS-C sensor we’ve yet seen. The Nikon Z50 instead uses a 20.9MP unit that is closely related to the one in the Nikon D500. This will be plenty of megapixels for most people, but some users may want more; and we’ll have more on that in a bit.

    Both cameras have sophisticated on-sensor autofocus systems that offer eye-detection and subject tracking, but they differ greatly in both interface and usability. Most notably, the Z50 has an AF joystick for interacting with your AF point, while the M6 II makes do with merely a touchscreen.

    Both capture full-width 4K video and offer fast burst speeds, but further differences like ergonomic design and their respective lens lineups will have a big impact on which option is the right one for you.

    Landscape photography

    Canon EOS M6 Mark II | Canon EF-M 22mm F2 | ISO 100 | 1/160 sec | F7.1
    Photo by Richard Butler

    Both cameras tick a fair amount of boxes for landscape shooting, albeit different ones. The more compact EOS M6 II is going to be the easier option to pack into a bag for heading out into the elements, though you may want to add on the optional EVF for shooting in bright light.

    However, the Nikon Z50’s claimed weather sealing is probably going to help it stand up to those elements better if you’re expecting inclement weather, and its larger grip, buttons and dials will be more easily operable with gloves. You can top them up with USB should battery life run down while you’re off the grid – and they have similar battery life numbers.

    If you like to crop, or you want to make the largest prints you can from an APS-C sensor, the M6 II is your best bet

    Based on our testing of cameras with similar sensors, we expect both the Z50 and M6 II to have good dynamic range, so that won’t be a big differentiator. But resolution absolutely will be: 32.5MP is a good amount more than 20.9MP. So if you like to crop, or you want to make the largest prints you can from an APS-C sensor, the M6 II is your best bet here.

    But we must also consider lenses: from our initial photos, we’ve only seen one native zoom lens that performs well on the high-res M6 II sensor, and that’s the wide-angle 11-22mm F4.5-5.6. There’s a wide suite of primes for the system now, to be sure (more on those later), but for users who work with a more ‘standard’ zoom range, we think Nikon’s Z50 solution may be best.

    Of course, you can always adapt lenses from Canon’s EF-S and EF mount DSLRs onto the M6 II, and Nikon’s Z-mount full-frame lenses and F-mount lenses on the Z50. If you’re willing to put up with the extra bulk and cost, either camera will offer you plenty of options.

    Travel

    Nikon Z50 | Nikon Z DX 16-50mm F3.5-6.3 | ISO 100 | 1/640 sec | F6.3
    Photo by Carey Rose

    Both cameras will to be great for travelers, for several reasons. Firstly they’re both reasonably compact and easy to pack. They both offer USB charging (be aware we think the Canon requires USB Power Delivery spec) so you can top up their batteries on-the-go. They each offer solid Wi-Fi connectivity so you can get images onto your phone and onto the web from just about anywhere.

    Oh, and we like the pictures out of each of them: even their un-tweaked JPEGs look to offer pleasing color and will be great for quick social posts. And if you do find you want to tweak your files, each allows for user-friendly creative filters as well as more powerful processing of Raw files right on the camera.

    For this use, we wouldn’t get too fussed about the standard zooms on either camera – they’re both compact, and the Canon offers good-enough sharpness for web posting. But if you want better low light performance or blurrier backgrounds behind your subjects, we’d recommend the EOS M6 Mark II because it has more native, fast-aperture primes available for reasonable prices.

    On the Nikon Z50, you can of course adapt Nikon’s full-frame Z primes, as well as crop-sensor and full-frame Nikon F-mount primes, but that adds a lot of bulk and, potentially, cost. On the M6 II, you have 16mm, 30mm and 56mm F1.4 primes from Sigma as well as Canon’s 22mm F2 and 32mm F1.4, and they’re all available for less than $ 500 US each.

    We found the original EOS M6 with Canon’s 22mm prime was a particularly pleasing combination for travel, and we’d expect the same with the Mark II. But it bears mentioning that if you are shooting in a lot of bright light, you’ll want a viewfinder, so if you get your EOS M6 II with the optional unit, don’t forget to bring it along.

    Sports and action

    Canon EOS M6 Mark II | Canon EF-M 18-150mm F3.5-6.3 | ISO 100 | 1/250 sec | F9
    Photo by Carey Rose

    Sports and action shooters eyeing either of these cameras will find that they look awfully capable from their specifications. The Nikon Z50 doesn’t shoot quite as fast as the Canon M6 Mark II, topping out at 11fps with autofocus to the Canon’s 14fps. If you want a live view of images between each of your shots, the Nikon drops to 5fps, which is again slower than the Canon’s 7fps.

    And all this is ignoring the Canon’s very fast 30 fps Raw Burst mode, which is just as it sounds: the camera shoots a burst of Raw images at 30 fps for around three seconds. The caveats with this feature include a 1.25x crop, as well as the requirement that you ‘unpack’ the burst using Canon’s proprietary software once you download them to your computer, but Canon edges out the Nikon on absolute speed here.

    We generally find we prefer a viewfinder to a rear screen when shooting sports and action, and it’s no different with these cameras. The Nikon Z50’s unit is broadly comparable to the EOS M6 II’s detachable unit, so as long as you get the Canon with a kit that includes the EVF-DC2, you won’t be left wanting.

    Both cameras comes with adept on-sensor phase detection systems capable of accurately following subjects very well

    But burst speeds are meaningless if none of your images are in focus. Luckily, both cameras comes with adept on-sensor phase detection systems capable of accurately following subjects very well, particularly if you choose a ‘zone’ and keep it over your subject on your own. If you want the camera to track your subject for you around the frame, the Nikon requires a series of button clicks to get there , whereas the Canon requires you to change one menu setting, and thereafter, you only need a half-press of the shutter once you find your intended subject.

    Lastly, ergonomics bear mentioning. The Nikon’s AF joystick makes moving your AF point a bit easier than the M6 II’s touchscreen (though the latter isn’t bad by any means), and the Nikon’s larger grip will be more comfortable if you’re adapting larger telephoto zooms. But if you opt for each system’s native, lightweight telephoto zooms (meaning Nikon’s DX Z 50-250 F4.5-6.3 or Canon’s EF-M 55-200mm F4.5-6.3), either camera will balance just fine.

    Family and moments

    Canon EOS M6 Mark II | Canon EF-M 22mm F2 | ISO 100 | 1/320 sec | F3.2
    Photo by Richard Butler

    To start, just as both cameras’ autofocus systems are capable with sports and action, they’re quite good at focusing on people as well. Both come with reliable eye-detection autofocus, ensuring focus is exactly where you want it. The M6 II has the edge again here: if for some reason it loses track of your subject, or that person turns away, the camera won’t jump to someone else, as the Nikon Z50 will.

    Both kit lenses are going to be great for general outdoor shooting, but if you’re out at a fancy candlelit dinner, you’ll want a fast prime lens for the best images, and Canon simply has better options here, as we covered in the ‘Travel’ section.

    Image quality on both cameras is generally superb. This means you will rarely have to tweak images before sending them off to your phone, which you can then easily share with the people around you, in the moment.

    Without its viewfinder, the M6 II is a bit easier to throw into a bag than the Z50, but once attached, the size difference between the two is less significant. And since both can be USB charged, you can use the same USB Power-Delivery charger you use for your phone to keep them topped up should you run out of power.

    Lifestyle and people

    Nikon Z50 | Nikon Z 50mm F1.8 S | ISO 100 | 1/4000 sec | F1.8
    Photo by Chris Niccolls

    While family and moments is primarily about casual outings, this type of photography is for the social media conscious photographer looking to add some panache to a scene with some posing and creative use of depth-of-field.

    To summarize, both cameras are capable of great image quality out-of-camera despite their small size, and each have great eye-detection focus (though we prefer generally the Canon’s). Both let you get your images onto the social web quickly, but you can tweak them on the cameras themselves before getting them to your favorite image-sharing app.

    As with a few of the previous categories, it really comes down to lenses here. Between Canon’s own primes and now Sigma’s, the EOS M6 Mark II has a pretty extensive range of fast prime lenses that are both appropriately sized and priced for the camera. Nikon’s only two native Z-mount crop-sensor lenses are currently kit zooms, and their slower variable apertures won’t blur backgrounds as well. Add a full-frame Z mount prime, or any F-mount prime and an adapter, and you’re spending more money and adding more size and weight.

    Video

    These cameras offer comparable video feature sets. They each provide 4K video from the full width of the sensor and have microphone and micro-HDMI ports, but no headphone port to monitor audio. The tilting touchscreens make it easy to shoot from odd angles, but hand-held footage has to rely on in-lens stabilization as neither has a stabilized sensor in the camera body. Our biggest concern was the lack of 24p video recording from the Canon, but the company says it’s adding it in a firmware update in 2020.

    The Nikon gives you more flexibility for configuring a separate i (custom) menu for video mode and they both allow you to set up separate button functions when video shooting.

    Additionally, both cameras feature face-and-eye-detect autofocus while shooting video, as well as tap-to-track functionality. In all, they’re both solid options for shooting good-quality, casual video.

    The wrap

    Throughout this article, there are some themes that have emerged. Both of these cameras are really good cameras that are capable of taking stellar images and video. Both cameras can perform very well with capturing fast action as well as photographing human subjects.

    They both handle very well, but differently, and this will come down to personal taste for many people. The larger grip of the Z50 lends itself better to larger lenses, which may be welcome if you’re adapting lenses from the company’s other lens mounts. Which brings us to the largest theme so far.

    There are currently more native EF-M zooms and primes available than there are for the Z50

    It’s true that vast majority of buyers aren’t likely to move too far beyond the kit lenses on either of these cameras, but the EOS M6 II gives you the most cost-effective and size-conscious options to do so, if you ever decide to. There are currently more native EF-M zooms and primes available than there are for the Z50, and native lens options are likely to be a less confusing path to navigate for new users than deciphering adapters, additional mounts, autofocus motor compatibility, and so on.

    Of course, it could be argued that buying full frame Z-mount lenses puts you on a full-frame upgrade path on the Nikon – a path that doesn’t exist for the Canon. But the affordability of the EF-M prime lenses means it might be more cost-effective to choose what you need now rather than compromising in anticipation of a switch you might make at some later date.

    But what about you? What do you make of these two cameras and how would you use them? Let us know in the comments.

    Articles: Digital Photography Review (dpreview.com)