In this article, we’re going to look at four tips to help you supercharge your Lightroom workflow and post-processing. Then you can spend more time doing what you love, photography!
The issue
Going through several hundred pictures after a photo session can seem so daunting and time-consuming that it becomes more of a chore than an enjoyable and creative part of the photography process. It’s those late nights staring at a collection of pictures on your computer monitor, sipping the last drops from your cold mochaccino long after the whipped cream has melted away, that can suck all the fun out of photography. It can make you want to up-end your workstation, chuck your gear in the trash, and look up the price of desert island real estate so you never have to edit another picture again.
Fortunately, most image editing programs have some type of photo management built-in to help streamline your editing. Lightroom has a set of tools that have been honed over many years of iterative development to really assist you when it comes to trimming precious time from your post-processing workflow. There are four specific techniques that can help you, and those just getting started in the field. Together they can save you time and maybe bring back the artistic spark that may have been lost over the years.

Can you help me save time post-processing in Lightroom? Tell me more!
#1 – Create your own presets
Most people know that Lightroom has a fairly extensive offering of built-in presets, and you can even buy additional sets like the ones we offer here at dPS. But as useful as those are, they might not meet your specific needs as a photographer. If you’re like me you, tend to use presets as a starting point and then tweak your images ad nauseam, but sometimes even getting to that starting point can be tricky.
Enter the wonderful world of user-created presets! Lightroom lets you save any combination of adjustments in the Develop module as a Preset that you can apply to any photo at any time. I find this really handy when doing my initial photo imports. I like the RAW files from my Nikon D750 to have a little bit of added vim and vigor right off the bat. So upon import, I usually apply a preset I made called “Nikon RAW Import” that adjusts black, white, and shadow levels along with a few other parameters. It gives me a nice starting point for almost any image and is a great way to save time when editing.
How to save your own presets
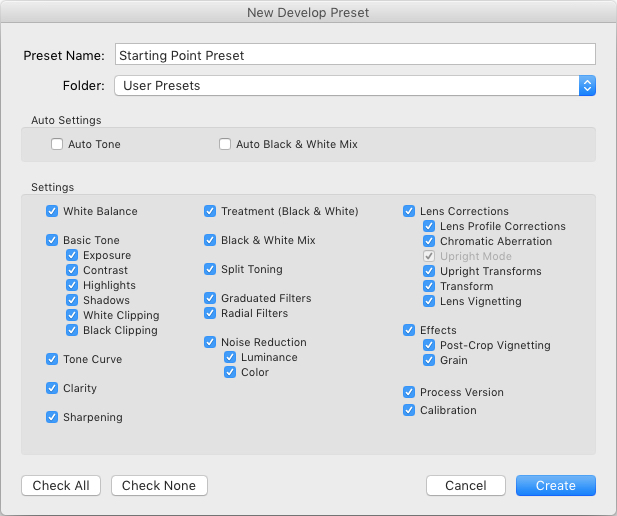
To create your own presets go to the Develop module and change the value of your sliders, adjust your tone curve, dial in your preferred level of sharpening and noise reduction, and you’re 90% finished. After you have an initial set of edits created go to the Develop menu and choose “New Preset.” Select the parameters you would like to include in the Preset and then click “Create.”
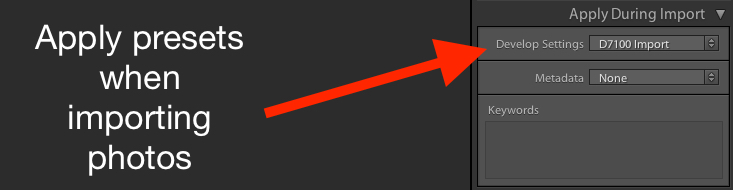
Your Preset is now ready to go and you can apply it with one click to any image, or to a batch of images. Do so by selecting them (from the thumbnails) in the Develop module, right-click on them, and choosing “Develop Settings > User Presets > [Your Preset name].” You can also apply it to all your photos on import by going to the right-hand side of the Import screen under the “Apply During Import” option. Where is says “Develop Settings” pull that menu down and find your preset from the list.
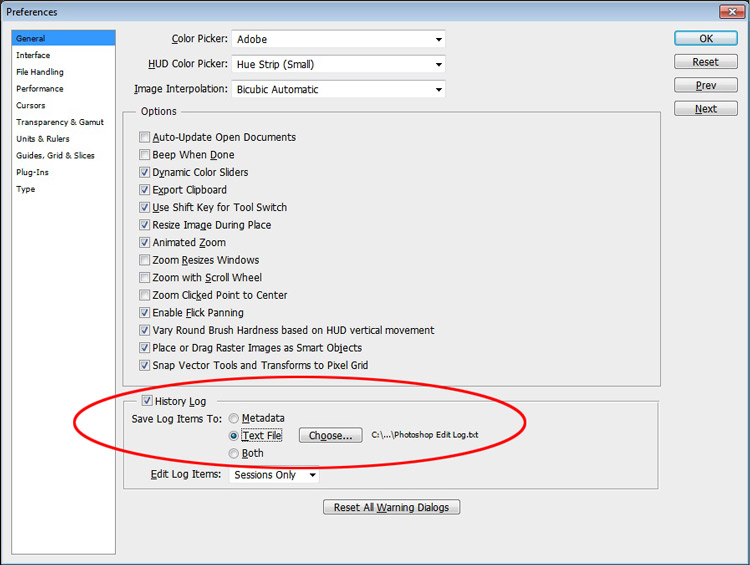
As a bonus, you can even share your Presets with others by navigating to the folder on your hard drive in which they are stored (“Preferences” menu > Presets > Show Lightroom Presets Folder), copying the file with your Preset data, and sharing it with anyone you choose.
Read more here: How to Create Your Own Lightroom Presets
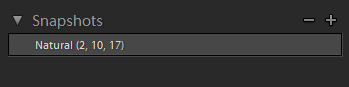
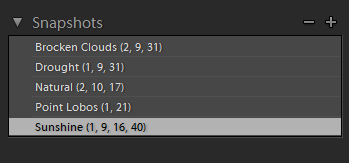
#2 – Sync edits across multiple photos
Photographers are going crazy over this! You can save all sorts of time in your Lightroom workflow by using this one weird trick! I know that sounds like a cheesy click-bait title from a sidebar you might see on a used car website, but in this case, it’s really true.
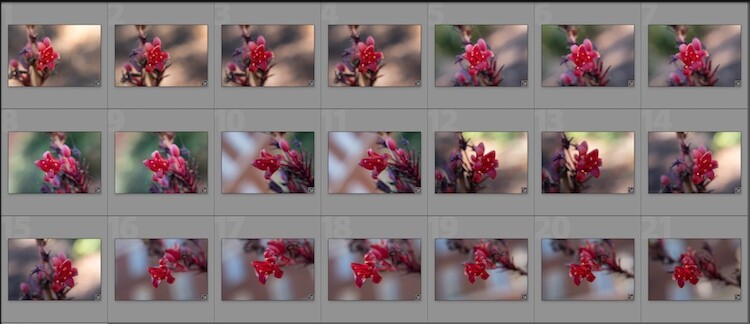
On many photo sessions you will end up with dozens of images that are relatively similar and thus can often benefit from the same types of adjustments. Let’s say you shoot a wedding and have 20 really nice images of the groomsmen getting ready and adjusting their superhero-themed vests in the church office. You could easily spend 5 or 10 minutes adjusting the white balance, black levels, highlights, color saturation, and noise reduction. You finally get one of the photos looking, as Goldilocks might say, “Juuuuust right,” and then realize you still have nine more to go. At which point you start looking up how much your 70-200mm lens might sell for on Craigslist because you know this is going to be another one of those editing sessions that involves way more late nights and cups of coffee than you had initially planned.
How to sync your processing settings
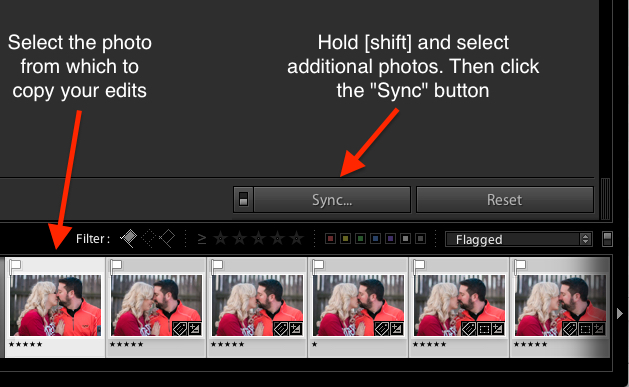
But wait, there’s hope! To instantly sync the edits from the first photo to all the rest which are similar, select the initial image in the filmstrip view at the bottom of the Develop panel. Then hold down the [shift] key while selecting all the rest and click the “Sync…” button in the lower-right corner of your screen.
You can pick and choose which edits you want to sync, and with the click of a button, all the other images are instantly edited just like the first one. BAM! Time saved: infinite. You’re welcome.
Alternatively, you could use the Copy/Paste function to copy edits from one picture to the next, but that only works with a single photo at a time. I have found the Sync option to be far more useful, you may as well.

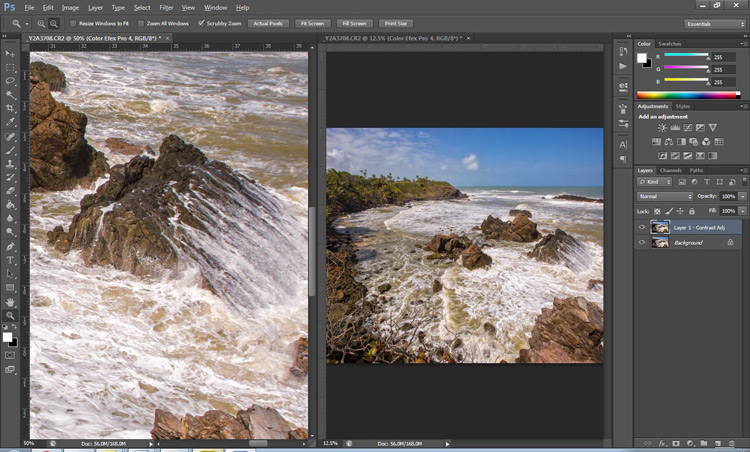
Using the Sync option saved my bacon on this photo shoot. I had so many pictures to edit that synchronizing the changes made things go much faster.
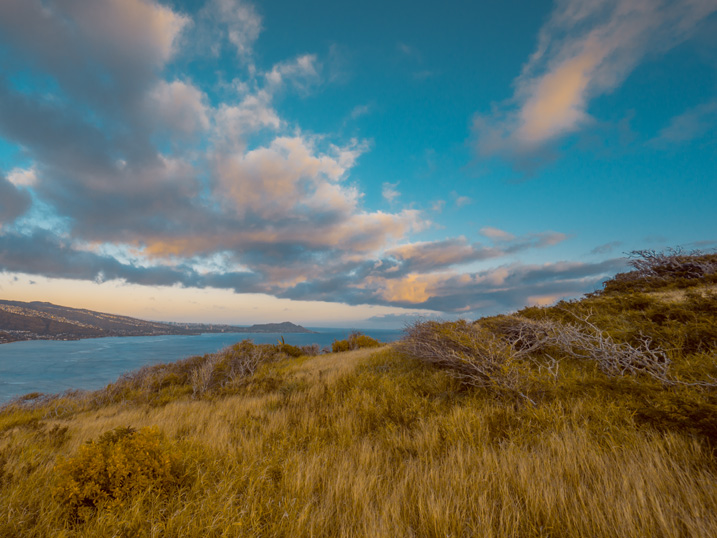
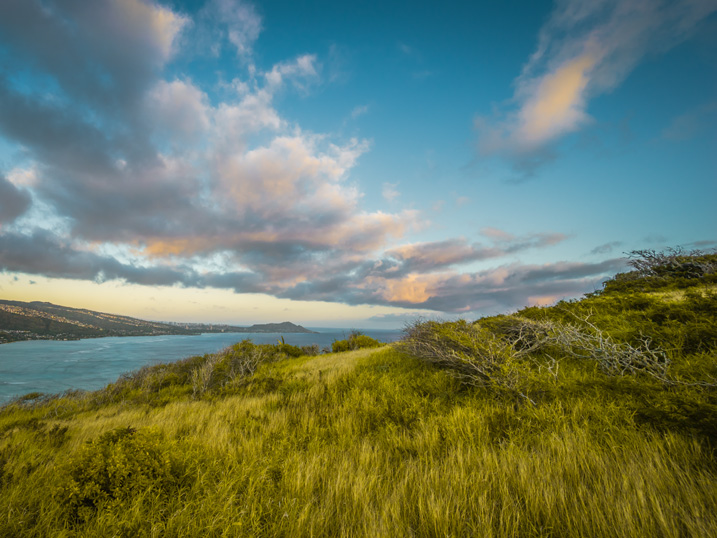
#3 – Use the White Balance Eyedropper
When I first started out with digital photography I was the kind of person who wanted to do everything myself. Auto mode? No thank you camera, I’ll set the exposure myself. Autofocus? I don’t think so. Automobile? Not me, I prefer to walk!
Over time, I learned to let go of some of these tendencies with one glaring exception. Setting the white balance on my RAW files in post-production, stuck with me far too long.
Setting the proper white balance is the foundation for almost any photo editing. If you fiddle with the Temp and Tint sliders long enough you can usually get a good result. The trouble is that takes a long time, especially when working with hundreds of images. It can take a lot of trial and error, and guesswork to dial in just the right white balance. Unless you let Lightroom do most of the heavy lifting for you.
White Balance got you down? The Eyedropper is here to help.
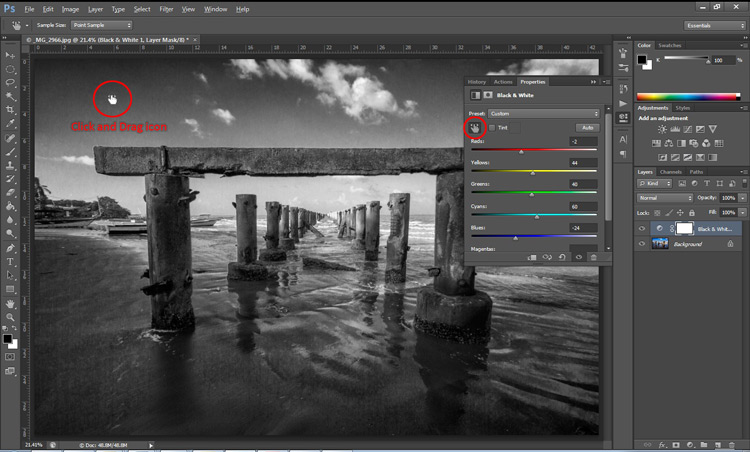
Using the eyedropper
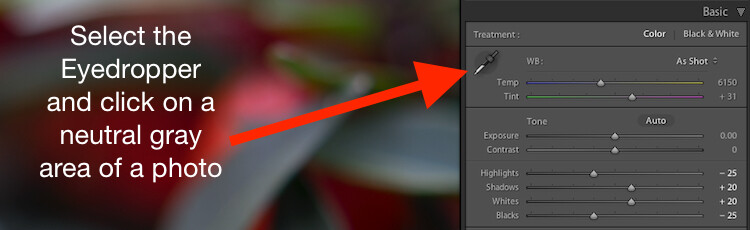
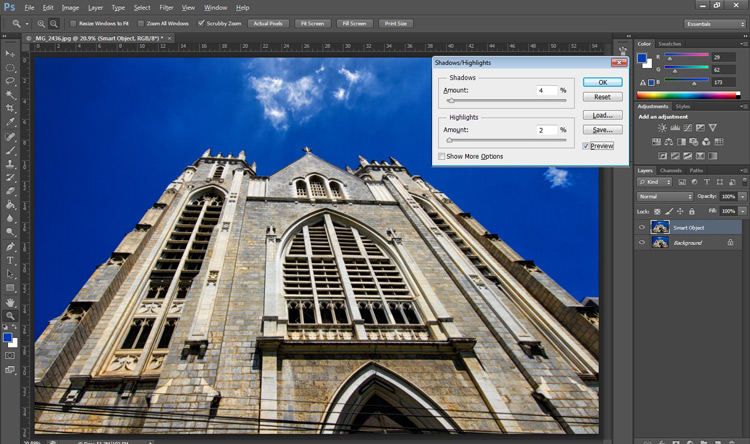
Nestled quietly on the left-hand side of the Basic panel in the Develop module is a strange icon. It looks like a medieval dagger or possibly a light saber that can’t decide whether it’s meant for a Jedi or a Sith. It’s actually an eyedropper. Using on it can help you out immensely when it comes to finding the proper white balance for a RAW file.
Click the icon and find a spot on your photo that is slightly gray (neutral). Not totally pure white mind you, but a little off-white to give Lightroom a reference point as it calculates the value of how the rest of the colors in the image should look. What it does is neutralizes any color cast or shift in that area. A half second later and voilà! Your picture is now properly white balanced, but if it doesn’t look quite right you can tweak it with the sliders. Using the eyedropper isn’t a surefire guaranteed method, but it almost always gets you right on the mark or very close to it.

One click and…bam! Instant white balance.
#4 – Flag/Reject when culling images
I was just talking with a friend recently who takes a lot of pictures of his kids with his DSLR. He told me that one of the hardest things for him to do is go through his images and remove the bad ones. His solution was to simply not delete any at all.
If this sounds like you, whether you’re professional or amateur, and you just can’t quite bring yourself to tap the [Delete] key when browsing through your photo library – Lightroom is here to help.
You might do a family portrait session and get 20 pictures with just mom and dad, 50 that you took in burst mode with the kids sitting on their lap. Then a couple hundred from when the family invited their pet ferret to join the shoot. Some of your images would be easy to discard due to being out of focus, poorly composed, or overly pernicious polecats deciding to climb atop dad’s carefully crafted coiffure. But what about the rest? The ones that are all pretty good while also being quite similar?
So many photos, so little time…
How to flag images in Lightroom
As you scan through your library in Lightroom, you can use the arrow keys to move from one image to the next, and the P and X keys to mark images as keepers or rejects. Tap P (pick) on a picture to adorn it with a white flag, and tap X to mark it with the Tiny Black Flag of Shame denoting a rejected image.
A Flagged picture is one that you have highlighted as particularly good, while a Rejected picture is not worth your consideration. Marking an image as Rejected does not delete it so you can always go back and look at it later. But it serves as a signal to you as you are culling, that you don’t need to consider it. You can also use the filter bar at the bottom of the screen to show only those images that are Flagged, Unflagged, or Rejected by clicking on their respective icons. If you accidentally mark an image incorrectly, press the U key to remove the Flag/Rejected status.
Filter them
You can also use the filter bar at the bottom of the screen to show only those images that are Flagged, Unflagged, or Rejected by clicking on their respective icons. If you accidentally mark an image incorrectly, press the U (unflag) key to remove the Flag/Rejected status.

Once you mark your images as Flagged or Rejected, use the filter icons to choose which photos to display.
Using the Flag/Rejected markings has significantly decreased my editing time, and will likely dramatically lower yours as well. In a similar fashion you can use the number keys 1-5 to mark images with one to five stars, and numbers 6-9 to label images with different colors. I find these less handy than simply using the Flag/Rejected method when doing the initial culling, but far more useful when deciding, for instance, which images are the Best of the Best and worth printing, sharing, or showing to clients.
Over to you
I hope these tips have been helpful. Certainly, there are many more options for helping your Lightroom workflow go a little smoother that we simply don’t have the space to cover in one article. What are your favorite tips? Please share your ideas, tricks, and shortcuts in the comments below!
googletag.cmd.push(function() {
tablet_slots.push( googletag.defineSlot( “/1005424/_dPSv4_tab-all-article-bottom_(300×250)”, [300, 250], “pb-ad-78623” ).addService( googletag.pubads() ) ); } );
googletag.cmd.push(function() {
mobile_slots.push( googletag.defineSlot( “/1005424/_dPSv4_mob-all-article-bottom_(300×250)”, [300, 250], “pb-ad-78158” ).addService( googletag.pubads() ) ); } );
The post 4 Tips to Supercharge your Lightroom Workflow by Simon Ringsmuth appeared first on Digital Photography School.


You must be logged in to post a comment.