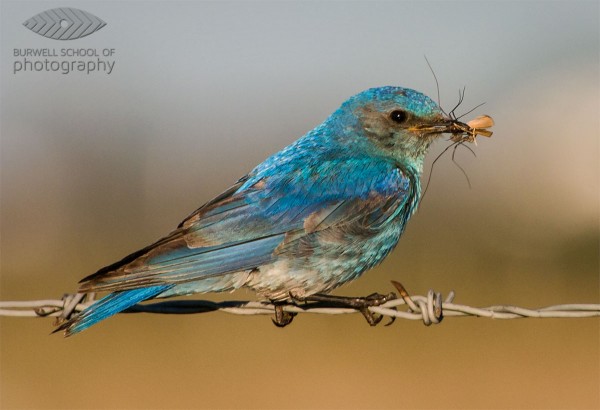
Mountain Bluebird with prey: Canon EOS Digital Rebel, Canon 100-400 F4.5-5.6L IS lens @400mm, 1/800th of a second at F8, ISO 400 – Hand held
A contribution by Paul Burwell from Burwell School of Photography
If there is one area that seems to flummox more aspiring wildlife photographers it is the subject of making sharp images. You’d think that with today’s modern cameras and equipment that there’d be no problem going home with sharp images after each wildlife encounter. Un fortunately, that isn’t the case and I’m going to provide you with some tips and tricks to make sure you’ve got the best possible chance of making sharp images.
Lenses
One of the truisms in wildlife photography is that it is virtually impossible to have too much lens. This means it is extremely rare that the wildlife critter you are trying to photograph is too big in your viewfinder and in fact the opposite is much more common. Not everyone can afford one of the prime super-telephoto lenses that the major manufacturers produce. These lenses in the range of 300mm to 800mm can set you back anywhere between $ 5,000 and $ 11,000 respectively. Unless you’re a pro or a serious amateur with a healthy bank balance, these lenses aren’t feasible for the average user.
So, what’s a person to do? My recommendation is to purchase the largest telephoto lens you can afford. And when you’re looking at telephoto lenses, you want the biggest number of millimetres that you can afford. Common lens lengths include 200mm, 300mm and 400mm.
If you end up purchasing a zoom lens, look for one that has the shortest range possible. Why? Because in general, the more extreme the range the lens covers, the lower the quality at all those ranges. Therefore, I’d choose a lens that gives a range of 70-300mm over a lens that gives a 35-3500mm range every time. You also want to purchase the fastest lens you can afford. All lenses have a maximum aperture they can photograph at.
A lens rated at F2.8 is two stops faster than a lens rated at F5.6 and allows four times as much light to reach the camera’s sensor. Because wildlife is often photographed under challenging lighting conditions, a faster lens allows for faster shutter speeds which equals sharper images.
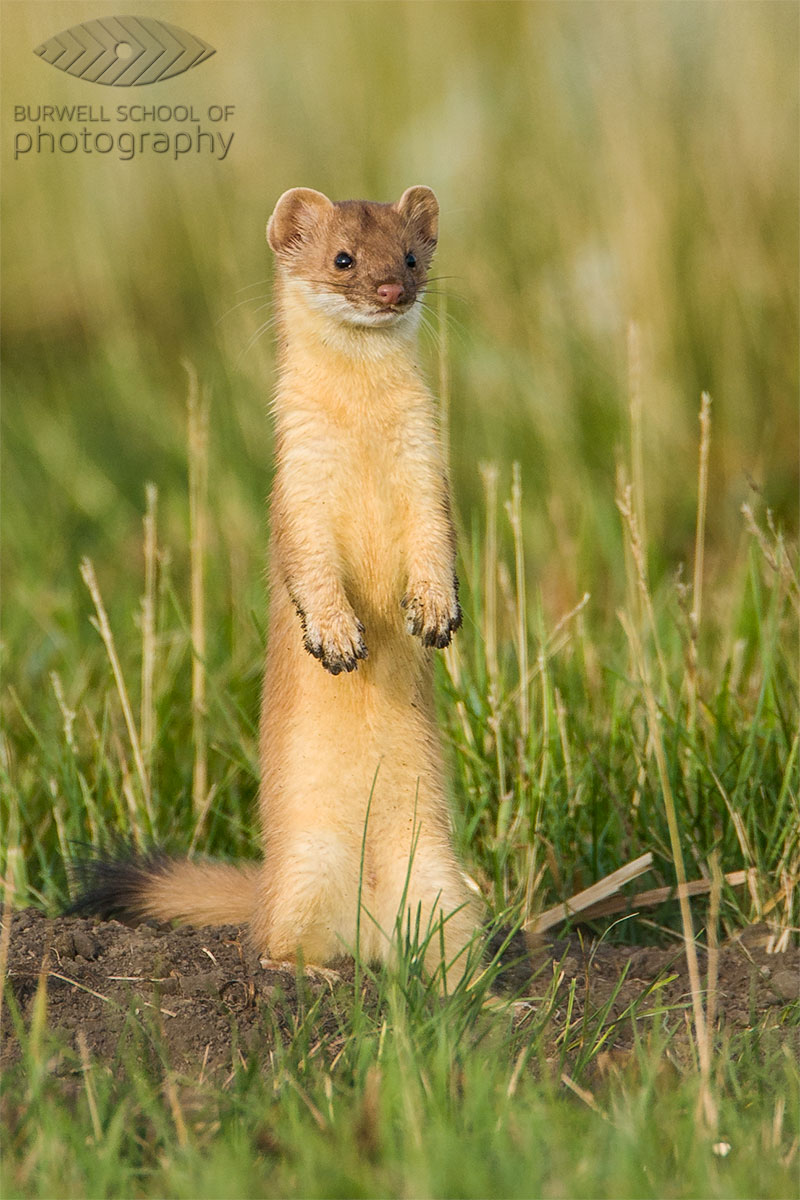
Long-tailed Weasel pauses outside of ground squirrel burrow: Canon EOS Digital Rebel, Canon 500mm F4L IS, 1.4x Extender II @ 700mm, 1/500th of a second at F7.1, ISO 200 – Hand held
Teleconverters/Extenders
I also recommend purchasing a teleconverter (or extender). Teleconverters are rated by the number of times they magnify your lenses range. So, if you’re using a 1.4x teleconverter on a 300mm lens, you’ve now got yourself a 420mm lens. Unfortunately, this comes at the cost of some light and so if your 300mm lens was rated at F2.8, a 1.4x teleconverter will cost you one stop of light and it will effectively become a 420mm F4.0 lens. Stay away from the two-times (2.0x) teleconverters unless you happen to own one of those multi-thousand dollar prime super-telephoto lenses we were discussing earlier.
You’ll often hear that teleconverters degrade the quality of the image and this is true, but there is a trick for overcoming this problem. The solution? Stopping down up to a full stop. If you’re not familiar with the terminology, stopping down means using a smaller aperture setting (smaller aperture == larger f-stop number).
While it is a general practice to photograph wildlife wide open (at the lenses largest opening or smallest f-stop) to separate the subject from the background, I recommend practicing with your lens/teleconverter combination to see how much you need to stop down to make sharper images. Depending on the lens I’m using, I find I need to stop down between 1/3 of a stop up to a full stop.
Support
What else can you do to get sharper images? Use some sort of support. I’ve met a few photographers who have no problem making sharp images hand-holding over 6.5kg (14 pounds) but the majority of people will make sharper images using support. Buy the highest quality tripod you can afford. Make sure the tripod is rated to support at least the amount of weight you’re going to put on it. High quality tripods can be pretty pricey but another alternative to consider that will also give your camera/lens combinations great support is a monopod.
These handy devices also provide excellent support for even the heaviest equipment and they are a lot easier to pack and move about. If you want to save some money, (and who doesn’t), consider purchasing aluminum tripods and monopods over carbon fibre. They aren’t quite as light and they get cold as heck in the winter, but they are strong and a whole lot more affordable.
So, now that you’ve got yourself the best wildlife photography equipment your pocket book will allow, stay tuned for my next column (next week) where I’ll give you the tips and tricks you’ll need to make the sharpest photographs possible.
Until then, get out there and practice, practice, practice!. Photograph ducks at the local pond or go to a dog park and capture some of the action there. Regardless of whether you are in a remote location or on your own back deck, the more familiar you are with your equipment, the better chance you’ll have of making an award winning shot.
Paul Burwell is the owner Burwell School of Photography
Post originally from: Digital Photography Tips.
Check out our more Photography Tips at Photography Tips for Beginners, Portrait Photography Tips and Wedding Photography Tips.
Making Sharper Wildlife Photographs – [Part 1 of 2]

Digital Photography School


You must be logged in to post a comment.