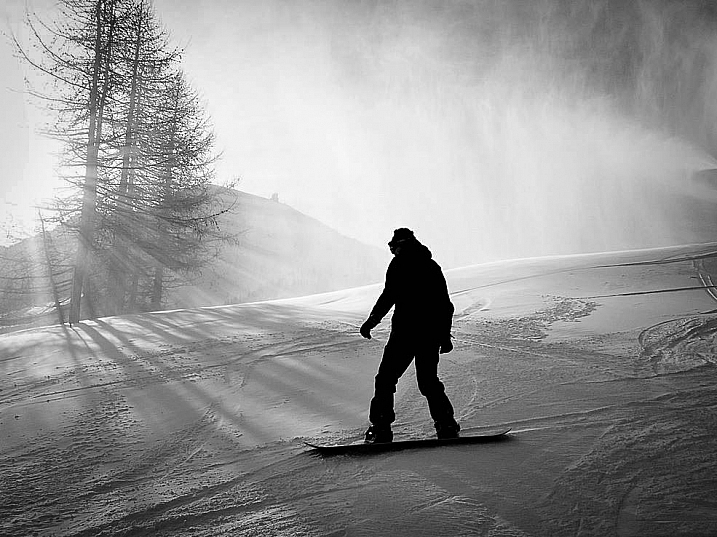
Tag: White

  • White Water Roofing: Wild Water Tanks Top Cool Punjabi Homes

    [ By Steve in Art & Sculpture & Craft. ]

    punjab_water_tanks_1a
    Out to impress the neighbors in Punjab, India? Try topping your humble abode with a cool water tank rendered as a jet, blossom, or bodybuilder.

    punjab_water_tanks_1b

    Keeping up with the Joneses (or their Punjabi equivalent) just got a lot tougher thanks to Santokh Singh Uppal, a successful entrepreneur who, in 1959 and at the age of 17, left his native village of Uppal Bhupa to make his fortune in the United Kingdom. “To me,” explained Santokh, “this Air India plane symbolizes the hopes and dreams of all those enterprising Punjab residents for whom going abroad is like the first step towards shaping their destiny.” Ajay Verma snapped the above shots of Santokh’s house-topper, completed in 2004 after five years of construction.

    Leaving On A Jet Plane

    punjab_water_tanks_2a

    punjab_water_tanks_2c

    punjab_water_tanks_2b

    More than a few Punjabis share Santokh’s sentiments and show it by mounting similarly artistic water tanks on the roofs of their homes. Most of these home-owners are NRIs – Non-Resident Indians – who have achieved success abroad yet still maintain their home base in their homeland. Mounting a decorative water tank symbolic of their personal odyssey, main interest or both serves to signal their family’s prosperity while spurring their village neighbors to top – no pun intended – their folk art braggadocio.

    Tanks For The Memories

    punjab_water_tanks_3b

    punjab_water_tanks_3a

    punjab_water_tanks_3c

    When, where and how did this weird water tank oneupmanship get started? “In Nawanshahr,” states photographer Rajesh Vora, “the proud owner of a restaurant in New Zealand celebrated his success as a chef with a pressure cooker-shaped water tank back home. Soon, villagers in neighboring villages started to copy it.” Not everyone is a successful restaurant owner, however, nor is constructing a rooftop water tank an endeavor anyone can engage in. True to their entrepreneurial spirit, enterprising Punjabis have opened off-the-rack water tank shops and will perform custom on-site installations upon request.

    Next Page – Click Below to Read More:
    White Water Roofing Wild Water Tanks Top Cool Punjabi Homes

    Share on Facebook


    [ By Steve in Art & Sculpture & Craft. ]

    [ WebUrbanist | Archives | Galleries | Privacy | TOS ]


    WebUrbanist

  • Improve Your Middle of the Day Photos By Doing Black and White

    Crystal-Palace

    Sometimes beginning photographers ask me to look at their photos and tell them how they can make the photos better. Nearly every time this happens I end up saying the same thing, “You need to stop taking your pictures in the middle of the day.”

    I have previously written about how and why photos taken at dawn and dusk are vastly superior to those taken at midday, so I won’t do so again here. I have also talked about a few things you can do to mitigate the damage of the midday sun. But that’s all you are doing – mitigating the problem – not solving it.

    At the same time, I understand that you cannot always photograph at dusk or dawn. Family and work commitments limit us all. We cannot always get up so early or stay out so late.  Some places aren’t even open or accessible at dawn. Is there anything else that can be done if you have to shoot in the middle of the day?

    There is one way that you can still take great photos in the middle of the day. That way is to convert them to black and white. Black and white photos frequently work much better than color photos in this regard.

    Dallas-1

    Look to the old masters

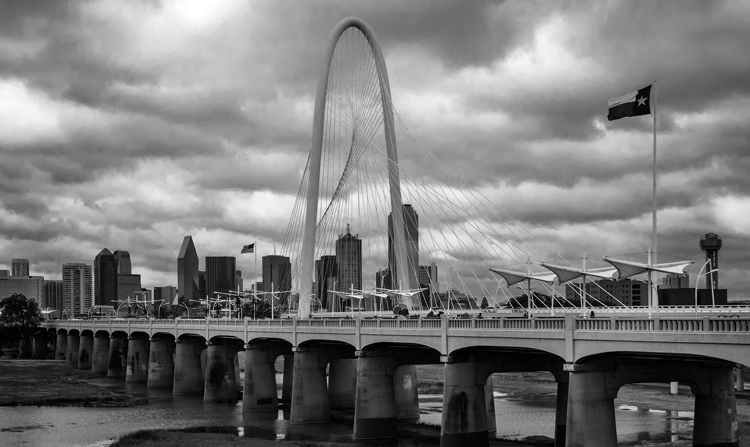
    If you don’t believe me, just to check out the work of photography masters. I initially noticed this when looking at the work of Ansel Adams, who many – myself included – consider the greatest photographer ever. A large number of his photos are obviously taken at midday. For example, check out Monolith, the Face of Half Dome (1927). Yosemite Winter Valley (1940), Canyon de Chelly National Monument (1942), Mount Williamson (1944). and Half Moon and Clouds (1968).

    All of these photos were obviously taken at midday. You can tell by the bright light and shadows. But they are all still great pictures. In fact, some of them are among his best. Why is that?

    Reason #1: High contrast works well in black and white

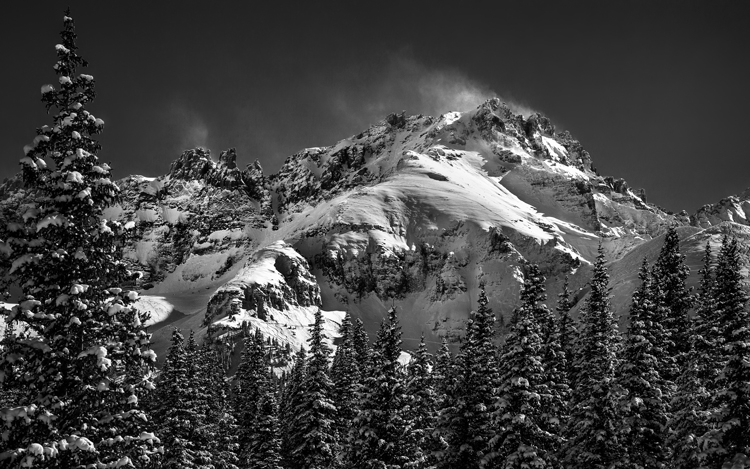
    Why does the same picture taken at midday look horrible in color, but pretty good as a black and white? One reason is that black and white pictures handle high contrast really well. That is not to say their dynamic range is any different, but that these pictures look great when there is high contrast within them. In fact, black and white pictures crave high contrast. Color pictures, on the other hand, don’t always do well with stark contrasts. Therefore photographing at midday – with all of its bright areas and dark shadows creating high contrast – can look really nice as a black and white photo.

    Mountain-1

    Reason #2: Pushing the processing

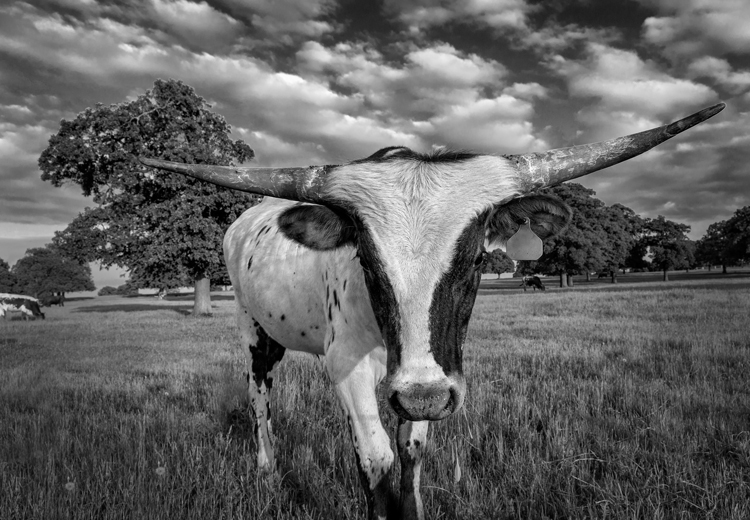
    The other reason why black and white photos taken at midday can still look great, is that they seem to handle processing better than color photos. In other words, you can push the processing further with a black and white photo and get away with it. This was true in the darkroom, and it is also true today with digital tools.

    Why is that? I think it is because black and white photos are already unnatural; obviously, the world is not black and white. When you look at a black and white photo, your mind knows that it is not an accurate representation of reality. If the processing is pushed a little further, your mind accepts it more readily.

    That is not to say that you cannot over do processing in black and white, you can. But it does offer you a little more flexibility.

    Longhorn

    A reason for HDR?

    Perhaps, for this reason, this is one area where HDR can still be a really useful technique. There is much discussion these days about HDR being dead. To be sure, almost no one in photography likes the HDR look (oddly, 100% of non-photographers do like that look). In addition, there are a lot of great tools these days for dealing with dynamic range problems without resorting to HDR. Nevertheless, black and white photos are one area where HDR is still very useful. Since there is no color, part of the surreal nature of HDR is avoided. In addition, the same phenomena mentioned above about being able to push the processing further in black and white is at work.

    Barn-2

    Break out the Neutral Density filter

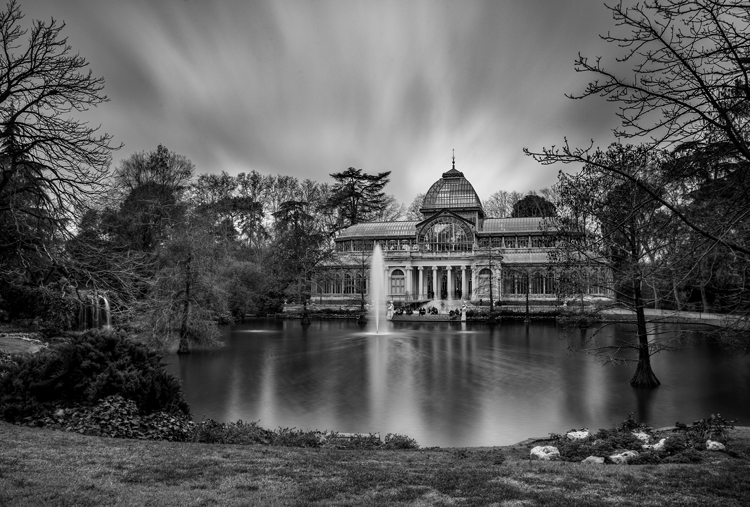
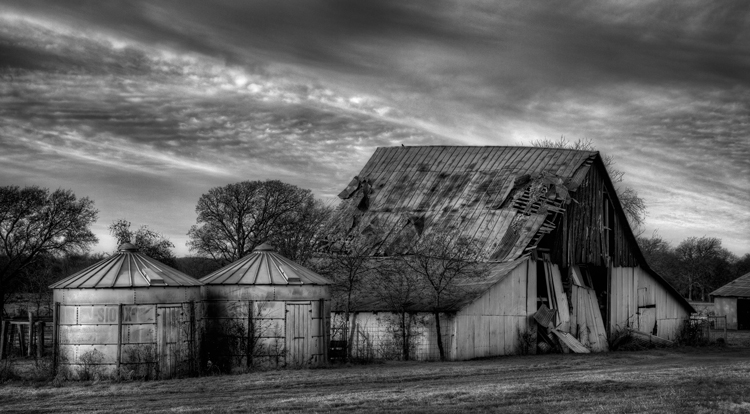
    Another way to improve your black-and-white photos taken at midday is to break out your 10-stop neutral density filter. If there are clouds in the picture, it will give them a sense of movement. If there is water in the picture, it will smooth it out. You can see and example of this in the top picture in this article, which has both clouds and water. Of course, this works for color pictures as well, but it seems to work particularly well with black and white images.

    Conclusion

    I still maintain that the number one thing you can do to improve your photographs is to start shooting at dawn or dusk. It costs nothing, and you don’t even have to increase your skills to make vast improvements. You just have to get up earlier, or stay out a little later. But for those occasions when that is just not possible, try converting some of your photos to black and white. The high contrast might look good on your photo. In any case, you’ll be able to push the processing a little further. It might prove an easy way to make your photos better.

    Please share your black and white midday photos in the comment below.

    googletag.cmd.push(function() {
    tablet_slots.push( googletag.defineSlot( “/1005424/_dPSv4_tab-all-article-bottom_(300×250)”, [300, 250], “pb-ad-78623” ).addService( googletag.pubads() ) ); } );

    googletag.cmd.push(function() {
    mobile_slots.push( googletag.defineSlot( “/1005424/_dPSv4_mob-all-article-bottom_(300×250)”, [300, 250], “pb-ad-78158” ).addService( googletag.pubads() ) ); } );

    The post Improve Your Middle of the Day Photos By Doing Black and White by Jim Hamel appeared first on Digital Photography School.


    Digital Photography School

  • 5 Reasons Why Converting to Black and White May Improve Your Image

    Photography styles are always down to personal taste, in my opinion. I respect that; people have different preferences, and in the same vein photographers can’t please everybody. This also applies to black and white photos, which will be the focus of this article. I have clients who absolutely do not like black and white images, and clients who want a full set of black and white conversions. Personally I give my clients at least 95% color photos and the rest are in black and white.

    reasons-to-convert-to-black-white-tips-photography

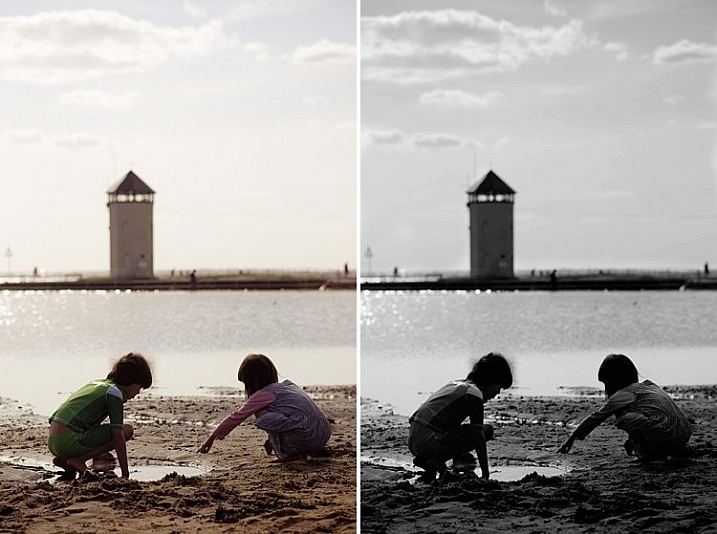
    But why convert to black and white? Is it ever necessary? When do I convert color images to black and white? Here are five reasons why I do black and white conversions on selected photos.

    #1 When the background is colorful and distracting

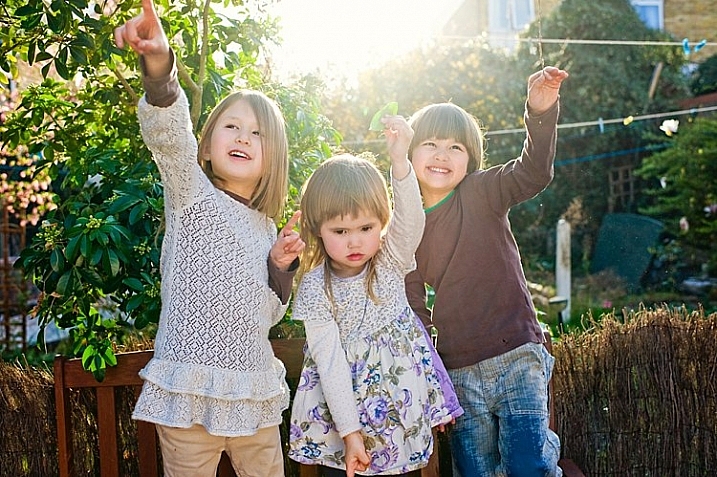
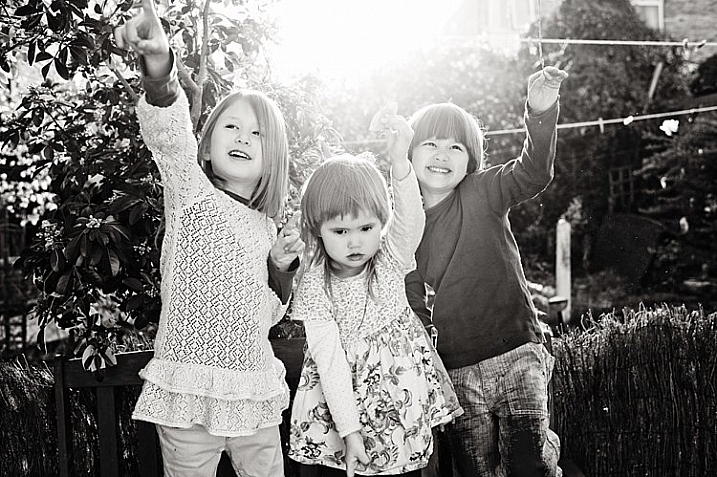
    When there are too many colorful things cluttering in the background and taking the focus away from the subject, if they are not intended to be there, they are more likely to be a distraction rather than an enhancement to the image. It may also be that you have no control over the location and cannot move things away to de-clutter. In the photo below, my intention was to shoot backlit, and this was the only possible spot in a small patio. Light was my priority, and I had no control over the neighbor’s garden. This was a personal snap of my kids and I was not going to spend ages photoshopping the clutter away. Black and white was the way to go.

    reasons-to-convert-to-black-white-tips-photography

    reasons-to-convert-to-black-white-tips-photography

    #2 When colors in the photo or the subject’s clothing do not enhance the image

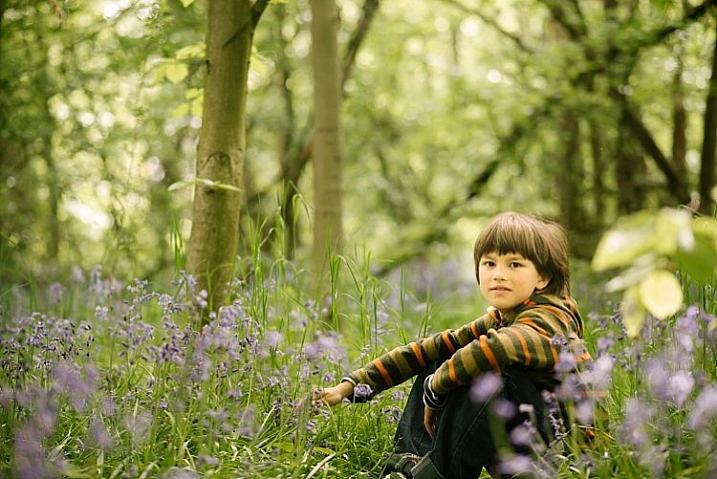
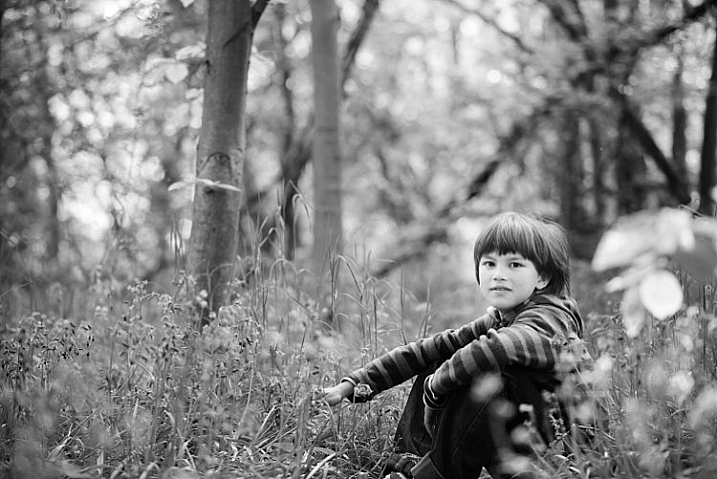
    Sometimes you just have to go with the flow. When you have children, you choose your battles. This photo was taken during a family walk looking at the bluebells. It was hard enough getting the kids out of the house in good time, let alone fighting over which outfits they want to wear. Clearly my son’s outfit does not remotely fit in with the tone of this image. Another hooray for black and white.

    If clients turn up during a photoshoot with outfits that are too bold or distracting, then you have the option of offering them a choice of color or black and white. Explain your reasons why you felt it was necessary to convert it, and show them the difference it makes on the impact of the image.

    reasons-to-convert-to-black-white-tips-photography

    reasons-to-convert-to-black-white-tips-photography

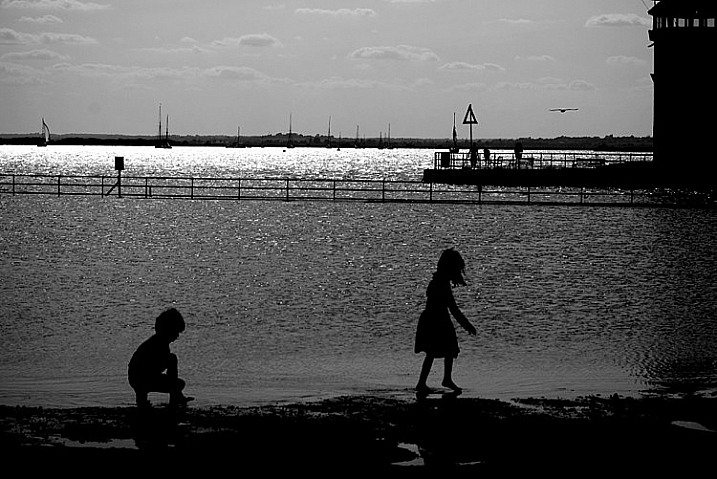
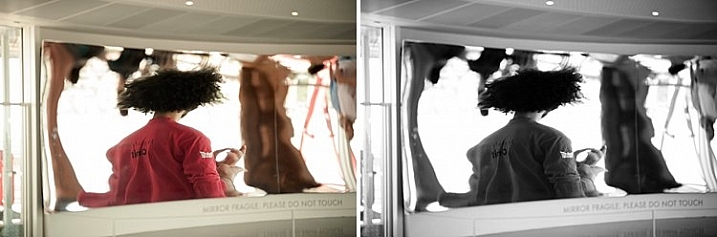
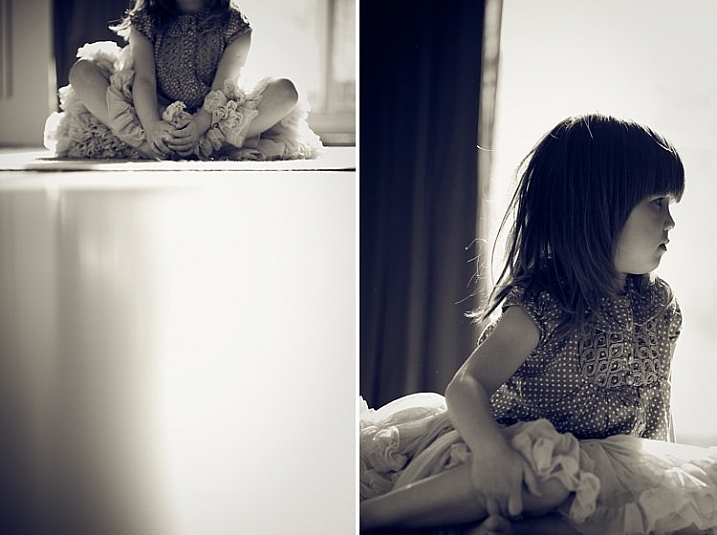
    #3 For artistic purposes like exaggerating contrasts and silhouettes

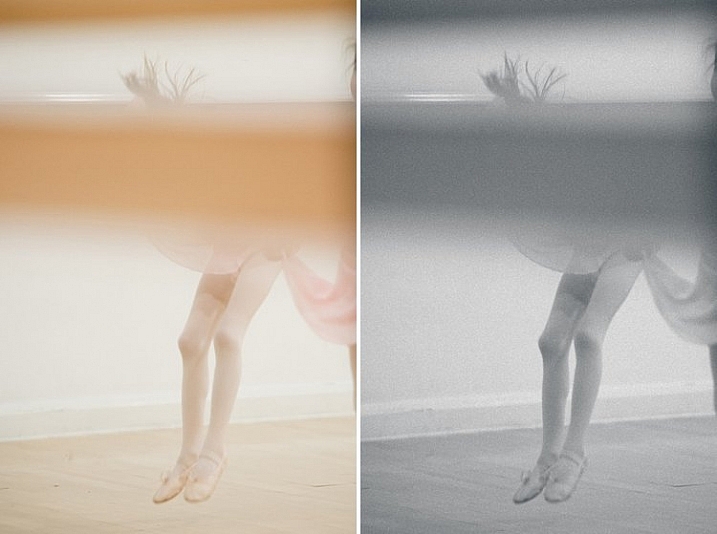
    There are no rules in photography when it comes to creative style. It’s all down to your personal taste and vision. Artistic license is a great thing. You can photograph with motion blur and activity blur in mind, or add grain for more creative effect or a film look. Converting to black and white is just one more creative tool at your disposal.

    reasons-to-convert-to-black-white-tips-photography

    reasons-to-convert-to-black-white-tips-photography

    #4 When black and white has more impact than color

    Sometimes a scene just looks blah. It’s muddy and the colors seems non-committal; they are neither here nor there, not standing out, nor serving a purpose. Trust your gut. When I see “muddy” I run to black and white. An example would be a photoshoot in a living room with cream walls, a cream settee, and the subjects are also wearing cream. You can bring out more contrast in a black and white image.

    At the other end of the spectrum, if the subject are wearing clashing colors that are too much, then converting to black and white turns the colors into varying values of gray, thus giving more cohesion to the overall look of the image.

    In this snapshot of my kids below, I blew out the sky and wanted to bring some of the faint clouds back in. Apart from the muddy colors, it was easier to recover the blown out sky which would have looked very gray in a color image anyway.

    reasons-to-convert-to-black-white-tips-photography

    reasons-to-convert-to-black-white-tips-photography

    #5 When the image is too noisy in color

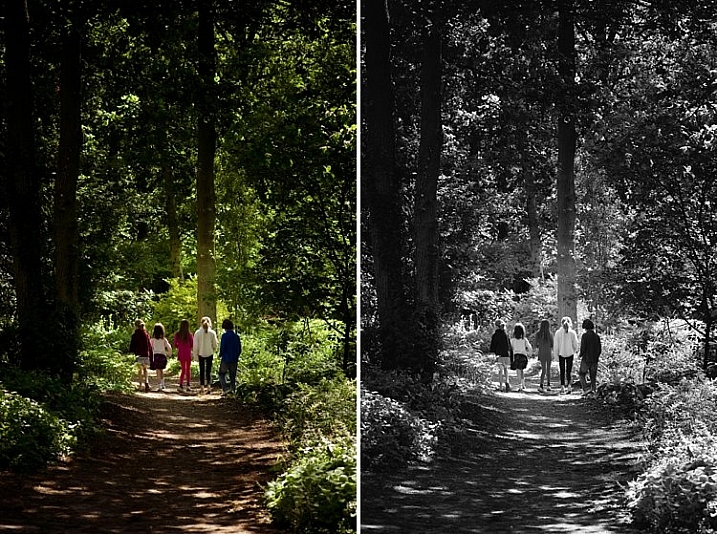
    Sometimes there are moments when your camera is not set correctly, and yet you see something you just have to capture in a split second, without having the chance to change your settings. The result would predictably be an underexposed image with unacceptable noise levels, or an overexposed image with plenty of highlights clipped. But the moment was priceless nonetheless. Black and white lessens the impact of the imperfection and makes the photo acceptable.

    Perhaps this is because we are used to seeing grain in old black and white photos, and accepting the nostalgia associated with such a photo could forgive such an error in today’s digital image. However, beware of making this as an excuse. It should be a last resort to save a photo that is priceless, but never as part of your normal workflow.

    reasons-to-convert-to-black-white-tips-photography

    The kids in the photo above were never still, always running in different directions. I looked back and suddenly saw them walking in a row down a shaded path. I took a few successive shots knowing full well it would be underexposed based on the settings of my previous shots. I anticipated they would suddenly disperse, which they did in a few seconds, so I fired away. From the shots I took within seconds of this happening, I chose the one where they had just walked through a sunlit part of the path. There was still visible noise even after editing, but it becomes a non-issue in black and white.

    How about you? Do you like black and white images? What reasons do you convert to black and white? Please share your thoughts in the comments below.

    googletag.cmd.push(function() {
    tablet_slots.push( googletag.defineSlot( “/1005424/_dPSv4_tab-all-article-bottom_(300×250)”, [300, 250], “pb-ad-78623” ).addService( googletag.pubads() ) ); } );

    googletag.cmd.push(function() {
    mobile_slots.push( googletag.defineSlot( “/1005424/_dPSv4_mob-all-article-bottom_(300×250)”, [300, 250], “pb-ad-78158” ).addService( googletag.pubads() ) ); } );

    The post 5 Reasons Why Converting to Black and White May Improve Your Image by Lily Sawyer appeared first on Digital Photography School.


    Digital Photography School

  • How to Choose the Best Black and White Photo Printer

    In the digital age, color accompanies most of the images we come across during our daily lives. So when it’s intentionally missing, as is the case with artistic black and white photography, people take notice. Monochrome photography is popular in the fine arts for a variety of reasons, many of which come down to how it emphasizes different aesthetic components Continue Reading

    The post How to Choose the Best Black and White Photo Printer appeared first on Photodoto.


    Photodoto

  • How Auto White Balance Can Hinder Your Photography

    You’ve likely heard that auto settings like auto exposure and autofocus aren’t fail-proof. They’re strong features, no doubt, and most photographers take advantage of them at least some, if not all, of the time. But the key to success with auto-anything is to make it work for you; that is, to understand its limitations, and know when it’s not going to give you the best results.

    If you’ve been a photographer for very long, you’ve likely run into the situation in which a very bright scene, a snowy landscape, for example, caused your camera’s auto exposure to significantly underexpose the shot, giving you murky gray snow instead of brilliant white. Likewise, a shot that was naturally dark, like a portrait of a black dog, might have been recorded too light, also resulting in unwanted gray or brown.

    In both of these cases, the auto exposure was tricked by the scene’s overall light or dark tone, and attempted to compensate for this problem by doing exactly what it’s designed to do: choose an exposure that will average out the tones in the scene. For many photographs, auto exposure does a fine job of selecting a correct exposure, for scenes when average is correct. The trouble is when a situation is not average. In those cases, it’s up to you, the photographer, to make the necessary adjustments.

    DJ ATM7 40 2

    DJ ATM7 40

    The exact same thing happens with your camera’s Auto White Balance, only in this case, the issue is not with light intensity, but with color.

    The Color of Light

    Not all light is the same; different types of light have different colors built-in to them. Daylight is basically white, while light from a sunrise or sunset has a red, orange, or pink cast to it (caused by the light being bent through deeper layers of atmosphere). Shade is usually a bit blue, as is snow, as both of these situations are receiving reflected blue light from the sky. Standard incandescent (tungsten) lightbulbs give off a strong yellow cast, while fluorescent lights, long the bane of photographers, can be anywhere from blue, to purple, to green.

    Your camera needs to know the color of the light so that it can accurately record the rest of the colors in the scene. With film, this White Balance” is built into the product (i.e., Daylight film and Tungsten film), but with digital cameras, we have the ability to change the White Balance on the fly. If you shoot a room illuminated only by tungsten light with your camera’s Daylight White Balance setting, the resulting photo will show incorrect colors that are skewed towards yellow (try it and see for yourself). You could also shoot an outdoor natural-light photo with the tungsten setting and get some simply awful blue images. But when these situations are shot with the correct White Balance selected, the colors in the photos should be spot-on accurate.

    The Auto White Balance Blues

    Your camera likely offers a handful of White Balance choices, settings like: Daylight, Cloudy, Shade, Flash, Tungsten, and Fluorescent. There is also, surprise, an Auto choice.

    Many beginning photographers tend to set their White Balance selection to Auto and leave it there. This mistake can be the cause of quite a few photographic problems. Like your auto exposure, Auto White Balance is pretty good. Especially when dealing with artificial light sources, the results of Auto can be very satisfactory. The trouble arises when a color cast is desirable, or when shooting a subject that is mostly one color.

    DJ CWG 3 11 E 2

    DJ CWG 3 11 E

    A great example is a classic sunrise or sunset scene. In this case, there can be quite a lot of red or orange light illuminating the scene. If you choose Auto White Balance for this shot, the camera will evaluate the scene and think, “Hey, something’s wrong! There’s a lot of red here! Better back off on the reds.” The problem is, you do NOT want your camera to correct for those colors. In this case, having a lot of red in the scene is correct according to the subject and your intention. Auto White Balance will probably deliver a sunset that has a much more bluish feel, not as dramatic, and not what the scene actually looked like.

    Another way Auto White Balance can be fooled is with objects that are mostly one color. A good example is flower photography. Suppose you’re photographing a large pink flower that fills the frame almost entirely. Auto White Balance will look at this shot and think, “Whoa, too much pink! Gotta back off on that.” Auto White Balance has no way of knowing if subject is truly that color, or if it’s the lighting. The only thing it can do is try to deliver what it perceives to be an average color balance for the image. In this case, the flower in the photo won’t appear the correct, vibrant pink that it was.

    DJ 776 9 2

    DJ 776 9

    Auto White Balance can even cause slight inaccuracies to everyday outdoor photos, often resulting in shots with just a bit too much purple than they should have (the result of Auto trying to over-compensate for green vegetation).

    Use Presets!

    So what’s the solution? Use those White Balance presets! Many photographers, including me, use the Daylight setting a great deal of the time, to help ensure accurate colors during all times of the day and in many weather conditions. The Shade and Flash presets can also be quite useful. If you’re shooting JPEG files, selecting the correct White Balance at the time of shooting is critical. But even if you shoot RAW files and have the (very useful) ability to adjust your White Balance in post-production, choosing the correct White Balance preset at the time of shooting can start your images off right, and save you plenty of time, and who doesn’t like that?

    Do you have any other stories or examples where Auto White Balance did you wrong? Please share in the comment below.

    googletag.cmd.push(function() {
    tablet_slots.push( googletag.defineSlot( “/1005424/_dPSv4_tab-all-article-bottom_(300×250)”, [300, 250], “pb-ad-78623” ).addService( googletag.pubads() ) ); } );

    googletag.cmd.push(function() {
    mobile_slots.push( googletag.defineSlot( “/1005424/_dPSv4_mob-all-article-bottom_(300×250)”, [300, 250], “pb-ad-78158” ).addService( googletag.pubads() ) ); } );

    The post How Auto White Balance Can Hinder Your Photography by Daniel Johnson appeared first on Digital Photography School.


    Digital Photography School

  • A Beginner’s Guide to Doing Black and White Photography

    If you’ve never tried black and white photography before, you may be wondering what the appeal is. After all, isn’t it a little like black and white television or silent movies – an anachronism in our modern, high-tech age?
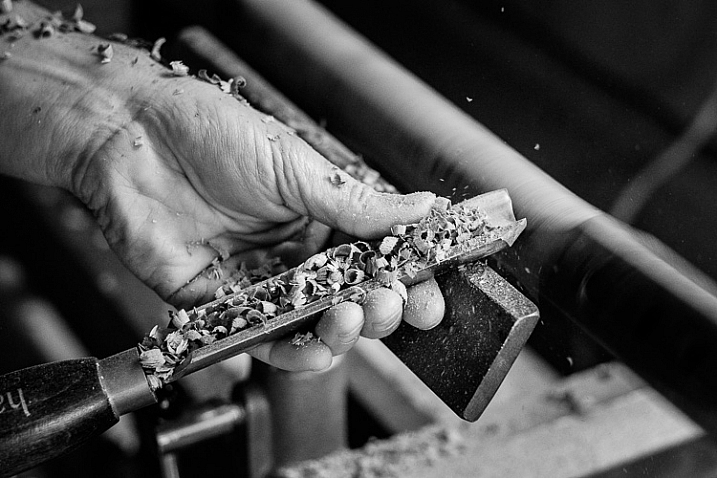
    Black and white photography

    The answer is no, definitely not. In the photography world, black and white is considered an art form. Some would even say only the best photographers work in monochrome. It’s a medium with a rich history, (look at the work of Ansel Adams, Edward Weston or Henri Cartier-Bresson for examples) and a bright future.

    Just as importantly, working in black and white can help you become a better photographer. How? It’s all to do with composition.

    Colour is very powerful, and tends to dominate the photo so much that it’s difficult to see other elements like tonal contrast, texture, shape, form and quality of light. Experienced photographers instinctively see these things, regardless of whether they work predominantly in colour or black and white. But if you’re just starting out, you may need some assistance to do so, and working in black and white photography will help you.
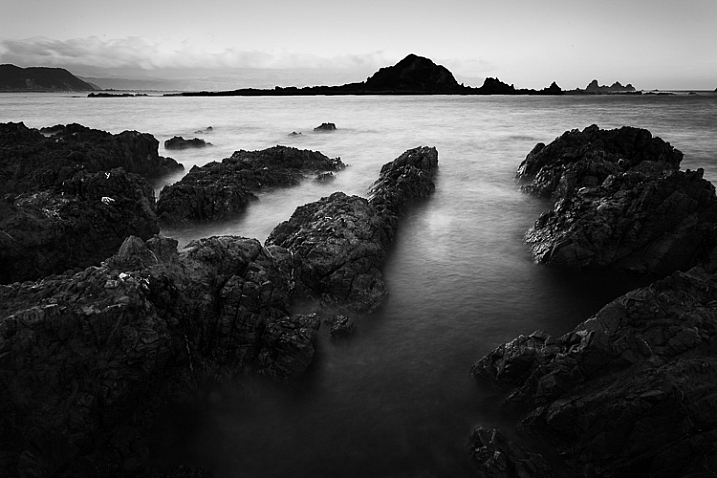
    Black and white photography

    Black and white emphasizes the textures of the rocks and sea in this landscape photo.

    Naturally, there are certain subjects that tend to work better than others in black and white; two in particular are landscapes and portraits. If this is your first time shooting in black and white, then these are great subjects to try out.
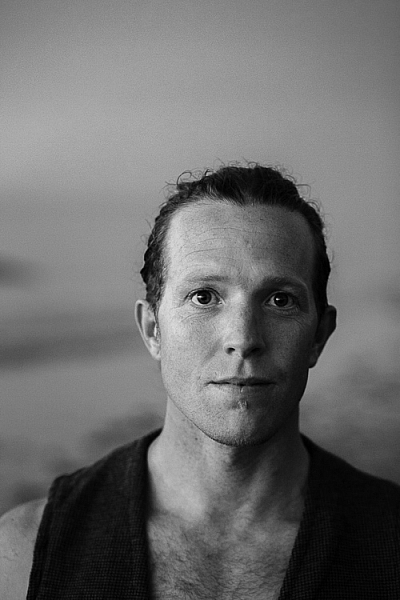
    Black and white photography

    Black and white portraits emphasize expression and quality of light.

    Black and white on your camera

    Before digital photography the only way to work in black and white was to use black and white film. Thankfully, now it’s much easier to work in black and white, just by switching your camera to Monochrome Mode (check your camera’s manual if you are unsure how to do so, look for Picture Styles settings).

    Cameras with electronic viewfinders automatically display the image in black and white, helping you see how the image will look, before you press the shutter. If you have a digital SLR you will get the same effect in Live View. This may be useful if you are working with your camera on a tripod (for instance, taking a landscape photo).

    Usually at this point I advise you to use the Raw format. In the long run it’s easier than using JPEG, and gives you better image quality. But I appreciate that if you’re new to photography you may still be working exclusively in JPEG. The rest of this article works on this basis.

    Working in Monochrome Mode

    Once in monochrome mode you will see some extra options. They help you set your camera up to produce the best results. Again, check your manual if you are not sure where to find them.

    Colour filters

    The colour filter settings are left over from the days of film photography. Photographers would buy coloured filters, and use them to alter the tones in black and white photos. For example, if your scene includes a blue sky, then using a yellow filter will make the sky a little darker, an orange filter makes it even darker, and a red filter darker still.
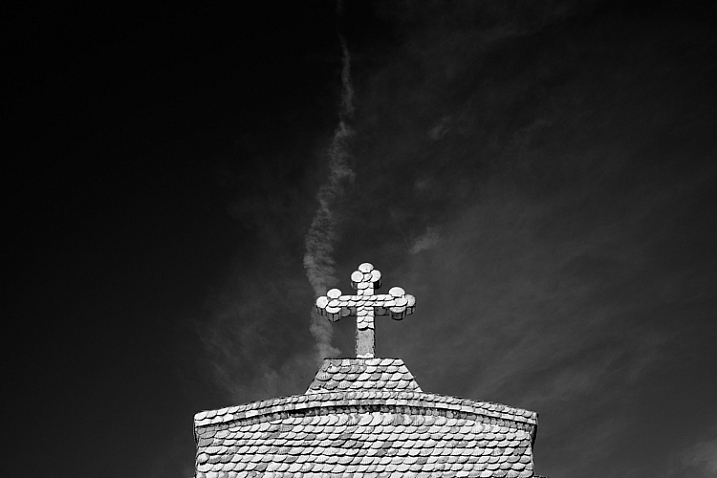
    Black and white photography

    This scene works quite well in black and white, but it’s not nearly as dramatic as it could be.
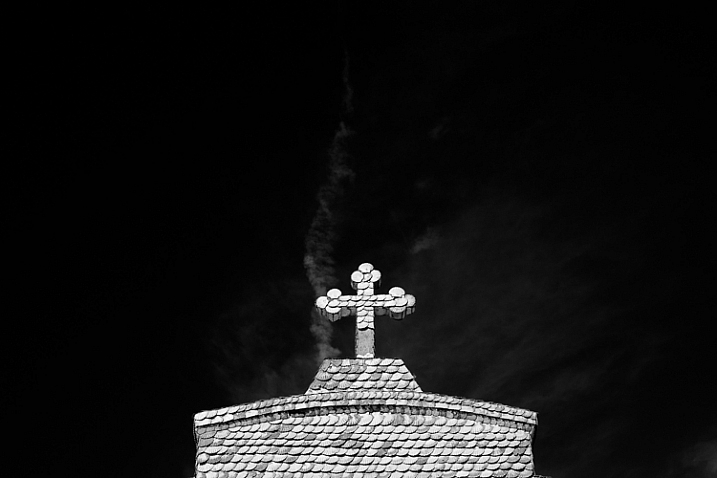
    Black and white photography

    Applying the Red filter setting makes the blue sky go much darker, creating a much more dramatic version of the same scene.

    There is also a place for green filters, which can bring out more detail in green subjects like leafy forests. Those four coloured filters (red, orange, yellow and green) have made their way onto most digital cameras as black and white settings.

    Contrast

    If you take a photo in flat light (for example, a portrait of somebody standing in the shade) the photo may look flat (two dimensional). So, you need to compensate by increasing the contrast. You can either do this in Photoshop or Lightroom after the photo has been taken, or you can do it in-camera with the contrast setting.
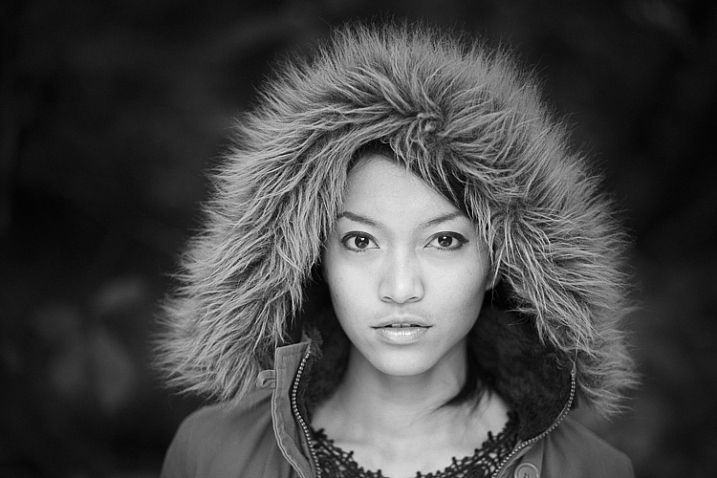
    Black and white photography

    The model was standing in the shade when I took this photo. The light lacks contrast, and the black and white photo is flat.
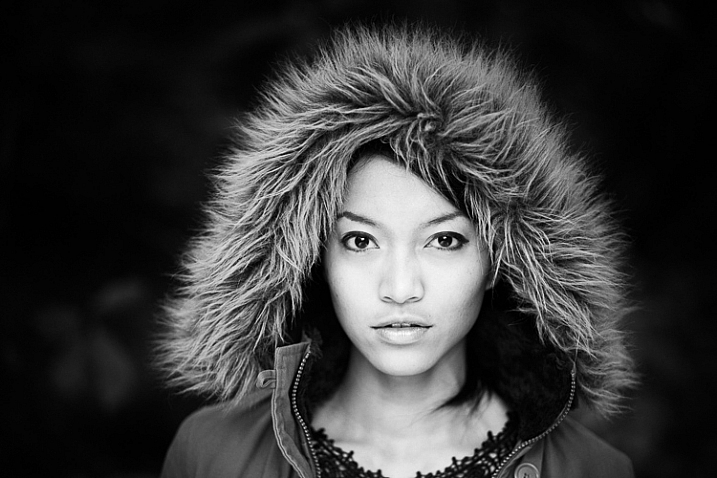
    Black and white photography

    Increasing contrast creates a much stronger image.

    Cropping and the square format

    Most modern cameras let you change the aspect ratio. The reasons why you might want to do that are a little complex, but the main one is that it lets you shoot in the square format, something you may already be used to if you use an app like Instagram on your smartphone. If your camera has an electronic viewfinder, it will display a square image for you, making composition much easier.
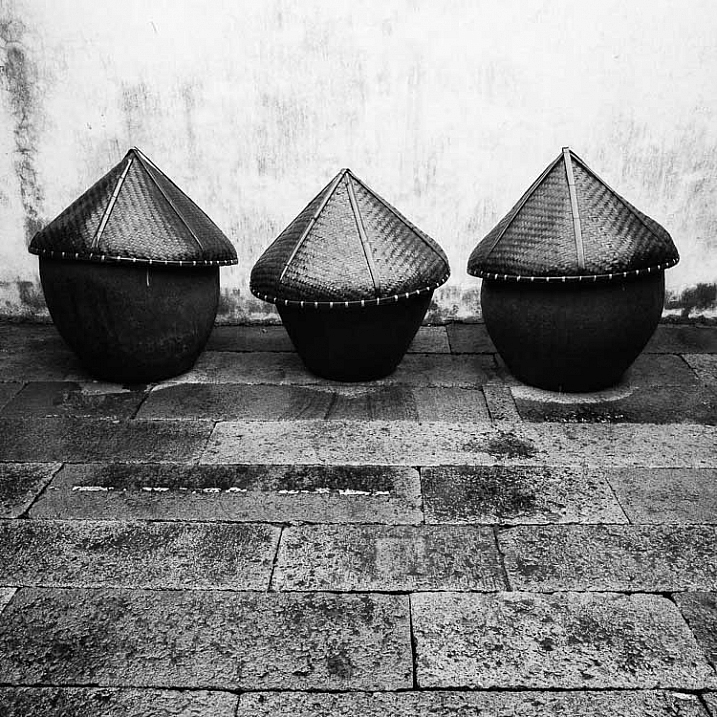
    Black and white photography

    Cropping to the square format emphasizes the shapes of the three pots.

    Toning

    Finally, you may have the option to tone your images. To be honest, unless your camera lets you apply toning affects subtly, I wouldn’t bother with these, as the effect is usually too strong.

    Have fun!

    Black and white is a beautiful medium to work in, one which you will appreciate the more you practice. In the meantime – have fun and enjoy yourself. You are following a path trodden by some of the most famous names in photography. And of course, if you have any questions about working in black and white, please let us know in the comments.

    Masterlng Lightroom: Book Three – Black & White by Andrew S Gibson

    Mastering Lightroom: Book Three – Black & White

    My ebook Mastering Lightroom: Book Three – Black & White goes into the topic of black and white in depth. It explains everything you need to know to make dramatic and beautiful monochrome conversions in Lightroom, including how to use the most popular black and white plug-ins. Click the link to visit my website and learn more.

    googletag.cmd.push(function() {
    tablet_slots.push( googletag.defineSlot( “/1005424/_dPSv4_tab-all-article-bottom_(300×250)”, [300, 250], “pb-ad-78623” ).addService( googletag.pubads() ) ); } );

    googletag.cmd.push(function() {
    mobile_slots.push( googletag.defineSlot( “/1005424/_dPSv4_mob-all-article-bottom_(300×250)”, [300, 250], “pb-ad-78158” ).addService( googletag.pubads() ) ); } );

    The post A Beginner’s Guide to Doing Black and White Photography by Andrew S. Gibson appeared first on Digital Photography School.


    Digital Photography School

  • Deal 12: Black & White Photo Artistry Course – 60% OFF!

    CVnMZHSrqAfZHd4w1Q6yEDCwWW1K9VKWcEPX91Nk2NkIt’s the final day of our 12 deals of Christmas and we’ve saved one of our best deals until last.

    Last year Sebastian Michaels smashed every dPS record with his Fine Art Grunge Composition course. This year he’s back, with this brand new Black & White Photo Artistry course!

    … and you can save 60% on the regular price right now.

    This course brings together all Sebastian’s best photo artistry approaches and techniques and expands on them within the specific realm of creative black and white.

    You’ll discover the pro secrets for producing stunning works of photo art. Awesome, intricate black and white compositions fit for print and canvas. All while honing your photography skills!

    Ready to create the most artistic photo works of your life? Grab this deal with a 60% saving today only!

    We think it’s a brilliant final deal in the 12 dPS days of Christmas and well know you’ll cherish everything it will teach you.

    Grab this deal before it is gone here.

    PS: Sebastian has put together 3 amazing bonuses for dPS readers – scroll down his information page to see them – they make this an even better deal!

    googletag.cmd.push(function() {
    tablet_slots.push( googletag.defineSlot( “/1005424/_dPSv4_tab-all-article-bottom_(300×250)”, [300, 250], “pb-ad-78623” ).addService( googletag.pubads() ) ); } );

    googletag.cmd.push(function() {
    mobile_slots.push( googletag.defineSlot( “/1005424/_dPSv4_mob-all-article-bottom_(300×250)”, [300, 250], “pb-ad-78158” ).addService( googletag.pubads() ) ); } );

    The post Deal 12: Black & White Photo Artistry Course – 60% OFF! by Darren Rowse appeared first on Digital Photography School.


    Digital Photography School

  • Weekly Photography Challenge – Snow White

    Check out these images of snow I rounded up earlier today.

    Thomas Hawk

    By Thomas Hawk

    Weekly Photography Challenge – Snow White

    This week your challenge is to go photograph something snow white – so what that means is that if you do not live in a place where it snows you can still shoot based on the theme white. Try doing a white subject on a white background, something high-key.

    Howard Ignatius

    By Howard Ignatius

    Howard Ignatius

    By Howard Ignatius

    Sheree Zielke

    By Sheree Zielke

    Thomas Hawk

    By Thomas Hawk

    Rene De Paula Jr

    By rene de paula jr

    Will Montague

    By Will Montague

    Ben Raynal

    By Ben Raynal

    Share your images below:

    Simply upload your shot into the comment field (look for the little camera icon in the Disqus comments section) and they’ll get embedded for us all to see or if you’d prefer upload them to your favourite photo sharing site and leave the link to them. Show me your best images in this week’s challenge. Sometimes it takes a while for an image to appear so be patient and try not to post the same image twice.

    Francisco Gonzalez

    By Francisco Gonzalez

    Randi Hausken

    By Randi Hausken

    Jérémy Lelièvre

    By Jérémy Lelièvre

    googletag.cmd.push(function() {
    tablet_slots.push( googletag.defineSlot( “/1005424/_dPSv4_tab-all-article-bottom_(300×250)”, [300, 250], “pb-ad-78623” ).addService( googletag.pubads() ) ); } );

    googletag.cmd.push(function() {
    mobile_slots.push( googletag.defineSlot( “/1005424/_dPSv4_mob-all-article-bottom_(300×250)”, [300, 250], “pb-ad-78158” ).addService( googletag.pubads() ) ); } );

    The post Weekly Photography Challenge – Snow White by Darlene Hildebrandt appeared first on Digital Photography School.


    Digital Photography School

  • 28 Wintery White Snowy Images

    For those of us who live in the northern hemisphere, the ground is probably covered in snow for many of us by this time of the season. So what better reason is there to get out and photograph all that white fluffy stuff?

    Here is that wintery white stuff in some snowy day images:

    Adam Foster

    By Adam Foster

    Jenny Downing

    By jenny downing

    Tim Donnelly

    By Tim Donnelly

    Maf04

    By maf04

    Visit Finland

    By Visit Finland

    Shigemi.J

    By Shigemi.J

    Mika_Oulu

    By Mika_Oulu

    Adam Vradenburg

    By Adam Vradenburg

    Andrew Smith

    By Andrew Smith

    Gerry Balding

    By Gerry Balding

    Rodney Campbell

    By Rodney Campbell

    Maziar Hooshmand

    By maziar hooshmand

    Russ Seidel

    By Russ Seidel

    Julie Falk

    By Julie Falk

    Shawn Harquail

    By Shawn Harquail

    Pascal Bovet

    By Pascal Bovet

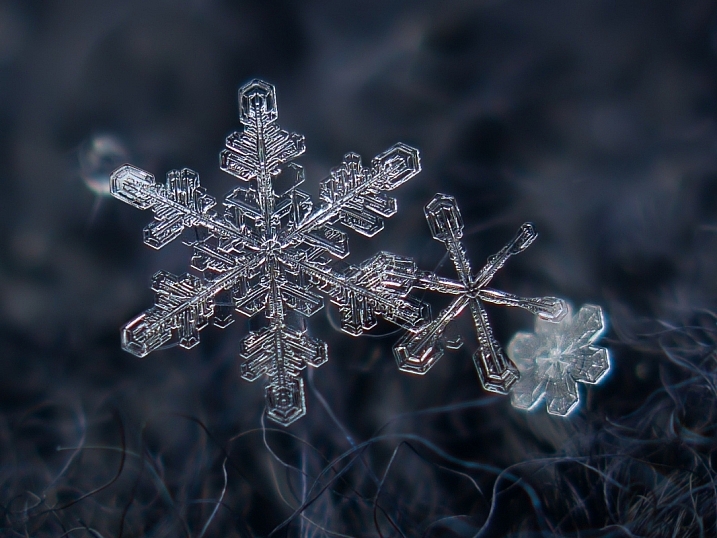
    Alexey Kljatov

    By Alexey Kljatov

    Kamyar Adl

    By Kamyar Adl

    Several Seconds

    By Several seconds

    Mike Norkum

    By Mike Norkum

    Rishi Bandopadhay

    By Rishi Bandopadhay

    Ishrona

    By Ishrona

    Roman Boed

    By Roman Boed

    Javier

    By Javier

    Flood G.

    By Flood G.

    Vida Dimovska

    By Vida Dimovska

    Brian Colson

    By brian colson

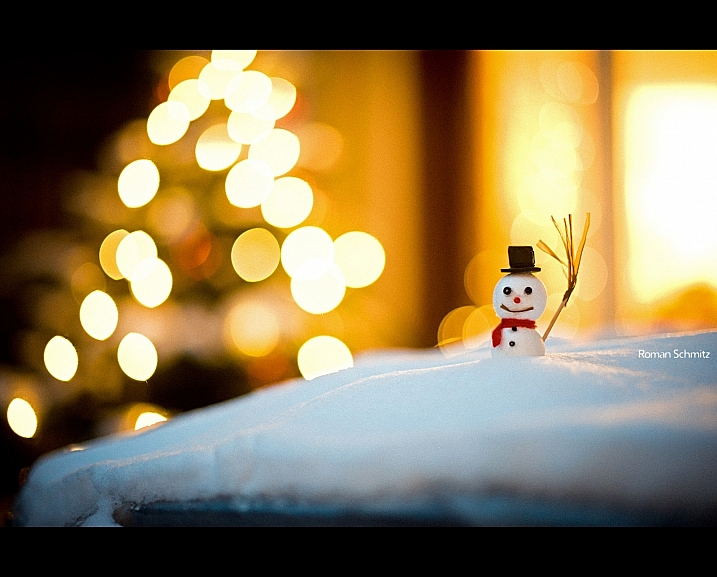
    Roman Schmitz

    By Roman Schmitz

    googletag.cmd.push(function() {
    tablet_slots.push( googletag.defineSlot( “/1005424/_dPSv4_tab-all-article-bottom_(300×250)”, [300, 250], “pb-ad-78623” ).addService( googletag.pubads() ) ); } );

    googletag.cmd.push(function() {
    mobile_slots.push( googletag.defineSlot( “/1005424/_dPSv4_mob-all-article-bottom_(300×250)”, [300, 250], “pb-ad-78158” ).addService( googletag.pubads() ) ); } );

    The post 28 Wintery White Snowy Images by Darlene Hildebrandt appeared first on Digital Photography School.


    Digital Photography School

  • Out of Africa: The black and white nature photography of Laurent Baheaux

    Laurent Baheux began in photography as a sports writer and photojournalist before a safari to Tanzania in 2002 changed his life. There he fell in love with photographing the exotic animals of Africa, preferring a fine art approach that gives his wildlife images a portrait-like quality. Read more

    Articles: Digital Photography Review (dpreview.com)