RSS
 

Posts Tagged ‘Users’

Fujifilm X-T1 users to get significant boost in autofocus performance and function

11 May

New firmware has been announced for the Fujifilm X-T1 mirrorless camera that promises to overhaul autofocusing performance and ‘introduces a new AF system’ to this X-series flagship body. Firmware version 4.00 will be available in late June, and seems to take significant steps towards solving issues with moving subjects and focusing in low contrast conditions. Read more

Articles: Digital Photography Review (dpreview.com)

 
Comments Off on Fujifilm X-T1 users to get significant boost in autofocus performance and function

Posted in Uncategorized


Apple overtakes Nikon for 2nd spot in most-owned camera rankings of Flickr users

17 Jan

Photo sharing website Flickr has published tables of its members’ most used cameras and brands, in which Apple has overtaken Nikon for the first time. Canon remains the most popular brand used, according to Flickr’s calculations, but in 2014 Apple knocked Nikon into third place, with Samsung moving ahead of Sony to take fourth. Read more

Articles: Digital Photography Review (dpreview.com)

 
Comments Off on Apple overtakes Nikon for 2nd spot in most-owned camera rankings of Flickr users

Posted in Uncategorized


Setting up Lightroom Mobile for First Time Users

11 Jan

I laughed at Lightroom Mobile the first time I saw it. “Why would I ever want to use that stripped down gadget on a small screen?” And now, here I am about help you install and use it. Why is this?

It’s because I have found how totally useful the app is in sorting through hundreds or thousands of images from the world of “any time, any where”. Most notably, in a comfy chair with good light or on a weekly airplane flight. iPads also became lighter and iPhone screens larger.

Let’s start with how to set up Lightroom Mobile on your iPad or iPhone and then give some examples of how I find it useful in managing a huge library. I will be using a Collection of mine that is a work in progress to craft black and white images of the Himalayas.

Setting up Lightroom for mobile use

Connect Lightroom to your Adobe ID

The first step is to make sure you have the right version of Lightroom on your PC or Mac. You need to have version 5.4 or later, you can download the latest version from Adobe here. You also need an Adobe ID (free) for this to all work as it is the hub in the cloud that makes this all spin. If you don’t have one, sign up here.

With Lightroom open, you will notice in the upper left corner the phrase “Get started with Lightroom mobile”

1

Click the triangle next to the words and log in with your Adobe ID

2

You will then see that the top left of the screen has changed to the name you gave to Adobe upon creating your Adobe ID.

3

Great! Now let’s set up Collections to synchronize

Setting up Collections to sync

Lightroom Mobile will currently only work with Collections. If you need help setting up a Collection, the free Adobe video here will help. To enable a Collection for syncronization, simply right click on the Collection and choose “Sync with Lightroom mobile”. Pretty easy!

4

After clicking, you will notice a double arrow appears to the left of the Collection. This indicates the Collection will be syncing when sync is turned on.

5 copy

Now, up in the top left, Lightroom will let you know it is starting the sync of those images.

6

As a first pass, we are done! Simply repeat this process for Collections you have already created. Additionally, when creating a new Collection, there is a box that can be checked to automatically sync the new Collection. It looks like this:

7

Setting up your iPad or iPhone for use

This is the easy part. First, ensure your iPad/iPhone is connected to the Internet. Go to the App Store and search for Lightroom Mobile.

Peter-West-Carey-adobe2014-1217-0225

Install (it’s free) and then start the app.

Peter-West-Carey-adobe2014-1217-0229

You will be presented with an Adobe ID screen after paging through the first time introduction.

Peter-West-Carey-adobe2014-1217-0230

After signing in you will be taken to a page showing all the Collections you have set up to sync on the desktop version of Lightroom.

Peter-West-Carey-adobe2014-1217-0232

Tap the main image and you will be taken to the Collection itself. The first time you run through Lightroom Mobile it will give you helpful contextual hints.

Peter-West-Carey-adobe2014-1217-0233

Tap on any picture to edit it.

Peter-West-Carey-adobe2014-1217-0235

Quick filtering with Lightroom mobile

While there are a lot of features in Lightroom Mobile that make it useful for photographers, this post is going to concentrate on the basics to get you started.

Now that you have a Collection synced to your iPad/iPhone (note: it might take a while to fully sync a larger Collection), you can start filtering. For me, filtering is the best use of this app, currently. I enjoy being able to filter my images from the comfort of my living room or while traveling. I also do some basic edits to images but I usually leave the major edits to my desktop. To filter images, I use both the flags and stars features. You can switch between changing those features by tapping the icons in the bottom left corner.

Peter-West-Carey-adobe2014-1217-0238-2

Peter-West-Carey-adobe2014-1217-0238

When the flag icon is highlighted, as it is here, simply move your finger up or down on the screen to pick, unpick or reject images. These settings will then sync over to your desktop within seconds as long as Lightroom is open on the desktop.

Peter-West-Carey-adobe2014-1217-0237

Peter-West-Carey-adobe2014-1217-0239

I use these two features to sort images. Flags are images I especially like and I know I want to work on back at my desktop. I then use two stars to indicate the image should be used for my stock photography work (the scale then goes up to three stars once edits are done, four stars when title and keywords are done and five stars when completely finished).

There are a lot of editing options available in Lightroom Mobile that can be accessed from tapping the icons at the bottom of the screen on an individual image.

Peter-West-Carey-adobe2014-1217-0241

All of these features are best left for a future post.

Offline use

One last thing; Lightroom Mobile usually needs to ‘see’ your desktop’s version of Lightroom in order to show previews the first time and make edits. Therefor, once I have a Collection fully sync’d, I will then turn on Offline Editing which allows me freedom from wifi to make edits, knowing they will sync the next time I am online.

To do this, click on the three little dots on the bottom of the Collection image:

Peter-West-Carey-adobe2014-1217-0232-2

This brings up a menu with many options.

Peter-West-Carey-adobe2014-1217-0243

Choose to Enable Offline Editing and Lightroom Mobile will now bring across Smart Previews of the images to your mobile device.

Peter-West-Carey-adobe2014-1217-0242

How do you use Lightroom Mobile

Lightroom Mobile has a host of other features such as automatically uploading images shot on your iPhone/iPad into Lightroom on your desktop.

What about you? What have you found useful in Adobe Lightroom Mobile?

googletag.cmd.push(function() {
tablet_slots.push( googletag.defineSlot( “/1005424/_dPSv4_tab-all-article-bottom_(300×250)”, [300, 250], “pb-ad-78623” ).addService( googletag.pubads() ) ); } );

googletag.cmd.push(function() {
mobile_slots.push( googletag.defineSlot( “/1005424/_dPSv4_mob-all-article-bottom_(300×250)”, [300, 250], “pb-ad-78158” ).addService( googletag.pubads() ) ); } );

The post Setting up Lightroom Mobile for First Time Users by Peter West Carey appeared first on Digital Photography School.


Digital Photography School

 
Comments Off on Setting up Lightroom Mobile for First Time Users

Posted in Photography


Leica M9 users report sensor corrosion issue

10 Dec

A growing number of Leica users are reporting white spots appearing on images taken with M9, M9-P, M Monochrom and M-E cameras. The common element in all of these models is their 18MP full frame Kodak CCD sensor which is protected by a piece of Schott S8612 glass. Read more

Articles: Digital Photography Review (dpreview.com)

 
Comments Off on Leica M9 users report sensor corrosion issue

Posted in Uncategorized


Netflix is seeking Instagram users to photograph movie locations

03 Oct

Netflix is looking to hire a trio of photographers who will travel the country snapping photos and posting them to the entertainment company’s Instagram account. The three Instagram users selected for the roles will travel with expenses paid for two weeks, taking pictures of iconic movie and TV locations. Learn more

Articles: Digital Photography Review (dpreview.com)

 
Comments Off on Netflix is seeking Instagram users to photograph movie locations

Posted in Uncategorized


Bad by Design: Everyday Objects Reworked to Frustrate Users

03 Sep

[ By WebUrbanist in Design & Products & Packaging. ]

frustrating watering can redesign

They say great design is in the details, so what would happen if you were to twist a key element here or tweak a core feature there? As it turns out, rendering an item relatively frustrating (but still functional) is quite easy and at times fairly humorous as well.

stacked fork frustrating design

sideways key

handled pot

backward borom

In an ongoing series dubbed The Uncomfortable, Katerina Kamprani “decided to create and design for all the wrong reasons. The goal is to redesign useful objects making them uncomfortable but usable and maintain the semiotics of the original item. Vindictive and nasty? Or a helpful study of everyday objects?”

distorted seat

frustrating seatback design idea

bent chair sloped seat

Much of her work deals with the most common items we use everyday, from tableware and cookware to keys and chairs, each recognizable but distorted, usable but difficult.

concrete umbrella

chain fork useless plate

hinged silverware functionless design

wine glass shape design

frustrating mug

Adding hinges and chains to spoons, forks and knives readily defeats their purpose, as does bending the handle on a mug or adding a nose-bumping extrusion to a wine glass. While the works are conceptual renderings, some are for sale as art prints and many others could be 3D printed as gag gifts, too.

Share on Facebook


[ By WebUrbanist in Design & Products & Packaging. ]

[ WebUrbanist | Archives | Galleries | Privacy | TOS ]


WebUrbanist

 
Comments Off on Bad by Design: Everyday Objects Reworked to Frustrate Users

Posted in Creativity


500px now supporting Lytro ‘Living Pictures’, offering users $250 rebate on Illum

25 Jul

Photo sharing site 500px has announced that it is now supporting images uploaded in Lytro’s unique ‘Living Pictures’ format, and is offering its customers a $ 250 discount on the purchase of Lytro’s Illum camera (MSRP $ 1599). The Illum is available now for pre-order and is expected to start shipping within the next couple of weeks. Click through for more information.

Articles: Digital Photography Review (dpreview.com)

 
Comments Off on 500px now supporting Lytro ‘Living Pictures’, offering users $250 rebate on Illum

Posted in Uncategorized


Adobe Lightroom allows users continued access after license expires

12 Jul

Adobe’s latest Lightroom update has made it possible for subscribers to continue accessing their images and edits, as well as some limited functions of Lightroom once a license for it has ended. Key functions, including the ability to use the Develop module, do go away once the subscription is out of date, but users retain the ability to view, organize and export images. Read more

Articles: Digital Photography Review (dpreview.com)

 
Comments Off on Adobe Lightroom allows users continued access after license expires

Posted in Uncategorized


Large Library Management with Lightroom and Daminion [for Advanced LR Users]

13 Apr

daminion-opener

If you have Lightroom you might assume that you have all you need for managing your images. That may not be the case and many professional and keen amateur photographers benefit from combining Lightroom with the image management software Daminion.

Daminion is an image management solution which helps you do large library management with Lightroom. You can think of it as being the rough equivalent of the Lightroom Library module operating on steroids. Daminion’s biggest advantage is that it is true multiuser software so, with Daminion server installed, multiple users can access a single catalog. This is something that Lightroom is notoriously poor at doing and which Adobe has so far failed to address despite multi-user/multi-computer access being one of the top ten feature requests for Lightroom.

You can download a version of Daminion here using the Download link. At the time of writing the current release version is 2.5 and version 3 is still in beta. Daminion comes as both a standalone and a server version. The Daminion standalone Free version handles up to 15,000 images per catalog. The paid versions are Basic, Standard and Pro which give you 25,000, 75,000 and unlimited images in a catalog respectively. There are also multiple Daminion server versions, one for non-commercial use and others for individual professionals and small teams.

NOTE: Daminion is available for PC only and not currently available for Mac.

You can install both the server and client versions on the same computer – the server version will run faster than the client version so it has value when you have a lot of images in a catalog. When you consider that some Daminion users have catalogs of a million or more images, speed of accessing and filtering these images becomes important.

Setting up Daminion

Once you have downloaded and installed Daminion, launch it and you can create a catalog. Like Lightroom you must import the images you want to manage with Daminion into the catalog. If the Add Files dialog doesn’t open automatically you can find it by choosing File > Add Files and then select the folders to import from.

daminion-import

While you can create and manage multiple catalogs in Daminion, like Lightroom, you can’t search across multiple catalogs so you should be careful about how you organize your images in catalogs. What makes sense in terms of catalog organization will depend on how you work with your images and if it makes sense to have them all in one catalog or in separate ones.

Daminion will recognize and manage a wide range of file types including common raster and vector formats as well as camera RAW images, video, music, and PDF formats. This gives it a broader scope as a management tool for digital media collections than Lightroom which is limited to photo and video formats only.

You can copy the images to another location on import or import them from their current locations. You can also group images by folder, date or file type on import. As the images are being imported you can begin to work with those already imported.

daminion-work-while-importing

daminion-catalog-tags

Organizing and tagging

When you have some images imported into Daminion you can investigate the tools you have for managing and organizing them. The Catalog Tags panel on the left of the screen (see image on the right) is pre-populated with tags. Some of these are created from the image metadata, such as Camera lens and Camera Model, and others are those that you may have applied to the images in other programs such as keywords, ratings and color labels.

To filter the images by any catalog tag click the tag group and the tag to view and click the circle icon to view images that match that tag. You can perform AND and OR filtering using the Find dialog which you can find by clicking the Advanced link immediately to the right of the search box on the toolbar (see image below).

daminion-searches

You can also add tags and keywords to your images using the Catalog Tags panel. These can be written to the image XMP metadata so they will be accessible not only within Daminion but also in other applications such as Lightroom and Bridge.

There are benefits to using Daminion for image management and filtering in preference to Lightroom. Daminion provides multiple ways to categorize your images including Categories, Collections, Events, Places, People and more. It also supports hierarchical tags, with no limitation on nesting levels. So you can configure hierarchical tags for categories, people, places, keywords, events and so on whereas in Lightroom you can create hierarchical keywords only. You can also create your own custom user defined tags in Daminion to categorize images by criteria that are meaningful to you. Daminion can write metadata directly into the RAW images rather than needing to do so to sidecar .xmp files, and it makes it easy for you to filter your image collection by writing complex searches using Boolean (AND/OR) operators.

daminion-boolean

Viewing your images

You can view your filtered images in one of a number of ways. You can sort them using a range of sort options including by shutter speed, file size, file name and so on. You can also view the images as thumbnails, using a compact view, details or filmstrip view.

daminion-compact

In Thumbnail view you can customize the information displayed above and below the image so it is easy to see the image properties that are meaningful to you. At any time you can view an image full screen by pressing Enter or click View.

You can select any image and view and edit its properties using the Properties panel. While Daminion is not an editor you can use it to rotate your images.

daminion-properties

As you work through your images you can drag images you want to do something with into the Tray. The Tray stores these images until you are ready to work with them such as by sending them to an external editor or using the multiuser checkout feature. The checkout feature helps you manage multiple people working with the same catalog, it maintains an audit history and gives you the ability to undo changes if, for example, a newer version of an image is replaced by an older version.

One handy feature of Daminion is the ability for you to publish images from Daminion direct to Dropbox so they are viewable on your iPad or other device. The Publish panel can be set up to convert and resize images including raw format images and then export them to a Dropbox folder on your computer. When this folder syncs to Dropbox the uploaded images can then be viewed on other devices.

daminion-publish

Is Daminion for you?

If you’re looking for a way to allow multi-user access to your image collection then Daminion is a great tool. It can be used along-side Lightroom for managing and organizing images which you then develop in Lightroom. The metadata changes made in either program can be easily viewed in the other program and the two work in tandem very well.

Do you also need some Lightroom organizational help? Try these:

  • Use Lightroom Collections to Improve your Workflow
  • 8 Important Things to know about Lightroom Collections
  • Why Lazy Photographers Should Use Lightroom Smart Collections
  • Organizing Images in Lightroom 5
  • Seven Pieces of Advice for New Lightroom Users

The post Large Library Management with Lightroom and Daminion [for Advanced LR Users] by Helen Bradley appeared first on Digital Photography School.


Digital Photography School

 
Comments Off on Large Library Management with Lightroom and Daminion [for Advanced LR Users]

Posted in Photography


Seven Pieces of Advice for New Lightroom Users

08 Apr

Lightroom Develop module

Andrew S. Gibson is the author of Mastering Lightroom: Book 2 – The Develop Module. There’s a special deal on now at Snapndeals, get 40% off for a limited time only.

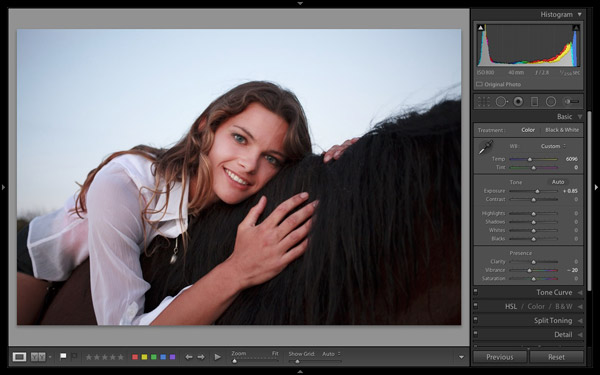
A Digital Photography School poll held earlier this year revealed that the majority of readers carry out their post-processing in Lightroom. Lightroom is attracting users all the time as it is not just a photo processor – it helps you organize, search and view your photos as well. If you are new to Lightroom then these tips will help you get started.

1. Understand the Lightroom Catalog

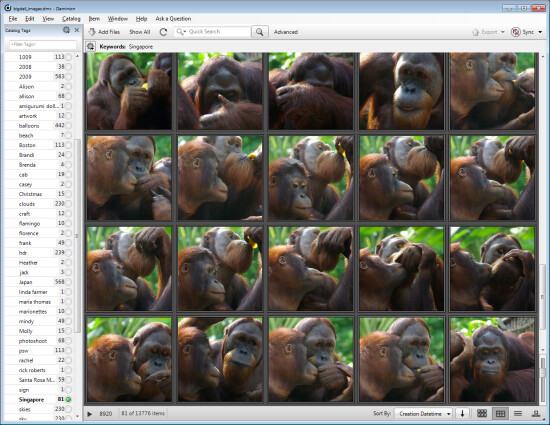
The Lightroom Catalog is a database containing all the information that Lightroom holds about your photos. It includes metadata, records of any edits you have made, star ratings, keywords, Collections and the locations where your photos are saved.

***An important note: the Catalog doesn’t contain any photos, just information about them.***

The Catalog is important, and for maximum peace of mind you should set Lightroom to make a backup copy every time you close the program. Do this by going to the General tab in Lightroom > Catalog settings and setting Back up Catalog to Every Time Lightroom Exits:

Lightroom Catalog settings

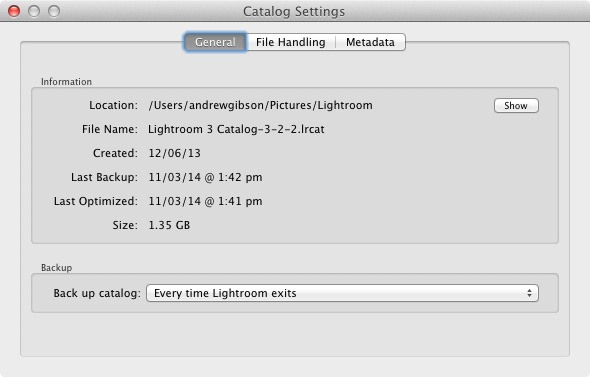
The next time you exit Lightroom it will give you the choice where to save the backup – it’s a good idea to save it on a separate hard drive to the one containing your Lightroom Catalog (located on the computer’s main hard drive). If the backup and the original Catalog are on the same hard drive, and it fails, you will lose both.

2. Appreciate the advantages that using Lightroom gives you

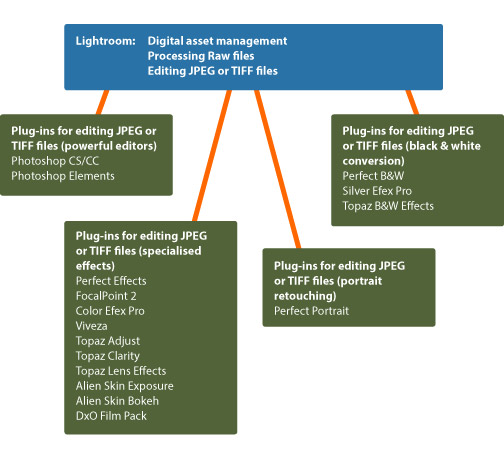
The main benefit of using Lightroom is that it becomes the heart of your post-processing workflow. You can do most of what you need in Lightroom: including viewing, organizing, searching and key-wording photos, through to post-processing and exporting. If you need to finish a photo in Photoshop or another program you can export it from Lightroom first, then bring it back into Lightroom when it’s done, where the two versions will exist side by side.

This diagram shows the workflow:

Lightroom workflow

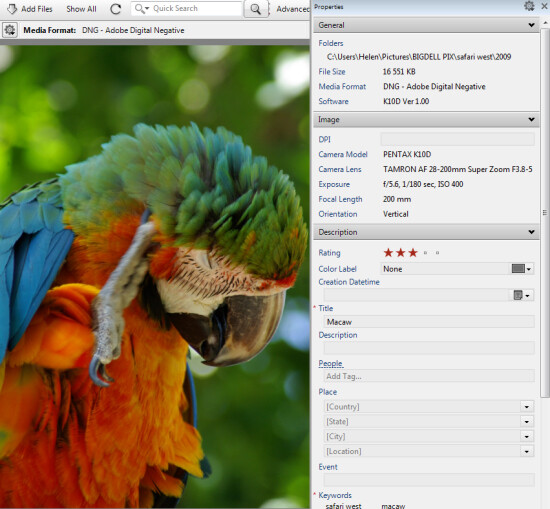
Another advantage is that Lightroom saves you hard drive space. Think about what happens if you process a Raw file in Photoshop. You start by converting it in Adobe Camera Raw, then open the file as a 16 bit TIFF in Photoshop itself, before finally saving it. Depending on what format you save it in, you end up with either a Raw file and a JPEG, or a Raw file and an 8 bit or 16 bit TIFF.

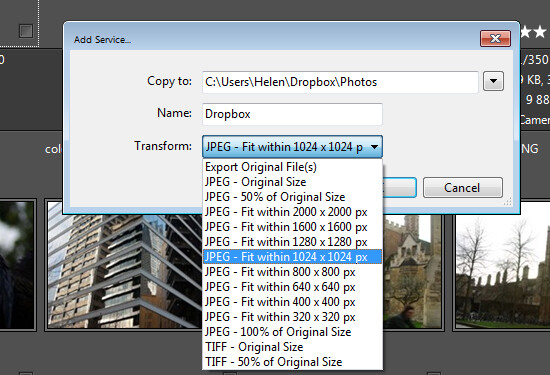
In Lightroom, on the other hand, all the edits you carry out on your photos are saved as text commands in your Lightroom Catalog. This takes up a lot less space and you only need to export your files into another format (JPEG, TIFF etc.) when you actually need them for something.

You can save even more hard drive space by converting your Raw files to the DNG format when you import them into Lightroom. This also makes Lightroom run faster. This is covered in more detail in my article Make Lightroom Faster by Using DNG.

3. Learn what you can and can’t do in the Develop module

Lightroom is primarily for processing Raw files, although it can also be used for editing JPEGs and TIFFs. All this is done in the Develop module. Even if you are processing a Raw file with the intention of exporting it to another program (like Photoshop or a plug-in) it is a good idea to do as much editing as you can in Lightroom first.

Why? The main reason is that using Lightroom saves you hard drive space, as mentioned earlier. When you export a photo to use in a plug-in, Lightroom converts it to a 16 bit TIFF (or other format of your choice) first. This negates the benefit of using Lightroom to save hard drive space, so you should avoid it where possible.

Things you can’t do in the Develop module are anything involving layers, creating HDR images by tone mapping, exposure blending, adding textures, creating composite images or adding fancy borders. For these you will need Photoshop or another program.

4. Retouching portraits in Lightroom

There are lots of Lightroom plug-ins available designed to help you retouch portraits. Indeed, there are so many that it’s difficult to know which are any good, especially as some cost more than Lightroom itself.

While you may need a plug-in (or Photoshop) for high-end retouching work, Lightroom has a built in Adjustment Brush preset that will do the job for you. It’s called Soften Skin and is a quick and easy way to retouch a portrait.

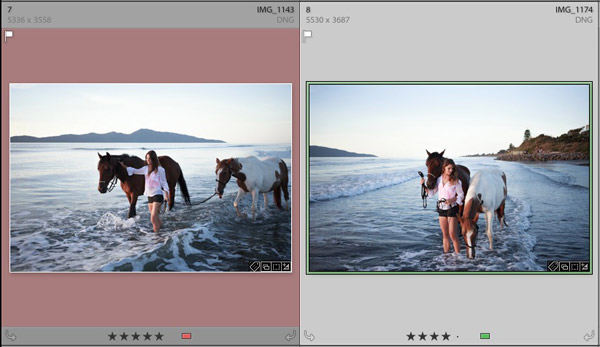
This before (left) and after (right) comparison shows what you can achieve in Lightroom:

Lightroom portrait retouching

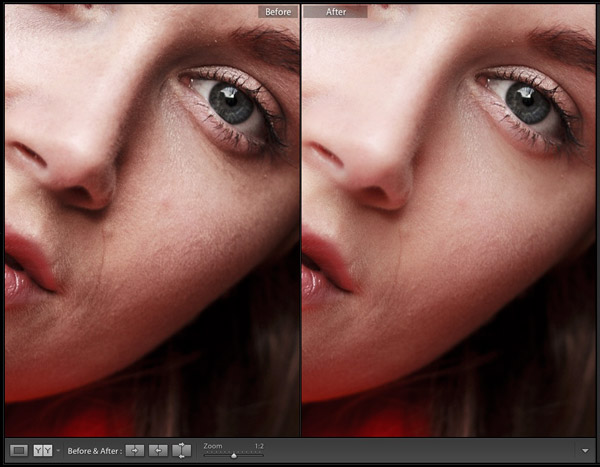
This is a good example of learning what you can achieve within Lightroom, saving yourself time, hard drive space and the expense of purchasing another plug-in in the process.

For more on retouching portraits in Lightroom see: How to professionally retouch portraits in Lightroom

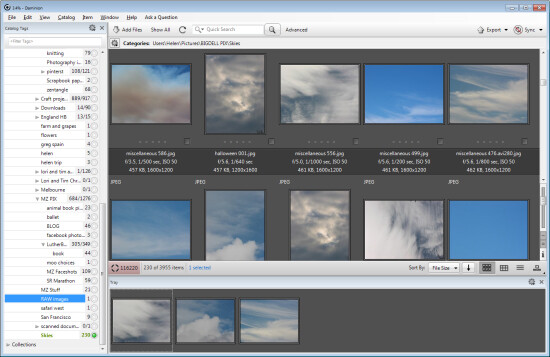
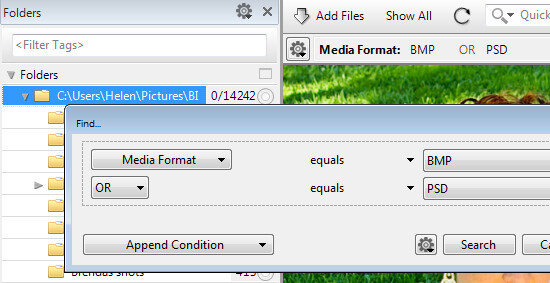
5. Learn to organize your images in the Library module

If you are new to Lightroom you will be accustomed to organizing your photos into folders on your hard drive. In Lightroom though, things are different. There’s only one module (Library module) that gives you direct access to the folders on your hard drive. The others all use Collections instead.

Lightroom is set up that way because Adobe wants you to organize your photos in Collections. The advantage of working this way is that a Collection can contain images that reside across a multitude of folders and bring them together in a way that makes sense for you. You can organize your images by date, subject matter, people’s names or any other way that is useful. My article Use Lightroom Collections to Improve Your Workflow goes into this in more detail.

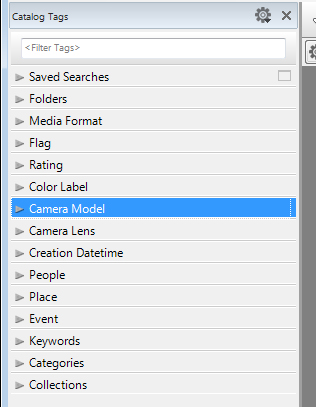
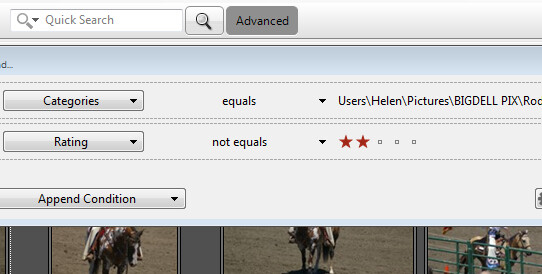
6. Decide how to use colour labels, star ratings and keywords from the beginning and stick with it

This is the hardest piece of advice to follow because when you are starting out you’re still figuring how to use these features. As your understanding of Lightroom grows, you will work out how to use these things in a way that suits you. Just be aware that consistency is your friend. If you start out using (for example) colour labels one way, then change your mind after a few months, it has the potential to cause confusion.

Lightroom colour labels and star ratings

For help with keywords, read my article Creative Ways to Use Keywords in Lightroom 5.

7. Put all your Raw files in a single folder on an external hard drive

This makes it easy to back them up. If you need help with deciding on a file structure then my article Organising Photos for Lightroom will help. The main benefit of keeping all Raw files in a single folder is that it is easy to back up. I recommend that you back your Raw files up to at least two different hard drives. Given that hard drive failure is inevitable (it is always a question of when, not if, even if the when is years into the future) it is wise to have multiple copies. That way if the worse happens it is an inconvenience, not a disaster.

Over to you

Now it’s your turn. What advice would you give to new Lightroom users? What do you wish you had known from the start?


Mastering Lightroom: Book Two

Mastering Lightroom: Book Two – The Develop Module ebookMy new ebook Mastering Lightroom: Book Two – The Develop Module teaches you how to process your Raw files in Lightroom for spectacular results. Written for Lightroom 4 & 5 it takes you through every panel in the Develop module and shows you how to creatively edit your photos. It’s now 40% off at Snapndeals for a limited time only.

The post Seven Pieces of Advice for New Lightroom Users by Andrew S. Gibson appeared first on Digital Photography School.


Digital Photography School

 
Comments Off on Seven Pieces of Advice for New Lightroom Users

Posted in Photography