Photography has been around since the early 1820’s. Of course, back then the technology of “picture taking” was not accessible to the common person. But have things ever changed! With the availability of digital cameras ever present, even in our cell phones, take a moment to consider these facts. Every two minutes today there are as many photos taken as were taken in the entire 19th century (1800s), and ten percent of all the photos ever taken were snapped within the last twelve months!
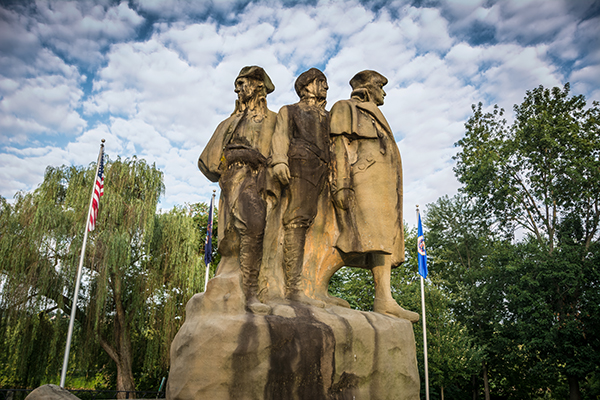
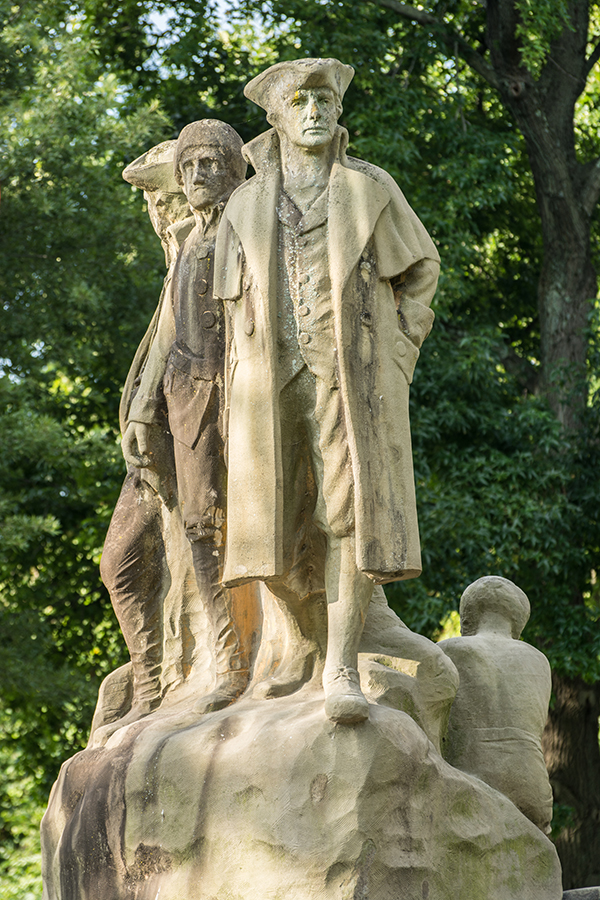
The Postcard: The Start Westward Monument in Marietta, Ohio. (18mm 1/80th of a second at f/5, ISO 100)
So, with nearly 200 years worth of photographs in our collective albums and portfolios, it has become challenging to find an iconic view or subject that hasn’t been overdone by millions of photographers, especially when it comes to state and national outdoor landmarks. In order to look beyond the “postcard shot”, you need to research unique perspectives and techniques to capture that popular subject in a way that creates an original image. But first, go ahead and take that “postcard shot”. (You know you want to!) Then consider the following 14 different suggestions for creating unique photographs of the most popular spots.
#1 Check the internet
This is a resource past generations would have loved to have! By searching Google, Flickr, 500px and other photo sharing sites you can see how other photographers have captured most popular scenes. Besides seeing the images that have already been done, this will give you an idea of the layout of the location before you arrive. You may also find ideas that other photographers have tried and notice something that you might do differently to make the same image better.
#2 Get to know your location
Research the area by downloading maps and brochures from the internet. If your destination is only open certain days and hours, be sure you’ve garnered that information before you head out on your shoot. Stop at the visitor centers and ask questions.
#3 Talk to the locals
Talking to a “local” can often lead you to all kinds of special photo opportunities that may have never been visited before, such as discovering a special lighting effect that only happens at a certain time of the day or year, or maybe a waterfall that is hidden from view.
#4 Shoot at popular sites during the week
Avoid the weekends when the crowds can make it almost impossible to get an image, especially if you are looking for a shot free of human presence.
#5 Look for new angles
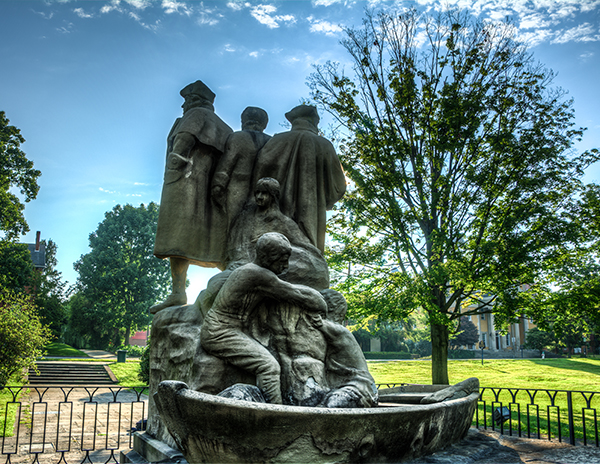
While looking for different angles, don’t forget to explore all sides of your subject.
Try to avoid the obvious straight-on shot that presents itself right in front of you,(the typical postcard shot), but look around for other angles instead – high, low or from the right or left. If you must shoot straight in front, try to include a foreground object.
Caution: If you are in a state or national park, be sure to abide by all park rules! Photographers sometimes tend to think that rules do not apply to them, but you will find that most park rangers will not agree with this point of view. These rules are put in place for your safety or to preserve the beauty of the area you are photographing.
#6 Photograph in different seasons
Photograph the scene or subject in all four seasons. Mother Nature provides amazing changes to scenery, from the different angles of the sun to the different colors of the leaves on the trees.
#7 Look for special events in nature
Some natural happenings can make your image unique, such as a full moon which may be included in the image if you are into nighttime photography. Special weather conditions can be conducive to producing a once-in-a-lifetime image. For example, some photographers may reject shooting on rainy days, but if you have the protective gear for your equipment, the rain can add special visual effects such as reflections or rainbows. Ice and snow coatings are often quite striking additions to outdoor objects both in nature or manmade.
#8 Look for special lighting
Of course the best light of every day will come during the golden hours, following the early morning sunrise and just before evening sunset. If you must shoot in the harsher lighting of midday, consider black and white images which can often produce some visually appealing contrast. If you are out on a heavily overcast day, you may be able to shoot all day, but in most of these cases avoid including the sky in your image. If you have the option, research natural lighting sources by using computer software, such as The Photographer’s Ephemeris, that show the position of the sun and moon to help you determine when the lighting will be best, and what time to arrive to capture your shot. These kinds of software can allow you to anticipate exactly when and where the best lighting may fall, on just the right spot, to create that once in a lifetime image.
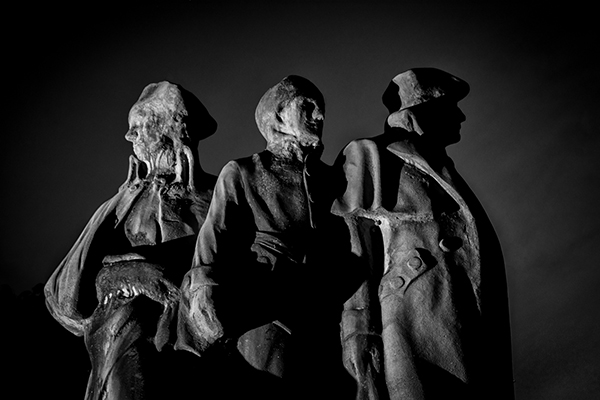
Black and white image shot after dark was lit with an off camera flash from the left side of the image.
#9 Add the human element
Including a person in the scene not only will add a sense of scale, but can also add excitement and fun to your photo, which will make your image much more interesting to your viewer.
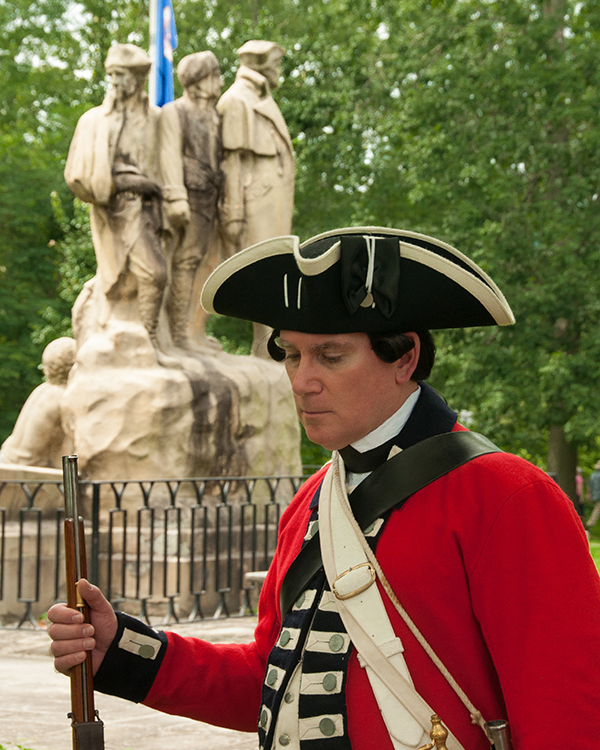
Special events present opportunities to include human elements, which add extra excitement to your images.
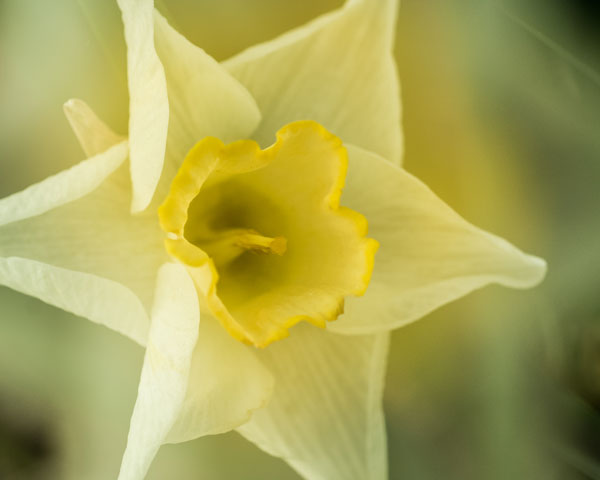
#10 Focus on details
Narrowing your focus to capture details can be an especially effective way to create a unique photo. Whether zeroing in on the part of the vista that makes that site unique, or the feature of the statue that expresses its purpose, an original visual story may be captured in your image.
#11 Include a foreground element
Incorporating a foreground object to frame the subject can add depth to your scene and also enhance the image. A foreground object can also be used to lead the viewer’s eye to the subject of your photo.
#12 Use special effects
Two filters that could help make that standout image are the polarizing and neutral density filters. Use of a polarizing filter will enhance the blue of the sky and add color saturation. Use of a neutral density filter will cut down the light entering your camera, which allows you to slow down shutter speeds to capture interesting motion effects with the sky or water. Experimenting with your white balance can also create some interesting results.

This image was created by using multiple exposures. The first exposure was of the monument against the sky. In the second exposure, the camera was turned upside down, capturing the top of some nearby trees. The sky was overexposed in each image, creating the white background.
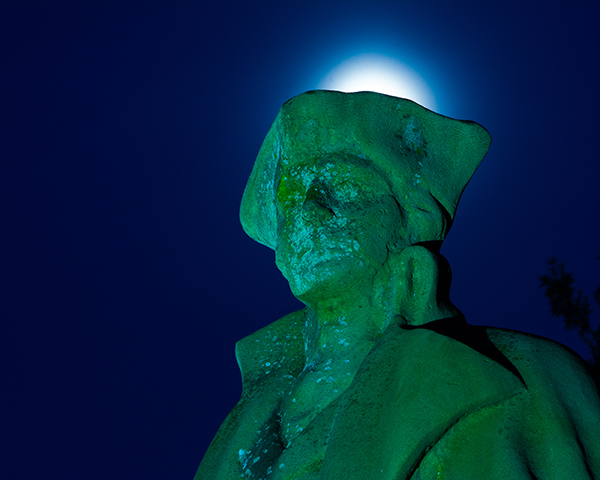
This image was shot at night the white balance was changed to Tungsten, which caused the monument to have a teal color. The glow above the head was created by the moon’s glow.
#13 Vary your focal length
Try different lenses to get varied results, for instance a telephoto lens will not only bring the scene closer to you, but will also compress the scene. On the other hand, a wide-angle lens allow you get more of your subject in the view, make background objects appear farther away, which adds depth to the scene.
In this image the monument is captured just after sunrise giving it a nice glow. Also by using a 150mm telephoto lens at f/4.8 we compress the photo and the background is out of focus to make the monument stand out.
#14 Experiment with DOF
To narrow your depth of field, open your aperture to a lower number, such as f/ 2.8, and make your subject stand out from the background. A distant landscape requires more depth of field to keep objects in focus, so you may want to close your aperture to something like f/16 to sharpen your image.
Researching your options and incorporating some of these tips will enhance the creative bent so many photographers already possess! Just don’t settle for the easiest, most common photographic result if you can take the time to shoot a more memorable image. Think and imagine your own photographic creations “beyond the postcard”. You’ll be glad you did!
Have any unique photographs from iconic locations or landmarks? Please share in the comments.
The post Beyond the Postcard – 14 Tips for Creating Unique Photographs in Iconic Locations by Bruce Wunderlich appeared first on Digital Photography School.

Digital Photography School


You must be logged in to post a comment.