by Sarah Hipwell.
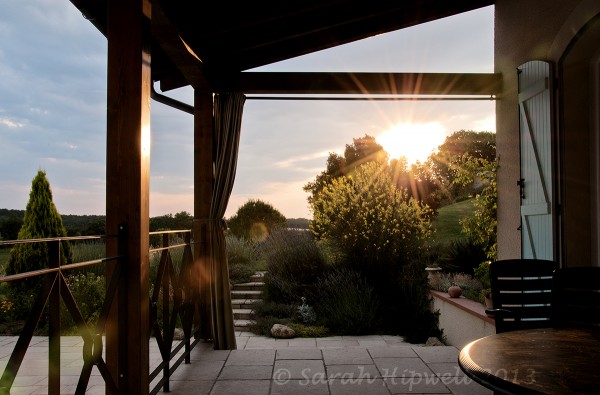
The above shot at 1/20sec at f22
I brought two cameras on a recent vacation to France. My trusty DSLR and my new fab Sony RX100.
I don’t normally bring a tripod on holidays but this time I wanted to get some decent video footage. I also wanted to experiment with a variety of (still) exposures for HDR work and to get a nice sunset (low light shot).
With such an array of tripods on offer, how do you decide which one to buy?
I narrowed my search to 5 key features:
- Low cost
- Size – folded & extended
- Portability
- Lightweight
- Sturdy enough to hold a DSLR with a 18-200mm lens
The cost of a tripod varies enormously and with so many brands, it can take a bit of time to find which model suits your requirements. Cost was a main issue for me for two reasons:
- I had to pack my tripod in one of the luggage bags that was going into the plane’s hold! See NOTE & TIP 1 below.
- As I wasn’t taking the tripod in my carry-on bag, I didn’t need to buy an expensive one and run the risk of it getting lost or damaged in transit.
This ruled out purchasing a carbon fibre model as they are quite costly and it wasn’t justifiable for my means (I don’t travel extensively). So I decided on an aluminium tripod.
The more compact the tripod the better when travelling. But I need the height when it is extended (I’m 5’ 9”).
Portability is a prerequisite for any travel tripod.
Last but not least, the tripod had to be able to hold my D300 plus a 18-200mm lens, which both have a combined weight of 1.463kg or 3.23lbs. See TIP 2 below.
After a considerable research online between brands and so forth, I was beginning to think my criteria was a tall order. Then I hit jackpot. I found a Manfrotto Compact MKC3-H01 on offer for 49 euros! This particular tripod isn’t their current model but it seemed to tick all my boxes. Plus, I have a Manfrotto 055XB so I’m already familiar with the brand.
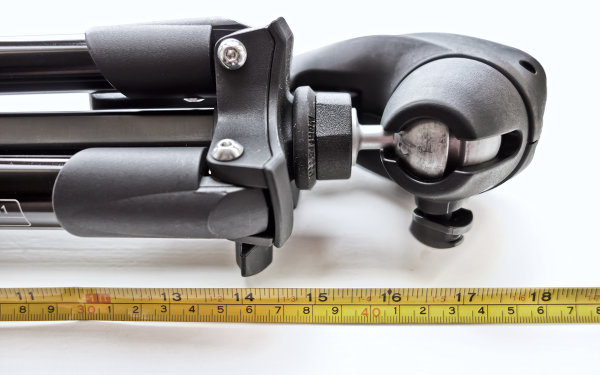
Tripod when closed measures 18”(46cm) and when it is extended, can reach 64”(163cm) with centre column fully extended
This tripod comes with a pistol type grip head which has two settings for photo(still) and video on the side. I found it is easy to use and a pleasant change from my usual ball-head socket type. My only gripe is that when I had it in the video position and tried to pan, it was quite jerky. I just loosened the locking wheel to make it more fluid, this wasn’t perfect but it worked.
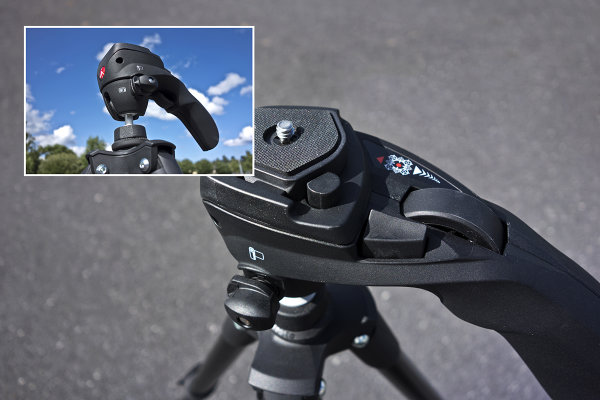
Pistol type movie/photo head showing the locking wheel
To sum up, the cost of this tripod was only 49 euros. Therefore, it wasn’t a big deal putting it into the plane hold. When folded, it measures a mere 18” and can extend to 60”. It is very lightweight, compact and easy to set up. The actual weight of this tripod is 1.15kg. An added bonus for me is this travel tripod can be used as a light stand! I can pop on my SB700 speedlight and shoot remotely. I had a wonderful two weeks with my family, I swam, read books (oh such a treat) and took over 32gb worth of images with the support of my new neat travel tripod.
NOTE
Check with each airline company in each country that you are flying to and from. Last year, I flew to Bordeaux from Dublin. I had a Manfrotto 5001B Nano Black Light Stand in my carry-on bag. However, en route home from Bordeaux the custom officials would not allow me to take on board the light stand as they deemed it a lethal weapon! I was quite fortunate, that a lovely desk clerk retrieved my already checked-in bag, so that I could put in my light stand without incurring any extra charges. She’s was a star!
TIP 1
When I was packing my travel tripod into one of the luggage bags, I thought of wrapping it in bubble wrap to protect it. I used a beach towel instead which I needed to bring with me. The towel provided adequate protection.
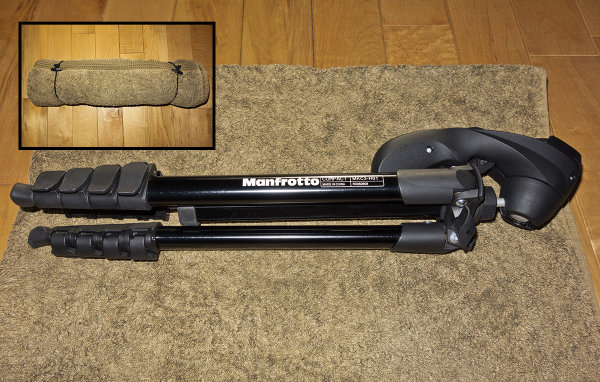
Using a large or beach towel to wrap around the tripod for added protection in luggage bag
TIP 2
The maximum weight that this tripod holds is 1.5kg (3.3lbs). I was thrilled when I weighed my DSLR camera plus the lens which has a combined weight of 1.463kg (3.23lbs). However, this is pushing it to the max. Fortunately, I didn’t experience any inclement weather while on holidays, i.e. wind/gusts. Otherwise, I would have been nervous using my DSLR body and lens on the tripod for fear of toppling over. For added stability in this case, I recommend adding a sandbag(s). Sandbags are not practical to bring away with you on vacation. Here’s my tip, there is a rubber end at the bottom of the centre column. Ease this off and you will see two holes. Place a cable tie through the holes to create a plastic ring. With another cable tie, secure this to a Ziploc bag filled with dried beans, rice or soup mix (Cable ties & Ziploc bags should be in your camera bag). Dried beans/rice can be purchased at the local supermarket very cheaply. See below.
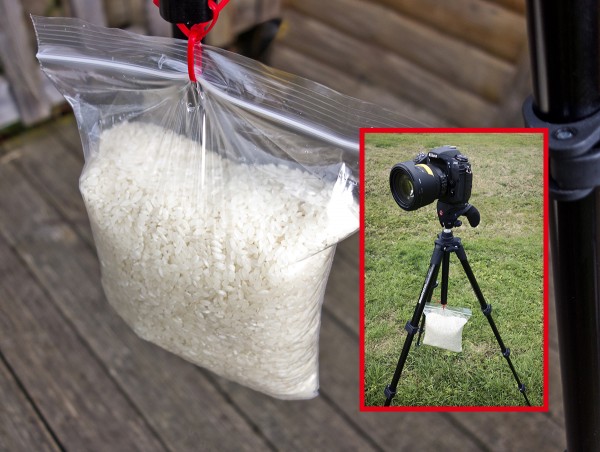
A Ziploc bag filled with 1kg of rice suspended from tripod using cable ties
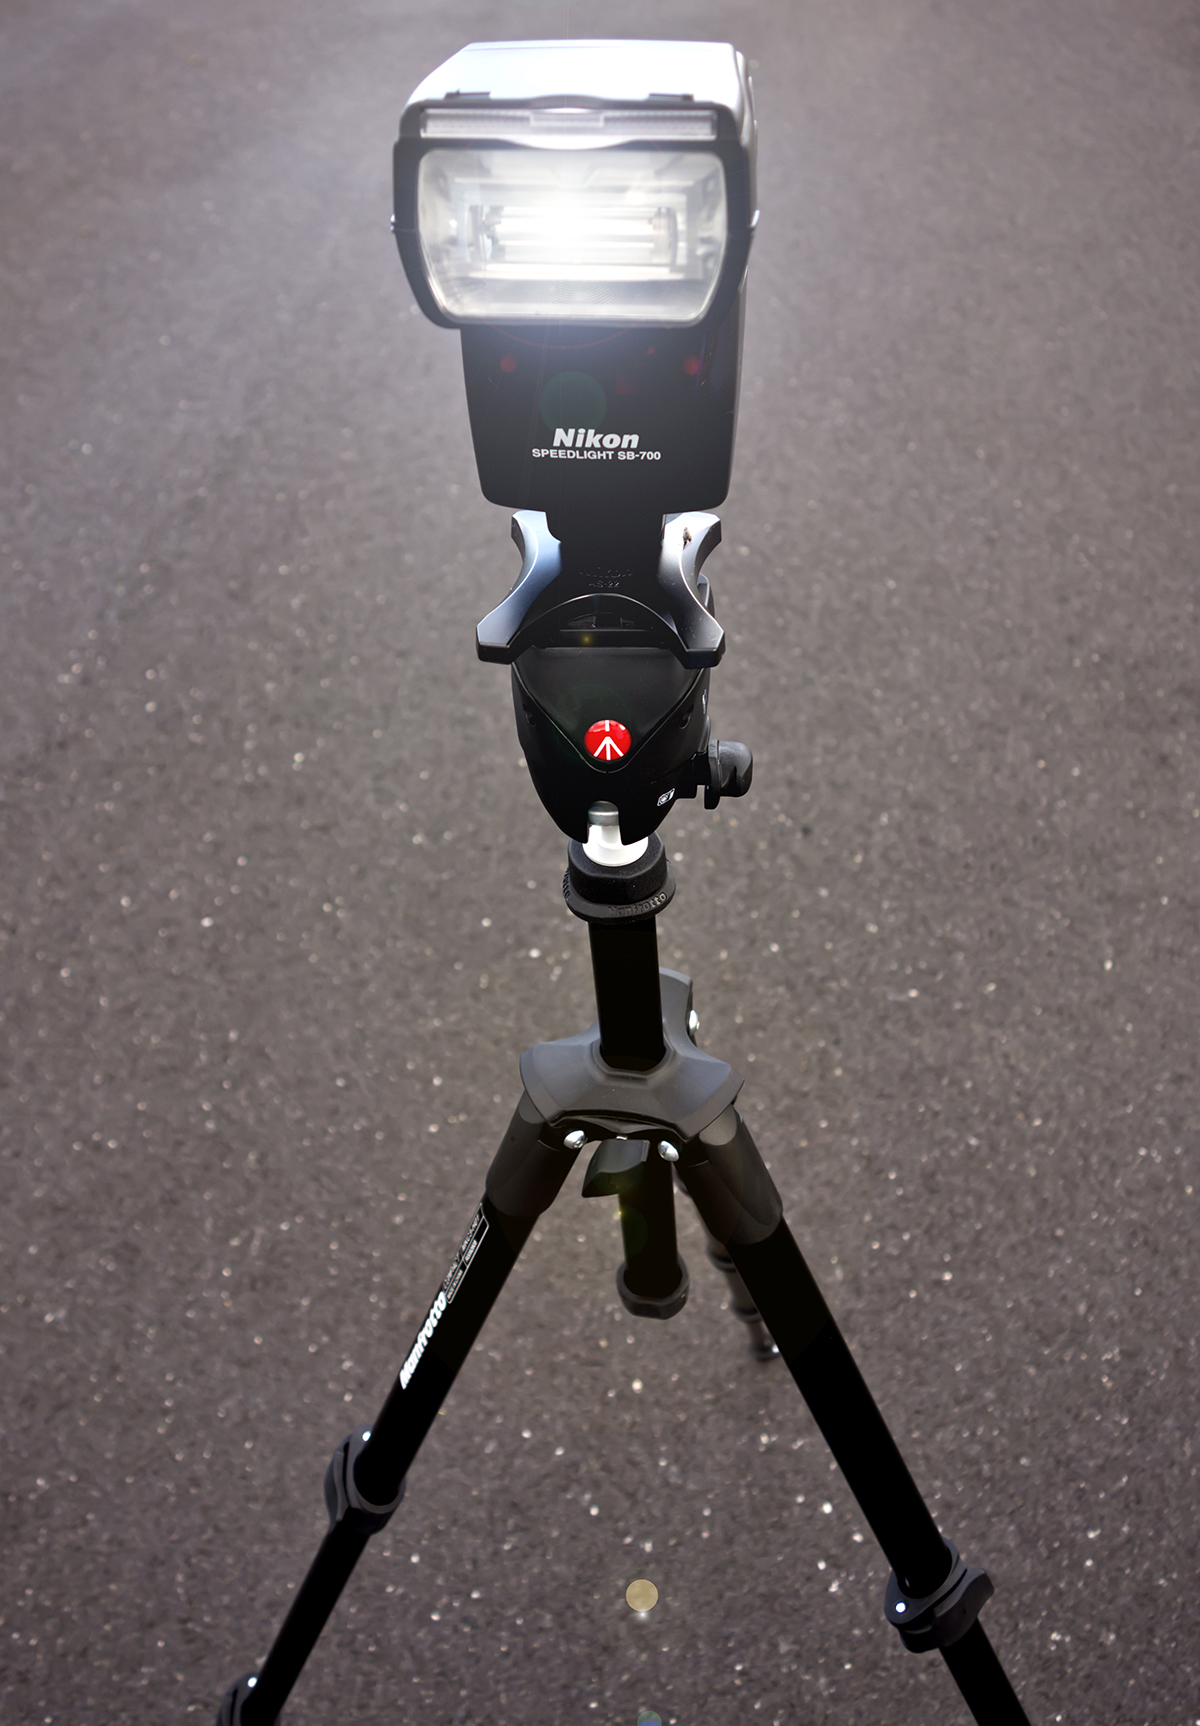
My SB700 speedlight on the Manfrotto Compact MKC3-H01
Check out more of Sarah’s work at her website – SarahHipwell.com.
Post originally from: Digital Photography Tips.
Check out our more Photography Tips at Photography Tips for Beginners, Portrait Photography Tips and Wedding Photography Tips.
A Travel Tripod that can Also Act as a Light Stand


You must be logged in to post a comment.