RSS
 

Posts Tagged ‘tools’

Photoshop Elements 12 adds useful editing tools, without the subscription

25 Sep

PSE12_3in_boxshot_front.png

Adobe has released version 12 of its Photoshop Elements software for Mac and Windows. One of the highlights of the latest version of this consumer-friendly photo editor is ‘Mobile Access’, which uses Adobe’s Revel cloud service to let users view and retouch photos on their mobile devices, keeping everything in sync. Other new features include ‘Content-Aware Move’, guided editors, and 64-bit support for Macs. Best of all, there’s no monthly subscription fee. Read on to learn more about Elements 12, and if it may be a good substitute for its big brother.

News: Digital Photography Review (dpreview.com)

 
Comments Off on Photoshop Elements 12 adds useful editing tools, without the subscription

Posted in Uncategorized


Google+ Releases Advanced New Photo Editing Tools

12 Sep

All At Once Her Heart Opened Up

Today Google+ released a whole new enhanced online photo editing suite of tools. I’ve been playing around with them for the past few hours and am impressed with what you can do with them as an online editor. While they won’t replace my more traditional desktop tools (i.e. Lightroom, Photoshop, Nik, FX Photo Studio Pro, etc.), I think a lot of more casual users will love them.

The online editor does a lot of the basics of editing (contrast, brightness, shadows, cropping, sharpening, structure etc.), but it also comes with some pretty slick vintage and what they call retrolux editing. These new tools allow you to customize your photos in a lot of the more popular faux photo styles currently hip with the Instagram crowd. While G+ offers some quick filters, they also give you more granular control over how much of each sort of effect you want.

The new editor also includes spot editing tools, which allow you to adjust only parts of a photo that need it and some interesting spot focusing tools, including tilt shift editing.

I edited the photo at the top of this post using the new G+ tools. It’s great to see Google continue to invest and innovate in the online photo sharing space. Below are some screen shots of some of the tools in action.

You can find more information about the new tools here and in the embedded post at the bottom of this post.

Google+ New Retrolux Editing

Google+ Structure and Sharpening Editing

Google+ Vintage Filters

Google+ Cropping Tools


Thomas Hawk Digital Connection

 
Comments Off on Google+ Releases Advanced New Photo Editing Tools

Posted in Photography


Flickr improves capture and editing tools in latest iOS app update

29 Aug

Screen_Shot_2013-08-29_at_9.52.55_AM.jpg

As part of its effort to ‘make Flickr awesome again’, parent company Yahoo has released a hefty update to its Flickr app for iOS. Improved capture tools include the ability to lock separate focal and exposure points on the capture screen with a two finger tap. In addition, users can view the filters ‘live’. When you are ready to edit, you can customize the exposure using the new Levels adjustment, correct color balance, sharpen, brighten, crop, straighten, or even add vignetting to your image. Click through for more details at connect.dpreview.com.

News: Digital Photography Review (dpreview.com)

 
Comments Off on Flickr improves capture and editing tools in latest iOS app update

Posted in Uncategorized


Blending modes: Tools for post-processing

26 Jul

thomas-park--ari--originalhands.jpg

In this article, Seattle-based photographer Thomas Park shows how you can use Photoshop’s layer ‘blending modes’ to remove stains and blemishes from scanned images, sharpen up your photographs and even warm up cold hands! (sort of). Click through for a link to the full article, ‘Blending modes: Tools for post-processing’.

News: Digital Photography Review (dpreview.com)

 
Comments Off on Blending modes: Tools for post-processing

Posted in Uncategorized


Urban Apps: 13 Interactive City Maps, Tools & Guides

15 Jul

[ By Steph in Gadgets & Geekery & Technology. ]

Urban Apps Main

Chances are, even if you’re a lifelong resident of a particular city, you don’t know every nook and cranny, every food truck location, or the lore of every interesting local building. Apps for smartphones, tablets and other gadgets are making big urban centers feel smaller than ever, making it easy to catch a ride, find cheap eats, check out street art and make new friends.

Eat Cheap – Roaming Hunger

Urban Apps Roaming Hunger

Find out where your next meal is parked with Roaming Hunger, an app that shows real-time food truck locations in your area. The app not only displays the trucks on a map, with their hours at that location, but also allows you to sort results by meal, and browse menus. Additional apps are city-specific, like Street Food App, which currently shows schedules for Boston, Calgary, Edmonton, Ottawa, Toronto and Vancouver.

Maps and Travel Guides – City Maps 2Go

Urban Apps City Maps 2Go

Want access to maps while traveling abroad, without gobbling up roaming data or lurking in a spot that offers wi-fi? City Maps 2Go downloads maps for the cities of your choice for offline use, including millions of POI (restaurants, bars, hotels etc.), 500,000 Wikipedia entries for sites and attractions, and travel guides. It’s avaiable for iPhone, iPod touch and iPad.

Connect – MeetMe

Urban Apps MeetMe

Among the most popular apps to show you who’s nearby and looking to meet new people, MeetMe gives both social butterflies and the shy an easy way to connect. You’ll probably find more people looking to date than to make new friends, and it might be easier to just walk up to someone and introduce yourself than spend your time scrolling through photos, but hey – whatever works.

Avoid Your Friends – Hell is Other People

Urban Apps Hell is Other People

Maybe, instead of making new friends, you want to avoid the ones you already have. There’s an app for that, too. Hell is Other People will show you where your friends are based on check-ins on Foursquare, Facebook, Instagram and other networks, and provide ‘safe zones’ where you can hang out without being recognized. Of course, it only works if your contacts are avid users of social media, and you might find yourself relegated to unexpected places in the city.

Find Street Art – 1AM Mobile

Urban Apps Street Art

This free photo app called 1AM Mobile lets users pinpoint, share and discover street art in their own communities before it’s gone, as it often is within days or weeks of completion. Shoot photos of street art and the app will map them, date them and credit you as the photographer before sharing them worldwide.

Next Page:
Urban Apps 13 Interactive City Maps Tools Guides

Share on Facebook


[ By Steph in Gadgets & Geekery & Technology. ]

[ WebUrbanist | Archives | Galleries | Privacy | TOS ]


WebUrbanist

 
Comments Off on Urban Apps: 13 Interactive City Maps, Tools & Guides

Posted in Creativity


Aviary 3.0 for Android launched with updated UI and editing tools

21 Jun

aviary.jpg

Aviary has announced a significant update to its Android photo editing app. Version 3.0 of Photo Editor by Aviary introduces a sleeker interface, modifications to some existing editing tools and availability of new filters previously only on the iOS version of the app. Click through for more details. 

News: Digital Photography Review (dpreview.com)

 
Comments Off on Aviary 3.0 for Android launched with updated UI and editing tools

Posted in Uncategorized


The Best Tips & Tools for Freelance Photographers

06 Jun

[Today’s guide comes from awesome photographer and Photojojo pal, Helena Price!]

Being a photographer is regarded as one of the coolest jobs on the planet.

That said, there’s a lot that goes into running a successful photography biz. Making good photos is just the beginning.

This year, I made the jump from my office job to becoming a full-time freelance photo-taker, and I’ve been lucky enough to do some really fun photo work for brands that I love (including Photojojo!).

These jobs don’t just fall into your lap. There’s an endless amount of helpful tools and resources out there for freelance photographers – you’ve just gotta go out there and find them.

After spending hours digging through the interwebs, asking freelance friends and compiling everything I’ve learned, I’ve put together this great beginners’ list of things to read/use/do if you’re making the jump into freelance photography.

Great Tips & Tools for Freelance Photogs

p.s. WE ARE HIRING AN EVANGELIST/BIZ DEV HERO. Creative deal-maker types, APPLY HERE.

Building Your Portfolio

beforeVirb: Virb is by far the easiest way to build a beeeeautiful portfolio website for your photography. They have tons of sleek, pre-designed website themes to choose from (my favorites are York, Grace and Copenhagen)—just add your photos, and voila! Your portfolio is ready.

Squarespace: Like Virb, Squarespace has everything you need to build a fresh new fully-customizable website with your name on it. Check out the themes on both and see what’s your favorite!

Tumblr: Want to set up a photoblog in just minutes? Tumblr’s got you covered. These days, Tumblr has plenty of themes that have the look and feel of a photography website, like this one by Pixel Union. Best yet, Tumblr is full of tons of photography blogs to get inspired by! For starters, check out their photographers directory.

Soaking in Knowledge

beforeA Photo Editor: Founded by Rob Haggart, the former Director of Photography for Men’s Journal and Outside Magazine, this blog is chock-full of inspiration, interviews, and practical advice that you can apply to your budding career.

Freelance Switch: A blog by freelancers, for freelancers. A couple of good articles to start with include 30 Inherently Useful Tools for Freelancers and 25+ Resources for Starting a Freelance Photography Business

Creative Boom: Creative Boom is a UK-based blog for freelance creatives. In their “Tips” section, blog founder Katy shares her top tips for creative freelancers, startups, graduates, artists and small businesses. Topics range from “How to win your first freelance gig” to “How to get tough with problem clients.” Go soak in her knowledge!

Keeping Your Books / Gettin’ Paid

beforeOneReceipt: This handy tool lets you store and organize all of your receipts, both paper and digital, so you can track and manage all of your freelance expenses.

Harvest: Harvest helps you you track all of the time you put into your freelance work, which is super important when it’s time to invoice folks for payment. Time is money!

Google Drive: Never send a Word document again! Google Docs lets you build docs, spreadsheets and more right in your Internet browser. You can send them as attachments or simply store them in the cloud as long as you need them.

Freshbooks: Freshbooks is another great tool for time tracking, billing, and keeping track of everything related to your photo biz. You can take a free trial for 30 days to test it out for yourself!

Preview: This app is great for reading PDFs—but did you know that it’s the BEST for signing documents too? All you have to do is write your signature on a piece of paper, Preview will let you scan it in using your webcam, and voila! You’ll be signing and sending documents in no time.

Other Helpful Things

beforePreview: This app is great for reading PDFs—but did you know that it’s the BEST for signing documents too? All you have to do is write your signature on a piece of paper, Preview will let you scan it in using your webcam, and voila! You’ll be signing and sending documents in no time.

Freelancers Union: The Freelancers Union is the best option for health insurance for freelancers. In addition, they have a Freelancers Yellow Pages where you can list your services, as well as a supportive community you can learn from.

Munawar Ahmed’s Blog: For those really getting into the nitty gritty of setting up your business, taxes, insurance and more, Munawar has tons of advice and knowledge to share. One click on his blog and you’ll realize this guy KNOWS his taxes!

Related posts:

  1. 9 Tips for Breaking into Photojournalism New in the Photojojo forum: One of you kids is…
  2. People in Motion — Two Quick Tips for More Interesting Shots Capturing motion well is one of the most difficult photographic…
  3. Top 10 Tips from Our Fave Kid Photographer! Holiday. Photo. Time. Three innocent little words that when strung…


Photojojo

 
Comments Off on The Best Tips & Tools for Freelance Photographers

Posted in Equipment


ACD Systems launches ACDSee 16 with more tools and introductory price

31 May

ACDSee16.png

ACD Systems has announced the latest version of its ACDSee photo management and editing software for Windows. ACDSee16 gains a range of editing and organizational tools, including features that simulate out-of-focus regions and tilt-shift lens effects. The latest version is available at a reduced price ($ 50), for a limited time, with existing users being about to upgrade for $ 30. A 15-day free trial is available from the company’s website.

News: Digital Photography Review (dpreview.com)

 
Comments Off on ACD Systems launches ACDSee 16 with more tools and introductory price

Posted in Uncategorized


Learn How to Use the Sharpening Tools in Lightroom

23 May

There’s no question that Lightroom is a powerful piece of photo processing software, but due to that power sometimes it’s not as easy to wrap our heads around everything it has to offer, that’s in part why I started my Let’s Edit YouTube series a weekly segment in which I share my own editing workflow for viewers to learn from.

After starting this series one of the most commonly asked questions was to go into more detail on how the sharpening tools in Lightroom work. Sharpening in Lightroom is broken down into four different sliders – Amount, Radius, Detail and Masking – and they each work together to help you achieve the perfect amount of sharpness in your photograph. Today, rather than simply answer this question to the comparatively small group of people over on my site, I thought I’d bring these tips to the dPS community as a whole. I know there are a lot more people out there looking to master the art of sharpening images and I’m happy to help explain them.

Before We Get Started

There is one thing I’d like to mention before we dive into the tutorial and that is that these tools are designed to help improve an image that is sharp to begin with. They won’t fix camera shake, missed focus points, or poor DOF choices, but rather improve upon an already sharp image. So with that said if you’re struggling to get your image tack sharp you might want to check out this great DPS article on five tips to achieve sharper images first and then head back here to learn how you can make them even better.

The Amount Slider

As the name implies the amount slider is a broad and general addition or subtraction of the amount sharpening applied to your image. The more you slide to the right the sharper your image will become. It works by increasing the contrast between different pixels in a fairly general way. The next three sliders can help us refine how the amount of sharpening is applied throughout the image.

Amount

Before we get into those other sliders though I do want to mention that each of these four tools has an extra option attached to it. By using the Alt (windows) or Option (Mac) key on your computer you will be shown an overlay that will help aid you in making better decisions with your sharpening.

For the amount slider this option removes the color from the image letting us use a simple gray scale image for sharpening. This is important because some colors can give false sense of sharpness when placed next to each other and can make it difficult to determine the true level of sharpness in the image.

The Radius Slider

Next in the detail panel is the Radius Slider which lets you control how far away from the center of each pixel the sharpening effect occurs. This is great for determining if you’d prefer a more airy feel (smaller radius) or a more hard edge feel (larger radius).

Radius

Each photograph is different and often times in portraiture the radius is left rather small, while in architecture or landscape, the radius can be made a bit larger to truly define the edges of your scene.

With the radius slider the option key will create an overlay that allows you to see the effect of the edge sharpening in a visual and easy to understand way. The edges that are being effected become clearly defined and the areas of the photograph where this effect is not being applied will be left hidden behind a gray overlay. In the screen-capture above you’ll see with the radius slider maxed out the trees along the horizon are clearly defined in the overly.

The Detail Slider

I like to think of the detail slider as a fine-tuning slider or even just simply as picking up from where the radius slider left off. Rather than focusing on the hard edges of the image the detail slider is designed more for bringing out the finer textures of the images.

Detail

It does this by controlling how the high frequency data is displayed.

The further you push the detail slider to the right the more high frequency data will be displayed resulting in more textures in your image. Be warned, if you push it too far in some cases the outcome will be overly sharp or you may start sharpening unwanted noise. These negatives are things you’ll want to watch out for as they can start to make your photograph too harsh for your viewer and distract from the overall story you’re trying to tell.

To help you determine the optimum positioning of the detail slider the option overlay available works in much the same way as the radius slider showing you where your detail is being applied by showing you the areas effected by your changes.

The Masking Slider

Finally we’re down to the last one of the four. The masking slider allows you to in a sense control where your sharpening is to occur. By sliding it to the right you reduce the areas of the photograph that sharpening will occur by ignoring less important edges and only sharpening the more obvious ones.

Masking

Again with the alt or option key held down you are presented with an overlay for this slider which shows you where everything is occurring The areas in black are being masked out, while the areas in white are where the sharpening will take effect. As you can see above here the hard edges of the dog around her ears, muzzle and eyes are being sharpened where as the areas in black are not. It’s a great way to keep you background filled with creamy bokeh, but sharpen the face or focal point of your subject.

Well that’s it – I hope this quick look into Lightroom’s detail sliders has helped you learn a bit about how to sharpen your photographs, if you’d like to see it in action check out this video where I go through the above steps while sharpening a Macaw from a recent trip to the local zoo.

John Davenport is an avid amateur photography who shares his photography on Facebook. He also runs a weekly series called “Let’s Edit” which focuses on editing photos in Lightroom.

Post originally from: Digital Photography Tips.

Check out our more Photography Tips at Photography Tips for Beginners, Portrait Photography Tips and Wedding Photography Tips.

Learn How to Use the Sharpening Tools in Lightroom


Digital Photography School

 
Comments Off on Learn How to Use the Sharpening Tools in Lightroom

Posted in Photography


Google Unveils Cutting Edge Photography Tools to Make Your Photos Look Better and the World A More Beautiful Looking Place

16 May

Through Glass

Google unveiled significant new innovation in the world of online photography this morning, continuing their rapid development pace on Google+. All in, Google+ pushed out 41 new features today.

Much of the new work is focused on post production photography to make people’s photographs look better than they can straight out of the camera.

Some have suggested that part of Instagram’s success has been their ability to enhance users’ photos with very simple, one touch filters. Instagram has focused on a faux film aesthetic which actually highlights the flaws in many photos to give them more of an artistic, old school feel. By contrast, Google’s easily and automatically applied post production tools, released today, work to make photos look more vivid, life like and realistic.

By using simple techniques like skin softening, clarity adjustment, smart vignetting, HDR and other enhancements, Google, by default, now offers an enhanced photo for every photo uploaded by users to Google+. Also, with this new tech, Google will give you the ability to view the before and after results and decide which you prefer to use. For photographers who do not want their photos altered in any way, these users can turn this default functionality off.

Google Releases New Tools for Photographers Using Google+

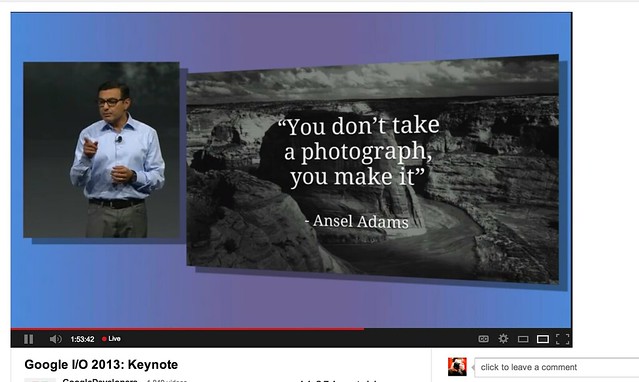
As a photographer, I have long been a believer of photo manipulation and post processing technology. Ansel Adams said “you don’t take a photograph, you make it,” as highlighted in Google Social Chief Vic Gundotra’s keynote this morning. Much of Ansel Adams’ genius has been attributed to the work that he did in the darkroom with his photos, his zone system, his post production technology of his time.

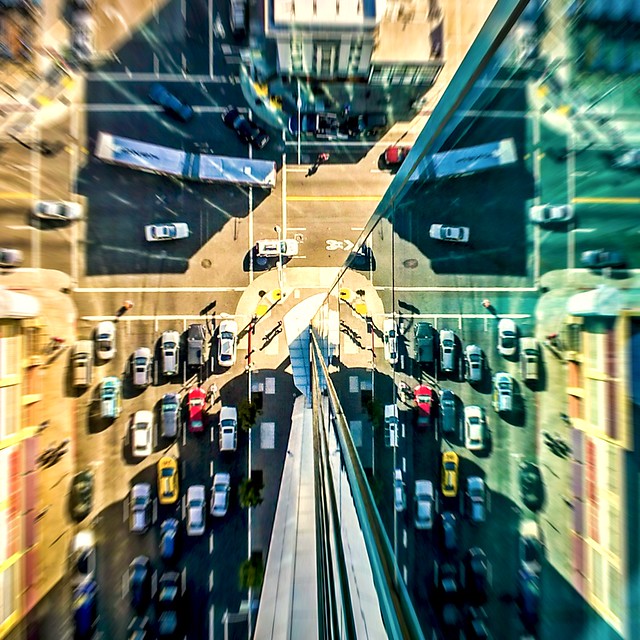
I post process all of my photos. The photo at the top of this post is the very first photo that I made with my new Google Glass that I bought yesterday. While I was able to get the composition to a point where I wanted in camera, much of the pop of that image is done with my own post production technique and style.

Many of my photographer friends also spend a great deal of time post processing their images — but the vast majority of the people out there really don’t post process at all. These people don’t own Lightroom and Photoshop or Nik Suite or Aperture or whatever else they might use to improve their photos. These are every day non-photographers who are still enamored with photography and imagery.

By applying some very basic algorithmic based enhancements, Google can make photos for the masses look much better than straight out of the camera. This is a very smart move on Google’s part. Where Instagram makes your bad photos look purposefully worse, Google now makes your bad photos look purposefully better! I stole that line from an unnamed source, btw. ;)

Where this new tech is especially powerful is in photos of people. By using basic skin softening post production tech, photos of people will look better on Google+ than on other social networks. By appealing to our vanity, this gives Google a big advantage. If people can post photos of themselves on Google+ that make them look BETTER than on other networks, many more people will choose to post their photos on G+. Just watch as people post photos of themselves on G+ for auto beautification and even download and post them to other networks I bet.

All of this sort of fancy post production *can* be done today by skilled post production photographers who spend hours and hours behind Photoshop. Now much of it will be automated and released to the masses.

There will undoubtedly be some naysayers about this tech. The same folks who moaned about the Instagramification of mobile photography will probably also complain about this new tech too. Google was smart here by giving users a very simple way to deal with this, by simply turning off this feature.

While the photo enhancements were the sizzle of Google’s announcements today, there were many other significant enhancements added to Google Photos.

Google will now begin to analyze your images and auto tag them. This is no trick where low paid overseas workers are manually reviewing your images; Googles’ algorithms now can look at the context of your photo and the actual subjects in your photos to identify possible tags for the images. If you post a photo of the Eiffel Tower, Google can detect the Eiffel Tower in your photo and add that tag for you. If Google gets the tag wrong, for whatever reason, it’s simple for you to just remove it.

What this means is that more of your photos will be seen in search by people using Google products. Many photographers are looking for more traffic and views on their photos. Who better to provide this traffic than Google Search, yes, using Google auto applied tags. This is the future of image search. If you are a photographer, especially one who depends on photography for your living, you cannot afford to ignore the significance of Google Search. Many of my own photo sales are made by people finding my photos while searching on Google. By uploading your photos to Google+, your photos will rank better in search and now even moreso with this new auto-keywording functionality.

Google Releases New Tools for Photographers Using Google+

Google also introduced a new smart algorithm that can analyze your photos and show you which ones Google thinks are the best of the batch, offering you highlights. Oftentimes we will “spray and pray,” taking 20 images of one person or subject. Google will analyze all of the images and suggest the best one for you. Google uses not just technical information about a photo (is it blurry or underexposed?) but they are using human tested aesthetics to look for what is most appealing.

But there’s more! In addition to the tech released above, Google has also added some very easy tools which will auto generate gifs for you of your photos, auto HDR bracketed shots, and suggest other compelling ways for you to present your photography to the world. Almost miraculously, Google can even look at photos of multiple people and merge the photos into a single photo that takes the best expression of each individual from *different* photos.

All of this also comes with an awesome new look and layout of Google+ which better highlights photography on the network. Popular photos will now be featured in jumbo new oversized form across a three column layout. For non highlighted photos, Google also made portrait oriented photos, especially, look better and bigger. In the past, the portrait format was the worst looking photo format on Google+, now it’s the best — that’s worth noting. ;) For folks who don’t like the three column layout, they can switch back to a single column if they’d like.

A couple of other notes: all of this work that Google does with your photos is done behind the scenes for your eyes only. You can use the tech or not use the tech. If you use the tech and like it, *you* then choose to share the image to Google+. Nothing is shared until you choose to share it.

The new technology will only work with the JPG format (hopefully Google comes out with RAW support down the road). Google increased everyone’s storage to 15GB of online storage, but note that any photo sized 2048 px or smaller does not count towards your 15GB storage limit (you can also buy more storage if you want to). Google allows unlimited uploading of photos that you either manually resize or allow Google to resize to 2048 px. There is an option on Google where you can set whether or not you want to upload full high res photos or resized 2048 sized images.

I upload some of my photos full res, and many of them I resize manually myself to 2048 px.

Google also introduced a free, stand alone hangout app that you can now use with your mobile phone or desktop device bridging text, photos and real time group video into a single app that preserves conversations (at your choice) over long periods of time. Hangouts have been one of the most popular Google+ feature and several photography related shows have been built around them.

More detail on these changes at Google here. More from Matthew Hanley here. Trey Ratcliff wrote insightful commentary here.


Thomas Hawk Digital Connection

 
Comments Off on Google Unveils Cutting Edge Photography Tools to Make Your Photos Look Better and the World A More Beautiful Looking Place

Posted in Photography