The post In the Dark: 10 Tips for Street Night Photography appeared first on Digital Photography School. It was authored by James Maher.
Much is spoken about photographing during the twilight hour, but what about after that?
Night is my favorite time for street photography. Cityscapes are lit with a myriad of interesting and colorful light sources, such as lampposts, neon signs, store windows, car lights, and bare bulbs. People dress in their favorite outfits to go out. Bland scenes by day can suddenly turn ominous and fascinating at night.
1/80s | f/2.8 | ISO 1600
Here are 10 tips for street night photography – so you’ll think about starting your next street photography session at twilight!
1. Use the ideal camera settings for sharpness at night
To freeze motion during the day, I prefer to use a shutter speed of 1/320s, with 1/160s as my lower threshold.
At night, this changes. In the brightest areas, you will be able to photograph at 1/250s, but most of the time it will be best to use a shutter speed somewhere between 1/160s and 1/60s.
You need to have steady hands and a wide-angle focal length. In fact, to photograph handheld at 1/60s, you need to stop your own motion completely. Fortunately, with some practice, it can be done.
1/125s | f/2.5 | ISO 6400
A wide-angle lens is necessary for this type of photography because the longer the focal length, the faster the shutter speed you need to keep an image sharp. With a 28mm or 35mm lens, it becomes much easier to handhold the camera at slower shutter speeds.
It will also help to use a fast prime lens, such as a 35mm f/2. It is possible to shoot at f/4 in brighter areas, but being able to shoot at f/2.8, f/2, or even f/1.8 will greatly expand your opportunities.
Finally, you will need to raise your ISO significantly. With modern digital cameras, you can photograph anywhere from ISO 1600 to ISO 6400 and get decent or good image quality. It’s just not possible to photograph handheld at night otherwise. I prefer to shoot at ISO 3200, and I sometimes go to ISO 6400 if needed.
To learn more about photographing with a high ISO, you can read this article, called “Reasons to Shoot High ISO Images.”
2. Seek out the light sources first
1/60s | f/2.8 | ISO 3200
You should always pay attention to the main light sources in a scene. This is true no matter where or when you are photographing, but it becomes even more important at night. Start by finding a beautiful light source or an area with good lighting, then wait around for something to happen.
Focus on how these light sources hit your subjects. If you are leaning against a shop with a lit sign behind you, like the man in the photograph above, then as subjects pass you they will be lit with a strong light that has a gorgeous color to it. If your lens’s aperture doesn’t go wider than f/4, this is a fantastic way to boost your shutter speed.
On the other hand, if you stand in the street and aim the camera at the light source, as I did for the photo above, then the light will be less pronounced on the subjects, but you will get the beautiful sign in the scene. Notice the difference between the light on the left and right side of the man’s face in the photo.
3. Photograph nightlife
1/125s | f/2 | ISO 6400
Some of the most interesting night street photography occurs where the most people are, and that is often where the nightlife is.
So seek out the night life and shoot it!
A fantastic project to look at for inspiration is Maciej Dakowicz’s “Cardiff After Dark” series.
4. Alternate between getting close and stepping back
I’m a proponent of Robert Capa’s advice: “If your photos aren’t good enough, you’re not close enough.” However, I often alter this strategy at night.
I try to get close to many of my subjects, but I will also try to create compositions where the subjects are small aspects of the overall scene. At night, backgrounds can be much more beautiful than during the day, so it often works to have people become the secondary element in the scene, rather than the primary focus.
The technical advantage here is that you do not need to use a fast shutter speed to capture the motion of subjects when you are farther away. You can freeze a moving subject at 1/60s from farther away, whereas you will need to use at least 1/125s when close.
5. Tripod and crowd blur
1/8s | f/4 | ISO 800 | Tripod
For night street photography, it’s usually best to go handheld, since you never know what interesting thing is going to happen and where it’s going to happen. However, one of the times to use a tripod is when you want to capture a busy scene with lots of people and motion.
Experiment with slower shutter speeds, such as 1/8s, and shoot a lot of photos. It took me a long time to capture the image above, because I wanted the people spread out evenly throughout the entire scene, and I also wanted something interesting in the foreground (ultimately, this was the pose of the woman in the street and the man looking at her).
It took some waiting and a lot of captures for this to happen.
6. Use a flash
Whether you want to try flash on the street is up to you, but keep in mind that it can easily lead to a confrontation. I prefer to work with the constraints of the natural light on the street, and I also get uncomfortable flashing strangers in the face in dark settings, but many prefer to photograph this way. It creates a fantastic look when done well.
Using a flash frees you from a lot of the constraints of photographing at night. You can use a faster shutter speed, include more depth of field in the photo, and reduce graininess (noise).
You can have the flash do all of the work lighting the scene, where the foreground area is lit and everything else is dark.
Alternatively, you can set the camera to expose for the scene, similar to what you would do without the flash, and then use the flash to add some fill light to your main subjects in the foreground.
7. Noise and the dreaded underexposed image
1/250s | f/2 | ISO 3200
You should always expose correctly when photographing with a high ISO.
That being said, even with the best settings, some of your images will be taken in areas that are too dark to be exposed correctly. It’s impossible to photograph this way and expose every image perfectly in-camera. For the occasional shots with excellent content that you want to save, you will have no choice but to raise the exposure when editing.
For that type of photo, I first ignore the noise and get the exposure and look correct in Lightroom. After I do this, if I’ve had to raise the exposure a significant amount, the grain will look terrible. Luckily, there are some ways to save an image like that as long as you’re photographing in RAW.
What I do is first remove the grain – then I add it back. I want the image to look grainy, but I want the grain to look pleasing. There are many noise reduction programs, such as Photo Ninja, Topaz’s DeNoise, and DxO. Personally, I like Lightroom’s built-in noise reduction. If the noise is still bad after noise reduction, I will sometimes bring the image into Photoshop and add a very slight Gaussian blur.
Then I will use Lightroom’s grain settings to add grain back into the photo. This grain looks much more pleasing to the eye than brightened, extreme digital noise, and it can further hide some of the technical deficiencies of underexposed images. The result will not be a perfectly sharp image, but it will still be pleasing and beautiful.
8. Blur and imperfection
Aim to get your photos as sharp as possible when you want sharpness, but know that a photo can still look fantastic even if it’s not tack sharp.
You don’t need to freeze motion perfectly when photographing at night for the image to still look great. I hold my day images to a higher standard than my night images when it comes to sharpness. They need to be interesting and look good, and that’s what counts.
Also, at shutter speeds around 1/60s to 1/30s, you can experiment shooting handheld with a slight blur, where your subjects are somewhat sharp but have a little motion to them. It’s a great way to add an energetic feeling of movement to an image.
9. Night images should be dark
1/250s | f/2 | ISO 3200
This is an overly general statement, so feel free to disagree, but I want to make a point here.
I believe that night shots should look like they were taken at night. They should be dark, with deep shadows and areas that are hard to see and make out. When you look at the histogram of a night image, it should be further toward the dark side (the far left) than a day image.
When you expose a night shot, especially with automatic settings, the camera will often misread the scene and overexpose the image. The photo will be bright and you will be able to see everything as you would during the day, but it will not feel like a realistic night scene. In such cases, you’ll want to lower the exposure compensation on your camera slightly.
There are many situations where bright night images are a good thing, but don’t be afraid to make your night images dark and realistic.
10. Be careful
Depending on where you live, going out at night with a camera is not always the safest idea. Travel light, keep your equipment to a minimum, and be careful about where you go.
Use your best judgment regarding who to photograph and think about bringing a friend along. You don’t want to suddenly find yourself in a bad situation.
Tips for street night photography: conclusion
Getting beautiful street photos at night isn’t always easy.
But if you remember these tips and you practice frequently, you’re bound to get some great shots!
Do you have any street night photography tips you’d like to add? Please share them in the comments below!
The post In the Dark: 10 Tips for Street Night Photography appeared first on Digital Photography School. It was authored by James Maher.
The post 10 Tips for Creating Great Family Portraits appeared first on Digital Photography School. It was authored by Darlene Hildebrandt.
Family portraits are a lot of fun – and they can be highly rewarding, too! However, it’s often tough to get started. After all, how do you pose an entire group of people? How do you interact with them? How do you get great photos?
Thanks to my background in classic-style studio portraiture, plus 25 years of experience photographing portraits and weddings, I have a few tips up my sleeve to share with you.
In fact, with a little planning, doing a family portrait will be fun for both you and the family you’re photographing. Here are 10 tips to help you have a successful and enjoyable photo session.
1. Use a tripod whenever possible
I already know what you’re thinking:
A tripod cramps your style. It’s too heavy and cumbersome, whereas your style is more free-flowing.
That all may be true, and in some cases (like when photographing kids running or doing more documentary-style photography), it may be better to shoot handheld.
However, just consider another side of the coin.
Most people are nervous when being photographed. Yes, nervous! Some are downright scared, and some would even go so far as to say that they hate having their photo taken.
So it is part of your job to help your subjects feel more comfortable and relaxed. That can be hard to do when you’re also nervous, especially if you’re new to portraits. But there’s a big advantage of putting that camera on a tripod. Two, actually.
A tripod automatically forces you to slow down. That’s a good thing! You can check your settings, review the composition, and preview the exposure to make sure you’ve got everything right. It’s easy to get carried away once you put the camera up to your eye, only to later realize you had the wrong white balance, your ISO was 6400, or you accidentally shot tiny JPEGs instead of standard RAW files. A tripod will help you slow down to avoid an “Oops!” moment.
A tripod allows you to get your eye away from the camera so you can actually make eye contact with your subjects. Your subjects are very real people, and they feel even more uncomfortable staring straight into your lens than they do looking at you. You can gesture to get the kids’ attention and you can make faces. But you’ll get way better expressions by interacting with your subjects than you’ll get while looking through the viewfinder. Try it!
2. Shoot in Manual mode
Assuming that you’re setting up your family portrait photoshoot in advance, you have control over all the elements.
Meaning that, once you get set up, the exposure should not need to change.
Unfortunately, if you set your camera to Aperture or Shutter Priority mode, depending on the metering mode selected, the camera could choose a slightly different exposure for each frame. You do not want that! Consistency is very important.
Inconsistent exposures create more work in post-processing, as you have to even out all the photos. Plus, they can cause a slight color shift, increase noise (if some of the shots are underexposed), and result in other undesirable things.
To keep your exposures consistent throughout the whole shoot, use Manual mode. Just remember that each time you change the pose, location, etc., you need to check the exposure again. I just fire off a quick test shot, review the histogram, adjust if necessary, and continue.
3. Lock the focus
Just as you do not want the exposure to change from frame to frame, neither do you want the focus to be adjusted. Assuming you’re using a tripod, you will not be moving. And if you’ve posed your group in a relatively static position, they should not be moving, either. Not much, anyway. Here, we are only concerned with moving closer to the camera, or further away from the camera.
So set your camera up to do one of the following: use focus lock, use back button focus, or use manual focus. With any of those options, the focus will not change from shot to shot.
If you use the shutter button to focus and someone moves a little bit so that the focus dot hits the background, you’ll have another “Oops!” moment. If you aren’t sure how to focus using one of the methods I recommended above, consult your camera manual.
Bonus tip:
Here’s an easy way to focus manually with pinpoint accuracy:
Turn on Live View so you can see the image on your screen. Hit your Zoom button (it may have a magnifying glass or a “+” sign on it) once or twice. The image on the rear LCD will zoom in so you can see what is in focus, which allows for more precise manual focusing. Press the Zoom button again to return to normal view and turn off Live View.
4. Stagger the heads
What you want to avoid here is a boring straight line, straight row, or straight column of heads. Diagonal lines are more dynamic and add interest to an image, so try to do that with the people in your portrait group.
Imagine there is a line drawn from each face to the next. Try and position your subjects so that no head is directly on top of, or beside (on the same level), another. Make diagonal lines, not flagpoles.
Use props to seat some people or bring some small folding stools. Have some people sit down or stand up on something. Use objects in the environment to pose your subjects, or if you have nothing available, just arrange them so the heights are staggered.
5. If it bends, bend it
This is a general rule for photographing people, and it’s a good one. People tend to stand stiff and rigid when you position them, so you need to get them to bend a few body parts to look more natural. Nobody naturally stands stiff as a board.
Here are a few starter poses:
Get your subject to shift their weight to one foot and stick out one hip away from the camera.
Get your subject to put a hand in a pocket. I usually recommend they put their thumb out, otherwise they have a tendency to shove their hand to the bottom of the pocket, which looks unnatural.
Get your subject to hook a finger on their belt or through a belt loop.
If your subject is sitting, have them lean forward a bit and put weight on one hip.
If your subject is standing against something, have them cross one foot over the other, toe down.
Have sitting (males) put one knee up, foot flat on the ground (but make sure they rotate so you aren’t looking straight at their crotch).
You get the idea. The best way to get someone to do any of this is to do it yourself and have them mirror you. Face them, do the pose you want them to do, and have them mimic it exactly.
An example of bending body parts. The girls did a much better job here than the guys, but even the arms bent at the elbow helps. Some people are stiff, and they may present a challenge. Just do your best.
6. Let kids be kids
I’ve found that often parents will tell their kids, “You need to be good and smile” before a photo session. For many kids, this puts too much pressure on them to perform. I usually prepare parents by getting them to tell their kids this instead:
We’re going to the park to take some photos. It will be a lot of fun.
That’s it! Set no expectations other than fun. Then you, as the photographer, should prepare yourself. Bring along props, and get Mom to bring one of the kids’ favorite toys or books. I usually have a hand puppet and bubbles in my camera bag along with my gear. If the kids don’t want to sit and smile, don’t force them. Let them run around and be kids for a while and shoot that. Play with them; make it fun. A few minutes later, they may cooperate and sit for a bit.
When I’m photographing kids, I make a total idiot of myself. I make funny noises, I sing songs (I’m really bad, but they don’t care), I make fish faces, and I play peek-a-boo behind the camera. I run back and forth to the camera with my hand puppet. I lie on the ground. I stick my butt out. Kids are the ones that have life the right way around; it’s us adults that ruin it. Let them be kids, and let them have fun. Then be ready to capture the fun when it happens!
This was a game of peek-a-boo around the tree. Look at those genuine smiles! You can’t force those.
7. Pose people to flatter them
Here’s the bottom line:
If Mom thinks she looks fat, then she isn’t going to like the photos, no matter how great the lighting and expressions (see the next tips). So you’ve got to get the posing right.
Be aware of people’s perceived “flaws” and work with them. Here are some quick tips:
If someone has a bigger bottom half, don’t pose them walking away from the camera using a wide-angle lens.
For double chins, take a slightly higher camera angle (above the subject’s eye level). Making them look up stretches their neck and minimizes the chin/neck area.
A bump on a nose will show up when they face one way and not the other (usually). So study their face to find out which way to shoot them.
When you have a couple with a huge height difference, get the taller partner to stand with their feet further apart. That will make them slightly shorter, closing the gap a bit.
For really heavy people (or those overly self-conscious of their weight), use the lying down in the grass pose and pile the kids on top (as shown in the image below). It works great every time, because it hides tummies, stretches out chins, and makes the kids closer in size (it just shows faces!).
The lying in the grass, pile on top pose. It’s great for families with small children. This family didn’t need the pose to correct anything; it’s just fun having the kids jump on top and squish Mom and Dad.
8. Lighting is king; get some in their eyes
Light can make or break any photograph, and portraits are no different. The biggest thing you want to make sure you do for portraits is to get light into your subjects’ eyes. There are many ways to do that, and it’s a huge topic, but here are a few things you can do to start off with good light:
Choose the time of day to do the portraits very carefully. Generally, late evening – about an hour before dusk – is the best time for portraits. Why? Because the sun is lower in the sky, and you don’t get the harsh overhead light you do at midday. Light is more directional, and it’s usually a bit diffuse if there’s haze on the horizon.
If you can’t shoot at dusk, find some shade. Get the family out of the sun, but make sure you don’t get a lit-up background. Bright areas in the background will draw attention away from the subjects. Look for areas in the shade of large buildings or under large trees.
Avoid shooting on an overcast day simply because the lighting is even and less harsh than bright sunlight. While it is true the light is softer and less harsh, the direction isn’t great. Overcast days give you direct overhead lighting and dark eyes, especially for anyone with deep eye sockets.
Add some light using a reflector or a flash if need be. Again, this is a complex subject, but learn to tell when you need more light on your subjects’ faces. Here’s a quick tip: If you cannot see a catchlight (the light source reflected in your subject’s eyes), then there isn’t enough light on their face!
Just as important as getting some light in the eyes is having it come from a good direction. We’ve established that overhead isn’t good direction, and neither is light straight from the camera. So turning on your built-in pop-up flash isn’t going to give you good light. Neither is mounting an off-camera flash above your camera. Light direct from the camera flattens the subject, and that is not what you want.
Instead, you want the light to come slightly from the side; 30-45 degrees from camera is a good starting point. To learn more about this, read my article on the 6 Portrait Lighting Patterns Every Photographer Should Know.
This was done just before sunset. The sun is coming over the kids’ shoulders on the left (from behind). I used a flash bounced into an umbrella off to the left to add light to their faces. Without the flash, they’d be in shadow.
9. Expression is everything
Lighting is king, but getting the right expression is everything! You can totally screw up the lighting and the pose, but if you get your subjects laughing or making the perfect face, the photo will be a big hit!
So how do you do this?
Being a photographer means that you sometimes have to be a comedian or a clown. Knowing the right thing to say or do to make people smile is mostly experience.
Sometimes you’ll get tough adults, too. The dad in the photo above by the brick wall pretty much has the same expression all the time. I’ve known this family and photographed them for 13 years; they’re my friends. So I know I can bug the dad a little bit or get out the ducky to have some fun at his expense.
If there are small children or babies involved, make sure to get their attention. It even helps to have an assistant; tell them to bring Grandma along or a friend to help out.
What always happens is you get the kids all looking and smiling, but what are the parents doing? Looking at the kids! I always tell the parents, “No matter what, keep looking at me as I make a total fool of myself. Do not look at your child!”
The baby is laughing, while everyone else followed instructions and looked at me. Success!
10. Have a little fun with it
The last tip is to not take yourself so seriously. Create a few really whacky shots at the end of the session (or even in the middle of the session if the energy seems to be fading).
Tell your subjects to do a group squish and really get them to squish. Often, they will start laughing, and as they pull apart, you can grab the shot.
Do a pile-on down in the grass. Ask your subjects to jump in the air or make goofy faces (you make one, too!). It breaks the tension and lightens up the mood.
I was making a similar face!
My off-camera flash stopped working, so this shot used on-camera flash (not my first choice!). But we were all tired and I thought this would be fun, so we just went for it. Notice how Dad has a new expression!
Bonus tip
Get the family to think about what they are going to wear ahead of time.
Some people disagree with my point of view on this, which is totally fine. But if you want to read more about it, see my article called “Clothing for Portraits – How to Tell Your Subjects What to Wear.”
Tips for family portraits: conclusion
Capturing stunning family portraits isn’t hard – especially if you remember these ten tips.
Just don’t be afraid to make a fool of yourself, and everything will turn out great.
So get out there, photograph some families, and have fun!
The post 10 Tips for Creating Great Family Portraits appeared first on Digital Photography School. It was authored by Darlene Hildebrandt.
The post 7 Tips for Taking Better Photographs of Cars appeared first on Digital Photography School. It was authored by Desmond Louw.
Taking photos of cars is such an interesting activity; it’s like doing science. Every time you shoot a car, you’ll learn something from it!
That’s why I would like to share some basic guidelines to get you started with car photography.
And by the time you’ve finished this article, you should be one step closer to getting gorgeous photos of cars!
1. Shoot at the right time of day
This is by far the most common mistake people make when shooting cars.
You see, the best time to do car photography is a few minutes after sunset (or a few minutes before sunrise). Use a tripod and get that perfect soft light on the paint.
This photo was taken for Top Gear a few minutes before sunrise:
2. Be on the lookout for reflections
You must carefully control what reflects in the car. Have a look around you, then look closely at the car and see what reflects off its surface.
A car (especially a new, shiny one) is like a mirror. So try to have an open space behind you, like a field. Also, try to avoid shooting with buildings or trees in front of the car. One of the most important things you want to show in your car pictures is the design lines of the car. But reflections can spoil these lines very quickly.
Also, be very careful not to include your own reflection in the photo. If you can’t avoid your own reflection, it’s best to put the camera on a tripod, set the timer, and move out of the shot. Just look at this photo I took of a dark shiny BMW 428i (below); behind me was nothing except the horizon. In fact, you can clearly see the horizon reflecting in the car:
3. Take driving shots
One very easy way to get a cool image is to shoot the car out of another moving car. (Please be super careful when doing this!)
For instance, try shooting the car out of a window while driving at 37 mph (60 km/h) with a shutter speed of 1/100s or so.
By doing this, you’ll get some nice movement on the road and on the wheels. You can even decrease the shutter speed further, though this will increase your chances of ending up with blurry photos.
This Audi S3 was shot before sunset; it was driving at 70 km/h (43 mph), and I used a shutter speed of 1/125s:
4. Pay attention to the color of the car
All types of paint react differently at different times of the day with different light. Most colors hate direct sunlight, but some colors actually handle direct sunlight really well.
Just look at this baby blue Beetle shot in the middle of the day:
5. Choose your background carefully
Make sure your background suits the car and the theme. Avoid including objects in the background that will distract the eye.
Things like dustbins, power lines, and other cars can kill a picture. For this Aston Martin shot (below), I used a simple background. The yellow paint matches the car’s color:
6. Pan for motion blur
A cool way to get some motion in your car photography is to stand next to the road and let the car drive past you.
Follow the car with your lens in one smooth action and set the shutter speed to 1/125s. You will be amazed by how easy this is!
This Ferrari was shot at 1/125s at 200mm. The car was driving roughly 37 mph (60 km/h):
7. Let the car interact with nature
Here’s another way to capture a photo that speaks to you:
Make the car interact with its surroundings.
Examples of this could be a car creating dust or a 4×4 driving over an obstacle. Look at this Chevrolet Trailblazer climbing over a rock:
And this G-Class AMG drifting on loose sand:
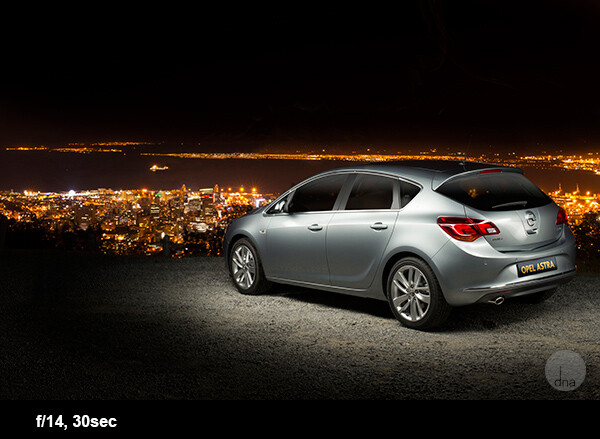
8. Shoot at night
Photographing cars at night might sound daunting, but you will be amazed by how easy and awesome it is! The biggest secret here is to find a spot where it’s completely dark; any streetlights or even a full moon could make life tricky.
Once you’ve found the right spot, set up your camera on a tripod. Set your ISO to 100, the shutter speed to 30 seconds, and the aperture to f/9.
When the shutter opens, take a strong constant light source and walk around the car, “painting” it with your light. A normal household flashlight works for this.
There are no rules here. Paint the car in different ways to get different effects, and you will be blown away by the results! Here are some examples of this technique:
This is an Opel Astra shot next to Table Mountain with Cape Town in the background.
This is a Dodge Charger with the skyline of Detroit in the background. The photo took me no longer than five minutes to set up and capture.
Tips for taking better photos of cars: conclusion
Car photography may seem difficult, but with these handy tips, you’re well-equipped to take some stunning car photos of your own.
So pick your favorite technique from the article, get outside, and start shooting!
Do you have any other car photography tips or favorite images you’ve taken of cars? Please share them in the comments below.
To learn related tips and techniques, check out these articles:
Light Painting Part One – The Photography
Showing Speed: Using Panning When Shooting Action
3 Tips for Creating Dramatic Images Using Motion
Do You Pack Up and Leave After Sunset and Miss the Fun of Night Photography?
The post 7 Tips for Taking Better Photographs of Cars appeared first on Digital Photography School. It was authored by Desmond Louw.
The post 6 Tips for Capturing Dramatic Skies in your Landscape Photography appeared first on Digital Photography School. It was authored by Hillary Grigonis.
Don’t let the “land” in landscape photography fool you; a great landscape photo relies just as much on the sky as the land. Boring gray skies make for boring landscape photos, after all!
That said, capturing a dramatic sky in-camera is trickier than it seems. When the sky is lighter than the land, your camera will typically overexpose it, turning a brilliant blue into a vague and unexciting gray or white.
But with a little fine-tuning, it is possible to capture a sky that is the cherry on top of a great scene! Here are six tips for capturing more dramatic skies in your landscape photography.
1. Time it right
Landscape photography may not require the split-second timing that’s necessary for capturing a toddler’s smile or a wide receiver’s catch, but timing is still a big part of the picture. The sky that’s gray one day could be bright blue the next. So when planning out a landscape photo, consider how the timing will impact the sky.
Watch for weather patterns that add interest to a shot, like a storm brewing just above the horizon. Weather plays a big role in the overall mood of the image – so if you’re hoping to capture a dark and gloomy shot, head out when the sky is stormy.
On the other hand, if you’re hoping to capture a more relaxed or happy photo, look for blue skies dotted with clouds.
The time of day matters, too. While the middle of the day will produce the most shadows on the land, it’s when the sky tends to be the clearest blue. And just after sunset and just before sunrise is often a good time to capture wispy clouds and a warmer tint of light.
Of course, sunrise and sunset is great for dramatic skies, as well.
2. Try the wrong white balance
Photography rules are sometimes meant to be broken, including rules about always using the correct white balance.
You see, the wrong white balance setting can create a more dramatic sky. This is especially true when shooting toward the beginning or end of the day – using a different white balance preset will adjust the color in the sky.
Auto, Cloudy, and Shade white balance presets will get you an orangish sunset with a light blue sky (with slight variations in warmth depending on the setting you choose). A florescent setting, on the other hand, will typically turn an orange sunset purple with a brilliant blue sky. Tungsten offers a similar effect, but with even deeper colors.
Using Kelvin temperatures to adjust your white balance results in even greater control over the colors in the sky. At around 5500K, you’ll usually capture a sunny sky with an accurate white balance – that is, where things that are white are still white in the picture, and where things that are gray are still gray in the picture.
A higher temperature – 6500K, for example – will give the land an orange glow but also enhance the colors in a sunset. A cooler temperature, on the other hand (e.g., 3000K), will play up the blues and purples. By using the Kelvin scale, you have more options for picking a white balance setting that best captures the colors in your photos.
Here, the white balance was altered in post-processing to warm up the sky.
While it’s always best to get the shot right in-camera, shooting in RAW offers you even more flexibility when it comes to adjusting the colors in the sky (and the rest of the image, for that matter).
If you overdid things by making the shot too warm or too cool, you can easily adjust a RAW photo in post-processing, so that you use the color temperature that best fits the image. If you have a landscape photo that you already shot in RAW, open it and try different white balance presets, or the temperature slider, to see first-hand how shooting with a different white balance would have impacted the shot.
3. Compose for the sky
When the sky is more dramatic than the land, why not use that to determine your composition?
Pay attention to where you place the horizon when you are composing your shot. Use the rule of thirds to imagine the image is divided into threes, then place the horizon on one of those horizontal lines. If you are shooting a photo with an average-looking sky, try placing the horizon on the upper third of the image, so more of the land is included in the photo, like this:
As the sky here isn’t very dramatic, the higher placement of the horizon improves the composition.
But if the sky is really dramatic, take advantage of that and include more of it in the frame – by placing the horizon on the lower third:
The sky here is dramatic, so the image was composed to show less ground and more sky.
4. Use a filter
There are two filters every landscape photographer should have in their camera bag in order to capture more dramatic skies.
The first is a graduated neutral density filter. Now, a regular neutral density filter is like putting sunglasses over your lens – it limits the light coming in for bright scenes or long exposures. But a graduated neutral density filter places that darkening effect only on a portion of the image. And by positioning the dark portion of the filter over a bright sky, you can properly expose the entire scene.
Without a graduated neutral density filter, the sky will often be overexposed and bland, or the land will be underexposed and dark. With the filter, you can achieve an exposure that works for both portions of the scene. The only downside is that graduated neutral density filters don’t work as well with an uneven horizon, like when shooting a cityscape. Graduated neutral density filters come in both circular and square formats, but the square is often preferred because you can place the horizon anywhere in the frame.
The second filter landscape photographers should use to capture more dramatic skies is a polarizing filter. Polarizing filters work by adjusting the reflected light coming through your camera lens. Since the sky is blue because of this reflected light, turning the front of the polarizing filter will adjust the intensity of the blues in the sky. Since polarizing filters only affect reflected light, they can still be used when mountains or buildings make the horizon uneven. Polarizing filters are also great for enhancing or removing reflections on water or other shiny surfaces.
5. Experiment with motion blur and long exposures
Long exposures aren’t just for photographing waterfalls. If you use a long enough shutter speed, the clouds will blur, too, creating a sky of wispy streaks and a slight feeling of motion.
To capture motion blur in the clouds, you’ll need to use a long shutter speed. The best settings will depend a bit on the weather and how much motion blur you’d like, but you can try starting with a two-minute exposure and adjust up or down from there.
If you are shooting during the day, you may not be able to balance out a two-minute exposure with a narrow-enough aperture or a low-enough ISO; instead, you’ll end up with a photo that’s way too bright.
So how do photographers capture motion blur in the clouds when the photo obviously wasn’t taken at dusk or dawn?
They use a neutral density filter – which helps block out some of the light so that you can set a long exposure during the day.
(Note that a neutral density filter is the same thing as a graduated neutral density filter, but the entire filter is dark instead of just half of the filter).
6. Use the Adobe Camera RAW Graduated Filter tool
While it’s always best to get the shot right in-camera, there are a few editing tools that can improve the sky in your landscape photos. One of those tools is the Graduated Filter inside Adobe Camera RAW (this works the same in Photoshop and Lightroom).
With the Graduated Filter, you can drag an effect over the sky in your photo. Like an actual graduated filter, the effect will only cover the top portion of the image and gradually fade away, making it possible to create natural-looking edits.
The Graduated Filter tool can be used to adjust the exposure, creating an effect much like an actual graduated neutral density filter. But the tool can also adjust contrast, saturation, clarity, sharpness, and color. That opens up a lot of possibilities for applying edits just to the sky for more drama – creating effects that sometimes can’t be done in-camera.
This is the original photo.
This is the same photo, but with a Graduated Filter used on the sky to increase the drama.
Capturing dramatic skies in your landscape photos: conclusion
The sky can make or break a landscape photo. From timing and composition to filters and post-processing, when you consider the sky as you shoot, you’ll end up with more dramatic, frame-worthy shots.
Do you have any other tips for creating dramatic skies in your landscape photography? Share them in the comments!
The post 6 Tips for Capturing Dramatic Skies in your Landscape Photography appeared first on Digital Photography School. It was authored by Hillary Grigonis.
The post Tips For Achieving Blurry Backgrounds When You Don’t Have a Fast Lens appeared first on Digital Photography School. It was authored by John McIntire.
Using a shallow depth of field to get blurry backgrounds in your photos is a powerful and popular tool for photographers. Blurring your background in this way makes it easy to obscure details in your scene that don’t add anything to your photographs. This helps to ensure that the focus of your images is your subject, and only your subject.
Using fast lenses with maximum apertures such as f/1.8 or f/2.8 is the easiest way to achieve this blurry background effect.
Using a fast aperture (f/1.8 here) is a surefire way to ensure blurry backgrounds in your images, but what do you do if you don’t have access to a fast lens? Canon 5D Mark III | Canon EF 85mm f/1.8 | 85mm | 1/1600s | f/1.8 | ISO 100
However, what do you do if you don’t have a fast lens? And what do you do in situations where you are unable to use your lens wide open?
Here, you can see the difference the aperture has on the background. On the left, the aperture is f/8, while on the right, it is f/1.8.
Fortunately, manipulating the aperture settings in-camera is only one way to control how depth of field appears in your images.
This article will show you two ways to help you achieve more background blur when you don’t have access to a fast lens and when you can’t shoot wide open.
1. Get closer to your subject
An easy way to obtain a shallower depth of field for blurry backgrounds is to simply get closer to your subject.
Simply moving your position so that you are closer to the subject is a great way to manipulate depth of field. The closer you get, the shallower the depth of field gets.
Depth of field is determined by multiple factors. Aperture is one, but another important factor is how close the camera is to your subject.
By moving your camera closer to your subject, you will increase the amount of background blur that appears behind your subject.
(Conversely, if you want more depth of field in your image, move farther away from your subject.)
Putting it into practice
With techniques like this, it can be a good idea to do a few exercises so you can see exactly what is going on.
To see this technique in action, find yourself a subject and position them in front of a background. Choose a background that’s a little bit busy (like foliage) so you can see the full effect.
In the leftmost image, I was 12 feet away from the subject. You can see almost all of the details in the background. I slowly moved closer, 2 feet at a time; you should be able to see as the background gets blurrier. The last image was from 4 feet away. (Images are cropped for comparison.)
If you’ve chosen a portrait subject, start from between eight and ten feet away. If you’ve chosen something smaller, decrease that distance as much as you need to have a somewhat reasonable composition.
No matter what lens you have, you should be able to choose an aperture of f/5.6. Dial that in and adjust the other settings until you have a decent exposure. Take a shot.
Step forward a foot and take another. Then move a foot closer again and take a third shot. Do this until you have reached your minimum focusing distance or you are too close to your subject to frame a photo.
Then you can review the images in order. Watch for how the depth of field becomes shallower the closer you are to your subject.
If you use multiple lenses, I encourage you to do this with all of them.
The reverse
Of course, if what you want is more depth of field (i.e., less blurry backgrounds) in your frame, you can always move further away from your subject.
In more depth
If you are technically minded and want to learn more about why and how this works, note that depth of field is governed by the inverse square law, just like many other aspects of photography. These other aspects include light intensity (which governs your exposure) and light fall-off (which governs the shape of the light).
With an in-depth knowledge of the inverse square law and how it works, you would actually be able to calculate exactly where you need to be with a certain focal length and aperture to get an exact result. You will probably never find yourself in a situation where you would need to do this, but it is still possible!
2. Bring your subject farther from the background
The other main way to achieve a shallower depth of field is to put more distance between your subject and the background.
Another easy way to manipulate depth of field for blurry backgrounds is to move your subject away from the background. Both images above were shot at f/8, but the lefthand image was taken 2 feet away from the background. The righthand image was taken 12 feet from the background.
This works the same way as the previous technique, but in this case, you will be moving your subject rather than the camera. If your subject is close to the background, more background detail will be present. To get more blur, simply move your subject forward.
Practice
To see this concept in use, position your subject almost touching a background of your choice; this can be a studio background, some trees, or a wall.
To practice this, have your subject move away from the background in set increments. Make sure you move the same distance back, as well. Here (from top-left to bottom-right), the subject started 2 feet away from the background and ended 12 feet away from the background.
Start at an aperture of f/5.6 and get a decent exposure with your other settings. Take a shot. Now move your subject a foot away from the background. Note that it’s important that you move the same distance backward. If you don’t, then you will have two factors affecting the depth of field in the frame, and it will be impossible to accurately see what is blurring the background.
Take another shot. Move yourself and your subject another foot back and shoot again. Repeat as many times as you want. In practice, how far away you move your subject is dependent on how much blur you want to achieve.
Do you want to retain some detail so that your viewers can recognize the background? Or would you rather obliterate any background details altogether, ensuring that your subject is the only thing for your viewers to focus on?
Real-world use
Now that you have put all of this into practice and you have your sequences of images, you should have a good idea of how the depth of field changes with your distance from the subject and the subject’s distance from the background.
At the end of the day, you do not need a fast lens to achieve blurry backgrounds in your portraits. You are still able to achieve a shallow depth of field with smaller apertures. Canon 5D Mark III | Canon EF 70-200mm f/4L | 1/200s | f/8 | ISO 800
Not only will you be able to use this knowledge to help you get a shallower depth of field when you can’t shoot wide open, but it will also help you design any desired photos long before you pick up the camera.
For example, you might want an image where your subject is in focus from front to back, but you want the background to be as obscured as possible. Having gone through these exercises, you should be able to approximate what aperture you need to use, how close to the subject you need to be, and how far away the background needs to be. And you should be able to do it in a fairly short amount of time, too!
Achieving blurry backgrounds: final words
Manipulating depth of field to get blurry backgrounds may be a basic technique, but understanding fundamentals like these helps give you a well-rounded set of camera skills that will serve you well in your photography.
The post Tips For Achieving Blurry Backgrounds When You Don’t Have a Fast Lens appeared first on Digital Photography School. It was authored by John McIntire.
The post How to Photograph Sun Flares: 14 Tips for Beginners appeared first on Digital Photography School. It was authored by Dena Haines.
Sun flares can add beauty and drama to your photos. Cameras and lenses are designed to cut down on flare – so when it comes to sun flares, you have to be a rule-breaker right from the beginning.
In this article, I’ll share 14 tips to help you get started photographing sun flares!
Photographing sun flares: 14 tips for beginners
There are no rules for sun flare photography; it’s all about creativity. You can capture sun flares at any time of day, and with these easy tips, you’ll be out experimenting in no time.
1. Try various aperture settings
Have you noticed that in some photos sun flares look soft and diffused, while in others they look bold and defined? That has a lot to do with which aperture setting was used.
If you use a fairly wide aperture, like f/5.6, you’ll get soft flares. But if you use a small aperture, like f/22, you’ll get stronger, more defined flares.
In the split image above, the f/5.6 shot is a softer-looking flare, and the f/22 shot is more defined. The points of the flare are created by the blades of the aperture inside your lens. When the blades come closer together (as with narrow apertures like f/22), you get more defined points in your flares.
Using different apertures will give you a variety of looks to choose from when you’re editing. You’ll also learn which type of sun flare you prefer, depending on the setting and feel you want in your photo.
2. Use Aperture Priority mode
The easiest way to control the aperture (as discussed above) is to put your camera in Aperture Priority mode (indicated with an “AV” on a Canon camera, and an “A” on a Nikon camera). That way, you’ll be able to easily adjust the aperture setting.
And with your camera set to Auto ISO, it will automatically choose the ISO and shutter speed settings for you.
Now you’ll be able to quickly switch apertures and see the difference it makes to your sun flares.
3. Partially hide the sun
Use an object (such as a fence post, building, or tree, etc.) to partially hide the sun. This will allow you to capture flare while adding an artistic touch to the object you’re shooting.
Move around the object and let the sun peek out at different locations as you keep taking photos. I love doing this, and I always come away with something unique.
4. Move around and take lots of pictures
When shooting sun flares, it really helps to move around – a lot. If you are partially hiding the sun (as mentioned in the previous tip), a slight movement to the right or left will cause a big change in the flare. Your photo could be flooded with too much light, or you might miss the flare altogether. But moving could also reveal the flare in just the right spot to create the look you want.
It’s important to take lots of pictures. You’ll eventually learn how much sun to include in relation to the amount of flare you want.
Sun flares can be unpredictable; that’s part of what makes them fun to work with.
5. Try using some filters
When photographing sun flares, filters can be helpful. I recommend considering either of the following options:
Polarizing filter: You’ll get different effects as you rotate this filter. It can help increase color saturation and decrease reflections. If you have a polarizer, play around with it and see how it affects the flares.
Graduated neutral density filter: This filter is darker at the top and becomes lighter near the bottom. It can prevent part of the image from looking blown-out when shooting into the sun.
I used a graduated neutral density filter for the photo on the right. It helped control the light, which kept the colors richer.
6. Shoot during different times of day
Around sunrise and sunset, the sunlight comes in at a unique angle. This creates a warmer, golden color, whereas during midday, there is a cooler (bluish) or more neutral light.
In the following image, two of the photos were taken around sunset, and the other two were taken a few hours after sunrise. Can you guess when each photo was taken?
I bet you got it right – the images on the left were taken near sunset. They have a warmer feel, don’t they? Whereas the images on the right have a cooler feel.
7. Divide the sun with your camera
You can get a softer, more diffused look by composing your photo so that the sun is not fully in the frame. Try cutting the sun in half, or only including its bottom third.
Play with it. Create different effects and see which you prefer.
8. Use a tripod and a remote shutter release
As I mentioned earlier, a smaller aperture setting (higher f-number) will give you a sharper, more defined flare.
But using a small aperture also means that your camera will require more time to take the photo. The longer the image takes, the more chance there is for camera shake to cause blur.
If you are handholding your camera, this could be a problem. When your camera is on a tripod, there is much less chance of camera shake.
Using a tripod will help keep your photos looking sharp and your sun flares looking crisp. By using a remote shutter release (or your camera’s self-timer), you’ll reduce camera shake even more.
9. Keep the sun at your model’s back
By keeping the sun at your model’s back, you’ll allow the light of the flare to spill out around them in interesting ways.
Depending on the time of day, you might need to lie down, and have your model sit or lie down, too. The image above was taken around 3:00 PM in the afternoon, and I was lying on the ground.
The higher the sun is, the lower you’ll need to be in order to place the flare at your model’s head or at your model’s shoulders. Having your model sit down will make it easier for you.
And when the sun is lower in the sky, positioning becomes easier for both of you.
10. Use a reflector
A reflector is designed to reflect the light back onto your subject. Reflectors are usually made of fabric (white, silver, or gold) and can be handheld, hung from a freestanding base, or placed on the ground.
Using a reflector can be helpful if your model is in the shade. It helps to brighten the face, making the photo look more pleasing.
11. Cover the sun with your hand to focus
It can be hard to focus when shooting sun flares. There is so much light that your camera may struggle to lock focus on the right spot.
When this happens, hold up your hand to cover the sun, compose your photo, and press your shutter release halfway. Once your camera focuses, take your hand down and press the shutter the rest of the way.
You may have to try this a number of times until you get exactly what you want.
12. Place the sun out of the frame
To get a really soft flare effect without a bright point, try placing the sun out of your frame.
I love how this adds soft light (as shown in the photo above), and how the eye is drawn up to the source of light.
13. Use spot metering
Spot metering handles bright light really well, so if you’ve got a choice, go with this metering mode. All but one of the photos in this article were taken using spot metering.
If your camera does not have spot metering, then partial metering is the next best choice. Note that I use autofocus with the focus point set to the center (as the focus point is where your metering mode will be active).
14. Have fun!
This last tip is probably the most important:
When photographing sun flares, experiment and have fun.
Don’t be afraid to take tons of pictures, try different aperture settings, and move around. Sun flares are wild and unpredictable. Be creative and use different objects to block (or diffuse) the light. You’re bound to get lots of overexposed and underexposed photos, but you’ll get a lot of gorgeous results, as well.
Photographing sun flares: Now it’s your turn
I would love to see your sun flare photos and hear your tips! Please share them in the comments below.
The post How to Photograph Sun Flares: 14 Tips for Beginners appeared first on Digital Photography School. It was authored by Dena Haines.
The post 10 Tips for Photographing Great Headshots appeared first on Digital Photography School. It was authored by Sean Gannon.
Creating beautiful headshots can seem like a daunting prospect. To have one person in front of your camera, looking to you for direction and positivity, can be tough. Plus, people are generally very critical of themselves when in front of the camera and can feel very nervous.
However, there are some simple things that you can do to make headshots a lot easier for everyone.
So here are 10 tips to help you photograph headshots:
1. Have a pre-session consultation
Before your session, make sure you know how the images will be used and what style your subject would like. You can have this “pre-session consultation” on the phone or face-to-face. Talking to your subject will help them relax so much more than an email, and a consultation will allow you to help them prepare for the session.
Make sure they know what to expect and are as relaxed as possible.
Find out what profession your subject is involved in; a corporate lawyer may opt for a clean white background look (above), while a more relaxed style of business (e.g., a yoga instructor) may prefer a more colorful, environmental image (below). Find out in the consultation what they want so you are prepared on the day.
2. Help your subject choose the right clothes
Generally speaking, solid, neutral colors work best for headshots, as you want to avoid anything that distracts from people’s faces.
If you’re looking to achieve a formal style, make sure that everyone gets the message and remembers to bring formal work clothes with them. Men often forget their jackets, so for a consistent look, try to have a spare one on hand, even if you need to clip it at the back.
If you know you’ll have lots of time with a person, get them to bring a few items of clothing. Remind them to iron their clothes, as well.
Here are some examples of good clothing choices:
3. Create separation from the background
For great headshots, make sure your subject doesn’t stand too close to the background.
If you are using a studio background (or the wall in an office) and you position someone close to it, you may see shadows on the wall, which makes the images look less professional.
For environmental headshots outdoors, I still recommend separation from the background. The resulting bokeh will create a nice, nondescript background, especially when you shoot at a wide aperture. Typically, I aim for an aperture of f/4 for environmental and natural light sessions, and f/8 for studio-style sessions with lights.
4. Starting the session
Whether you are photographing headshots for a single person or a whole team, make sure you have a general chat with each person first to help them relax.
This can be just a 10-second, confident handshake and a “How are you?” People generally feel very nervous about having their photograph taken, and talking about something within their comfort zone (where they live, if they have children or pets, etc.) will really help them to become (and to appear!) more comfortable.
5. Silly faces!
A great way of helping people relax in front of the camera – especially if you don’t have much time with them – is to ask them to pull a funny face for the first frame.
Use this as a lighting test for a new person, as well. It’s a great way to break the ice, and very few people will refuse to do it. Once your subject has pulled a silly face, everything else is easy!
6. Lighting and positioning
For business and actors’ headshots, I tend to light quite evenly. There are a few circumstances where the images are low-key, but for the most part, they are evenly lit. A classic beauty lighting setup works well, with one light above and a second light, or a reflector, supplying fill light from below.
Ensure the subject is turned with their body 45 degrees away from the camera and toward the main light source (if your lighting allows for this). Their face should be pointed straight toward the camera. You may need to guide people to look straight down the lens. It’s surprising how many people look off-camera, at the flash, or somewhere random.
7. Sit people down
People may be more comfortable sitting down, and by asking them to rest their hands on the tops of their thighs, it gives them something to do with their hands. It also ensures that the subjects all know where they need to be, and that they don’t move around too much.
8. It’s all about the little adjustments
What separates a great headshot from an average one is generally very small changes. These little adjustments can make all the difference. The slight tilt to the head, leaning forward, a gentle but intriguing smile. Don’t be afraid to ask someone to make very specific changes to their expression and position until you get the image you’re looking for.
9. Keep talking and be positive
When you’re in the midst of taking photographs, make sure that you keep talking to your subject. Reassure them that they’re doing it right and you’re getting great images.
Even if you’re not satisfied with the images you get when your subject turns their head in a certain direction or when the light falls in a bad way, never express those feelings. Silence will kill the atmosphere, so no matter what is happening, just keep chatting and being positive.
10. Shoot tethered
If you have all the necessary equipment, shooting tethered is a fantastic way to get great headshots. When people see a couple of shots on the screen, they can very quickly get an idea of what needs to be changed. The immediate feedback from the screen will help everyone massively.
Photographing great headshots: conclusion
I hope you find these tips for better headshots helpful.
Do you have any other tips we missed? Please share them – and your favorite headshot photos – in the comments below!
On Pinterest? Here’s an image to pin.
The post 10 Tips for Photographing Great Headshots appeared first on Digital Photography School. It was authored by Sean Gannon.


You must be logged in to post a comment.