RSS
 

Posts Tagged ‘Tips’

6 Tips on How to Create Abstract Photos

29 May

It’s time to have some fun with your camera, and pop you out of the realistic rut you may not even know you’re in. It’s time to create some images based on color, light, emotion, and a lack of concern for sharpness or details.

It’s time to play around with abstract photography!

PWC-Travel2015-1229-0212

Abstract | ab-stract | adjective | of art : Expressing ideas and emotions by using elements such as colors and lines without attempting to create a realistic picture.

You already have all the tools you need (a camera or even a smartphone),  so let’s take a look at some methods of creating emotive and abstracted images.

Techniques

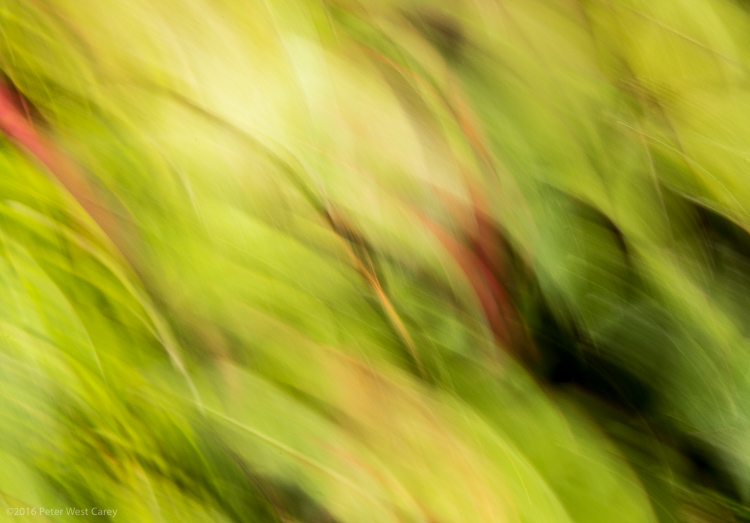
1 – Move Your Camera

The simplest method for creating images filled with color and lines, is to blur the snot out of everything. This is a liberating concept for most of us. “I get to move my camera and not worry about staying super steady? Heaven!” I can hear you shout.

All of these techniques are paths of self discovery, but I can give some tips on where to start.

PWC-Travel2016-0323-3539

First, slow your shutter speed down to 1/10th of a second or slower. As with panning blur, this is where things get interesting. You can do this in Shutter Priority mode, or if you know how to adjust your camera in Aperture or Program modes, you can use those to get the same shutter speed. You’ll also be helped with a low ISO, such as 100 or lower.

Second, look for things in the shade. That slow shutter speed needs a lack of light to work well, otherwise your shots will be blown out (overexposed).

Third, take some sample shots moving your camera in one direction, then another. I know, this sounds like lame advice, and is simplistic, but it starts out that way. You have to start seeing what the scene in front of you does when you move one way or the other. Then start moving in circles or random wiggles.

PWC-Abstract2016-0420-4743

Sometimes straight lined objects look best when you go with their grain and direction. Sometimes circular items (flowers being an easy target) look best with some random wiggle. This is your official “Get out of photography-jail free card” to experiment and make some ugly images. But you may also make some that pique your interest.

PWC-Abstract2016-0419-4286

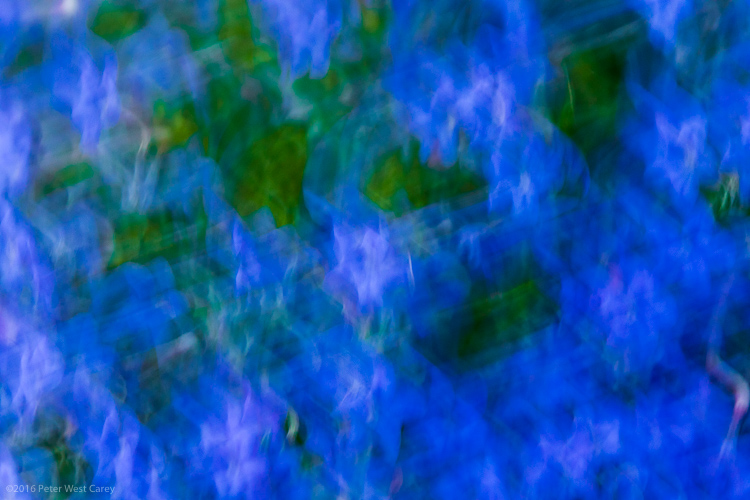
2 – Move the Subject

I used to hate see tags on train cars, until I realized the magic of all those random colors screaming by at 40 miles per hour (65 km/h).

Now I often look for all kinds of colorful items, just for their color alone. The shape, subject, or intent may not be what I want, but if I can use that color and get it to move just the way I want…I can capture the colorful essence.

PWC-Oregon2012-0630-8954

This can be a lot like light painting, but without the subject emitting the light. Think of other things that can be moved around, and go for bold colors.

WARNING: Watch out for white, yellow and other super bright colors. Their properties mean they will fill your sensor with too much data too fast, and they will washout/cover over any other colors you may have in your shot.

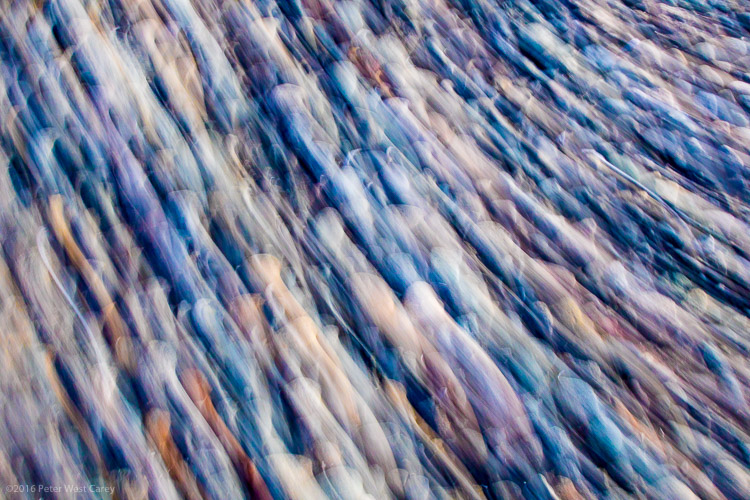
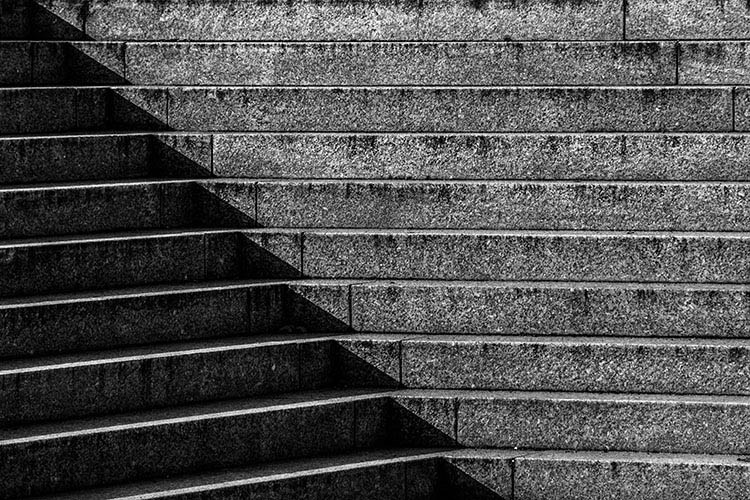
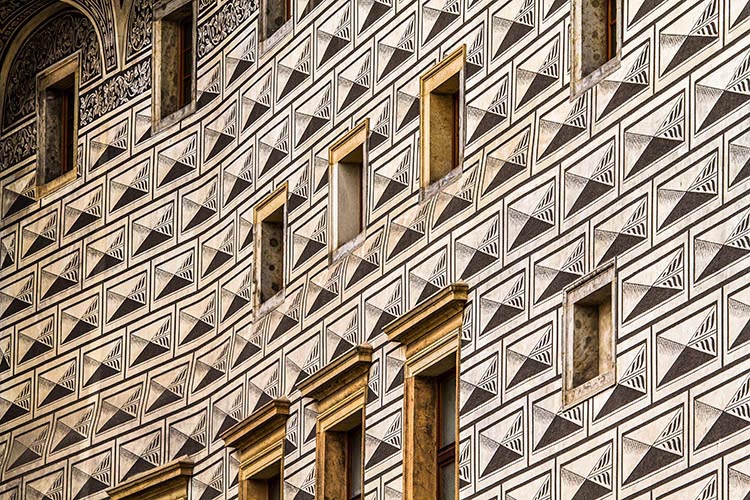
3 – Remove Reference

A zoom lens will be your best friend here. Wide angle shots, even with ample blur, often allow us to ground ourselves in the scene, not the colors or emotion. It’s breaking out of what we can recognize, and can relate to, that helps the abstract images.

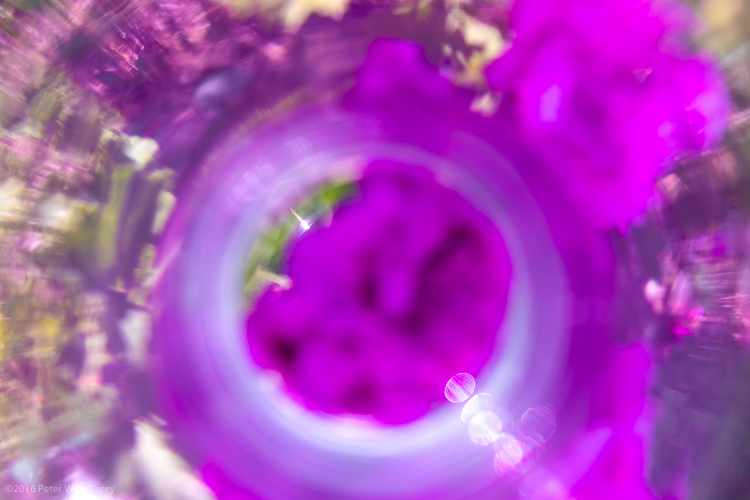
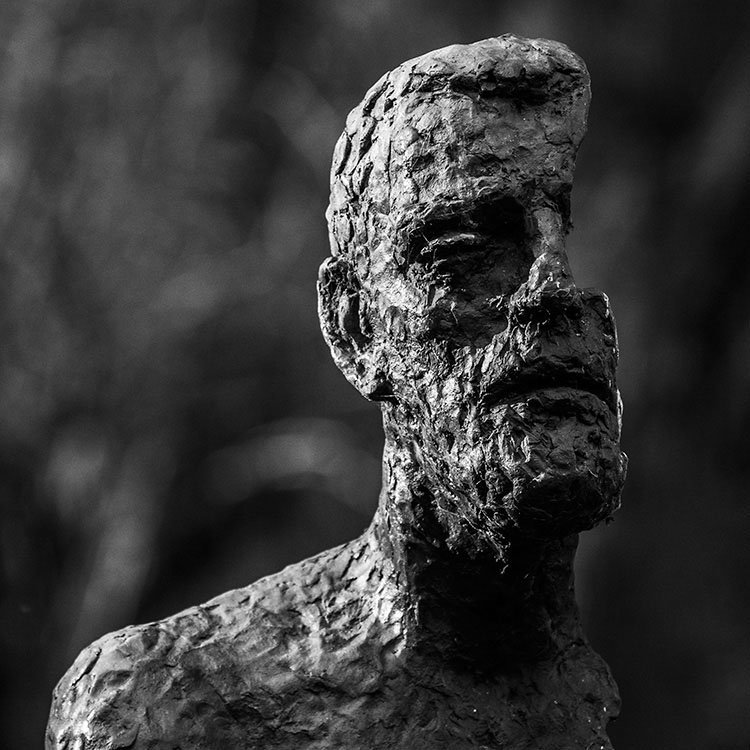
Let me show you an example. What do you see here (below)?

PWC-Abstract2016-0419-4328

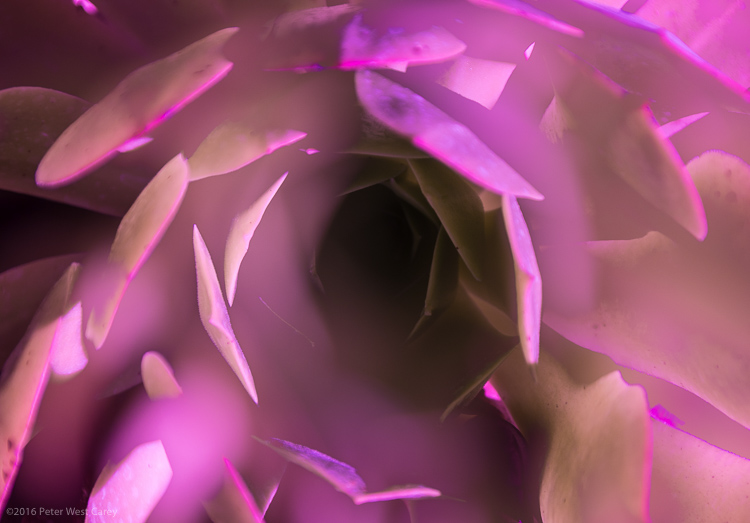
Now let me show you the larger context.

PWC-Abstract2016-0419-4309

The more you zoom in and pick apart details, the more you can play with abstraction.

4 – Shoot Through Things

I have yet to experiment heavily with shooting through objects, but there is much fun to be had here too. Having a way to hold the object helps, and a clamp on a light stand would be handy. Otherwise, start with everyday objects and work your way through colored glass, a glass block, or even smear various gels and liquids (Vaseline, olive oil, etc.) on a clear sheet of glass or plexiglass.

PWC-Abstract2016-0428-4858

5 – Multiple Exposure

Using in-camera multiple exposure techniques can sometimes leave too much of the original, recognizable subject, for some photographers’ tastes. I have found the Average setting on my Canon to work well in combining shots. If you want to get funky, go for the Dark setting, and prepare to shoot a lot of tests.

My method is to take one shot, mostly in focus. Then I shoot two more in varying degrees of out of focus. This sometimes ends up with more of a soft focus look, and that’s where the argument can be made that these images are not abstract enough. That’s why I’ll choose to zoom way in, to hopefully make the subject a little more out of context.

PWC-Travel2016-0323-3621

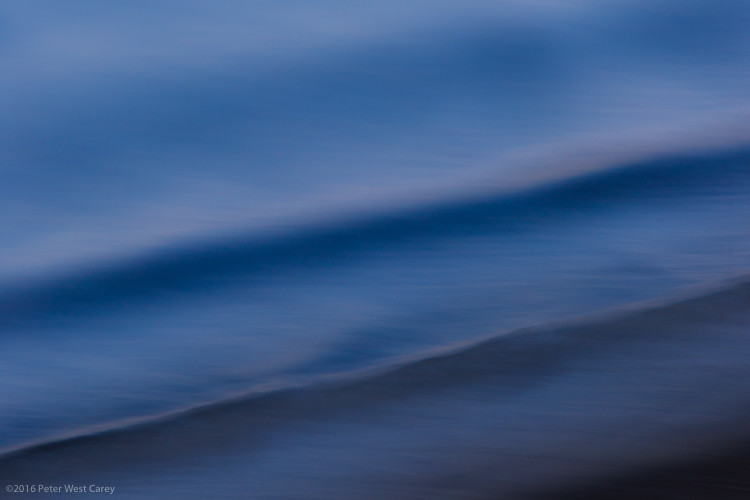
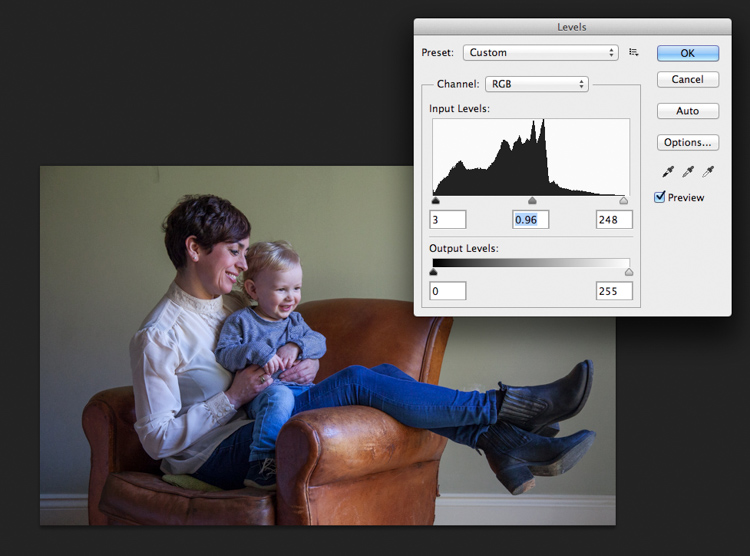
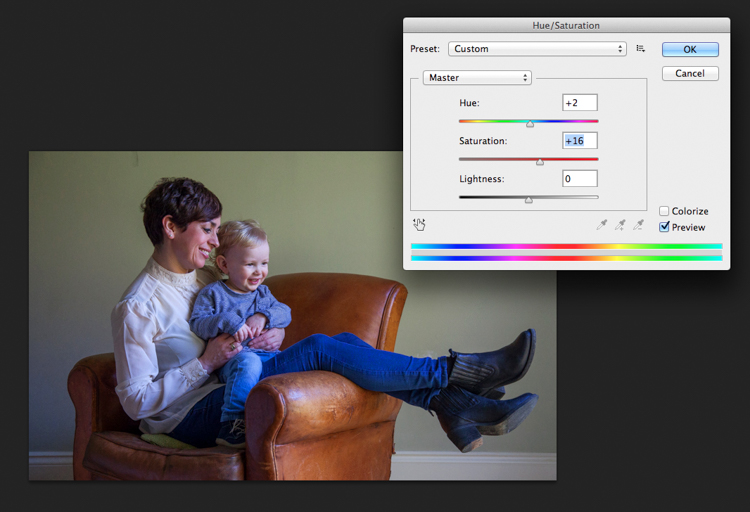
6 – Post-Processing as a Playground

You know how people tend to complain about too much post-processing of some artists’ work? Now’s the time to cast off those bonds and have some fun. You can soften scenes to make them even more ethereal.

PWC-Abstract2016-0419-4585

Or you can try on different versions of the same image, but with vastly different color renditions (in this case, I simple moved the White Balance Temperature and Tint sliders in Lightroom).

PWC-Travel2016-0323-3463-3

PWC-Travel2016-0323-3463

PWC-Travel2016-0323-3463-2

Once your images are in the computer, let your impulses go wild!

Conclusion

PWC-Abstract2016-0419-4467

The thing I like most about abstract photography is that it plays on the “This is something I really like, but I’m not sure why” nerve inside all of us. I can possibly breakdown each of these images and tell you why I picked them, but in the end, it doesn’t really matter. It’s about creating art for art’s sake. It’s about getting back to the basics of attraction to art. It’s about being surprised by what you see on your LCD while breaking a few of the rules you used to hold so dear.

Now go experiment and show me what you can create!

googletag.cmd.push(function() {
tablet_slots.push( googletag.defineSlot( “/1005424/_dPSv4_tab-all-article-bottom_(300×250)”, [300, 250], “pb-ad-78623” ).addService( googletag.pubads() ) ); } );

googletag.cmd.push(function() {
mobile_slots.push( googletag.defineSlot( “/1005424/_dPSv4_mob-all-article-bottom_(300×250)”, [300, 250], “pb-ad-78158” ).addService( googletag.pubads() ) ); } );

The post 6 Tips on How to Create Abstract Photos by Peter West Carey appeared first on Digital Photography School.


Digital Photography School

 
Comments Off on 6 Tips on How to Create Abstract Photos

Posted in Photography


How to Get the Correct Exposure at Night with These Helpful Tips

25 May
Tappan zee bridge

Colorful lights on the Tappan Zee Bridge reflected in the Hudson River at night. Behind the shot: ISO 200, aperture f/8, shutter speed 90 seconds, White Balance tungsten, lens used 80-200mm f/4.5 manual Nikkor zoom.

Exposing your photos correctly at night can be a bit challenging, and will certainly require some trial and error. In this article, you will learn helpful information to minimize the learning curve. Follow the tips outlined below and you will be taking better night photographs in no time.

Tappan zee bridge at night

View of the Tappan Zee Bridge and surrounding landscape at night. Behind the shot: ISO 400, aperture f/8, shutter speed 10 seconds, White Balance auto, lens used 105mm f/2.8 Nikkor.

Claiborne pell newport bridge

Night-time view of the Claiborne-Pell Newport Bridge and Narragansett Bay, taken in Jamestown, Rhode Island. Behind the shot: ISO 200, aperture f/8, shutter speed 25 seconds, White Balance fluorescent, lens used 50mm f/1.8D Nikkor.

Things You’ll Need

A Tripod

If you’re shooting at night, your exposures are going to be pretty long (anywhere from one to 30 seconds, or more). Since it is impossible to hold your camera perfectly still for that long, you will need a sturdy tripod, so that your camera does not move at all during the exposure. For added stability, you can hang your camera bag (or another somewhat heavy object) from the hook on your tripod’s center column. This is especially handy in windy conditions.

Plants at night

Long exposure of plants illuminated by streetlight at night in Nyack, New York. Behind the shot: ISO 400, aperture f/4, shutter speed 30 seconds, White Balance tungsten, lens used 50mm f/1.8D Nikkor.

Illuminated plant at night

Golden plant illuminated by streetlight at night in Nyack, New York. Behind the shot: ISO 400, aperture f/4, shutter speed 30 seconds, White Balance tungsten, lens used 50mm f/1.8D Nikkor.

Remote Shutter Release

With a long exposure, any camera movement can ruin the shot, making it soft or blurry. To ensure you get a sharp image, use a remote shutter release (remote trigger). The best type of shutter release to use is the kind that functions as a timer remote as well. If you don’t have a remote shutter release, you can use your camera’s self-timer. The only downside to using the self-timer is that you will have to keep your shutter speed at 30 seconds or less. If you don’t have too much light, you can always increase your aperture (decrease the f-stop) or increase your ISO to speed up your shutter speed.

Colors of night

Assorted foliage illuminated by streetlights in Nyack, New York. Behind the shot: ISO 200, aperture f/5.6, shutter speed 30 seconds, White Balance fluorescent, lens used 24mm f/2.8D Nikkor.

Colorful night

Colorful plants and trees in Nyack, New York. Behind the shot: ISO 200, aperture f/5.6, shutter speed 30 seconds, White Balance fluorescent, lens used 24mm f/2.8D Nikkor.

Camera Settings

Shoot RAW

Keeping image quality in mind, you should always strive to shoot in RAW format. It records more pixel information, and does not compress your images at all. RAW provides you with more post-processing options, including white balance correction. If you happen to under or over expose an image, you can easily adjust the exposure if your image is in RAW format.

ISO

When taking photographs with little available light, you are better off using a low ISO (400 and below) and longer exposure times. This is important so you don’t get too much noise (or grain) in your images. Also, make sure you have Long Exposure Noise Reduction turned on in your camera’s settings.

Yellow leaved tree moving clouds at night

Yellow-leaved tree and moving clouds at night in Nyack, New York. Behind the shot: ISO 200, aperture f/5.6, shutter speed 30 seconds, White Balance tungsten, lens used 50mm f/1.8D Nikkor.

Tree in wind

Tree in wind at night in Valley Cottage, New York. Behind the shot: ISO 400, aperture f/2.8, shutter speed 30 seconds, White Balance tungsten, lens used 50mm f/1.8D Nikkor.

Use Manual Mode

While shooting in very low light, your camera’s light meter may not read the scene too well. Your best bet is to use Manual mode, where you control both the aperture and the shutter speed. To find a baseline for the correct exposure, you can use the following trick (which I learned in this blog post):

  1. Set your ISO to 6400
  2. Set the aperture you would like to use
  3. Set your shutter speed at one second

Take a test shot using these settings to get an idea of what your image will look like. Note, these settings are almost equivalent to a 1-minute exposure at ISO 100, a 30-second exposure at ISO 200 and a 15-second exposure at ISO 400, etc. If your scene is too bright with these settings, you can see what a half second exposure at 6400 looks like. This would equal a 30-second exposure at ISO 100, a 15-second exposure at ISO 200 and a 8-second exposure at ISO 400. This baseline is a great guide, you can easily take test shots to figure out what shutter speed to use.

Autumn leaves in motion

Autumn leaves in motion at night in Valley Cottage, New York. Behind the shot: ISO 400, aperture f13, shutter speed 30 seconds, White Balance fluorescent, lens used 24mm f/2.8D Nikkor.

Tree at night

Tree and clouds in motion at night in Nyack, New York. Behind the shot: ISO 400, aperture f/5.6, shutter speed 30 seconds, White Balance tungsten, lens used 50mm f/1.8 manual Nikkor.

If you use the above trick, you won’t unnecessarily waste time taking a bunch of long test exposures. As it is, long exposure night photography is rather time-consuming. Make sure you switch your ISO back to 400, or below, before you start taking photos that you intend to keep.

In scenes where you have a decent amount of available light (e.g. places with numerous streetlights), you may be able to use Aperture Priority mode instead of Manual mode.

In Conclusion

Night photography can be rather tricky, and requires a good amount of practice. In time, you will have a feel for the amount of light in various night scenes, and be able to figure out accurate camera settings with relative ease. Hopefully, the information contained in this post will help you capture great long exposure night shots, that don’t need much post-processing.


googletag.cmd.push(function() {
tablet_slots.push( googletag.defineSlot( “/1005424/_dPSv4_tab-all-article-bottom_(300×250)”, [300, 250], “pb-ad-78623” ).addService( googletag.pubads() ) ); } );

googletag.cmd.push(function() {
mobile_slots.push( googletag.defineSlot( “/1005424/_dPSv4_mob-all-article-bottom_(300×250)”, [300, 250], “pb-ad-78158” ).addService( googletag.pubads() ) ); } );

The post How to Get the Correct Exposure at Night with These Helpful Tips by Marshall Reyher appeared first on Digital Photography School.


Digital Photography School

 
Comments Off on How to Get the Correct Exposure at Night with These Helpful Tips

Posted in Photography


Photo Composition Tips from Bob Holmes – Composition in Travel Photos

23 May

Who better to get photo composition tips from than four-time Travel Photographer of the Year award-winner, Bob Holmes? He shares some techniques you can use to work with composition and take better photos, no matter where your travels may take you.

Havana 012016 1314 Thumb dPS

Bob has been all over the world, and his travel photos have appeared in National Geographic, Departures, and 46 books as the sole photographer. Working outdoors on most of his trips, Holmes is an expert at using natural lighting in photos.

He loves looking for composition that grabs you, and his unique tip is that you need to “get in the zone” and be fully responsible for everything in the frame. The key to learning composition is to practice – you can’t become a great photographer in a week, but you will get there by shooting as much as you can.

Bob Holmes dPS

Watch this video interview I did with Bob Holmes, then look below the video for more helpful resources.

Check out these dPS resources for more info:

  • LIFE IN NATURAL LIGHT- The Ultimate Guide to a photographer’s most powerful tool
  • NATURAL LIGHT – Mastering a Photographer’s Most Powerful Tool
  • TRANSCENDING TRAVEL – A guide to captivating travel photography

googletag.cmd.push(function() {
tablet_slots.push( googletag.defineSlot( “/1005424/_dPSv4_tab-all-article-bottom_(300×250)”, [300, 250], “pb-ad-78623” ).addService( googletag.pubads() ) ); } );

googletag.cmd.push(function() {
mobile_slots.push( googletag.defineSlot( “/1005424/_dPSv4_mob-all-article-bottom_(300×250)”, [300, 250], “pb-ad-78158” ).addService( googletag.pubads() ) ); } );

The post Photo Composition Tips from Bob Holmes – Composition in Travel Photos by Marc Silber appeared first on Digital Photography School.


Digital Photography School

 
Comments Off on Photo Composition Tips from Bob Holmes – Composition in Travel Photos

Posted in Photography


8 Quick Tips to Improve Your Photos of Architectural Details

19 May

When you’re photographing architecture, it’s easy to get lost in the grandeur of some buildings. That’s not a bad thing. That’s how they were designed, to be a spectacle. Cathedrals, palaces, opera houses, and state buildings are all examples of architecture that’s meant to impress.

That’s the bigger picture. In terms of photography, however, it can be better to pull away from the grand, and look for opportunities in the details. All buildings and structures are sums of smaller parts, and it’s these parts that can often lead to visually interesting photos. Photographing these details comes with its own set of considerations. This article will point out a few things to look out for while you are out and about looking for the smaller picture, and 8 tip on how to improve your photos of architectural details.

#1 – Low contrast lighting

If the weather is poor and the sky is a drab, colorless grey, it may seem like a less than worthwhile opportunity for photography. That may be the case for some subjects, however, overcast days provide incredibly soft light that is quite suited for architectural details. This softness allows you to capture subjects with a lot of fine detail, that would normally be lost in the contrast.

8-tips-architectural-details-2448

Overcast days will help to bring out details that would have been lost in contrast.

Likewise, keep an eye out for photo opportunities in areas of shade. You may need a tripod to take advantage here, but the extra effort is worth it.

8-tips-architectural-details-1927

Photographing subjects in the shade provides soft, even lighting.

#2 – Side lighting

For bold images, look for scenes with strong light coming from the side. This type of lighting will increase contrast, especially in texture, and it will help to emphasize the shape of your subject.

8-tips-architectural-details-9763

Side lighting helps to emphasise texture and shape.

#3 – Patterns in light and shadow

Pay close attention to how light falls on various subjects. When you’re photographing details, shadows and highlights can, themselves, become an important compositional element.

8-tips-architectural-details-9709

Shadows and highlight can become graphic elements in their own right.

#4 – Patterns

8-tips-architectural-details-1864

Repeating patterns can make for bold imagery.

To me, the best part of photographing architectural details is the wealth of compositional possibilities. Man-made structures are full of patterns and shapes that can be exploited for photos. Take advantage of them by filling the frame for an abstract feel.

8-tips-architectural-details-9717

The curve in these stairs made for natural leading lines.

#5 – Reflections

For all of the wonderful architecture in the world, there’s at least as many drab and ugly buildings that appear to have little to offer photographers. They often do have something worth captuing, but it takes work to figure it out. One way to add interest to these subjects is to look for reflections. Reflections can add visual interest and color, to an otherwise lifeless and boring subject.

8-tips-architectural-details-9752

Reflections can add a boost to an otherwise lifeless scene.

#6 – Fixtures

It’s not always about the buildings, and only the buildings. Fixtures can often be overlooked, yet they can prove to be as compelling a subject as the architecture. When you’re considering a location, do look out for interesting fixtures like signs, light fittings, and security cameras.

8-tips-architectural-details-1903

Keep an eye out for interesting fixtures that other may overlook.

#7 – Statuary and monuments

When you think of architecture, statues are probably the last thing on your mind. However, they are a key element to a lot of buildings and monuments. For example, the Charles Bridge in Prague has 30 large, and very detailed, statues that beg to be photographed.

8-tips-architectural-details-2250

Statues are a common architectural features. Don’t neglect them with your camera.

8-tips-architectural-details-2470

#8 – Black and white

This last tip is for when you’re back at home. If your images are full of texture or strong patterns, consider a black and conversion. Stripping the color element out of those images will help to emphasize your compositional elements, and can lead to much stronger photos.

8-tips-architectural-details-2595

Black and white processing can help to emphasise texture in a scene.

Experiment

These tips are hardly exhaustive, and only scratch the surface of the possibilities available to you when photographing architectural details. If there’s something man-made, there’s a photograph to be had somewhere. Just keep going until you find it.

Do you have a tip of your own? Please share it below!

googletag.cmd.push(function() {
tablet_slots.push( googletag.defineSlot( “/1005424/_dPSv4_tab-all-article-bottom_(300×250)”, [300, 250], “pb-ad-78623” ).addService( googletag.pubads() ) ); } );

googletag.cmd.push(function() {
mobile_slots.push( googletag.defineSlot( “/1005424/_dPSv4_mob-all-article-bottom_(300×250)”, [300, 250], “pb-ad-78158” ).addService( googletag.pubads() ) ); } );

The post 8 Quick Tips to Improve Your Photos of Architectural Details by John McIntire appeared first on Digital Photography School.


Digital Photography School

 
Comments Off on 8 Quick Tips to Improve Your Photos of Architectural Details

Posted in Photography


5 Tips for Going from Pixels to Print Quality

18 May

Whatever level of photographer, you are sure to have gathered a stockpile of pixels.

It’s just the way it is nowadays. Whether you are the kind of person that clogs up their hard drive, gradually slowing your Mac or PC down until you are forced to do something about it. Or perhaps you are already super organized having kept negatives, CDs, DVDs, hard drives, a raid system or even the cloud?

Indeed whatever storage method you choose you need to catalogue the files by name, event, and year, so you may retrieve without having a complete breakdown while searching for your favorite file. After all photography should be fun, not pain.

Many photographers use Lightroom, which is a great program, not only for editing but also for organizing your ever-increasing pile of pixels. But then what? What do you do with them then? I think you would agree we all spend too much time in front of screens? So why would you keep your masterpieces locked away in digital format?

To create that killer slideshow you will amaze your friends with is a lot of fun, especially if you have a large TV or digital projector. However, be careful of the content of your slideshow. Nothing worse than visiting a friend, only to be subjected to look through every snap taken on their holiday. Slideshows really should not be much more than ten minutes long or people generally loose interest. Keep them simple also, not too many whizzy effects, that just makes your viewer feel queasy!

PIC 10 simonjohn co uk

So you have this catalogue full of great images, what next? I would say enjoy them. Have your favorites printed and framed. Photography is personal, just like any other art form. By printing your special images, and hanging them in your home, you are not only enjoying the fruits of your labour, but also creating personalized wall art. This shows friends your talents, without the need for a longwinded slideshow.

You may find as time goes by, the framed photographs mean more or less to you. This is quite natural as we grow, and our taste and habits change also. Not to worry, you can always replace them with fresh images. It’s not like the old days when the portrait your parents had remained in the given spot forevermore. In fact, it is refreshing to change your images from time to time. Just like wallpaper or any other interior design things, move on. Only when you can look back at a photograph you made perhaps 10, 20, or 30 years ago, and still love it, will you know it’s a keeper!

My background is a portrait and wedding specialist. Lets take a look at an image from my portfolio. I will describe the process from capture through editing, and finally the framed piece for the wall (above).

#1 – Get it right in-camera

Pic 1 simonjohn co uk

As you can see the old chair, and soft natural light, was perfect for the basis of this portrait. I positioned the mother in the first third of the image, placing her legs over the arm of the chair for a more relaxed contemporary look. My directions to her were simply to get close, and look at your beautiful boy. All I had to do then was to get the toddler to look in the right direction, with the expression to fit. A squeaky toy often saves the day!

The mother is in profile, while the toddler is in three quarter face, adding interest and different angles to the image. The lighting was a large window (not with hard sunlight) off to the right. I also placed a reflector just below the mum’s boots, to bring light back into the eyes and softly wrap around into the shadows. The exposure was 1/250th (freezing the toddler) with an aperture of f/5.6, using a 70mm focal length, as my back was pressed against the far wall of the room.

So to summarize; I feel the expressions are captured well. The lighting is fitting, being soft and directional. The image has style, and is well balanced compositionally. But it just needs something more. The capture stage is so important to get right. Photoshop should not be regarded as a fixer. The great Ansel Adams talked about “printing virtuosity” and just because we now craft our images on a screen, as opposed to in the darkroom, quality and finishing are still paramount.
So take a look at the edited image below.

Pic 2 simonjohn co uk

#2 Basic adjustments in Photoshop or Lightroom

Firstly, you will need to level the image in Photoshop, bringing the sliders in to just clip the histogram at both ends. This ensures depth in the blacks and good clean whites. The mid-tone is really your X factor, but just be aware that you have detail throughout all tones if that is the look you are after. Be careful if you make it too light, the image could appear milky. While if you make the mid-tones too dark the image could appear muddy.

Screen Shot 2016-04-27 at 21.12.41-untitled

Secondly, I have adjusted the Saturation and the hue of the image to achieve the color pallet I require. Often you can go between the levels and saturation, and make small tweaks as the image takes shape.

Screen Shot 2016-04-27 at 21.13.20-untitled

#3 – Add a texture overlay (optional)

Next you could do as I have here, added a texture overlay. I felt it complimented the chair in its shabby chic style. I photographed a piece of wall, then blended the two images using opacity in the layers pallet. I added a layer mask, then rubbed through with a soft brush to create the subtle look you see here. I then added a soft Gaussian blur from the PS filters, blending the two layers together.

PIC 5 simonjohn co uk

PIC 6 simonjohn co uk

Pic 2-simonjohn.co.uk-untitled

PIC 8 simonjohn co uk PIC 9 simonjohn co uk

#4 – Local tone control

Finally to complete my image I needed to Dodge and Burn. As you can see this really is a subtle finishing skill, and should not be left to a Photoshop filter. In a future article I will explain exactly how to dodge and burn your images like a professional, directing the eye of your viewer to the important parts of the image. But for now, let’s see the final piece as it was hung on my gallery wall.

PIC 10 simonjohn co uk

#5 – Print it

I have printed the image on Fuji fine art 300mgs rough texture paper, which I love. The paper is not only excellent for color rendition but has a wonderful tooth to it, adding texture and depth. I have framed the portrait in a simple natural oak and white acid free mount. I have chosen clear glass. Although there is much talk about non-reflective glass, this simply flattens and dulls the image; I would not recommend it. The finished portrait compliments its surroundings, and fits well into the décor and given space.

As I said at the start of the article, it’s important to display your favorite images rather than hide them away on a computer. I am happy to share with you, that I have done just that here. This is my girlfriend Yvonne and my son Miles.

Some photographers prefer to print their own images. This can be a very good way of speeding up workflow and achieving exactly the right colors you require. In recent years printers have became smaller, and inks and paper more archival. I will perhaps invest this year simply for ease of use, and meeting clients deadlines. Perhaps one issue, according to friends who print their own, is you tend to have a fair amount of wastage profiling papers and inks. If you are not particularly a high volume, large output photographer, ink wells can get clogged up causing spattering of pigment. However I think both these problems are now almost eradicated as technology improves year after year.

If you choose, as many professional photographers do, to use a pro lab you have to close the color loop from the start. I use a Spyder 4, as seen in the screenshots below, and my lab use the Epson 9900 and 4900 for printing the Giclee fine art papers I require.


2

4
It is attached via USB to your monitor, and simple to follow with onscreen instructions. Basically it brings the colors back in line within the colors space you use. Until recently most labs suggested sRGB, as the colors seen on your screen were pretty much what could be printed. The other often used space is Adobe 98, but not all printing machines can produce such subtleties in color. Progress moves on and there are machines that can print Adobe 98, but my advice for now would be stick with sRGB (ask your lab if you want to know which they use).

Because you are working in a given color space the lab can set its own monitors accordingly, and with a skilled technician the loop should be closed. Sometimes you may find a print is slightly too dark or light. This may be due to the ambient light in yours or your printer’s room being marginally different. A good working relationship is what is needed when using a lab. When asked to reprint an image they should work with you, and offer tips and help if needed; its in everyone’s interest. I rarely have a print that is off, but if I do my lab simply reprints without charge.

So how should you prepare your files? Follow this checklist below for ease of use:

  • Always shoot in raw. Much more detail recorded through highlight to shadow.
  • Save the raw file but create a working tiff.
  • Once you are happy with the finished tiff export as a jpg if sending to a lab.
  • Export or print always at 300dpi for best quality.
  • Check your prints against your monitor and if adjustments are needed, make sure you talk to your lab first.
  • Never compromise composition for print size, i.e. if your image looks better 10×5.5 rather than 10×8, make it that way and drop it on the nearest paper size available. Simply have a mat made to fit your masterpiece.

Do not hang your finished prints in direct sunlight. Like anything that has natural fibers and dyes they will fade. Hung correctly, ink jet prints are now considered very stable, and a alternative to traditional lab chemistry for environmental reasons, but also better quality colors and increased tonal range.

Please share photos of prints you make and hang up on your walls in the comments below. Ask any questions you may have about the process as well and I will try and help you out.

googletag.cmd.push(function() {
tablet_slots.push( googletag.defineSlot( “/1005424/_dPSv4_tab-all-article-bottom_(300×250)”, [300, 250], “pb-ad-78623” ).addService( googletag.pubads() ) ); } );

googletag.cmd.push(function() {
mobile_slots.push( googletag.defineSlot( “/1005424/_dPSv4_mob-all-article-bottom_(300×250)”, [300, 250], “pb-ad-78158” ).addService( googletag.pubads() ) ); } );

The post 5 Tips for Going from Pixels to Print Quality by Simon John appeared first on Digital Photography School.


Digital Photography School

 
Comments Off on 5 Tips for Going from Pixels to Print Quality

Posted in Photography


Long Exposure Fire Photography – 5 Tips for Beginners

15 May
tips for long exposure fire photography

ISO 100, f/10, shutter speed 5.0 seconds

A long exposure photo can make flames look soft and feathery, capture spark trails, and be used to create a romantic or cozy mood. The tips in this article will help you get started with long exposure fire photography.

Long exposure fire photography: 5 tips for beginners

Remember to be careful as you practice your fire photography. Fire can be dangerous, and it’s easy to be careless when we’re thinking more about our photography than the fire. Maintaining a safe distance is important for you and your gear.

1. Use a slow shutter speed

To take a long exposure photo, the shutter in your camera needs to be open long enough to blur motion and light. Here are a couple of ways to ensure that the shutter stays open:

  • Shutter Priority: you choose the shutter speed
  • Aperture Priority: the camera chooses the shutter speed

Shutter Priority

Put your camera in Shutter Priority mode, choose your desired shutter speed, and let the camera do the rest.

This will force your camera to let in light for the amount of time you’ve chosen. This means your camera will be choosing your ISO (if it’s set to auto) and your aperture. This will give you varied results depending on how much light is available. Using Shutter Priority in this way can be fun. When you choose a shutter speed of five or six seconds, you can capture interesting flame shapes, and lots of spark trails. The bonfire and torch photos in this article were captured in Shutter Priority mode.

long exposure fire photo

ISO 100, f/11, shutter speed 6.0 seconds

Aperture Priority

You could also put your camera in Aperture Priority, choose a mid-range aperture (f/8 – f/11,) set a low ISO (100 – 200,) and let your camera choose the shutter speed. If you’re shooting at night (when it’s really dark) and the fire is your light source, your camera will choose a slow shutter speed. This should give you a photo with large depth of field, relatively free of grain (noise).

If this causes your shutter to be open for longer than you want, increase the ISO. This will start adding noise, which can be reduced during editing. The card game and match photos in this article were shot using Aperture Priority.

long exposure flame photo

ISO 100, f/11, shutter speed one second

Those are a couple of suggestions to get you started. Long exposure fire photography is all about playing around and having fun. Try lots of different apertures and shutter speeds. If you’re like me, you’ll get excited as you review each shot, and see the interesting shapes you’ve captured.

2. Set your camera on a tripod

When using a long exposure, you’ll want to reduce camera shake which results in blurry photos. Camera shake occurs when the camera moves while the shutter is open. Slow shutter speeds (of more than one second) make it impossible to hand-hold your camera, and still get sharp images. Using a tripod will keep your camera steady.

3. Use a remote shutter release or set the self-timer

Your remote (or the camera’s self-timed shutter release) can also help you cut down on camera shake. When you press the shutter release manually the camera moves a little, this could cause blur in your photo. But when you use a remote shutter release (or set your camera’s self-timer) you don’t have to worry about that. This may seem like a small thing, but it can make a big difference to your image sharpness.

long exposure fire spark trails

Spark trails. ISO 320, f/6.3, shutter speed 6.0 seconds

When capturing match flames the remote works best. It’s super frustrating trying to capture that flame burst while waiting for the camera’s self-timer.

4. Choose your subject

Do you want your main focus to be the fire itself? Or are you trying to capture more of the mood created by the fire? While capturing the mood, it can be tricky to focus on people. It’s not easy to sit still during a long exposure and any movement will create blur in your photo.

The following photos were shot in Aperture Priority mode, with an aperture of f/8. For the first photo, I set the ISO at 100, and my camera chose a shutter speed of 5 seconds. That was too long for my daughter to stay still, so the photo is blurry.

long exposure fire photography tips 3

ISO 200, f/8, shutter speed 5.0 seconds (blurry)

For the second photo, I set the ISO to 400 which cut the shutter speed in half = 2.5 seconds. That was a little easier for her, and the photo is clearer.

long exposure fire photography tips 2

ISO 400, f/8, shutter speed 2.5 seconds

5. Switch to manual focus

Sometimes auto focus doesn’t work well in the dark.

Here’s how to focus on something other than the fire: Shine your flashlight on the subject, and press the shutter release button halfway. When autofocus locks on, turn off the light and switch to manual focus. Without moving or adjusting anything on the camera, take your shot. Your camera will maintain the same focus point – as long as nothing is adjusted.

Note: you could also try back button focus.

Where will you practice?

Do you enjoy a cozy fire at your campsite, or having bonfires at the beach? Do you like candlelit dinners? Or what about backyard marshmallow roasts? All of these would be great places to practice long exposure fire photography.

long exposure bonfire

ISO 160, f/5.6, shutter speed 6.0 seconds

Experimenting with long exposures around a campfire can be a little addictive. I’ll bet the more you practice, the more fun you’ll have.

Don’t forget your flashlight! You’ll need it to see your camera controls, for help with focusing, and to get safely back to your car.

long exposure fire photography tips

ISO 100, f/16, shutter speed 5.0 seconds

Please share your tips and photos by commenting on this article.

googletag.cmd.push(function() {
tablet_slots.push( googletag.defineSlot( “/1005424/_dPSv4_tab-all-article-bottom_(300×250)”, [300, 250], “pb-ad-78623” ).addService( googletag.pubads() ) ); } );

googletag.cmd.push(function() {
mobile_slots.push( googletag.defineSlot( “/1005424/_dPSv4_mob-all-article-bottom_(300×250)”, [300, 250], “pb-ad-78158” ).addService( googletag.pubads() ) ); } );

The post Long Exposure Fire Photography – 5 Tips for Beginners by Dena Haines appeared first on Digital Photography School.


Digital Photography School

 
Comments Off on Long Exposure Fire Photography – 5 Tips for Beginners

Posted in Photography


8 Tips to Avoid Crowds at Popular Landscape Locations

11 May

Photographing popular tourist destinations can at times be a great challenge. Hundreds of people are walking within your frame, and regardless of the direction you’re facin,g it’s nearly impossible to capture an image without people in it.

1

I often visit beautiful landscapes, many of which are popular among tourists, even though I prefer to shoot more unique locations, and enjoy photographing in quite areas where it’s nothing but nature and me. So when I visit extremely crowded landscapes, I get slightly stressed. But these touristic places are popular for a reason.

When I visited the famous Svartifoss, Iceland a few weeks back, I left without taking more than a couple snapshots, most with my phone. Even though the roughly 40 minute long hike is considered challenging by some, I was amazed to see the amount of people gathered around the waterfall, not to mention the bunch of tripods placed all over. It seemed to be impossible to take the classic image with the river leading up towards the falls, as a group of tourists had occupied the entire place.

Even though it might seem impossible to take professional looking landscape images from these places, there are ways to avoid the crowds and enjoy them alone. It all comes down to planning and prioritizing.

1 – Choose the Hour Wisely

If you’re into landscape photography you may already know that the best time to photograph is during the Golden Hour. This is the time of the day where the sun’s position in the sky is at the lowest, which creates a soft light ideal for photography.

2

2 – Wake Up Early

Since many tourists aren’t dedicated photographers, most of them won’t be awake and out in nature for sunrise. Normally they prefer spending a couple extra hours in bed and having breakfast at the hotel.

3

This is a great advantage for us who wish to capture the beautiful landscapes in optimal light. It’s rare that you meet large crowds this early in the morning, but you may meet a fellow photographer or two. Usually most photographers, and non-photographers, that are up for sunrise try not to get in each other’s way.

About one or two hours after sunrise, depending on what time of the year it is, the first busses filled with tourists begin to arrive. This gives you a lot of time to enjoy these places, and take the images that will be difficult to capture when it gets annoyingly crowded.

3 – Enjoy the Sunset

It’s no secret that it’s more normal to be awake for sunset than for than sunrise. Accordingly the crowd will be a larger during this hour, and if you’re photographing close to a large town it might even be very crowded. Since I’m a landscape photographer and this article is mainly focused on avoiding crowds at popular landscape destinations, I won’t get into cityscapes, etc.

4

What you will see when you are photographing landscapes during sunset is that most people present are fellow photographers. Most normal tourists tend to head back towards the town or hotel, for dinner or other activities.

4 – Photograph the Night Sky

If you haven’t photographed landscapes at night yet, I strongly recommend you try it. Be aware though, as it is highly addictive!

Images captured during the night can often be quite different than what you normally see from these touristic locations, since the majority of people prefer to sleep at this time. I would say the lack of sleep is part of a landscape photographer’s life (for both beginners and professionals).

5

Another benefit of photographing at night is that you might witness certain astrological events, such as meteorite showers, or the northern lights in the northern hemisphere. Be sure to bring something warm to drink as it may get chilly throughout the night.

5 – Choose the Month Strategically

I know that getting vacation days outside the normal holidays might not be possible for everyone, and some locations are definitely best to visit during certain times of the year. But, visiting during low-season is the best method to avoid the crowds.

6

If you want to photograph events such as the Tulip Festival in the PSNW (Washington/Oregon), or the Cherry Blossom in Japan, you have to visit during a specific time of the year, and most likely it’s going to be crowded with both photographers and tourists. While the tips above still will be beneficial, you will most likely not be at these places alone.

However, if you’re not photographing a specific event, visiting during low season can be a great choice. Not only will you avoid the biggest crowds, you may also be rewarded with some unique scenery and weather.

7

I’ve visited Iceland during low season a couple times, and the results have been great. Yes, it has been challenging with the harsh weather but when the light is good, it’s GOOD!

6 – When the Crowds Won’t Leave

But what if you’re not able to go during low season, sunrise, or sunset? What if there is still a large crowd even during these times? Should you just give up and head back home? Of course not! There’s always a solution, so don’t worry.

7 – Use a Neutral Density Filter

While I won’t get too into the technical aspects of Neutral Density Filters, they allow you to use a longer shutter speed. By placing the dark piece of glass in front of your lens, you need a longer shutter speed to get the correct amount of light to reach the camera sensor. Just be sure to bring a tripod, I doubt you will be able to hold your camera completely still for several seconds or minutes.

8

Why it’s Beneficial to use an ND Filter at Crowded Locations

When you are using a long shutter speed, all motion within the frame will become blurred. The longer your shutter speed is, the less visible people will be. In fact, if you set the shutter speed to a couple minutes, you may even completely remove all people from your image.

8 – Stack Multiple Images

Stacking multiple images is another method to remove crowds from your pictures. This is a little more advanced than using an ND Filter, and requires that you have an image editing software such as Adobe Photoshop. Let’s do this step by step:

  1. Take a set of images from the exact same position. Ideally you should use a tripod so that the frame is the same on each image. Try to take 20-25 images with an interval of roughly 20 seconds. Having this interval will allow people to move a little between each shot.
  2. Import the images to your computer.
  3. Open Photoshop
  4. Click File > Scripts > Statistics
  5. Choose Median as your Stack Mode in the box that appears, and check the box for “Attempt to Automatically Align Source Images”.
  6. Go to YouTube and watch funny videos until Photoshop is done processing…
  7. When the image is done, zoom in to 100% and look for any spots where the script wasn’t able to do a perfect job. If you find such spots select the Spot Removal Tool and carefully heal these places.

9

This is a great technique to remove people from your images. My experience is that the script works well on 99% of images, and even on the remaining 1% it does a decent job.

Final Words

I think most of us have experienced being frustrated due to the large crowds more than once. Personally I think it’s important to remain respectful to both fellow photographers and other tourists when we are at these popular places. Sometimes all you need is a little patience.

10

On another note, the best way to avoid the crowds is to go somewhere less known. I know it’s scary for many to go explore new locations, as you already know how beautiful the popular spots are, but the best images are often taken at less known locations.

What do you do when photographing these popular locations?

googletag.cmd.push(function() {
tablet_slots.push( googletag.defineSlot( “/1005424/_dPSv4_tab-all-article-bottom_(300×250)”, [300, 250], “pb-ad-78623” ).addService( googletag.pubads() ) ); } );

googletag.cmd.push(function() {
mobile_slots.push( googletag.defineSlot( “/1005424/_dPSv4_mob-all-article-bottom_(300×250)”, [300, 250], “pb-ad-78158” ).addService( googletag.pubads() ) ); } );

The post 8 Tips to Avoid Crowds at Popular Landscape Locations by Christian Hoiberg appeared first on Digital Photography School.


Digital Photography School

 
Comments Off on 8 Tips to Avoid Crowds at Popular Landscape Locations

Posted in Photography


4 Tips for Pre-Visualizing – Look Before You Shoot

11 May

For a limited time only at Snapndeals, May 10-24th only get 33% OFF Timeless Portraits & Natural Light Black & White Portraiture, a 2-eBook Bundle by Wayne Radford.

Pre-visualizing is an art form, that I believe, is not taught enough these days. It is the foundation for an artist or photographer to establish lighting, background, foreground elements, composition, and harmony. You need to establish all this before lifting a camera to your eye. Let’s look at some techniques and tips for pre-visualizing.

1 – BACKGROUND

Are there any distracting elements behind the subject that draw your eye away, e.g., bright hotspots such as sun coming through trees, strong geometric shapes, or bright colours. If these are a problem, move the subject or camera position around to avoid or minimize their effect.

PHOTO 1

2 – FOREGROUND

Can you use any foreground elements to help create framing – examples would be rocks or foliage. Even getting down very low to blur the foreground will create a framing effect.

3 – COMPOSITION

Look around for shapes and perspectives that create more interest and lead your viewer around the scene. Example: I like to use the Golden Triangle instead of the Rule of Thirds, so I’m looking for elements that balance with that in mind. There is a sample below and you can read: Divine Composition With Fibonacci’s Ratio (The Rule of Thirds on Steroids) for more comprehensive information. Of course, it’s built-in as part of the cropping tools of Photoshop CS6 (and LR) and later, but I suggest learning to see this way before post-production adjustments.

4 – HARMONY

This one is the most overlooked aspects of composition. I want my subject’s face to stand out, so I generally choose backgrounds that are complimentary to their clothing for colour, and depth of tone for black and white. Also, try minimizing any additional colours in the background that clash with the subject. Yes it sounds complex, so I’ve added some study examples to make it easier. (clothing colour selection is also important, but that’s a subject of its own for another day). Next time you watch a movie, look at the colour coordination of clothing and scenes.

PHOTO 1

I chose an old painted door as the background for these two girls as it had the same hues (colour tones) as their clothing and skin. Look at your subject’s clothing colours, and then find a background tone that will compliment it. This will make them stand out from the background and not create a distracting colour contrast. An example would be if the background were green or blue.

The simpler, less cluttered backgrounds work best, especially when the colour tones harmonize. Keep the subject at least a meter or more away from the background, and use a wide aperture of f/1.2-2.8 to create a shallow depth of field.

PHOTO 2

Be careful that the subject doesn’t blend into the background. In this study I first looked for the light direction, then looked at the background colour and tone. It was a yellow painted wall which normally would record brighter than his face, but as it was undercover in shade, it rendered quite dark. Looking at his clothing colours I knew that there would be separation that could be controlled in Photoshop without any problem, if necessary. Again distance from subject to background, combined with an f/2.8 aperture setting, creates a lot of background blur which allows the subject to pop. Note, there are no distracting background elements.

PHOTO 3

When searching for suitable locations, you may find lots of distracting objects and textures that will make your image busy. This is when pre-visualizing where the camera and subject should be placed, and what you want to be included in the background should be used.

In this image of the two boys, I noted that the trees and shed were too cluttered and distracting. By placing the boys a good distance from the shed and trees, and again setting the lens to create a shallow depth of field, (f/2.8 70-200mm lens) I was able to achieve good subject to background separation. The bikes were important to the story, so I placed them in the background to give the boys a direction to walk. Also, note the rim lighting on their hair gives extra separation.

PHOTO 4

Pre- visualizing this scene is an easy one for a trained eye – find the light, look at the background. Here you can see the light wrapping around the columns, creating graduated shadows, and a diminishing background that gives depth to the overall image. In this study, the light is cross-lighting them at 90 degrees to their bodies, so turning their faces to the light creates modelling on their faces, which adds shape to their faces.

The background almost has a 3D look in the way it diminishes. Column over column, and arches layering over each other, creates great depth.

The following study is an example of how I try to pre-visualize a portrait session

When I found this beach location (below), I was overloaded with ideas on how I was going to use it. This is the opposite to writers block, where you become void of ideas. Instead, you can be over excited with creative ideas and forget the basics that make a portrait work.

The first consideration was the direction and quality of light. In this study the open sky (right hand side of the photo, over the ocean) was the main light. Note the sun was setting over a hill behind the children, so I am using the soft light provided by the open sky. While it is a fairly flat light and very soft, it provides enough cross lighting to enhance texture and shape in the clothing and rocks. Notice the small specular light, rim lighting her legs, and the shadows in her clothing. These are helpful indicators to the direction of light when it is flat.

PHOTO 5

The next consideration is the placement of the subjects in relationship to the light, and the natural props such as the rocks and driftwood. Those props are the things that get photographers excited, the challenge is how to use them creatively. Remember this is all done before lifting the camera to your eye – the art of pre-visualizing. I also noticed the angular shape in the rocks curving towards the ocean, this matched the angle of the driftwood.

PHOTO 6

The girl was placed on the most distant rock (also the flattest one for comfort) so the light was coming from her front left-hand side, creating some modelling to her clothes and face. It also allowed the image to read from left to right.

The boy was placed on the driftwood, with his rod angled to match the driftwood branch beside him. It’s also a similar angle to the diagonal line running from top right to bottom left in the image. My only disappointment was the horizon line running through the girl’s head. It wasn’t possible to move the camera any lower, and raising the camera higher would have placed the boy’s head near the horizon line. Moving the girl wasn’t an option either due to the awkward shapes of the rocks. I was happy to leave it that way, as the shallow depth of field had created enough background blur to allow her to separate from the background.

PHOTO 7

Canon 5D + 70-200 f/2.8 IS lens – F4 @1/800th – ISO 400
Hand-held at ground level
Photoshop CS6 – Alien Skin Exposure 7

When you learn the art of pre-visualizing, you will look at your work with greater satisfaction. You will know that you alone created the image to the best of your ability, using all the artistry skills of light and composition before even raising the camera to your eye. Not everything is created in the computer, I believe pre-visualizing is another tool in the journey of craftsmanship.

For a limited time only at Snapndeals, May 10-24th only get 33% OFF Timeless Portraits & Natural Light Black & White Portraiture, a 2-eBook Bundle by Wayne Radford.

googletag.cmd.push(function() {
tablet_slots.push( googletag.defineSlot( “/1005424/_dPSv4_tab-all-article-bottom_(300×250)”, [300, 250], “pb-ad-78623” ).addService( googletag.pubads() ) ); } );

googletag.cmd.push(function() {
mobile_slots.push( googletag.defineSlot( “/1005424/_dPSv4_mob-all-article-bottom_(300×250)”, [300, 250], “pb-ad-78158” ).addService( googletag.pubads() ) ); } );

The post 4 Tips for Pre-Visualizing – Look Before You Shoot by Wayne Radford appeared first on Digital Photography School.


Digital Photography School

 
Comments Off on 4 Tips for Pre-Visualizing – Look Before You Shoot

Posted in Photography


5 Tips for Doing Photography from a Hot Air Balloon or Biplane

08 May

Do you do most of your shooting with your feet firmly planted on the ground? Camera shake is a basic concept that directs you to take a strong stance, brace your elbows, and keep that camera as still as possible. But what if you are not on the ground? What if you are up in the air? For myself, I would say that 95% of my photography happens on land, and while I get to do some underwater scuba photography sometimes, and that shooting from the sky is something I have only done a couple of times. But I hope that the lessons I have learned will help you, when and if you have that rare opportunity to get up off the ground and photograph the world from new heights.

001 Title

These tips are inspired by a balloon flight that I had in Bagan, Myanmar. Despite growing up with one of the world’s largest balloon festivals in my backyard (Albuquerque, New Mexico), I had never been in one. I have helped many land, but never been up in a balloon. So in Bagan, when an opportunity presented itself, I couldn’t think of a better way of seeing the over 2,000 temples of the area from the air. Also, I will show some photography examples from a single engine prop plane flight over the Bay Area, California.

So here are my five tips for doing photography from midair:

1. There’s limited space – so chose wisely

In anything defying gravity, whether it be a balloon or a plane, space is always limited. Before going up, there should be a safety briefing, and the pilot has the final say. So talk to the pilot and see if you can get a spot on the corner, or if he knows the best place from which to get a photos. It may not even be where you expect.

002 Limited space

2. The changing light conditions – be prepared

Most balloon flights start before sunrise, for both romantic notions, along with better flying conditions. But for a photographer that makes our job all the more difficult to capture the early morning darkness, turning into blue, then golden hour, and finally full daylight. So we have four different lighting conditions that need to be captured. If you bring a tripod leave it on the ground. It may be good for a sunrise picture, but getting the balloons or airplanes ready requires work. So there are lots of moving parts, and when you are in the air, you will definitely not need it.

The tip is really that there are many variables regarding light conditions.  I know it is a little obvious, but in a balloon (or airplane) you are not in a stable environment.  You will be dealing with multiple light conditions in a limited time and it is not so easy to just wake up the next day and fly again, so you need to be prepared for anything.

Bring a flash for fill. Use a gel on your flash to balance the blue or orange natural light. The fill flash is for the people in the balloon. During flight the balloon rotates, thus there are many times when the sun is at your back, being able to fill the shadows with some light is beneficial.

003 Changing light 2

003 Changing light

3. Camera – bring a second one along if possible

While I am not a gear junky, this is one place where it is nice to have another camera on hand. The confining space and the dynamic conditions (take off, spinning, turning, landing, etc., along with the changing light) make an extra camera really handy to have to be able get a range of shots in a limited space, in a limited amount of time. There are really not many options for doing that without having multiple cameras.

4. Lenses – take a long one

So what lenses to put on your cameras, is the next logical question. My first tip with lenses would be to bring a long telephoto. I have seen too many people with a 16-35mm lens try get the whole landscape, but when you are up high, you can get everything in frame with a longer lens. At 16mm the features of the landscape become minuscule from the air. It may seem strange to you to use a longer focal length lens for landscapes, but they are your good friend when floating or flying.

004 Lens 150mm

150mm lens

5. Don’t forget to just enjoy the trip

Balloons are to airplanes, as sailboats are to motorboats – they are quiet and hover calmly. It’s a bit surreal that it’s just a pocket of air that so delicately hoists you off the ground and drifts with the wind. It’s so smooth, so enjoy it!

Let me give you a breakdown of what I found worked for me, and if you have your own ideas please share them in the comments below.

004 Lens 200mm

My two cameras where a Canon 7D and a G-12. I brought two lenses with me, an equivalent 16-35mm lens, which stayed in my bag once we loaded up, and a 70-200mm. I brought a Canon 430ex II flash that was mounted on the hot shoe of my Canon G-12 (no need for it to be on the 70-200 when you are floating way up in the air). The flash was used primarily as fill light when the balloon would spin into the sunset with the sun behind. Thus, the basket, pilot and other passengers wouldn’t be black silhouettes or the background being totally blown out. I used a ¼ CTO gel to balance the orange morning sun.

Using my 70-200mm lens I was able to compress the background while still encompassing the landscape. In this case using a higher f-stop could help for clarity of both foreground and background. However, depending on when you actually get up in the air, you might want some more speed while keeping your ISO down. You also need to remember that you are moving. On the other hand, while directly over a subject a little less depth of field can be used, so a larger aperture. Takeoff and landing would be the best times to get some nice landscapes, but inside the balloon safety is first, and we were instructed to have our cameras secured. Thus, after takeoff get ready to start shooting before you are just way too high.

005 Zoom in

While having coffee and getting instructions from our pilot I asked a question, made a joke (that was not about safety), and hinted at a corner spot. The pilot, in my case, goes up every day during the winter months, and was no fool when it came to understanding my intention. So what do you know, he assigned me first, right in the corner. Whether he did it for a tip or for photography sake, I have no idea, but it worked in my favor. Instead of only a 180 degree view, I saw more like 270 degrees and that was 25% more options. I took it.

So go out there and get up in the air, land safely, and see the world from a new perspective. After all, photography is about perspectives and new horizons. Change your perspective of the world down here.

006 Salt Ponds of San Fransisco Bay Areal Photo from Single Engine Prop Plane

007 Sutro Tower San Fransisco 170mm from Single Engine Prop Plane

Seeing things in a new way can only make you understand your time on the ground that much better. As photographers a common goal we all share are the amazing visuals that we capture and create. So create from above, and share your thoughts in the comment section below.

googletag.cmd.push(function() {
tablet_slots.push( googletag.defineSlot( “/1005424/_dPSv4_tab-all-article-bottom_(300×250)”, [300, 250], “pb-ad-78623” ).addService( googletag.pubads() ) ); } );

googletag.cmd.push(function() {
mobile_slots.push( googletag.defineSlot( “/1005424/_dPSv4_mob-all-article-bottom_(300×250)”, [300, 250], “pb-ad-78158” ).addService( googletag.pubads() ) ); } );

The post 5 Tips for Doing Photography from a Hot Air Balloon or Biplane by Branson Quenzer appeared first on Digital Photography School.


Digital Photography School

 
Comments Off on 5 Tips for Doing Photography from a Hot Air Balloon or Biplane

Posted in Photography


5 Tips for Thinking Out of the Box to Inspire Your Photography at Home

05 May

Have you ever felt like the inspiration well is running dry ?

You carry your camera with you everywhere you go, day in and day out, but you just don’t see Kodak moments any more? If you know that feeling, than you must have been around shutters and lenses for some time now, and can’t wait to see something new.

Wait no more! here are some ideas that will inspire you, and help you get rolling again.

Istanbul railway station

1 – Understanding the box in order to think out of it

Photography can be a very technical act; operating your camera in a scientific way, following exact rules that will bring the wanted results. Or it can be the act of an instant emotional reaction to the world, you see a moment and click, you grabbed just it before it’s gone forever, thinking can be done afterwards. Both ways are good and every photographer is captivated by a different mix of both.

Thinking out of the box requires a box to begin. If you find yourself uninterested in doing things that you already know and have done, that is your box. Underneath it is the magic that made you grab the camera for the first time, the thing that got you excited when you held your eye to the viewfinder. On your first encounters with the camera you fell in love with a simple magic that the camera can do, it is now the time to go back to that magic and do it all over again.

The hunt for an interesting texture photo while on a short brake from computer work, led me to this photo out of my studio’s window.

texture out of the window at home

2 – The routine dichotomy

Routine is often thought to be a major enemy of creativity. You walk by the same corner every day for years, and you get used to it so much that you stop seeing its potential to make great photos. On the other hand, routine is the frame in which you create. Once you get used to the background noise, you can pay attention to the little changes in light, color, and small details that are never the same as the day before.

Make routine your friend by focusing your attention on smaller details every time you walk by the same scene. Look out of your window at different hours of the day, over and over again until new details start popping up in your viewfinder.

look for details out of your window

3 – Shoot without a camera

You may put the blame for the drought on your camera, and go look for the latest pixel beast to get you all excited again, or you can try something new, you can try seeing pictures without a camera.

As you do things during your day, try to imagine what they would look like in different photos, with different focal lengths or different exposure values. You may also look at things through a paper cut frame. Hold the frame at a different distance from your eye to zoom in and out, think of your composition, and move on.

Using your imagination instead of a camera will ignite a new spark in the way you see photography. Then, next time that you want to take a photo, you will see it before even having the camera up to your eye.

think-out-of-the-box-photo

4 – The Dead End

Back in the days before smartphone and GPS, you had to find your way around when driving in a new place, and once you faced a dead end street, you had to u-turn and find a new way. That’s when you had to be creative and come up with an inventive solution. That leads to thinking out of the box.

That survival skill is still there and can be kicked in by defining small boundaries in which you photograph, limiting yourself to taking pictures in uncomfortable conditions. For example, do portraits with just a wide angle lens, or look for triangle shapes only with a telephoto lens. Creating dead ends for your photography will force you to find creative solutions, which will lead to new and exciting photographs of the same old world.

The Fuji X100's fixed lens has made me cross the street to get closer to this group of boys and created a strong feeling of speed. Photo by Ouria Tadmor

The Fuji X100’s fixed lens has made me cross the street to get closer to this group of boys and created a strong feeling of speed.

5 – Experiment with home made light

In your home there are many different light sources that would make a good starting point for a photo session, they can be the subject of your photo and the light source at the same time. When you start from the light source and challenge yourself to see where you can go with it, you challenge your creative mind to take a different path than the more common way of seeing something you want to photograph, and thinking how to light it. Mastering this thinking technique can be of use later when you might need to photograph a subject that is not talking to you, just go for the light.

Home lights as photo inspiration

Conclusion

It is not always possible to stay creative and inspired in photography, but the innovative side of your brain can be kept in shape by repeating these small exercises regularly, at home with any type of camera. Do so and you are promised to come home with better photos next time you go on a photographic vacation.

googletag.cmd.push(function() {
tablet_slots.push( googletag.defineSlot( “/1005424/_dPSv4_tab-all-article-bottom_(300×250)”, [300, 250], “pb-ad-78623” ).addService( googletag.pubads() ) ); } );

googletag.cmd.push(function() {
mobile_slots.push( googletag.defineSlot( “/1005424/_dPSv4_mob-all-article-bottom_(300×250)”, [300, 250], “pb-ad-78158” ).addService( googletag.pubads() ) ); } );

The post 5 Tips for Thinking Out of the Box to Inspire Your Photography at Home by Ouria Tadmor appeared first on Digital Photography School.


Digital Photography School

 
Comments Off on 5 Tips for Thinking Out of the Box to Inspire Your Photography at Home

Posted in Photography