RSS
 

Posts Tagged ‘Tips’

4 Tips to Creating More Unique Images

30 Aug

You can call it the “Intelligent Eye”. The ability of you, the photographer, to see something unique, unusual or comical in your surroundings, then have the awareness to capture it for storytelling. With practice, you can develop the skill of capturing those interesting moments or opportunities, that many would miss or otherwise ignore. As a result, your photography will stand out from the rest because it will be distinctive and specific to your own personal experience. It’s good to be different! Read on to get tips for creating more unique images.

Photograph 10

Okay, so how do you achieve, or improve this ability to see unique things, and all of the interesting opportunities in your environment?

TIP #1 – Practice Observing

Practice observing. To be great at just about anything requires practice, or actually doing that thing. Yes, some people have natural talents and they don’t require extensive practice, but for others, myself included, practice is the best way to improve.

Photograph 3

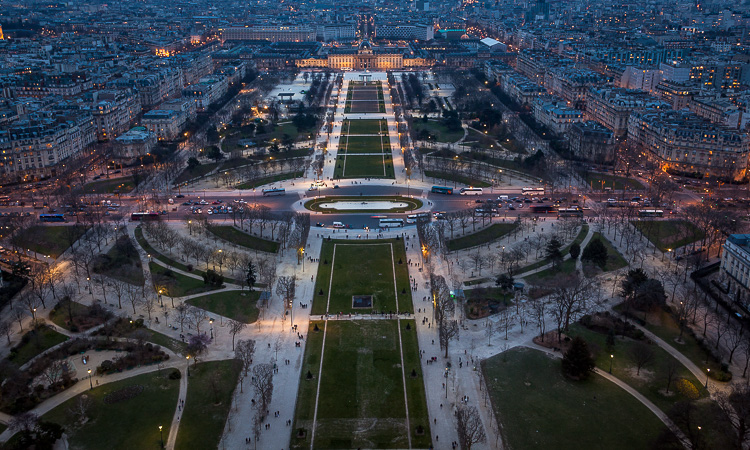
Take some time, daily if you can, and throw yourself into a busy street (not literally!) and observe. Walk slowly, or sit, and simply observe your environment. Notice the colours, shadows, words, and the things people do. People do the most fascinating things if you pay attention.

My only gripe is people staring at their smart phones, and yes, I can be guilty of that at times too. Imagine all of the interesting things people could be doing, if only they put down their phones. Of course, they may say the same thing about us standing there with our cameras.

Focus on the smallest of details. Maybe you notice someone walking across the street without shoes, or someone with interesting hair or clothes, or maybe there is nothing interesting and that’s okay too. Move on, remain aware of your environment, and keep practicing the skill of observation. Over time, you will begin to notice more opportunities for some great photographs, and you’ll make unique images.

Photograph 5

TIP#2 – Practice Without a Camera

More practice. Okay, this may seem redundant, but I’m talking about practice without a camera. You can practice this skill at any time, no matter where you are in the world, or what you are doing. Carefully observe and study your environment.

I don’t know how many times I’ve seen something clever or interesting, and got a little frustrated because I didn’t have a camera. You must begin to make a habit out of always observing, seeking out the unusual, studying the world and people around you.

Photograph 9

Keep in mind, the greatest artists become obsessed with their work, so make it a habit to always be focused on your skill of seeing, with or without a camera. Over time, you will be amazed at how many things you would have missed or ignored without this improved skill.

TIP #3 – Be Different

It’s good to be different. Share your work, and enjoy the works of others, but please, don’t become overly concerned about how many likes or hearts or comments you get. It’s not important! You can conform, and begin to manipulate your work to become popular and fit with what is expected, or you can be original and create something unique to your own personal experience and creative spirit.

Photograph 12

There are some great online communities, but it’s disappointing to see so many works of art looking the same, lacking originality. Yes, the basics of post-processing are important, but it will be difficult for you to stand out from the crowd if your artwork looks the same as every other artist.

Capturing your unique experience and environment will help you stand out. You may or may not become famous, but at least you had the courage to be different, to tap into your own unique creative abilities. Finally, embrace your uniqueness, and remember that life is complex and messy, so it’s okay to create photographs not in line with what is expected. Focus on tapping into your personal and unique creative spirit.

Photograph 7 Photograph 6

TIP #4 – Be Present

This is the most important tip. Enjoy living and creating in the present moment as much as possible. Whether you are in the field, in a darkroom, or behind a computer – get lost in the moment, focus on your environment and enjoy the experience of life and witnessing the world as it unfolds.

Photograph 15

Do you have any other tips for finding and creating more unique images? Please share in the comments below.

googletag.cmd.push(function() {
tablet_slots.push( googletag.defineSlot( “/1005424/_dPSv4_tab-all-article-bottom_(300×250)”, [300, 250], “pb-ad-78623” ).addService( googletag.pubads() ) ); } );

googletag.cmd.push(function() {
mobile_slots.push( googletag.defineSlot( “/1005424/_dPSv4_mob-all-article-bottom_(300×250)”, [300, 250], “pb-ad-78158” ).addService( googletag.pubads() ) ); } );

The post 4 Tips to Creating More Unique Images by Jason Lowry appeared first on Digital Photography School.


Digital Photography School

 
Comments Off on 4 Tips to Creating More Unique Images

Posted in Photography


Tips for Doing City Photography from Above

30 Aug

Many cities have places with great panoramic views of the city vistas from above. For example, in the U.S., New York has the top of the Empire State Building or Rockefeller Center. Similarly, Chicago has observation decks in both the Willis Tower (formerly the Sears Tower) and the Hancock Building. In Europe, there are great views of Paris from Montparnasse Tower. You can capture London from the top of St. Paul’s Cathedral, or now the observation deck of the Shard (the new tallest building in London), and the list goes on.

Madrid, Spain, from the Circulo des Bellas Artes

The Gran Via in Madrid, Spain, from the Circulo des Bellas Artes

But these shots present certain challenges. Often tripods are not allowed. Sometimes you have to shoot through glass. And when should you go? What settings should you use? In this article, we’ll work through these issues so you can get great shots from these city overlooks.

What? I Can’t Use My Tripod?

Sometimes you are allowed to use a tripod, and sometimes not. Each building has its own rules. To make things even more interesting, some buildings seem to have different rules depending on when you visit (or perhaps the mood of the security guards). So you will need to be prepared to shoot without a tripod.

If you go up the building in the middle of the day, that might not matter very much. There will be enough light to support a fast shutter speed, and you can get away with hand holding. But if you are shooting in dim light or at night, you will want to use a longer shutter speed. That will require some sort of stabilization.

Paris from the Eiffel Tower

Paris from the Eiffel Tower

In almost every case, you will find something available at the top of the building to support your camera. Sometimes you have to resort to using the the floor (which can work if you press your lens up against the window), but often there is some sort of shelf to use. Many buildings have plexiglass panels at the top, with small gaps between them, and you can hold your camera against the sides of the panels to steady it.

Shooting Through Glass

Oftentimes, you are photographing from an enclosed structure surrounded by glass. That means reflections are going to be a problem. I wish there was a magic bullet to solve this problem, but there isn’t. I do have a few tips to help you minimize the reflections though.

Chicago from the Willis Tower (formerly known as the Sears Tower)

Chicago from the Willis Tower (formerly known as the Sears Tower)

Before resorting to that, see if there is any way to shoot unobstructed. As mentioned above, some buildings have plexiglass panels on top. There are often carve-outs in the panels that you can shoot through, which you should definitely use. If not, check to see if you can shoot between the panels. That will avoid the whole issue with reflections.

If not, you are going to need to take steps to minimize reflections. Let’s start with one that should be obvious (but I always see people doing it). Do not use your camera’s flash. First of all, the flash is useless in this situation. Everything will be too far away for the flash to have any effect. More importantly, the flash will cause reflections and glare in the glass.

Next, hold your camera directly up against the glass. This will minimize reflections. In addition, make sure your point of focus is set far away from you and that your camera is not trying to focus on the reflections.

Panama City, Panama from the Intercontinental Hotel (shot through glass)

Panama City, Panama from the Intercontinental Hotel (shot through glass)


If you are on your own (like in a hotel room or somewhere you can set up), then make sure all the inside lights are off, and use the curtains to block any light coming from the room. Some photographers hold a black cloth against the window with a hole cut in the center to shoot through. If you have the opportunity and time to prepare, that is the best option.

Usually, you will find yourself in a public place where such steps are not possible. In that case, just use your body or hand to block any areas of glare or bright light.

After that, just take a few pictures and see if there are any reflections in the final result. Zoom in on your LCD to take a close look. If you find any reflections or glare, just adjust your position slightly to try to get it out and shoot again. You would also try a polarizing filter.

London from the top of St. Paul's Cathedral

London from the top of St. Paul’s Cathedral

What Camera Settings Should I Use?

Your exposure settings will depend on how much light is available at the time you are shooting. While I obviously cannot give you exact exposure settings, I can give you a few ideas to maximize your light and get the best exposure.

First and foremost, remember that you don’t need to use a small aperture for these shots because you do not need a deep depth of field. Your focus will be set at infinity. Nothing in your shot will be within 50 feet/15 meters of you. Too see this for yourself, take a look at the distance scale on the top of your lens (assuming it has one). It will show you that everything farther than about 30 feet/10 meters is set at infinity (in fact, the focus will be at infinity even sooner for wide angle lenses). There will not be a wide range of distances in your shot that require a deep depth of field. Therefore, if you find yourself in need of more light to create your exposure, widening the aperture is a good place to start.

Chicago from the Hancock Building

Chicago from the Hancock Building

Your other two exposure settings (shutter speed and ISO) will depend entirely on whether you can use a tripod. If you cannot use a tripod, raise the ISO until your shutter speed is fast enough to hand hold. Remember you can cheat a little bit and use a slower shutter speed than usual by propping your camera on something. But blur from movement during the exposure will ruin the picture. Remember that digital noise can be fixed in post-processing, but camera shake cannot. Raise the ISO as much as you need to get a supportable shutter speed.

If a tripod is allowed, things are much easier when it comes to exposure settings. You can use as slow a shutter speed as you want. That will also allow you to reduce the ISO, and use a smaller aperture as well. In fact, you may want to keep the the ISO low and the aperture small to force the camera to use a long shutter speed. That will capture traffic trails, create some movement in the clouds, and other effects.

New York, from Rockefeller Center (Top of the Rock)

New York, from Rockefeller Center (Top of the Rock)

Finally, consider bracketing your photos, especially if you are shooting at night. The scene before you will contain bright lights and dark portions. This will challenge your camera’s dynamic range. Even if you will never use any sort of blending or HDR, you might be pleasantly surprised by the overexposed or underexposed images.

Making a Composition from a Jumble of Buildings

When you are up high in a building overlooking the city, you will have a great view, but that doesn’t necessarily mean a great picture. The key to success is creating a composition out of what is before you, in other words to generally find a center of interest. That is, find something to key on that will anchor the picture. Sometimes it is obvious – like when you are staring at the Empire State Building or the Eiffel Tower – but other times it isn’t. You’ll just have to find something to center your picture on. It could be a building that stands out, perhaps a bridge, or even a leading line.

In doing so, don’t overlook the usual compositional rules. Start with the Rule of Thirds. Put your horizon line on either the top third or the bottom third. After that, you might consider placing an important, or prominent, feature on one of the vertical third lines.

Paris from the Montparnasse Tower

Paris from the Montparnasse Tower

Just these two concepts – ensuring you have a center of interest and following the Rule of Thirds – will go a long way to ensuring success. After that, you can find lines, shapes, and forms to work around. Experiment with different focal lengths and angles. Remember that nothing is moving so you can keep experimenting all you want.

When to Go

Deciding when to go capture you city view from above will have more to do with how the pictures turn out, than anything else you do. Avoid going in the middle of the day. Travel schedules don’t always allow that, but that is the worst time for these pictures.

If you are going to a public observation deck, when you can go will be limited by the opening hours of the building. They are generally not open early enough for sunrise, so that won’t be an option. Almost all locations are open for sunset and a few hours of darkness, so that is often an option.

London from the tower of Westminster Cathedral

London from the tower of Westminster Cathedral

The best time to go is just before sunset. You will have the best of all worlds with one ticket. You can capture the sunset and twilight. After that, just wait around for a little while for some night shots.

But in any case, go. It is an easy way to get great shots of whatever city you happen to be visiting. Get up high and capture the city from above.

googletag.cmd.push(function() {
tablet_slots.push( googletag.defineSlot( “/1005424/_dPSv4_tab-all-article-bottom_(300×250)”, [300, 250], “pb-ad-78623” ).addService( googletag.pubads() ) ); } );

googletag.cmd.push(function() {
mobile_slots.push( googletag.defineSlot( “/1005424/_dPSv4_mob-all-article-bottom_(300×250)”, [300, 250], “pb-ad-78158” ).addService( googletag.pubads() ) ); } );

The post Tips for Doing City Photography from Above by Jim Hamel appeared first on Digital Photography School.


Digital Photography School

 
Comments Off on Tips for Doing City Photography from Above

Posted in Photography


Tips for Photographing Wedding Decor Details

26 Aug

Wouldn’t we all love to be the photographer for lavish, perfectly detailed weddings? It’s discouraging sometimes to follow the work of famous wedding photographers and feel like we’ll never measure up. The truth is that for most of us, we’re photographing weddings of average everyday people, who can’t afford those over-the-top perfect weddings.

700

That doesn’t mean that the wedding we’re photographing is any less special, or any less important. The bride and groom have put so much time, effort, and thought into every detail of their wedding. Even if their budget is a fraction of some of those perfect weddings, they’ve most likely spent what amounts to a small fortune for them.

When I am hired to photograph a wedding, I want to treat each wedding as if it were the glamorous wedding of royalty. Whether you are the hired wedding photographer, or just a friend of the bride with a camera, I have a few hints to help you photograph the decor details of any wedding, and make it look like everything the bride and groom hoped it would be.

698

Get There Early

Arrive at the wedding or reception about half hour before it’s supposed to start. You will most likely have a small window of time where the decorations will be finished, but the guests have not arrived yet. You can photograph details with the guests there, but it’s harder to get clean photos without people in them, and sometimes the decorations have been moved or ruined later in the day. There are some things that you’ll need to photograph later, like if you want to show guest signatures on the guest book (or globe!), but try to get most of the details shots before the guests arrive.

696

Arrange the Details

Sometimes you can move things around a little bit to get more of the story of the wedding theme. In the photo above I wanted to capture the mass amounts of origami cranes that the bride and groom had folded themselves, but I also wanted to pull one out to photograph with the sign telling the guests to “please take a favor”. Often I will open a favor box to photograph the contents inside, artfully arranged.

Sometimes you can photograph a centerpiece arrangement better if it’s moved slightly closer. You can borrow the bride’s bouquet if she has set it down for a bit (ask first), or borrow one of the bridesmaid’s bouquets to photograph. As long as you don’t do anything that can’t quickly be put back into place, you’ll be fine. Make sure to return everything how you found it when you’re done capturing that particular detail.

697

Shoot Wide Open

I like to photograph most wedding details with my lens almost wide open (with my aperture set between f/1.4 and f/2, usually). This can give the photograph more of an artistic feel, and help the focus be on exactly what you are photographing. If the wedding doesn’t have a lot of fancy details, or attention to perfection, you may want to blur out a lot of background.

I use a 50mm 1.4 lens, or an 85mm 1.4 lens, but most prime lenses will do. Be especially careful that your focus is exactly where you want it to be, and hold very steady. Your focus has to be tack sharp, or the whole thing will just look like a blurry mess. Shooting wide open is, of course, a matter of style and preference, and some may like an entirely different look.

Find Different Angles

I will often stand on a chair to get the angle I want when I’m photographing details. (This is where it’s definitely better to get there before the guests!) You have to get creative with your angles, so your photos don’t look like every other guest’s pics. (This is especially important if you are the hired photographer.) Pay attention to what you can see in the background, where the light is coming from, and which parts are the most important. Even a slightly different angle can transform a photo from “meh” to “wow”, so try lots of different angles to see which one looks the best.

693

Work With Difficult Lighting

Many weddings and receptions are held indoors, and sometimes they’ve created a specific mood with low lights. This can be a challenge as a photographer, but it’s completely doable. I prefer not to use flash, because I very much prefer the look of no flash in this instance, so I’ll be sharing how I work in dim lighting without flash.

Remember how we are shooting wide open? Not only does this give us an artistic look, but it really helps when there isn’t much light. Sometimes I’ll photograph an entire reception with my aperture at f/1.4 to let in as much light as possible. You will also need to crank up your ISO; keep going higher until you can shoot with a shutter speed that can safely be handheld (for me, that’s about 1/80th, but you may have a steadier hand and be able to go even slower than that). You may have quite a bit of noise in your photos when your ISO is that high, but I like that look, especially when there’s a moody low-light ambience.

In a pinch, if the lighting is extremely low, try shooting in RAW, underexposing to allow your shutter speed to be as fast as you need it to be, and then bringing the exposure up in post-processing.

694

Photograph Everything

It’s guaranteed that there was a lot of thought, time, and money put into creating the bride and groom’s perfect wedding and reception. I want to capture every detail for them, because although all of the food and flowers will be gone a few days after the wedding, my photos will be there forever.

So I recommend that you photograph the food, the drinks, the centerpieces, the flowers, the favors, the guest book, and every single decor grouping around the room. It might seem silly to photograph a bowl of blueberries, but it will be so much fun for them to look back through the photos later, and remember all the little details of their wedding. If they want to make a book out of the photos, pretty detail photos can make the book have the same feel as the whole wedding did, and they really add to a collage. When in doubt, just take the photo. If their centerpieces are all the same, I’ll just photograph one of them, but if they are all different, I photograph most, or all of them.

695

Get the Whole Picture AND the Close-ups

As you can see with the above photo, you can photograph the exact same thing, but get a whole different feel by stepping back, then getting in really close, focusing on one little detail. Get the surrounding setting, and then focus in on the parts that make it special.

If there’s a decor grouping in a corner, I’ll photograph the whole thing, and then pick parts of it to get in close. I’ll do the same thing with the centerpieces, floral arrangements, cake, food table, etc. This is a great way to really tell the story, and make your photos a lot more interesting.

Edit the Wedding Consistently

Make sure that all the photos from the same wedding or reception are edited consistently. My weddings each look different from each other, because every wedding is a different lighting and coloring situation, but each wedding is consistent with itself.

Batch editing can help with keeping things consistent, or using the same actions or presets on every photo can help too. Do not edit one photo with a “vintage” action, one photo with bright colors, and another matte. This will make them look unprofessional, and make it hard to put together a book or collage of their big day.

699

As you photograph any wedding or reception, remember that every little detail is important to the bride and the groom. They thought everything through from top to bottom, start to finish. Even if it’s not a picture perfect wedding, it still represents what they love, and everything is important to them. Help them remember their special day with photos that will last long after the last crumb of cake is eaten, and the final flower is withered.

googletag.cmd.push(function() {
tablet_slots.push( googletag.defineSlot( “/1005424/_dPSv4_tab-all-article-bottom_(300×250)”, [300, 250], “pb-ad-78623” ).addService( googletag.pubads() ) ); } );

googletag.cmd.push(function() {
mobile_slots.push( googletag.defineSlot( “/1005424/_dPSv4_mob-all-article-bottom_(300×250)”, [300, 250], “pb-ad-78158” ).addService( googletag.pubads() ) ); } );

The post Tips for Photographing Wedding Decor Details by Melinda Smith appeared first on Digital Photography School.


Digital Photography School

 
Comments Off on Tips for Photographing Wedding Decor Details

Posted in Photography


Tips for Shooting the Milky Way

23 Aug

Seeing the Milky Way with your own eyes is what you may call a jaw dropping experience, but one that can be truly achieved only in complete darkness. While stars are visible even in light polluted areas, the Milky Way’s beauty, which is actually caused by concentrations of stars, gas and dust, fades away in the light polluted areas and cannot be seen.

2 frames portrait

Before going in to practice, you need to understand few things about the appearance of the Milky Way:

  • The part that you want to shoot is the center of the galaxy, and it is not visible all year long. In the northern hemisphere the Milky Way is best observed between April and September. During April and May it is almost parallel to the horizon (the best time for Milky Way panoramas) while in June to September it gets more vertical.
  • Unlike star trail photography, when shooting the Milky Way your goal is to achieve a sharp image, where the stars are seen as points and do not smudge.
  • At the beginning of the Milky Way season, it rises above the horizon late at night – and as the months pass, it rises earlier and earlier.
  • Getting a good photograph requires quite a lot of editing, in order to emphasis the Mily Way’s colors and shapes.

Planning ahead

Before going out to shoot the Milky Way, there is some planning that needs to be done.

  • Choose your location carefully (there is no place for spontaneity). There are several things to consider, but most importantly you need a dark location, as far as possible from light polluted areas. Consider that city halos are visible at night for a very long distance, so get as far as possible from light sources. The darker the area you’re in, the clearer the Milky Way will be seen.
  • Consider an interesting item to be used as your anchor in the photo. It is not enough to shoot the Milky Way, you want to have a nice foreground to make your photo interesting and unique. Find yourself a big tree, an interesting rock formation, a pier on a lake, or any other item to be used as your anchor. Try to make your foreground correspond the the Milky Way’s view.
  • Learn about the weather and lunar (moon) phases – to get a good, clean shot you need a good, clear and dark sky. Choose that period of the month when the moon is not visible in the night sky, and make sure the forecast does not predict too many clouds. High humidity is also not good, as it may accumulate on your lens and result in blurry frames.

2 frame landscape

Prepare your gear

Before you head out make sure you are prepared with:

  • A DSLR camera with a fully charged battery. Unfortunately – not any DSLR (or mirrorless) camera will work for you. You need to be able to go to a minimum of ISO 2,000 and preferably even higher.
  • Plenty of room on your memory card. Shooting in RAW is crucial for post-processing.
  • A wide angle lens. Anything between 10-20 mm will give you good results. You can shoot also with narrower lens but results will be less impressive. A wide aperture is also essential to allow lower ISO.
  • A strong, steady, tripod. When placing it, make sure nothing will cause it to shiver from a passing wind.
  • A remote control can help but it is not mandatory – you can program your camera to shoot in delay mode or self-timer.

3 frames

Getting started

Single frame option:

Although you may want to show as much of the Milky Way as possible, it cannot stand alone. Your photo must rely on a strong anchor, or foreground, if you want your viewers to be really impressed. You also need to consider that it is impossible to have all of the Milky Way in your frame, and shooting a panorama may be a good solution.

In most cases, it will be quite difficult, to the verge of impossible, to build your composition at night, in total darkness. So, it is better to arrive before night falls and it gets too dark to see. The last minutes of the day are your best time to plan and build your composition. But, remember to consider the expected location of the Milky Way in the sky. Use one of the many sky apps available to help you plan.

1 frame

Single frame shot.

Take the first shot which will be used as the foreground of the frame. If you want your foreground to be a silhouette then all is good but, if you want details to be shown, you will need to have at least one frame lit. This can be achieved in a few ways:

  • Shooting one frame during twilight (to be blended in during post-processing later).
  • Using a high ISO and longer exposure.
  • Using an outside light source such as flash (with a flash it is better to use a CTO gel for the right temperature).
    Your goal here is to get one frame that has good appearance of your chosen foreground. It is better to take a few options; using different ISO level, exposure time, lightning options, to be able to choose the best rest afterward. When satisfied, you can move on.

Set your camera to the widest aperture you have on your lens, the highest ISO bearable, manual focus to infinity, and longest possible shutter speed, considering the rotation of earth (see below).

Choosing the correct shutter speed:

  • If your exposure is too long, the rotation of earth will start to have impact, and the stars will start to arch in your frame.
  • Calculate the longest possible shutter speed while keeping the stars clear and sharp using the 500 Rule. This rule considers your focal length to determine when star movement will start to be seen in your image. The calculation is 500 divided to the focal length equals time in seconds. This calculation is for full frame cameras and in crop sensors you need to add the crop factor to the calculation (1.6 for Canon / 1.5 for Nikon). Here are couple of samples:
    • Using a 10mm focal length on a full frame sensor: 500 / 10 = 50. You can use up to 50 seconds as your shutter speed with this lens/camera combination.
    • Using a 10mm focal length on a Canon crop sensor: 500 / (1.6*10) = 31.25. You can use up to 31 seconds as your shutter speed with this combination.
    • Using a 10mm focal length on a Nikon crop sensor – 500 / (1.5*10) = 33.33. You can use up to 33 seconds as your shutter speed with this gear.

Panoramic option:

9 frames

9 frame panoramic shot.

There is no change in the settings for your camera when shooting a panorama.

You may want to consider the appearance of the Milky Way though. If it is relatively horizontal it is a good idea to aim for a wide panorama, showing it from side to side. If it is vertical, you may want to build your panorama upwards.

In a panorama it is recommended that you have a 30% overlap, but when shooting at night it is more difficult to see – so it is even better to have a larger overlap between the frames. Better to be on the safe side, than discover later that you have gaps in your final result.

When shooting a Milky Way panorama you may want to position your camera in portrait orientation (vertical). Although you will need more frames from one side to the other, you will have more sky, and a chance of catching the entire Milky Way. If shooting in landscape position, you may need to shoot two “floors”, in order to catch the entire Milky Way together with the ground.

10 frames

10 frame pano shot.

18 frames

18 frame pano shot.

Post-processing your Mikly Way photos

Milky Way frames require a lot of post-processing work, which deserves its own article. There are also many ways to approach post-processing of the Milky Way, and it depends on the software you are using and your personal taste.

I’m working with Lightroom and Photoshop. Starting with Lightroom, I use the Dehaze and clarity sliders, tone adjustments, saturation and noise reduction. After reaching the best possible outcome, I move to Photoshop for some additional adjustments by playing with curve layers.

1 frame original

Before post-processing.

1 frame edited

Final processed image.

Your turn

Have you tried to capture the Milky Way before? Please share your experiences, questions, and your images in the comments below.

googletag.cmd.push(function() {
tablet_slots.push( googletag.defineSlot( “/1005424/_dPSv4_tab-all-article-bottom_(300×250)”, [300, 250], “pb-ad-78623” ).addService( googletag.pubads() ) ); } );

googletag.cmd.push(function() {
mobile_slots.push( googletag.defineSlot( “/1005424/_dPSv4_mob-all-article-bottom_(300×250)”, [300, 250], “pb-ad-78158” ).addService( googletag.pubads() ) ); } );

The post Tips for Shooting the Milky Way by Amir Ehrlich appeared first on Digital Photography School.


Digital Photography School

 
Comments Off on Tips for Shooting the Milky Way

Posted in Photography


Tips for Abstract Macro Photography – Using Texture and Light

21 Aug

Macro photography opens up a whole new world to those who are willing to get up close. There is no shortage of subject matter to photograph, but in this article we’ll look at the abstract world of texture and light.

Rusted paintwork of a Dodge Campervan

Rusted paintwork of a Dodge Campervan

The beauty about these subjects is that they can be shot anywhere; in your backyard, on your street, or in any part of your city. Textures are everywhere. They are really easy to find, and working with the light properly will help you to highlight the grittiness and tactile effect of textures. Ideally, a macro lens would be perfect to use for this type of photography, but a good 50mm or 85mm can work too. A macro lens gives you the bonus of being able to focus really close, normal lenses may not be able to get as close as you want.

My view is that even if you don’t have a macro lens, give this a try anyway, a new tiny world of wonder awaits you!

What is Abstract Macro Photography?

Abstract photography, in general, is about representing a subject in a non-literal way. The focus of abstract photography is more about colour, shape, and texture, as opposed to the literal representation of the subject. Abstract macro photography, takes this to the next level by enabling you to get even closer to your subject, and therefore also able to be more abstract in a sense. In this article, we are concerned with texture and showing that in our images.

The same guidelines around composition apply, you can use the rule of thirds, curves, and lines, to draw the viewer into your image. The difference is that the subject may not be immediately recognizable, your centre of interest might be a colour, or the curve of a flower. So for abstract macro photography, you will need to think a little differently.

Cracked paint on a car bumper

Cracked paint on a car bumper

What will I need to do abstract macro photography?

A macro lens will work best. A 50mm or 85mm lens will work pretty well too, you may not be able to get as close to your subject though, so be aware of that (or you can try close-up filters). You will need a tripod too, or some sort of support for your camera, as shooting macro images handheld is really difficult and can be frustrating.

What can I photograph?

Textures are all around you. Think of the rusted lamppost at the corner of your street, the peeling paint on the wall of the shed, or even the cracked paint on the bumper of a car. They are everywhere.

You need to spend time looking at all the surfaces around you, then take some test shots to see if they work. The key thing to be aware of when shooting textures is how the light is affecting the scene. Macro photography is like a micro landscape image. It has a foreground, middle-ground and background. There are colours, shapes, and of course textures in the image.

When you look at the texture, take some time to study where the light is coming from, and how it is affecting the image. Try a few different angles to see what works best in the scene. Using side light (i.e. light some from the left or the right) will accentuate the texture in your image. Side light will give your image a three dimensional quality, so try and get some directional light on your scene if possible.

Reflections from a security gate

Reflections from a security gate

Find your texture, and use this as a workflow

  • Work on building your composition – is there a particular part of the texture you want to emphasize, try and get some side light if possible?
  • Use manual focus to bring even a small part of your image into sharp focus, this sharp area will be the natural focal point for your viewer.
  • As an abstract image, you don’t need a subject as such, but the texture and the colours will be the reason for the image, so make sure the subject matter is interesting.
  • Check the histogram to make sure that you are exposing your scene correctly.
  • Capture the shot.
  • Try shooting the same subject from different angles, and maybe even with a different centre of interest.
  • Take as many images as possible, from different angles, with different focal points.

The beauty about this type of photography is that you have an infinite number of subjects. It is really easy to get going once you start looking around you, at what there is to photograph.

The beauty of cracked window putty

The beauty of cracked window putty

Have you tried abstract macro photography before? If not give it a go and share some of your images in the comments below. See if we can guess what you photographed.

googletag.cmd.push(function() {
tablet_slots.push( googletag.defineSlot( “/1005424/_dPSv4_tab-all-article-bottom_(300×250)”, [300, 250], “pb-ad-78623” ).addService( googletag.pubads() ) ); } );

googletag.cmd.push(function() {
mobile_slots.push( googletag.defineSlot( “/1005424/_dPSv4_mob-all-article-bottom_(300×250)”, [300, 250], “pb-ad-78158” ).addService( googletag.pubads() ) ); } );

The post Tips for Abstract Macro Photography – Using Texture and Light by Barry J Brady appeared first on Digital Photography School.


Digital Photography School

 
Comments Off on Tips for Abstract Macro Photography – Using Texture and Light

Posted in Photography


5 Tips for Protecting Your Digital Photos

20 Aug

The advent of the internet has provided endless opportunities for photographers; it has


Fashion Photography Blog

 
Comments Off on 5 Tips for Protecting Your Digital Photos

Posted in Uncategorized


Tips for Doing More Spectacular Sunset Photography

17 Aug

The first thing I was told to do when I wanted to learn how to photograph landscapes and cityscapes, was to always shoot during the sunset. I have always asked myself why, but the answer is actually pretty easy. You get amazing colors in the sky, dramatic clouds, and soft light.

Sunset tips 1

You can photograph the most beautiful place in the world and I can guarantee you, it will look much better during the sunset. The only problem with this mindset, is that you will never take another image in the middle of the day. If I find a really cool spot to photograph, but there won’t be any sunset anytime soon, my go to option is to create a desaturated long exposure. The second option is to come back another day.

In this article, I am going to give you some tips on how to shoot sunsets to get the best results possible. These tips can also be applied to photographing a sunrise, if you have the energy to wake up at 5am and go outside.

How to predict the best sunsets

Depending on where you live, the sunset will be different. You can’t really predict a nice sunset, but there are some signs that can help you decide wether you should go out and give it a try or not. Of course, I would recommend going out and photographing all the time, but if you’re a busy person and do not want to go back home frustrated, then you should consider these few tips.

There are some areas in the world where sunsets are not vivid, and you won’t see any colors in the sky. For example, I have lived in the United Arab Emirates for a year and during that period I have only witnessed around 10 beautiful sunsets (no joke). However, when I go to the south of France, there is a dramatic and vivid sunset everyday.

Sunset tips 2

One of the better sunsets in the United Arab Emirates. This is considered as an amazing sunset over there, but in reality it is just very average.

Sunset tips 3

An amazing sunset in the south of France: I was really surprised because I got the same sunset five days in a row. and it wasn’t even summer.

There is a simple reason explaining this – clouds make all the difference. I am talking about patchy white clouds with a blue sky. These clouds will catch some amazing colors and give you the best results possible when the sun sets.

Sunset tips 4

There were some patchy clouds in the sky, and during the sunset the colors turned out really nice in this image.

If there aren’t any clouds, then your sunset will be pretty boring. You will only have a nice gradient of color going from blue to orange.

Sunset tips 5

Example of a sunset without any clouds.

I usually don’t bother going out when there is an overcast day to shoot sunsets, because the results are quite disappointing. The clouds cover the sky and you can’t see it, so you will end up having no colors at all.

If there is some light rain during the evening, then you can be pretty sure you will get an amazing sunset. I really can’t explain it, but trust me, it works all the time.

Planning and patience

Planning is the most important thing, I would recommend going to the location around 30 minutes before the start of the sunset to compose your shot, especially if you don’t know the location.

With sunsets, the scene can change very very quickly. I highly recommend composing your shot, placing your camera on the tripod, and not moving until the sunset is totally finished.

Sometimes a nice color can appear on a cloud for only two minutes, and if you’re not ready then you won’t be able to photograph it. There is an app called Magic Hour which you can download on your mobile device (for iOS only) Based on your location, it will give you the time that magic hour begins, the time of the sunset, and the time it ends. It also does the same thing for the sunrise the next morning.

Note: you could also try the Photographer’s Ephemeris or PlanIt! apps.

Sunset tips 6

With this information, you have the time to look around, try different compositions, and decide which one works best. I will repeat – once you find your composition, place your tripod, and do not move it. It’s better to have one good photo of a sunset then five different average ones.

You will stay behind your tripod for 30 minutes, taking an image every time the sunset changes, with the clouds moving and new colors appearing. It is quite frustrating, but at the end you will have the best composition possible, with an image of the best clouds, and the best colors of the whole evening.

Sunset tips 7
I waited in the cold for one hour to photograph this sunset. At first it looked terrible, but it started developing very well. I ended up having some nice cotton candy looking clouds.

Lens and composition

I would recommend using a wide angle lens to capture the whole scene, if you’re going to compose your image to include some foreground, middle ground and background, which I highly recommend. This enables the viewer to position himself in the image, and it adds a good sense of depth. Also, try to make the sky or the foreground at least a third of the image.

Sunset tips 8

The trees as the foreground, the Eiffel Tower as the middle ground, and the sky as the background, all give nice depth to this image.

If you cannot find that type of composition, then using a long lens can be a good alternative, while using the rule of thirds.

Sunset tips 9

I could not find a good composition for this shot, so I used a long lens to compress everything. and composed it using the rule of thirds.

Sunset tips 10

Composing my shot using the rule of thirds.

Settings and extra gear

A tripod is essential because you will want to shoot with an aperture between f/8 and f/13 for sharp images, and ISO 100 for the best image quality. This cuts down the light quite a lot, and you will end up having a slow shutter speed to compensate. To avoid any shaky images, use a tripod with a cable release or a two second timer.

I highly recommend exposing your images for the highlights (which means you are exposing for the sky). The rest of the image will be underexposed, but if you’re shooting in RAW you will be able to recover details in the shadows.

Another solution is to use a graduated neutral density filter that will cut down the light on your highlights in the sky, and keep your mid-tones and shadows well exposed.

Sunset tips 11

A graduated filter that you can stack.

I usually leave my white balance on auto, because with RAW files I can take more time to change it on Lightroom. If you’re shooting JPEG, the white balance that works the best with sunsets is Shade or Cloudy. It gives a nice warm magenta color to the image, and makes the vivid colors in the sky pop more.

Polarizing filters are also a good alternative to recover details in the sky, and make the colors more saturated without any post-production.

Sunset tips 12

Using manual focus can be useful if it gets too dark and your lens has trouble focusing by itself.

Get creative

For sunsets, in my opinion the best thing to do is to get creative – either do HDR or digital blending.

In both cases, it’s better to take three different exposures to get the full dynamic range of the scene. Especially because there will be a lot of contrast between the brights and the darks, it’s difficult to get all the details. You can merge the exposures automatically with a software, or manually with luminosity masks.

Sunset tips 13

This sunset looks good, but because I did not shoot three different exposures you can see in the middle there are white pixels in the sky that I could not recover.

You can also get creative by doing long exposures and stretching the clouds. And of course you always have Photoshop and Lightroom to finish your art the way you like it.

Sunset tips 14

This is an example of a creative sunset: I shot 3 different exposures, a long exposure of the clouds, a long exposure of the car trails one hour later, and merged everything on Photoshop to get the best of both worlds.

Now it’s your turn. Do you have any other sunset photography tips to share? Please do so, and share your images as well, in the comments below.

googletag.cmd.push(function() {
tablet_slots.push( googletag.defineSlot( “/1005424/_dPSv4_tab-all-article-bottom_(300×250)”, [300, 250], “pb-ad-78623” ).addService( googletag.pubads() ) ); } );

googletag.cmd.push(function() {
mobile_slots.push( googletag.defineSlot( “/1005424/_dPSv4_mob-all-article-bottom_(300×250)”, [300, 250], “pb-ad-78158” ).addService( googletag.pubads() ) ); } );

The post Tips for Doing More Spectacular Sunset Photography by Yacine Bessekhouad appeared first on Digital Photography School.


Digital Photography School

 
Comments Off on Tips for Doing More Spectacular Sunset Photography

Posted in Photography


Tips for Creating a Personal Photography Project

16 Aug

One of the best ways to grow your photography is by working on a personal photography project. As a professional photographer, I am always working on personal projects. It’s a way to keep myself inspired, and to feel challenged to grow. It’s also a great way to keep my portfolio fresh, try out new ideas, and grow my vision as a photographer.

Shooting a place more than one time gives you the opportunity to capture the place in the perfect light. I had visited this part of the Oregon Coast more than a dozen times before the perfect scene appeared.

Shooting a place more than one time gives you the opportunity to capture the place in the perfect light. I had visited this part of the Oregon coast more than a dozen times before the perfect scene appeared.

In this article, I will share with you:

  1. What is a personal photography project?
  2. What’s the value of working on personal projects?
  3. What makes a good project?
  4. How to be successful
  5. Ideas for personal photography projects of your own

What is a personal photography project?

I define a personal photography project as choosing a subject to shoot over and over again over time. It can be as simple as shooting your kid’s sporting event every weekend, photographing an intriguing building near your home six times, or creating a series of portraits of your friends.

Personal-Projects-Oregon-Beach-CBB

I photographed about 60 miles along the northern Oregon coast over a period of six months. I created a route that I drove whenever I could. By shooting the same place over and over again, I was able to truly capture the personality of the places.

2 – What’s the value of personal projects?

Some photographers are reluctant to shoot the same subject over and over again, but by photographing it more than once, it gives you some great opportunities to grow as a photographer.

  1. It gives you the chance to get it right. Have you ever said, “I wish I would have done X better?” By going back and shooting something more than one time, you create the opportunity to analyze your mistakes, and go back and do it again. In this exercise, you shoot one day, analyze what you can do better, then tweak your shooting until you learn to nail it every time.
  2. It gives you some structure. When you have some free time, you don’t have to wonder what you are going to shoot. If you have committed to photographing the City Hall in your town six times, you can just go shoot it. On the other side of the coin, you can also put your shoots on your calendar weeks, or months, ahead of time.
A different mood of Cannon Beach, Oregon.

A different mood of Cannon Beach, Oregon.

A Project could look like this – Shoot City hall at:

  1. Sunrise
  2. Sunset,
  3. Morning light
  4. Afternoon light
  5. Golden hour
  6. Dusk
  7. With the moon
  8. On a sunny day
  9. On a cloudy day
  10. On a rainy day
  11. On a Snowy day
  12. During each of Spring, Winter, Fall, and Summer

Can you begin to see the many opportunities, and how to create different pictures of just one thing?

I was fascinated by this lone tree growing out of a huge rock near Garlibaldi, Oregon but I wanted to get it with a beautiful sky.

I was fascinated by this lone tree growing out of a huge rock near Garlibaldi, Oregon, but I wanted to get it with a beautiful sky.

It took many evenings of watching for the perfect sunset, but the photo was well worth it.

It took many evenings of watching for the perfect sunset, but the photo was well worth it.

Once you nail the technical part of a situation, you can challenge yourself to do something really different. This is the point the great photos come in!

The great photos don’t come when you are trying to figure out how to focus your camera, use your flash, or what is the right exposure or camera angle. Once you’ve got all that nailed, the real creativity begins! That’s when the great pictures happen. Here’s an example:

Posey-Personal-Projects

This was my first glamour shoot. I just practiced finding the perfect window light in my studio. And, as a journalistic photographer, I rarely do any retouching, but this subject offered the opportunity to pull out some new retouching tools, and also reminded me to pose the subject in such a way to hide skin imperfections.

I fell in love with the work of a glamour photographer, Sue Bryce. She does beautiful work and doesn’t use studio lighting, she uses window light in a very sophisticated way. I decided to emulate her work by studying her technique. I had never studied glamour photography, so not only would the lighting be a challenge, but the posing would be too. Here’s what I did:

  • I studied her technique, watched some YouTube videos, and took detailed notes.
  • I practiced posing myself in front of the mirror.
  • I did some tests with window light in my studio to find the best times of day to shoot, and to decide what kind of reflectors, props, and backdrops I needed.
  • I found a few make-up artists who wanted to build their portfolio, and offered to work with me for prints.
  • I scheduled several friends for shoots.
Suzanne-personal-projects

This was my second shoot. I practiced using a different kind of light, a little bit harder with more fill.

I also had the chance to work with posing and hands. It felt awkward to me, and I didn’t really get the subject to do what I wanted her to. It was time to go back to the mirror and practice with my own hands, then create language that would help my subject move into those poses.

allie-personal-projects

This shoot went much better. I was learning, developing skills, having fun, and building my confidence in this new world of glamour photography.

Tyler2-personal-projects

By my fourth subject, I had learned how to direct my subject into a pose, and had a great feel for window light.

Tyler-personal-projects

I had a few new pieces for my portfolio, not to mention a few happy friends with prints.

Let’s back up a few steps and review some of the ideas we’ve touched on so far.

3 – What makes a good photo project?

  1. Have an objective, a goal. Be clear on your outcome. It can be to master a new skill, to create a series of prints, or to make a calendar as a gift.
  2. Select a subject that you can return to over and over again.
  3. Choose something you are really interested in, and passionate about. For ideas, think about the activities you and your family are involved in. Would any of your hobbies make a good project? Are there places you love to visit or photograph?
  4. Find something to shoot within 10 or 20 minutes of your home.
  5. Commit to something that either happens on a regular basis at a scheduled time, or a place you can just show up and shoot anytime. For example, a ballet class that happens every week or a favorite park, botanical garden, or lake.
  6. Choose a subject with a variety of visual possibilities.
  7. Choose a subject with a learning goal, or end product in mind. You might want to learn more about light, or shooting in manual mode, or photographing people.
The Capital Building in Washington DC is stunning at night, and I wanted to capture the full moon rising behind it. This was the sixth night I made a trip to the monument. Persistence paid off.

The Capitol Building in Washington, DC is stunning at night, and I wanted to capture the full moon rising behind it. This was the sixth night I made a trip to the monument. Persistence paid off.

Several years ago, while living in Washington, DC, I chose to shoot the monuments with a full moon. Why was this a good project? Let’s look at the checklist above and compare

  1. I love documenting history, enjoy being out in the evenings taking pictures at night, and I always feel a sense of wonder seeing the Washington, DC monuments.
  2. I wanted to create a set of prints that I could share and offer to my corporate clients.
  3. Getting to the monuments was easy for me.
  4. I could write the full moon dates in my calendar months ahead of time and keep my schedule clear. (Although I did get strange looks when I told friends I couldn’t join them for dinner because it was a full moon!)
  5. There are lots of monuments to photograph within walking distance.

I loved having something on my calendar to shoot. It provided some structure, and gave me something to shoot for several months without having to come up with a new idea. And, now I have a beautiful collection of photograph for my portfolio.

This is the World War II Memorial in Washington DC with the Washington Monument in the background. Committing to shooting a personal project is fun, rewarding and builds your self-confidence.

This is the World War II Memorial in Washington, DC with the Washington Monument in the background. Committing to shoot a personal project is fun, rewarding, and builds your self-confidence.

4 – How to be successful

  1. Make a commitment and write out the whys of doing the project.
  2. Find an accountability partner, a coach, a class, or a photo group, to share your progress.
  3. Put the time commitments on the calendar. Treat this as a new ritual. Plan the time and treat it as sacred.

5 – Ideas for your own personal photography projects

Here are some ideas to get you started on your own personal project.

  • Find a photographer or a style you love and try to mimic that style. I fell in love with Georgia O’Keefe’s paintings and her use of color. Ultimately, studying her art led me to creating these photographs. 
  • Shoot the full moon every month for six months. I chose to shoot the monuments in Washington, DC with a full moon and created a beautiful series of art prints.
  • Photograph a local park 10 different times, at different times of day. This is a simpler version of my Oregon Coast project.
  • Shoot a local landmark at all times of the day. It could be a building, for example the City Hall, a mountain, or a river. This project will give you an opportunity to learn about the quality of light at different times of days, the right angles, and it’s simple! Buildings and mountains are always there for you.
  • Shoot a kid’s sporting event every weekend. This will help you refine your skills with stopping action and learning focus.
  • Make portraits of your relatives and create a beautiful coffee table as a Christmas gift for the family. A great way to take care of that holiday gift list, as well as learn more about photographing people and developing a style of your own.
  • Photograph pets. Pets can be a real challenge. It will be an opportunity to learn about capturing action as well as learning about light.

Shooting projects is an amazing way to grow your portfolio and your self-confidence. Do you have an idea for a project? Share it with me in the comment section below, I’d love to hear about it or see your images.

googletag.cmd.push(function() {
tablet_slots.push( googletag.defineSlot( “/1005424/_dPSv4_tab-all-article-bottom_(300×250)”, [300, 250], “pb-ad-78623” ).addService( googletag.pubads() ) ); } );

googletag.cmd.push(function() {
mobile_slots.push( googletag.defineSlot( “/1005424/_dPSv4_mob-all-article-bottom_(300×250)”, [300, 250], “pb-ad-78158” ).addService( googletag.pubads() ) ); } );

The post Tips for Creating a Personal Photography Project by Vickie Lewis appeared first on Digital Photography School.


Digital Photography School

 
Comments Off on Tips for Creating a Personal Photography Project

Posted in Photography


6 tips for better wildflower photos

15 Aug

Tips for better wildflower photos

Shooting wildflowers can be an intimidating endeavor, especially if you’re looking to capture grand scenes and vistas. Navigating the crowds, finding the perfect composition and nailing the shot can all be overwhelming. But it doesn’t have to be that way – in this article I’ll help you navigate these challenges so you can enjoy the experience and make the most of peak wildflower season.

Choose the right gear for the job

This isn’t a one-size-fits-all gear list as it really depends upon how much hiking you have to do to get to your desired location. That being said, I’ve highlighted some of the most important items from my kit in this list.

  • Tripod: A sturdy tripod is a must if you plan on focus stacking, it also comes in handy if your shooting in conditions that require slightly longer shutter speeds.
  • Lenses: When I’m out shooting wildflowers I always try to cover a focal length of 16-300mm. The majority of my compositions fall in the 16-35mm range, but you never know when you may want to snap an abstract shot or try something new when you’re out in the field.
  • Headlamp: You may not plan on staying out late, but loosing track of time while shooting an amazing sunset is very easy to do.
  • CPL: The sky in your composition will benefit a great deal from using a circular polarizer and the vegetation’s rich colors will be brought out as well.
  • Bug/Bear Spray: This may sound trivial but if you’re shooting anywhere in the mountains this is a must. Watch out for ticks as well when you’re out shooting. Bears aren’t always an issue, but in certain areas they can be a problem so it’s definitely best to check trip reports and stay well informed.
  • Well stocked backpack: A camera backpack or your favorite hiking backpack with a first aid kit, water, extra batteries, wireless remote, cleaning cloths, tripod tools, extra layers (Gortex jacket etc.) and snacks is a must. Anytime you go hiking it’s a great idea to be prepared for anything in the field.
  • Maps/GPS: I always bring a map or a guide book in addition to a GPS unit with me to areas that I’m not familiar with.

Check flower reports and scout locations

Before heading out into the field I always make sure to scout out locations and check on the condition of the flowers I’m intending to photograph.

  • Check local wild flower reports online – hiking trip reports are great places to look for wild flower updates
  • Aim to photograph the flowers when they are just starting to peak; this is where checking reports pays off. Staying slightly ahead of the curve will ensure that you will be able to photograph the flowers when they are looking their best.
  • Talking with other local photographers is a great way to network and to get an idea of what the flower shooting conditions are like in your area of interest.
  • Scout your location to determine what areas are best for sunrise, sunset and day/night time shooting. Figure out how many miles you’ll be hiking and plan accordingly.
  • Remember to give yourself plenty of time to drive to your location, hike in, take photos and hike out.
  • Mark the areas that you’re interested in shooting on a map or set waypoints on a GPS to give yourself a guide of sorts to roughly follow while you’re out in the field.

Find your composition

Choosing your composition can feel like a tricky task – especially with the added element of flowers thrown into the mix. Here are some helpful tips that can make the process a bit less overwhelming.

  • Look for flowers just approaching the peak of their bloom: once you have found a nice patch of flowers make sure that they can be incorporated into your composition effectively.
  • Add depth through layers: flowers can add a really nice foreground element to your photo so try to fill the lower 1/3 to lower 1/2 of your frame with them to give your photo lots of FG interest and depth. Focus stacking is one way to achieve this look.
  • Let the flowers be your leading line: sometimes nature can provide you with nice patterns and colors to lead your eye through the frame to your focal point. Look for flowers that can provide that ‘line’ to your focal point or that offer depth through layers.
  • Don’t let the conditions dictate whether or not you choose to go out and shoot: shooting in foggy and challenging weather conditions can offer up some amazing and unique results!
  • Shoot in both landscape and portrait orientations: don’t get too set on one composition, move around and experiment! This is something that I have to continually remind myself to do.

Get creative: go abstract

When you find yourself surrounded by fields of gorgeous flowers it’s very easy to become overwhelmed and bogged down by the seemingly endless photographic possibilities. Finding abstract compositions requires some work, but the results can be very rewarding.

  • Take a step back and look for subtle opportunities to photograph the flowers and vegetation themselves.
  • Look for different kinds of texture and layering in the vegetation.
  • Let the plants and flowers become your composition.
  • Look for natural leading lines, patterns, curves and turns in the plant life.
  • Pay attention to complementary colors and patterns as color can add a great deal of interest to your photo.

Etiquette

This isn’t something that’s discussed very often in landscape photography, but I think that it’s especially applicable for this type of shooting.

  • Show up early and find your composition: One of the biggest issues that I see in the field is dealing with people fighting for compositions. If another photographer was there before you, then respect their space and look for different compositions. Remember that a wide-angle lens covers a lot of real estate, so keep that in mind when looking for alternative compositions. Get there first and you will be rewarded with lots of options for outstanding compositions.
  • Respect the Flowers: This almost goes without saying, but never pick the flowers and move them to improve your composition – this happens more often than you would care to believe. Also, take care not to sit on or trample the meadows when composing your shot(s).
  • Tread Lightly: Chances are that if you’re shooting wildflowers you will find yourself off trail at some point. Follow game trails and stick to paths that have already been well traveled. Never create your own trail through a meadow unless you have no other options and always tread lightly. These areas have very fragile ecosystems and see a great deal of foot traffic, so it’s important to practice sustainability.
  • Leave No Trace: Surprisingly this is still a huge issue. The bottom line is; if you pack it in, pack it out – don’t leave anything behind.

Articles: Digital Photography Review (dpreview.com)

 
Comments Off on 6 tips for better wildflower photos

Posted in Uncategorized


3 Tips for Taking Better Motorsport Photos

11 Aug

If you’re a fan of motorsport, then you’ve probably tried to take photo of a race car on the track. It’s not as easy as it looks is it? The high speed nature of motorsport photography tests even the best photographers and cameras. So it takes a special skill set to move your motorsport photos up to the next level.

Taking a photo of a car on track is one thing, but if you’d like to add one or more of the following elements to your photos, you’ll start to create some special images. So make sure you keep these three things in mind next time you are at a race track shooting motorsport: speed, action and emotion.

DPS Panning 001

#1 Speed

One of the biggest things that draws people to motorsport is the speed. If you’d like your photos to stand out, you need to showcase that speed in your photos. The photographic technique for doing this is called panning.

Panning is basically using a slow shutter speed to introduce motion blur into your photos. The easiest way to do this, is to focus on a particular point of the car, and move your camera in a smooth motion in the same direction as the car. This will keep the car nice and sharp, and blur out the background.

I would recommend that you start with a shutter speed of around 1/200th of second. As it takes a lot of practice to get a nice smooth motion. As you improve your technique and grow in confidence, you can progress to slower shutter speeds.

DPS Panning 002

Panning is one of the hardest techniques in photography. It takes a lot of practice to get it right. The slower the shutter speed, the less likely you are to get the car sharp in the photo. But the trade off is a more dramatic the effect when you do get it right.

Just remember that not even the professionals get every shot perfect, though they may not admit it. But once you have mastered the art of panning, you can look to add some more creativity to your shots by panning through objects, or using interesting angles.

DPS Panning 003

#2 Action

Getting a photo of one car on track is great. But those action moments are what really tell the story of the race.

Ideally you want to be on the look out for the moments when two or three cars are jostling for position. Usually in the opening laps of a race. Shots of the race leaders fighting for the lead will give your photographic story more definition.

To capture those actions moments, you will want to position yourself at one of the slower corners of the track. One that encourages passing. To do this you’ll need to be familiar with the venue. Each and every track is different.

DPS Action 001

Photographically, you’ll be looking to use a fast shutter speed to freeze the action. I would recommend using a shutter speed of 1/1000th at a minimum. Although the speed really all depends on how fast the cars are traveling at that section of the track.

Now, since you are freezing the action, you’ll still want to make the cars still look fast. To do this you will need to hide the wheels of the cars. Either shooting the cars directly front on, or from behind. Hiding the lack of motion in the wheels will give the cars a sense of speed, while still showcasing the action.

DPS Action 002

DPS Action 003

#3 Emotion

Motorsport, much like all sports, has high highs and low lows. That is reflected in the emotions you’ll see around the race track.

To complete a photographic story of the race, you’ll need to capture either the fans, teams, or drivers celebrating victory. That could be a victory burnout, it could be driver waving to the crowd, or it could be the team applauding as their driver crosses the checkered flag.

DPS Emotion 001

While the highs are good, the lows also tell an equal part of the story. It could be a crash between two competitors. It could be a driver walking away from his broken down car. These all add up to telling the story of the race.

Unfortunately, it takes a little bit of luck to capture the emotion in motorsport. That’s why these shots are the most rewarding.

Photographically these emotional moments take split second decisions to capture. If you’re photographing a driver doing a burnout, you’ll need to quickly drop the shutter speed to showcase some motion in the wheels. but not so much that the car starts the blur. I’d suggest something along the lines of 1/250th.

For capturing other celebrations, which are often just fleeting moments. I’d recommend a high shutter speed and wide aperture to create shallow depth of field to draw focus to the part of the celebration that tells the best story.

DPS Emotion 002

Summary

If you can keep those three things in mind while you are taking photos trackside, you’ll take your motorsport photos to the next level. Then you’ll really telling the story of an event, instead of just capturing cars on a track.

googletag.cmd.push(function() {
tablet_slots.push( googletag.defineSlot( “/1005424/_dPSv4_tab-all-article-bottom_(300×250)”, [300, 250], “pb-ad-78623” ).addService( googletag.pubads() ) ); } );

googletag.cmd.push(function() {
mobile_slots.push( googletag.defineSlot( “/1005424/_dPSv4_mob-all-article-bottom_(300×250)”, [300, 250], “pb-ad-78158” ).addService( googletag.pubads() ) ); } );

The post 3 Tips for Taking Better Motorsport Photos by Rhys Vandersyde appeared first on Digital Photography School.


Digital Photography School

 
Comments Off on 3 Tips for Taking Better Motorsport Photos

Posted in Photography