You can currently pick up 2 eBooks on Street Photography by James on sale now at SnapnDeals!

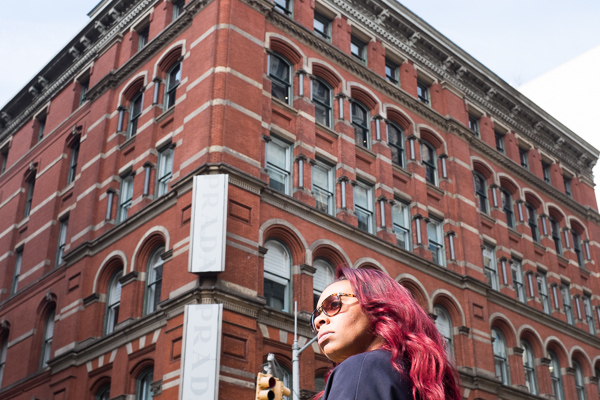
Windswept Hair, Prince and Broadway, SoHo
If you live near me, the birds are starting to chirp, it no longer hurts your face to walk out the door, and everyone sheds their all black winter outfits and puts on their most interesting attire.
If you live in the southern hemisphere, it’s beginning to cool off nicely. Spring and fall are the best times of the year to capture people and focus on street photography. If ever there’s a time to do it, it’s now.
So here is a list of street photography tips and exercises to get you out there shooting.
1. Linger in the same area
Prada Store, Prince and Broadway, SoHo
For this entire list of exercises, we are going to stick to the same general area. If you notice, all of the descriptive images in this article are from the same area of SoHo in New York City, at different times of day and in different seasons. There are so many reasons why this is a beneficial way to shoot.
The more you visit and revisit an area the more you get to know how it works and thinks, and the more you will get to know the characters. You will allow yourself to get familiar with the themes and subjects of the area. In addition, by the end of this exercise you will have a set of cohesive images that will work well when displayed together. Each image will play off the others.
From a technical and learning standpoint, there are a lot of advantages as well. It is common for people to walk around constantly while trying to find content to photograph, which is normal, but often waiting in the same spot or area for something to happen is a more effective strategy. Whether you are walking or waiting, the same amount of interesting moments will happen, and if you are waiting you will be better prepared to see them happen and capture them correctly.
As you visit the same area on multiple days, pay attention to the location of the sun in the sky and how it affects your images. Notice how the illumination of a scene and the appearance of your images change as you photograph into and away from the sun. Notice how the quality of light changes as a cloud moves over the sun and away again. Take the same shot twice at different times of day. Take advantage of the golden hours, as they are the most beautiful times to photograph, but don’t shy away from shooting in the harsh light of midday or at night.
2. Capture a strong facial expression or gesture

Window Glance, Broadway, SoHo
A significant percentage of the greatest street photographs have emotion to them. They make the viewer feel something. This is not by accident; it is what most likely drove the photographer to take a shot.
It is difficult to capture someone at the height of their emotion because those moments are so fast and fleeting. More importantly, if you are not actively looking for them then you will not be able to catch the moments before they disappear. Emotion does not only have to be on a subject’s face. It can be in their stride, in their posture, and in their hands.
Hint: It is much easier to capture an image like this if you pick a location and linger.
3. Capture a photo with multiple subjects

Diverse Crowd, Prince and Broadway, SoHo
Create a scene that is busy with delightful things for the viewer to explore. These photographs work extremely well because, in addition to being interesting, they give our eye more to look at, and can help the photo feel more balanced when done right. These elements don’t have to be people – they can be objects, animals, signs, or pretty much anything as long as they are balanced well in the scene.
4. Capture a small detail

Bubble, SoHo
The opposite of the last exercise is to hone in on a small detail. Make the entire photograph about some tiny detail that alludes to a larger idea or story.
In the case of the image above, I tend to view the neighborhood of SoHo as a bubble. It has turned into a shopping mall and not much of a true neighborhood anymore. This photo is my way of alluding to that.
What’s the best strategy to finding something like this? Honestly, there isn’t one except for keeping your eyes open. This tip is similar to searching for a strong expression, in that the only way to do it well is to keep your eyes open so you can see it in the first place. You will be surprised at how many of these photographic moments pass you by when you are not actively looking for them. In addition, the more time you spend in the same area the more of these types of images will pop out at you.
5. Take a street photograph without people

Shoe Store Display, SoHo
Street photography is often confused with the idea that you need candid people in the frame. This is a misconception. Street photographs are about people and culture and life, but they can just as easily be devoid of people. Some of the best and most interesting street photographs are devoid of people. Lee Friedlander was an expert at this, take a look at his work for inspiration.
6. Photograph differently

Matching Jordans, SoHo
If everyone is photographing in one direction, photograph in the other. The key to this type of work is to have fun and to create unique images that mean something to you. Create images where you live or work, where you hang out, and what you know best. Those will turn out to be the most unique and insightful images.
7. Think of an idea and figure out how to capture it

Vince Camuto, SoHo
A majority of the best street photography is spontaneous, but the more time that you spend in an area the more you will begin to think about ideas to capture. In some cases, just thinking about these ideas will make you better able to notice and capture them when they do spontaneously happen. In other situations, however, you will be able to find an area and wait for the photo you are thinking of to come along.
In the photo above, I wanted to create an image where it looked like a window display was beckoning to someone. The image of the naked man was on a loop from a video, so it took a some time for the right person to come and make eye contact at the right moment.
Bonus tip – take a ‘boring’ photo
Too often I hear people say, ‘I live in a boring area. Nothing happens here. I can’t do street photography.’ I think you can do street photography anywhere. Focus on step number five. You don’t need to live in the most fashionable area with the most people to do this type of work. Photograph suburban life. Photograph what it’s like to live in a sparse area.
If you live in a sparse area, create a sixteen image essay that explains your neighborhood. Give me a glimpse into what it’s like there. If done well, it can be just as fascinating and interesting as anything else, and it will be unique, which is the most important thing. Explore the work of William Eggleston, Stephen Shore, or Lee Friedlander, who all did a significant portion of their work in sparse areas.
For more street photography tips:
- Masters of Photography: Bruce Davidson, Master of the Subway
- In the Dark: 10 Tips for Street Night Photography
- The Master Henri Cartier-Bresson – the Decisive Moment
- 30 Street Photography Images to Inspire You
You can currently pick up 2 eBooks on Street Photography by James on sale now at SnapnDeals!
The post 7 Street Photography Tips and Exercises to Try This Season by James Maher appeared first on Digital Photography School.

Digital Photography School


You must be logged in to post a comment.