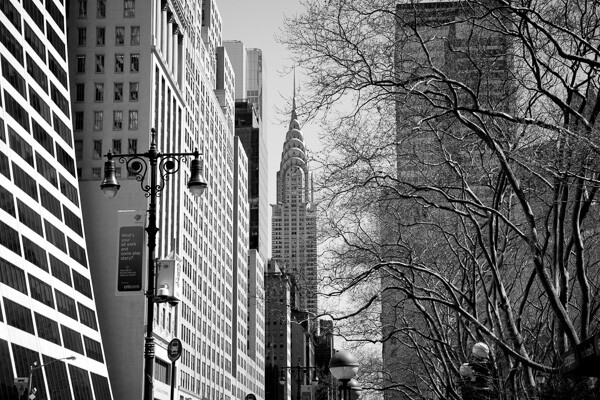
Chrysler Building
My most common critique when looking at digital images is that they look over-processed. It is so easy to do this and such a common mistake, that it is important to understand the main mistakes that photographers make when retouching their images.
Keep in mind that I am not referring to images that purposely are made to look like fairy tales or use creative color for a specific purpose, but I am referring to heavy handed post-processing when it is not necessary.
Good photographs do not make you notice the post-processing first. Good post-processing is subtle, aims to stay out of the way and not become the focal point of the image. But you need to be careful not to overdo it. With a program like Adobe Lightroom, it becomes so easy to move the sliders and increase the contrast and saturation significantly, and before you know it the image does not resemble a photograph anymore.
So here are the most common mistakes that I see when people over-process their images.
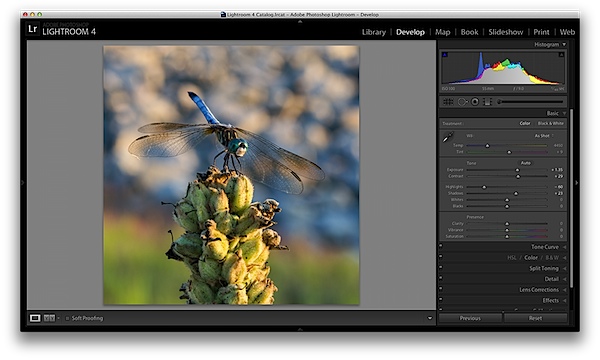
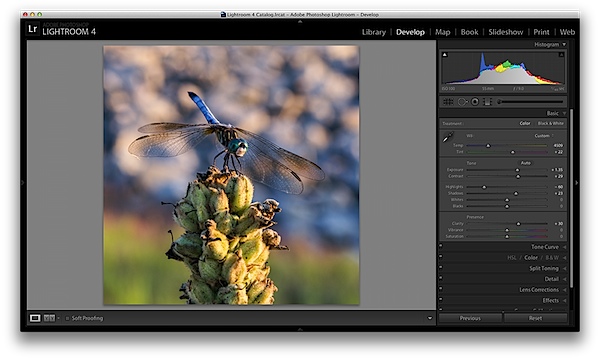
**This article is assuming that you shoot in RAW. If you don’t, I highly suggest that you do. Yes, it makes the files larger, but to get the highest quality image and have the most latitude to process your images well, it is necessary to shoot in RAW.
1. Over sharpening
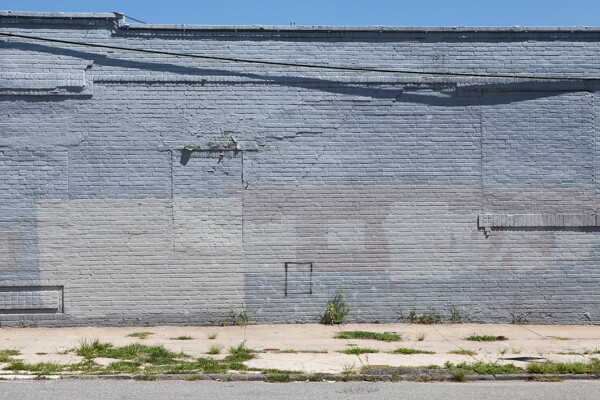
Wall, Gowanus.
Over sharpening is one of the most rampant problems for digital photographers. The reality is that most digital photographs need very little sharpening, if any. If the image is sharp when it is captured, meaning there is no handheld camera shake, the correct aperture is used, and the most important element is perfectly in focus, then you are a majority of the way there for sharpness.
You do not want the sharp areas to look like they are jumping off the print. You want them to be sharp, but more importantly you want them to look realistic. The second that your sharpening makes the photo even slightly unrealistic, then you’ve gone overboard. When in doubt, always keep in mind that it is much better to be slightly under sharpened than over sharpened. I have many images that were taken with a good digital camera and sharp lens with the perfect settings, and they don’t need any sharpening at all. None. This is not every image, but some.
Also, always make sure to sharpen your image after you have sized it to the final print size. It is a bad practice to sharpen your image and then convert it to a different size.
2. Over colorized images and heavy-handed White Balance changes
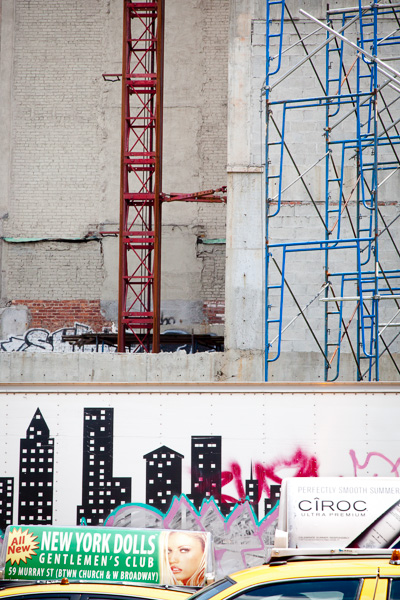
Layers of a City. Strong colors but not too strong or unrealistic.
In my opinion, color is the toughest aspect to get correct in digital photography. It takes a lot of experience to become skilled at working with color.
To be able to do good color work, it is vital to have a solid monitor and a color calibrator. You should calibrate your monitor every few weeks. If your monitor’s colors are off, then what looks good to you is not how the image will look to others when you share it on the web or when you create a print. While there are a lot of great options for monitors in every budget, I prefer the NEC SpectraView line and an X-Rite i1 Display calibrator.
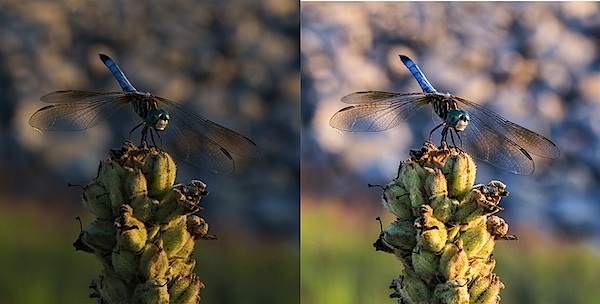
Color is subjective. I might prefer realistic and subtle colors, while another person might prefer dreamlike and surreal colors. That is fine, but always be careful about overdoing it with color. Over saturating an image might make it more noticeable at first, but it can easily look heavy-handed and fake. Always use caution when pushing the saturation slider to the plus side. Sometimes this can work when done a slight amount, especially in hazy light, but too often it will make the colors in the image look unrealistic.
In addition, some people also frequently go overboard with tinting images. It’s the Instagram effect. For instance, if all of your images have a warm or red tint, then there’s a good chance you are being too heavy-handed. This is not true for all cases, of course, but it is important to keep this in mind. Tinting, especially slightly, can be very important, but not every image should look red. Always pay attention to the White Balance of an image and fiddle with it. See how the image will look both without a tint and with one, and print out test images. This will train your eye to see color.
Also, when you do a lot of editing to an image, such as when increasing the contrast, that can make the colors look too strong. It often helps to pull back the saturation slightly in these cases.
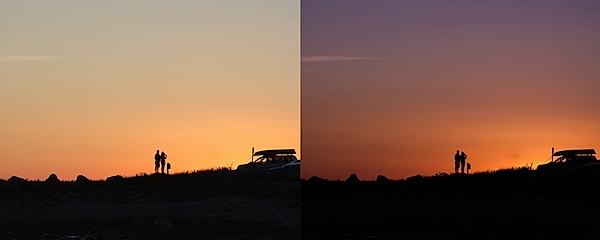
3. Too much contrast
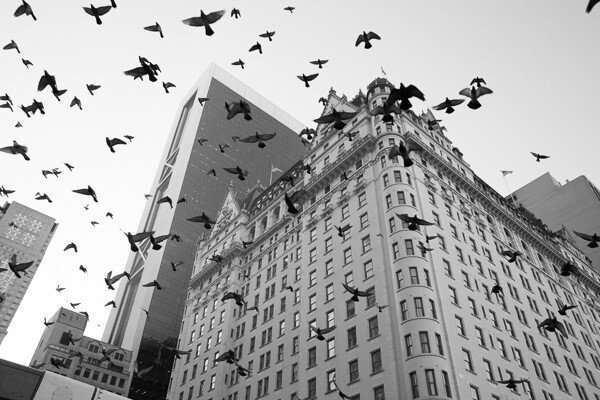
Plaza Hotel.
Most cameras will purposely capture images with flat contrast in RAW settings, so often some contrast increase is needed. However, it can be easy to overdo it and add too much contrast to your images. This is a problem that I have frequently, and I often have to catch myself and pull back the contrast.
This is another issue where balance is important. There is a very small range where the contrast is perfect. Too little and your image will look flat; too much and it will look fake. Creating images with too much contrast is a very frequent problem, especially with black and white images.
Sometimes, instead of increasing the contrast, you really just want to turn the darkest grays into black by lowering the blacks slider. You will find that this will give you the effect that you want without overdoing the general contrast of an image.
Finally, pay attention to the light sources in your image, because they will determine how much contrast is needed. If the sun is shining directly on your scene, then much less contrast will be needed, because the natural light will be providing the contrast. If the sun is behind your image, then you will often need to darken the blacks or increase the contrast, unless you want to emphasize the haziness of the scene. Shooting into the sun, then not increasing the contrast much is how many of those gorgeous, hazy engagement and wedding photographs are done.
4. Too much vignette
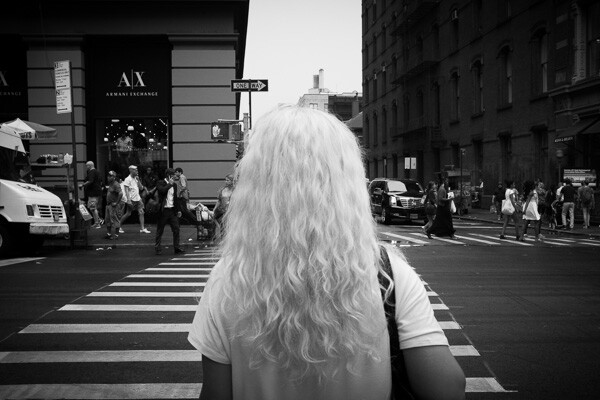
White Hair, SoHo.
I love vignettes. They can look great and be very important to keep the eyes within the scene. However, be careful about overdoing it, because it can easily look fake and over-processed. That being said, some photographers use harsh vignettes as a style and it looks fantastic, so take this tip with a grain of salt. Use it when needed, but be aware of overdoing it.
5. Not getting the photo right in the camera
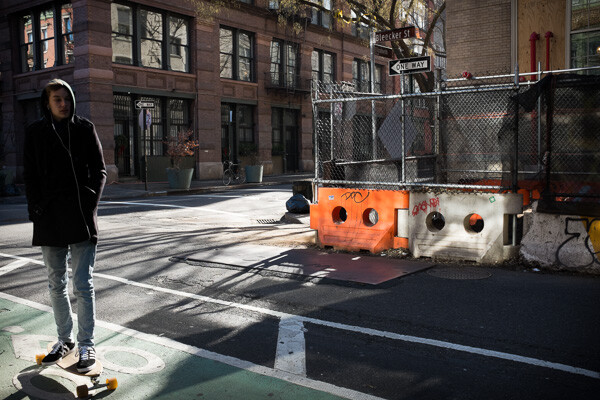
Skater, Bleecker Street
I find that the most common situations where over-processing occurs is when the image was not taken correctly in the camera. Perhaps the lighting at the time of the capture wasn’t ideal or the exposure was off. It’s easy to think you can just fix this in post-processing, and sometimes you can, but it’s hard and it’s not the same as getting it right in the camera. The image will look different if it is captured perfectly versus captured with the wrong settings and then fixed. I find that in their quest to fix poorly captured images, this is when photographers will most often get heavy handed with post-processing.
If you go out to capture the image at the right time of day, in the right lighting, and get the exposure and sharpness correct, then you will only need to do a very subtle amount of processing to get the image perfect. This is the recipe to create a gorgeous print, and while it’s not always possible, it is what you should be aiming for. It is so much easier to create a good image this way. If you are spending an hour to fix an image then most likely something was wrong with the image to start with.
True photography starts with the camera and post-processing is meant to improve the image, not fix it.
How do you feel about this topic? Are you or have you been guilty of any of these? Do you have others you’d add to this list? Please share in the comments below.
The post Are You Guilty of these 5 Over-Processing Sins? by James Maher appeared first on Digital Photography School.

 This online course by Brent Mail (recent contributor to dPS with this popular post) is all about helping you to take great photos of children.
 For the next 6 days you can pick up their Spring Drops, Italy 1970, Hot Summer and B&W Portraits preset packs to be used in CaptureOne at under half price.


 Today we’re launching a new dPS eBook that I suspect is going to give a lot of our readers hours of fun while playing with their digital cameras.


You must be logged in to post a comment.