RSS
 

Posts Tagged ‘Them’

How To Create Your Own Unique Textures and Apply Them To Your Photography

16 Jul

I would like to take you through a journey today and show you how some very ordinary looking photographs of the world around us can be combined to create some very interesting and one-of-a-kind pieces of art. Some might argue that what I’m doing is no longer considered photography, but I’d argue that everything presented within the final image was at one point captured using a camera, and therefore still falls under the category of photography albeit slightly manipulated.

The world around us is filled with textures and abstract patterns that often go overlooked in pursuit for larger more dramatic subjects. No matter what type of photographer you are and whether or not you’d go so far as to do what I’m sharing today I do think it’s worth it to spend some time learning about how to capture these kinds of images as it will help you see the world differently.

Texture-11

So What Is A Texture?

Texture in art (at least in how we’re using it today) can be defined as: the visual ”feel” of a two-dimensional work.

When I first started getting into photographing textures I wasn’t sure that it could be all that interesting. I thought that a texture had to be something very traditional like sand, or wood, or rust. I soon realized that in reality just about anything can be considered a texture if you want it to be, you just have to use it as such in your final image.

That said I do think the best textures are more abstract images with a bit of depth to them. If the image you’re using as a texture is too clearly defined then you’ll end up having a difficult time separating your texture from the subject of the image you end up applying it to.

Capturing Textures

texture2

There are simple textures like – wood, rust, paint, sand, stone – and more complex textures like – a dirt path through the woods, a canopy of a forest, a collection of flowers, the list goes on forever.

Ideas to Keep in Mind When Capturing Textures

  • Fill the Frame
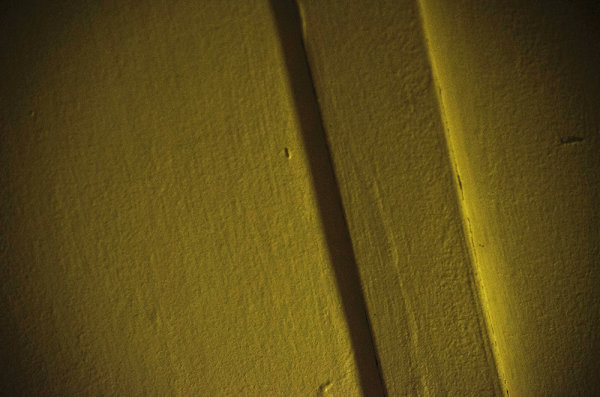
  • Look for Compositional Elements (Like the beam in the photo above)
  • Don’t rule something out just because it doesn’t look like a texture.
  • Don’t worry too much about your camera’s settings
  • Be creative

Texture-8

Creating & Using Textures in Your Workflow

The first step in the process is to take the individual textures that you’ve collected and create your own unique texture.

Texture-8

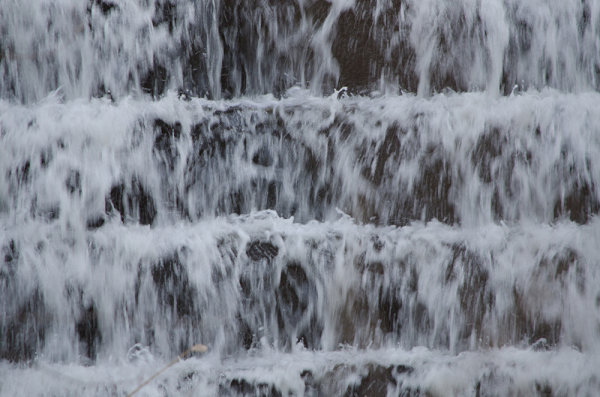
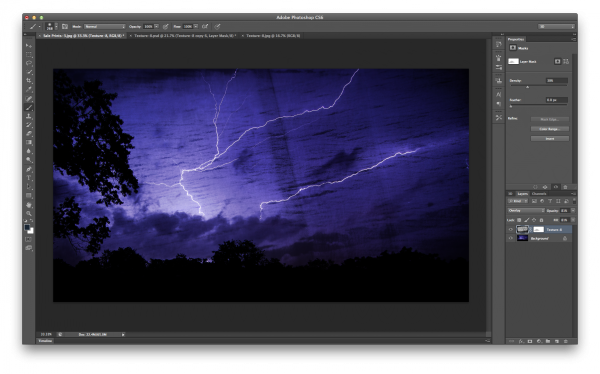
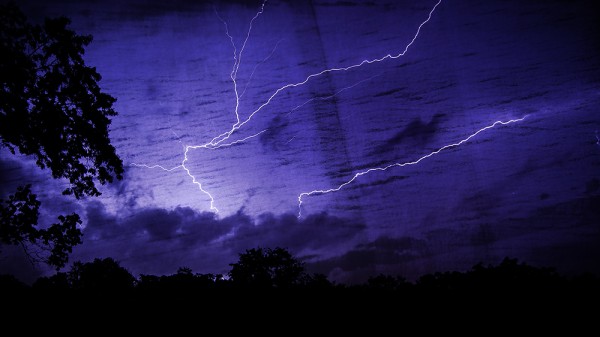
This texture is the image that I applied to the lightning bolt photo at the bottom of this post and is a combination of the three textures that you’ve already seen above (the waterfall, the ceiling and the frozen lake).

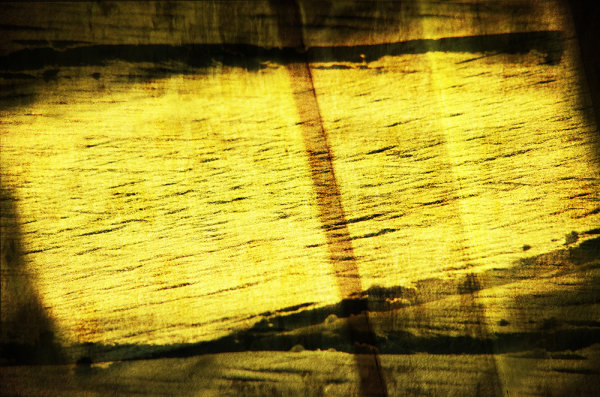
I won’t go through every step, but instead I’ll give you a general idea of how I went about creating this texture in a simple five step process that you can use as a guideline to create your own.

Screen Shot 2013-07-14 at 4.01.37 PM

Click to Enlarge

  • Bring all your textures into photoshop as different layers
  • Determine what you’d like the strongest element of your texture to be – here I choose the ceiling and placed it as the bottom layer (the background).
  • Determine if you want to duplicate any of your textures for a stronger appearance . Here I choose to duplicate the frozen lake a total of 7 times.
  • You don’t have to keep all your layers in the same orientation. Here I’ve rotated two of the frozen lake layers slightly and flipped one upside down. I then applied various layer masks and blending modes to get the final look that I wanted.
  • Play with different blending modes. I find that overlay is my go to blending mode, but subtraction and soft-light work well too. Try them all and have some fun – after all this is creative expression through experimentation!

Once I create the texture I save it as a JPEG and toss the PSD. I find that there’s no need to really save the PSD as they take up more space and if I want to change the texture in the future I’d rather just try and create something completely different than make subtle changes to one I already have. Of course you’re free to do that differently if you so choose.

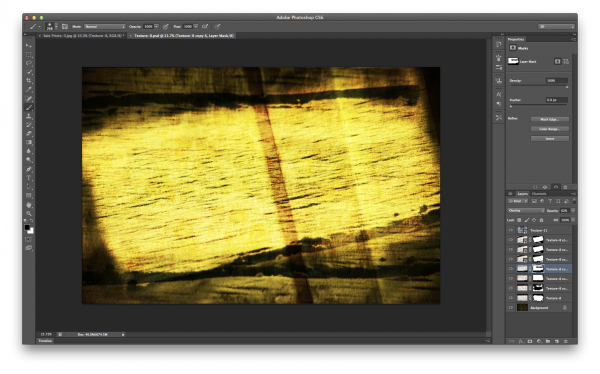
The next step is to apply our newly created texture to our subject photo and create our final piece of photographic art. To do this you pretty much do the same process as we went through above. Bring your texture and your photo into Photoshop as layers, set your photograph as the background and then blend your texture into your photograph.

Screen Shot 2013-07-14 at 4.44.02 PM

Click to Enlarge

For this photograph I dropped my texture in on top of the lightning bolt photo, popped it to an overlay and reduced the opacity slightly. I then applied a quick mask to remove some of the brightness that was created around the base of the lightning bolt, and finally converted the textured layer to black and white to let the true colors of the background layer show through.

I realize this style of processing photography isn’t for everyone and I might be pushing the limits of creativity and for some this might be too much, but I do find it fun and enjoyable to go about creating these images and I hope you’ve learned something today and maybe even got inspired to try it yourself.

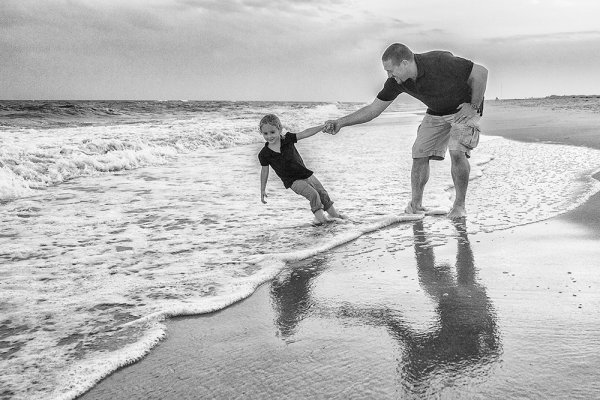
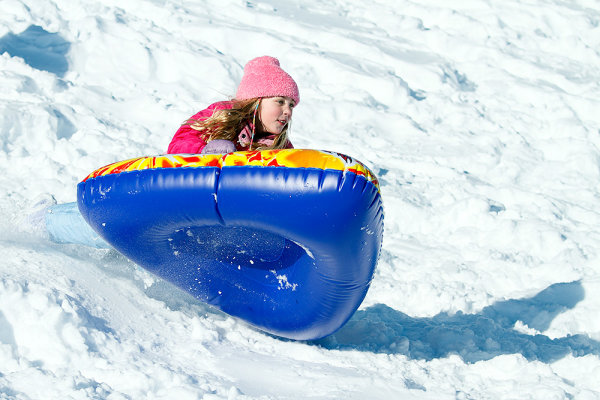
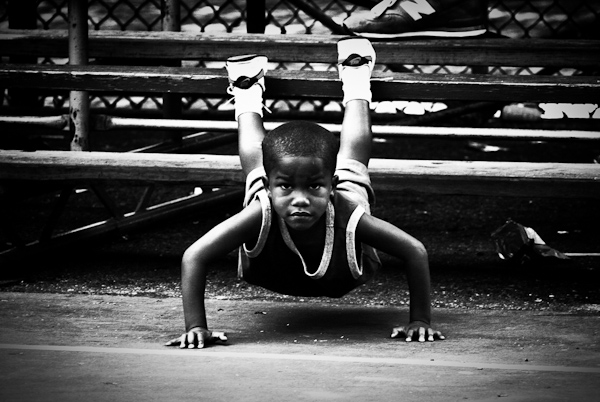
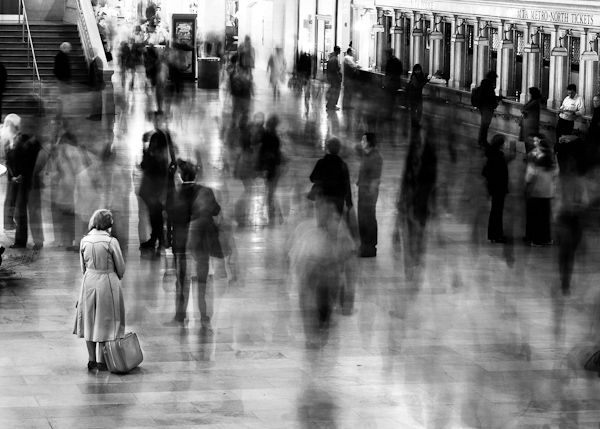
A Few Examples Before I Go

In closing I’d like to share with you a few examples of what I’ve been able to come up with so far and I hope you enjoy what I’ve created.

Some Fun with Textures

TexturedExample3

lightningtextured

Post originally from: Digital Photography Tips.

Check out our more Photography Tips at Photography Tips for Beginners, Portrait Photography Tips and Wedding Photography Tips.

How To Create Your Own Unique Textures and Apply Them To Your Photography


Digital Photography School

 
Comments Off on How To Create Your Own Unique Textures and Apply Them To Your Photography

Posted in Photography


Props Are Evil: How To Use Them For Good

21 May

A Guest Post by Lynsey Peterson.

Nothing freaks me out like props.  Every time I see a picture of flower girls holding an empty frame that is outlining a bride and groom kissing in the distance, I die a little inside.  

Whenever I am subjected to a photo that attempts to bring in a letter jacket and a football and a casual I’m-just-hanging-out-here-in-my-letter-jacket-holding-my-football expression, I try to remember that I am terrible at making coffee and therefore cannot give-up photography immediately and go get an application at Starbucks.  We have come to a place where portrait photography trends are natural and candid and while you would think that means we are leaving all props behind to die a formal, posed, and staged death, we just can’t help ourselves from wanting to put a little extra something in there.  

Something personal.  Or themed.  Or fun.  As a photographer, the logistics of getting something personal or themed or fun in an image and having it look natural are overwhelmingly complicated.  Often leading to overwhelmingly complicated images.  But if done right, a little extra something adds…….a little extra something.  Photographing people with props comes down to one basic thing: how can you make this interact with that?

Props1 1

Make it Natural

This shot doesn’t scream A PROP WAS USED HERE, though it was.  This bride did not provide me with a “must have” shot list, which of course makes her my favorite bride ever, but she had one simple request: one picture of her drinking a can of PBR in her wedding gown.  

Now admittedly when she told me that, I wanted to pass out from the biggest eye roll that has ever happened because……….how on earth was I going to pull that off?  The goal was a tongue-in-cheek stylish effort that didn’t come across as a classless snapshot.  

Had there been any posing or obvious mention of the can, it could have easily gone from sweet and funny to tasteless and tacky.  Instead it’s a near romantic take on a candid moment at a reception.  It’s rare that making a joke out of the prop or drawing obvious attention to it generates a beautiful and interesting portrait.  Since it’s already on the losing side of “one of these things is not like the other”, there is no need to point it out.

Props2 1 

Make it Different

When it comes to props in portrait photography, chances are good that it’s been done before.  So do it different.  Photography is just storytelling and a prop is just another subject in your cast of characters; how many lines it gets is totally up to you.  High school seniors tend to be the group most interested in including a prop.  Which is often sports equipment and getting creative and unposed with things like sporting equipment is not an easy task.  Step out of the intended purpose and treat it like an object.  

A soccer ball doesn’t have to go at the feet, a letter jacket doesn’t have to be worn, a lacrosse stick doesn’t have to……do whatever it is that lacrosse sticks do.  The image is about a person—the viewer knows what the intended purpose is of a practical use prop.

Props3

Make it Simple

Including a prop adds another level for the eye to process, so clean up everything else as much as you can.  A tight frame, a clean background, and minimal distractions are all your friends.  Stick with them and they won’t do you wrong.

Props4

Make it Meaningful

As props go, the easiest of the bunch are the ones people want included because they are highly personal and mean a great deal.  Wedding rings, special stuffed animals, maybe their cat (tip: avoid this one if you can).  The interaction here will be easier, so the key is highlighting the connection between the person and their special prop.  

The book in this photo was written by their great-grandmother and has obvious family importance.  Before this shot I took dozens of them just holding the book, wanting badly to document the entire cover.  Finally it dawned on me that the the story here was about kids having something so significantly personal and historic still able to generate their interest.  Great images are never about the prop, but the people it connects to and why.  

Props5 1

Make it Timeless

Props have a way of dating a photograph.  Take a moment to consider what the image you are about to take will feel like in 10 years.  Or 20.  Or 50.  If there is anything that can be changed, deleted, or moved so that in a decade this image will have every bit as much relevance as it has today, do it.  

These kids had on screen print t-shirts featuring cartoon characters that most of us likely won’t know in a few years.  T-shirts, messy faces, lollipops, and two boys makes for a complicated snapshot.  Colorful props, interaction, and sweet expressions makes for a timeless portrait.  

Props6 1

Make it make Sense

In my opinion, there is no tougher prop than a costume.  And when these sweet girls showed up in tutus at a suburban park, I had no idea how PINK TUTUS and grass and dirt were going to mix together.  Seemed a little like onion flavored ice cream.  If you take it apart piece by piece, it’s easier to vision it as a whole.  

I knew I wanted to show off the tutus full glory so the girls had to be standing.  I wanted the relationship of the sisters to play a huge role.  And I wanted it to have a feeling of magic.  Much like how I feel when I go to the park in my own pink tutu.

Props7 1

With enough creativity, almost any prop can make an image fun, personal, and interesting.  Unless someone shows up with their cat and lacrosse stick.  Then you’re on your own.

Check out more of Lynsey Peterson’s work on her website.

Post originally from: Digital Photography Tips.

Check out our more Photography Tips at Photography Tips for Beginners, Portrait Photography Tips and Wedding Photography Tips.

Props Are Evil: How To Use Them For Good


Digital Photography School

 
Comments Off on Props Are Evil: How To Use Them For Good

Posted in Photography


5 Terrifying Photography Fears and How to Overcome Them Today

15 Apr

You’re walking down the street, sleek camera in hand. As luck would have it, a photogenic girl crosses your path, stopping at the curb long enough to pull her hair back. She is silhouetted against the glowing city light; this is the perfect photographic moment. You reach for your camera, frame the shot, and…she’s gone. You didn’t hear the click Continue Reading

The post 5 Terrifying Photography Fears and How to Overcome Them Today appeared first on Photodoto.


Photodoto

 
Comments Off on 5 Terrifying Photography Fears and How to Overcome Them Today

Posted in Photography


Let Them Run Around: Photographing Children

16 Jan

The girl in this photo was like the Energizer bunny- she wouldn't sit still! This photo was taken as part of a family portrait session. The posed shots were challenging because three young children didn't want to sit still. Once we allowed her to play in the surf a little, we got much better shots of her.

I am often asked by people, “What can I do to get my children to sit for a photo?” Children can be among the most compelling of subjects to photograph, and as a professional, one of the most profitable.  But children have this odd tendency to want to move around, and not sit still.  This can at times be frustrating when looking for that perfect portrait.  To combat this, as a photographer, a change in mindset is in order. Rather than trying to force the child to sit still, try allowing the children to move around.  Let them get involved in exploring their surroundings. No, you won’t get the traditional portrait of the subject sitting in front of the camera, but you may just get something better, more natural, and more fitting with the child’s personality.

Children can sometimes be the hardest subjects to photograph because they become self conscious in front of the camera.  The worst thing I’ve ever heard a parent say to a child when being photographed is something along the lines of “Let’s see a REAL smile!”  Parents think they are helping but saying such things makes the child wonder what’s wrong with the smile they just gave, and the next one will invariably be worse.  By putting children in their own element, allowing them to explore, to play, you elicit a more natural response that shows their true personalities.

This shot was taken in the child's own home. She was shy around the camera and wouldn't sit still for me. By allowing her to roam around, talk to me, get to know me, she let her guard down, and I was able to get some candid shots of her.

One of the ways to encourage children to be themselves is to put them in a setting that they’ll want to explore. A studio setting, while great for the photographer, can be a nightmare for children.  The lighting, the stands, the backgrounds are at times intimidating and at others distracting.  If a child is going to be distracted, have them be distracted by something that will make a great picture. Often, when I am approached by people to photograph their children, I’ll suggest a setting like a beach, a park, or even their own bedroom. These types of settings put them at ease. Once they are at ease, a variety of shots, including the traditional portrait, can be captured.

Another tack to take would be to schedule the session to specifically be a play session.  In the winter, with snow on the ground, a hillside with sleds can be an ideal setting for capturing children.  Bring a couple of sleds and let them have fun! Build a snowman! Have a snowball fight! In the summer, at the beach, playing in the water and in the sand provides a wonderful glimpse into children’s personalities. A pool will work just as well. Any park setting with a jungle gym is a great starting point for a children’s session. Let them climb, let them swing, let them get dirty.

Get the kids out and let them play!  Just be sure you are ready with the camera when they do.

In the winter, a snow-covered hillside can be the perfect setting for a children's session.


Post originally from: Digital Photography Tips.

Check out our more Photography Tips at Photography Tips for Beginners, Portrait Photography Tips and Wedding Photography Tips.

Let Them Run Around: Photographing Children


Digital Photography School

 
Comments Off on Let Them Run Around: Photographing Children

Posted in Photography


WHAT EACH FUNCTION OF THE CANON T2I OR 550D DOES AND HOW TO USE THEM PART 1

03 Jan

In this tutorial I go over how to set your shutter speed,aperture,iso and white balance plus how to set a custom white balance. I also go over how auto focusing points work. I go over what each function of the dial is and what it does so you now can go out and shoot in manual now!!! I go over how to put the battery and sd card in the camera plus how to take your lens on and off the T2I 550D. If You Wish To Puches One Link Here amzn.to MY WEB SITE www.daviddimages.com MY TWITTER twitter.com SKYPE DAVIDDIMAGES FACEBOOK COMING VERY SOON!!!! AhDah by Kevin MacLeod (incompetech.com) Licensed under Creative Commons “Attribution 3.0” creativecommons.org
Video Rating: 4 / 5

Had a chance to interview Tom Howie, VP of Sales and Marketing for Glidecam at NAB last month and he was gracious enough to share, in great detail, the proper way to set-up and fine tune the Glidecam HD 2000 (or any Glidecam HD) during the interview. During the process he candidly answers questions that I’ve seen floating around the forums relating to the use of not only the Glidecam products but all similar devices. Here’s a (very 😉 rough cut of the part of the interview that directly relates to setting up, fine tuning and actually using any of the Glidecam HD units. After the setup instruction he shares some interesting tips and exercises to help us get ready to shoot successfully with the rigs. I cut a lot out and split it into 3 parts but it’s still 38 mins long (total) so grab a cup of coffee and settle back for an in depth look at the proper way to set up and start using the Glidecams according to Tom and Glidecam.. btw: Schy Gleason, our cameraman on the interview had to shoot from out in the aisle at NAB which as you might guess is not an optimum place to be at anytime. So please excuse any bounces or sudden position/focus shifts as he was constantly struggling for space. Shot in available light at ISO 640 on a Nikon D7000, GenusTech shoulder rig and Bravo follow focus. Recorded on Zoom H4N and painlessly synched with Dualeyes (Thank you Singular that was a lot of pieces to sync ;-).


How to Prevent Photo Horror Stories — 6 Scary Photo Scenarios & How to Get Through Them

25 Oct

Extra photos for bloggers: 1, 2, 3

As photographers, we plan and plan for big shoots.

But, we all have those days. The ones where that black cat that crossed our path, or we accidentally walked under a ladder.

Despite our best efforts, things can go wrong from time to time.

We’ll show you how to ward off those photoshoot nightmares. Our tips will prevent scary photo scenarios like garlic chases vampires away!

How to Prevent Photo Horror Stories

p.s. Take a peek at our Pinterest today for a chance to win a set of Tattly Temporary Camera Tattoos!

No Memory Cards, No Problem

paint-smDear Photojojo,

I booked a photoshoot, and when I got there, I realized I had forgotten ALL of my memory cards! I apologized to the client and rescheduled, but I felt like such a dummy. How do I prevent this in the future?

Love,
Forgetful in Florida

Dear Forgetful,

This happens to the best of us. Here are some simple ways to keep track of your memory!

  • Make a checklist of all necessary equipment. Leave it by your keys the night before a shoot. Check it off in the morning before you leave.
  • Stash extra memory cards in common places. Leave one in your car, a hidden pocket in your camera bag, or in your wallet. That way you’ll always have a backup!
  • Shoot tethered to your laptop! By connecting the USB cable that comes with your camera to your laptop, images will be saved onto the computer instead of a memory card. This may limit mobility, but it will prevent you from disappointing your client.

Sincerely,
Photojojo

Grain, Grain, Go Away!:

paint-sm Dear Photojojo,

I got home from a shoot only to realize I shot everything at 6400 ISO. The grain and noise is insane! What do I do?

Help!
Grim and Grainy

Dear Grim and Grainy,
Here are a few ways to enhance those grainy images.

  • You can use CameraRaw, Photoshop’s built in file converter for RAW files, to reduce noise in the image. The “filter” menu in Photoshop also has a noise reduction feature.
  • Other editing programs, such as iPhoto, Aperture, and Picassa have similar features or plug-ins you can install.
  • Only sharpen the parts of your photo that really need it. When you sharpen an image, it increases the contrast between the light and dark areas. Sharpening the whole image will increase the appearance of those noisy pixels all over. By selectively sharpening certain areas, you can minimize the grainy look.
  • You can also turn noisy color images into black and white. The grain gives it that good-old-fashioned-film feeling, and black and white takes away the distraction of colored pixels.

Keep your chin up!
Photojojo

White Balance Woes:

paint-smDear Photojojo,

All of my photos have a strange color cast. My indoor photos look orange, and outdoor ones look blue.

I’m guessing I have the wrong white balance settings? What is white balance anyway?

Is there anything I can do?
Blue in Longview

Dear Blue,

White Balance can be tricky, even for the most experienced photogs.

  • Your camera has settings to adjust for the temperature/color of light you are shooting in. Set your camera to the correct white balance while shooting, like daylight outside, and tungsten settings for indoors, to keep the color cast minimal.
  • Keep a gray card or a white balance lens cap in your camera bag for setting your white balance on location. A gray card is a neutral, 18% gray. Place the card in your scene for one shot, and remove it for your the next.
  • By doing this, you can set a custom white balance for each particular scene. Or use it when editing images on the computer later.
  • You can also correct white balance settings after the fact. With editing software like Photoshop, GIMP, or Adobe Lightroom, you can correct for a color cast.
  • If your image looks too blue, adding in yellow can help neutralize the tones. If it is too orange, adding a bit of cyan, green, and blue will make it look normal.

Yours truly,
Photojojo

Eyes Wide Shut:

paint-sm Dear Photojojo,

I photograph weddings. It never fails that during group photos, someone will blink or make a face.

Are there any tricks for getting people to keep their eyes open?

Sincerely,
Eyes Closed in Minnesota

Dear Eyes Closed,

It’s definitely hard to get everyone to look perfect at the same moment.
Here are some tips:

  • Make sure your group shot is in a nice shady place facing away from the sun. It’s even harder for people to keep their eyes open when the sun is shining in them (obvi).
  • Here’s another trick. Use a tripod, and take A LOT of photos of the same group. Numbers can work in your favor. For groups smaller than 20, divide the number of people by three if there’s good light and two if the light’s bad. That’s how many shots you need to take. Then use editing software to swap heads if someone is blinking or making a funny face in the group photo.

Happy Shooting,
Photojojo

Constant Callers:

paint-sm Dear Photojojo,

I recently did a photoshoot for a friend, and now she’s calling me everyday to check on her photos. I want to stay friends with her, but her constant calls are driving me crazy!

How do I tell her that editing takes time?

Sincerely,
Aggravated in Arizona

Dear Aggravated,

You are not alone in this situation. Try to stay positive, and remember she is just anxious to see your amazing work.

  • Remind your friend that you want to give her the best product you can, and in order to do so, you need at least a week or two.
  • If you plan to work with clients more frequently, put a section in your contract that explains the turnaround time. Let them know up front when they can expect to see the finished images.
  • Make a mini blog post on your site to give her a preview of those rad photos!
  • Email her or Instagram one pic a day until you get them all finished. She’ll be excited and check her email more than her texts.

Keep calm,
Photojojo

Cry Babies:

paint-sm Dear Photojojo,

With the Holidays coming up, I’ve started booking more sessions with kids and families.

How do I deal with children that won’t quit crying?

Sincerely,
Cranky in Connecticut

Dear Cranky,

  • How bout penciling a sweet ‘stache on that lil cutie?! Keep one of these in your camera bag and everyone will be laughing.
  • Attach a PEZ dispenser to your camera’s hot shoe to get portraits of kids with a little curiosity on their face.
  • Turn the music up, and use the ioShutter release to dance around with the little one and snap away at candid moments.
  • Another secret weapon… BUBBLES! Who can resist?

Dry those eyes,
Photojojo

Still Puzzled?:

  • Have other photo problems? Send us an email.
  • Share your photo horror story or your advice by tagging us @photojojo on Twitter and Facebook.
  • Send us a link to your favorite photo problem-solving forum!

Related posts:

  1. Halloween Photo Tips — Our Ghoulish Guide to Scary Snaps How can you not love a holiday that encourages you…
  2. Photojojo’s Guide to Scary Photo Pumpkins Live in NYC or San Francisco? Come to our Photo…
  3. Best New Photo Gifts of the Season (2 of 2) Dear friends, ’tis our final installment of photo goodies for…


Photojojo

 
Comments Off on How to Prevent Photo Horror Stories — 6 Scary Photo Scenarios & How to Get Through Them

Posted in Equipment


What Makes A Great Street Photograph and How Do We Create Them

16 Oct

This post is written by James Maher – author of The Essentials of Street Photography – an eBook currently onsale at SnapnDeals (25% off).

Pushups, Rucker Park, Harlem

Pushups, Rucker Park, Harlem.

Growing up I obsessed with basketball.

I would skip school; I would play in light rain and sometimes snow; I occasionally failed classes and always fell asleep in them.  From age 8 until 22, it’s pretty much all I did and all I wanted to do.

The best players were often reserved, relaxed, and mentally tough and focused.  The intense look in the child’s eyes above explains it all and shows how innate this mentality and focus can be.

What Makes A Great Street Photograph?

So how does this story relate to you taking a ‘great street photograph?’

I want to share with you what I have learned, because it has nothing to do with tips, tricks, or techniques. The techniques are necessary to be able to take a technically good photograph but they are not the reason why you take great photographs.

Great street photographs say something about life; they speak to us; they fill us with an emotion; or they give us insight.

They are not about light; they are not about shapes or forms; they are not about faces.  Light, shapes, and faces can only aid in the success of a photo; they cannot be the reason for it.  When you look at a great street photograph you should not leave it saying, ‘Wow that light was amazing.’  You should leave it saying, ‘Wow the emotion or story in that photograph really hit me – AND the light was amazing.’

A great street photograph is one that makes a person think or one that brings up a specific feeling, story, or idea.

For a quick example, you shouldn’t be trying to capture a face; you should be trying to capture an expression.

If Only For A Moment

If Only For A Moment.

“If Only For A Moment” – A fleeting moment with a story.  No faces, subtle blue lighting, and no spectacular forms that stop you in your tracks.  What is here is the subtle body language of the pass and that split second ‘what if’ thought going through their minds.  This photo leads you on a mental journey through all of those ‘what if’ moments in your life and youth.  It makes your heart beat.

How Do We Create Them?

So how do we create these photographs with meaning?  Aren’t we at the whims of randomness and our surroundings in street photography?

Not necessarily.

The answer to this comes back to you and it is the reason for the personal stories in this article.

Street photography is a form of self expression.  We go out and we search for the type of content that means something to us.  When we are out there we are basically photographing ourselves, and searching for people, ideas, stories, and thoughts that we relate to and want to share.

Look at the body of work of any street photographer and you will be able to get some consistent insight into their personalities and how they see the world.  They, like us, were at the whims of their surroundings and everyday randomness, yet this meaning still broke through in their work.

That is why you cannot copy another photographer’s style.  You can only learn from them and their techniques and apply them to your own way of shooting and your own personality.  Style isn’t about a look; it is about meaning.

It is about you.

Street photography is about exploring the world through our eyes and sharing the insights and stories that we see and find.  It is showing the viewer how we see and think about the world.

The best photographers are not just interested in photography; they have an interest in people, in life, in social issues or cultural issues.  They read and they explore new places and new ideas.  They are curious both about others and about themselves.  They have a good eye for design, but more importantly they have a good nose for the ideas that are floating around them.

Guess in Red

Guess in Red.

“Guess in Red.” – I grew up with a serious case of Attention Deficit Disorder, which luckily subsided as I got older.  Even simple stimulations would lead my mind way off track.  Because of this and over time, I became very sensitive to advertising and how it intrudes on our attention, because it would break mine constantly.  Walking around the streets was like a sensory overload.  It’s led me to become fascinated with advertising and their intrusive nature and influence on our lives.

Is the above photo a coincidence or is it the result of influence?

If you want to take better street photographs, figure out why you are shooting and what you want to capture from it.  What do you relate to most?  Is there a specific type of content or person you are attracted to?  Are you attracted to specific emotions or are there cultural issues that you want to show us?  There are an infinite amount of ideas that you can go out and capture.

To better understand yourself and your work, study you archives and search for themes.  Group similar photographs together.  You might notice some ideas that you had previously missed.

It’s not easy.

Think about what your personality is like and how that relates to what you see out there.   Maybe you can start by photographing a specific aspect of what life is like in your town or street.

Just because you live in an unpopulated area doesn’t mean you can’t do street photography.  Give us insight into what it’s like to live where you are.  You don’t even have to leave your home and it doesn’t matter if people are in the photographs or not.  If you live in a town without a lot of people, then perhaps out of a series of twenty images, only 5 to 7 of them should actually have people in them.  Photograph that sparseness.  Let us into your world.

I can’t think of many things that sound more interesting than that.

Waiting in Grand Central

Waiting in Grand Central.

New York is a city where there are a lot of people, a lot of stimulation, and a lot of things happening all at once.  However, it is also a very lonely city.  Living here, you feel like everyone is competing with you and that everyone is moving so fast that you can barely keep up.  This shot was my way of portraying these feelings visually.

A great street photograph is one that comes from your soul and explains how you see the world.  Light, faces, composition, and forms are all part of the recipe but they are not the reason why you click that shutter.

And you can create better street photographs by better understanding yourself and your world.

What are your thoughts about what creates a great street photograph?

This post is written by James Maher – author of The Essentials of Street Photography – an eBook currently onsale at SnapnDeals (25% off).

Post originally from: Digital Photography Tips.

Check out our more Photography Tips at Photography Tips for Beginners, Portrait Photography Tips and Wedding Photography Tips.

What Makes A Great Street Photograph and How Do We Create Them


Digital Photography School

 
Comments Off on What Makes A Great Street Photograph and How Do We Create Them

Posted in Photography


Microsoft PowerPoint 2010 – Don’t Use Keyboard Shortcuts? Remove Them From ScreenTips

16 Oct

If you prefer not to use keyboard shortcuts in PowerPoint 2010, stop showing them in the pop-up ScreenTip help.

As you move your mouse pointer over various on-screen icons and other elements in Microsoft PowerPoint 2010 and see popup ScreenTips appear, you may have noticed keyboard shortcuts shown occasionally. If you’re used to pressing CTRL + S to save a document or CTRL + P to print one, you may find these reminders useful.

However, some people rarely venture far from the mouse, preferring to click buttons, navigate menus, and never worry about memorizing combinations of letters and modifier keys. If you fall in this latter category, you may wish to ditch these shortcut reminders….

Read more at MalekTips.
New Computer and Technology Help and Tips – MalekTips.Com

 
Comments Off on Microsoft PowerPoint 2010 – Don’t Use Keyboard Shortcuts? Remove Them From ScreenTips

Posted in Technology


Google Chrome – Disable Plugins Such as Flash Unless You Want Them to Run

16 Oct

Show boxes inside Google Chrome when a Flash, Shockwave, Adobe Reader, or other plug-in wants to run, allowing you to click to play them.

If you are concerned about the privacy, security, and system stability implications of running plug-ins such as Flash and Shockwave inside Google Chrome, you may have thought about completely disabling plug-ins. Unfortunately, doing so makes some websites difficult, if not impossible, to access.

One option is to have Google Chrome show you when it wants to run a plug-in, but not actually do so, giving you the ability to selectively turn on a Flash widget, play a Shockwave game, display a PDF file with an external viewer such as Adobe Reader, etc….

Read more at MalekTips.
New Computer and Technology Help and Tips – MalekTips.Com

 
Comments Off on Google Chrome – Disable Plugins Such as Flash Unless You Want Them to Run

Posted in Technology


Ways to Redesign Flickr Groups to Make Them More Social, Addictive and Powerful

16 Oct

Flickr is currently in the process of redesigning the Groups section of their site. Initial comments by some beta testers have suggested that more emphasis will be placed on photos and less on discussion threads. I’m not a part of this new beta group, but I thought I’d share a list of ways that Flickr could improve Groups anyways. I believe that Groups represent Flickr and Yahoo’s greatest chance at making progress in social — an area increasingly being dominated by Google+, Facebook, Twitter, Instagram, Pinterest and other Yahoo social competitors.

Although I have not been as active in Groups over the past year, I’ve literally spent thousands of hours in Flickr Groups and feel like I understand how they work and their dynamics very well.

1. It cannot be overstated. The power of Groups are in the discussion threads. The power of Groups are in the discussion threads. The power of Groups are in the discussion threads. Discussion threads, positioned correctly, can be like crack. They can be terribly addictive. Flickr should be doing everything that they possibly can to push people to the discussion threads in Groups. This is how you turn a casual user into a hardcore top 1% Flickr user. If you can suck someone into the discussion threads you can get 100x the use of Flickr out of them. These are the most valuable members on Flickr. These are the biggest Flickr evangelists. These are the ones who will promote the site more than everyone else. Every design decision around groups should be made with the idea of how can we suck more users into the group discussion threads.

2. Toxic people are like cancer. Toxic people will drive people away from Flickr. Toxic people are the single biggest impediment for Flickr Groups to overcome today. The answer to protecting Flickr members from toxic people is simple. Create a more robust blocking mechanism which allows users to block each other. Online harassment that turns into real life harassment will drive even the most hardcore Flickr Group addict away from social. The best way to prevent this harassment is to allow users the ability to block each other. This seems so basic. Google got this super right a long time ago with Google+.

If I choose to block you then you should be made completely and entirely invisible on the site. Poof. Gone. Vanished. It’s not that you still can’t harass, but it makes it harder to harass someone when you are invisible to them in any profile they create that gains momentum on the site. This would encourage people to behave more civilly towards each other if such a tool existed.

Civility will help social for groups.

3. The goal for Flickr should be to create a page of discussion threads that are irresistible to me — an entire page of threads that I simply can’t help myself but click and converse. Any thread that is not of interest is a waste of space. Allowing me to mute or hide threads will ensure that I will be more social because I will see more opportunities to be social. There is no reason for me to see a thread about baseball that keeps popping to the top if I don’t care about baseball.

Muting threads also helps with trolling.

4. Flickr already has a super powerful tool that they are using in their help forum that they are not using in their Groups. If they’ve already coded it for the help forum it seems like a total non-brainer to simply port it to other Group discussions. This is the button that shows me posts that I’ve posted in. Obviously I care more about the threads that I’ve posted in than the threads that I haven’t.

5. Flickr needs to allow me to subscribe to threads that I’m particularly interested in and aggregate these threads on a single page sorted by recent activity. If you want people to be active in multiple groups (and you do, trust me) you want them to be able to easily follow the conversations that they care about in multiple groups. This does not happen today. Instead you have to go to group by group by group by group to hunt around for the conversations that you care about. Alternatively you can bookmark them all and go back and check them manually over and over and over again. You quickly tire of bookmarks because you are only interested in a Group conversation if there is new activity. Having a page to view subscribed threads could become the most powerful page for social on the web.

6. Flickr can’t fight anonymity at this point. It’s too late. Google and Facebook forced this issue early on by requiring users to use names that they are commonly known by. There would be too much of a revolt if Flickr even tried to institute anything like this. However, they can allow verified profiles. By allowing users to opt in to verified profiles they would give these accounts more credibility. Verification could be done similar to how Google used to do it by having users submit a Government ID or simply enter in a credit card number on a credit card. NOTE: I’m suggesting this be made voluntary and OPT IN. If people want to opt in, why not let them? If someone wants to keep their hackerboy6969 anonymous ID this is fine too.

7. Groups need to be promoted more heavily by Yahoo and Flickr across other sections of the site. Yahoo especially and Yahoo search especially, should be driving traffic to Group discussions. Although Yahoo probably has to talk to the boss (Bing/Microsoft) at this point to try to have any input on the search algorithm, if I were Yahoo I’d try to get multiplier algorithm weightings for public group conversations and general group pages. If someone is searching for information on a new Canon 5D Mark III, by all means, Yahoo should try to route them to a Canon Group on Flickr where they can find discussion about this. It’s relevant and invites them to be more social on a Yahoo property.

8. Group invitations should be super easy. New blood is vital to ensuring Group success. Flickr should make it as easy as possible both to invite other Flickr members to your Groups and also equally important to invite people outside of Flickr to your Groups. A Group invitation section should be made which will invite Facebook friends, people in your address book, etc. to your Group. A few years back Flickr made it actually harder to invite people to Groups. They probably did this due to criticism about people spamming Group invitations. Instead of making Group inviting harder, they should simply allow users to mute these notifications by category.

9. Flickr needs to come out with a super easy way to consume and converse in Group discussion threads on both iPhone and Android.

10. Create a +/@ mentioning system for Groups. If someone +/@ mentions me in a Group (or on a photo page discussion as well), I should receive a notification. This is smart and will invite and encourage me to respond.

Flickr Group discussion threads represent the future for social at Yahoo not just for the photo community that is Flickr. Group discussion threads represent the future for social ideally for millions of other topics. To this end, Flickr Photo Groups should be considered as much a social lab as anything for Yahoo. Thoughtful consideration should be made as to how to push this Group format out to the rest of the social web, inviting people to create and manage groups about everything from knitting to hang gliding. Yes, photos are important. Every Group should have a photography function, but the discussion threads really are the power.

By making Groups more about photos and less about discussions Yahoo squanders this important opportunity.

I also believe that Yahoo should consider hiring some people to live in Groups for a while. They should hire some super smart people who understand psychology and just have them live in Groups. Their entire job should just be to participate in Groups all day long and then thoughtfully consider how to make them more and more social.

Although Yahoo staffers are in some Groups today, I can’t think of any who are particularly hyperactive there. It’s hard to be social in Flickr Groups when you’re so busy writing code all day, but Yahoo does need some talent to really get in there and understand what they have — because today I don’t think they really do and I’m not sure there’s ever any HOPE that senior management at Yahoo will ever truly understand what they have with social in the form of the seedling that is Flickr Groups.


Thomas Hawk Digital Connection

 
Comments Off on Ways to Redesign Flickr Groups to Make Them More Social, Addictive and Powerful

Posted in Photography