RSS
 

Posts Tagged ‘Them’

Advanced Shooting Modes: What They Are and When to Use Them

06 Apr

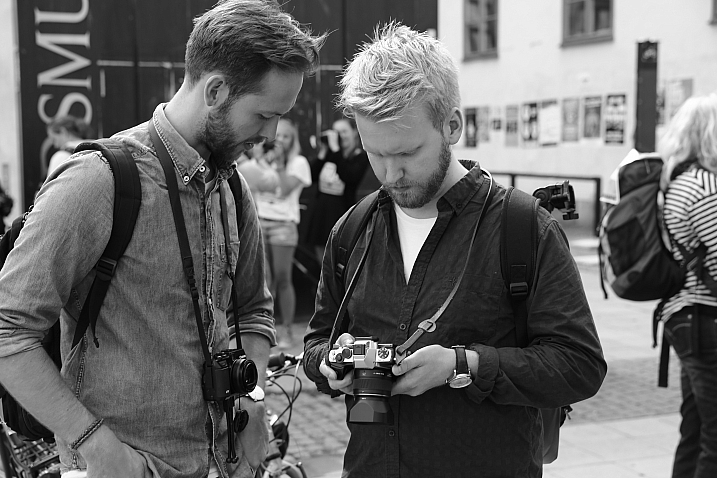
Are you ready to get off Auto? When most people get started in digital photography, the first thing they do is set the shooting mode dial on the top of the camera to Auto. It makes sense to let the camera make decisions about things while you’re just getting used to using it.

In Auto mode, the camera makes decisions not only on the Aperture, Shutter Speed, and ISO but also on many other factors such as White Balance, Focus Mode, Focus Points and Metering Mode.

After awhile, you might start to choose one of the automatic scene modes such as portrait, sports, landscape or night, if your camera has those options. This gives the camera a bit more information about what you’re shooting so it can make better decisions for you.

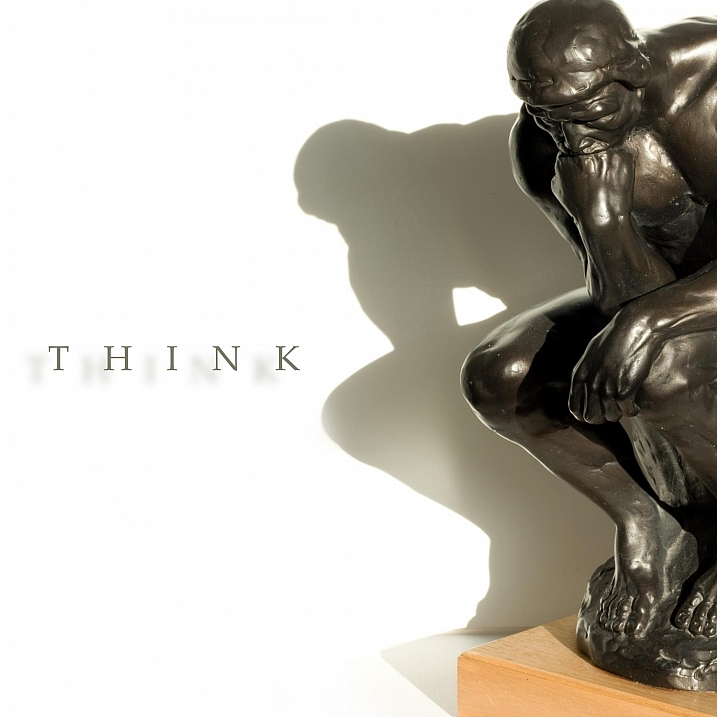
But at some point, you are going to want to take control and make those decisions for yourself. Your camera is smart, but it’s not an artist! This is where the advanced shooting modes come in.

The Exposure Triangle

Before we get into discussing advanced shooting modes, you need to understand the concept of how the exposure triangle works.

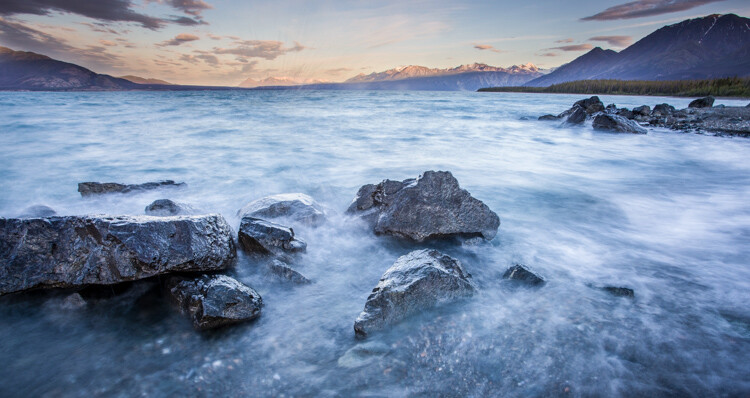
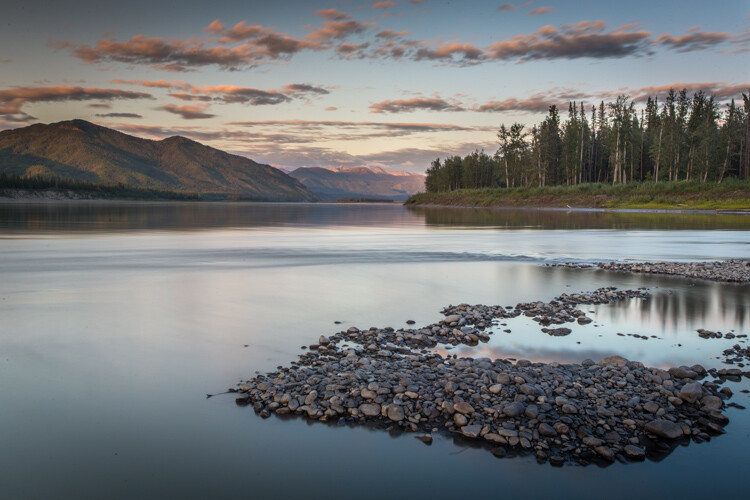
First, there is shutter speed – the length of time that the shutter is open. This is the easiest part of the triangle to understand; the longer the shutter is open, the more light comes in and hits your camera’s sensor.

The San Diego skyline by Anne McKinnell - Advanced Shooting Modes: What They Are and When to Use Them

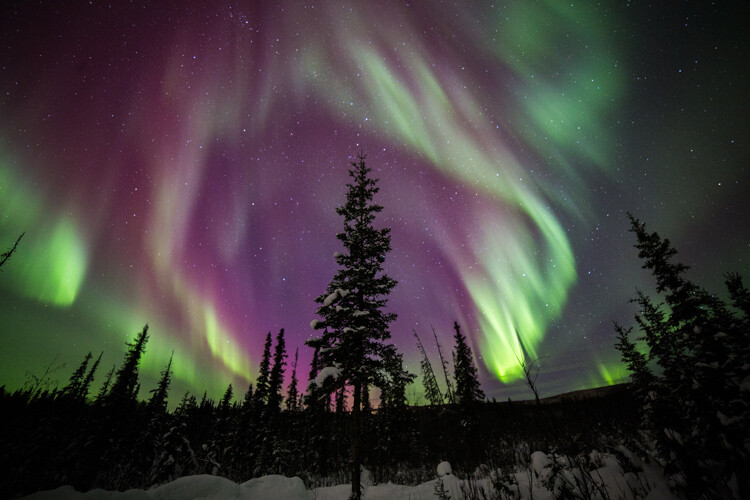
ISO 100, 24mm, f/22, 80 seconds

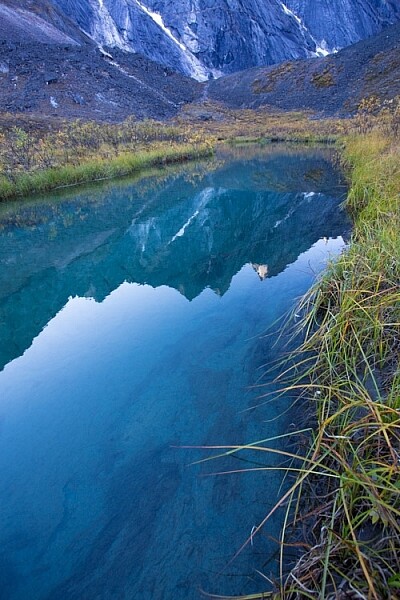
Second, there is the aperture – the variable opening in your lens through which the light passes. The opening is round and works just like the pupils in our eyes. On a bright day, you squint, making the pupil smaller to let in less light. When the light is dim, your pupil is larger to let in more light.

Generally speaking, a small aperture opening and a long shutter speed may allow the exact same amount of light in as a large aperture opening and a short shutter speed. Choosing this balance between aperture and shutter speed is the key, and your choice will depend on what you are trying to achieve with your photograph.

The third and final factor in determining exposure is ISO – the sensitivity of your camera’s sensor to light. For those of you who remember the film days, ISO is similar to ASA, the speed of the film. Essentially, it’s best to leave ISO at a low setting such as 100 (other photographers will recommend using high ISO as needed – do your own research and experiment with your camera). But if you’re in a low-light situation, you might need to increase it so that less light is required to make a good exposure.

Advanced Shooting Modes: What They Are and When to Use Them

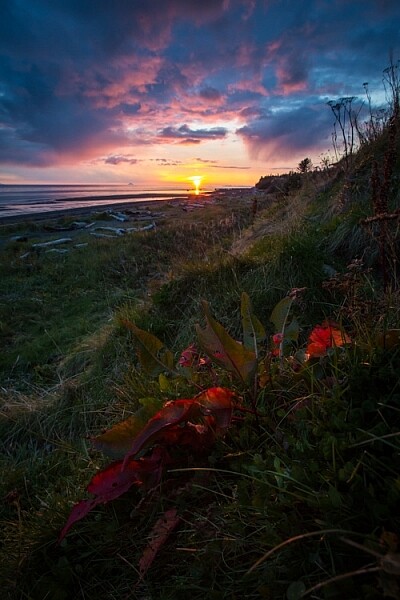
Big Bend Ranch State Park, Texas. ISO 200, 10mm, f/18, 1/10th of a second.

Advanced Shooting Modes

There are five main advanced shooting modes available on most digital cameras:

  1. P for Program Mode
  2. A or Av for Aperture Priority Mode
  3. S or Tv for Shutter Priority Mode
  4. M for Manual Mode
  5. B for Bulb Mode

Many professional photographers frown upon using anything other than Manual Mode. But I respectfully disagree. A camera is just a tool and a smart one at that! There’s nothing wrong with letting your camera do what it’s good at as long as you are controlling the factors that are important to you.

Program Mode

In Program Mode, your camera chooses the shutter speed and aperture. You can control other factors like white balance, focus mode, focus points and metering mode. Program mode is a good place to start when you’re just coming off of auto mode and learning how to use your camera settings. But it isn’t where you want to stay because aperture and shutter speed are the key to taking control of your images.

Aperture Priority Mode

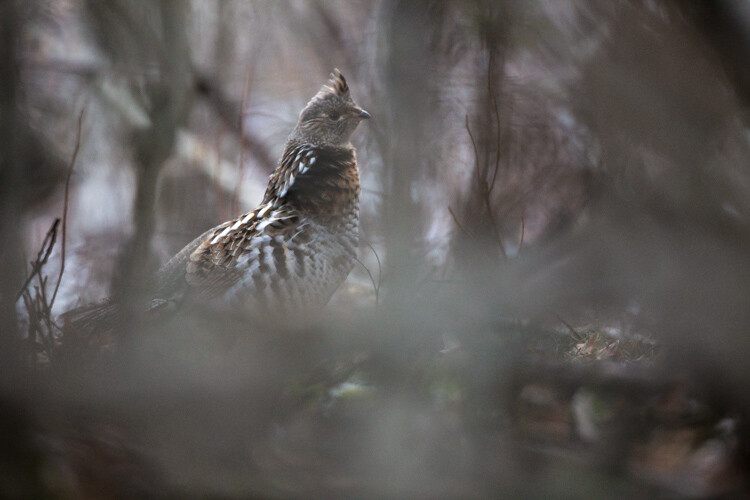
When you use Aperture Priority Mode, you tell the camera what aperture you want to use, and it will calculate the appropriate shutter speed to make a good exposure. The size of the aperture affects depth of field, which is a critical concept when you want to take creative control of your images.

When you have a very large aperture opening, such as f/2.8, you are going to have a shallow depth of field. That means that whatever you focus on will be sharp, but everything in front and behind it will be out of focus.

On the other hand, when the aperture opening is small, such as f/22, you have a large depth of field, so more things that are in front and behind your focus point will also be sharp.
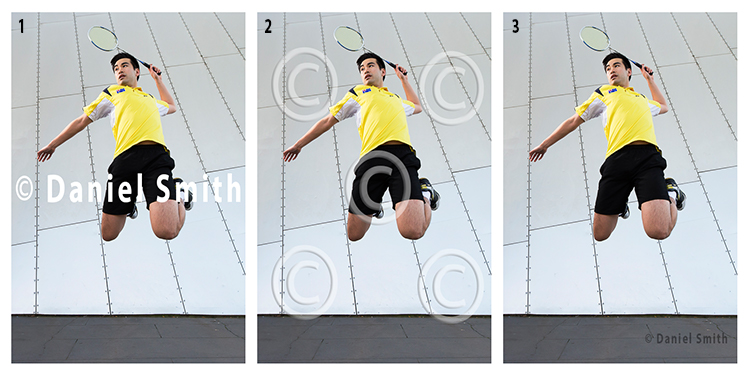
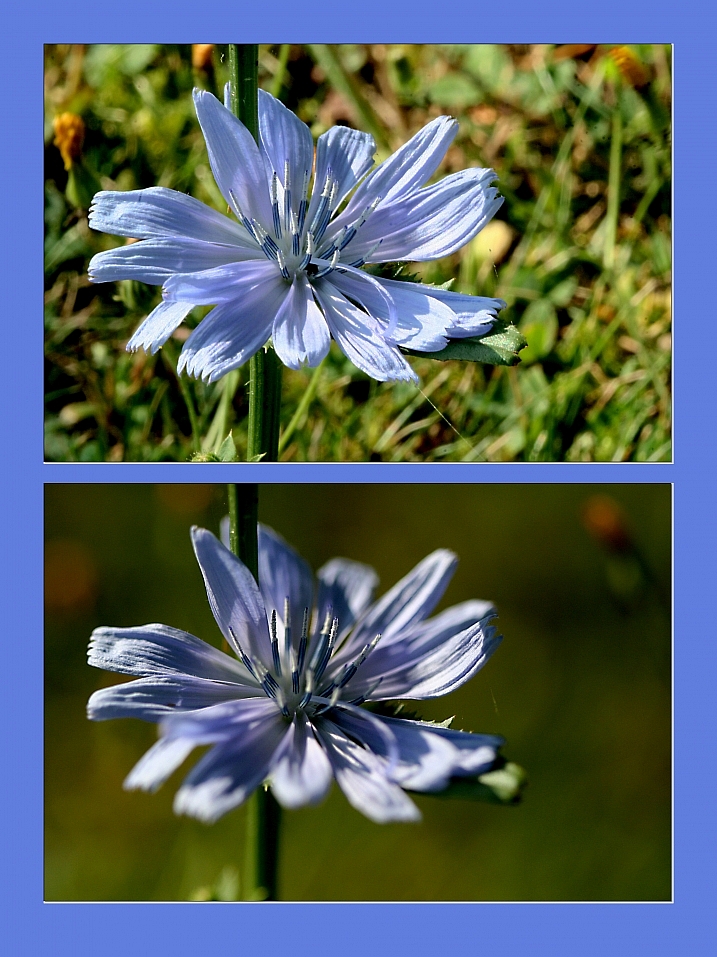
The difference between large and small apertures - Advanced Shooting Modes: What They Are and When to Use Them

Try them all

The best way to understand this is to try it out for yourself. Put your camera in Aperture Priority Mode and take the exact same photograph using each aperture setting. Then look at the photos on your computer and you’ll see the effect that aperture has on the depth of field.

What you’ll find is that photos with a large aperture have a soft background and photos with a small aperture have a background that is in focus. For me, depth of field is the most important factor in my photography, so I almost always use Aperture Priority Mode.

Organ Pipe Cactus National Monument Arizona - Advanced Shooting Modes: What They Are and When to Use Them

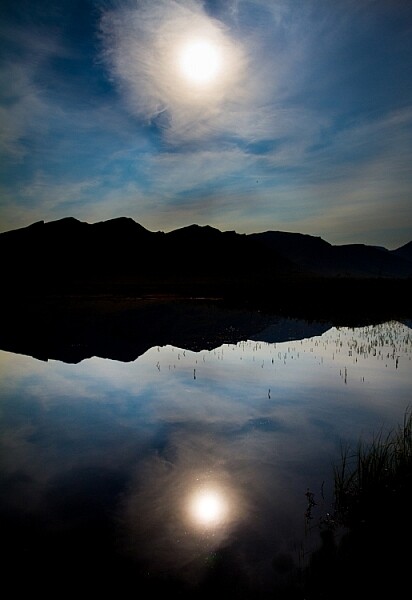
ISO 100, 33mm, f/18, 1/25th of a second. For this image, it was important to keep everything sharp from the closest cactus in the foreground to the mountains in the background. So I chose a small aperture to ensure I had good depth of field.

F-Numbers are Tricky

Before we leave this topic, there’s one thing that many people find confusing and that is the f-stop numbers. A large aperture opening is represented by a small number and a small aperture is represented by a large number. I don’t want to get into too much math here, but my trick for remembering how this works is to think of it like a fraction. 1/2 is larger than 1/8, so f/2 is a larger opening than f/8.

Shutter Priority Mode

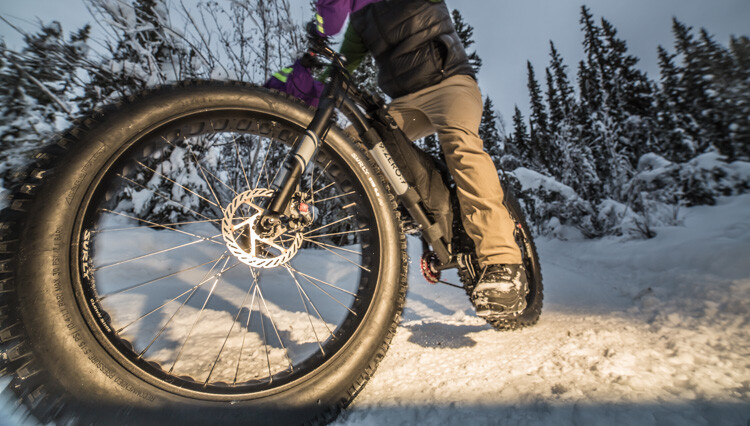
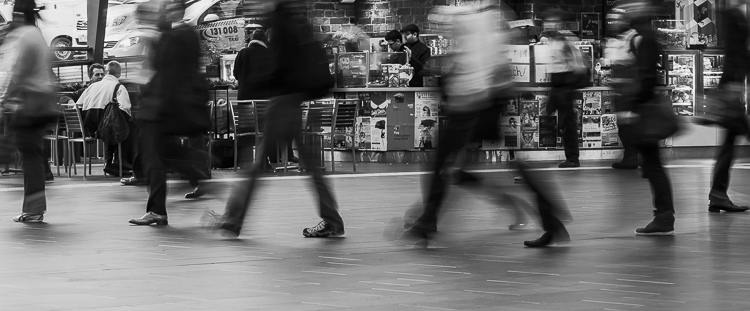
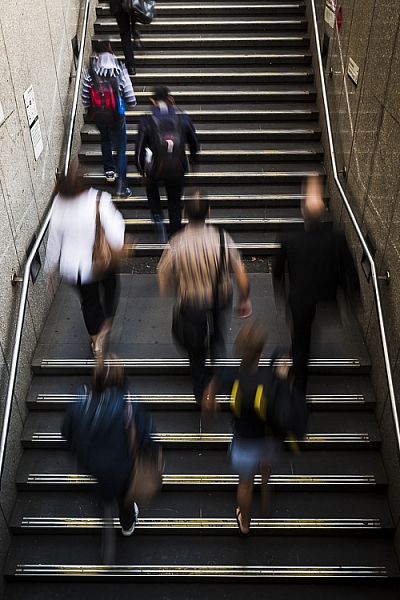
When you use Shutter Priority Mode, you tell the camera what shutter speed you want to use, and it will calculate the appropriate aperture to make a good exposure. This mode is most useful when you have moving objects in your frame and you want to either freeze the motion or blur the motion.

For example, if you are photographing a bicycle race, you probably won’t be happy with just any old shutter speed. You’ll likely want to use a relatively long exposure, such as half a second or one second, to blur the motion of the bicycles going by. Or you’ll want a fast shutter speed such as 1/500th of a second to freeze the motion. Anything in between would look out of focus.

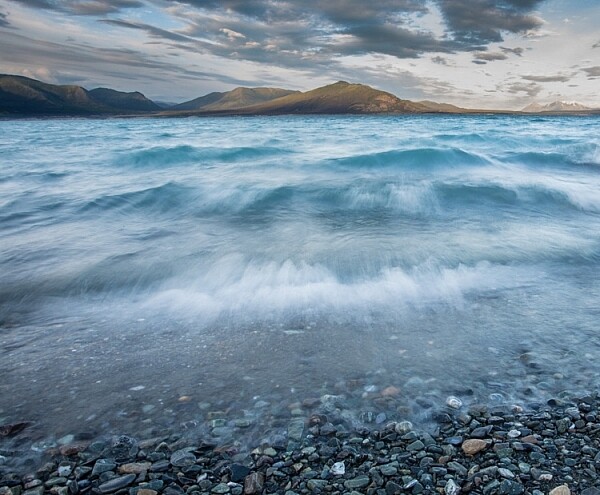
Shooting waterfalls is another good example of when to control the shutter speed for the silky water effect.

Englishman River Falls, Vancouver Island, British Columbia - Advanced Shooting Modes: What They Are and When to Use Them

ISO 100, 180mm, f/22, 1/10th of a second.

Manual Mode

When you are in Manual Mode, you must tell your camera both the aperture and the shutter speed you want to shoot at. You will use your camera’s light meter to determine whether the settings you have entered will create a good exposure, then adjust the settings based on whether you have too much or not enough light.

In Manual Mode you are in complete control and practicing with it will give you a good grasp on how aperture and shutter speed work together. Once you understand this, it may be more convenient to use either Aperture Priority Mode or Shutter Priority Mode to accomplish your goals.

Bulb Mode

Bulb Mode allows you to extend the shutter speed beyond the camera’s built-in limit, which is usually 30 seconds. You can use this mode to photograph the streaks of clouds moving across the sky, or at night to photograph star trails.

To use Bulb Mode, press the shutter button and hold it down. The shutter will open and stay opened until you release the shutter button. But of course, this method isn’t practical because you can’t just stand there holding the shutter button down for 10 minutes! Plus, having your finger touching the camera during a long exposure will cause camera shake and your photo would be blurry.

Star trails at Joshua Tree National Park, California - Advanced Shooting Modes: What They Are and When to Use Them

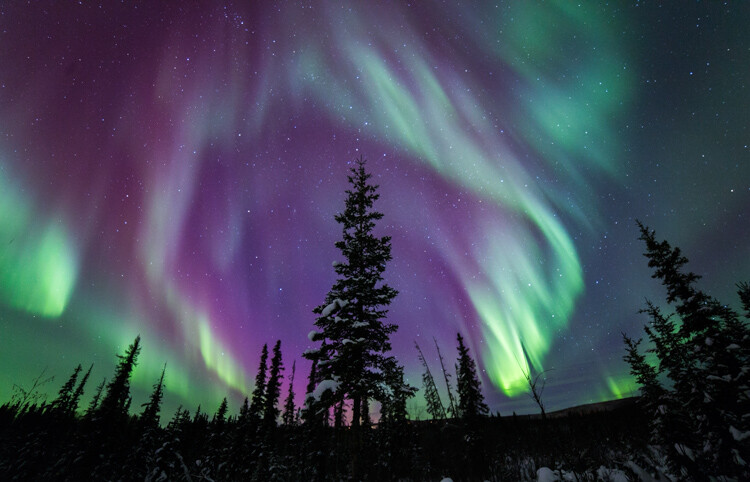
This photo was made using an intervalometer programmed to make a 7-second exposure every 15 seconds for two hours. Then all the images were stacked to create the star trails.

The best way to use Bulb Mode is to use a shutter release cable (or a remote trigger). This allows you to press the button on the cable to open the shutter and then lock it opened so you can walk away and come back later to release it. Another option, instead of using a cable release, is to use an intervalometer which will allow you to program how long you want the shutter to be opened and even program multiple shots. For example, you can set it to take a 2-second exposure every 5 minutes for an hour.

Conclusion

Remember, the camera is your tool to use any way you like to make your art. The shooting modes are just some options that are available to you so you can accomplish your creative goals. Have fun and experiment!


Shooting modes are just one of the camera settings you’ll want to master to take control of your camera and your photography. My new eBook Taking Control: Essential Camera Skills for Beginners will help you understand what all the knobs and dials on your camera do and how to use them for creative control over your images.

The post Advanced Shooting Modes: What They Are and When to Use Them by Anne McKinnell appeared first on Digital Photography School.


Digital Photography School

 
Comments Off on Advanced Shooting Modes: What They Are and When to Use Them

Posted in Photography


Ask the staff: Pick one focal length or lens to rule them all

27 Mar
Can you guess the focal length? Photo by Wenmei Hill

We handle a lot of glass in the DPReview office, but there always seems to be a handful of lenses or fixed lens cameras that everyone is extra eager to lay some paws on. Which got us thinking of a fun hypothetical: If we could only choose one lens to use for the rest of time, what would it be?

To keep things interesting, and to vary the answers, we opened the question up to include one lens in particular or one focal length. The photograph that accompanies each answer was shot with that staff member’s chosen lens or focal length. We purposely didn’t list the gear used. See if you can guess!

Carey Rose

Any guesses what focal length Carey gravitates toward?

Before I worked at DPReview, I would have immediately chosen the 35mm focal length. Now that I’ve worked at DPReview for some time, I have to say… I haven’t really changed my mind.

Splurging on a battered old D700 after college left me without enough money to pick up anything approaching a fast zoom, so I started building up a collection of affordable Nikon AF-D primes: a 50mm F1.8, a 35mm F2, an 85mm F1.8. I quickly realized that I just wasn’t a zoom guy, and the 35mm F2 was glued to my camera most of the time. A used X100 was a natural next step for a more portable setup when I scored a good deal on one.

Even today, after using lens after lens and camera after camera for review after review, the 35mm focal length remains my go-to. It doesn’t matter whether I’m headed to shoot an event, a wedding, an environmental portrait, or just strolling around when some nice light hits, it’s more likely I’ll have a 35mm lens with me than any other.

Wenmei Hill

Wenmei likes versatility. Did she choose a zoom or a prime?

I’m going to take the easy way out and pick a zoom lens rather than a single focal length. My choice is the Nikon AF-S 24-120mm F4G ED VR, and my excuse is that the majority of shooting I do (documentary lifestyle and candid portraiture) requires a flexibility that is difficult to get with a single focal length.

I’m choosing the 24-120mm even though it’s not one of my ‘favorite’ lenses because it is relatively small, lightweight and versatile enough to get the variety of shots I look for when photographing. I am able to immerse myself in a scene at 24mm but also step back for a portrait at 120mm, using the longer focal length to get pleasing bokeh and separation from the background.

Shooting it on a DX-format body gives me even more reach at the long end (180mm equivalent) for portraits. I already use this lens as my everyday lens when I don’t have a particular creative plan and want to be prepared for anything, so it’s the one I’d choose if I had to pick just one.

Dale Baskin

Dale chose a specific focal length that he didn’t always love. Can you guess what it is?

This will probably seem like I’m going for the low hanging fruit, but I would choose 35mm. I used to be a solid 50mm guy, and if I wanted to go a bit wider I switched to 28mm, skipping 35mm entirely. My shift to 35mm began in earnest when I started shooting Fujifilm’s X100 series of cameras, which have a 35mm equivalent lens.

Now, one could argue that I’m choosing 35mm because I really enjoy the camera to which it’s attached, but that’s not the case. In fact, when I first started shooting the X100 I enjoyed it despite the focal length. It was actually the one thing I didn’t care for about the camera. However, as I continued to use it, I learned to adjust my style to take advantage of the 35mm field of view. After a few months, I found myself really enjoying it, so I decided to do a little experiment: I was about to embark on a trip to Brazil and decided to shoot my entire adventure at 35mm. The idea was both exciting and scary; I knew from experience that I would be giving up some shots by not having the right lens. However, I like to travel light, and I hate carrying camera gear, so I threw down the gauntlet and accepted my own challenge.

The upshot? I had a great trip and captured a lot of memorable images. Did I miss a few shots along the way? Sure, I did. But on the flip side, I got some great photos I would have otherwise missed because I forced myself to visualize every scene at 35mm instead of mentally switching to a different focal length. Now, no matter what camera I happen to be testing, one of the first lenses I always put on the front is a 35mm (or equivalent).

Sam Spencer

Sam chose a specialty lens. This image was shot using a similar lens, albeit with a different focal length. Do you know what it is?

Forever? Forever ever? I’m sure I could do the practical thing and say ’24-70’, or be a motorsports spectator the rest of my life and say ’70-200’, but I’m weirder than that. If it was a lens for me to shoot what makes me happy for the rest of my days, it’d be the Nikon PC-E 85mm F2.8 for product, portrait, and automotive photography. The maximum magnification of 1:2 means I can get close for product, and use the tilt to either get more of the product in focus, or isolate the focal point. I like medium telephoto lenses for the narrower field of view that makes selecting a background out of a busy environment much easier, and even F2.8 can be bright enough to blur the background at 85mm. I’m a control freak, not a speed demon, so I’ll be watching eBay for a copy…

Dan Bracaglia

Dan’s image was shot with the equivalent of his favorite focal length. The image was cropped in slightly, still any ideas what he chose?

The first and only lens I’d owned for many years was a 50mm. But as my interest in photography (and other activities) grew I found myself yearning for other lenses. If you’d asked me this question when I was 16 years old and shooting a lot of skateboarding, I probably would have said a fisheye is my favorite lens. If you’d asked me again when I was 18 or 19 years old and starting to get into photojournalism, I’d probably have said 24mm. If you’d ask me when I was 24-28 years-old, and reviewing cameras for a living, all why exploring the streets of NYC/Seattle, I most likely would have said 35mm. But these days, I’ve come full circle and 50mm is my focal length of choice if I could only shoot one lens for the rest of my life.

Sometimes overlooked or seen as pedestrian, there are plenty of reasons why a normal 50mm lens is number one in my heart and bag: For starters the nifty fifty is as practical as they come. Most manufacturers make a reasonably fast, yet inexpensive 50mm equiv. Moreover, I’d argue its the most versatile focal length of them all: in a pinch it can be used for portraiture or detail shots, in the same way a tele can. And it can also be used in some capacity as a wide-angle, if you have the room to move (I’ve shot many concerts with just a 50mm, without feeling a need for something wider). And if you get a reversal ring, you can mount a nifty fifty backward and use it for macro shooting!

For years I’ve carried a Nikon 50mm F1.8 in my bag as the ultimate backup for just about anything I’m shooting: weddings, concerts, portrait sessions, travel. It’s light cheap and versatile. But these days, the lens spends as much time mounted on my camera as glass I own costing 6x as much.

Jeff Keller

Jeff chose a workhorse zoom. Can you guess which one?

Since I’m always shooting with something work-related, I don’t get to use my EOS 5D III very often. But when I do, my daily driver is the Canon EF 24-105mm F4L IS USM. Not the most exciting choice of lens, I admit, but for land- and cityscapes that I enjoy taking, it definitely fits the bill. The image stabilization works well, it focuses silently and the weatherproofing is helpful when you’re out at Snoqualmie Falls and it’s throwing mist. Naturally, not long after I bought the 24-105, the Mark II arrived, with new optics, better autofocus and new coatings to reduce lens flare and ghosting. The lens is larger and heavier than my Mark I model, which I consider a good size for its focal length and aperture.

It’s nice to see that Canon isn’t the only one offering a lens with this focal range. Sigma’s 24-105mm F4 DG OS HSM Art lens is even bigger and heavier than Canon’s Mark II version, but the build quality is excellent. And, according to DxO, it’s also a sharper lens. And did I mention that it’s a bit cheaper?

Thus, if I was stranded in a world with wonderful landscapes and cool architecture, the Sigma 24-105mm F4 Art would be permanently mounted on my 5D III.

Vladimir Bobov

Vladimir is our newest DPR team member. He makes sure the site works properly. Any guesses what focal length he chose?

I wasn’t sure whether to bother praising the 50mm focal length. I figured that it’s so common, that talking about it would be either redundant at best or boring at worst. However, sorting my photo collection by focal length showed that I took more photos with a 50mm (on a 35mm full frame camera) than with any other lens, including the more versatile zooms.

So why pick the “normal” prime for the rest of my life? Versatility and portability. It’s the perfect lens for candid portraits in a casual setting – fast enough to use in low light, and small enough to not intimidate the subject. Wide enough for full-body and group portraits, and good enough for head-and-shoulders (especially when paired with an APS-C camera). I’ve also been able to use it effectively for landscapes, close-ups, product, and food photography. So although I’d certainly miss the other focal lengths, with enough creativity and trickery, the 50 and I could live happily ever after.

Richard Butler

Richard chose a favorite lens that doesn’t yet exist. This image falls toward the tele-end of his made-up range. Can you guess what it is?

If I have to live within the constraints of reality, then I’d be tempted to say a 35mm just for its Goldilocks-like flexibility. But, it seems only fair that if I agree to be bound by an arbitrary restriction, I’m should get to relax the need to limit myself to lenses that actually exist. The problem is that I really like 35-40mm equivalent lenses but also love something around 90mm equiv. for portraiture and a lifetime seems like a long time to have to go without.

Equally, if I have a 24 or 28mm equivalent lens, I get back into the habit of ‘seeing’ wide-angle scenes and I’m sure there’s some aphorism about making one’s life spicy. This is why I’m pushing back against reality: the need for a 90mm equiv, rules out the use of a 24-70mm equiv and, over time, the limiting equivalent aperture of an 18-55mm F2.8 on APS-C would leave me frustrated. Sigma’s 18-35mm F1.8 is a work of genius that I wish were available on mirrorless systems, so I’m going to put my faith in the men and women of Aizu and trust that they’ll make me a 16-60mm F2 for APS-C mirrorless. I mean, how hard could it be?

Allison Johnson

Allison chose a specific zoom lens, can you guess which one?

Maybe a truly bold person picks a prime to shoot with for the rest of their life, but I’m going to play it safe and pick a zoom, whatever that says about me. The Olympus 12-40mm F2.8 is not the very best lens I’ve ever shot with, but it’s fairly versatile, sturdy and relatively small. It’s the right size (along with the OM-D cameras I’ve used it with) so that it’s doable to carry around all day in my purse, and I like having a fairly wide 24mm equiv. out to 80mm for a little more reach when I want it.

Really, it’s not special in any way except that it’s a solid standard zoom for a system I like. I’ve had many happy days shooting with it, including one wonderful afternoon at a defunct nuclear power plant (seriously, it was awesome). If picking a zoom makes me basic, then so be it.

Barney Britton

Any guesses what lens Barney chose?

If I was trying to impress you, and if I wasn’t such a died-in-the-wool contrarian, my choice for ‘go-to’ camera and lens would be a Nikon D810 and a 35mm lens – something good, like the Nikon 35mm F1.4 or Sigma Art 35mm F1.4, or perhaps an old ’sleeper’ favorite, like the Nikon AF-D 35mm F2, for the hipsters. If you were to ask me what focal length I use most, I’d say that probably around 90% of my photography could be achieved with a 35mm lens. If you were to ask some of my comment-thread critics on the other hand, they’d tell you that 90% of my photography could be achieved with an iPhone, or their 5-year old daughter, or their blind grandmother, or their blind grandmother’s 5 year-old iPhone, but that’s beside the point.

But I’m not trying to impress you. Which is why I’m going to cheat a little, and make a case for a zoom lens, and one that doesn’t get a lot of love in these parts – the Nikon AF-S 24-120mm F4. The current version of Nikon’s ‘street-sweeper’ do-everything zoom, it’s true that the 24-120mm isn’t the sharpest lens in Nikon’s stable, or the best-controlled when it comes to distortion, or the toughest, and all the rest. It’s a kit zoom. A pretty good kit zoom, in my opinion, but still. So why – if I had to choose only one lens – would I pick the 24-120mm? Because it just works. I know that if I go out shooting with the D810 and 24-120mm, come rain or shine (or snow, or hail, or desert dust, or any of the other nasties I’ve thrown at it) I can capture pretty much anything I might want or need to. It’s almost boring. I wish I had more of an excuse to attach other lenses, but to be honest, most of the time I just don’t. I actually sold a bunch of my Nikon glass recently, because it wasn’t getting used.

The image above was taken just after a torrential downpour last December which turned into a hail storm. The camera and lens were – like me – soaked. Could I have taken it on something better? Maybe, but I wouldn’t have wanted to risk damaging a more expensive lens in those conditions. And would it be a better picture had I done so? Or a happier memory? No.

What would you choose?

If you could only shoot with one lens, or one focal length for the rest of your life, what would you choose? Feel free to share your answer in the comments! 

Articles: Digital Photography Review (dpreview.com)

 
Comments Off on Ask the staff: Pick one focal length or lens to rule them all

Posted in Uncategorized


Catch them all: high resolution poster shows every Pentax SLR ever produced

23 Feb

Ricoh has released two posters charting the history of Pentax cameras, both in downloadable high-resolution PDF formats. These posters join the company’s existing online Pentax History website, serving as large visual aids to complement the site’s extensive product-by-product details.

The first of the two posters is dubbed the ‘Pentax Archives,’ and it shows camera models over the years starting with the Asahiflex I from 1952. Many of the cameras are accompanied by descriptions detailing the notable aspects of the model. The other poster shows every Pentax SLR from 1952 to 2017.

You can download them here:

  • Pentax Archives
  • Every Pentax SLR from 1952 to 2017

Those interested in additional information can view the brand’s history archives sorted by year, film and digital categories here.

Via: PentaxRumors

Articles: Digital Photography Review (dpreview.com)

 
Comments Off on Catch them all: high resolution poster shows every Pentax SLR ever produced

Posted in Uncategorized


The Five Most Essential Camera Settings and How to Use Them

14 Dec

Modern cameras, from phones to high-end DSLRs, are designed to make decisions for us. And for the most part, they do a pretty darn good job of it. Slap your SLR into AUTO mode and more often than not you’ll get images that are sharp with decent exposure. If you are just looking to document your world, then go for it, snap away. The drawback is that images taken in AUTO tend to look similar to one another, with a uniform depth of field and exposure. If you want to move beyond the automatic camera settings, you need to understand your camera, how to use it, and most importantly, what impact changing those settings will have on your final image. Here are five of the most essential camera settings, what they mean, and how they impact the photograph.

Five Most Essential Camera Settings

ISO

Five Most Essential Camera Settings

This night image required I use a fast shutter speed to retain detail in the flame, so I had to use a high ISO (3200). In the next detail shot, you can see the noise, in the original RAW file. (By the way, this image shows what happens when you free methane from a bubble in the ice of a frozen pond in the boreal forest, and then set it alight.)

First, the acronym ISO is terrible, because it’s basically meaningless in terms of photography. It stands for “International Standards Organization” a European non-governmental organization that makes sure industries apply the same standards. In the case of photography, they want to make sure that an 800 ISO on a Canon is the same as on a Nikon, Sony or Fuji. If that standard didn’t exist, then settings wouldn’t be applicable across camera brands. So if I set my Canon to make an image at 1/100th sec at f/2.8 and ISO 400, and you set your Nikon to the same setting, we wouldn’t get the same exposure. Thankfully all the major manufacturers do subscribe to the ISO standards.

Yeah, yeah, but what is ISO? It is the measure of the sensitivity of your camera’s digital sensor to light. The lower the number the lower the sensitivity, the higher the number the more sensitive the sensor becomes. If you are shooting in a low light situation, say a poorly lit room or a dusky evening, an ISO setting of 100 will require that more light reaches the sensor than if you were to use a setting of 400, 800, or 1600.

Five Most Essential Camera Settings ISO

Note the noise in the detail of the person’s clothing and in other shadowed areas.

Drawbacks of high ISO

So why not shoot at high ISOs all the time? Two reasons: 1. High ISOs often create digital noise on the image, (though camera sensors are getting better and better) and 2. Sometimes you may want to force a slow shutter speed, in which case you want low sensitivity to light. This may be the case when you are trying to capture blurred motion such as water, wind or to create pleasing blurs in sports photography.

  1. High ISOs often create digital noise in the image, (though camera sensors are getting better and better)
  2. Sometimes you may want to force a slow shutter speed, in which case you want low sensitivity to light. This may be the case when you are trying to capture blurred motion such as water, wind, or to create pleasing blurs in sports photography.

In short, ISO is one of the three tools you have at your disposal to manipulate your exposure.

Shutter Speed

The length of time your camera’s sensor is exposed to light is the shutter speed. Many cameras have a mechanical shutter that snaps open and closed allowing light to reach the sensor, others use a digital shutter that simply turns on the sensor for the set period of time before switching it off again. Shutter speed has a huge impact on the final image. A long shutter speed will create blur in moving subjects. As a landscape photographer, I use long shutter speeds often to blur water, expose starlight, or capture wind motion.

Five Most Essential Camera Settings

For this image, I used a 0.5 sec shutter speed to blur the waves somewhat, but retain detail.

Five Most Essential Camera Settings shutter speed

A 30-second shutter speed blurred the Yukon River in this image, into a mirror-like surface.

Short or fast shutter speeds have the effect of stopping motion. Use a shutter speed of 1/2000th of a second and the motion of a runner or a cyclist will be stopped dead.

Five Most Essential Camera Settings shutter speed

This image of a bike passing used a shutter speed of 1/500th of a second. It was just enough to be sharp overall while retaining some sense of motion in the spinning tire.

Your use of the shutter has to be thoughtful to create a good image. Think about the final image you want to create. Does it have blurred components or is it all sharp? Do you want to stop, or convey the sense of motion? Consider, experiment, then decide on your shutter speed.

Aperture

Five Most Essential Camera Settings aperture

An f-stop of f/11 at 17mm was sufficient to make the entire image, from inches in front of the lens to the cliffs in the distance, sharp.

The aperture, or f-stop, may be the most confusing aspect of photography for many photographers because it affects images in unexpected ways. Essentially, the aperture is how big the hole in the lens is. The smaller the hole, the less light is allowed in, the larger it is, the more light gets through. What often confuses people is the numbering system: the smaller the number, the larger the hole. So f/2.8 is a larger opening than f/4, f/5.6, f/8, f/11 and so on. Lenses with a wide maximum aperture (a small number like f/2) are considered “fast” meaning they are capable of allowing in more light.

But it’s not just about light, and how wide a lens can open. The aperture also affects image sharpness. Most lenses (dare I say all?) are sharper, a few stops down (called the sweet spot). A lens with a maximum aperture of f/2.8 will create a sharper image at f/8, then at f/2.8. The higher quality the lens, the less this matters, but it is noticeable on most lenses.

Five Most Essential Camera Settings aperture

A very shallow depth of field in this image brings the grouse hiding in the brush into focus while the surrounding chaos of branches blurs into a haze.

Depth of Field and application

Next, the aperture also controls the Depth of Field. The DoF is the amount of the image from close to far that is in focus. A lens, when set wide open, say f/2.8, will have less DoF than when the same lens is set to f/11.

Like shutter speed, your use of aperture should be purposeful. Have a landscape image that you want in focus from front to back? You better select a high f-stop (like f/11). How about a portrait where you want a clean, soft background but a tack-sharp eye? Then use a small f-stop (like f/2.8 or f/4) and watch that focus point.

The aperture has a direct impact on shutter speed. A large f-stop will require you to use a longer shutter speed to attain proper exposure. Just as lower f-stop, will allow you to use a fast shutter speed. These two are completely interrelated, there is no escaping it, so you NEED a strong understanding of both.

White Balance

White balance, like ISO, relates to the sensor, but in this case, it has to do with the color of the light, rather than its brightness.

Different light sources have different color tones. Our eyes often don’t detect these differences, but you can bet your camera will. Have you ever seen a photo of a home interior lit by soft-white bulbs, but including a window? Usually, the interior of the room looks natural while the light outdoors looks artificially blue. That’s white balance. The camera (or photographer) decided to use the interior light (the warm-toned bulbs) as the natural color, but then the natural light

The camera (or photographer) decided to use the interior light (the warm-toned bulbs) as the neutral color, but then the natural light outdoors appears blue. When the white balance is set wrong, the colors are off. They look too yellow, blue, or orange. When it’s correct, everything looks natural, or as our eyes detect it.

Five Most Essential Camera Settings white balance

Here is the camera’s AUTO selection for the White Balance. The colors of the aurora borealis appear too purple and yellow.

Five Most Essential Camera Settings white balance

In this version, using the same post-processing for exposure, I adjusted the white balance further into the blue range, making the colors of the lights appear more natural and pleasing.

What about Auto White Balance?

I’ve got a confession to make here. I almost always use the AUTO white balance setting on my cameras. Cameras are pretty darn good at assessing color tones and deciding on the appropriate white balance. When it does get it wrong, I can check the image on the LCD and make the correction for the next shot. Second, I shoot exclusively in RAW format which means that I can make adjustments to the white balance in the computer. I trust the image on my computer screen more than I trust the tiny LCD on the back of my camera.

That said, there are times to adjust the camera’s white balance settings. The first is if you are shooting JPEGs. That image format will not allow you to effectively adjust white balance later, so it’s got to be right in the camera. The second is when stacking images either for high contrast scenes or for panoramas. When stacking images, slight changes in color tones will make combining them into HDR or panoramas much more difficult or impossible. You can also use White Balance if you purposefully want to make an image look cool or warm, or if you are using artificial lights. (Now THAT subject warrants an article of its own…)

Be mindful of your White Balance, know what it does and how it will impact your image, then decide how, or whether to use it.

Exposure Compensation

ak-homer-109266-sunset-139

Here I used Exposure Compensation to make sure that the image was bright enough to show details in the foreground while assuring that the bright sunset in the background was not blown out.

These two images show how useful Exposure compensation can be. The image below was made in bright sunlight, but a purposeful underexposure of three stops reduced the mountains to black but retained detail in the sky, making a surreal image.

Know your camera well

Exposure Compensation is a tool you should know how to adjust without even lowering the camera from your eye. Exposure compensation allows you to very quickly, add or subtract light from an image. Too dark? Use Exposure Compensation to add a stop of light. Too bright? Exposure Compensation can quickly reduce the exposure. How it is set depends on your camera settings.

I use Aperture Priority mode most often on my camera. That means I select the aperture, and the camera decides the shutter speed. If I adjust my Exposure Compensation, the camera will retain my chosen aperture and simply adjust shutter speed up or down to get the desired exposure. If I were to use Shutter Priority, as I sometimes do, the camera will adjust the aperture. In AUTO the camera will make that decision for me.

I use Exposure compensation constantly. It is my go-to method for fine-tuning my exposure in the field. On my Canon DSLR, I can adjust it with a simple twitch of my thumb on the rear wheel of the camera. Other cameras have their Exposure Compensation controls on the front, a wheel near the shutter button, or some other system of buttons on the back. Know how your camera works, and learn to adjust this quickly and efficiently. Understanding this important tool will mean you don’t miss your chance to get the shot right when you are working in the field or studio.

Conclusion

These five camera settings are the most important things to understand on your camera. Experiment with them so you know how they affect your final image, and know how to change each quickly and without fuss. Once you do, you’ll have taken charge of your photography, and be on your way to creating purposeful images.

If you have comments or questions please share post them below.

googletag.cmd.push(function() {
tablet_slots.push( googletag.defineSlot( “/1005424/_dPSv4_tab-all-article-bottom_(300×250)”, [300, 250], “pb-ad-78623” ).addService( googletag.pubads() ) ); } );

googletag.cmd.push(function() {
mobile_slots.push( googletag.defineSlot( “/1005424/_dPSv4_mob-all-article-bottom_(300×250)”, [300, 250], “pb-ad-78158” ).addService( googletag.pubads() ) ); } );

The post The Five Most Essential Camera Settings and How to Use Them by David Shaw appeared first on Digital Photography School.


Digital Photography School

 
Comments Off on The Five Most Essential Camera Settings and How to Use Them

Posted in Photography


3 Tough Photography Client Questions and How to Answer Them

29 Aug

Ah yes, the priceless questions photographers get from their clients. If your work involves human subjects, you may occasionally feel that you’re locked in the eternal struggle of staying true to your vision, while still making your clients happy. Any of these photography client questions sound familiar:

  • Can we have all the RAW files?
  • Wouldn’t a jumping shot near this cliché tourist destination be awesome?
  • Can’t you just fix this in Photoshop?

DPS 3

While it may feel like you can only have either one or the other, I’m convinced you can have it both ways: happy, well-served clients, and a strong standard for how you shoot and share your own work. Here’s how we tackle the three tough client questions we get most often:

1 – Can you to deliver all the RAW files in the final package?

I KNOW, I KNOW, when you get this question your first instinct may be to delete their email and never respond again (or am I the only dramatic one?). But this one is an easy one to tease apart. The goal here is to get to the bottom of what the client really wants. So, before you launch into your response, ask them leading questions to find out real the root of the issue.

DPS 1

The first possibility is one of sheer numbers: Do they fear that they won’t get enough images? Are they hoping to go through them to make sure that you really did select the best ones for them? This is the time to gently explain your process to them. Explain ow you carefully cull, deliver only the best image, and spare them the misery of pawing through all the shots of their double chin or half-closed eyes.

Client education is key

Conversely, they might not even know what a RAW file actually is. Some clients think that RAW is a synonym for unedited, and want to try out their own iPhoto tricks on their images later. Now’s the time to lay down some education about the advanced programs that can open RAW files, including the fact that they require quite a bit of training to use them correctly. Normally that’s more information than the average client has ever gotten about photo editing, and they are able to reframe their question to express their needs more specifically.

DPS 5

This is also a good time to throw out the old “It’s industry standard to not provide RAW files, so that we photographers can provide you with the exact final product that is worthy of your time.” They wouldn’t walk into a chef’s kitchen and judge their work based on the raw meat in the fridge, the same holds true for their photographer.

Once you hear their concerns, and educate them through your process in a professional and kind way, most sane clients realize that asking for the RAW files just isn’t realistic.

2 – Wouldn’t this jumping shot in front of the Space Needle be awesome?

DPS 6

Okay, the late 90s jumping shots aren’t our bag either (if it is yours though, I hope the clients who ask for this are finding you!). However, we make it a firm policy to never say no to a client’s idea. Not only does it throw off the energy of the shoot, it makes the client feel that they are separated from the process of creating images; that their ideas aren’t as good as the professionals. In short, it makes them feel bad, and a subject who feels bad will never create the bomb images you want.

Always say yes client ideas

We always say yes if a client has an idea for an image that we aren’t particularly into. It lets them know they’re an integral part of the process, and encourages everyone to get creative with the shoot. Not only that, but sometimes we think a particular pose or scene isn’t going to look good, and it ends up being an awesome idea that we never would have come up with ourselves. That kind of discovery is golden. Never think that your style is so entrenched that you can’t hear new ideas, and always be ready to learn and experiment when you have clients who are in it with you.

DPS 7

All that being said, sometimes you do end up with shots that are just not you, not your look, and not something you necessarily want to represent you. Guess what? You get to choose what you share, how you blog, what your social media will show off, and how you want your portfolio to look. Deliver the client’s images with a smile, make the client happy, and share the ones you love on your own pages. There’s no rule that you have to share every image from a shoot. Select your favorites and move along.

3 – Can’t you just fix this in Photoshop?

I will be the first to admit that I’m abnormally flattered when people assume that I’m a Photoshop wizard, just because I’m the photographer. Thanks for the vote of confidence, guys.

DPS 4

However, the reality is that I am fairly abysmal at it. I would rather spend my time out shooting, than inside glued to my computer, making people look ten pounds thinner, or removing the billboard from behind the venue. Just no thank you.

So when the Photoshop question comes up, I try to manage of expectations ahead of time, as much as possible. When the parent at a wedding asks very seriously if you’ll make them look thinner, I respond with something like, “There’s absolutely no need for Photoshop on a perfect day like today. Everyone here loves you and wants to keep you just as you are. Also, no.”

If there’s an object that could easily be moved from a scene (garbage cans, a sign, trash) then I make a point to move them before shooting, so the client is aware that not everything is post-production magic.

Follow this general rule of thumb

DPS 2

Our general policy for retouching in Lightroom is that if something will not be there in two weeks (e.g. a bruise, zit, etc.) we’ll do a light erase, no problem. If there are larger things that the client requests be handled in Photshop, like the mother of the groom who insisted that I edit all the photos of her scowling in the background (you can’t make this stuff up) we let them know individually that we do have a per-image rate for Photoshopping. If they want to go ahead with it, fine by me, but it’s a friendly reminder to clients that Photoshop isn’t a magic button that photographers press behind the scenes to turn every Furbie into a Victoria’s Secret model.

Plan moving forward

The moral of the story is to be kind, ask questions, and get to the bottom of what your clients really want when they ask you these dreaded things.

Then let me know in the comments below. What questions do you dread? How do you respond to them? I’d love to hear how you tackle the tough ones.

googletag.cmd.push(function() {
tablet_slots.push( googletag.defineSlot( “/1005424/_dPSv4_tab-all-article-bottom_(300×250)”, [300, 250], “pb-ad-78623” ).addService( googletag.pubads() ) ); } );

googletag.cmd.push(function() {
mobile_slots.push( googletag.defineSlot( “/1005424/_dPSv4_mob-all-article-bottom_(300×250)”, [300, 250], “pb-ad-78158” ).addService( googletag.pubads() ) ); } );

The post 3 Tough Photography Client Questions and How to Answer Them by Laura Sullivan appeared first on Digital Photography School.


Digital Photography School

 
Comments Off on 3 Tough Photography Client Questions and How to Answer Them

Posted in Photography


6 Still Life Photography Mistakes and How to Avoid Them

28 Aug

As a beginner photographer, I still remember experimenting with random photo-shoots of colorful fruits, leave,s and flowers. Believe it or not, capturing the inanimate has always been one of our favorite pass time activities as photographers. But, not anymore! With so much demand for lively product shoots in magazines and websites, still life photography is a million dollar business today.

Capturing the still life is a very unique photographic experience. With your subject being inanimate, you get enough time to play with all the creative controls on your camera, and keep snapping until you end up with a shot to which you say – Woah! That is the perfect one.

Rikaguite 225579 compressed

Capturing still life photographs seems easy, but breathing life into those inanimate objects requires a great deal of creativity and obviously, a lot of practice. Should you mess up with the lighting and framing, it’s fairly easy to end up with an austere shot of that already dull bunch of keys. Here are the six most common mistakes that photographers make while doing still life photography.

Still Life Mistake #1 – Improper Lighting

Rule one, your subject needs to be well lit up. After-all, it is the central theme of your photo-shoot. Using natural light generally gives superb results.

In case you are shooting inside a room, you need to be a little creative with the way light falls on your subject. One of the most common mistakes is to photograph your subject under full blown artificial light sources like LEDs and fluorescent tube-lights. Why? Because such light sources add a color temperature to your subject that makes it look less natural. Moreover, they make your inanimate object look just what they are – lifeless and boring.

Rikaguite 846293 compressed

Solution

Place your subject near a natural light source, such as an open window. Get creative with the light falling on the subject. Does it look amazing when light falls on it from the side? Or does it look more attractive with light falling on it from behind? I personally find natural light from the side to look more attractive. The subtle shadows and visible details under the natural light, sparks interest in the otherwise dull object.

Rikaguite 552047 compressed 1

Another important thing to take care of is the intensity of the natural light falling on your subject. Avoid shooting it under direct sunlight. The bright sunlight may washout the otherwise delicate details and colors of your subject. As a remedy, in case you really need to shoot under broad sunlight, use a light modifier such as a soft-box (or translucent reflector) that will help produce an overcast effect, and will direct the light to softly diffuse over your subject.

Still Life Mistake #2 – A Distracting Background

Placing your subject on a backdrop full of distractions is another potential mistake in still life photographs. Your product being the central theme, deserves all the attention. Therefore, you need to ensure that the background is free from all such distractions. By this, I mean anything that shifts your attention from the main product to the backdrop behind it. For example: capturing a vase of flowers in a background of a home furniture shot.

Rikaguite 336911 compressed 1

Solution

Choose a wall that’s simple, and painted with a plain color. If your wall is not plain, use a piece of white chart paper to cover the wall, so that it doesn’t interfere with your main subject. One more tip, if you’re shooting your product over a table top, again make sure that the table is neatly covered with a white piece of cloth or paper. The main idea is to focus as much attention on your product as possible.

Still Life Mistake #3 – Not Using a Tripod

In case you need to shoot your subject with longer shutter speed, you need to make sure that you do not end up with a blurry shot. An example under this kind of setup can be a decorative indoor water fountain. You may want to use longer shutter speed to capturing the motion of the falling water. So in this case, it makes any sense to use a tripod because even a slight camera shake can result in a blurry shot.

With a tripod, you may also wish to use a wireless remote control for shutter release. This makes sure that not even the slightest of the shakes can blur your photo. Alternatively, in case you do not have a remote control shutter release, you can capture the shot by setting your camera on the 2-second timer mode.

Still Life Mistake #4 – Improper Framing

Rikaguite 534724 compressed 1

Framing your shot helps focus and arrest the attention of the viewers on your main subject. While framing the shot, determine whether the subject fills the frame in a way that draws the required attention. Utilize the rule of thirds, move around and experiment with different possible angles. You’ll definitely come up with that perfect shot.

Still Life Mistake #5 – Not Experimenting

Rikaguite 486072 compressed

Being fastidious really pays off when it comes to taking still life photographs for professional and commercial purpose. When you’ve finished setting everything up for the shoot, take a few good clicks and randomize the entire setup – shift your subject to a little different location, add something to the scene that complements the subject, use different angles and lights, try framing the shots all over again. You’ll end up with a unique piece of art each time.

Still Life Mistake #6 – Wrong Choice of Lens

Still life photography is all about creating depth, and bringing out the subject in a way that directly interacts with the viewer. How will you achieve this level of focus? By utilizing the shallow depth of field.

This works great with subjects with high levels of detail such as: flowers, leaves, and fruits. Under this kind of a setup, you will want to come closer to your subject, set the camera to AV mode (Aperture Priority), and keep the focal length as long as possible. A telephoto lens is your best bet for this kind of a setup, because the longer focal length compresses perspective, helping your subject stand out more.

Rikaguite 868377 compressed 2

This doesn’t mean that only telephoto lenses work for still life photography. If you wish to bring out, and focus on the delicate details of your subject, go ahead and shoot with a telephoto lens. On the flip side, if you wish to capture everything on your table top setup, you would be fine with a either a standard 50mm lens or a wide angle.

How do you capture the still life?

What has been your experience with still life photography? Do you have any other useful tip to share? We look forward to your thoughts and suggestions on this article.

googletag.cmd.push(function() {
tablet_slots.push( googletag.defineSlot( “/1005424/_dPSv4_tab-all-article-bottom_(300×250)”, [300, 250], “pb-ad-78623” ).addService( googletag.pubads() ) ); } );

googletag.cmd.push(function() {
mobile_slots.push( googletag.defineSlot( “/1005424/_dPSv4_mob-all-article-bottom_(300×250)”, [300, 250], “pb-ad-78158” ).addService( googletag.pubads() ) ); } );

The post 6 Still Life Photography Mistakes and How to Avoid Them by Rika Guite appeared first on Digital Photography School.


Digital Photography School

 
Comments Off on 6 Still Life Photography Mistakes and How to Avoid Them

Posted in Photography


‘Ansel made photographs, he didn’t take them’: Jeanne Adams interview

27 Aug

Ansel Adams’ name is synonymous with landscape photography, but a new interview with Adams’ daughter-in-law Jeanne reveals more about a lesser known side of his work. The long-time CEO of the Ansel Adams Gallery talks with Advancing Your Photography’s Marc Silber, discussing the legendary photographer’s portraiture and architectural imagery, and shares some stories of Adams’ interactions with his workshop participants. 

Articles: Digital Photography Review (dpreview.com)

 
Comments Off on ‘Ansel made photographs, he didn’t take them’: Jeanne Adams interview

Posted in Uncategorized


Photography: One Hobby to Rule them All

18 Aug

Fellow photographers, let’s reflect for a moment on our mutual passion for this amazing art form, and maybe even do a little bragging about it. Photography is an incredibly rewarding hobby; in fact, it’s so rewarding that I believe it to be the best hobby one could enjoy. Here are five reasons why.

IMG 1636 dps

1. Photography complements many other hobbies

If your other hobby involves any physical thing, well then, you’re able to take beautiful photos of it! Whether it’s gardening, cars, or cooking, being able to skillfully photograph the things you spend your free time doing, only enhances the pleasure you take in those activities.

IMG 6922 dps

This principle extends beyond the photographer too. My mom spends all of her free time in the summer taking care of her numerous gardens (about five different flower gardens, a vegetable garden, an herb garden, and two shade gardens). She loves to see photos of the many plants that she puts so much time and energy into cultivating (and of course I love taking them; the photo below is of a daffodil that was grown by my mom this spring).

IMG 5299 dps

2. Photographers get to beautifully capture their loved ones

Anybody with a camera tends to take a billion photos of their kids, especially while they’re so little and cute – it’s pretty much impossible not to. But only photographers are knowledgeable about window lighting, reflectors, bouncing a flash, or using fast glass to make the best photos in poor lighting situations. Especially for an active little one, it takes a photographer who knows how to take control of the camera settings to get a shot that’s not blurry.

IMG 8438 dps

Aside from the kids, folks are always grateful for the photographer in the family who takes photos during holiday gatherings and special occasions. Unless the photographer corrals everybody into a group shot, it usually doesn’t get taken. There is also the candid photos of genuine moments while families enjoy each other’s company. While selfies and food photos abound, a true photographer is more focused on the meaningful moments.

All of those everyday moments matter, especially when it comes to one’s immediate family. I’m 30 years old, but I still spend Sunday evenings over at my parent’s house for family dinner. None of my immediate family particularly likes getting photographed – but every now and then I sneak in some candids. The older I get, the more these kinds of photos are cherished.

26045993031 0e0648589a o dps

3. Photographers get to relive their magic of vacation all over again

All of the wonders that we spend our hard-earned money to see make the trip back home, packed up into a few tiny memory cards.

IMG 9719 dps

There’s no doubt that anybody with a smart phone is snapping away their entire vacation. But it takes some specialized gear to really capture the most amazing travel photographs. It also takes some post-processing knowledge to make those photos wall-worthy.

For example, wide angle lenses are crucial in capturing the majesty of a stunning landscape, or perhaps some ancient architecture. Just the right amount of HDR will really bring out a landscape, or an intense black and white conversion might be the perfect touch for an architectural shot. Photographers know how to work their digital toolkit to really make the most of those beautiful vacation memories.

9233878664 aef785d3a7 o dps

4. Photographers get to see the world from a different perspective

Photography often propels us forward into new territory, that we otherwise wouldn’t experience. If there’s any beauty to be captured, we’re willing to accept the uncomfortableness that might go along with it.

Getting up before dawn on a weekend isn’t most people’s idea of a great way to start the day, but capturing a sunrise photo makes it all worth it. Dirty hands and knees are often required for getting the perfect floral or insect shot.

IMG 9521 dps

Photography connects us with nature in ways that wouldn’t exist without our cameras. I truly believe that the heart of a photographer is just a little more wild, a little more adventurous.

6573220145 6bf98a9bf7 o dps

5. Photographers are a part of one big, awesome, online community

Whether it’s Flickr, 500px, your favorite online photography forum, or maybe even your local photography club -photographers support each other. For the most part, we are ready and willing to help, to share our process, and to share what the conditions, settings and equipment were for those really amazing shots.

IMG 5622 dps

When you go looking, there is an almost never-ending source of support and encouragement for your photography. It is one of the few creative realms where we’re able to teach one another, even if we’re separated by half the planet. And that, my fellow photographers, is quite the blessing!

Does anybody have any other perks that they love about being a photographer? I’d love to hear some more reasons why photography rocks in the comments below.

googletag.cmd.push(function() {
tablet_slots.push( googletag.defineSlot( “/1005424/_dPSv4_tab-all-article-bottom_(300×250)”, [300, 250], “pb-ad-78623” ).addService( googletag.pubads() ) ); } );

googletag.cmd.push(function() {
mobile_slots.push( googletag.defineSlot( “/1005424/_dPSv4_mob-all-article-bottom_(300×250)”, [300, 250], “pb-ad-78158” ).addService( googletag.pubads() ) ); } );

The post Photography: One Hobby to Rule them All by Matt Robinson appeared first on Digital Photography School.


Digital Photography School

 
Comments Off on Photography: One Hobby to Rule them All

Posted in Photography


The Good, The Bad, and the Ugly of Watermarks and When and How to Use Them Effectively

20 May

When going out and photographing you put your heart and soul in to capturing that special moment, and later, you may pay great care and attention to finishing the image off in post-processing. You are so proud of the results you simply cannot wait to share it online, or add to your portfolio on your website!

One of the most popular practices amongst many photographers is the humble watermark; an opaque logo or text layered on top of an image. But is watermarking really necessary to protect your images – and is it really beneficial, or does it just get in the way?

Image 3

For the benefit, if are unfamiliar with what a watermark is, it is placing a logo or text  (or a combination of the two) with a reduced opacity over the main image. So why watermark in the first place?

Don’t know how to make a watermark? Check out: How to Watermarking Images With Photoshop and Lightroom.

What do watermarks do?

Watermarks prevent, or reduce the chance, of your images being stolen or used without your permission.

You’ve worked very hard – from capturing the image to editing it, and the last thing you want is for somebody to use your image without your permission; especially if it’s for the their financial gain. You would also like to have control over who uses your image. Many people believe that by adding a watermark to their images it will stop people, or at the very least deter them, from using their images without permission.

However, there is no real proof that a watermark does indeed reduce this from happening at all. It’s now all too easy to crop a watermark out of an image, or for the more savvy, clone it out altogether. Some thieves may not even bother with any of that; they may just simply take the image, with or without a watermark, and use it. The truth that is once your images are online, you cannot stop your images from being used without your permission – watermark or no watermark.

 A watermark on your work looks professional

This is a yes, and no answer. A good watermark can, in a very loose sense, look professional. However, the vast majority of watermarks – at least the ones I’ve seen – bring the level of professionalism right down. They are either simply too big, too distracting, have too much going on, or are poorly designed. They can even be a mix of all those things. A bad watermark can quickly degrade even the best image.

If you’ve decided that you still wish to watermark your work, here’s a quick example of bad, and good watermarks.

Watermarks

Example 1 (above left)

The watermark in the first example here has no reduced opacity, and is also straight across the middle of the image. By having it in that position, it is obstructing the view of the subject. In addition, it is also far too large. This would count as a bad example of a watermark.

Example 2 (above middle)

In this example, the opacity of the watermark has been reduced, which helps the image behind show through more than the first example. However, the watermark covers the entire image. The design is also quite generic which is okay for a stock website, where the images might be sold. But for a personal watermark, it looks too plain.

Example 3 (above right)

This is how a watermark should look; it’s small and discrete. It won’t stop people from stealing the image as it could easily be cloned out. However, if you wanted to try and prevent theft, this watermark could be placed closer to the main subject.

Generally, a watermark should:

  • Be small and monochromatic – or have very little color. Large, colored watermarks, detract from the image as they can compete with the subject too much.
  • Be placed in a descreet area of the image that does not interfere with the view of the image, but will make it more difficult to remove or clone out.
  • Have limited text
  • If the watermark is small, then having text will be all but near impossible to read

When and where to watermark

Watermarks can have their place on images. Although, they should not be on every image that you post online. Social media platforms, such as Facebook and Pinterest for example, could benefit with a subtle watermark on your images. In this case, if other users do share your photo, you can at least get a little exposure, provided they do not crop the watermark out.

Another instance where a watermark could be of benefit, is when you are showing images to someone as proofs or previews; perhaps after a wedding, or a model photoshoot for example. In those cases, the watermark could say SAMPLE or PROOF; something to make it known that those images are not the final product. In this scenario, the watermark is not intended to stop the unauthorized use of the images – rather it is there to make it known that, if these images are used, they are not the final product.

On the other hand, if you have a website that you use to show off your work, or even to potential clients as a portfolio, watermarking your images will not be of great benefit, as they generally do not look that professional.

Image 1

Conclusion

I am of the opinion that watermarks are used all too often nowadays, by photographers who want to get their name out there and prevent the theft or unauthorized use of their work, which is perfectly understandable. However, I believe that in most cases, a watermark does not add any significant purpose to your work. A watermark does not stop anyone from stealing your image, nor can it guarantee that your name will gain greater exposure if your images are shared. Rather, watermarks only degrade the quality of your work as they are most often not designed correctly, and are an obstruction to your image.

The only way that you can guarantee that your work will not be stolen, or used without your permission at all, is to never post or upload your images anywhere on the internet.

I enjoy sharing my work on the internet. But likewise, I like to share work that people can enjoy without the degrading distraction that a watermark provides. What are your thoughts? Do you use watermarks? Please share your thoughts and opinions in the comments below.

Image 2

googletag.cmd.push(function() {
tablet_slots.push( googletag.defineSlot( “/1005424/_dPSv4_tab-all-article-bottom_(300×250)”, [300, 250], “pb-ad-78623” ).addService( googletag.pubads() ) ); } );

googletag.cmd.push(function() {
mobile_slots.push( googletag.defineSlot( “/1005424/_dPSv4_mob-all-article-bottom_(300×250)”, [300, 250], “pb-ad-78158” ).addService( googletag.pubads() ) ); } );

The post The Good, The Bad, and the Ugly of Watermarks and When and How to Use Them Effectively by Daniel Smith appeared first on Digital Photography School.


Digital Photography School

 
Comments Off on The Good, The Bad, and the Ugly of Watermarks and When and How to Use Them Effectively

Posted in Photography


4 Things You Can Learn From Film and How to Apply Them to Your Digital Photography

15 Apr

Since the introduction of digital cameras, photography is becoming more and more popular amongst everyone. This is largely due to the fact digital has dramatically reduced the cost of taking photos, as they no longer required to be developed, and the recording media (SD or CF cards) can be reused. Another fantastic advantage of digital, is the instant replay it gives you of the photo just taken, giving you the option to correct any flaws in the image. This is something that could not be done with film, and each photo taken would cost money; regardless of how great it was, or was not.

Digital Film

Digital technology has come so far in the last several years that it is out-performing film on almost every level; for example, camera’s can now go up to ISO 3.2 million – an ASA (film equivalent to ISO) level that was never even considered during the films days.

But does this mean that film is useless, and has nothing to offer? Absolutely not. Regardless of whether film is making some sort of a resurgence or not, there are still many things that film can teach you about photography, that digital simply cannot. Here are some thing that shooting with film can teach you better than what digital capture can do:

1. SELF CONFIDENCE

With the immediacy of the feedback that digital cameras provide you, it is all too easy and tempting to continually check your camera’s LCD to see how your photo has turned out. This tendency to keep looking at the LCD is often referred to as chimping. You may chimp for various reasons, ranging from ensuring your photo is correctly exposed (the most common reason), in focus, or seeking self-gratification that you’ve done a good job.

Now, imagine you were photographing with film. You would not be able to see your photos straight away; you’d have to wait a week or even two! You would not be able to see if the photo was correctly exposed, or pat yourself on the back about getting a great frame – at least not right away!

Film taught photographers to read the light and tones within their environment, and to learn how to use their tools correctly. This built confidence within photographers to trust in their own abilities and decisions. It meant that photographers would worry less about receiving positive reassurance on the photo they’d just taken; they knew that they had exposed and focussed correctly and kept going. There was no ,”Hold on, I’ll just check to make sure your wedding dress is correctly exposed”, or “I missed that shot because I was checking my exposure.”

Fredrik Holmberg

By Fredrik Holmberg

So why is chimping a bad habit? Because it says that you are not that confident in your own abilities and judgement, and you need the constant reassurance that you are doing a good job. It results in you potentially missing a great opportunity for a photograph, as your attention has now shifted from your subject to your camera. Wedding, sport, and action photographers may miss a critical moment, a defining moment, if they are always looking at their screen. If you’re looking at your screen, you’re not ready for the moment and you most certainly are not taking photos.

For portrait photographers, taking your camera way from your eye breaks that connection between yourself and your subject. It also says that you’re more interested in the result than you are them.

Apply this to your digital photography

To increase your confidence in your own abilities, I challenge you to only look at your LCD once or twice the next time you’re out photographing. These times should really only be to help you achieve the exposure you wish. If the lighting conditions are consistent, there is no reason you should need to look at your LCD again.

2. PUSH YOURSELF MORE

All too often you may see an outstanding result on the back of your camera. You stop taking photos because you are convinced that it cannot be bettered; only to see your friend take a better image right next to you. The instant replay of your work on the back of your camera can often prevent you from pushing yourself just that little bit further, and getting that great shot. That instant replay didn’t exist on film cameras, so photographers didn’t know if they had “the shot” or not; they had to keep pushing themselves to ensure that they did get it.

Calvinnivlac

By calvinnivlac

If you’re tempted to keep looking at your screen, I’d encourage you to turn preview or replay to off in your camera menu. If you are still tempted to press play and have a sneaky peek, tape a little piece of paper or card over the screen so you cannot see the image.

Apply this to your digital photography

Do not be tempted to keep looking at your screen, and being satisfied with what you see after the first one or two frames. Keep going. Perhaps you could try different angles, settings, lighting etc., but you should always keep pushing a little further to get a better shot. Even if it is just three or four additional frames.

3. YOU THINK MORE

Taking a photo with digital cameras costs nothing; just the minuscule amount of electricity the camera needs to operate and a little bit of storage. Memory cards can hold thousands of photos – far more than the 36-exposure roll of film. But that limitation of 36 exposures can teach you something that digital cannot – discipline.

John Goode

By John Goode

Think about the last time you went out taking photos. How many did you come back with? I would bet that you might have hundreds of photos to go through, maybe even thousands. Now, divide that number by 36. That’s how many rolls of film you went through. When you have such a limited number of exposures until you have to change your roll (which takes a lot more time than switching memory cards, by the way), you don’t just take photos every time you see something you like. You look at the subject or scene and consider it more carefully. In doing this, you evaluate if it is indeed worth taking a photo of or not.

Apply this to your digital photography

Try shooting with a smaller memory card like 1gb, or even smaller if you can find some old cards. Limit yourself to 36 shots per day or per outing. Do not delete images as you go, only fill the card or your limit of shots and no more. It will help you be more intentional with your shooting. If you are always deleting images, that defeats the purpose of having a smaller card!

4. GREATER VARIETY IN YOUR WORK

Have you ever gone through photos that you’ve taken and realized that you took so many images of the same thing, with little or no difference between many of them? Do you find it boring going through your photos sometimes because there is such little variation in so many images? With film, each frame cost more money than digital, so photographers made each frame count.

Phil

By Phil

Apply this to your digital photography

Do you really need 10 photos of the same object, from the same angle? No, you don’t – those 10 frames are all the same, so therefore are really just one photo taken ten times. You can still have 10 photos of the same subject, but vary them; try different angles, focal length, exposures. Even try photographing it with a different lens (wide angle versus telephoto). Make each frame different to the next, and make each frame count. Not all the images will work out, but you will have much more variety in your work from the same number of subjects. It will also help you greatly in the future when deciding on what approach to take for your next subject.

Summary

So there you have it, some simple and practical things that shooting with film can teach you better than digital. If you have a film camera laying about collecting dust, why not pick it up, put a fresh roll of film in (extra points if you shoot on slide film) and start using it? It will be quite a strange sensation using a film camera and the the images you take may not be that fantastic to start. Should you stick with it, it will help you on your journey to improving you photography and in my experience, nothing is more satisfying that nailing a photo on film over digital.

googletag.cmd.push(function() {
tablet_slots.push( googletag.defineSlot( “/1005424/_dPSv4_tab-all-article-bottom_(300×250)”, [300, 250], “pb-ad-78623” ).addService( googletag.pubads() ) ); } );

googletag.cmd.push(function() {
mobile_slots.push( googletag.defineSlot( “/1005424/_dPSv4_mob-all-article-bottom_(300×250)”, [300, 250], “pb-ad-78158” ).addService( googletag.pubads() ) ); } );

The post 4 Things You Can Learn From Film and How to Apply Them to Your Digital Photography by Daniel Smith appeared first on Digital Photography School.


Digital Photography School

 
Comments Off on 4 Things You Can Learn From Film and How to Apply Them to Your Digital Photography

Posted in Photography