RSS
 

Posts Tagged ‘Than’

6 Ways to Take WOW Photos in Less Than an Hour

08 Sep

If you’re like most photographers, nothing gets you more excited than a new tip or trick that can help you make your photographs more awe inspiring. The problem is that a lot of these processes can take some time to learn and execute correctly. Pretty quickly you realize that it may take you more than a few tries to master the new technique to become a better photographer.

IMG_6179

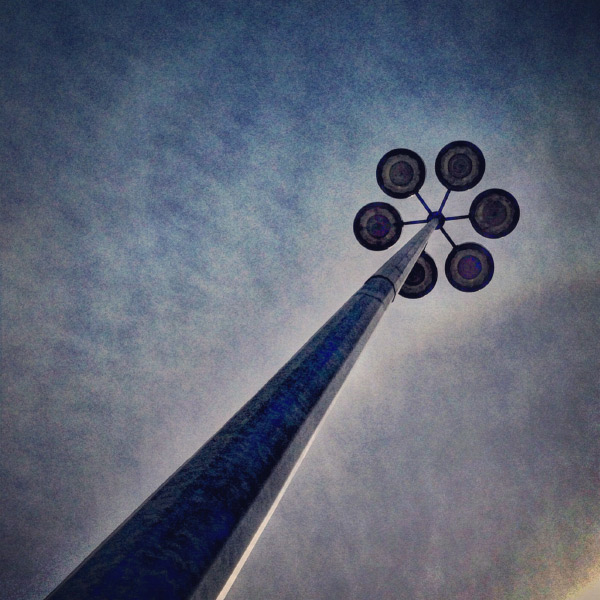
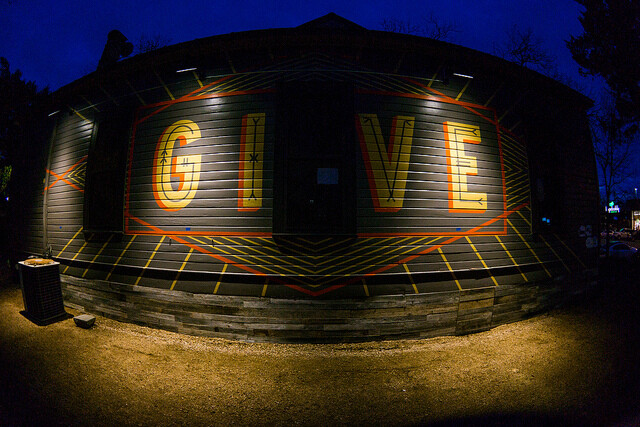
A mundane parking lot light stand can become something wondrous.

You’re also busy with more than just photography to take care of, and with instant gratification pervading all aspects of our lives, who wouldn’t appreciate a few SIMPLE photo strategies that provide immediate results?

Forget about aperture and shutter speed, focal length, ISO, and all the technical stuff for now. If you use the techniques in this article, alone, or mix and match, I guarantee you’ll learn how to take WOW photos in less than an hour. I use my “Snapshots to WOW Shots” process with many of my photography classes, from grade one kids who’ve never seen a camera before, to seasoned professionals who need to inject a quick fix into their  photographic repertoire. It works for everyone, guaranteed. Give it a try!

Method One: Bird’s Eye View

In our day to day lives we see the world from a height of about five to six feet. To create a WOW shot you need to alter that perspective. Show your viewers a point of view they don’t normally see. Just about any subject can be transformed into a WOW if you shoot it with your camera pointing straight down. This is what is called the bird’s eye view.

IMG_3957.Wjpg

Looking straight down on antique silverware – a different point of view.

IMG_4813W

Shot by one of my grade 4 students – atop the play structure, pointing the camera straight down. 

Picture-197W

A crazy abstract shot looking down at colored pages in a binder.

Picture-366

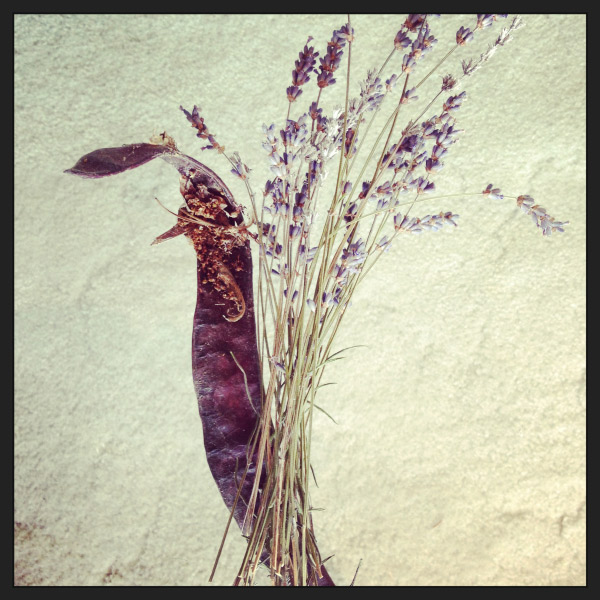
An herbal still life shot through a glass coffee table, straight down.

Method Two: Worms Eye View

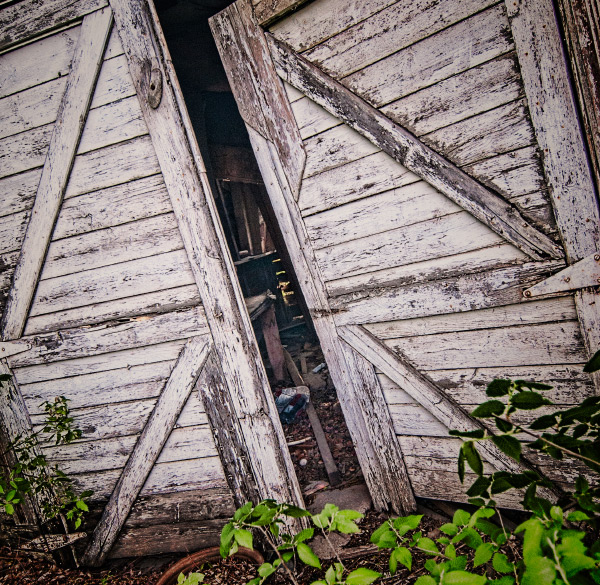
Similarly, not too many of us spend our days down on the ground. So shoot from a very low angle, and point your camera up, or just explore the world from the point of view of a worm (down on your belly!) and mundane things look a whole lot more interesting. Instant WOW shots, from the worm’s eye view.

These shots usually have the added benefit of helping to eliminate distracting backgrounds such as buildings, tree,s or other objects that you don’t want in your image. Bonus!

_DSC7921W

Feeling so small…the worm’s eye view.

DSC04831-eyes

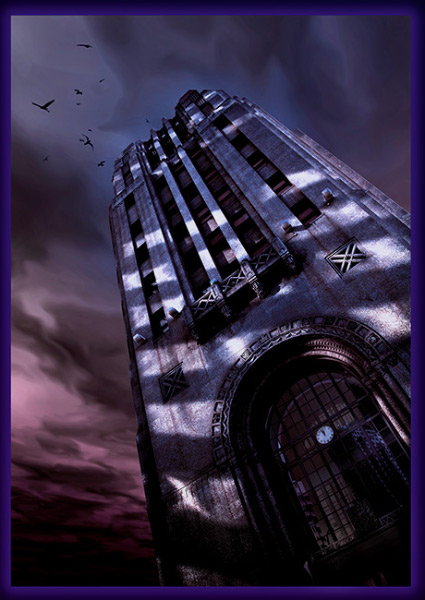
One of my school students shot this one – taking the worm’s eye view literally, but it’s a very freaky WOW Shot.

nat_fieldW

nat_hamlton-bank-copy5W

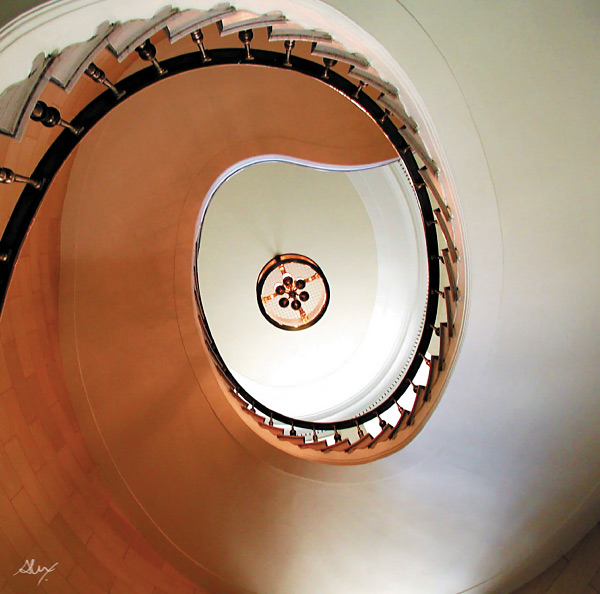
Taken lying on the floor of the lobby looking up at the top of the staircase. 

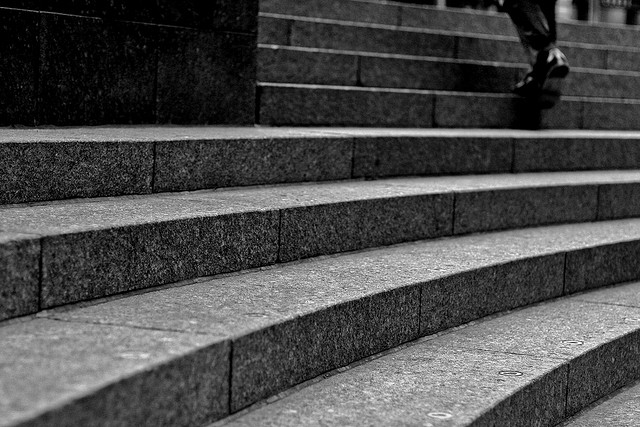
Method Three: Shoot at an Angle

Just as our five foot world gives us a consistently average perspective, it also provides us with horizontal lines and vertical angles. We see the world this way 90% of the time, and there’s nothing particularly WOW in that. But give your camera a twist; a 45 degree angle can add dynamism and drama, instantly!  Just make sure that it’s a big enough angle that it’s clear you did it on purpose, and not by mistake.

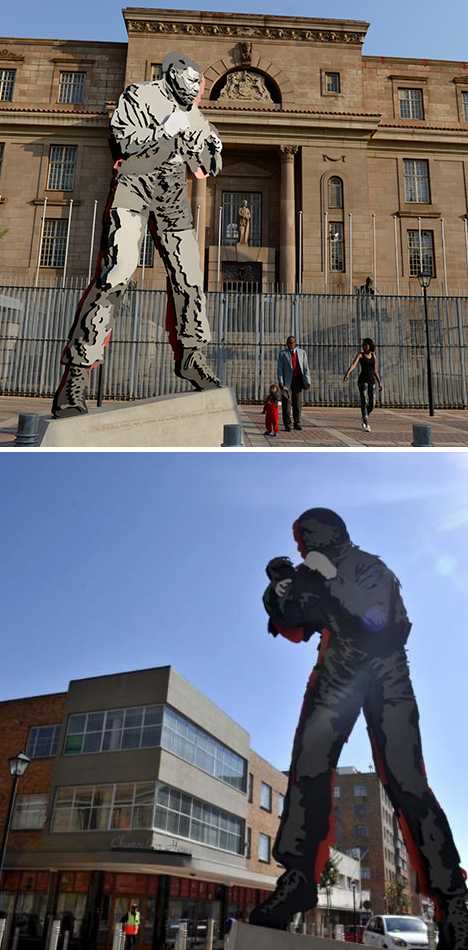
Buildings, trees, large objects, and even people look great with a bit of angular rotation when you want to make a point or add impact.

A bit of an angle - on purpose, give the image a more dynamic feel.

A bit of an angle – on purpose, gives the image a more dynamic feel.

A little "off kilter" makes us pay more attention.

A little “off kilter” makes us pay more attention.

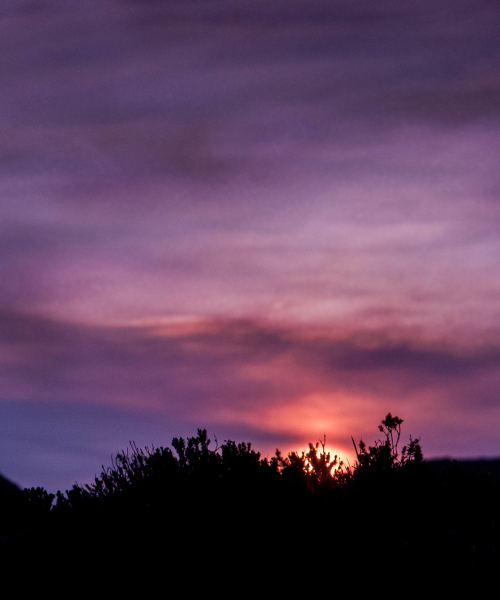
Method Four: Get the Sun Behind Your Subject

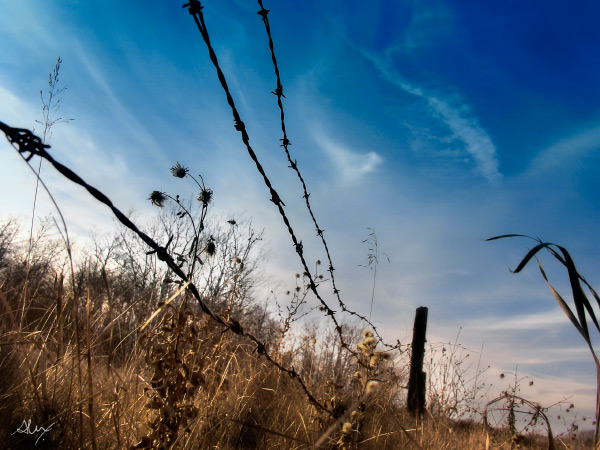
There are all sorts of fabulously detailed techniques for shooting silhouettes, rim lighting, and other back-lighting effects. But really all you need to get an instant WOW Shot is to either place your subject so that the sun or light source is directly behind them, with their head or body blocking the main point of light. Shoot in manual mode and be sure your flash is off.  Point and expose for the sun, then recompose with the sun directly behind your subject.  Whether it’s an animal or a person or an object, use that subject to block the sun, and you’ll have a winner.

Picture-053W

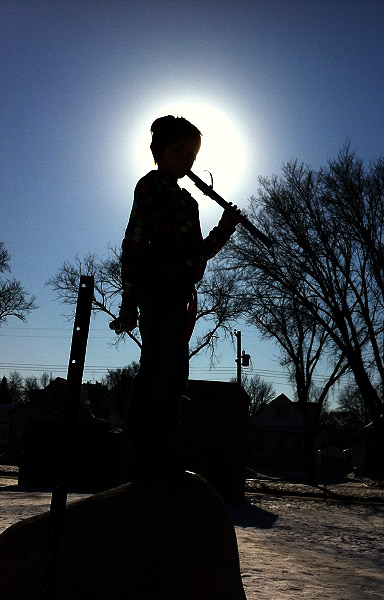
Drama abounds in this simple shot – just a quick iPhone grab during a school photo class.

Picture-388W

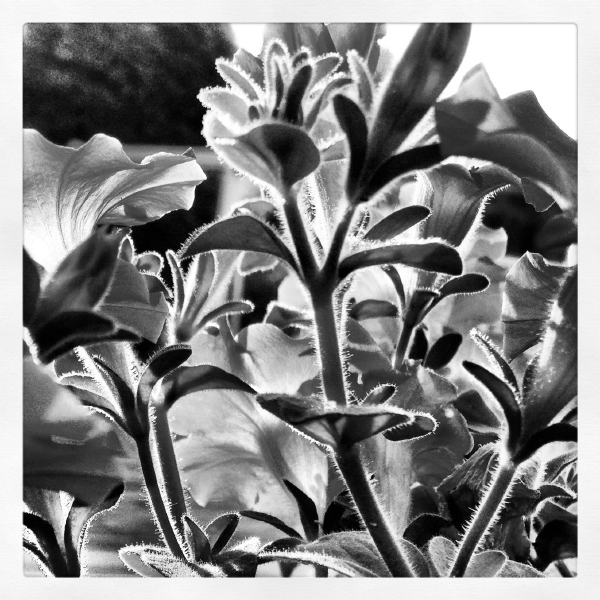
Method Five: Use Shadows

Nothing tells a story more than shadows – they are ethereal, transient, and mystical. Incorporate shadows into your image, or shoot only the shadows. They always tell an intriguing story, and create a captivating image.

Picture-955

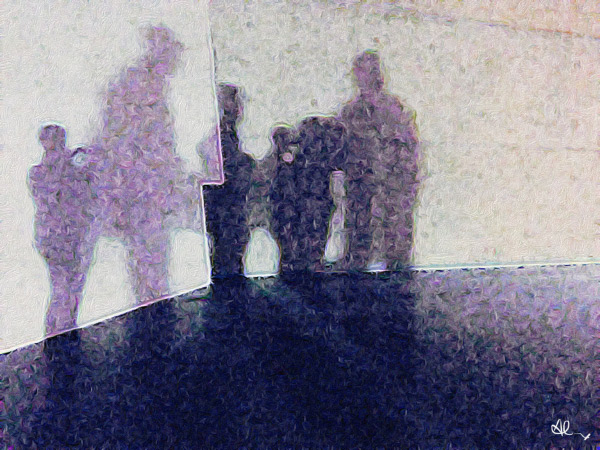
Abstract or editorial, the shadow knows.

IMG_6203W

Do you know what’s happening here – the shadows are a riddle and the answer.

photo-1

The Ultimate WOW Shots

The ultimate WOW shots are created when you use one of more of these techniques by combining elements, angles, and points of view.

_2DS2507W

Combining the worm’s eye view AND the sun behind the subject.

A simple street scene is so much more dynamic with long shadows.

Combine shadows with the sun behind the subject. A simple street scene is so much more dynamic with long shadows.

Combine a bird's eye view with shadows. It adds interest and drama.

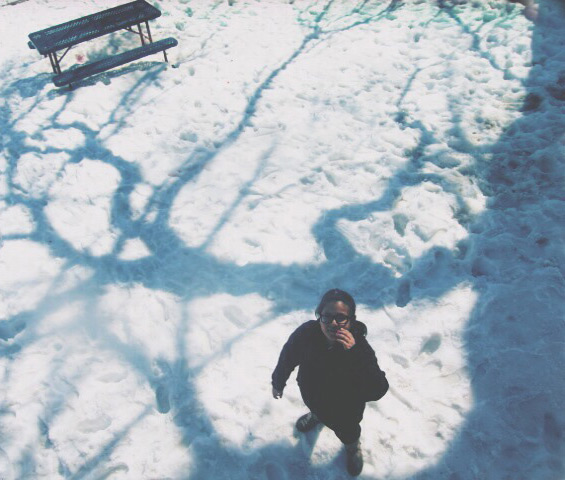
Combine a bird’s eye view with shadows. It adds interest and drama.

A worm's eye view and the sun behind the subject. Simple. Wow!

A worm’s eye view and the sun behind the subject. Simple. Wow!

Apply what you have learned

To wrap it all up, these five easy methods will give you dramatic results, and if you’re already proficient with a camera and have a bit of knowledge about composition, color theory, and light, you’ll be shooting like a rock-star photographer in less than an hour –  including the time it took to read this article.  If you’re already a skilled shooter, give these a try and it will help simplify your photographic life while adding more finesse to your portfolio.

Show me your WOW shots, I’d love to see how you put this into action! Share in the comments below.

The post 6 Ways to Take WOW Photos in Less Than an Hour by Alex Morrison appeared first on Digital Photography School.


Digital Photography School

 
Comments Off on 6 Ways to Take WOW Photos in Less Than an Hour

Posted in Photography


How to Get More Referrals Than You Can Handle

12 Aug

Referrals are an incredibly effective way to build your business and get great clients. Referred clients are often more loyal, consistent, more suited to work with you and they often send more referrals your way. How do I know this?

By Leo Reynolds

Referrals work – but have a system

My partner Nicole and I have gotten 80% of our videography work from referrals. And it didn’t happen by accident, we created a system that ensures we don’t have to go out looking for our next gig. A system that we created at the start to have referral clients reaching out to us with projects they wanted us for. Talk about turning the tables! So now, I’m going to share with you our exact system and how you can implement it right now.

What to consider before you get started building your referral system

But before we get into the nitty gritty of our system, there are a few important things you need to consider. Let’s take a look at the questions below; they will help you frame your understanding of our system. Answer these questions before we dive in and you’ll be ready to start implementing this system as soon as you finish reading this article.

By Stefano Bertolotti

1. Why would someone send a referral your way?

Before you begin to ask for referrals, create a list of the benefits your clients experience when they work with you. These are the same benefits a referral client would experience if they worked with you as well. What are the social, emotional and professional benefits that go along with being someone who refers people in need to those who can help? In this case, the referral client is in need and you are the person that can help.

2. Who would make an ideal referral for you?

Write down the types of people who make great referrals. Your customers may have no idea whom to refer to you, so make it easy for them to send the right people your way.

3. Where would a client find a potential referral to actually send your way?

Write down the places where your referrers would meet or connect with good referrals for you. Your goal here is to help your clients, and other acquaintances, understand who in their lives will benefit most from a referral, and where they cross paths with these people. This makes it easy for the referrer to start thinking of people to refer to you immediately.

4. How should someone go about sending you a referral?

Empower your clients to have a simple conversation with a potential referral who will effectively connect them to you and what you do. You absolutely cannot leave this to chance. You must be able to articulate what you do in a way that truly connects you to the people you want to serve. This is absolutely essential.

Write down how you’d like people to refer their contacts to you. What do you want them to say? Create a short script for them- they’ll thank you for it as you just made things even easier for them. How do you want them to talk about what you do? What specific words and phrases do you want them to use? Get very specific. You decide how you want people to talk about you.

Just thinking about these questions and writing down your responses is going to put you ahead of most of your completion. Your answers to these questions will play a major role in implementing our getting more referrals system; so take it seriously.

The four step referral system

All answered up? Okay, let’s get into the four steps of the referral system.

At the bottom of this post, there is a link where you can download a checklist that goes along with this system. Go ahead and download it now and I’ll meet you back here once you have it open along with this post.

Downloaded and opened? Awesome! Let’s get started. This system is broken into four major steps:

By Shereen M

Step 1: Know when to ask for a referral

We recommend asking for referrals at the time of delivery of your project, when the quality of your work, and the experience of working with you is fresh in the client’s mind. The optimal opportunity to ask for referrals during this time is when the client compliments your work or asks you questions about your business.

Step 2: Know how to ask for a referral

The actual words you use to ask for a referral is critical to getting the referral you want. This is why we are just flat-out giving you a script you can use when asking for referrals:

I really appreciate all the positive feedback about my work. I always want to exceed my client’s expectations; it’s actually how I get most of my projects. Most of my work comes from referrals from clients like you.

Can you take a few minutes today to help me help others with their photography needs? Could you introduce me to three of your contacts that you think might need my expertise? By making these connections, sharing with them how much you enjoyed working with me and how happy you are with the results, I can continue to serve people I love working with.

Thank you in advance for the introductions and creating the potential for another great experience.

A few things are being said here in this script.

  1. Your work speaks for itself and is the reason you continue to succeed in your field.
  2. The client understands that giving you referrals is what is expected since that’s how you get most your work.
  3. The client starts to feel important and plays a critical role in creating connections and providing great experiences for others.
  4. The “thanks in advance” assumes that they will actually take action which sets up an expectation. The client understands you expect them to send you some referrals.

Step 3: Your post referral strategy

Once you get a referral, follow up with them ASAP. You don’t want to wait too long. Reply the next day at the latest. Many times your client referred them to you the same day they reach out to you. You will want to capitalize on that moment of good will and excitement.

Also, make sure you circle back to the referrer, thank them and tell them how the project is going. It shows how serious you take your business and they will send you more referrals in the future.

Step 4: Giving referrals to get referrals

By Nan Palmero

Don’t just sit around and wait for clients to send you over referrals after you ask them to. One of the best ways to get referrals is to give them. Who are the other service providers that serve your target market? Make a shortlist of people you can refer to?

Are you a wedding photographer that can refer a videographer or banquet hall manager to someone? Maybe even a client of yours? The next time you see someone who would be an ideal client for someone else, go ahead and make that referral. If you are giving your colleagues in your target market referrals, chances are they will want to do the same for you in return.

Final advice

This is a tried and true system. Use it. The key is to stay consistent and go through the steps of this system every time you have a client.

Not working with a client right now? You don’t need to wait to put this into practice. Reach out to past clients you haven’t already asked for a referral and use the script above. You can change up the first paragraph of the script with: “I was reviewing some of my past work in my portfolio and was reminded how much I enjoyed working with you as a client. I’m always looking for ideal clients like you to work with.”

You got this! Don’t hesitate. Use this system and start getting more referral work today.

Download the checklist

Remember, there is a nifty checklist that goes along with this getting more referral system. You can download it here!

The post How to Get More Referrals Than You Can Handle by Omar Zenhom appeared first on Digital Photography School.


Digital Photography School

 
Comments Off on How to Get More Referrals Than You Can Handle

Posted in Photography


17 June, 2014 – Sony A7s Tests With Lower DR than A7r

18 Jun

Who do you trust? I trust my eyes. And so when I tested the Sony A7s the other day and found that I couldn’t see any dynamic range advantage over the A7r, that’s what I wrote. But, I was chastised by many because Sony claimed 15 stops of DR. Why the hell couldn’t Michael see it?

Now, two days later, DxO Labs has published their sensor test results for the A7s and indeed the A7s ranks almost a stop lower than the A7r. One may debate whether or not DxO and Sony use the same measurement criteria, but there’s no way to quibble about the fact that DxO has hundreds of self-consistent lab tests spanning years, regardless of the absolute numbers. I guess the eyes have it.


The Luminous Landscape – What’s New

 
Comments Off on 17 June, 2014 – Sony A7s Tests With Lower DR than A7r

Posted in News


Bigger than life: Drone flight documents Alaskan ice caves

27 Mar

Screen_Shot_2014-03-26_at_10.57.22_AM.png

The 12-mile long Mendenhall Glacier, located just outside of Juneau, Alaska may be one of the world’s most easily accessible glaciers. But the crew of Firefight Films takes you far beyond the parking lot. Billed as the first documented drone flight through ice caves, Firefight Films’ co-founders, Lion El Aton and Christopher Carson, outfitted a DSLRPros DJI Phantom with a GoPro HERO3+ Black Edition to venture beyond the physical limits of a human film crew. See video

News: Digital Photography Review (dpreview.com)

 
Comments Off on Bigger than life: Drone flight documents Alaskan ice caves

Posted in Uncategorized


Larger Than Life: 10 Monuments Honoring Nelson Mandela

08 Dec

[ By Steve in Global & Travel & Places. ]

nelson mandela monuments memorials
Though Nelson Mandela’s passing will spur the creation of memorials worldwide, a number of larger-than-life tributes are already extant or planned.

Nelson Mandela Capture Monument

nelson mandela capture monument(images via: Lemay Online)

The Nelson Mandela Sculpture in Howick KwaZulu-Natal was inaugurated and unveiled by South African President Jacob Zuma on August 4th, 2012. Artist Marco Cianfanelli was commissioned to create the sculpture in time for the 50th anniversary of Mandela’s capture by police in 1962, after which he was imprisoned for 27 years.

nelson mandela capture monument(image via: Lemay Online)

The sculpture comprises 50 metal columns ranging in height from 5 to 10 meters (16 to 33 ft). Visitors can only discern the portrait of Mandela at a point 35 meters (115 ft) away from the front of the sculpture, signifying the fact that Mandela, dubbed “The Black Pimpernel”, was able to elude authorities for 17 months after his arrest was ordered.

Boxing Mandela Statue

nelson mandela statue boxing(images via: National Geographic and Howzit MSN News)

In June of 2013, a strikingly styled statue of Nelson Mandela was unveiled and unlike other Mandela statues on display around the world, this one depicts the famed freedom fighter as, well, a different sort of fighter. Situated in front of the Magistrate’s Courts in Johannesburg, the 5 meter (16.5 ft) tall steel statue by Marco Cianfanelli depicts Mandela in his younger days when he was known mainly for his skills in the boxing ring.

Nelson Mandela Park Public School, Toronto

nelson mandela park public school toronto(image via: Edwards13)

Built in 1917, Toronto’s Park Public School underwent a multimillion dollar renovation that included the school’s name being changed to Nelson Mandela Park Public School. Much of the structure’s imposing architectural elements and Beaux Arts detailing both inside and out were retained in the renovation while students learn the reasons why their school, located so far from South Africa, was named for someone whose fame knows no national boundaries.

nelson mandela park public school toronto(images via: Toronto Star, HiMY SYeD and CBC.ca)

Located in in downtown Toronto’s Regent Park neighborhood, the school’s official renaming ceremony on November 17th of 2001 was attended by none other than Nelson Mandela himself. Mandela took time out from his third trip to Canada (during which he accepted honorable Canadian citizenship) to visit the school named for him and spend time with some of the students.

Mandela & Biko Mural

nelson mandela steve biko mural Cape Town(image via: Hot 106.5FM)

The epithet “man of the people” suits the late Nelson Mandela more than most who’ve been casually dubbed as such, and his accomplishments are perhaps greatest treasured by the lowest levels of South African society. Here in one of Cape Town’s rougher neighborhoods, a well-worn mural depicts anti-apartheid freedom fighter Steve Biko alongside a younger Mandela.

Next Page – Click Below to Read More:
Larger Than Life 10 Monuments Honoring Nelson Mandela

Share on Facebook


[ By Steve in Global & Travel & Places. ]

[ WebUrbanist | Archives | Galleries | Privacy | TOS ]


WebUrbanist

 
Comments Off on Larger Than Life: 10 Monuments Honoring Nelson Mandela

Posted in Creativity


Lomography raises more than $1M for production of new Petzval lenses

09 Aug

Petzval.png

Lomography’s campaign to raise funds to bring the centuries-old Petzval lens back into production via Kickstarter has now raised more than $ 1 million – ten times the original target. The ‘New Petzval’ lens looks and functions much like the originals, with a brass exterior, and the aim is to produce it in both Canon EF- and Nikon F- mounts. The lens is expected to be available next spring. 

News: Digital Photography Review (dpreview.com)

 
Comments Off on Lomography raises more than $1M for production of new Petzval lenses

Posted in Uncategorized


9% of dPS Readers Have Owned More than 10 Digital Cameras

10 Jul

Last month 14,002 readers responded to the question in our monthly poll which asked how many digital cameras they had owned.

The results are in!

Screen Shot 2013 07 02 at 9 34 03 PM

It seems there was a fairly even spread among readers who have owned between 1-5 digital cameras – with 10-20% of respondents in each category.

The interesting category to me was the 10+ category with just under 9% of our readers having owned more than 10 cameras! The comments that accompanied the original poll post showed that many of those who voted in this category reported having had significantly more than 10 too! It looks like we’ve got some enthusiasts in our midst! :-)

Post originally from: Digital Photography Tips.

Check out our more Photography Tips at Photography Tips for Beginners, Portrait Photography Tips and Wedding Photography Tips.

9% of dPS Readers Have Owned More than 10 Digital Cameras


Digital Photography School

 
Comments Off on 9% of dPS Readers Have Owned More than 10 Digital Cameras

Posted in Photography


Amateur filmmaker builds ‘bullet time’ rig for less than $100

02 Jul

jerem.png

Ever wanted to add a little spice to your video creations, perhaps your next Matrix fan-fiction video, by adding a little slow-motion bullet-time effect? Jeremiah Warren did just that, employing a ceiling fan, a GoPro 3 video camera, and a handful of bits of wood, effectively eliminating thousands of dollars worth of individual cameras and rigging, not to mention computer-controlled timing equipment. Click through for more details and to see the results.

News: Digital Photography Review (dpreview.com)

 
Comments Off on Amateur filmmaker builds ‘bullet time’ rig for less than $100

Posted in Uncategorized


Design A Wedding Dress For Less Than $20 by Angy Chesler

25 Jun

I was looking for a way to make a dress that would hold up in a trash the dress session. This year I got help when I went to Photography workshop by Bambi Cantrell. She taught us how to make an amazing wedding dress out of window screen. All you need is about 30 yards of grey tulle. It has to be grey, white won’t match the screen and 20 yards of window screen and a box of paper clips. At targeted I also bought a slip for the model in skin color, to cover her body and make her more comfortable. I started out with the 30 yard tulle, which I wrapped around her waist twice. It’s important not to wrap it too much around the waist, since you can easily lose any waist line. Once it’s tight around the waist I cross the tulle over her shoulders and keep wrapping it until I create a nice shape.

Hawaii-Wedding

You can get really creative here, it doesn’t have to be symmetrical. I played with different versions, over one shoulder, over both shoulders and also left the shoulder free of tulle. The end of the tulle I tug under the first wrapper around the waist line. Once you are finished with the tulle the fun begins. It’s time to move the window screen. I bought silver metal window screen at Wal-Mart. I wrap it around the waist like a scarf that I would use as a dress. With the help of paper clips I secure it. You have to open the clips to be able to weave it through the screen. Once the first two rounds of screen are wrapped it’s time to form the metal screen. You can just bend it in any directions you want to and secure it with paper clips. Keep going and adding to the design until you use all the screen.

Searching for a background that would reflect the design in shape and color I decided that the beach after sunset would be the best place. !0 minutes after sunset the light was perfect. I put my Canon 5 D Mk 2 on a tripod. I used a slow shutter speed of a 1/6 at ISO 100 and F 2.8 with a 16-35 mm lens. My model stood super still without any movement, so I could blur the waves with the slow shutter speed. I used an off camera Flash with 1 f-stop over from the right to give the model some light and shape.

I studied photography in Europe. Since 2001 I have been working in Hawaii. My work includes U/W photography and videography, Architecture and Weddings
http://www.vip-wedding-hawaii.com

dslrBlog

 
Comments Off on Design A Wedding Dress For Less Than $20 by Angy Chesler

Posted in Photography