RSS
 

Posts Tagged ‘Taking’

Taking Your Photography Outside of Your Comfort Zone

21 Jul

A contribution from Lori Peterson

New photographers sometimes jump in and photograph everything they can. They will photograph a wedding one-day and commercial real estate on another. It isn’t until later on that they realize the importance of finding their niche and concentrating on the things that fuel their art and their passion and still manage to pay their bills. 

Life can bring you lessons you didn’t even know you needed to be taught. I have been present as a photographer in hospital situations and you have to expect the unexpected. Whether it’s shooting images at a birth or documenting a medical procedure for a family, you should always be prepared for things to change.

If you are planning on being a birth photographer, not only is it important for you to discuss expectations from your client, but you should also find out what the doctor and hospital will allow. Your client might want you to photograph parts of the delivery, but the hospital or doctor may have very strict rules about photography.   Births aren’t always smooth, quick, and without drama. You might plan on being at a birth for a few hours, but if labor stalls, you might be there longer. Expect the unexpected.

If you are allowed to photograph the birth you should be mindful of the doctor, the nurses, and all the other hospital staff that need to be in the room to take care of your client and the baby. Your job is to document, not to be in the way. 

01

If complications arise and there is a need to go to the OR for a cesarean, make sure that your client has discussed this possibility with the doctor. The doctor and the anesthesiologist have the final say so as to whether or not you can go back with your client. Be polite and respectful. If you can’t go back to the OR, make plans to photograph the baby as soon as possible so that your client can still have those early moments recorded.

If you are allowed back in the OR, ask the anesthesiologist about where you can shoot from. Don’t badger them with questions and chitchat. Don’t try shooting over the screen to get shots of the surgery itself.

Once the baby is born just remember to keep documenting those moments. Mom is missing out on some of those and Dad might need to be with her. Don’t forget to capture the interactions of the new baby when they bring him or her over to Mom for the first time.

Image 02

Learning to expect the unexpected has helped me when doing more photojournalism type shoots as well. Most recently I was hired to help a family document their six-year-old son’s Selective Dorsal Rhizotomy surgery. Surgery time was pushed back a bit and then waiting time was also pushed back. There was a lot of waiting. 

After his surgery he did a lot of sleeping. There was a lot of pacing and worrying from family members and from me as well. His parents just wanted to stick close by and be there in case he woke up. They talked to him, they held his hand and they waited.

Image 03

I shot images during his first time getting out of bed, his first time in physical therapy, and his first time crawling and standing after his surgery. Some of the moments when he was crying were so difficult for me, but I had to remind myself to keep documenting this for him and his parents to look back on. Lighting changed. People walked in. People walked out. He was awake. He slept. The situation changed routinely, but what was expected of me didn’t.

04

For some photographers shooting in a hospital setting might not be ideal, but I can tell you from personal experience that helping families to document their lives is one of the most rewarding types of photography you can do.

Stepping outside of your comfort zone can bring you a new awareness of the world around you and remind you of how wonderful photography can be to document life events. It will physically and emotionally challenge you. You will have to learn to move fast. You will have to learn that sometimes the shot doesn’t have to be technically perfect to tell the story. It’s very different than portrait photography because you aren’t in control of everything. You have to learn to give up some of that control and trust your instincts. Capturing those moments are such a precious gift you are giving to your clients, and you will reap the rewards by adding to your skill-set for future endeavors.

Lori Peterson is an award winning photographer based out of the St. Louis Metro Area. Her dynamic work ranges from creative portraits to very unique fine art photography. Lori’s work can be seen at www.loripetersonphotography.com and also on her blog at www.loripetersonphotographyblog.com. You can follow her on Facebook at https://www.facebook.com/LoriPetersonPhotography.

Post originally from: Digital Photography Tips.

Check out our more Photography Tips at Photography Tips for Beginners, Portrait Photography Tips and Wedding Photography Tips.

Taking Your Photography Outside of Your Comfort Zone


Digital Photography School

 
Comments Off on Taking Your Photography Outside of Your Comfort Zone

Posted in Photography


3 Tips for Taking Portraits that Reflect the Character and Spirit of your Subject

23 May

A Guest contribution by Hailey Bartholomew from You Can’t Be Serious.

1. Do Something

Who are you photographing? If you don’t know them well, find out what they love to do and where they relax the most.

Maybe they love to row boats or take picnics at their favourite park every Sunday.

Maybe you are photographing your grandmother who loves to be out in her garden. Go and do that with them.

Whatever they love to do to relax, tag along with your camera.

But don’t sit back on the sidelines hoping to catch a moment from far away – get down and into whatever they are doing. You need to be in IN that row boat and if your nana is kneeling in the dirt, you should be too. Get into the action and photograph your loved one or client doing what they love.

The family below loved playing music together and going on picnics… We did that!

Katie-6.jpg

This couple love drinks by the pool….

Ali+Chris_12.jpg

2. MOVE!

Set your camera settings to multiple shots so you can shoot lots of frames quickly. Then, either get your subject to move around, or YOU move with them.

If you have little kids and they keep wanting to run around, hold their hand and say pull me along! Select follow focus and start shooting. You will create natural moments but also fun energetic photos.

Your subject will forget it is about being formal and ‘looking’ good’ if you are moving and having fun. Same if they are moving around.

I love to get my subjects to piggyback each other or walk in a row or play around. Be there to catch the action and you will find your subjects are relaxed. Maybe play some music and dance!

NewImage

NewImage

NewImage

3. Have your Camera Handy

The perfect photo opportunity occurs when a real perfect moment is actually happening!

The best way to get someone being real is to capture a real moment of joy or happiness or reflection. If I have my camera way upstairs and in it’s case I am much less likely to capture everyday perfect moments with my kids.

So I keep my camera handy. It sits out of the case on a bench or is in a bag I take everywhere. Then when the right something happens I am ready to go!

Try a week long challenge and have you camera handy all week long. Keep it on your shoulder or on the bench in the lounge – somewhere you can grab it quickly. See what perfect and REAL moments you can capture!

Below is a moment with my daughter… after hanging out the washing she came to show me her rockstar outfit… ;) So glad I caught this moment. So perfectly her!

NewImage

And another great ‘real’ moment was this recently on the beach we found an old trampoline and dug a hole for it. My daughter had the best time leaping off and onto the sand!! Lucky I had my camera with me!

NewImage

Lastly.. keep it real by being real yourself. Be honest and true to who you are. Don’t try to be all professional and formal and knowing everything rather relax, explore photography and be yourself. This keeps things not too formal. Have fun!

Hailey Bartholomew is an award winning film-maker & photographer who is in love with real and fun work that hopefully either makes you smile or makes you think. Hailey works for international aid organisations, shoots TV commercials, documentaries, family portraits and promo videos. You can see some of her work at her site You Can’t Be Serious.

Post originally from: Digital Photography Tips.

Check out our more Photography Tips at Photography Tips for Beginners, Portrait Photography Tips and Wedding Photography Tips.

3 Tips for Taking Portraits that Reflect the Character and Spirit of your Subject


Digital Photography School

 
Comments Off on 3 Tips for Taking Portraits that Reflect the Character and Spirit of your Subject

Posted in Photography


What the Mona Lisa Can Teach You About Taking Great Portraits

13 May

Mona-Lisa

When it comes to famous images the Mona Lisa by Leonardo Da Vinci is one of the most recognized in the world.

When I visited the Lourve in Paris a couple of years ago I was stunned by the crowds of people gathering around this small image, pushing and shoving to get close and to take a picture of it (I got some great shots of the crowd).

The Mona Lisa has been at the center of much debate and speculation over the years but why is it an image that intrigues people so much and what can we learn from it as photographers today?

While we live in a different time (the Mona Lisa was painted in the 1500′s) and use different technology – is there something in this famous image that we can be inspired by as image makers today?

Lessons from the Mona Lisa for Photographers

Today I want to explore some of the different aspect of the Mona Lisa and point out some things that Leonardo did in painting this image that I think we could take away as portrait photographers today.

Composition

mona-pyramid.png
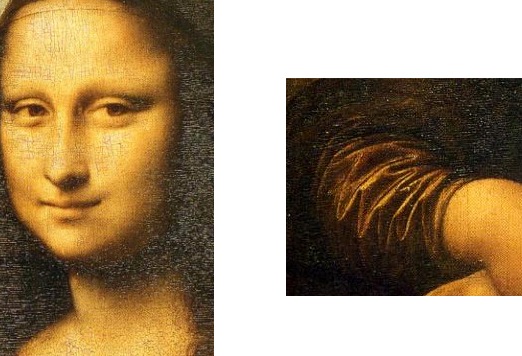
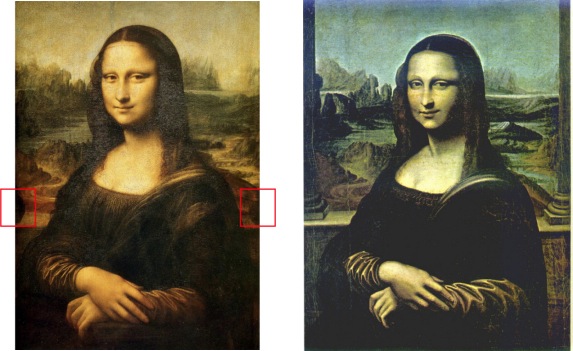
While we look at the Mona Lisa today and see it’s composition as fairly standard and simple – for it’s time the composition of the Mona Lisa was ground breaking and has set new trends in painting which have been followed for centuries since.

One of the compositional elements that the portrait is known for is Leonardo’s use of a pyramidal composition which shows the subject with a wider base at her arms and her hands forming the front corner and everything is in place to draw the eye up her body to her eyes and her infamous smile.

Take Home Lessons for Today

The same form of composition can work for us. While I wouldn’t dare suggest that this is the only or best way to set up a portrait shot – the pyramidal composition is one worth trying.

The Pose

Again – today we look at Mona Lisa’s pose and it seems fairly normal but for it’s day it was quite revolutionary as most portraits at the time were rigid, stiff and quite often profiles rather than front on.

In contrast Mona Lisa is somewhat relaxed and at ease as she leans upon the arm of a chair with her hands crossed in a relaxed fashion.

While she’s slightly turned to one side she sits open to the viewer and holding their eye.

Also unusual for the time was the fact that Leonardo went against the norm with the framing of this image and opted for a three quarter length pose rather than a full length one. In this way he filled the frame with his subject which lends itself to an intimate image and little room for distraction by her context.

One last aspect of the pose is that the Leonardo has positioned Mona Lisa’s eyes at the eye level of the one viewing the image. This brings a sense of intimacy to the image as we the viewer gaze directly into her eyes (there’s not a sense that we’re looking down on her or that she’s doing that to us).

mona-hands.png

Take Home Lessons for Today

This classic pose works today. Fill your frame with your subject by using a three quarter length pose, relax your subject, have them turn their body slightly away from the camera and look directly at the camera. Give their hands something to lean on (they can look awkward otherwise). Most of all – attempt to relax your subject.

The Background

mona-background.png
Much has been written about the background of the Mona Lisa and we can draw out a few things from it for today.

One thing worth noting is that while paintings of the day generally had both the subject and background in sharp focus with lots of detail – the background of the Mona Lisa seems to ‘fade’ or become more blurred and out of focus the further from the subject it extends.

This was unusual for the time and is an effect that many portrait photographers use today by choosing a large Aperture to make for a blurred background that leaves the viewer of the image to focus upon the subject.

While there is definitely points of interest in the background (there’s a lot of debate about whether the two sides of it ‘match’ and whether it’s supposed to be some kind of a fantasy/imaginary background) the colors in it are somewhat bland, muted and subtle – again leaving the focus upon Mona Lisa.

Take Home Lessons for Today

There are different ways to use a background of a portrait. It can either be used to put your subject into context by showing their surrounds – or it can be used as a backdrop that is largely a blank canvas with few features so that your subject stands out.

In a sense Leonardo has done both with his background. It doesn’t take the focus away from the subject – yet the landscape behind her does have an element of mystery and interest to it. It’s also visually complementary to the subject with some of the shapes and colors almost mirroring colors and shapes in the subject’s clothing.

The lesson is to carefully consider your backgrounds – they can greatly enhance or detract from your portraits.

Light

One of the things that I like about the Mona Lisa is the way in which light falls upon the subject. Leonardo uses light to draw the eye of the viewer to the parts of the image that he wishes to be highlighted (the face and hands) and balances the image nicely by placing hands and face in positions that counter one another.

Leonardo also uses shadow (or a lack of light) to add depth and dimension to different aspects of the image – particularly the area around Mona Lisa’s neck and in the ripples on the dress on her arm.

light-1.jpg

Take Home Lessons for Today

Think about how your subject is lit. Use it to draw the eye to key parts of your image but also use shadow to create depth and dimension to your shots.

Clothing

We’ve talked about clothes and portraits here at DPS before and Leonardo takes the approach of darker less obtrusive clothes in this image. Once again – this is a little different to other portraits of the time which are renowned for being bright.

While her dress has quite a bit of detail (the lace work is quite fine and the detail in the folds on her arms are lovely) and it all is within keeping of the feel of the image – everything works to highlighting her face.

mona-lisa-clothes.jpg

There’s also a lack of any kind of jewelry or any other kind of accessory to distract the viewer away from Mona Lisa’s face.

Leonardo obviously wants something about the woman herself to shine through in this image rather than anything else.

Take Home Lessons for Today

Clothes are another element that can be a real distraction in a portrait. Take a lesson from Leonardo and use clothes that fit with the subject and give them context – but which don’t distract your viewer.

Framing

One of the things that I’d not noticed about the Mona Lisa before that i read about today is that on either side of the subject just under and to the side of each of her shoulders there is half of a round ball shape (see the images below on the left).

It is believed that what we see of currently of the image is actually slightly smaller than the original. Part of the image was lost when the image was re-framed at some point. What were the balls?

The most widely accepted theory is that in the original and full version of the painting two columns extend up from the balls on either side of Mona Lisa. She’s actually sitting on a balcony overlooking the view behind her. You can see the horizontal edge of the balcony extending between the two columns.

Here’s how one artist reproduced the Mona Lisa with the extra columns.

mona-lisa-framing.jpg

Whether or not the columns in the original looked exactly like this reproduction or not I’m not sure – but it seems that Leonardo used a technique that we call ‘framing‘ in photography today. This technique is all about drawing the eye of the viewer of an image to your main subject. It also has the potential to add a little context to a portrait (with the columns it would be more obvious that Mona Lisa is sitting on a balcony).

Take Home Lessons for Today

Learn to use techniques like framing to draw the eye of the viewer of your images to your main subject. Frames can be subtle and a natural part of the environment around your subject. Don’t use them in every shot but do keep your eye out for opportunities to include them to add another dimension to your portrait work.

Mystery

Who is the woman (its been argued that she is anyone from a female form of Leonardo himself through to the wife of the man who commissioned the image)? What is the background? Why is she smiling (or is she)?

mona-smile.png

There’s something mysterious both about the subject herself (her look is both alluring and aloof) and the way that the image was painted (Leonardo used a technique called ‘blurring’ around the edges of the subject that was new for his time that give it a mysterious quality). This leaves the viewer of the image asking questions and entering into it with imagination. Leaving elements of the image open to interpretation can make an image impact it’s viewer.

Take Home Lessons for Today

One of the elements that takes a proficient image and makes it a great image is that it goes beyond being a record keeping exercise and becomes a story telling one.

The Mona Lisa has drawn viewers to use their imagination and have conversation about it for centuries simply because it leaves parts of the story untold. This is something that can’t really be learned as a photographer – but is something that comes with experience.

What Lessons Does the Mona Lisa Teach You about Photography?

What have I missed out on? What do you see in this famous painting that could teach us about photography?

Post originally from: Digital Photography Tips.

Check out our more Photography Tips at Photography Tips for Beginners, Portrait Photography Tips and Wedding Photography Tips.

What the Mona Lisa Can Teach You About Taking Great Portraits


Digital Photography School

 
Comments Off on What the Mona Lisa Can Teach You About Taking Great Portraits

Posted in Photography


How taking tablet photos can look even sillier: Just add a telephoto lens

23 Apr

ipad_telephoto_lens.jpg

If taking a photo with a nearly 10-inch tablet didn’t look silly enough, you can now pair your iPad with a telephoto lens to expand tablet photography horizons. Regardless of the awkward appearance of the iPad as a camera, shooting with the tablet has grown in popularity. The new 10x zoom accessory for the iPad 3 and 4 and 12x zoom for the iPad Mini is a further proof. Read more about the lens at connect.dpreview.com.

News: Digital Photography Review (dpreview.com)

 
Comments Off on How taking tablet photos can look even sillier: Just add a telephoto lens

Posted in Uncategorized


8 Places For Shooting You Have To Master Before Taking Your Camera Elsewhere

03 Apr

It happens to all of us. Regardless of experience or skill level, at some point, we’ve all thought, “I have no idea where to take pictures!”. We’ve run out of new, fresh ideas and are seriously considering abandoning any photography this weekend. Of course, we know that we haven’t literally run out of locations to shoot, we just aren’t thinking Continue Reading

The post 8 Places For Shooting You Have To Master Before Taking Your Camera Elsewhere appeared first on Photodoto.


Photodoto

 
Comments Off on 8 Places For Shooting You Have To Master Before Taking Your Camera Elsewhere

Posted in Photography


No Wi-Fi Zones: Taking a Break from Constant Connection

22 Jan

[ By Steph in Design & Guerilla Ads & Marketing. ]

No WiFi Zone 1

Free wifi is becoming so ubiquitous in many cities, it’s hard to find a street corner where you can’t instantly connect – and most of us like it that way. Unrestricted access to virtually all of the knowledge and information in the world is nothing to sneeze at, but with it comes people who are glued to their devices instead of talking to each other. Kit Kat has a new marketing campaign that actually blocks all wireless signals within a radius of 5 meters.

No WiFi Zone 2

The Free No WiFi Zone is a simple installation in downtown Amsterdam that creates a refuge from the internet. Reflecting the candy bar’s slogan “Have a break, have a Kit Kat,” the campaign emphasizes taking a breather from email, social media updates and other trappings of our connected culture.

No WiFi Zone 3

“The world is becoming one big WiFi zone,” reads the ad, created by advertising agency JWT Amsterdam. “It’s available in bars, restaurants, trains, airports, supermarkets… There’s even WiFi on Mount Everest. Result? People are constantly online. Time for a break.”

Share on Facebook


[ By Steph in Design & Guerilla Ads & Marketing. ]

[ WebUrbanist | Archives | Galleries | Privacy | TOS ]


WebUrbanist

 
Comments Off on No Wi-Fi Zones: Taking a Break from Constant Connection

Posted in Creativity


Rain or Shine it’s Photo Taking Time

13 Nov
Check it out

The weather may have decidedly taken a turn for the grey, but our new Digital Time-Lapse Camera doesn’t mind. It wears a weather resistent jacket that lets it shoot time-lapse videos no matter the atmospheric conditions.

It’s true, the temperature might drop, but your camera sure won’t. The Three Way Camera Strap offers three camera slingin’ styles from one super-sturdy strap.

Click through to check them out in the Photojojo Shop (just don’t forget to bring your umbrella).

The Digital Time-Lapse Camera Tweet It!
$ 180 at the Photojojo Shop

The Three Way Camera Strap Tweet It!
$ 40 at the Photojojo Shop

No related posts.


© laurel for Photojojo, 2012. |
Permalink |
No comment |
Add to
del.icio.us

Post tags:


Photojojo

 
Comments Off on Rain or Shine it’s Photo Taking Time

Posted in Equipment


Surf Photography: Chris Burkard’s Tips for Taking Great Outdoor Photos

20 Oct

www.silberstudios.tv We’re at Silber Studios with our guest Chris Burkard, a freelance surf photographer known for his distinct and creative photos. Unlike many professional photographers, 23-year-old Chris has not had formal training; instead, he developed his photography techniques through lots of practice with composition and natural lighting. His tips on composition and style will help any amateur photographer take better photos. I’m envious of the slew of big-name clients he’s managed to gather. Chris Burkard has been the Senior Staff Photographer for Water Magazine and Surfline.com and has already published his first book, The California Surf Project. Chris won the first annual Follow The Light Foundation grant and has worked with more than 35 national and international surf publications, including Surfer, Surfing Magazine and many others.
Video Rating: 4 / 5

An introduction to using long or telephoto dslr camera lenses. Lots of people have asked to have camera lenses explained and this is just one of our videos which will help you understand all about your camera lenses. To have camera lenses explained in full visit the lenses section of our video site www.photographycourses.biz for unique content that’ll explain all.
Video Rating: 4 / 5

 
Comments Off on Surf Photography: Chris Burkard’s Tips for Taking Great Outdoor Photos

Posted in Photography Videos


Taking a Look at the Nintendo 3DS

17 Oct

Nintendo’s next generation handheld, the 3DS, is here. The box contains the system, an AC charger, a charge cradle, a metal telescoping stylus, a set of Augmented Reality cards and tons of literature. The 3DS can display glasses free stereoscopic 3D on the top screen using a parallax barrier. The effect is like looking into a diorama. New inputs include a really nice analog slide pad and motion sensing, and the resistive touch screen returns. New onboard features include a variety of AR games, a Mii studio, streamlined online friends lists and a 3D camera. The web browser and the digital store are not available at launch. Added horsepower puts the 3DS’s visuals at about Gamecube level, though few of the launch games really strut their stuff.

All shot with the GoPro 3D Hero as a little bonus footage for Dreaming Awake – www.dreamingawakemovie.com Follow me on twitter @designbydave
Video Rating: 4 / 5

 
Comments Off on Taking a Look at the Nintendo 3DS

Posted in 3D Videos


Connect: Tips for taking your smartphone into the ocean

16 Oct

wavespray.jpg

Simple waterproof gear can protect your smartphone while you catch the spray of the surf and actions of the waves for stunning images from the sea. Allan Hoffman offers seven tips for taking your smartphone into the ocean.

News: Digital Photography Review (dpreview.com)

 
Comments Off on Connect: Tips for taking your smartphone into the ocean

Posted in Uncategorized