Here is another composition exercise from the old blog posted originally in June 2007. It is good to use a waterproof camera, especially, when you are paddling a tippy boat. And, always keep that camera on a leash. Usually, I […]
paddling with a camera
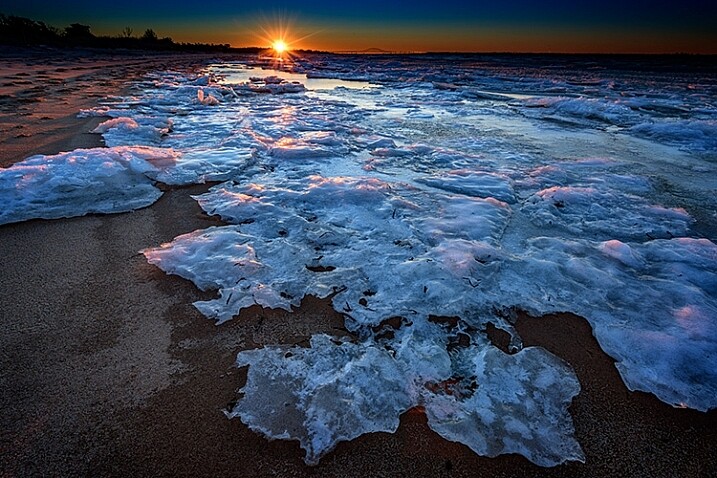
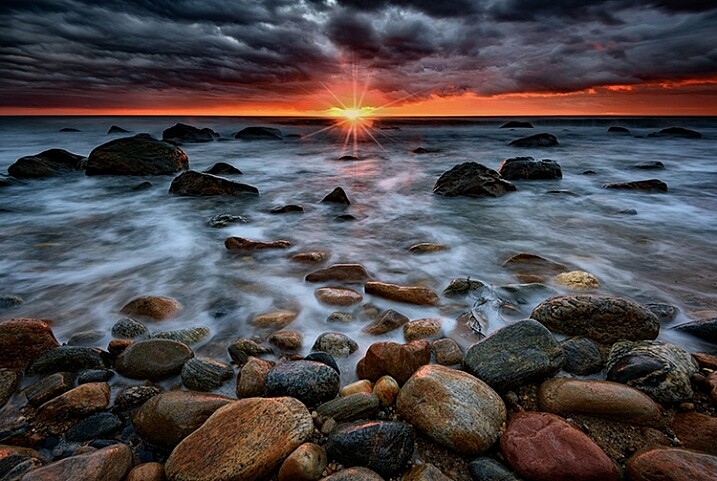
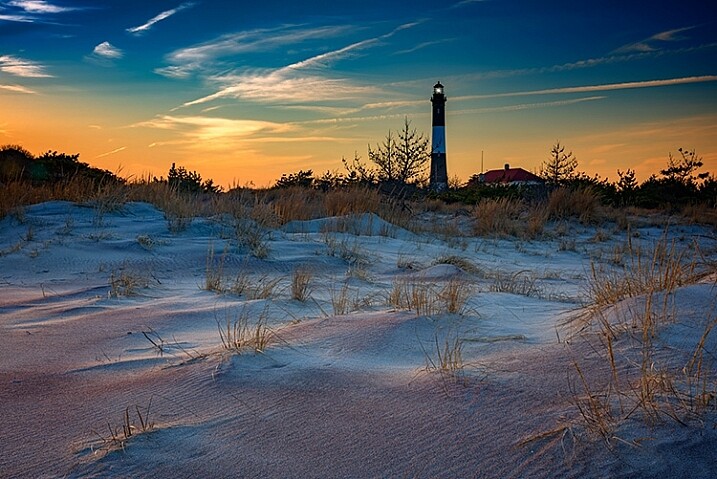
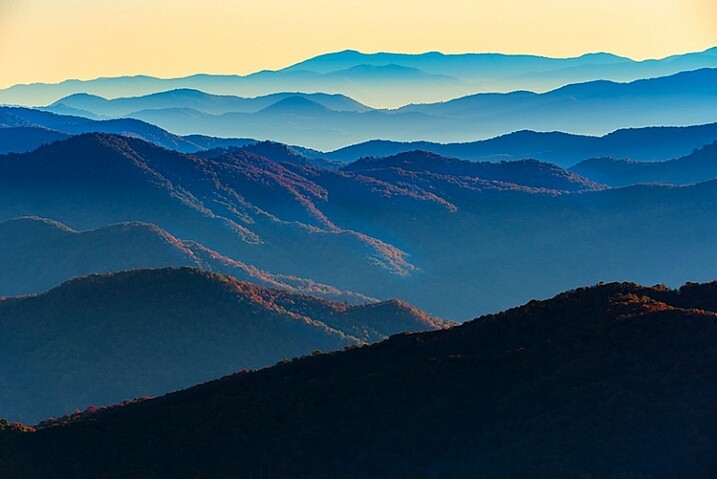
Posts Tagged ‘Sunset’
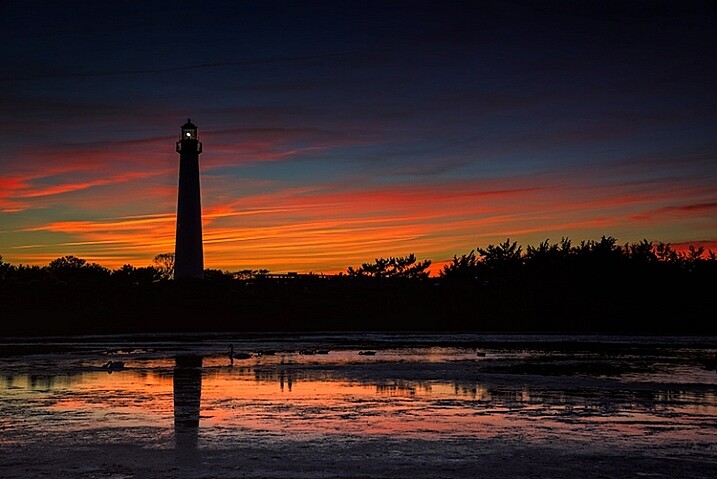
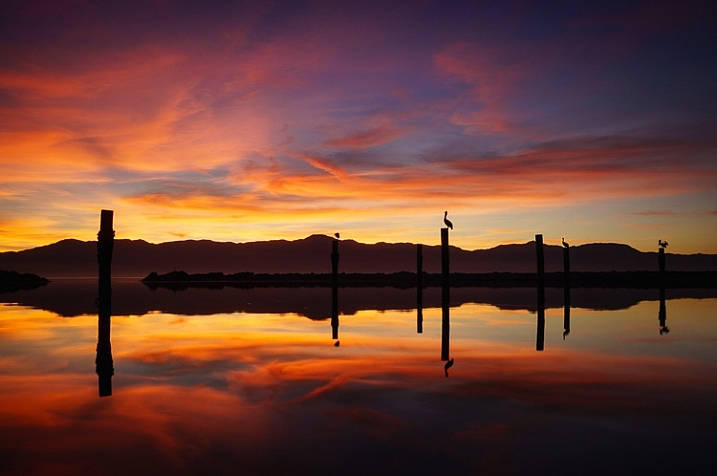
6 Sunset Pictures from 10 Minutes of Paddling on Boyd Lake
23
Oct
Two Photos Combine for a Perfectly Mirrored Sunset
26
Sep
Warning: preg_replace(): The /e modifier is no longer supported, use preg_replace_callback instead in /home/forge/content.photojojo.com/content.photojojo.com/wordpress/wp-content/plugins/ozh-better-feed/inc/feed.php on line 134
Capturing the same sunset, 2 years apart
04
Sep
$ (document).ready(function() { SampleGalleryV2({“containerId”:”embeddedSampleGallery_3692727126″,”galleryId”:”3692727126″,”isEmbeddedWidget”:true,”standalone”:false,”selectedImageIndex”:0,”startInCommentsView”:false,”isMobile”:false}) });
This is an interesting exercise / study on photography and post processing.
I took both of these photos from exactly the same spot (slightly different focal length 16mm vs 17mm), in the middle of the winter, at the same time of the day, but two years apart. The big difference in the landscape appearance is that two years ago we could hardly see any snow, but this year it was frozen solid from the middle of November until the very end of March.
 |
| Canada. Montreal. Lachine | Location: 45.42907, -73.68791 |
I also used two very different processing methods for each photograph. For this year’s photo I used an HDR Photography workflow, using Lightroom, Photomatix and Photoshop. As you can see, I processed it heavily in Photomatix: the colors are vibrant, and the details in foreground are prominent.
For the older photo, I used an “old school” single RAW Lightroom processing technique. To achieve the warm, softer look I used the Split Toning feature in Lightroom. At this point I am not sure which one I like better. They look very different, but I kind of like them both.
It’s an interesting experiment in how taste and technique (and two years time…) can make the same scene look totally different.
Viktor Elizarov is a travel photographer based in Montreal, Canada. He’s also the man behind PhotoTraces, a travel photography blog and community of over 60,000 photographers. Visit Tutorials section of his blog for free tutorials and free Lightroom presets.
Articles: Digital Photography Review (dpreview.com)
Mike Olbinski releases stunning sunset time-lapse featuring unusual cloud formations
07
Jun
‘Tis the season for dramatic weather in the middle parts of the US, and as such, it’s also the season for incredible time-lapse videos. If you thought we reached peak weather time-lapse just last week when we posted Chad Cowan’s excellent Fractal, well, see what you think after watching Mike Oblinski’s latest.
He captured unusual cloud formations called Undulatus Asperatus rolling across the plains of North Dakota at sunset. As always, we recommend going full screen and cranking the resolution up.
Articles: Digital Photography Review (dpreview.com)
Tips for Location Scouting to Get the Perfect Sunset Photograph
12
May
Location scouting to find the ideal spot is just as important as what camera settings you use. Don’t miss this important first step in order to get your perfect sunset photograph.
Scouting is part of the photography process
“Hi. Are you a photographer?” a young voice called to me.
“Hello,” I turned back and replied to a smiling and inquisitive face. It was a little girl with a point-and-shoot camera.
“Yes, I am,” I nodded in affirmation. The backpack and tripod were a dead giveaway.
“This is so beautiful,” and after a moment of watching me, “Aren’t you going to take a photo?” the girl continued, as she scrutinized me searching for something in between granite boulders on the beach but not taking photos.

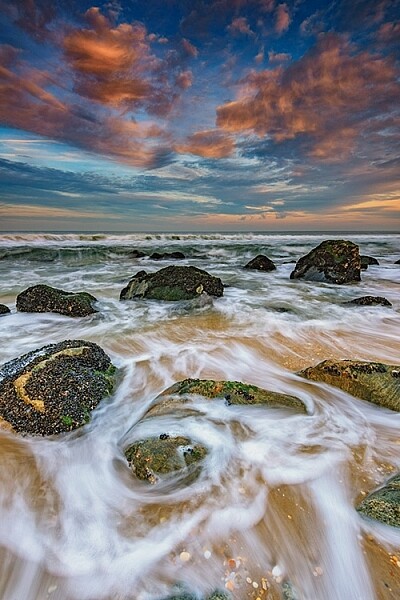
Composing for the water channel.
Mother Nature had put on a mesmerizing show of stormy clouds and light at Camps Bay Beach in Cape Town, and it seemed that almost everyone had their cameras and cell phones pointed towards the far horizon. Our brains are programmed to do routine work subconsciously, like changing gears of a car.
For a landscape photographer, scouting for a good location is part of the job. It can be a challenging, albeit fun routine, and I was doing exactly that an hour prior to what was going to be a stunning sunset. In fact, I find it quite therapeutic to search for a good spot. You pay attention to details and discover small wonders in the process.

Lightning strike while location scouting.
The question from the little girl triggered a lot of possible answers in my mind. “I am trying to make a good photo,” could be one of the answers, but it would have confused her even more, so I told her that I was looking for an interesting pattern of rocks for my sunset shot. My quest resumed after she and I finished chatting.

Nature’s wonder.
What makes a good photo?
In my journey of landscape photography thus far, I have learned that the main characteristics to look for are good light and composition. After you find these, you need good camera settings and technique to capture the moment.
What can you do to take a better photo?
The light is not within your control. But you need to gain knowledge of the terrain, keep an eye on the weather and clouds, and possibly go around dawn or dusk to get softer colors and light.
The choice of composition is yours based on your own style and preferences. As a landscape photographer, you need to have an aesthetic sense that attracts viewers to your images, a style that will become your own. Composition is a topic in itself, but obviously, the key is choosing a location that provides good subjects (e.g. a waterfall, mountains, icebergs, boulders, trees, rocks) or something that appeals and possibly tells a story.
Camera settings and techniques come with experience. Do not compare it to the value of the equipment you own – the simplest equipment can take a great shot. The only way you can get better is by taking photos, learning more about the basics, and correcting yourself after making mistakes. If you can invest in the best camera, filters, tripods and other accessories, then that’s a bonus. Whatever equipment you own, you must know its full capabilities and how to make good use of it.

Camp Bay boulders.
How did I make a good photo that day?
The day I met the girl, I was at one of the most picturesque beaches in the world, Camps Bay. The location and subjects were there, but I still had to work to narrow down my composition for the sunset.
I needed to make decisions such as; Am I going to set up on the sand or in between the boulders? Should I go on the mossy rocks or stand in the water?
The light, as per my assessment of the weather forecast, was going to be perfect if the clouds allowed the sun to peek through the horizon. I brought the lens and camera of my choice, filters, shutter release, and tripod to take photos in low light.
After some exploration, I settled upon a water channel between two massive granite boulders. My test shot looked promising. My hunt for an agreeable foreground was finally over. The water would make interesting patterns through that small ally, and the leaden clouds and orange sun would be my background.

Test shot with minimal post-processing.
I took another test shot and soon realized that the sun was going to be behind the boulder on the left, and I would miss it in my photo as I had miscalculated the angle. I re-evaluated the scene and adjusted my perspective to align the composition with the drowning sun. Careful use of camera settings, a polarizer, and a soft graduated ND filter yielded a result that I was satisfied with. Mission accomplished!

The water channel.
Conclusion and video
As you will see in the video (and image) below, I took an additional photo of this channel from a higher vantage point as well.
So the next time you see a landscape photographer rushing to and fro on a location, you must know that he is busy making a photo, as pressing the shutter button is only the last part of the job!
I hope these tips are helpful. Please share your questions and comments below.

Water channel from above.
The post Tips for Location Scouting to Get the Perfect Sunset Photograph by Mujahid Urrehman appeared first on Digital Photography School.
How to Plan a Successful Sunset Portrait Session
02
May
In this article you will get some solid tips for planning and executing a sunset portrait session. Learn how to take the images that you and your subjects will love.

Plan ahead for a successful sunset portrait
Many photographers feel overwhelmed when they start photographing portraits, professionally or for fun.
Where should I shoot? How should I pose people? What lens should I use? What settings should I be using? When should I move them to/from a great spot? What should I say to get great emotion?
A plan will give you confidence and help alleviate some of the immediate pressure of decision making. It’s not restrictive because often the best shots are unplanned, but rather something to give you confidence and a direction to fall back on when you aren’t feeling inspired.
Here is our rough plan for all of our sunset shoots, whether it be an engagement, part of a wedding, family portrait, maternity, or outdoor newborn session. Our sunset portrait sessions are always planned approximately one hour before sunset.
This plan’s purpose is twofold – it not only helps you have more confidence and direction, but will also help you make the most of your location and sunset lighting.

STEP ONE: ARRIVE EARLY TO SCOUT
Plan to arrive at least 20-30 minutes early to scout a new location. You never know what amazing little lane or spot may be just around the corner, so it’s worth taking some extra time to explore. It’s also nice to arrive before your client so that you can make them feel welcome upon their arrival.
STEP TWO: ASSESS THE LOCATION
Start to assess the location by asking the following questions:
Where are some nice shady spots to begin? Shady spots are perfect to start off with while the sun is still bright and harsh.
What is the highest point at the location? If you are at a hilly location, this is where you will be able to capture the final moments of sunset and make the most of the golden light.
Where is the most impressive spot for sunset? This is where you want to end up – so it should be last on your route.
With these questions answered, you can very roughly map out a planned route. This means you’ll always have a direction to head and will be able to lead the clients confidently around the location.

STEP THREE: SHOOT FOR THE BEST LIGHT
To make the absolute best of the sunset lighting, you can follow the same sort of pattern every shoot (in this order):
- Shade shots
- Filtered Light shots
- Silhouette shots
- Sunset shots
- Dusk shots
Let’s put your plan into practice, assuming sunset is 6 pm:
4:40 pm – Arrive, scout the area and assess the location.
5:00 pm – Your client arrives and is briefed about the fun time they are going to have!
5:10 pm – SHADE SHOOTING
Get straight into shooting in the nice shady spot you already found. We love to knock out some more formal shots like these here, as usually these are photos clients love, but don’t want big on the walls. Save the more impressive lighting for landscape shots.


5:25 pm – FILTERED LIGHT SHOOTING
You can then move on to any shots where you want the sun in the photo, but you can filter the light through the trees. (Read our past article on four different ways to filter sun flare in this article: How to Control Sun Flare in Your Photos). Photos such as these:


5:40 pm – SILHOUETTE SHOOTING
Roughly 10-20 minutes before sunset is usually the best time to try a silhouette. As silhouettes require you to shoot at a very low angle, you won’t be able to match up the height of the sun with the clients’ feet if you wait any longer. You can read our article on capturing silhouettes here.


5:50 pm – SUNSET SHOOTING
At this point, the light will be golden – so you want to be at your final spot. Do all you can to make this most of the beautiful soft light – you can even position your clients out in the open if you know how to control sunflare. We try to take a variety of photos at this time – a landscape, waist-up, and close-ups. That way, we can create wall art sets that all have the same sunset colouring.


6:00 pm – DUSK SHOOTING
The sun has set, but you still have a glorious window of 15 minutes where you can capture the gorgeous colours of dusk. Because the sun is no longer emitting harsh light, you can now use the whole other side of the location! Areas that were previously too lit by the sun can now be shot in the soft light of dusk.


6:10 pm – DONE!
This plan is designed to give you some structure if you are lacking confidence and direction for your sunset portrait photo sessions. It will help you get the most from the sunlight, and effectively manage your time during the shoot. Of course, being photographers, we’re all for creativity, so breaking the rules is great once you have more confidence.
Please share your sunset portrait images in the comments below.

The post How to Plan a Successful Sunset Portrait Session by Alana Orth appeared first on Digital Photography School.
Sunset Fog on Mount Tamalpais
15
Sep

Fog flows through the trees below Mount Tamalpais and over the Pacific Ocean
As part of my effort to field test the new Canon 5D Mark IV I decided to head out to Mount Tamalpais in Marin, California. Low lying fog hugging the coastline made for some very scenic and surreal sunset photos. This is a teaser photo seeing that it was taken with my old 5D Mark II, but rest assured I’ll have more images and opinions to share about the new 5D Mark IV soon enough. Have any questions about the 5D Mark IV or anything you specifically would like to see tested? Let me know.
Photo Details:
Canon 5D Mark II
Canon 50mm f/1.4
ISO 160, 1 min exposure at f/16
The post Sunset Fog on Mount Tamalpais appeared first on JMG-Galleries – Landscape, Nature & Travel Photography.
JMG-Galleries – Landscape, Nature & Travel Photography
Tips for Doing More Spectacular Sunset Photography
17
Aug
The first thing I was told to do when I wanted to learn how to photograph landscapes and cityscapes, was to always shoot during the sunset. I have always asked myself why, but the answer is actually pretty easy. You get amazing colors in the sky, dramatic clouds, and soft light.

You can photograph the most beautiful place in the world and I can guarantee you, it will look much better during the sunset. The only problem with this mindset, is that you will never take another image in the middle of the day. If I find a really cool spot to photograph, but there won’t be any sunset anytime soon, my go to option is to create a desaturated long exposure. The second option is to come back another day.
In this article, I am going to give you some tips on how to shoot sunsets to get the best results possible. These tips can also be applied to photographing a sunrise, if you have the energy to wake up at 5am and go outside.
How to predict the best sunsets
Depending on where you live, the sunset will be different. You can’t really predict a nice sunset, but there are some signs that can help you decide wether you should go out and give it a try or not. Of course, I would recommend going out and photographing all the time, but if you’re a busy person and do not want to go back home frustrated, then you should consider these few tips.
There are some areas in the world where sunsets are not vivid, and you won’t see any colors in the sky. For example, I have lived in the United Arab Emirates for a year and during that period I have only witnessed around 10 beautiful sunsets (no joke). However, when I go to the south of France, there is a dramatic and vivid sunset everyday.

One of the better sunsets in the United Arab Emirates. This is considered as an amazing sunset over there, but in reality it is just very average.

An amazing sunset in the south of France: I was really surprised because I got the same sunset five days in a row. and it wasn’t even summer.
There is a simple reason explaining this – clouds make all the difference. I am talking about patchy white clouds with a blue sky. These clouds will catch some amazing colors and give you the best results possible when the sun sets.

There were some patchy clouds in the sky, and during the sunset the colors turned out really nice in this image.
If there aren’t any clouds, then your sunset will be pretty boring. You will only have a nice gradient of color going from blue to orange.

Example of a sunset without any clouds.
I usually don’t bother going out when there is an overcast day to shoot sunsets, because the results are quite disappointing. The clouds cover the sky and you can’t see it, so you will end up having no colors at all.
If there is some light rain during the evening, then you can be pretty sure you will get an amazing sunset. I really can’t explain it, but trust me, it works all the time.
Planning and patience
Planning is the most important thing, I would recommend going to the location around 30 minutes before the start of the sunset to compose your shot, especially if you don’t know the location.
With sunsets, the scene can change very very quickly. I highly recommend composing your shot, placing your camera on the tripod, and not moving until the sunset is totally finished.
Sometimes a nice color can appear on a cloud for only two minutes, and if you’re not ready then you won’t be able to photograph it. There is an app called Magic Hour which you can download on your mobile device (for iOS only) Based on your location, it will give you the time that magic hour begins, the time of the sunset, and the time it ends. It also does the same thing for the sunrise the next morning.
Note: you could also try the Photographer’s Ephemeris or PlanIt! apps.

With this information, you have the time to look around, try different compositions, and decide which one works best. I will repeat – once you find your composition, place your tripod, and do not move it. It’s better to have one good photo of a sunset then five different average ones.
You will stay behind your tripod for 30 minutes, taking an image every time the sunset changes, with the clouds moving and new colors appearing. It is quite frustrating, but at the end you will have the best composition possible, with an image of the best clouds, and the best colors of the whole evening.

I waited in the cold for one hour to photograph this sunset. At first it looked terrible, but it started developing very well. I ended up having some nice cotton candy looking clouds.
Lens and composition
I would recommend using a wide angle lens to capture the whole scene, if you’re going to compose your image to include some foreground, middle ground and background, which I highly recommend. This enables the viewer to position himself in the image, and it adds a good sense of depth. Also, try to make the sky or the foreground at least a third of the image.

The trees as the foreground, the Eiffel Tower as the middle ground, and the sky as the background, all give nice depth to this image.
If you cannot find that type of composition, then using a long lens can be a good alternative, while using the rule of thirds.

I could not find a good composition for this shot, so I used a long lens to compress everything. and composed it using the rule of thirds.

Composing my shot using the rule of thirds.
Settings and extra gear
A tripod is essential because you will want to shoot with an aperture between f/8 and f/13 for sharp images, and ISO 100 for the best image quality. This cuts down the light quite a lot, and you will end up having a slow shutter speed to compensate. To avoid any shaky images, use a tripod with a cable release or a two second timer.
I highly recommend exposing your images for the highlights (which means you are exposing for the sky). The rest of the image will be underexposed, but if you’re shooting in RAW you will be able to recover details in the shadows.
Another solution is to use a graduated neutral density filter that will cut down the light on your highlights in the sky, and keep your mid-tones and shadows well exposed.

A graduated filter that you can stack.
I usually leave my white balance on auto, because with RAW files I can take more time to change it on Lightroom. If you’re shooting JPEG, the white balance that works the best with sunsets is Shade or Cloudy. It gives a nice warm magenta color to the image, and makes the vivid colors in the sky pop more.
Polarizing filters are also a good alternative to recover details in the sky, and make the colors more saturated without any post-production.

Using manual focus can be useful if it gets too dark and your lens has trouble focusing by itself.
Get creative
For sunsets, in my opinion the best thing to do is to get creative – either do HDR or digital blending.
In both cases, it’s better to take three different exposures to get the full dynamic range of the scene. Especially because there will be a lot of contrast between the brights and the darks, it’s difficult to get all the details. You can merge the exposures automatically with a software, or manually with luminosity masks.

This sunset looks good, but because I did not shoot three different exposures you can see in the middle there are white pixels in the sky that I could not recover.
You can also get creative by doing long exposures and stretching the clouds. And of course you always have Photoshop and Lightroom to finish your art the way you like it.

This is an example of a creative sunset: I shot 3 different exposures, a long exposure of the clouds, a long exposure of the car trails one hour later, and merged everything on Photoshop to get the best of both worlds.
Now it’s your turn. Do you have any other sunset photography tips to share? Please do so, and share your images as well, in the comments below.
googletag.cmd.push(function() {
tablet_slots.push( googletag.defineSlot( “/1005424/_dPSv4_tab-all-article-bottom_(300×250)”, [300, 250], “pb-ad-78623” ).addService( googletag.pubads() ) ); } );
googletag.cmd.push(function() {
mobile_slots.push( googletag.defineSlot( “/1005424/_dPSv4_mob-all-article-bottom_(300×250)”, [300, 250], “pb-ad-78158” ).addService( googletag.pubads() ) ); } );
The post Tips for Doing More Spectacular Sunset Photography by Yacine Bessekhouad appeared first on Digital Photography School.
5 Tips to Take Better Sunset Photos – and Why Not to Photograph the Sunset Directly
31
Mar
As a landscape photographer, I participate in many online groups, and I also teach classes where I get the opportunity to see less experienced photographers’ work. I often see some very good work, but many times I also see missed opportunities. Newer photographers just getting started photographing landscapes often times become so enamored by the colors in the sky, that they neglect other areas of the image. I often see images with weak, underexposed foregrounds, and poor compositions that keep them from being good photos and relegates them to being just pretty snapshots.
Don’t get the wrong idea. I often photograph at sunrise or sunset. But, the sun or sky is rarely the subject of the photo. It may be an element in the image, but the subject is generally something else. In many ways, it can be more difficult to make a great image at sunset or sunrise, because there is a tendency to be drawn to the pretty colors in the sky. But as photographers, we really need to pay attention to the other elements in the image to ensure we’re creating a complete composition. So below are a few tips to help improve your sunset or sunrise photos.
1- Put the sun in the background
This tip is the most obvious. Sunsets make great backgrounds, but rarely do they make great subjects. You need to find a good foreground. The gorgeous colors in the sky can be so vibrant that they really allow us to see our surroundings differently. The play of light and shadow over objects in the foreground, due to that great directional light given off when the sun is lower in the sky, helps create interest that might not be there in the middle of the day when the sun is higher.
The best way to do this is to find something of interest right in front of you. Use a wide angle lens, such as the 16-35mm or something around that range, zoom out to as wide as you can, and put your foreground object a few feet in front of you. Stop down and set your aperture to f/11 or smaller, and focus on your foreground object to ensure that it’s sharp. If you want to add some extra interest, try stopping your lens down as far as you can. This will help create a starburst where the sun is, which will add a little extra interest in your scene.
One thing to keep in mind, is that the exposure for your foreground subject and the background exposure, are likely going to be very different. You have a few options here. The first would be to expose once for the foreground, and once for the background, and then blend them together in Photoshop. A great article on blending exposures is 5 Easy Steps To Exposure Blending for High Contrast Landscapes. Next, and generally my preferred method, is to use a graduated neutral density filter to try and darken the bright sky in the background, so that it is more balanced with the foreground subject. Read Using Graduated Neutral Density Filters for Landscape Photography for more on ND Grads. The last, and easiest option, is to create a silhouette of the foreground objects, while properly exposing the colorful sky and sun in the background. This works best with a singular object with a distinctive form, such as a bridge, a tree, a distinctive building, or a person in a distinctive pose.
2 – Photograph with the sun at your side
In this case, the sun itself won’t be in your scene at all. The magic of sunsets or sunrises is the soft, warm, directional light they offer. This light can create tremendous light and shadow play within the scene, making textures in your foreground especially desirable. Rocks, logs, trees, grasses, and undulations or patterns on the ground, will create interesting shadows and highlights that draw your viewer’s eye into the scene. In this case, it’s often best to put the sun to your side, so that it rakes across the scene, letting the shadows and highlights play from one side to the other.
With a scene like this, a polarizing filter may help as well, as they are most effective when the camera is aimed 90° from the sun. This will help deepen blue areas of the sky, enhance other colors, and reduce any haze that may be in the scene. You may need to make some choices about exposure, if the contrast between highlight and shadow in the foreground is too great. A graduated neutral density filter can help keep the sky under control if it is still too bright against the foreground.
3 – Keep the sun at your back
At sunrise or sunset, that soft warm light that I mentioned as being great from the side, is also great from behind you. This will help create a soft frontal light on your scene, illuminating all of the details. This is likely to be the easiest exposure of the three situations, in that the light will be very even, with no bright highlight or deep shadow areas in the scene. You’ll likely get soft, warm pastel colors if there are any clouds or haze in the sky to reflect the sun’s light.
Be careful when composing your image, as the sun behind you will cast a long shadow, and you may end up with your own shadow in the photo. To minimize this, try crouching down low, and setting your tripod as low as possible to help shorten the shadow. Also, if using filters for longer exposures, on DSLRs with optical viewfinders, the sun can enter the camera from the rear, affecting your exposure. Take care to cover your viewfinder in these instances.
4 – Arrive early, stay late
You’ll want to get there early for sunrise. The color in the sky can start half an hour, or more, before the sun actually rises, with clouds first showing subtle traces of pink and purple before the red, orange, and yellows appear as the sun breaks the horizon. You’ll want to be set up and ready when that happens, which means trekking through the dark to your location. Advance scouting can be helpful for this.
The same is true at sunset, but in reverse. Just because the sun has gone down, doesn’t mean that the show is over. Generally speaking, the sky will continue to light up, and colors will continue to change for about 30 minutes after the sun goes down. Many photographers have packed up and gone before this happens. Patience will reward you with more subtle color changes, such as reds going to purples and blues, rather than the vibrant yellows and oranges you get during the initial phases of the sunset.
5 – Shoot RAW
More than any other time to shoot, sunset or sunrise creates dramatic colors and fantastic play between light and shadow. Because of that, it can be difficult to try and capture the detail in the shadows or highlights, depending on which way you bias your exposure. A RAW file contains much more information than a JPEG, which will allow you to bring out the details in shadow and highlight areas that may be lost if shooting JPEG files. In addition, shooting RAW files allows you to adjust your white balance in processing to give you better control over the overall tone of the image.
For more on processing RAW files, check out Understanding the Basic Sliders in Adobe Camera RAW, and for more on why you might want to consider photographing in the RAW format, see 5 Reasons To Shoot Your Landscape Images in RAW.
What’s your favorite sunrise or sunset photography tip? Please post your tips and images in the comments below!
googletag.cmd.push(function() {
tablet_slots.push( googletag.defineSlot( “/1005424/_dPSv4_tab-all-article-bottom_(300×250)”, [300, 250], “pb-ad-78623” ).addService( googletag.pubads() ) ); } );
googletag.cmd.push(function() {
mobile_slots.push( googletag.defineSlot( “/1005424/_dPSv4_mob-all-article-bottom_(300×250)”, [300, 250], “pb-ad-78158” ).addService( googletag.pubads() ) ); } );
The post 5 Tips to Take Better Sunset Photos – and Why Not to Photograph the Sunset Directly by Rick Berk appeared first on Digital Photography School.
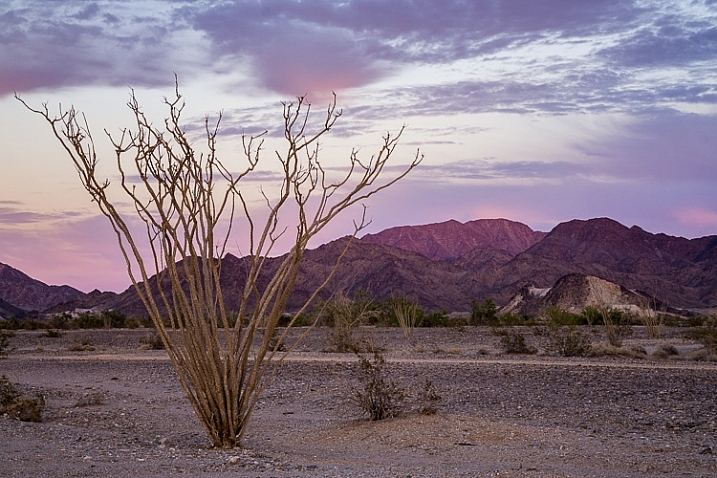
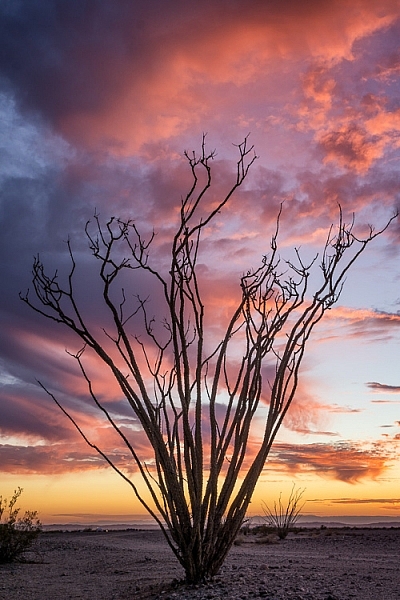
How to Find a Great Sunset Photography Location
05
Mar
We all know that one essential ingredient to a great photograph is beautiful light, and that some of the best light happens during sunset. But what truly makes a great sunset photography location?
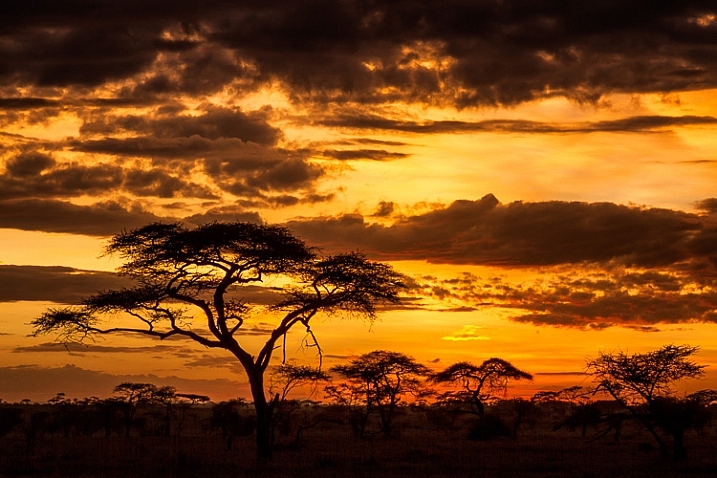
Acacia tree or umbrella thorn in Serengeti National Park, Tanzania.
In my experience, the best locations are ones where you can find two different compositions, that will work under different lighting situations, to double your chances of making a spectacular sunset image.
To understand what I’m getting at, first think about the direction of light. As the sun descends in the sky and approaches the horizon, the last of the sun’s rays have a wonderful warm hue, that can light up the tips of mountains, and cast a golden glow on the land in the direction opposite the sun. Then there’s usually a lull for a few minutes when nothing much happens, giving you a chance to change position to face the sun. When the sun falls below the horizon, you’ll have an opportunity to make backlit or silhouette photos.
Finding Your Location
It’s best not to leave location scouting for the last minute, or you won’t have enough time to find a spot with two good compositions, in both directions. Scouting a location is a good activity for mid-afternoon, when you’re probably not going to be photographing anyway, due to the harsh light. Leave your gear at home, or only take minimal equipment to record the scene, so you don’t have a heavy load and you can move quickly and easily.
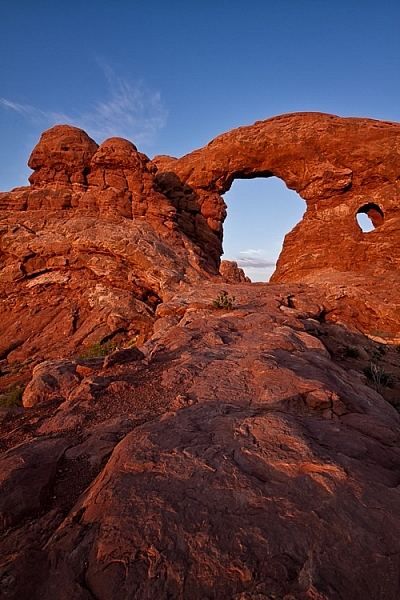
Arches National Park, Utah
Before you go scouting, don’t forget to find out the exact direction where the sun will set. This is easy to find with a quick internet search and a compass, or using an app on your phone or tablet.
When you are scouting, what you’re looking for is a good composition for both a front-lit scene and a backlit scene. They don’t necessarily have to be at the exact same spot, but it should take you no more than a few minutes to walk between them.

Sunset at Arches National Park, Utah.
Composition Tips for Front-lit Scenes
For your front-lit scene, you are going to have nice golden light throughout the landscape, and if there are any mountains in your frame, they will have dramatic bright light on the top. What I usually look for in this kind of a scene is depth, by using foreground elements to emphasize the distance between foreground and background.
Try to find some leading lines that will guide the viewer’s eye through the image, and ideally lead to something in the background. Or, find other interesting features, such a plant or colourful rocks, to place in the foreground of the scene.
Composition Tips for Backlit Scenes
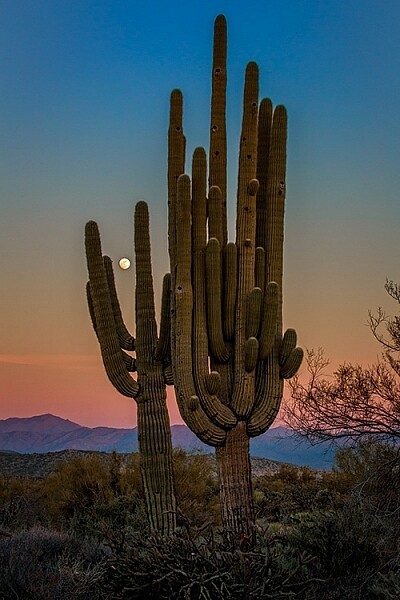
Once those final rays have disappeared from your front-lit scene, you’re ready to change positions and get ready for the backlight. In a backlit scene, everything on the ground is going to be in shadow, so you no longer need to worry about depth – it’s all going to be black anyway. So now what you are looking for is something with a great shape, to make an interesting silhouette against the colourful sky. This can be jagged mountains, sea stacks on the ocean, a cactus, or anything else that has a really strong shape. Don’t pick anything that is going to just look like a vague blob of darkness.
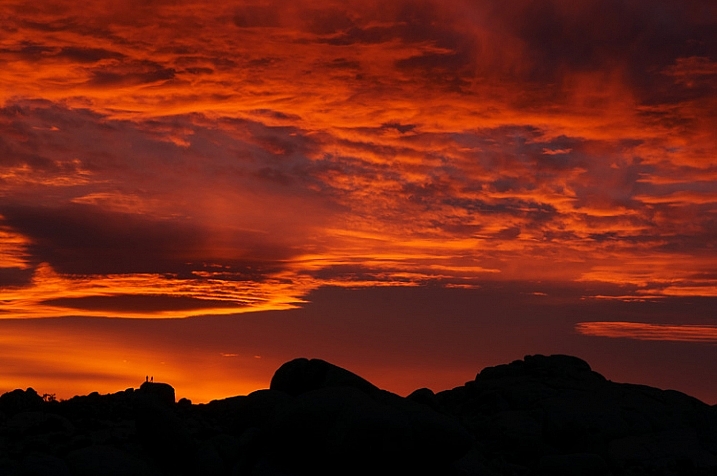
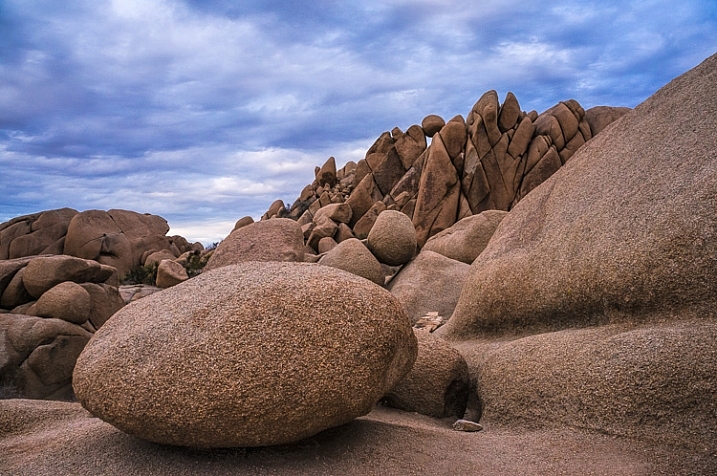
Sunset at Joshua Tree National Park, California
In the Field
Keep these composition ideas in mind when you scout your location, and if you need to, mark your chosen spots with a GPS while you are scouting, to make it easier to find your location when you return to the scene for sunset.
Go early! If there are any clouds on the horizon where the sun will set, the last rays for your front-lit scene will come sooner than expected.
Ogilby Road near Yuma, Arizona.
Exposure for Front-lit Scenes
As the sun descends in the sky and approaches the horizon, your scene will have a more even exposure than it would have earlier in the day. But you still may want to use a graduated neutral density filter, to even out the exposure between the brighter sky and the darker land.
Exposure for Backlit Scenes
When exposing for a backlit scene, it’s important not to use an exposure setting that takes the whole frame into account, like matrix or evaluative metering. Instead use spot metering, and meter on a sky portion of your image, which will capture the dramatic colours in the sky, while allowing your subject in the foreground (the one with the great shape) to become a silhouette.
Conclusion
You can only plan so much when it comes to sunset photography, the rest is up to mother nature. You can only guess what is going to happen with the clouds and the light. When you get there, you may only have clouds for your front-lit scene and not the backlit one. But at least if you plan out two different shots, you’ll double your chances of coming home with a stunning sunset photo.
googletag.cmd.push(function() {
tablet_slots.push( googletag.defineSlot( “/1005424/_dPSv4_tab-all-article-bottom_(300×250)”, [300, 250], “pb-ad-78623” ).addService( googletag.pubads() ) ); } );
googletag.cmd.push(function() {
mobile_slots.push( googletag.defineSlot( “/1005424/_dPSv4_mob-all-article-bottom_(300×250)”, [300, 250], “pb-ad-78158” ).addService( googletag.pubads() ) ); } );
The post How to Find a Great Sunset Photography Location by Anne McKinnell appeared first on Digital Photography School.
You must be logged in to post a comment.