RSS
 

Posts Tagged ‘Stunning’

Stunning time-lapse captures the seasons of Norway

03 Feb

Norway is an amazing place and this time-lapse by Morten Rustad definitely does the region justice. Morten says that he travelled some 20,000km, took some 200,000 images, filling 20 terabytes worth of hard drive space to put this film together. Sit back, turn off the lights, crank the sound and definitely enjoy this one in HD.

To find out more about the film and how Morten went about putting it together please visit his website. 

Articles: Digital Photography Review (dpreview.com)

 
Comments Off on Stunning time-lapse captures the seasons of Norway

Posted in Uncategorized


Photographer captures stunning Aurora Borealis time-lapse from airplane

19 Jan

If you’re seated next to a window on a flight to Iceland, it’s a good idea to keep your camera close. Landscape photographer Aryeh Nirenberg did, and was treated to an incredible show from the Aurora Borealis at 35,000 feet. With an empty row and his camera nearby, he created an impromptu rig to stabilize the camera and record the time-lapse above.

Whatever works, right? Nirenberg’s D810 is braced against the window with a tripod, and a blanket cuts glare from the cabin lights.

Nirenberg propped his Nikon D810 against the window using his tripod, and wrapped a blanket around the lens to cut the glare from cabin lighting. We think the effort was well worth it for a unique view of one of nature’s best light shows.

Check out Aryeh Nirenberg’s Instagram to see more of his work.

Articles: Digital Photography Review (dpreview.com)

 
Comments Off on Photographer captures stunning Aurora Borealis time-lapse from airplane

Posted in Uncategorized


How to Get Stunning Macro Photos with Your Mobile Phone

01 Nov

If you’ve ever scrolled through Instagram or Flickr and seen an incredible close-up photograph of a flower, insect, or even jewelry, you may have wondered how you can get similar photos, especially if you don’t have a camera. Thankfully, you don’t have to buy a DSLR or expensive macro lens to get these kinds of shots. All you need is a mobile phone, a simple accessory, and a bit of curiosity. In this article, I’ll go through some tips to help you get stunning macro photos using your mobile phone.

how-to-get-stunning-macro-photos-with-your-mobile-phone

Busy

Lenses

While some phones have a macro mode, the best way to get amazing macro photos with your phone is to invest in an inexpensive lens (or set of lenses) that work specifically with your device. I have an iPhone 5s and initially purchased the Olloclip 4-in-1 set that includes lenses for wide-angle, fisheye, macro 10x, and macro 15x.

I quickly discovered the 10x was my personal favorite since it best suited most of my subjects. So I also got the Olloclip Macro 3-in-1 that has lenses for 7x, 14x, and 21x, as well as a couple special hoods that diffuse the lighting and make getting a good shot a bit easier. Over time, I’ve discovered that the 7x lens is my go-to for nearly all of my macro photos since it can capture a large enough area while still getting lots of detail. You can experiment and use any of these magnifications to get the types of shots you are not able to take with your phone camera alone.

Prairie

Options

There are definitely other brands and magnifications available, but make sure that the lens you buy fits with your phone and won’t get in the way of taking photos. Note that most lenses slip over your phone so you cannot typically use them with a phone case. Olloclip has special cases with openings at the camera area for easy access, or you can go without a case.

You never know when you might come across something that will make for a good macro photo. Initially, I suggest taking your lenses with you (they fit in a pocket), especially when you go outside so that you can experiment with different subjects. A garden or another area with flowers or insects is a great place to try out your new lens. Or if it’s winter, use your lens as an excuse to buy a bouquet of flowers.

Garden

Lighting

As with all photography, lighting is critically important for taking good macro pictures. Daylight is probably the best and easiest to work with, but bright sunlight can make for tricky shadows. With macro photography, sometimes you can simply move your subject to decrease shadows by gently bending a flower stem or turning a leaf toward you.

Fullsun

You can also use your body to block bright sunlight or put a hand over your subject to reduce glare. You can play around with sunrise and sunset, and catch lighting in the background of your images. With macro lenses, the light will often turn into a lovely addition to your photos in the form of bokeh, or out-of-focus areas that make your pictures appear to glow.

Bokeh

Note: you can also add light. Read: How to Create Gorgeous Flower Images using a Flashlight and a Reflector

Focus and framing

With macro photos, there are endless ways to frame your subject, but you will be limited in the depth of field or the area of the photo that will remain in focus. You want the subject to remain (mostly) in focus, depending on your magnification. The larger the magnification, the smaller the area of exact focus in your pictures. This can lead to surprisingly beautiful photos which you might not expect to get from just your mobile phone.

Sunset

Sometimes your intended subject will be too large to fully capture, even with the smaller magnification (like the 7x lens), so you may have to focus on only a part of the subject like the center of the flower, or a few petals. This is the fun part of macro photography! You can shoot the subject from directly above, from the side, or even from below. Experiment with different angles for the same subject.

Center

Other notes

When taking macro photos, any movement is your enemy. Even slight movement while shooting will result in blurriness. You will need to remain very still, and do everything you can to keep your subject from moving. A tripod for your phone can help but isn’t necessary. Just find a position that’s comfortable, stay as still as possible, and steady your phone with two hands.

Sometimes, like on a breezy day, it’s impossible to keep your subject in one place. You can sometimes hold your subject still (as with a flower), but other times you can’t, as with shooting insect photos. One helpful tip for these situations is to use the burst mode on your phone’s camera which takes many shots in rapid succession. On an iPhone, you can hold down the camera button on the side of the phone or on-screen to shoot multiple photos very quickly. Android phones usually have a way to do this, too. If you don’t have built-in burst most, just take many photos while staying as still as possible. This is how I get most of my insect photos, patience and taking many shots. It’s easy to weed out the blurry photos later.

Beebalm

Editing – especially for Instagram users

Since many people who use their mobile phones for photography also use Instagram to share them, here are a couple extra tips for Instagram users.

1. You don’t need to use Instagram’s filters to make great photos.

Adjusting color or warmth slightly can make your photos look more like real life. In the image below, the only adjustment has been to crop the image.

Original

2. Turn up the Lux

This is the little light/dark option at the top of the screen when you are on the Filter or Edit pages in the Instagram app. Using this editing trick (try moving it to the right to 50 or even 100), you increase the intensity of your images. This makes the photo a little less washed out, which can help if you’re taking photos on a very bright day. In the image below, this is turned up slightly and adds more depth to the petals.

Lux

3. Sharpen your macro photos

Using Instagram’s own built-in sharpen edit, you can bring a bit more detail out of your macro photos. In the image below, this has been adjusted and brings out the detail in the center of the photo.

Sharpen

Conclusion – your turn

Do you have any tips for getting good macro shots with a mobile phone, or with other gear that doesn’t cost a lot of money? Leave your thoughts in the comments below, and feel free to share your own macro shots, too. I’d love to see your photos.

Ladybug

googletag.cmd.push(function() {
tablet_slots.push( googletag.defineSlot( “/1005424/_dPSv4_tab-all-article-bottom_(300×250)”, [300, 250], “pb-ad-78623” ).addService( googletag.pubads() ) ); } );

googletag.cmd.push(function() {
mobile_slots.push( googletag.defineSlot( “/1005424/_dPSv4_mob-all-article-bottom_(300×250)”, [300, 250], “pb-ad-78158” ).addService( googletag.pubads() ) ); } );

The post How to Get Stunning Macro Photos with Your Mobile Phone by Beth Ringsmuth Stolpman appeared first on Digital Photography School.


Digital Photography School

 
Comments Off on How to Get Stunning Macro Photos with Your Mobile Phone

Posted in Photography


How to Create Stunning Architecture Photography by Painting with Light

15 Sep

My name is Mike Kelley. I’ve been lucky enough to travel the world and see incredible architecture while working for hotels, architects, designers, and developers.

Architecture tips 04

Architecture tips 07

In this article, I’d like to share with you one of my favorite techniques for photographing architecture. If you’ve ever tried to photograph a building at twilight, you know how tough it can be to properly expose all parts of the scene. You know how some areas tend to fall into darkness.

When this happens, many photographers will just try to recover the shadows with a brighter exposure or some dodging and burning. Unfortunately, that can lead to muddy results which often display a lack of texture and color.

Although this article touches on my basic processes, a full tutorial on my workflow is $ 100 off right now over at Snapndeals – Mike Kelley’s Where Art Meets Architecture Course

Light painting for architecture photography

One technique that I’ve adapted to use with modern photographic tools is light painting. Back in the old days, depending on how old you are, there were many photographers who painted with light. They would literally stop down the aperture, wear an all-black outfit, and wave a light around for a 30-60 second exposure to fill in shadows and give the image some nice snap.

Luckily, things are a bit easier these days (to me, at least). You can use a single Speedlight and see the results instantly. All without burning through expensive sheets of 4×5 film, or having to dress like Steve Jobs to keep yourself from showing up in the exposure.

I personally use either a Lowel GL1, Yonguo Speedlight or Profoto B1 light to pull it off, depending on how much power I’ll need. The aim here is to add light in spots that appear to have natural light falling on them – either from landscape lighting or interior lighting. Adding flash or hot light will dramatically clean up the quality of light, by giving it direction and fall off. Whereas the ambient light may create a muddier appearance due to having no directionality, incoherent color casts, or being mixed with the falling light of the day.

Architecture tips 01

So you’re all set up for your twilight. You’re waiting for that perfect balance between falling ambient exterior light and interior glow. Before, during, and after twilight, you should have the camera set in one place on a tripod and every couple of minutes, shoot a bracketed set of images at 0 EV, -2, and +2, or something similar, whatever your preference may be.

Shooting at twilight

When the time for the perfect twilight has arrived, and the falling ambient exterior light and interior glow from the practical lights are perfectly balanced, it’s time to add your hot light or flash. Moving quickly (it helps to have a plan ahead of time for what you’ll flash) add light to areas that you think have fallen into too much shadow or places that could use a little texture and color.

I also recommend adding a CTO gel to your lights to warm them up so that they match the interior glow of the house or any exterior lighting that may be present. This process should take no more than five minutes and should be shot tethered, whether to a computer or a wireless solution like a CamRanger, so you can see what you’re doing immediately and adjust accordingly.

Architecture tips 12

Architecture tips 17
Architecture tips 27

After you’ve gone around and added light, continue to bracket exposures to cover your bases. Sometimes I’ll use an exposure from when it’s completely dark outside and the only light in my scene is from the interior glow to remove any distracting reflections or color casts that popped up.

Processing the images

When in post-production, try to keep it simple. I used to think it was a source of pride to edit these photos and have to use 50, 70, or even more layers. But the fewer layers there are in Photoshop, the less of a chance there is for something to go awry. Depending on the subject, 10-15 flash pops should be more than enough to get this amazing effect on your images. You may want to add or remove some color using curves, and it would also be wise to make sure that everything blends together seamlessly by setting the blend mode of your flash pop layers to Lighten.

Replace the sky if necessary

Lastly, in many of my images I end up replacing the sky. Don’t underestimate what an amazing impact a new sky can have on your image – but only when it’s done perfectly! If there’s anything that takes people out of an image and ruins the moment, it’s a poorly composited sky that doesn’t match the color and brightness of the rest of the image So choose your sky carefully. I personally like to vary the opacity of my sky layer to taste so that things all blend seamlessly.

No architectural photo would be complete without nice, straight verticals lines, so use CMD/CNTL + alt + shift + E to stamp all to a new layer. Then drag out some ruler lines and make sure there’s no distortion – we don’t need people thinking our clients can’t build straight homes.

Architecture tips 08

Here is the final image

You can watch a video of this entire process below and see me in action:

Summary

I hope you enjoyed this quick tour through one of my favorite techniques. The more you use it, the more flexible you will become with adding light and mood to make your photos really stand out.


If you would like to go more in depth with this technique and learn how to build your own business in real estate and architectural photography, Kelly’s full-length tutorial is currently 33% off over at Snapndeals – grab it before the sale ends September 27th, 2016.

googletag.cmd.push(function() {
tablet_slots.push( googletag.defineSlot( “/1005424/_dPSv4_tab-all-article-bottom_(300×250)”, [300, 250], “pb-ad-78623” ).addService( googletag.pubads() ) ); } );

googletag.cmd.push(function() {
mobile_slots.push( googletag.defineSlot( “/1005424/_dPSv4_mob-all-article-bottom_(300×250)”, [300, 250], “pb-ad-78158” ).addService( googletag.pubads() ) ); } );

The post How to Create Stunning Architecture Photography by Painting with Light by Mike Kelley appeared first on Digital Photography School.


Digital Photography School

 
Comments Off on How to Create Stunning Architecture Photography by Painting with Light

Posted in Photography


Learn Ansel Adams’ Biggest Secret for Stunning Photography – Visualization

22 Jun

Ansel Adams is the most widely known photographer in history, you don’t need to look very far to see one of his images. Would you like to know the whole key to Ansel Adams’ stunning photographs?

This is a photograph of half dome in Yosemite taken in 1927 by Ansel Adams

Monolith, The Face of Half Dome, by Ansel Adams (Image courtesy Ansel Adams Illumes and The Ansel Adams Gallery)

In this this video interview with his son, Michael Adams, you will hear about his breakthrough as a photographer, when he went from merely recording an image, to being an artist who interpreted the image to tell the story he wanted.

As you’ll hear, Ansel had his breakthrough when he climbed up to take a photograph of Half Dome, the iconic monolith in Yosemite, California. The moment he realized that the yellow filter just wasn’t going to convey what he saw and felt, he changed to a red filter which expanded the tones of the image and brought out the darkness of the sky, thereby creating the mood he had visualized.

Ansel said, the whole key lies in first visualizing the image you want, rather than just snapping away.

By first forming the image or idea in your mind’s eye, you can then set about to capture it. His son Michael summed it up with, “He knew what he wanted and he got what he wanted.”

These are Ansel’s’ key points that you can practice to continually improve your photography:

  • Look at the external event, and then visualize what you want it to look like, clearly and decisively.
  • Try to make the photograph of what you saw and felt.
  • Train yourself to see what the camera sees by comparing what you see, with what it looks like in the camera.
  • Practice your craft and do your homework so you can make the photograph you desire by going through these steps to capture what you visualized.
  • Placing the camera: Find the best point of view of the lens.
  • Make a proper lens selection.
  • Decide on your depth of field and set your aperture.
  • Control your exposure and later, the development.

As he said, with practice this becomes automatic and instinctive. Put Ansel’s advice into action and let me know your results in the comments below.

googletag.cmd.push(function() {
tablet_slots.push( googletag.defineSlot( “/1005424/_dPSv4_tab-all-article-bottom_(300×250)”, [300, 250], “pb-ad-78623” ).addService( googletag.pubads() ) ); } );

googletag.cmd.push(function() {
mobile_slots.push( googletag.defineSlot( “/1005424/_dPSv4_mob-all-article-bottom_(300×250)”, [300, 250], “pb-ad-78158” ).addService( googletag.pubads() ) ); } );

The post Learn Ansel Adams’ Biggest Secret for Stunning Photography – Visualization by Marc Silber appeared first on Digital Photography School.


Digital Photography School

 
Comments Off on Learn Ansel Adams’ Biggest Secret for Stunning Photography – Visualization

Posted in Photography


25 Stunning Images that Show Next to Nothing – Minimalism

04 Jun

Just like the TV show Seinfeld that was a show about nothing, putting next to nothing in your images can produce some good results.

min·i·mal·ism – a style or technique (as in music, literature, or design) that is characterized by extreme spareness and simplicity

Sometimes in an image less is more, and many beginners try to put too much into their images which makes them busy and unfocused. Look at these images that use minimalism well:

Patrick Marioné - Thanks For > 2M

By Patrick Marioné – thanks for > 2M

Darwin Bell

By darwin Bell

Iñaki Bolumburu

By Iñaki Bolumburu

Kai C. Schwarzer

By Kai C. Schwarzer

Susanne Nilsson

By Susanne Nilsson

Maf04

By maf04

Craig Sunter

By Craig Sunter

LadyDragonflyCC - >;

By LadyDragonflyCC – >;<

Kai C. Schwarzer

By Kai C. Schwarzer

Daniel Sjöström

By Daniel Sjöström

Jeff Wallace

By Jeff Wallace

Takashi .M

By Takashi .M

Kai C. Schwarzer

By Kai C. Schwarzer

Stewart Ayrey

By Stewart Ayrey

Daniel Sallai

By Daniel Sallai

Michael Taggart Photography

By Michael Taggart Photography

Jonathan Kos-Read

By Jonathan Kos-Read

Marilylle Soveran

By Marilylle Soveran

Soumyadeep Paul

By Soumyadeep Paul

Danipuntocom

By Danipuntocom

Georgie Pauwels

By Georgie Pauwels

Howard Ignatius

By Howard Ignatius

Md. Al Amin

By Md. Al Amin

Steve Corey

By Steve Corey

Kristina Alexanderson

By Kristina Alexanderson

googletag.cmd.push(function() {
tablet_slots.push( googletag.defineSlot( “/1005424/_dPSv4_tab-all-article-bottom_(300×250)”, [300, 250], “pb-ad-78623” ).addService( googletag.pubads() ) ); } );

googletag.cmd.push(function() {
mobile_slots.push( googletag.defineSlot( “/1005424/_dPSv4_mob-all-article-bottom_(300×250)”, [300, 250], “pb-ad-78158” ).addService( googletag.pubads() ) ); } );

The post 25 Stunning Images that Show Next to Nothing – Minimalism by Darlene Hildebrandt appeared first on Digital Photography School.


Digital Photography School

 
Comments Off on 25 Stunning Images that Show Next to Nothing – Minimalism

Posted in Photography


25 Stunning Photos of City Skylines

15 Apr

Urban landscape photography, pretty much involves city skyline images. Iconic shots of skylines and many cities of the world are instantly recognizable.

See if you find these images inspiring, and if you can name the cities:

Anh Dinh

By Anh Dinh

Olsonj

By olsonj

Viisoreanu Florin Gabriel

By Viisoreanu Florin Gabriel

Chris Toe Pher

By Chris Toe Pher

Matt Paish

By Matt Paish

Mike Boening Photography

By Mike Boening Photography

Michaela Loheit

By Michaela Loheit

Yooperann

By yooperann

Miroslav Petrasko

By Miroslav Petrasko

Maciek Lulko

By Maciek Lulko

Miroslav Petrasko

By Miroslav Petrasko

Whereisemil

By whereisemil

Herr Olsen

By Herr Olsen

Giuseppe Milo

By Giuseppe Milo

Aurimas

By Aurimas

Jamie McCaffrey

By Jamie McCaffrey

Ram Balmur

By Ram Balmur

RobinTphoto

By RobinTphoto

Peter Hubler

By Peter Hubler

Gordon

By Gordon

Dave Wilson

By Dave Wilson

Gord McKenna

By Gord McKenna

Hopeless128

By hopeless128

Loïc Lagarde

By Loïc Lagarde

Siyamalan

By Siyamalan

googletag.cmd.push(function() {
tablet_slots.push( googletag.defineSlot( “/1005424/_dPSv4_tab-all-article-bottom_(300×250)”, [300, 250], “pb-ad-78623” ).addService( googletag.pubads() ) ); } );

googletag.cmd.push(function() {
mobile_slots.push( googletag.defineSlot( “/1005424/_dPSv4_mob-all-article-bottom_(300×250)”, [300, 250], “pb-ad-78158” ).addService( googletag.pubads() ) ); } );

The post 25 Stunning Photos of City Skylines by Darlene Hildebrandt appeared first on Digital Photography School.


Digital Photography School

 
Comments Off on 25 Stunning Photos of City Skylines

Posted in Photography


How to Add a Texture Overlay to Your Images for a Stunning Effect

07 Feb

Adding a texture overlay to your images is an amazing creative tool. It adds another dimension of depth in the image; it makes it dreamy and adds a painting flavor. It also creates a timeless feeling, especially useful when you want to give a vintage look to your pictures.

You will really love this effect, it can be used in your personal work, and also sometimes in your commissioned work when you have some creative freedom over the result.

Adding a texture overlay is very easy. In this article I will explain how to create your own textures, then how to edit them to have infinite creative possibilities.

05 texture 100 percent

First – shoot your own textures

You can find many free textures online, for example on Deviant Art, or on any stock photo website. This is east, and sometimes helpful, although you can have copyright issues. The textures you will find online for free, are not always at high resolution. You will mainly find small files, not always the best to work with. But, I must say that so far I have never had any issues regarding textures size, even when printing my work in large format.

Shooting your own textures can be very fun, and a great creative exercise. Okay sometimes you will feel weird because people will not understand what you are shooting down on the pavement, nor they will see the point in photographing an old and dirty rain gutter. But it is well worth it.

It is very easy to find great textures around you and build you own texture stock. You only have to take a walk with your camera to find textures. Look for some old painting on the walls, wood on the doors, or any bench in the street. You can also find metal objects with great texture and colors. You are looking for whatever has scratches, and can add an organic and natural feeling to your work. You can use stones, such as marble or granite, but also canvas or any other fabric with a nice texture as well.

01 textures

When shooting your texture, pay attention to your exposure compensation, as you want to have a contrasty, image to get more difference between the darks and lights. Also, you want to make sure everything is more or less sharp, so pay attention to your focus, depth of field, and angle from which you are shooting. This way the texture will be more homogeneous on your final image (and as you will see later in this same article you can adjust the texture in many ways).

To help you start your own textures library, you can find a link to download some textures you can use for free at the bottom of this article. I found many good textures for free online, so it is my way to pay forward this kind of generosity I found among photographers.

You can create your own textures at home

In Brussels it is freezing cold and rainy during the winter, so maybe you are the same as me, you do not want to go outside.

03 blue tale 01 no texture

When you look for a specific effect you can make your own specific textures. For example, in the picture A Blue Tale (above) I wanted to play with a pencil color effect. Therefore I created the following texture to be added to the clouds.

I simply colored a piece of paper with a blue pencil crayong to have those lines and a texture effect. In this case, the preparation of the texture is fully part of the creative process, to put all those details together to create the image.

02 color pencil texture

03 blue tale 03 color pencil texture added

03 blue tale textures

You can also play with paper, painting, burn some paper (although I recommend being very careful).

Now that you have your textures ready to be used, let’s open them in Photoshop. You can also use the ones that I shot for you down my street. To add a texture you can simply grab your moving tool and drag and drop it on your picture – or by doing copy/paste on your image.

Play with the Blend Modes

You can change the Blend Mode to change the look. When you add a texture to your image it will first look as follows, you see only the image of the texture on top of your image.

04 texture normal 100 percent

Play around with all the options Photoshop offers. Some texture/image combinations it will look weird, and others will look amazing.

Select your texture and hold down the Shift button, and + or –, to change quickly Blend Modes to go through them one by one, and test on your image. It allows you to see what every single Blend Mode will do to your texture – great way to quickly learn which one you like best.

  • The darkening group will help you to get rid of all light tones.
  • The lightening group will allow you to get rid of your darks.

04 Blend Modes panel

Most of the time, I choose the Soft Light Blend Mode – but you can choose any option, depending on your taste and the sought-after effect.

04 Blend Modes

Modify your texture

Move and resize the texture layer. Grab your Move Tool to place the texture as you wish on the image. Use Cmd/Ctrl+T to activate the Free Transform Tool and resize the texture layer, or flip it, to adjust it to the underlying picture.

You can add a Levels Adjustment with Cmd/Ctrl+L, to add some more detail contrast in your texture. You can also adjust the color. Usually I add the color in my image and prefer a desaturated texture. Hit Cmd/Ctrl+U to play with its color – if you want to desaturate it or change the color tones.

Play with the layer opacity

Turn down the opacity to see what best suits the chosen texture and image, in this case we’ll turn it down to 82%. Once you have found the right opacity you can always go back and change it whenever you want.

05 opacity

Add a layer mask on the texture layer

Applying texture over the whole image is great to give an artistic feel when the person is far away or it’s applied on a landscape. But, usually you want to avoid strong texture on your main character, especially if it is a close-up portrait, so you will want to soften the texture, or to erase it completely on areas such as the skin and eyes.

06 add layer mask

Add a layer mask on the texture layer and paint in black, playing with your brush opacity, size, and hardness to erase the texture where you want. Paint white your layer mask with a very soft edge brush, and low opacity, to bring back some texture on the subject edges to blend it with the background.

05 texture 100 percent

Add some more textures

You can lower the opacity of your textures and add as many of them as you whish to get the visual affect you want. If you want to see the full edit of this picture you can have a look at my speed editing video below:

I hope you will now want to add texture overlays to some of your work, or at least give it a try. It’s a great technical and creative exercise.

You can start with the free textures I prepared for you (click here to download them), and with some time start to shoot your own. Feel free to share the results or your technique in the comments below.

Editor’s note: if you have questions or issues downloading the textures, please contact Amelie on her site as they are not being hosted here on dPS so we cannot sort that for you. Thank you.

googletag.cmd.push(function() {
tablet_slots.push( googletag.defineSlot( “/1005424/_dPSv4_tab-all-article-bottom_(300×250)”, [300, 250], “pb-ad-78623” ).addService( googletag.pubads() ) ); } );

googletag.cmd.push(function() {
mobile_slots.push( googletag.defineSlot( “/1005424/_dPSv4_mob-all-article-bottom_(300×250)”, [300, 250], “pb-ad-78158” ).addService( googletag.pubads() ) ); } );

The post How to Add a Texture Overlay to Your Images for a Stunning Effect by Amélie Berton appeared first on Digital Photography School.


Digital Photography School

 
Comments Off on How to Add a Texture Overlay to Your Images for a Stunning Effect

Posted in Photography


Can the Skyfire App Predict Stunning Sunset Colors Days in Advance?

18 Jan

Skyfire-Review-9
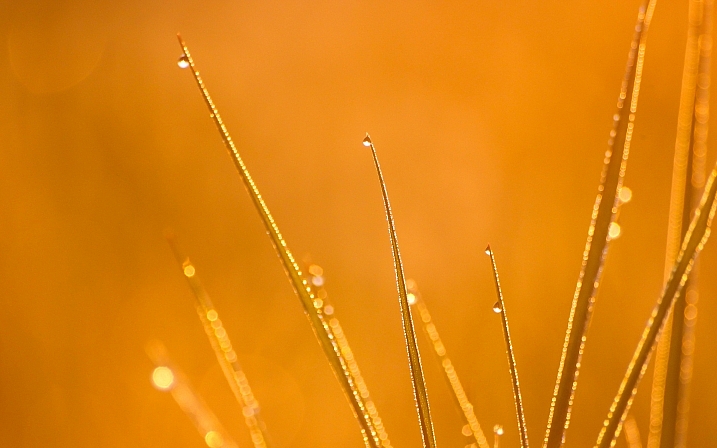
What if you could predict beautiful sunset or sunrise colors? The colors we dream of when the word sunset crosses our mind; deep oranges, pinks, reds and streams of yellow, often against a deep blue sky.

Skyfire attempts to do just that for you, in app-form of course. Skyfire is a subscription product from the makers of The Photographer’s Ephemeris (TPE) that uses a host of data to help predict the probability of desirable sky colors for beautiful photos.

What is Skyfire?

Developed by Matthew Kuhns and a team of photographers, Skyfire is a subscription service that runs exclusively on TPE. Currently it only runs on TPE for iOS, but it will soon be ported over for Android as well. It uses a combination of data from weather monitoring and prediction stations, currently only in the lower 48 US states (plus minute amounts of the Canadian and Mexican borders). Correlating items like topography, cloud height and type, as well as gap light, (the amount of light coming in from under clouds that gives them their brilliant colors at sunset and makes it seem the sky is on fire, hence the name) Skyfire attempts to predict your odds of capturing beautiful sunset and sunrise colors in the clouds.

Skyfire’s subscriptions and prices are $ 9.99 for a three month Basic subscription, or $ 29.99 for a year. The Plus version (explained in a minute) is $ 14.99 for three months or $ 44.99 for a year.

Disclaimer about weather

Skyfire-Review-17

While technology has made bold strides in the meteorological world, it’s still not perfect – thus, Skyfire is not perfect. The app updates as new information comes in from weather services, and it updates itself four to six times a day on average. The app shows the latest update times so you will know if your current odds are based on recent data, or old info.

Also, the localization of weather can be very fickle. While Skyfire attempts to consider items like the general topography (highs and lows in the elevation of the Earth), sometimes local weather patterns can make those predictions tricky.

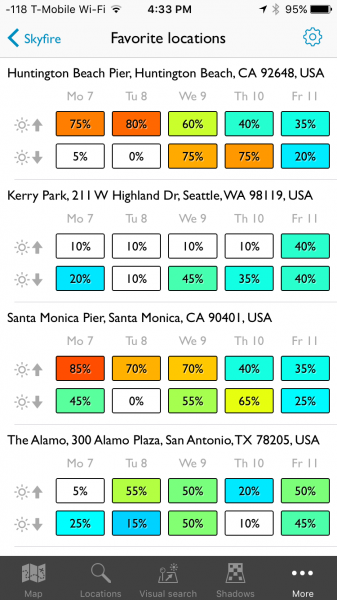
That is why Skyfire shows its predictions as a percentage chance of colors happening. This scale can be used to guess if it is worth heading to your local hotspot for an evening or morning shoot. The prediction capability will show the odds for either two or four days in advance, depending on the service you choose.

Skyfire-Review-21

How to use Skyfire

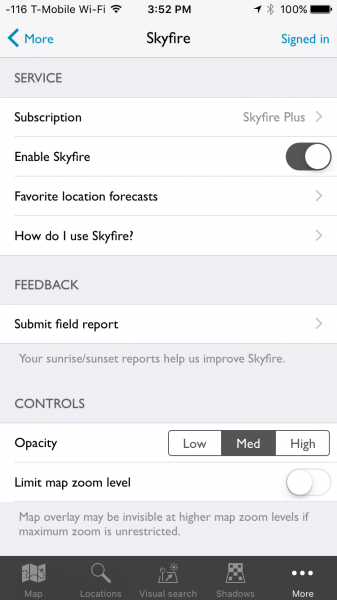
The first step in using Skyfire is to sign up for the service. Inside the More menu item in TPE is the main Skyfire control panel. Here you will find an option to turn Skyfire off and on, as well as manage your subscription. Crookneck is nice enough to offer a 30 free trial so you can see if the feature works well for you, before buying. Subscribing to the service, even in trial mode, will require creating an account with Crookneck, which is all done in-app.

Skyfire-Review-22

Once you either sign up for the service or activate the trial period, Skyfire’s basic functionality is very easy to use. Select a date for which you want to see a prediction – Skyfire Basic allows predictions up to two days in advance while the Plus subscription will show four days in ahead. Date selection is done by tapping on the date at the top of the screen, then simply scrolling until the appropriate one is selected.

Skyrife-Review-23

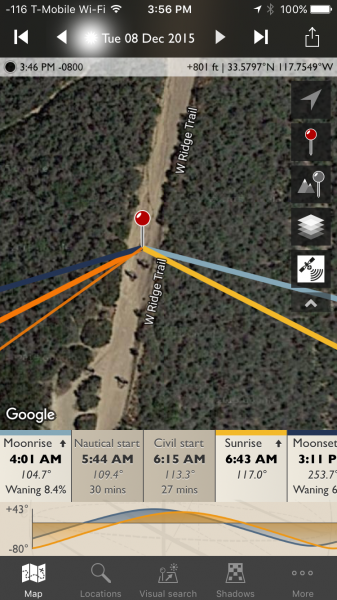
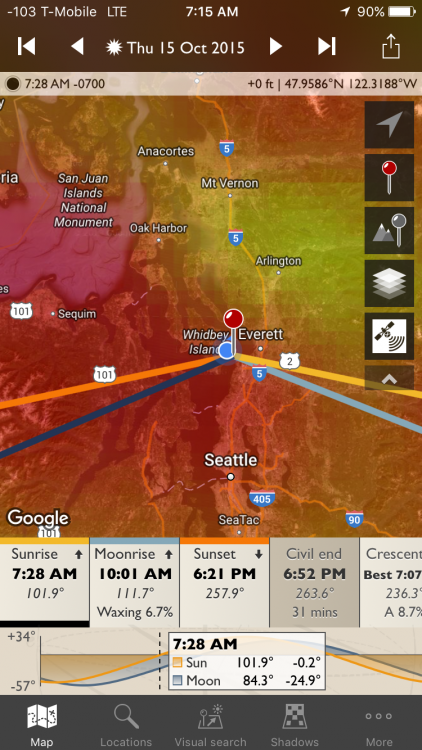
With the correct date selected, tap either the sunrise or sunset icons, from the timeline on the bottom of the screen. If you are zoomed-in too far, Skyfire will tell you to zoom out. Once you are zoomed out (by using a pinching motion on the screen) to the appropriate level, a semi-opaque overlay will show up with varying colors.

Skyfire-Review-24

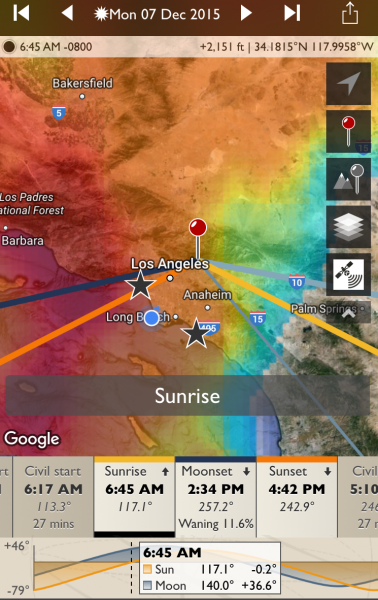
No color overlay means no chance color and clear skies (the bottom right corner in the example above). You’ll still see the sunset or sunrise at that location, but the odds are there will be no clouds to take on color. The scale then follows the colors of the rainbow, more or less, to show slim chance (lighter blue) to high chance (red). In between are varying shades of blues to greens, and yellows to red. White means there will be cloud cover but no colors, and you likely won’t even see the sunset or rise.

It should be noted, the overlay color show the area where the greatest chance for sky color will occur. Meaning, it might be clear above you (no chance) but possibly red to the West. If you are deep in a valley you might not be able to see to the West, but if you’re on a mountain peak, you will know which direction works best.

How well does it work

While I don’t have hard stats from years of testing to document Skyfire’s accuracy, but I do have my own experience, and that of two other photographers in various locations around the US who’ve tried it. I’ve used Skyfire in both Orange and LA Counties, California as well as Seattle, Washington. Rachel Cohen has tested the app in Ann Arbor, Michigan, while Richard Wong uses the app in the San Francisco Bay Area of California.

The short of it: Skyfire works well enough for my use as a professional photographer. I find its predictability to be within Crookneck’s stated goal of 80% accuracy (the app has an opt-in feature that allows users to send in photographic feedback of their experience which helps the company track accuracy and improve the product) and I have trusted it to get me out of bed early enough to catch pleasing sunrises.

Rachel used the app nearly every day during her 30 day trial and Richard tried it several times, including a trip to Quebec, Canada (note, while Skyfire only states coverage for the Lower 48 US, areas close to the border often get coverage as weather knows no border). “It’s great for traveling, as I can look up to four days ahead and get an idea of how to position myself best for the sunset, and what to expect in general on how colorful it might be”, Rachel commented when asked what she liked best about the app. Richard offered, “I like that Skyfire helps with coming up with ideas for shooting locations at sunrise / sunset. This especially comes in handy for sunrises to determine whether or not to set the alarm the night before.”

Skyfire-Review-25

Knowing Skyfire is not perfect, Richard mentioned, “Wind conditions need to be accounted for, and mountains. I drove 2+ hours to Point Reyes National Seashore expecting good odds of an explosive sunset, but it was cloudless when I arrived, with none in sight in any direction because the clouds had blown inland.” Rachel found that it’s best to fiddle with the zoom depending on your location, “I’m not quite sure where it loses its accuracy, but I can be at, or near a location, then look at the Skyfire app. What I see in the sky might not always represent what’s actually happening. If I zoom way out on the map, it seems more accurate than limiting zoom. Usually I try it both ways. Especially if traveling any distance.”

While the app shows the percentage for probability of photogenic cloud colors, it can’t predict just how amazing those colors will be. This type of knowledge comes with experience, and knowing local patterns.
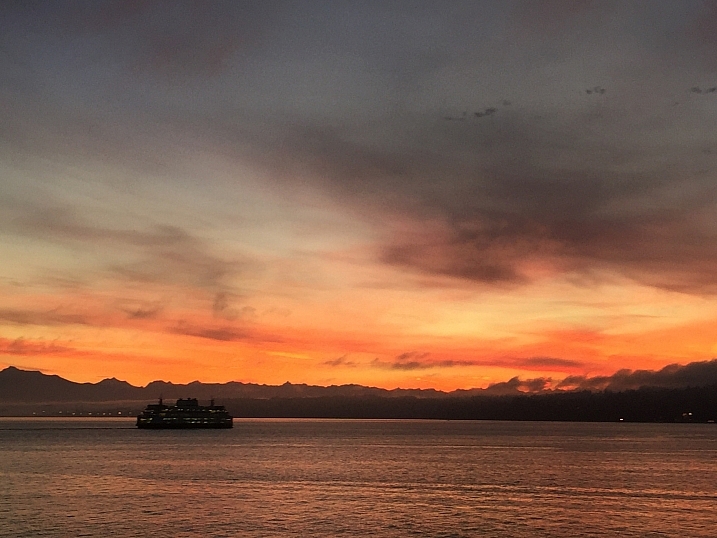
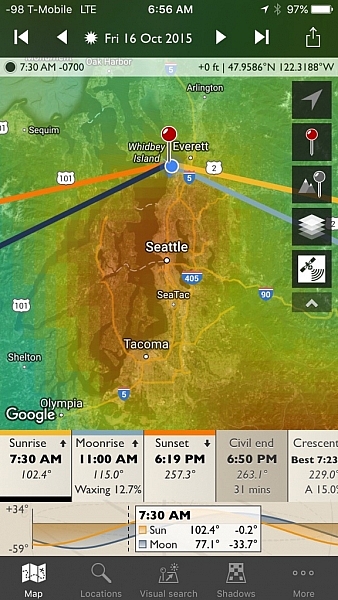
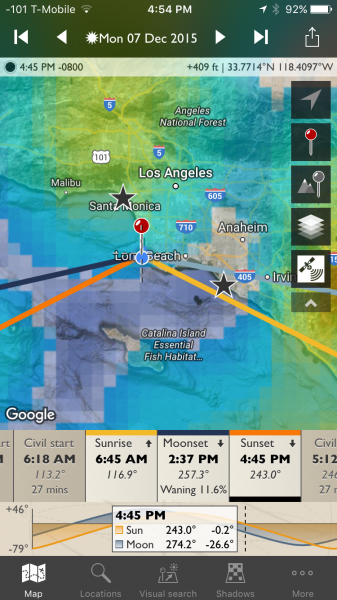
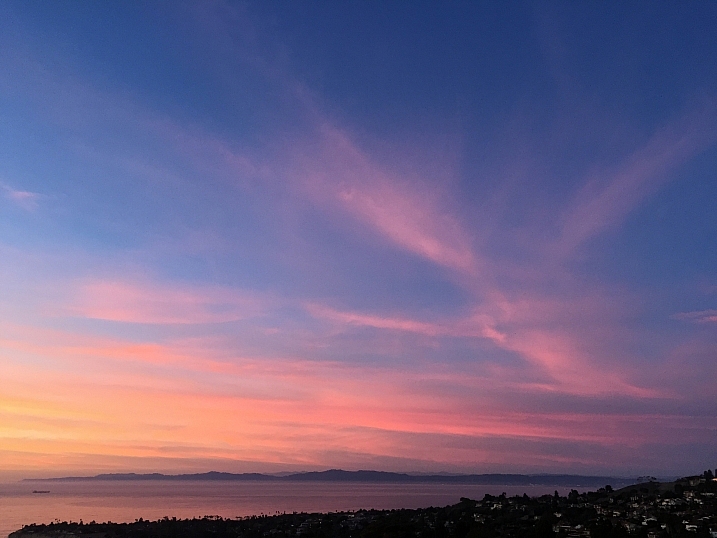
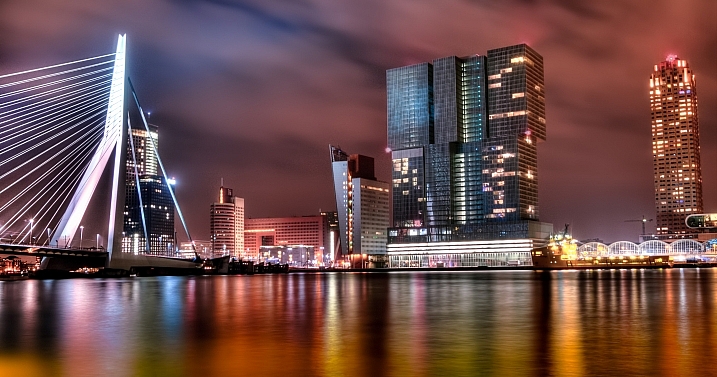
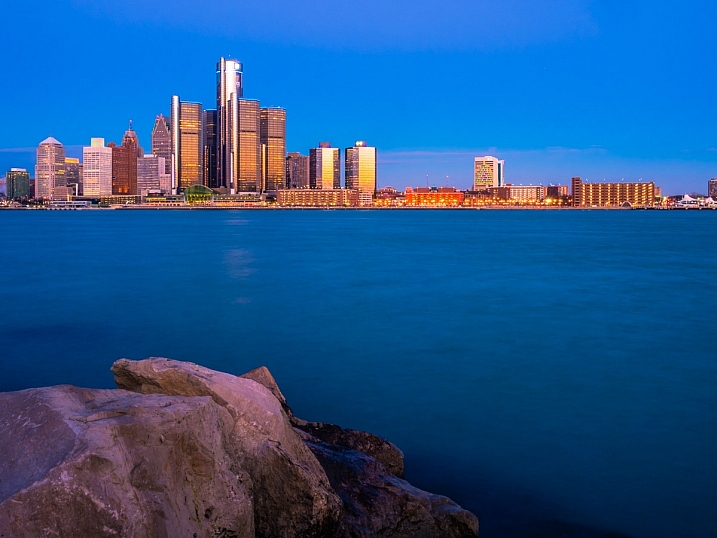
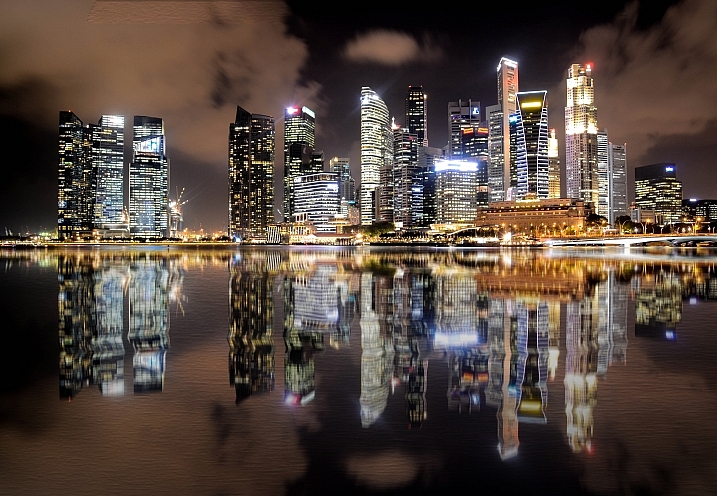
My Results

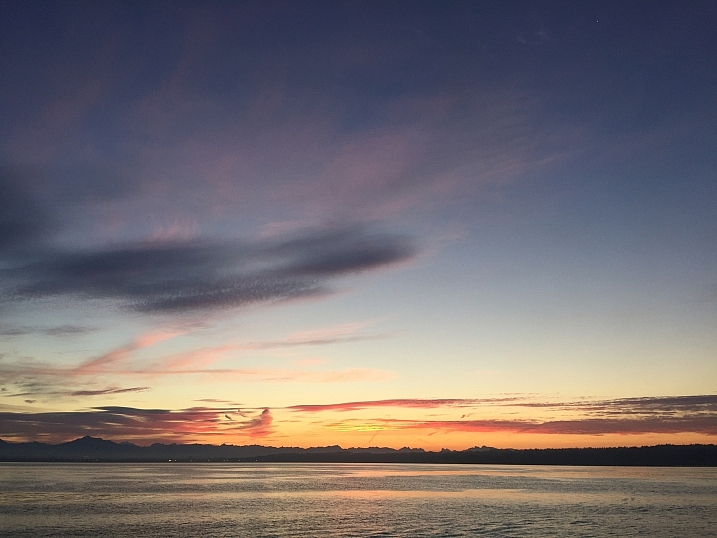
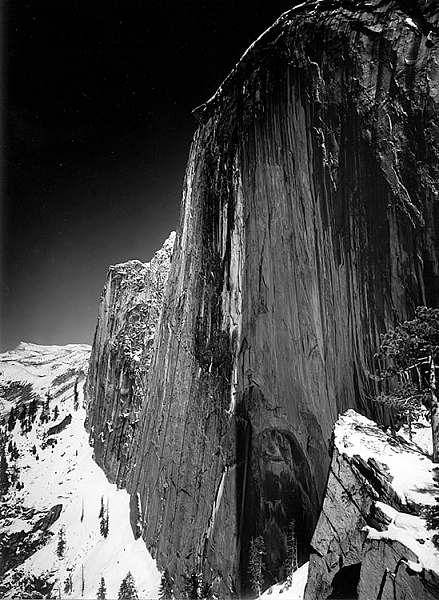
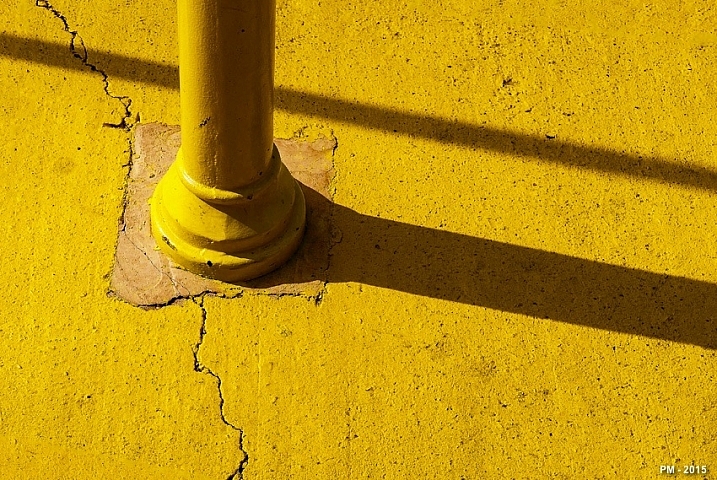
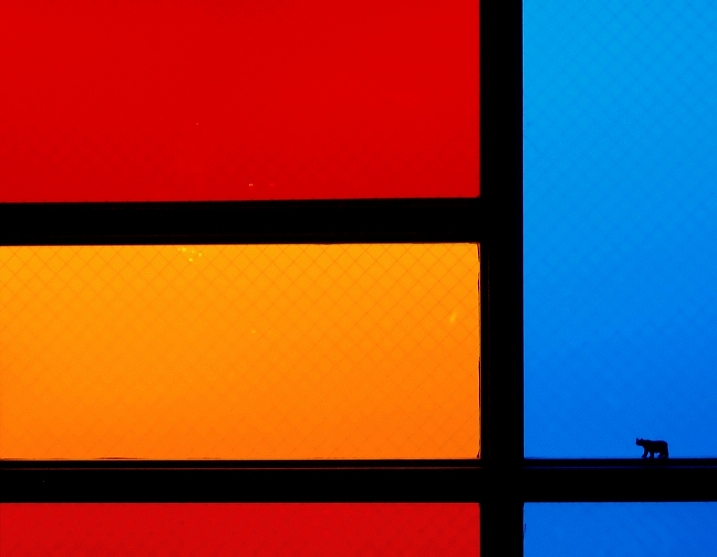
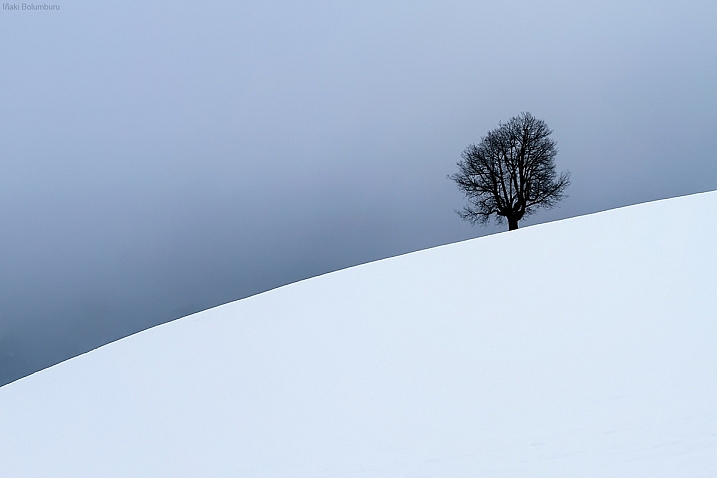
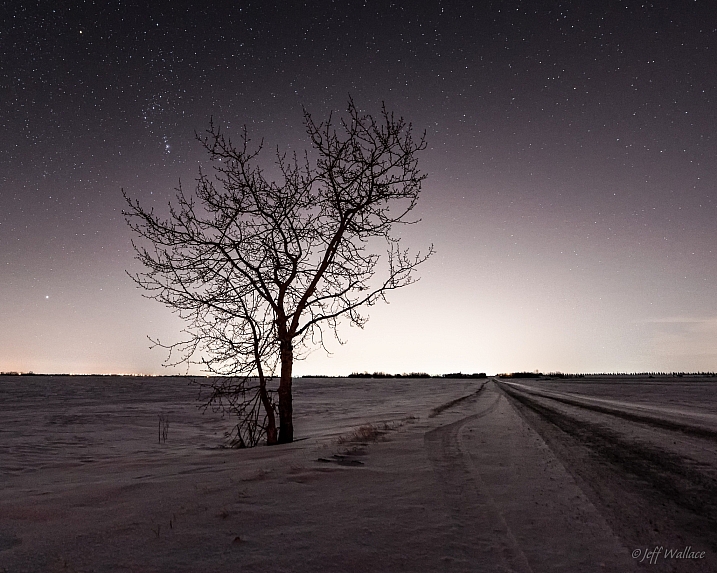
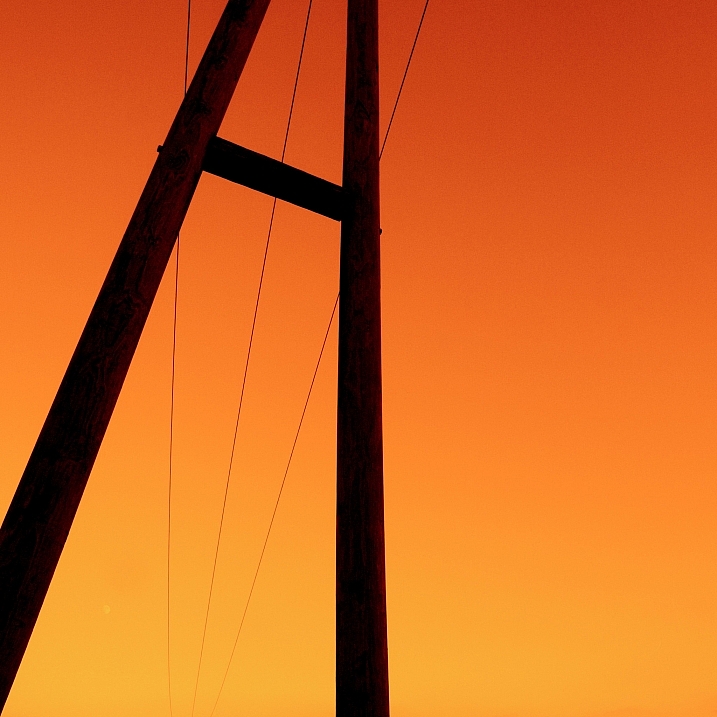
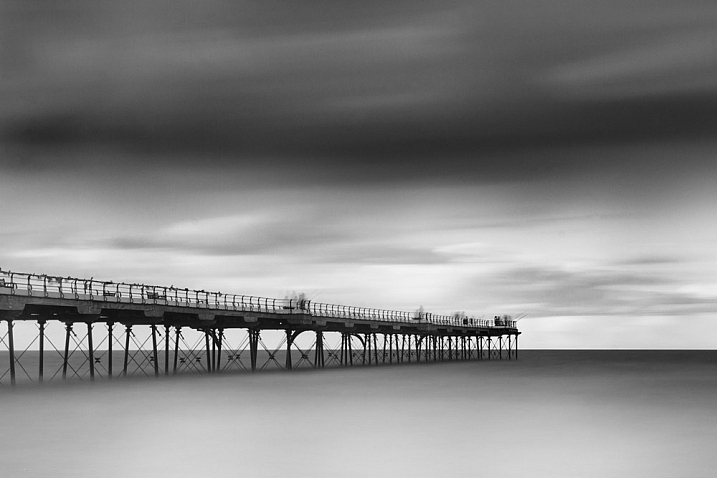
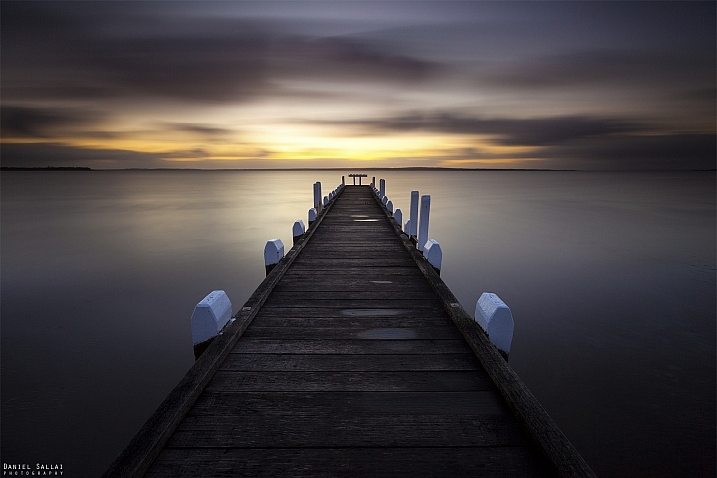
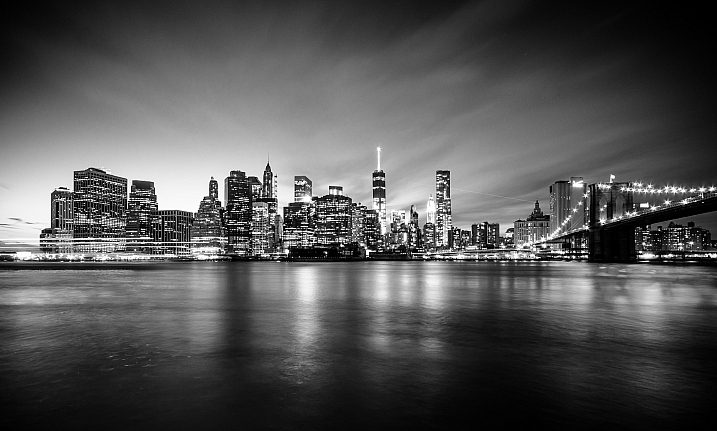
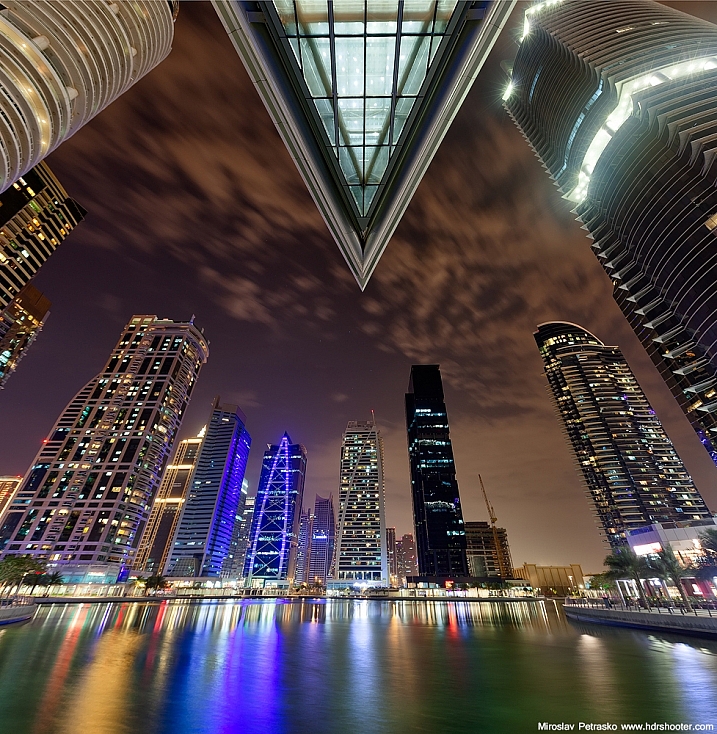
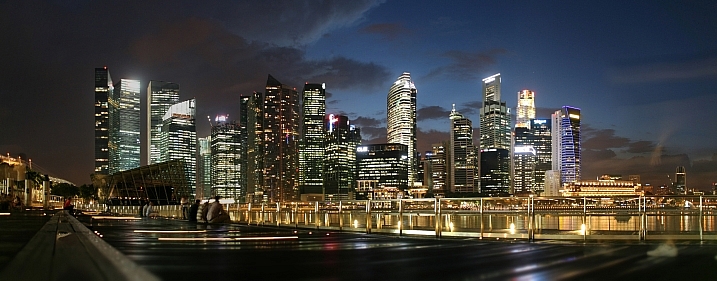
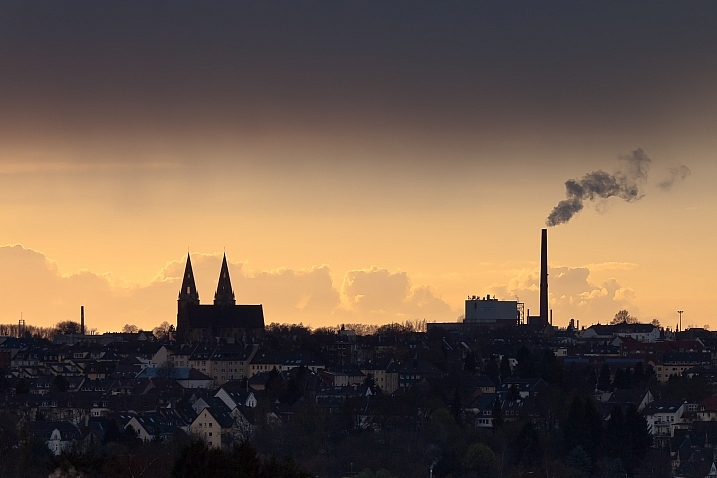
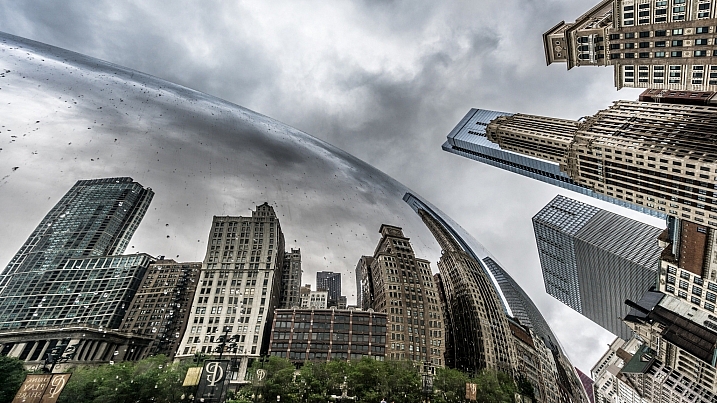
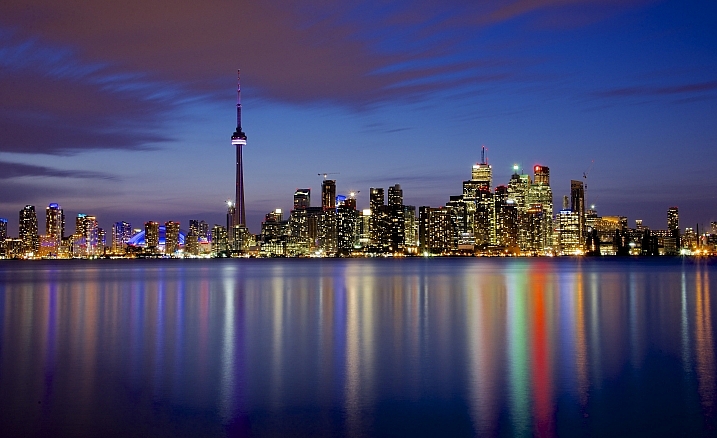
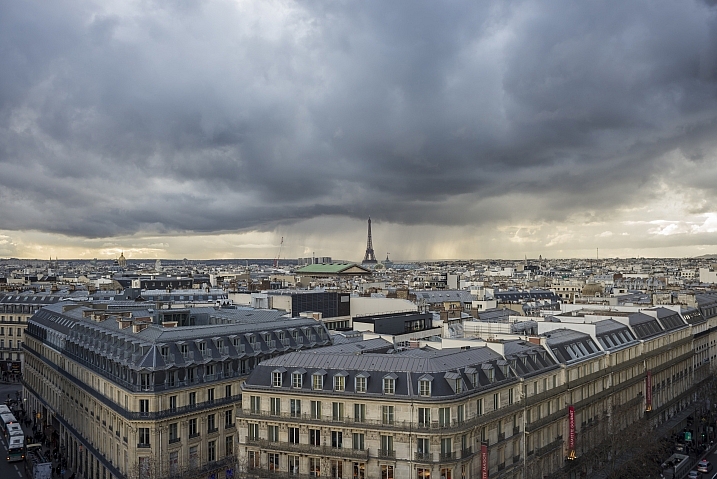
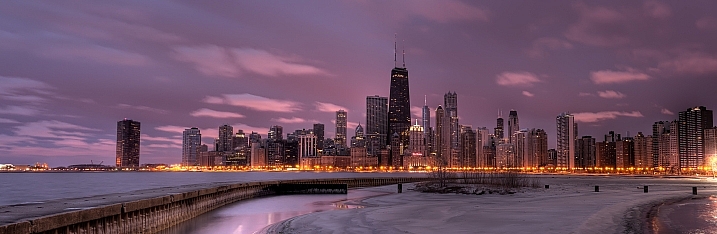
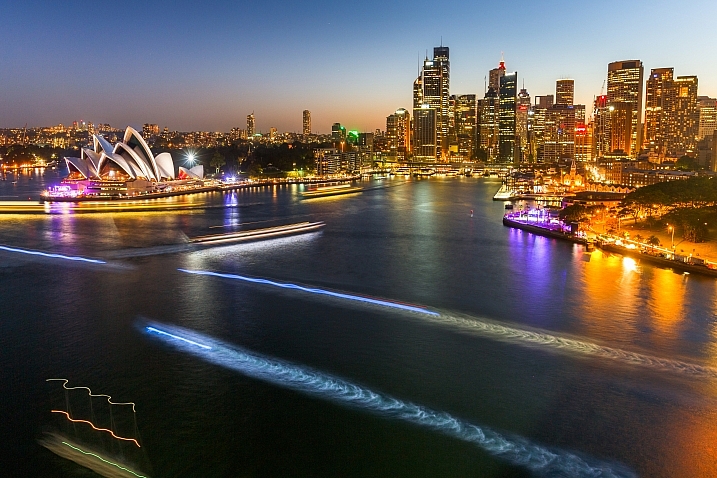
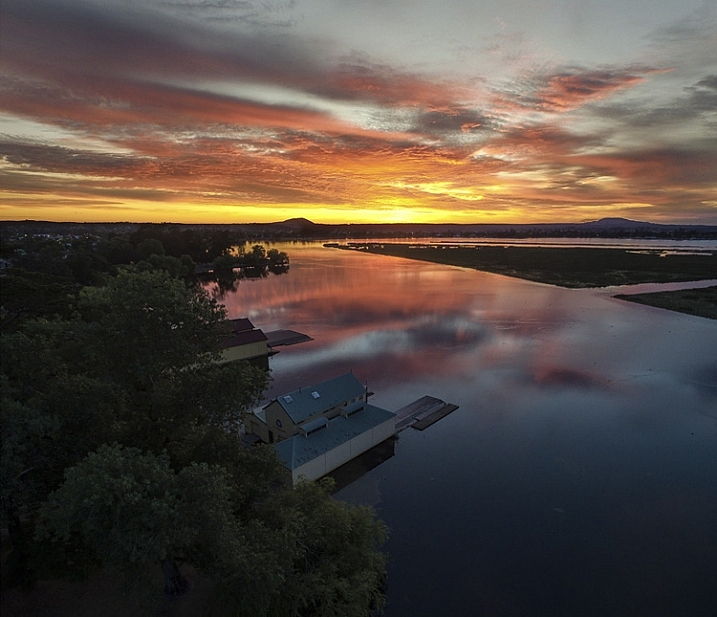
I’ve been testing and using Skyfire for a few month,s and as I mentioned, I’ve been happy with the product. While access to it was given to me in order to perform this review, I had initially paid for a three month subscription because I found it useful. Below are some examples of my results.

Skyfire-Review-9

Skyfire-Review-6

Skyfire-Review-7

Skyfire-Review-15

Skyfire-Review-16

Skyfire-Review-9

Skyfire-Review-10

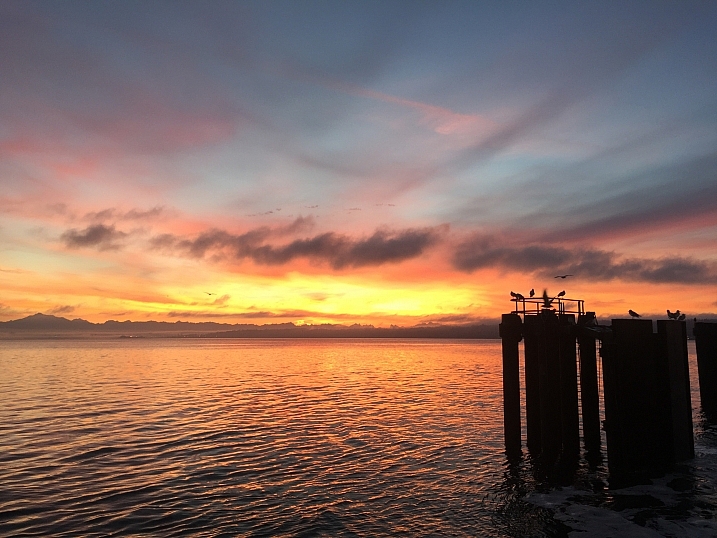
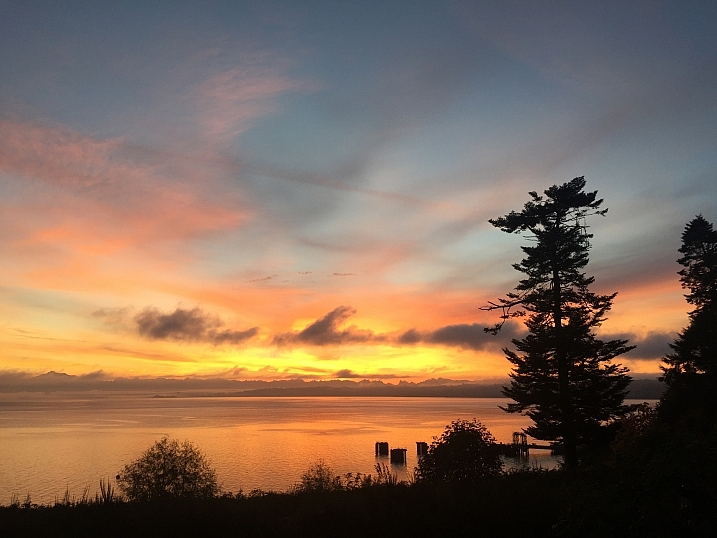
This last one is where Skyfire said there as a low chance, but the sky had different plans.

Skyfire-Review-30

Skyfire-Review-29

Skyfire forecast push notifications

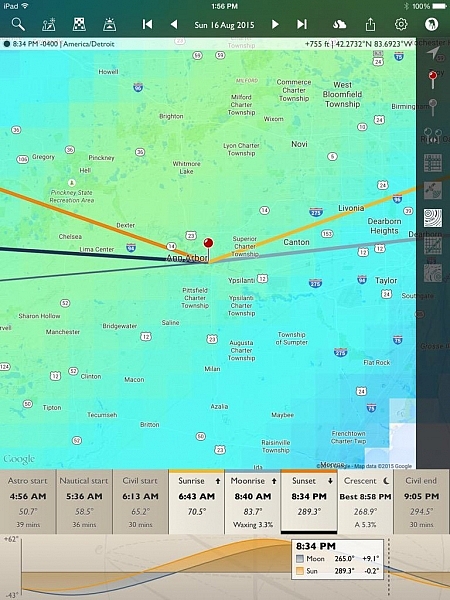
One of Skyfire’s strongest features works when you forget to check the app. You can set up push notifications (Skyfire Plus subscription required) inside the app, and it will notify you, based on percentage thresholds you set, when there are particularly high odds of great sunrise/sunset colors. You first pick your favorite locations via a simple search.

Skyfire-Review-28

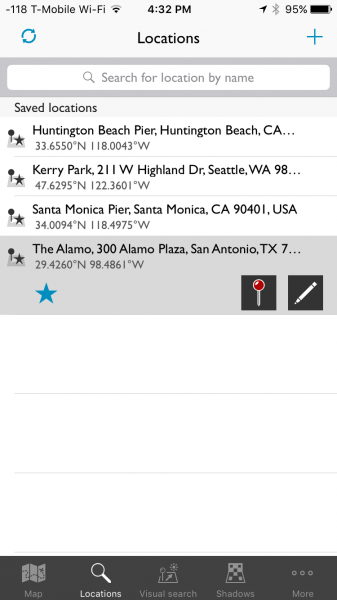
Skyfire will then keep track of your favorite locations and can show you the current predictions for each one.

Skyfire-Review-27

I’m heading to San Antonio tomorrow and I enjoy that the app helps me plan my tourism and photography. I know, as of right now, the sunset chance on my day of arrive is low, but the next morning is 50/50. So, I will check back tomorrow night, but in the mean time, I plan on making that morning an early one.

The notifications look like this:

Skyfire-Review-26

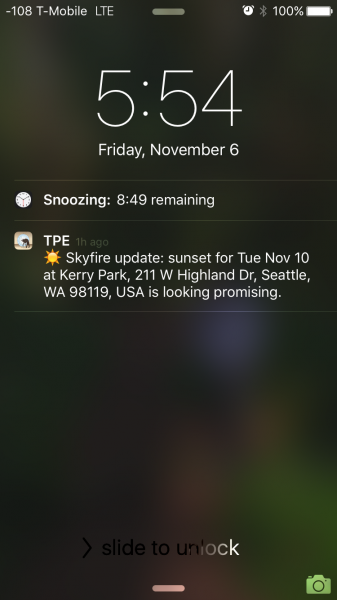
You can configure the notifications from one day in advance, to two or four days, depending on which subscription you opt-in for. Further, you can use the iPhone Do Not Disturb feature to make sure you aren’t receiving these texts when you are sleeping.

What’s next for Skyfire?

I got in touch with Matthew Kuhns and asked him what is next for Skyfire, he said:

“We are currently working on expanding the coverage area to Europe and Canada, which is challenging in that it requires some new forecast models to be created. And simultaneously we are working on the Android release for The Photographer’s Ephemeris plus a few other secret yet really awesome new features! The core service is also being analyzed and improved through the hard work of the entire team thanks for the great user feedback and field reports we receive. 

One hurdle many people don’t realize, is that most weather forecasts are broad stroke type predictions, and one of the biggest challenges with Skyfire is to take a broad forecast and nail down where the clouds will be exactly at sunset and sunrise, which is only a 20 minute window. Cloud forecasts are one of the trickiest parts of forecasting, and so developing ways to reliably analyze, interpret, and generate predictions based on these data sets is very challenging.

Conclusion

Skyfire is a robust feature inside TPE and for my money, it’s worth a yearly subscription. A hobbyist might opt for the Basic version, but as a professional who likes to hedge the bets in his favor, I prefer the Plus version. The push notifications are helpful for when I forget to check my phone. I have also found the app to be helpful for non-photography trips, such as the simple joy of enjoying a colorful sunset with my wife.

More information about the nuts and bolts of how the app is built can be found on Skyfire’s site.

Have you tried this app yet? What are your thoughts and results? Please share in the comments below.

Disclaimer: Skyfire was provided to the writer at no charge for the purpose of this review/article, but he was happy enough with it to purchase a subscription to continue using it. All reviews here on dPS are 100% unbiased opinions of the writers. 

googletag.cmd.push(function() {
tablet_slots.push( googletag.defineSlot( “/1005424/_dPSv4_tab-all-article-bottom_(300×250)”, [300, 250], “pb-ad-78623” ).addService( googletag.pubads() ) ); } );

googletag.cmd.push(function() {
mobile_slots.push( googletag.defineSlot( “/1005424/_dPSv4_mob-all-article-bottom_(300×250)”, [300, 250], “pb-ad-78158” ).addService( googletag.pubads() ) ); } );

The post Can the Skyfire App Predict Stunning Sunset Colors Days in Advance? by Peter West Carey appeared first on Digital Photography School.


Digital Photography School

 
Comments Off on Can the Skyfire App Predict Stunning Sunset Colors Days in Advance?

Posted in Photography


How to Use Drones to do Stunning Aerial Photography

22 Dec

DPSLakeSheds

One of the most exciting developments in photography in the last year or two is the drone – high flying cameras that enable you to capture unique viewpoints of common subjects. Recently the cost of getting a camera into the air has dropped dramatically and if you decide to venture down this road I guarantee you won’t be disappointed. Apart from the amazing images you will capture, they are also tremendous fun!

DPSBeetWest

As with most modern technology there is a vast range of drones, or UAVs (unmanned aerial vehicles), on the market. Similar to camera equipment in general, how much you’re prepared to spend will determine the quality of camera on-board, and the flying characteristics of the drone itself. There are low-cost models that will take very basic images, up to the big boys toys that will happily lift your prized DSLR up into the heavens. You can even add your GoPro on to some units that will take advantage of camera gear you may already have. One company has a range of models that has a large percentage of the market – DJI. Their Phantom range of drones are the first choice for many, and though they do make some high end-models, the Phantom 3 series models are the most popular drone in the world, for good reason.

Getting Started

DPSSovHIll

One of the big advertising features of most drones these days is their ease of operation. “Fly Straight Out of the Box” is a common term you’ll see, and in fact it is also very true. Charge the battery, download the app to your smartphone, fire it up, and away you go.

However, it must be mentioned that as easy as these are to fly, common sense and care is a big part of aerial flying. It’s suggested you start with some limitations in place, easily set up on the smartphone app that runs the drone. This is usually along the lines of limiting the maximum height you can fly, and also how far away you can send the drone.

71yjfeMJWwL SL1500

Photo courtesy of DJI

Always start somewhere wide open, such as a local oval or park, and spend time getting a feel of the controls before you even think about pressing the shutter button. Always be aware of your location in relation to what’s around you. As these cameras usually have a wide angle lens (20mm equivalent) and it’s easy to mis-judge your positioning when in close proximity to objects such as trees and buildings, especially if viewing the smartphone screen is your prime.

Rules and Regulations

Most countries have rules to follow, and while they can’t all be mentioned here, usually they are along the lines of these:

  • Drone must always be in Line of Sight (LOS) – that basically means you should always be able to see it
  • Maximum Height 133 metres (400 feet)
  • Never fly over groups of people
  • Respect others privacy
  • No flying anywhere near airports and other no-fly zones as specified in each country

It’s suggested you check with your local air safety authorities for particular details in your area.

DPSBurrumbeet

A few months ago I was flying above my local railway station, looking for the perfect image at dusk, just as the lights came on that illuminate the tower every evening on this historic building. Happily flying for five minutes or so, I looked down to see two local policemen coming over to me. My first reaction in these circumstances is to gauge their reaction to drone flying, and if there are any concerns I bring the machine down immediately. Unfortunately drones have been getting some negative publicity in the press, certainly not helped by the person that crash landed one on the front lawn of the White House in Washington earlier in 2015. Luckily these two policemen were very interested in what I was doing. By showing them exactly on-screen what I was seeing, and explaining the whole procedure and the care I was taking in not flying directly above any people, they left with a very positive attitude.

I think it’s very important to fly with this attitude in mind. And one other thing about flying in public places….you will need to be prepared to become the centre of attention as people are generally quite intrigued by what you doing!

DPSRailStn

Its also tempting to think that aerial imaging is going to be a great new avenue for making some money from your photography. Once again this is another area where the rules vary from country to country, and you should look into the certification you may need in your area to undertake paid aerial work.

DPSWHeip

Amazing Technology

Todays drones have some amazing technology on board that has revolutionized aerial photography:

  • By connecting your smartphone to your handheld remote control unit, you can see on-screen exactly what the drone is viewing. This makes for perfect compositional adjustments.
  • Camera controls are extensive – auto or full manual control, RAW capture, even time-lapse
  • The drone will hover in the one spot with incredible stability, almost like an aerial tripod! You can take your hands off the controls and the drone will stay in that position.
  • Failsafe flight options. With an average 20 minutes flight time per battery charge, the drone can detect when your battery is getting low and will go into RTH mode (automatic return-to-home), ensuring the drone comes back to you! If for some reason the lightbridge connection between the remote control and the machine itself is lost (this can happen when flying behind buildings or trees), once again RTH is activated. Another great use for the RTH feature is when you have lost sight of the drone, which is quite easy to do once it gets some distance away from you, by pressing the RTH button your flying camera will happily return to you before you know it.

DPSGolden

Aerial Photography

When you first start flying, it’s very exciting to get home, load your images, and marvel at the amazing scenes you have captured. In my first few weeks of flying, everything I took was thrilling. However, I quickly realized that aerial photography is no different to other forms of photography – it’s still all about the light! So rather than just heading out randomly, I once again started to chase the light and conditions, which has always been the strength of my landscape photography.

As a landscape photographer I am always aware of weather conditions and what they might offer. Now even more so, as a drone pilot you will have to also take into account the wind forecasts. Drones are not something you fly in high winds (unless you have to get that amazing once-in-a-lifetime scene in front of you!) and you will find yourself looking for calm weather more than any other condition.

DPSWindfarm

At present the in-built cameras on most drones are nowhere near the quality you are used to with your ground level camera. However, I have found the images I have been able to capture are surprisingly good. Though only 12mps, the fact that you can shoot a RAW file gives you more options to work with later on. The jpg files are also surprisingly good, especially if you have been flying in good light.

Even when shooting in low light the quality has been amazing for such a small camera unit, and the stability of the camera at 300 feet can be quite astonishing. You can also shoot panorama images just as you would when down at sea level, once again creating something very unique. And why not try a time-lapse from 300 feet?! I have had images printed up to A3 size (roughly 8×10) and you would be hard pressed to tell they were taken with a 12mp camera.

DPSGlengower

I should also mention that most drones these days shoot high quality video, even up to 4K, which produces stunning aerial footage. In fact, at 4K resolution it’s possible to take a high quality frame directly out of the video.

Unique Views

One thing you will love is the amazing patterns you find in the landscape when viewed from above. Drones allow you to get into the area that most planes and helicopters are not allowed to – below 300 feet. Google Maps makes a great starting point for finding locations that look worth visiting.

It certainly beats putting your camera on the end of a ten foot pole (yes, I did that a few years ago).

DPScanola

As a landscape photographer for a number of years now, I can’t recommend highly enough aerial imaging as a unique way to add that extra aspect to your photography. Everyone you share your images with will be amazed and intrigued, and don’t forget how much fun it is. If you ever tire of it, you may like to try herding sheep with your drone – yes, it’s been done!

Have you tried out any drone or aerial photography yourself? Please share your tips and images in the comments below.

googletag.cmd.push(function() {
tablet_slots.push( googletag.defineSlot( “/1005424/_dPSv4_tab-all-article-bottom_(300×250)”, [300, 250], “pb-ad-78623” ).addService( googletag.pubads() ) ); } );

googletag.cmd.push(function() {
mobile_slots.push( googletag.defineSlot( “/1005424/_dPSv4_mob-all-article-bottom_(300×250)”, [300, 250], “pb-ad-78158” ).addService( googletag.pubads() ) ); } );

The post How to Use Drones to do Stunning Aerial Photography by Andrew Thomas appeared first on Digital Photography School.


Digital Photography School

 
Comments Off on How to Use Drones to do Stunning Aerial Photography

Posted in Photography