RSS
 

Posts Tagged ‘Studio’

‘The Darkroom’ bar for photographers to offer a photo studio, functional darkroom… and booze

27 Aug
via Google Street View

A new bar called ‘The Darkroom’ is planned for construction on Florida Ave. in Washington D.C., according to a local news report, and it’ll cater specifically to photographers. The bar’s nature was revealed in a liquor license application submitted to the Alcoholic Beverage Administration in D.C.

According to the application, ‘The Darkroom’ will include a functional darkroom, photo studio, bar, and art gallery. The application also indicates the bar would be used to host classes, lectures, screenings and art shows. Those classes would be ‘designed to preserve the history and explore the future of the medium.’ The individual who filed the application, however, hasn’t issued any comments on the plan.

Via: PetaPixel

Articles: Digital Photography Review (dpreview.com)

 
Comments Off on ‘The Darkroom’ bar for photographers to offer a photo studio, functional darkroom… and booze

Posted in Uncategorized


Pentax K-70 added to studio test scene

25 Aug

The Pentax K-70 features a 24MP sensor with, for the first time in a Pentax, hybrid AF in live view. It also brings Pentax’s impressive Pixel Shift Resolution mode down to the mid-level DSLR segment. Take a look at how it fares against its competition in our studio test scene.

Raw support is still in progress, so note that we will be adding Raw Pixel Shift shots in the future as support is released. This also means Raw conversions were done with the ‘Embedded’ camera profile, and will be updated once the ‘Adobe Standard’ profile is available.

Articles: Digital Photography Review (dpreview.com)

 
Comments Off on Pentax K-70 added to studio test scene

Posted in Uncategorized


VSCO Open Studio is a free NYC workspace for photographers

12 Aug

VSCO has announced the launch of VSCO Open Studio, a free-to-use photography studio in the NoMad neighborhood of Manhattan, New York City. ‘It’s expensive to rent studio space for your passion projects. We get it,’ the company explains, saying that is why it decided to launch a free workspace replete with a permanent cyclorama, lighting equipment and gear that can be borrowed.

The Open Studio is located in VSCO’s NYC office, and while it is free to use, there is limited availability and therefore a $ 250 deposit is necessary to reserve the space. Those who fail to cancel at least 72 hours before their scheduled session will forfeit the deposit. Up to six people can be on the premises (though special permission for higher numbers can be requested), and the photography must be for a non-commercial project. Sessions are available once a week for 2-hour blocks.

VSCO has temporarily stopped accepting requests due to high demand.

Via: VSCO Blog

Articles: Digital Photography Review (dpreview.com)

 
Comments Off on VSCO Open Studio is a free NYC workspace for photographers

Posted in Uncategorized


Throwback Thursday: when studio lenses retire

11 Aug

The Nikkor 50mm F1.4D has been around for, well, a while. Its age was something we noted even when we reviewed it back in 2008, though it’s still one of five 50mm lenses that Nikon still makes today (counting the 50mm F1.8G not-so-special edition that comes with the Nikon Df). Most significantly for us, it was one of our standard studio lenses for Nikon-mount cameras for quite some time.

Notice how I said ‘Nikon-mount’ and not just Nikon – because, fun fact, a number of digital cameras used the Nikon F mount back in the day. Just check out the leading images for our reviews on the Finepix S5 Pro and Kodak DCS 14n. The last Nikon camera we slapped it on for such a purpose was the Nikon D3S, even though the newer G version had been out for some time. And why not? Stopped down, the Nikkor 50mm F1.4D is plenty sharp, as with most standard 50mm primes.

So, you just dropped $ 6500 on a D5 and didn’t budget for lenses – good thing the Nikkor 50mm F1.4D can be had on the cheap these days.

So when Sam discovered this lens lurking in the back of our special cabinet of studio lenses, collecting dust ever since it had been replaced with the newer G version, we got kind of excited. This is a lens I own personally and have been using on older camera bodies for years, but we were eager take it for a spin on some newer sensors to see just how well it holds up.

It should go without saying that the Nikon 50mm F1.4D holds up just fine on the old 12MP full-frame sensors of yore, but at this aperture, it should be fine even on newer setups. Nikon D700. ISO 1600, 1/200 sec, F2.8.

Photo by Carey Rose

As far as the technical details go, this iteration of the lens was introduced in 1995, though the basic optical design goes all the way back to 1977 – 7 elements in 6 groups. (For comparison, the newer 50mm F1.4G is 8 elements in 7 groups). It’s made of decent quality plastic, feels fairly dense given its compact dimensions, and you’ll constantly have to tell people who borrow it to keep their fingers off the focus ring while focusing, lest they blow out the motor on the camera. This lens further shows its age by focusing externally, and is very obviously not weather-sealed. On the plus side, it focuses very fast on a higher-end camera body with a good focus motor, but it doesn’t focus silently like its G-series replacement.

Detail in the corners on 24MP is pretty good (as it should be at F5.6). Hopefully you’re a fan of hexagonal bokeh, because the aperture blades on the 50mm F1.4D aren’t rounded. Nikon D750. ISO 1600, 1/100 sec, F5.6.

Photo by Carey Rose

So while it makes a little noise while doing so, this older 50mm F1.4D focuses a fair bit faster on a pro-level body than the newer F1.G version. It was actually great on the D5, though unfortunately, you lose all the outer cross-type points when using a D-series lens. So we just stuck to the center points for low-contrast subjects when using it.

The simple design is so delightfully transparent and obviously imperfect at wider apertures that I find it a lot of fun to shoot with.

On a personal note, I still love this lens. Newer designs handle flare better and are generally sharper wide-open (especially in the corners). But there’s something about the character of this lens that keeps it in my bag. The simple design is so delightfully transparent and obviously imperfect at wider apertures that I find it a lot of fun to shoot with. Just watch out for fringing on backlit subjects.

So, sharpness isn’t all that great wide-open. But that bokeh still looks mighty nice. Nikon D5. ISO 1000, 1/125 sec, F1.4. Processed to taste from Raw with no noise reduction applied.

Photo by Carey Rose

So what’s in the future for our former-studio lens? Well, seeing as DPReview owns it and it’s in almost brand-new condition, it seems fitting to give it a second life out in the real world. It’s a lens that I’m looking forward to continuing to use on newer bodies when I want something a little less clinical, and it’s small enough to basically disappear once it’s mounted.

When you’re out and about, the Nikon 50mm F1.4D will make the Nikon D5 look a little less obtrusive than with a big F2.8 zoom, and with snappy autofocus to boot. ISO 1400, 1/250 sec, F2.

Photo by Carey Rose

Do you have an older, out-of-date lens that you still hold on to? What keeps you coming back to it? Let us know in the comments!

Articles: Digital Photography Review (dpreview.com)

 
Comments Off on Throwback Thursday: when studio lenses retire

Posted in Uncategorized


An introduction to our studio test scene

08 Aug

Our test scene is at the core of our camera testing, designed to allow like-for-like comparisons between cameras. Here we explain how the tests are conducted and why we work this way. We will publish a video explaining what we look for in the scene and where we look, in the coming weeks.

Philosophy

Our studio test scene is used to give a consistent and reproducible means of comparing camera output. We have a well-established testing methodology designed to shed light on the performance differences of camera sensors and the results of their JPEG engines. All analyses are cross-checked against our real-world experiences.

To enable comparison between cameras with different pixel counts, we offer a ‘Compare’ mode that re-sizes all the cameras to the largest resolution shared by all the selected cameras.

Lenses and focal lengths

Interchangeable lens cameras are shot using prime lenses that offer around 85mm equivalent field-of-view – a decision that stems from our historical use of each brand’s 50mm lenses on APS-C, which are generally very sharp and consistent across the frame when stopped down a little. The aim is to remove, as much as possible, the impact of the lens. Our testing has shown the use of dedicated own-brand primes to be more reliable than using multiple copies of third-party lenses.

Compact cameras are test-shot across a range of focal lengths and apertures. We then chose the focal length closest to 85mm equivalent that offers sharpness and across-frame consistency that fairly represents the lens performance as a whole. Unlike our ILC tests, any would-be buyer will be forced to use the built-in lens so we aim to include, rather than remove, the lens performance. As such, we do not cherry-pick the best performance if it’s unrepresentative of the rest of the lens’s performance, nor do we rigidly use the 85mm equivalent setting if it’s uncharacteristically poor.

JPEG

JPEG images are exposed assuming that most users will rely either on their camera’s meter or on the histogram and, as such, are shot using whatever shutter speed is required to give correctly exposed middle grey values. White balance is set manually for the daylight scene, and low light is shot using the default Auto White Balance setting, to show the degree to which the camera tries to correct a very orange light source.

Cameras are mounted securely on a macro rail on a heavily weighted-down tripod, to minimize external vibrations. Self timer and any available anti-shock modes are also employed to minimize the impact of shutter shock.

Raw

Raw images are shot using set combinations of shutter speeds and apertures to allow the assessment of sensor performance on a common basis (so at any given ISO, all cameras will receive the same amount of light). At higher ISOs, we reduce the illumination of the scene by up to two stops if a camera doesn’t offer sufficiently fast shutter speeds to allow correct exposure. If this still isn’t sufficient, we then stop down the camera’s aperture, again ensuring that the net effect of illumination, shutter speed and aperture values are consistent across cameras.

These files are processed using the Adobe Camera Raw with noise reduction minimized and with shadows brightened to reveal the difference in shadow performance. All Raw images are white balanced during processing.

How can I check which settings you used?

All relevant shooting settings can be viewed by clicking the [i] icon at the lower right of each comparison window. If the [i] is illuminated in yellow, then some aspect of that particular shot is considered non-standard in such a way that it is not 100% comparable with other images. The cause of this inconsistency should be noted in the information tab if you click on the [i] icon.

Lighting

We offer two lighting conditions, a ‘Daylight’ mode that is illuminated to 10EV using daylight-balanced Kino Flo RF55 lamps, and a low light mode lit by a 25W tungsten incandescent light bulb.

Experimental error

Like all processes there are sources of variation (error), including differences in chart alignment, focus and lens performance over time. While we have done everything possible to minimize the impact of these errors (including using a large, easy-to-align chart, careful manual focusing and selecting copies of lenses that are used only for studio testing), it is impossible to eliminate experimental error altogether.

Our comparison tool makes it possible to identify differences that are within the realms of well-controlled error, so we trust our readers not to read too much into very slight differences in apparent performance.

Consistent comparison

Overall, the aim of the test scene is to provide fair, consistent and comparable images across every camera that comes through our test studio. We endeavor to maintain the highest possible standards and are happy to discuss and investigate any apparent inconsistencies raised by personal message or feedback email.

Articles: Digital Photography Review (dpreview.com)

 
Comments Off on An introduction to our studio test scene

Posted in Uncategorized


Canon G7 X Mark II added to studio scene

05 Jul

$ (document).ready(function() { ImageComparisonWidget({“containerId”:”reviewImageComparisonWidget-49064581″,”widgetId”:379,”initialStateId”:null}) })

JPEG Performance

One of the obvious changes to the G7 X Mark II’s image processing is with sharpening$ (document).ready(function() { $ (“#imageComparisonLink2662”).click(function() { ImageComparisonWidgetLink(2662); }); }). For the G7 X Mark II, the large radius sharpening has been increased, which does enhance certain types of detail$ (document).ready(function() { $ (“#imageComparisonLink2664”).click(function() { ImageComparisonWidgetLink(2664); }); }), but ultimately emphasizes lower frequency detail$ (document).ready(function() { $ (“#imageComparisonLink2676”).click(function() { ImageComparisonWidgetLink(2676); }); }) over high frequency detail. A significant downside of large radius sharpening is more pronounced sharpening halos$ (document).ready(function() { $ (“#imageComparisonLink2663”).click(function() { ImageComparisonWidgetLink(2663); }); }) compared to the G7 X, which can look particularly egregious$ (document).ready(function() { $ (“#imageComparisonLink2675”).click(function() { ImageComparisonWidgetLink(2675); }); }) next to the more refined sharpening the RX100 IV demonstrates (pay attention to the edges of the color patches).

Noise reduction has also changed. When we took the G7 X Mark II to Sasquatch! music festival, we noticed noise reduction at base ISO was fairly strong. Compared to the G7 X$ (document).ready(function() { $ (“#imageComparisonLink2672”).click(function() { ImageComparisonWidgetLink(2672); }); }), we can see the stronger algorithm in action, especially when compared to the amount of detail visible in Raw$ (document).ready(function() { $ (“#imageComparisonLink2671”).click(function() { ImageComparisonWidgetLink(2671); }); }) mode. The excessive noise reduction combined with the large radius sharpening we mentioned earlier mean that fine detail isn’t as well preserved in the JPEG as it could be.

The benefit of both the sharpening and NR parts of the new engine is better detail retention at higher ISOs$ (document).ready(function() { $ (“#imageComparisonLink2670”).click(function() { ImageComparisonWidgetLink(2670); }); }), with an ISO 1600 shot from the G7 X Mark II shot showing as much detail as an ISO 800 shot from the G7 X. At the highest ISOs, 6400$ (document).ready(function() { $ (“#imageComparisonLink2668”).click(function() { ImageComparisonWidgetLink(2668); }); }) and 12800$ (document).ready(function() { $ (“#imageComparisonLink2674”).click(function() { ImageComparisonWidgetLink(2674); }); }), the image engine oddly remains unchanged.

Raw Performance

Raw high ISO performance in low light remains largely the same as the G7 X$ (document).ready(function() { $ (“#imageComparisonLink2677”).click(function() { ImageComparisonWidgetLink(2677); }); }), which is right where we expect image quality to be from the Sony sensor used across many 1-inch type cameras$ (document).ready(function() { $ (“#imageComparisonLink2678”).click(function() { ImageComparisonWidgetLink(2678); }); }). 

These improvements come with many other changes for the G7 X Mark II, which will be covered in our full review. Stay tuned!

Articles: Digital Photography Review (dpreview.com)

 
Comments Off on Canon G7 X Mark II added to studio scene

Posted in Uncategorized


Equipment Tips for Quick and Efficient Studio Product Photography

05 Jul

In this article I’m going to discuss the equipment you will need to create great product photography. I built my setup to provide great versatile lighting, speed, and the ability to cut out the product in post production very quickly and accurately. This setup can be used for still life, food, fine art and even some macro work.

Article Example_03

When I first started doing product photography I was hired by a company to reshoot their entire 3200 piece inventory. Needless to say that was a HUGE job, and speed and efficiency was paramount. I had previously not done more than a few dozen parts at one time for a client, so I really was not set up to undertake a job of this scale. I was going to have to rethink a lot of things, and I knew I was going to need additional studio equipment. The words, “Not going to happen” were not going to come out of my mouth, as I wanted the challenge and the learning experience. Many of the things I implemented for that specific job are still in use for my product photography today. This tips in this article are a good base to start if you are an aspiring product photographer.

Requirements of a product setup

Article Example_04

Here is what I felt were the most important things to plan for to make this job happen.

  1. Speed – to be able to quickly move through multiple angles of a single product, and to adapt quickly to the next product.
  2. Versatile light – lighting that can stay constant for similar groups of products, but remain flexible enough to quickly shift to get proper exposure.
  3. Cut-out ease – the ability to knock out a product from the background quickly in post-production, and place a product on pure white without having to open the image in Photoshop.

With this list in mind you find yourself smack dab in the crosshairs of a shooting table. There really is no other way around it. This is why a shooting table works so well for this type of setup.
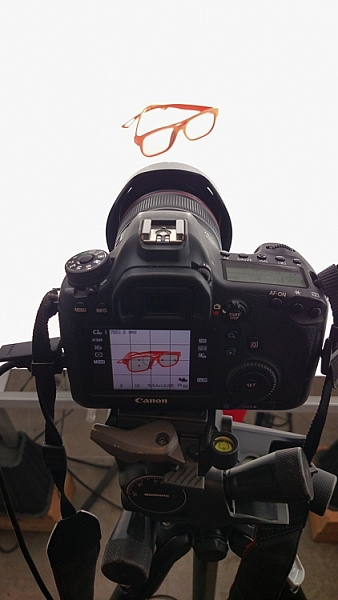
1. Speed

Article-Example_01b

A platform is needed when you want to quickly move products in front of your camera and then off the set. Why not make it a platform that is specifically made for photography? The seamless background of a shooting table means less fussing around with intersecting lines that is typical with most background setups, and you won’t have to spend much time with product placement within the scene. That alone will speed up your shoots.

2. Versatile light

You can bounce light off the white shooting table, or better yet light the table from below, causing it to glow. Another great thing about a shooting table is that it’s white. White is a great way to control the shadows of a product. If I had it my way I would have the product completely enshrouded in white light or reflectors, then introduce shadows that add shape and dimension via black cards for the ultimate control. That unfortunately isn’t going to happen, but a white table is a great start.

ShootList4

Table with light coming from below.

ShootList5

Table with light from above.

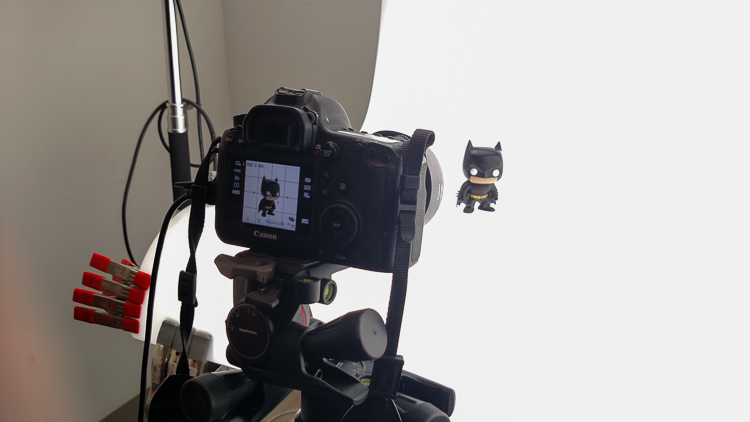
3. Remove background quickly in post-production

Article Example_05

Article-Example_02b

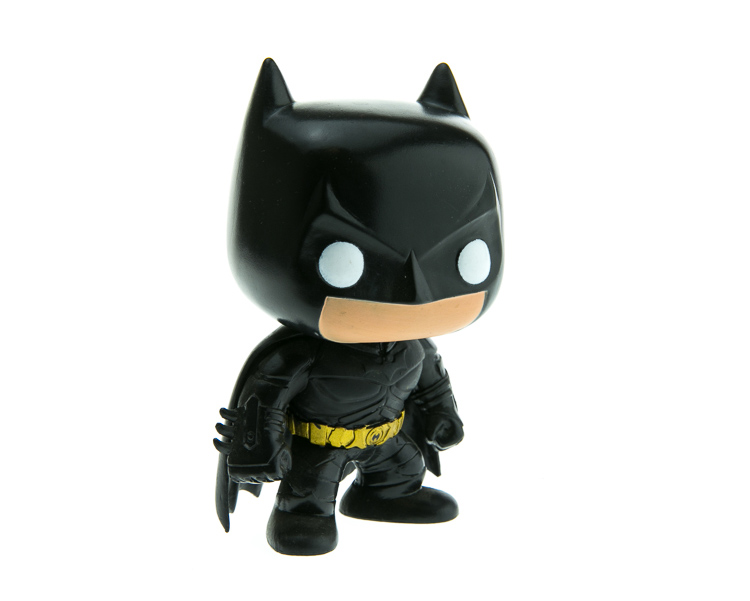
Nice clean light, easy to cut-out product shot.

No one wants to sit around using the Quick Selection tool in Photoshop, refining the edge, seeing the horrible job that tool does, and then finally having to use the much more labor intensive Pen tool to mask out the background. It’s far easier to get this done in camera, or at least give yourself a huge head start. The time you will save with this method will add up very quickly, and will give you a more natural look.

A shooting table

A shooting table is the first place to spend your money. There are many different tables out there but after all my research I found the Foba DIMIU shooting table to be the perfect solution for me.

ShootList3

It is a large shooting area, a long sweeping seamless Plexiglas surface that allows you to light from above or below it, the table frame features 4 – æ inch studs at each corner that can be used for various attachments such as arms and brackets to hold cards, product or lights.

ShootList1

The table is lightweight, can be moved around the studio with ease, and is easy to assemble. I raised the height of my table by using 6×4 lumber cut into blocks, and some bed risers.

ShootList2

At $ 1,544 I realize that the price might keep it out of a lot of hands. But, don’t fret, a more affordable option can be found, like the Manfrotto large still life table for $ 811. If you’re planning on shooting only small products, the Manfrotto mini table at $ 480 is an option as well. Keep in mind, if you think you might have large products in the future, spend the money now and get the largest table you can afford.
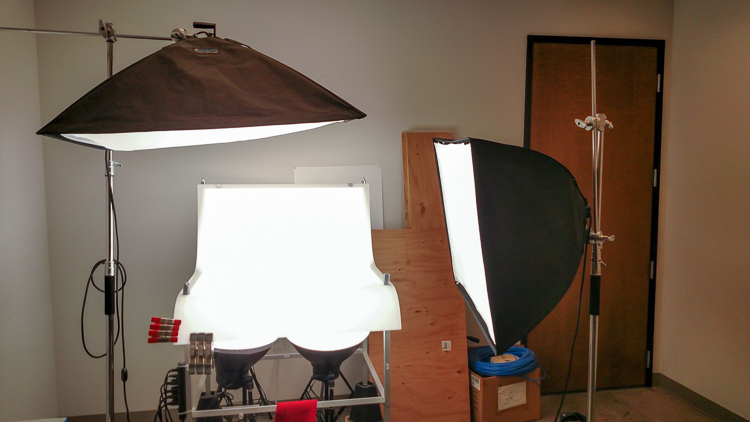
Lighting

Lighting is the next thing to consider. The type of system you choose is going to make a pretty big difference when it comes to shooting your actual products. You will ultimately be choosing between two main types of light; a constant (continuous) light system or a studio strobe (flash) system.

A constant light setup is going to be much easier if you’re just starting out with product photography. With a constant light system the learning curve is exponentially smaller. The benefits of What You See Is What You Get (WYSIWYG) light cannot be overstated. I am going to go out on a limb to make a broad statement and say that if you are reading this article for help with your product photography, then you likely do not have the experience needed to employ studio strobes as your light source.

Article Example_03

Even if you have some experience with strobes, unless you have two to three years or more of shooting strobes in a product environment, do yourself a huge favor and get continuous lights. You will be amazed at how much, and how quickly you will learn when you use constant light. Plus there are some added benefits of using a constant light:

  • No tether equipment. You do not have to control the lights with a radio transmitter, by placing the light in optical slave mode, or by a cable like you do with studio strobes. They will always be on, ready to make pictures.
  • You can use them as video lights if you want to get into motion for product shots.
  • They are a far superior light learning tool, even for more advanced photographers. In my opinion this reason alone is why you want go with constant light.

ShootList9

Okay great, you are going to take my advice and get some constant light. My recommendation would be the Westcott Spiderlite TD6 system for the following reasons:

  • They are bright.
  • The fluorescent bulbs stay cool. A huge deal when you are stuffed in a studio with no windows.
  • The included bulbs are daylight balanced and can be mixed with light from a window.
  • Option to use tungsten halogens (not sure why you would because those bulbs run so hot).
  • Westcott has plenty of light modifiers for shaping your light.
  • Light output is controllable in 33% increments with three switches.
  • Solid build, with all metal heads and quality light modifiers.

When I bought the kit from Westcott it came with the Spiderlite TD6 head, six 50w fluorescent bulbs, a tilter bracket, and the 36×48 softbox. I paid $ 700 per light, and bought two of those kits for a grand total of $ 1400.

ShootList10

There is some good news though. At the time of writing this article, there is a Westcott promo kit that comes with two of everything, two heads, two brackets, two sets of bulbs, and two softboxes, one is the 36×48 the other is a strip 12×36. The kit is going for $ 799. A fantastic buy for this lighting system.

If that is still a little more than you want to spend, then there are some other options for lighting. Impact has a kit that has light heads, stands, bulbs, and modifiers for about $ 265. But as my grandfather always said, you can’t afford to buy something twice. If product photography is something you are going to do, pay for the quality of Westcott. It will last, day in and day out.

My TD6 lights are used primarily as my key (main) and fill lights. I still need to be able to light my shooting table. For that I turned to some reflectors.

ShootList6

I went with two 16″ reflectors from Flashpoint, for $ 70 a piece. These sit under my raised shooting table and shine straight up through the bottom to blow out my table top.

ShootList7

Light stands

Now is a good time to talk about support. Supporting your lights should be carefully considered, and you need to ensure you don’t skimp here. I have a story to help illustrate this point. While doing a product shot for a client I was moving about the studio, and I brushed past my lights on my way back to my camera. Before I could turn around and look at the scene I heard a crash. My light had toppled over, hit the table, knocked the product off balance, and it hit the floor and broke. It was a bottle of wine. I was left with a huge mess to clean up, a broken bottle that needed to be replaced, and a bill from the client for the unreturned product. It could have been worse, but not by much. Invest in your light stands. Get good ones and weigh them down properly with sandbags.

You are going to want to use some sort of a C-Stand. Whether it be a turtle base (removable legs from the center column) a rocky mountain C-stand (a stand with one leg that can go up and down the center column) or a super C-stand (extra heavy duty) invest in a C stand for your large lights. Also, always have sandbags handy to weigh the C-stands down once you bring them onto your set.

ShootList8

For the price of $ 129 per stand from Adorama, for their Flashpoint C-stand with turtle base is pretty great, I couldn’t be more pleased. It has been a fantastic solid stand for my large TD6 lights.

The other stand that I bought was a lot less mission critical, it was for my reflectors. I bought a few Manfrotto Nanopole stands which bottom out at 20″, and can go as high as six feet. They are not meant for anything too heavy, but they do the small stand job perfectly.

So, we touched on all the main equipment needed to make a successful product photography set. Do you have any other tips to add? What do you use for product photography? If you have any questions please ask in the comments below.

googletag.cmd.push(function() {
tablet_slots.push( googletag.defineSlot( “/1005424/_dPSv4_tab-all-article-bottom_(300×250)”, [300, 250], “pb-ad-78623” ).addService( googletag.pubads() ) ); } );

googletag.cmd.push(function() {
mobile_slots.push( googletag.defineSlot( “/1005424/_dPSv4_mob-all-article-bottom_(300×250)”, [300, 250], “pb-ad-78158” ).addService( googletag.pubads() ) ); } );

The post Equipment Tips for Quick and Efficient Studio Product Photography by Jacob Macias appeared first on Digital Photography School.


Digital Photography School

 
Comments Off on Equipment Tips for Quick and Efficient Studio Product Photography

Posted in Photography


20×24 Studio will stop producing Polaroid 20 x 24 film next year

25 Jun
20 x 24 camera designed and built by Tracy Storer, Operator of Polaroid 20×24 Studio West

The Polaroid 20 x 24 is facing extinction as the last company producing the large-format instant film, 20×24 Studio, has announced plans to stop production at the end of 2017. 

The studio and its owner John Reuter originally purchased an original Polaroid 20 x 24 camera from Polaroid after it declared bankruptcy in 2008, as well as hundreds of cases of existing film for it. The company sought to keep the format alive by producing its own iteration of the cameras and film, but a lack of demand and other issues have forced it to abandon that dream.

In a statement posted on 20×24 Studio’s website, Mr. Reuter said:

“Our hope now is that we can work on some great projects with many of our legacy clients as well as new artists who have yet to experience the ultimate in instant analog image making. Our original business plan was for five years with the inventory purchased and for a variety of reasons we have not worked through the material. Instant film will not last forever and despite storing the film stock in cold storage and mixing the chemical reagent only as needed the studio projects that they can maintain the quality for two more years.”

Elaborating on this to the New York Times, Mr. Reuter said it would take a massive ‘multimillions’ investment to continue producing the film, something that isn’t feasible for the company given the relative lack of demand. As it stands, the camera itself costs $ 1750 to rent per day and each film exposure costs $ 125. Mr. Reuter anticipates the existing stock being used up by the time 20×24 Studio closes its doors next year.

Take a look below at the 20×24 camera in action as Douglas Doubler photographs ballet dancer Rachelle di Stasio. 

Via: New York Times

Articles: Digital Photography Review (dpreview.com)

 
Comments Off on 20×24 Studio will stop producing Polaroid 20 x 24 film next year

Posted in Uncategorized


After 176 years, Indian photography studio closes its doors

22 Jun
Bourne & Shepherd Studio, Kolkata, India. Photo by Biswarup Ganguly. Used under CC 3.0

A studio in India, founded by British photographers Charles Shepherd, Samuel Bourne and William Howard in 1840 will close its doors after 176 years in operation. Considered the oldest continuously operating photographic studio, Kolkata-based Bourne & Shepherd’s current owner cites the recent major changes in photographic technology as a reason for the closure.

The studio was known for its portraiture, producing images of religious figures and government officials, from the British Raj era onward. Speaking to Indian publication The Hindu, a former employee explains that the shift to digital made it difficult for the studio to survive, saying ‘How can you expect that a studio can operate in this generation where everyone is clicking photos from their mobiles and digital cameras?’

Though the studio will no longer be in operation, the current owner says that he’ll continue to maintain the shop’s collection of historic photos and equipment.

Articles: Digital Photography Review (dpreview.com)

 
Comments Off on After 176 years, Indian photography studio closes its doors

Posted in Uncategorized


Three’s a charm: Sony RX10 III added to studio scene comparison tool

02 Jun

The Sony Cyber-shot RX10 III has impressed us so far. Its new 24-600 F2.4-4 lens has impressed us on the trail and in our initial testing, but it does come at a pretty price. We put it in the studio for a more controlled lens, and image quality test. See how it stacks up against its nearest competitors.

Articles: Digital Photography Review (dpreview.com)

 
Comments Off on Three’s a charm: Sony RX10 III added to studio scene comparison tool

Posted in Uncategorized