RSS
 

Posts Tagged ‘Studio’

StyleShoots Live robotic photography studio uses AI to shoot and process photos

24 Feb

A new robotic ‘smart studio’ device aims to increase brands’ photography efficiency and productivity by replacing, to a certain degree, professional human photographers with artificial intelligence and a robotic camera/lighting system. Called StyleShoots Live, this smart studio is equipped with robotic lighting, a Canon 1DX Mark II camera, and machine intelligence for shooting, processing and exporting photos and video automatically.

StyleShoots, the Dutch company behind the smart studio, unveiled the product on Wednesday, saying it is ‘designed to create instantly edited video and stills for fashion lifestyle and eCommerce shoots in minutes.’ This is made possible via a large steel enclosure in which a model is posed. A variety of technologies then make technical decisions, adjusting lighting and camera settings as necessary to shoot content that matches brand-specified customized styles.

The resulting content is automatically processed, including things like cropping images to certain aspect ratios or stitching together multiple videos. The final content can then be reviewed by the human in charge and, if approved, exported for various platforms. A human is given control over the entire process via a built-in iPad Pro with a Live View mode of the model.

Speaking about the smart studio, StyleShoots’ Head of Product Anders Jorgensen said:

‘Fashion brands need to keep their customers engaged with fresh content every day – and video shared on social media is the most powerful form of storytelling. To keep up with the continuous demand, StyleShoots Live creates stills and video ready for publishing on Instagram, Facebook, Snapchat, and websites within minutes – without any manual editing or post production.’

Of course, such a studio raises concerns about technology and its potential ability to replace human photographers with machines. In response to that concern, StyleShoots explained in a long FAQ sheet that it didn’t design its smart studio to be a replacement for humans. ‘To run a fashion shoot,’ the company explained, ‘you need a creative eye to compose the shot, pose the model and style the clothes — a robot can’t do that (yet).’

Source: StyleShoots

Articles: Digital Photography Review (dpreview.com)

 
Comments Off on StyleShoots Live robotic photography studio uses AI to shoot and process photos

Posted in Uncategorized


Silkypix Development Studio Pro8 released with new clarity slider and B&W controls

17 Feb

Japanese software developer Ichikawa Soft Laboratory Co. has released a new version of its Silkypix Development Studio Pro application that introduces a number of new tools and functions. Version 8 of the Raw adjustment and conversion program adds a clarity slider to the tool-set, that can be used to emphasize or smooth-out differences in neighboring tones to deliver more or less tonal impact in an image.

Users can also now take more control of black and white conversions using the Monochrome Controller Function that allows a range of colors to be lightened or darkened to simulate the use of colored optical filters over the lens of a camera loaded with black and white film. For selective enhancements a brush tool has been added to the Partial correction tool kit which the company says will make it easier to create rounder selection areas for adjustment.

Those who like to shoot underwater will be glad of a dedicated tool for correcting the color of images recorded in a range of sub-aqua conditions which reduces the impact of color-loss and shift at various selectable depths. Silkypix also now allows a single license to cover three computers and the company says it has cleaned up the user interface to make it more straightforward to use.

The program, and variations on it, is favored by a number of camera brands as an in-the-box raw converter given away with their cameras, but the full version can be purchased on-line from the manufacturer for 22464 JPY (approx. $ 200/£160). A 30-day free trial is also available. The program supports raw files from 613 cameras, it is claimed. For more information see the Silkypix website.

Press release

Product release announcement, high quality RAW development software high-end version “SILKYPIX Developer Studio Pro8 download version”

The product concept of SILKYPIX Developer Studio Pro8

“SILKYPIX Developer Studio Pro8” is the latest development in the SILKYPIX series, aiming at “enhancement of functions for finishing photographs that meet the photographer’s expectations” and “a comfortable and enjoyable RAW development software.” In this version, we have added “Clarity” and a “Brush” to the “Partial correction tool,” which have been requested by many customers. In addition, it has been equipped with a “Monochrome controller” specialized for monochrome adjustments and a “Underwater photo controller” specific for underwater photography. This RAW development software will be a strong support so you can create your own works.

SILKYPIX Developer Studio Pro8 major features

Clarity adjustment
A “Clarity” parameter has been added to the “Tone” adjustment item to adjust the luminance level of each pixel based on information from surrounding pixels. Increasing the effects of “Clarity” will make it possible to finish the details of the subject in a bold picture, so it is effective when you want to finish bold scenes with a hazy surrounding. In contrast, by lowering the “Clarity” you can finish with a soft ambience like with a soft focus, so you can use it to effect with women and children’s photography.

A Brush added to the Partial correction tools
A “Brush” that makes it possible to select correction areas more freely to “Partial corrections” was added in “SILKYPIX Developer Studio Pro7.” Using the “Brush” makes corrections easier even in difficult areas of “circular correction filter” and “gradual correction filter.” More creative adjustments have become possible by making partial corrections that do not take the form of the subject.

Strengthening the Monochrome Controller Function
A Monochrome Controller function has been installed specialized for adjusting monochrome pictures. Eight kinds of “Color filters” can be selected, and it is possible to reproduce filters when shooting monochrome photographs on your screen. In addition, since the “Lightness” can be adjusted for each hue, you can make a thorough finish to your black and white photographs. Even beginners of black and white photography can easily switch between color and monochrome images after applying parameters in the preview display, so you will be able to intensify the understanding of effects on monochrome photographs due to changes in color.

Underwater Photo Controller Installed as a Function for Correcting Dedicated to Underwater Photography
A function from “SILKYPIX Marine Photography” for RAW development software dedicated to underwater photography has been installed into “SILKYPIX Developer Studio Pro8” called Underwater photo controller. With this Underwater photo controller, you can correct the bluishness that is difficult to adjust with the normal white balance by using “White balance for underwater.” It also features “Color restoration,” which actually reproduces colors lost in water, as well as “Muddy reduction” to eliminate murkiness in water.

Focus Peaking Function Installed
A Focus peaking function has been installed to detect the parts focused on from adjacent pixels in the image, and to display them with colors added to those parts. With this function, you can clearly check the area of focus.

Improved User Interface
We have improved the design to be clean and simple to make it possible to concentrate on adjusting images. In addition, the layout has been changed to make it easier to understand for those using adjustment functions for the first time. Also, you can now change the background color of the preview display according to your preference.

One License Can Be Used on Three Computers
In recent years, more and more people own multiple computers, such as desktops, laptops, tablets, etc., sometimes using both Windows and macOS. With such changes in the industry, “SILKYPIX Developer Studio Pro8” is now available for use on three computers with one license.

New function / Improvement list

  • Tone – Clarity slider addition
  • Partial correction tool – brush addition
  • Monochrome controller
  • Underwater photo controller
  • Warning indication – Focus peaking addition
  • Preview display Select background color
  • Choose Rating Display / Non-display under the thumbnail display
  • Improved User Interface
  • One License Can Be Used on Three Computers

SILKYPIX Developer Studio Pro8 download version (Win/Mac) license price

Regular list price
New license
28080 JPY (tax included)

Upgrade license
Customer who already has following license can purchase one license for your one product license.
Upgrade target products:
SILKYPIX Developer Studio Pro, Pro5, Pro5 for Panasonic, Pro6, Pro7, Pro7 for Panasonic
11232 JPY (tax included)
Upgrade target products:
SILKYPIX Developer Studio 3.0, 4.0, 6, 7
16848 JPY (tax included)

Special price for bundle products
Customers for (bundle version) SILKYPIX series which were shipped with the cameras and lenses
22464 JPY (tax included)
[Target products]
SILKYPIX Developer Studio SE version
SILKYPIX Developer Studio 4.0 for TAMRON
SILKYPIX Developer Studio 4.0 for CASIO
FUJIFILM RAW FILE CONVERTER powered by SILKYPIX
SILKYPIX Developer Studio 3.0 for PENTAX or LE
SAMSUNG RAW Converter

Articles: Digital Photography Review (dpreview.com)

 
Comments Off on Silkypix Development Studio Pro8 released with new clarity slider and B&W controls

Posted in Uncategorized


Adorama introduces Canon RT radio controlled TTL studio head and hotshoe flash

02 Feb

$ (document).ready(function() { SampleGalleryV2({“containerId”:”embeddedSampleGallery_9533390039″,”galleryId”:”9533390039″,”isEmbeddedWidget”:true,”standalone”:false,”selectedImageIndex”:0,”startInCommentsView”:false,”isMobile”:false}) });

Camera store Adorama has announced that it is to introduce a new line of monoblock studio heads that are designed to work directly with Canon’s RT radio TTL flash system. The company claims that the Orlit Rovelight RT 610 TTL Wireless Monolight, with its RT system built-in, is the first of its kind. The head can also be used with all Canon and Nikon DSLRs using the Orlit TR-611C and TR-612N TTL Transceivers that have been launched alongside the head. These transceivers allow TTL control of the head even with Nikon cameras.

The Orilt Rovelight RT 610 TTL is a 600Ws head with a guide number of 201ft/61m @ ISO 100 that features modes for Canon’s ETTL and Nikon’s iTTL metering systems. It is powered by a rechargeable 6000mAh lithium ion battery pack that Adorama claims is good for 450 full-power flashes per charge. The longest recycle time will be 2.5 seconds at full power, but the head offers output settings down to 1/256th in 1/3EV steps across the nine-stop range. There is said to be a variance of only 150 K across the output range from the standard color temperature of 5500 K, and a high speed sync mode allows for shutter speeds of up to 1/8000sec. The modeling bulb is a 20W LED that has a 3200 K tungsten color balance and three brightness levels.

The head accepts Bowens S-type modifiers and has an integrated umbrella shaft slot. The flash control system can be divided into five groups, while 16 channels are provided to avoid interference with other systems in the vicinity.

The new studio head can also be controlled by or work alongside the company’s Orlit RT-600C TTL Speedlite. This new flash unit can sit in the camera’s hotshoe to act as a master or it can join a group of other RT flashes as a slave. The unit has a guide number of 160ft/48m @ ISO 100.

The new studio head, flash unit and transceivers will ship later this month but can be ordered now on the Adorama website.

  • Orlit Rovelight RT 610 TTL Wireless Monolight – $ 699.95
  • Orlit RT-600C TTL Speedlite – $ 169.95
  • Orlit TR-611C Transceiver – $ 69.95
  • TR-612N TTL Transceiver – $ 69.95

Press release

Adorama Announces Orlit, and “The First Canon RT Wireless Compatible Monolight”

Adorama, one of the world’s largest photography, video, audio, imaging and electronics retailers, has announced Orlit, the brand new line of TTL flash solutions for photographers. Available exclusively at Adorama, the line consists of the Orlit Rovelight RT 610 TTL Wireless Monolight, the first monolight to ship with the Canon RT radio system built in; the Orlit RT-600C TTL Speedlight for Canon, ideal for Canon users who want to use the unique Canon 600EX-RT wireless radio system; and the Orlit TR-611C and TR-612N TTL Transceivers, which enable shooters to achieve a more extensive and powerful lighting solution with wireless control for Orlit Canon and Nikon systems.

Optimized for exceptional, true TTL performance, the all-new Orlit flash lighting line is now available for pre-order, exclusively from Adorama, and will begin shipping in February 2017. The Orlit product line-up includes:

Orlit Rovelight RT 610 TTL Wireless Monolight: The only 600ws wireless TTL monolight that breaks the Canon RT radio barrier and also works with Nikon wireless systems. The Orlit RT610 TTL brings additional professional radio-based and infrared remote flash options to loyal Canon RT users, who can now use the Canon 600EX-RT as a master and the Orlit RT610 as the slave.

With an outstanding Guide Number of 201 (ft. at ISO 100), and manual levels from full to 1/256 power with fine 0.1 stop graduations, this monolight from Orlit boasts a bright 20 watt LED modeling lamp with a tungsten 3200K color temperature. The HSS Mode allows sync shutter speeds up to 1/8000, while Freeze Mode achieves an additional reach of 1/19000 to capture split second moments.

The Orlit Rovelight RT 610 user interface features a large, full-color LCD display, simplified menu system, and a generous power and function control dial. Future technologies and camera sync are firmware updated through the USB port.

The Orlit Rovelight RT 610 TTL Wireless Monolight is now available for preorder and retails for $ 699.95 USD.

Orlit RT-600C TTL Speedlite for Canon:

This versatile Canon RT/ETTL wireless radio-compatible speedlight, which transmits both the Canon RT radio and optical systems, can act as a master to up to five independent groups or slave unit for remote power control. A Guide Number of 160 (ft. @ ISO 100, at 200mm zoom) in combination with the compact and lightweight design of the flash makes the Orlit Speedlite a top choice for professional Canon shooters.

Using the Orlit Speedlite for Canon is a breeze, with a flash head that rotates 180 degrees in any direction and tilts over 90 degrees for any type of bounce or modifier use. The head zooms automatically or manually from 20-200mm, ensuring the necessary coverage without light spill. The Orlit RT-600C also has a holder to place color balancing gels before the flash head. Like the Orlit Rovelight, the Orlit RT 600C user interface features a clear LCD display with a simplified but extensive menu system, with future technologies incorporated via firmware updates.

The Orlit RT-600C TTL Speedlite for Canon is now available for preorder and retails for $ 169.95 USD.

Orlit TR-611C TTL Transceiver & Orlit TR-612N TTL Transceivers:

Designed for Canon and Nikon cameras, respectively, adding 980ft/300m of remote lighting freedom. Using an Orlit transceiver on the camera’s hot shoe, Canon and Nikon photographers can easily adjust the exposure for the Orlit Rovelight RT610 TTL Monolight, while the Canon TR-611C adds control to the Orlit RT600C Speedlite.

This TTL wireless flash transmitter from Orlit can trigger one or more receivers for studio flash and speedlights. Featuring direct group access, multi-group triggering, stable signal transmission, and sensitive reaction, photographers can achieve wide flexibility and control over their strobist setups. And with the Orlit TTL Transceivers, high speed synchronization is available for most Orlit camera flashes, with a max speed up to 1/8000s.

The Orlit TR-611C & TR-612N TTL Transceivers are now available for preorder and will each retail for $ 69.95 USD.

Designed with Users in Mind
The Orlit TR-611C and TR-612N Transceivers feature an efficiently designed user interface with a clear LCD display, simplified but extensive menu system, and are graced by soft menu touch control buttons for all options. Future technologies are firmware updated through the USB port.

The Future of TTL Flash is Now
Coming soon, the Orlit smartphone app seamlessly integrates the latest in wireless command into studio life. A rich array of screens give touch control to the myriad of Orlit features without going near the set, from the convenience of a smartphone.

Articles: Digital Photography Review (dpreview.com)

 
Comments Off on Adorama introduces Canon RT radio controlled TTL studio head and hotshoe flash

Posted in Uncategorized


Join Me For a Drop-In Studio at GPP2017

01 Feb

Just a quick heads-up for anyone headed to Gulf Photo Plus in Dubai that I’ll be holding a drop-in studio session on the afternoon of Weds., Feb 15th. It’s not an official class, just something cool happening on the side.

You can learn more about it here, but basically it is free and we’ll be experimenting/learning/failing/etc. Specifically, we’ll be working with gels in the context of future posts in the just-started Lighting 103 module. So I thought it would be espcially cool to possibly incorporate photos of some of Strobist’s international readers as we get further into the course.

Which is why you are getting this invite!
Strobist

 
Comments Off on Join Me For a Drop-In Studio at GPP2017

Posted in Photography


Astropad launches Astropad Studio for the Apple iPad Pro

12 Jan

The team behind Astropad, an iOS app that turns your iPad into a graphics tablet for the Mac, has today released Astropad Studio, a premium version of the original Astropad. The new release was specifically designed to work with the iPad Pro and offers better performance and an expanded feature set. 

Astropad Studio can communicate with an Apple Mac computer via a Wi-Fi or USB connection and uses Liquid Extreme, an improved and 5 times faster version of the standard app’s Liquid technology which allows for smooth operation of the tablet and image quality that is free of compression artifacts. 

In addition, Astropad Studio supports both Bluetooth and wired keyboards and comes with the new Magic Gestures feature that allows for the creation of gesture shortcuts using touch-Pencil combinations. Sidebar shortcuts automatically adapt to the Mac app you are working with and Stroke Lab lets you adjust the characteristics of your pencil stroke in a variety of ways. 

Astropad Studio will be available as a subscription service for either $ 64.99 per year or $ 7.99 per month. This includes syncing of settings across devices and priority support. A 7-day free trial is available for those who are interested in trying the app. More information is available in the video below and on the Astropad Studio website.

Articles: Digital Photography Review (dpreview.com)

 
Comments Off on Astropad launches Astropad Studio for the Apple iPad Pro

Posted in Uncategorized


Canon EOS M5 added to studio scene comparison tool

08 Dec

The EOS M5 is Canon’s current enthusiast-grade mirrorless camera. With a 24.2MP APS-C sensor, Dual Pixel autofocus and a pleasant-to-use interface, the M5 is the most competitive EF-M camera Canon has released.

We’ve put a production EOS M5 through our studio scene so you can see how it compares with its peers. Note that we’ve used a different lens on the M5 compared with the M3; we may re-shoot the scene in the future for the sake of consistency.

View the Canon EOS M5 in our studio scene comparison tool

Articles: Digital Photography Review (dpreview.com)

 
Comments Off on Canon EOS M5 added to studio scene comparison tool

Posted in Uncategorized


Tips to Help You Find the Right Photography Studio Space to Rent

06 Dec

Are you looking to up your portrait, fashion, or product game but are running out of space in your home? Maybe you are on the cusp of having a steady stream of clients but small droughts here and there have you worried about signing a lease for more space. Or perhaps you are curious about what you could do with some professional equipment and a dedicated space? Renting photography studio space is often a perfect solution for any of these situations and more.

Ravenshoe Group

By Ravenshoe Group

Casual studio renting sounds ideal; no need to own extra gear, no monthly rent, no lighting/heating/insurance costs. But it can have some drawbacks if you’re not careful. Here are some tips to help you find the right photography studio space to rent.

What do you need in a photography studio?

Some studios have all the gear you would ever need; C-Stands, professional strobes and modifiers, and a gaggle of backdrops. Others will give you a heated space and an outlet, that’s all.

The right photo studio equipment can make magical images

Image by Erik Söderström/Flickr

Your first step before renting a space is to figure out just what you need. Having a list of items you require will help you in the next phase (searching for your studio) as you file through website after website.

For those totally new to studio shooting, I’d suggest finding a class to help you become familiar with handling the expensive gear in a studio space. I know I was intimidated the first time I was given an Alien Bee light and told to set it up.

If you are only showing up with a camera, you’ll need to make sure the studio has it all. But if you like your strobes (yes, you can use a typical camera flash, with or without modifiers, in a studio) maybe you only need a dry space with a variety of backdrops.

Resources for your search

Google Maps works as a starting point but shouldn’t be your only stop. I use search terms like “Photo Studio”, but you have to be careful how you use the word “studio” otherwise you’ll start getting all kids of apartment listings.

Getting setup for a photo studio shoot

Image by Heisenberg Media/Flickr

I’ve found Yelp to be useful for all the normal Yelpy reasons, but also because the photos help me get a sense of the space.

Facebook groups are another excellent place to find space but make sure you do a little research first. Chances are someone has already asked your question, so search the results in your area. These groups are often run by local photography clubs, so a search for the likes of “Nashville Photography Club” will point you in the right direction. I find that photography club members are usually quite helpful finding most any photo resource when I am visiting a new location as well. They can also be a good source if you are looking for a mentor or assistant to help in the studio.

Knowing what you’re getting

Read the studio’s website very carefully if when in doubt, ask. Keep your emails that describe what you’re getting and what’s not included. Know when you can show up and if they will let you tour the space before your reservation date.

Lots of space can be an advantage when renting photo studio space

Image by jm3/Flickr

This is just a business transaction; don’t be afraid to ask for what you need. If you want a fog machine, ask if one is included. Will a changing room be available? Will remote triggers for any flashes be included or should you bring your own? If you like a specific modifier for the lights, make sure they can provide it.

These all seem like simple things but they will trip you up if you make an assumption that turns out not to be true. If the space has plenty of daylight but no good draperies to cover the windows, you should know this before you show up with clients.

Be prepared

Know which gear is available when renting a photo studio

Image by a kindly stranger/Flickr

Assume nothing. While the list of items may be complete and you received guarantees in email, be prepared to have vital items with you or a backup plan in place. What if the backdrop color you want got damaged just before your session by another patron? What if you really need music for your shoot (such as playback for a music video) and their system breaks?

Have backups and backup plans. Carry extras of your own gear, as much is as practical, in case you are the cause of a breakage. Such as a lens cracks or your own wireless transmitter freaks out. You’ve spent time and money on the shoot; make sure it is not scrubbed because of something that can be backed up.

Depending on the level and importance of the shoot, you may want to rent backup gear if there isn’t a shop close to your rental studio. Studio space can range from $ 30-$ 150 per hour or more, and if you are bringing in hair and makeup professionals or maybe a model or two the costs add up. It’s worth the slight extra cost to make sure that money isn’t wasted because you ran out of batteries or gaffers tape or can’t find your 50mm lens.

Conclusion


Renting studio space to expand your skills and resources is a great option as your photography grows. Getting in with a local group, via Facebook or an internet search, is a great way to find space and people who might be good mentors. Make sure you know what you are getting yourself into and what is and is not, included with the rental.

Most of all, have fun shooting!

googletag.cmd.push(function() {
tablet_slots.push( googletag.defineSlot( “/1005424/_dPSv4_tab-all-article-bottom_(300×250)”, [300, 250], “pb-ad-78623” ).addService( googletag.pubads() ) ); } );

googletag.cmd.push(function() {
mobile_slots.push( googletag.defineSlot( “/1005424/_dPSv4_mob-all-article-bottom_(300×250)”, [300, 250], “pb-ad-78158” ).addService( googletag.pubads() ) ); } );

The post Tips to Help You Find the Right Photography Studio Space to Rent by Peter West Carey appeared first on Digital Photography School.


Digital Photography School

 
Comments Off on Tips to Help You Find the Right Photography Studio Space to Rent

Posted in Photography


Simple Studio Technique: Pet Portraits

03 Dec

Perfect pet portraits

A few weeks ago we visited an animal adoption center in Seattle, to shoot some portraits of the dogs (and cats) awaiting owners at The Motley Zoo. When we published our video feature recently, many of you wanted a little more information about how we shot the images, so we’ve put together a slideshow of some of our favorite shots, including some bonus images not used in the video.

Click through to see the photos, and for those of you who were curious, we’ve included more information on the lighting and setup we used on the shoot. Also, they’re pictures of pets, what more do you want?
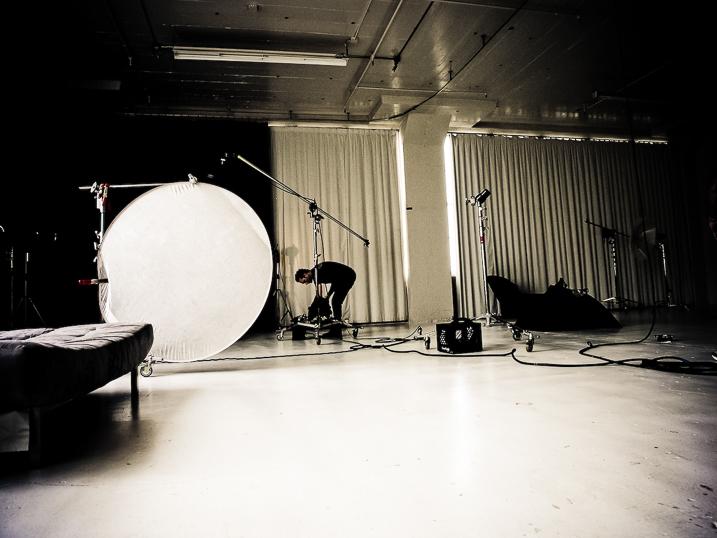
Lighting

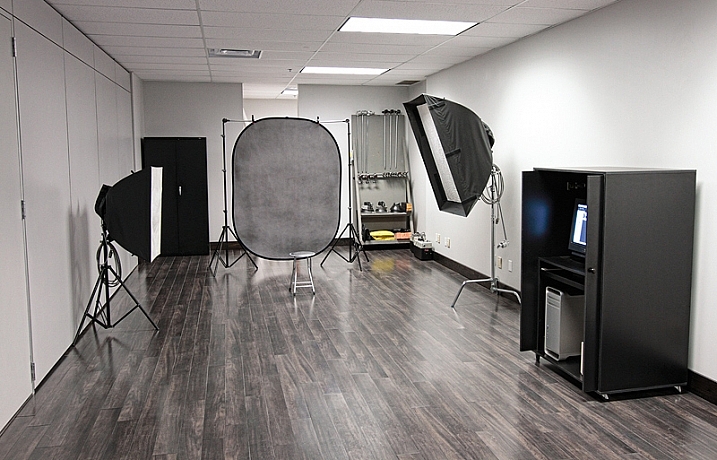
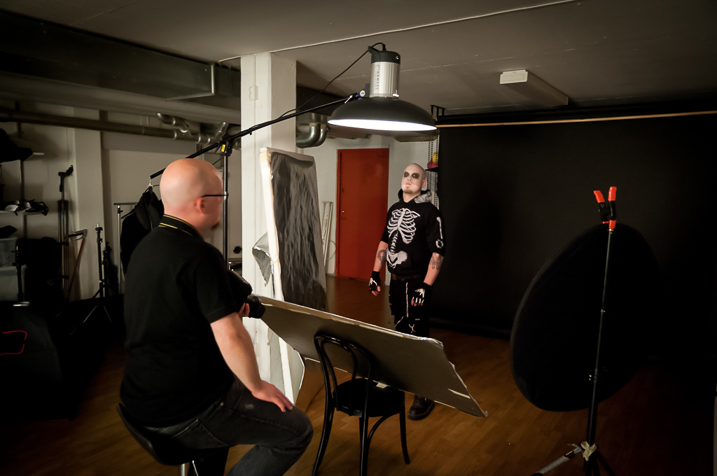
For lights we used three Sony HVL-60M flashes, two of which were attached to softboxes and positioned on stands.

The flash on the camera played the role of TTL trigger, while the other two off-camera flashes fired through the softboxes to provide illumination.
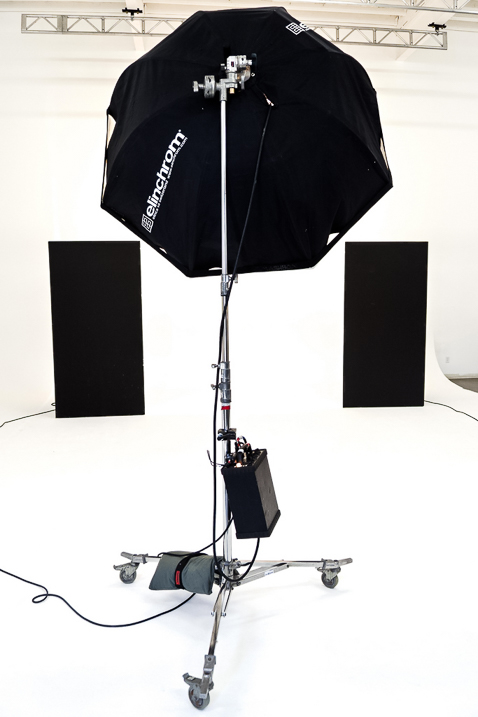
Lighting

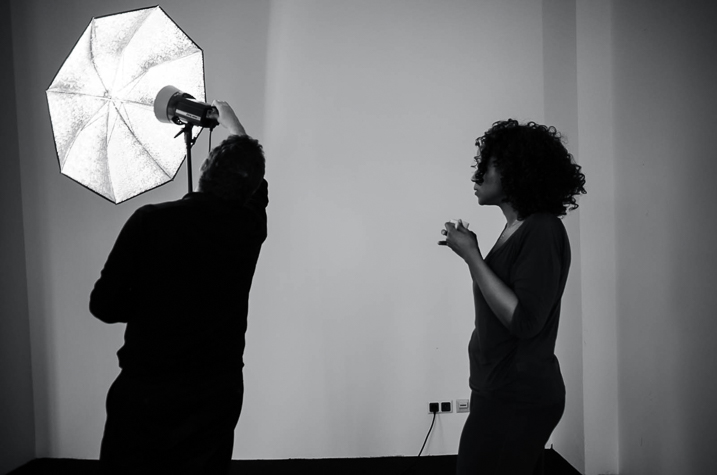
The key light, which was placed just slightly above eye-level for the dogs and off to the left, was fired through a Westcott Rapid Box 26″ Octa Softbox.

The second light was an overhead fill bounced off the silver inside of a 60″ umbrella, to save space in the relatively small room in which we were working. This light was placed off to the right of the setup, aimed to cover both the backdrop and the subject, to provide a bit of fill light and illuminate the backdrop. 

Get their attention

When working with animals it’s very important to bring something to grab their attention.

For dogs, treats are always a great way to have them look wherever you want, as long as they’re well behaved. With Ginger Rogers, the sweet little blind Poodle pictured above, we borrowed a squeaky toy that the shelter calls the ‘Photo Pig’. They call it that because it’s shaped like a pig. And they use it to get the dogs’ attention for photos.

Photo Pig.

Shoot from eye-level

Shooting from a pet’s eye level helps in a few ways. 

First, it’s a better angle for classic ‘head and shoulders’ shots when combined with a longer focal length, presenting the dog as a more ‘human’ subject, giving the image more personality.

Second, it can help with intimidation, or rather avoiding intimidation, especially with smaller breeds. Just watch out, some dogs love to give kisses when you squat down to their level. Keep your front element covered, or have something handy to clean it.

Posing your pet

Profile shots are a great way to add variety in sets of shots taken at the same time.

Be sure to keep the subject facing the side that the light is on, so their face isn’t lost in shadow and they still get ‘catch lights’ in their eyes.

What about cats?

Cats are a bit more tricky than dogs. We tried, but our hit-rate wasn’t quite as high as we needed it to be. It’s harder to get a cat’s attention, and they can get aggressive and skittish if they’re not in a co-operative mood.

Toy with them

Getting cats to sit still can be a nightmare. Sound tends to startle cats, so for this kitten portrait we ditched the Photo Pig in favor of feathers attached to a string on the end of a pole. Dangling it just out of shot kept his chin up for the picture.

Watch your settings

We were using the Sony a6300 for this shoot, and overall the camera worked well. Off-camera TTL lights made setting up the exposure quite easy. 

When using flash on a mirrorless camera, make sure you’re not in exposure preview mode, otherwise, at typical flash exposure settings you’ll just be looking at a completely dark, underexposed preview image.

Also, be aware that battery-powered flashes can have quite long recycle times, especially when fired through modifiers. The modifiers, while necessary for this soft diffused look, sap light, requiring the flash to be used at a higher power level.

Focus tips

When stopped down past F8 the a6300’s switches to contrast detection in AF-C mode, slowing down the ability to keep up with skittish pets. To avoid this, we switched the camera to AF-S to get rid of the distracting hunting. Inevitably, this left us with some shots that aren’t entirely sharp in the right place. But with a bit of processing, even the shots that aren’t 100% sharp on the animals’ eyes are still perfectly usable for a web gallery.

Pet Portraits

If you’re interested in adopting any of the animals you’ve seen here, we’re sure The Motley Zoo would love to hear from you. We hope you enjoyed this quick look behind the scenes of a fun photo shoot. Check out the video, if you haven’t already and share your tips for pet portraits in the comments!

Articles: Digital Photography Review (dpreview.com)

 
Comments Off on Simple Studio Technique: Pet Portraits

Posted in Uncategorized


Studio and the Sheep Pasture

19 Nov

Inside and outside in the same shoot? It works out when you have fabulous location within a short drive of your studio. Want to book your own shoot like this? […]
Jake Garn Photography

 
Comments Off on Studio and the Sheep Pasture

Posted in Uncategorized


Olympus OM-D E-M1 Mark II added to studio comparison scene

17 Nov

The Olympus OM-D E-M1 Mark II raised a lot of eyebrows when it was released. It comes with an all-new 121-point autofocus system, 20MP sensor and 60fps Raw + JPEG shooting. Oh, and a $ 2000 MSRP. Can’t forget that.

Nonetheless, Olympus’ new flagship is here, and it is seriously capable. We’re in the home stretch on our full review, but in the meantime, check out how it stacks up against the competition in our studio comparison scene.

Articles: Digital Photography Review (dpreview.com)

 
Comments Off on Olympus OM-D E-M1 Mark II added to studio comparison scene

Posted in Uncategorized