RSS
 

Posts Tagged ‘Starting’

DJI AirSense will add aircraft detection to DJI drones starting next year

23 May

This morning, DJI hosted a panel of experts in the aviation field, including the Federal Aviation Administration’s (FAA) Jay Merkel and AUVSI’s Tracy Lamb, to discuss the implementation of airplane and helicopter detectors in its new consumer drones starting January 1, 2020. Every drone model weighing over 250 grams will have AirSense Automatic Dependent Surveillance-Broadcast (ADS-B) receivers installed.

AirSense technology, which is a product of over 30,000 hours of development efforts by DJI engineers on all security measures, works by receiving ADS-B signals from nearby airplanes and helicopters. It allows drone pilots to detect and avoid traditional aircraft nearby. ‘I was an F-18 pilot years ago, and when you’re going that fast, it’s really hard to see anything. … ADS-B is certainly one of those things that for all pilots, and for controllers as well, becomes a situational awareness tool’ said Houston Mills of UPS Airlines, at the panel.

AirSense is currently embedded in some of DJI’s enterprise-level drones including the Mavic 2 Enterprise. The manufacturer now aims to make the same level of safety and security available to consumers. Instead of relying on sound or sight, ADS-B can identify planes and helicopters from miles away, and display the location on the screen of the remote.

Along with the announcement, DJI has released a comprehensive 37-page ‘Elevating Safety’ white paper outlining efforts they have taken to ensure that drones and their operators remain compliant. One significant burden to innovation in improving safety measures has been the media’s numerous inaccurate portrayals of reckless drone use. Most claims, including the incidents at Gatwick and Newark airports, are still unfounded.

DJI stands by the fact that existing data on drone safety is inaccurate. However, they understand they need to continually focus on research, development, education, and advocacy for solutions that will improve safety. They’ve outlined their intentions with the following 10 points:

1. DJI will install ADS-B receivers in all new drones above 250 grams.
2. DJI will develop a new automatic warning for drone pilots flying at extended distances.
3. DJI will establish an internal Safety Standards Group to meet regulatory and customer expectations.
4. Aviation industry groups must develop standards for reporting drone incidents.
5. All drone manufacturers should install geofencing and remote identification.
6. Governments must require remote identification.
7. Governments must require a user-friendly knowledge test for new drone pilots.
8. Governments must clearly designate sensitive restriction areas.
9. Local authorities must be allowed to respond to drone threats that are clear and serious.
10. Governments must increase enforcement of laws against unsafe drone operation.

These 10 steps are DJI’s proactive plan for addressing the continual growth in the drone industry. It divides responsibility between the government, remote pilots, and the company to ensure drones continue to safely integrate into airspace.

Articles: Digital Photography Review (dpreview.com)

 
Comments Off on DJI AirSense will add aircraft detection to DJI drones starting next year

Posted in Uncategorized


New York Times Lens photo blog will enter ‘temporary hiatus’ starting in late May

15 May

The New York Times photo blog Lens will go on a temporary hiatus starting later this month, the publication’s Director of Photography Meaghan Looram announced to staff in a note that has been shared on Facebook. Looram praised the photo blog, saying it ‘set out to showcase work that risked getting lost in the digital blizzard.’ However, Looram notes, ‘Lens was founded during a different era,’ and it seems it is time for the photo blog to evolve.

Looram’s note explains:

‘Lens was founded during a different era. Digital platforms were presenting new challenges to the industry, and Lens provided one of the few dedicated showcases for photography. But since then, the means of consuming photography have changed and expanded. We believe that this is the perfect time to take stock of and celebrate what Lens has achieved and to give serious thought to how to better position Lens for the future.’

The photo blog isn’t ending, but will instead return as an updated offering that better suits present needs. ‘We want Lens to evolve into an unrivalled source for those who want to read about and think about photography,’ Looram said. The team plans to solicit ideas from readers regarding ways to reinvent the brand as ‘a dynamic space to highlight more of the incredible photography that all of you produce on a daily basis.’

Looram concluded her note, stating:

‘There will be time to celebrate Lens and its wonderful run. In the meantime, a final nod to the creators, producers and caretakers of Lens: What an extraordinary thing you created and produced for a decade. You have our deepest admiration and gratitude. Onward.’

Though Lens is temporarily ending, Looram notes that The NYT is still accepting pitches and the annual New York Portfolio Review that Lens helped launch will continue in the blog’s absence.

Articles: Digital Photography Review (dpreview.com)

 
Comments Off on New York Times Lens photo blog will enter ‘temporary hiatus’ starting in late May

Posted in Uncategorized


Flickr to begin deleting images over the 1K limit starting tomorrow for free accounts

05 Feb

Changes to the way photo sharing website Flickr operates mean starting tomorrow free accounts that have more than 1,000 images shared on their account are in danger of having images deleted. In November 2018 new owners SmugMug warned the days of all users being entitled to a terabyte of storage were numbered, and noted that as of February 5th 2019 free accounts will be cut down to size starting with the oldest posts.

The company says the cull should affect only a small percentage of its user-base, as 97% of its free account holders have fewer than 1000 images and videos stored. Those who have more should upgrade to a Pro account or scale their albums back. It also points out that the 1000-image limit is five times as generous as the original free account quota, which was only 200 pictures or videos.

Yahoo gets the blame for the situation, as in 2013 it raised the storage limit to attract new users which actually led to sign-ups just using the free storage but not interacting with the community, according to Flickr’s VP of Product Andrew Stadlen. He also says it costs a lot to host all that data, and that by offering it for free devalued the concept of paid online space.
If you are one of that 3% with more than 1000 images in a free account you need to take action now. Fortunately, Gizmodo has produced a handy guide to getting your pictures downloaded back to your local drives.

For more information on these changes see the Flickr blog post from November, and this one from mid-December.

Articles: Digital Photography Review (dpreview.com)

 
Comments Off on Flickr to begin deleting images over the 1K limit starting tomorrow for free accounts

Posted in Uncategorized


Tumblr will remove and ban all ‘adult content’ from its platform starting December 17th

05 Dec

In a controversial move, social media website Tumblr has announced it will start removing all pornography and explicit content on December 17th, 2018 and subsequently ban adult content going forward.

The ban comes three weeks after Apple removed the Tumblr app from its iOS app store after it was discovered underaged content was slipping through an ‘industry database of child sexual abuse material,’ but it’s unclear if the move to ban all adult content is due to Apple’s decision.

For context of how much adult content there is on Tumblr, former Tumblr CEO David Karp said in June 2012 that roughly two to four percent of the content on Tumblr was related to pornography. A year later, in May 2013, web analytics firm SimilarGroup came out with its own analysis claiming 22,775 of the 200,000 most-visited Tumblr domains were pornographic in nature — roughly 11.4 percent. The discrepancies between those two statistics is stark, but regardless of how it’s looked at, there’s a great deal of adult content floating around the social network with more than 100-million blogs.

‘Posts that contain adult content will no longer be allowed on Tumblr, and we’ve updated our Community Guidelines to reflect this policy change,’ says Tumblr CEO Jeff D’Onofrio in a blog post on the Staff Tumblr. He goes on to say ‘Bottom line: There are no shortage of sites on the internet that feature adult content […] We will leave it to them and focus our efforts on creating the most welcoming environment possible for our community.’

Where things get interesting is how Tumblr is defining adult content. On Tumblr’s Help Center page, it defines it as follows:

Adult content primarily includes photos, videos, or GIFs that show real-life human genitals or female-presenting nipples, and any content—including photos, videos, GIFs and illustrations—that depicts sex acts.

Tumblr goes on to say on the same page what is allowed, which reads as follows:

Examples of exceptions that are still permitted are exposed female-presenting nipples in connection with breastfeeding, birth or after-birth moments, and health-related situations, such as post-mastectomy or gender confirmation surgery. Written content such as erotica, nudity related to political or newsworthy speech, and nudity found in art, such as sculptures and illustrations, are also stuff that can be freely posted on Tumblr.

In terms of photography, it appears as though nearly all nude photography will be removed and banned, regardless of how tasteful it is or isn’t. That is, unless it’s a male nipple or pertains to the other exceptions mentioned above.

Tumblr has started flagging content as inappropriate already and will continue to do so. In the event a piece of content was flagged unnecessarily, something that’s already happening, Tumblr has an appeal button alongside the post that can be used to protest the flag.

Articles: Digital Photography Review (dpreview.com)

 
Comments Off on Tumblr will remove and ban all ‘adult content’ from its platform starting December 17th

Posted in Uncategorized


Photokina 2019 gets postponed, will become an annual event starting May 2020

04 Dec

In 2017, Photokina’s organizers announced the world’s largest trade fair would ‘reposition’ itself an annual event starting in 2018 and subsequently announced that after this year’s Photokina, which took place in September, the event would be moved to the month of May going forward.

Naturally, it was expected the next Photokina event would take place in May 2019, but plans have changed. According to the German Photo Industry Association (PIV), conceptual sponsor of the trade fair, and Koelnmesse, the event’s organizer, the 2019 Photokina event has been postponed a year, meaning the next Photokina event will take place from Wednesday May 27th, 2020 through May 30th, 2020.

‘The decision to postpone the start of the announced annual cycle by one year is intended to give all participants the opportunity to further develop the new concept for Photokina and to tap into new target groups among exhibitors and visitors in order to heighten the status of the trade fair as a global platform for the photography and imaging industry,’ reads the announcement press release.

From left to right: Gerald Böse, President and Chief Executive Officer Koelnmesse GmbH, Rainer Führes, CEO of Canon Deutschland GmbH and Chairman of the Photoindustrie-Verband – The Imaging Association, Jürgen Roters, Mayor of Cologne

PIV CEO Rainer Führes is quoted in the press release saying Photokina 2018 ‘clearly exceeded our already optimistic expectations with groundbreaking innovations and 180,000 visitors from 127 countries.’ He goes on to say that Photokina 2018 ‘set the bar very high for the next event.’

“It is therefore unlikely that, in May 2019 after just over seven months, we will once again be able to create the same enthusiastic atmosphere that characterized Photokina 2018 […] This is why we have decided to start the planned annual cycle in 2020.’

Considering the quick turn-around time from the last Photokina — not to mention its proximity to CP+ in March and NAB in April — it was a big ask of Photokina and its organizers to expect exhibitors, media, and attendees to bounce back with enough updates, products, and cash to fill the floors.

Articles: Digital Photography Review (dpreview.com)

 
Comments Off on Photokina 2019 gets postponed, will become an annual event starting May 2020

Posted in Uncategorized


Essential Portrait Photography Gear You Need When Starting Out

26 Nov

My last post was on equipment to have when starting out as a wedding photographer.

I am not reiterating what I have touched on in that article, although there are some slight overlaps. Still, I recommend that you read that first.

dps-equipment-portrait-photography.

In this article, I touch on the differences between wedding and portrait photography which I have not covered in the previous post. I also follow that with equipment you need for portrait photography.

Differences

1. Weddings are fast-paced. Portrait photography is slower in comparison.

2. Weddings require photojournalistic shots and a documentary style to the coverage. Portraits most often include must have looking photos or a well-composed artful photo.

3. Weddings can involve countless lighting conditions, many of which you have no control over. Portraits are more manageable than weddings, and you have more control and options.

4. Weddings require dealing with large numbers of people but with less personal face-to-face interaction. Portraits are the opposite – especially involving children.

Given the above differences, this is the equipment I suggest you have in your bag as a portrait photographer.

dps-equipment-portrait-photography

1. Zoom Lens – Wide and Long

An excellent example of a wide zoom lens is the 24-70mm f/2.8 or if you have a kit lens, the 18-55mm. While this lens is versatile for wedding photography, in a small studio, this helps when shooting portraits with many people in them. There is no need to change lenses every time you go from photographing one person to three or five. The important thing to remember here is the distortion you get when shooting with a wide focal length at close range to your subject. 35mm for a full body length is good, but you start getting distortions wider than that, especially shooting 24mm at close range.

However, if you have a big studio, then you could do with a prime lens like a 35mm for a crop-sensor or a 50mm/85mm for a full-frame camera.

The 70-200mm f/2.8 (Nikon also has an f/4 option) is an excellent zoom lens. I used this lens for the cherry blossom photos above. An inexpensive alternative is the 55-200mm f/3.5. Using long focal lenses are fantastic for separating the subject from the background.

2. Fixed Lens

Also called prime lenses, those with longer focal lengths, such as the 85mm, 105mm, and 200mm, are great for portraits. You get amazing compression and depth of field. If you only have a small studio, using these lenses may be tricky because you need to have enough space between you and the subject. However, if you are shooting outdoors, results can be dramatic and beautiful.

If you are a natural light photographer, having a prime lens with a wide aperture is your best friend. For example, you can shoot between f/1.4 – f/2.2 and still get sharp images. However, a word of caution, there are other factors to consider to get sharp images at these apertures. Including: how you hold the camera, your ISO and shutter speed settings, and the use of a steady surface or tripod/monopod where needed. Because you have more control over the time you spend on portraits, and it’s not fast-paced, you can afford to use a tripod. Slowing things down may help you to nail your focus or achieve the compositions you are after.

Here is an article I have written comparing natural light and the use of flash.

3. Tripod or Monopod

As mentioned above, using a tripod or monopod is helpful when photographing subjects using natural light – especially if you have a static set-up/backdrop. You don’t have to keep moving your camera, and you get the same frame and composition every time.

If you take the majority of your portraits in your studio, there’s no need to shell out for an expensive portable tripod. These tripods are generally expensive because they are sturdy and made from lightweight materials, and they are a small size. As long as your tripod is strong and stable, even if it is super heavy, it can do the job.

dps-equipment-portrait-photography

4. Artificial Light Source

If you don’t purely rely on natural light, consider other light sources such as continuous lights, LED lights, flashguns, and electronic flashes/strobes. With these, you can shoot at any time of day under any lighting conditions. You are then not dependent on sunlight, the weather or the season. This article on a portable started kit may help with how artificial light sources can look.

You may need remote triggers and receivers to work these with your camera. Unless, for example, you are using the built-in creative lighting system of your flashgun unit in the case of Nikon.

5. Light Modifiers

With the use of artificial light sources, it is crucial to pair them with modifiers to take the edge off and soften the light. There are many types you can go for and this article could help you decide.

dps-equipment-portrait-photography

6. Reflector

Reflectors are a handy tool for portrait photography, especially when using in a studio environment. Using the correct reflector has an undeniable impact on the image before applying any editing in post-production. Read this article for a side-by-side comparison of various reflectors. If you have space, it is a good idea to have one large reflector propped up on a stand in your studio (lockable castor wheels are handy).

As this is to do with portrait photography, this article on setting up a home portrait studio might help give you more of an idea of the basics.

I hope you found this article helpful. If there is any equipment you wish to add, share your thoughts in the comments below.

Top feature image by:

Alexander Dummer

The post Essential Portrait Photography Gear You Need When Starting Out appeared first on Digital Photography School.


Digital Photography School

 
Comments Off on Essential Portrait Photography Gear You Need When Starting Out

Posted in Photography


Wedding Photography Gear You Need When Starting Out

12 Nov

What’s in your bag?

dps-equipment-wedding-photography

Weddings are vibrant and full of emotions, making it all too easy to have a purely romantic view of the day. For the couple and guests, that is very true. However, if you are a supplier on the day, it can be a very different experience. All the more if you are the wedding photographer! The pressure is on, and you have a huge responsibility to capture the day.

When you first begin photographing weddings, it is important to have a love for weddings and a connection to the occasion. If you hate weddings – which some people do – I suggest you steer clear of wedding photography. It is also beneficial to have a creative eye. If you lack both, it will be apparent on the images you capture.

When starting as a wedding photographer, it is quite understandable that you may not have the full arsenal of cameras, lenses, flashes, etc. Often we start with only the basic equipment in our bag and plenty of creativity (and for some, a healthy dose of confidence).

If you are considering being a wedding photographer and exploring what you can achieve with a basic kit, then this article is for you. These are also just my suggestions. I do not assume that you could not become a competent wedding photographer otherwise.

dps-equipment-wedding-photography

1. Camera

A full-frame professional camera is ideal, but if you only have a crop-sensor camera, there’s no reason you can’t shoot a wedding. The main impact of this would be the lenses. Unless it is a dedicated crop-sensor lens, a crop-sensor only uses a section of the lens, causing some loss in light and sensor use.

Newer cameras are equipped with better technology to handle noise, especially in low-light conditions. This technology is crucial because regardless of season, weddings will always involve low-light. Often very little natural light. The pixel size of images from newer cameras is also generally larger allowing more room for adjustments like cropping. It also allows better enlargements of your photographs in print. 24MP is now average for a newer camera whereas it was around 12MP 10-years ago.

2. Lenses

I feel lenses are a must. If you want to shoot weddings, at least have the 50mm or 35mm prime lens. They open to larger apertures than the kit lenses (the ones that come with the camera body). A maximum aperture of f/1.8 will do, but even better is f/1.4 and f/1.2. However, these lenses can be pricey though. If you tend not to use a flash unit, the advantage of these lenses is made clear.

A zoom lens is a massive help when capturing unfolding events during a wedding day. You don’t have to zoom with your feet as you do with a prime lens. In my opinion, you can get away with using a zoom kit lens for candid captures and don’t have to shell out for a pricey f/2.8 zoom when starting out. I must also add that these f/2.8 zooms are amazing pieces of glass and are worth the investment if you can afford it.

Top tip: Use a hood or a UV filter on your lens to protect it from knocks and breakage. Some people say filters affect the sharpness. That may be so, but I’d rather have an intact lens and a 99% sharp photo than a broken lens and a 100% sharp photo. The difference is pixel-peeping minuscule.

3. Flash Gun

Many people call themselves a natural light photographer. There is nothing wrong with that. However, if you want to shoot weddings, I encourage you to be open-minded and explore the possibility of learning to use flash. Weddings, especially evening receptions can be notoriously dark and having a flash gun will serve you well.

Top tip: Use a diffuser or bounce card.

dps-equipment-wedding-photography

4. Memory Cards, Spare Batteries, Remote Triggers or Transceivers (If You Use Off-Camera Flash)

These are self-explanatory. Have spares and spares of spares!

5. Backup Equipment

If you have to borrow extra equipment for back-up, do so. You never know when something will unexpectedly pack-up! When I shot my first wedding, I owned one camera body (a crop-sensor), and I borrowed my sister-in-law’s camera, just in case. I didn’t use it but having it with me gave me peace of mind.

dps-equipment-wedding-photography

6. Other Helpful Equipment But Non-Essentials

The following can come in handy but in my opinion, you can do without them:

Grey card – You shoot at a fast pace in various lighting scenarios during a wedding – indoors, outdoors, tungsten, LED, natural lights, etc. It would be crazy to use a grey card every time you moved! You can shoot in Kelvin or use Auto White Balance. The important thing is that you shoot in Raw so you can adjust the white balance in post.

Reflector – I used to carry a reflector when I first started, but now I take my flash guns instead. And I never go without at least two of them! But a reflector is handy. Because I don’t carry one with me most of the time now, when I shoot small details, I use a small piece of white card or anything white that may be handy.

Tripod – I never carry a tripod as I find it too cumbersome and heavy! But you’d never see me cover a wedding without a monopod. They are easier to lug around!

7. Non-Essentials That Add Value to Your Service

Brides are often grateful when you magically produce things that they did not expect you to have. For instance, bobby pins, hair grips, scissors, or tissues. Likewise, if you help in other ways when you can, for example, putting the buttonholes on, helping with jewelry, etc. As they say, it’s in the little things.

dps-equipment-wedding-photography

Lastly, invest in a good, well-padded camera bag. Your equipment will love being in it!

You can read more about lenses for wedding photography in an more exhaustive article I have written here.

I hope you found this article helpful and I wish you the best in your journey as a wedding photographer! Do share your thoughts or any equipment you may want to add in the comments below!

The post Wedding Photography Gear You Need When Starting Out appeared first on Digital Photography School.


Digital Photography School

 
Comments Off on Wedding Photography Gear You Need When Starting Out

Posted in Photography


5 Things I Wish I’d Known Before Starting Nature Photography

30 Aug

5 Things I Wish I'd Known Before Starting Nature Photography - rose macro

How do you, as a beginning nature photographer, go about improving? How do you ensure that you gain useful skills as rapidly as possible so that you can start shooting professional quality nature photography?

5 Things I Wish I'd Known Before Starting Nature Photography - flower macro pink

In reality, it’s often difficult for the beginner to recognize how they should learn nature photography.

But I myself am a nature photographer, and looking back the answers to these questions are clear. So I thought I’d make a tutorial that discusses several things I wish I had known at the beginning of my nature photography journey.

Read on. The sooner you know these things, the sooner you’ll begin to take consistently stunning images.

1. Photograph every day

The first thing I wish I had known when starting nature photography is extremely simple,

Photograph every day!

I cannot emphasize this enough.

5 Things I Wish I'd Known Before Starting Nature Photography - flower close up

If you’re truly serious about improving as a nature photographer, you should try to take at least one photograph of nature, every single day. It doesn’t matter if you take it with your DSLR or your iPhone. Just get out and shoot.

You’ve likely heard that practice makes perfect, and this is part of that. But there’s more to it. By photographing every day, you’ll ensure that your artistic eye remains strong.

5 Things I Wish I'd Known Before Starting Nature Photography - yellow flower poppy

What do I mean by that? If you photograph every day, thinking about light, color, and composition will become second nature. You’ll start to see photographic opportunities everywhere.

This is exactly where you want to be as a nature photographer.

2. View the type of photography you want to create

extraordinary-photographs-ordinary-subjects

This is a huge one, as well. If you want to create great nature photography, you have to view great nature photography.

When you view amazing photography, you develop an eye for light, color, and composition without even realizing it.

nature-photography-flower-macro

This is an essential skill for a budding nature photographer. Plus, there’s an added bonus – it’s really fun!

Start by looking up the type of photographs that you’d like to create. You can use a well-organized site like 500PX. Or you can just use Google. The important thing is that you find photography to look at for inspiration.

For instance, if you’re an up-and-coming macro photographer, try viewing the portfolios of photographers such as Mike Moats and Kristel Schneider.

If you’re a beginning landscape photographer, look at the work of Ian Plant and Thomas Heaton.

If you’re a budding wildlife photographer, look to photographers such as Marsel Van Oosten and Matthew Studebaker.

5 Things I Wish I'd Known Before Starting Nature Photography - flower extreme close up

Then expand from there.

The purpose isn’t to memorize their images so that you can copy them in the field. Rather, the goal is to appreciate great imagery, while recognizing (if only subconsciously) what makes it great.

The goal is also to get inspired.

3. Light matters more than you think

I’ve emphasized the need to practice photography every day, and that truly is essential. However, when practicing, there’s something extremely important you need to consider. That is the light.

I’ll state it plainly. Photograph the two hours after sunrise, the two hours before sunset, and during midday only if it’s cloudy.

Otherwise, stay indoors.

extraordinary-photographs-ordinary-subjects
nature-photography-flower-macro

This generally takes some retraining of the brain. It’s easy to think to yourself, “It’s such a nice sunny afternoon; I should get out and photograph!”

But you need to resist this thought. Because photographing during a sunny afternoon will result in harsh, contrasty images that are almost never desirable in nature photography.

Start spending time observing the quality of the light. Notice how nicely illuminated your subject is when the sun is low in the sky. Notice how lovely and soft the light is on a cloudy afternoon. Notice how harsh the light is under the midday sun.

nature-photography-flower-macro
extraordinary-photographs-ordinary-subjects

As a beginning photographer, I often forgot about this rule. So my photographs paid the price. I have thousands upon thousands of photographs that are simply unusable because of the harsh sunlight.

Memorize the rule. You may not be able to see such a difference in your images at present. But in a few years, you’ll thank me!

4. Gear matters less than you think

While light is more important than you think, gear is also less important than you may imagine.

You might think that gear is essential. You may ask me, “Jaymes, if my gear really isn’t important, then why do you spend so much time reading gear reviews and upgrading your equipment?”

But my response is this: gear does matter. High-quality lenses will allow you to capture the detail on a singing bird or the movement of sparring polar bears.

5 Things I Wish I'd Known Before Starting Nature Photography - flower extreme close up - daisy

High-quality cameras will allow you to photograph a wolf under the cover of twilight or a hawk flying directly above.

Yet gear is nothing without the photographers that wield it. A good photographer can get stunning images with any equipment. Whereas a bad photographer cannot create stunning images, regardless of their gear.

extraordinary-photographs-ordinary-subjects
nature-photography-flower-macro

So focus less on making sure you have the right equipment. Instead, practice using the equipment you do have. Try to eke out as much as you can from it.

Eventually, if you work hard enough, you will get beautiful images, high-quality gear or not.

5. Most of the images you take will be terrible

Beginning nature photographers often have a dangerous misconception about nature photography. That is that the best photographers rarely take bad images.

This belief can lead to discouragement on the part of the budding photographer.

5 Things I Wish I'd Known Before Starting Nature Photography - flower extreme close up abstract

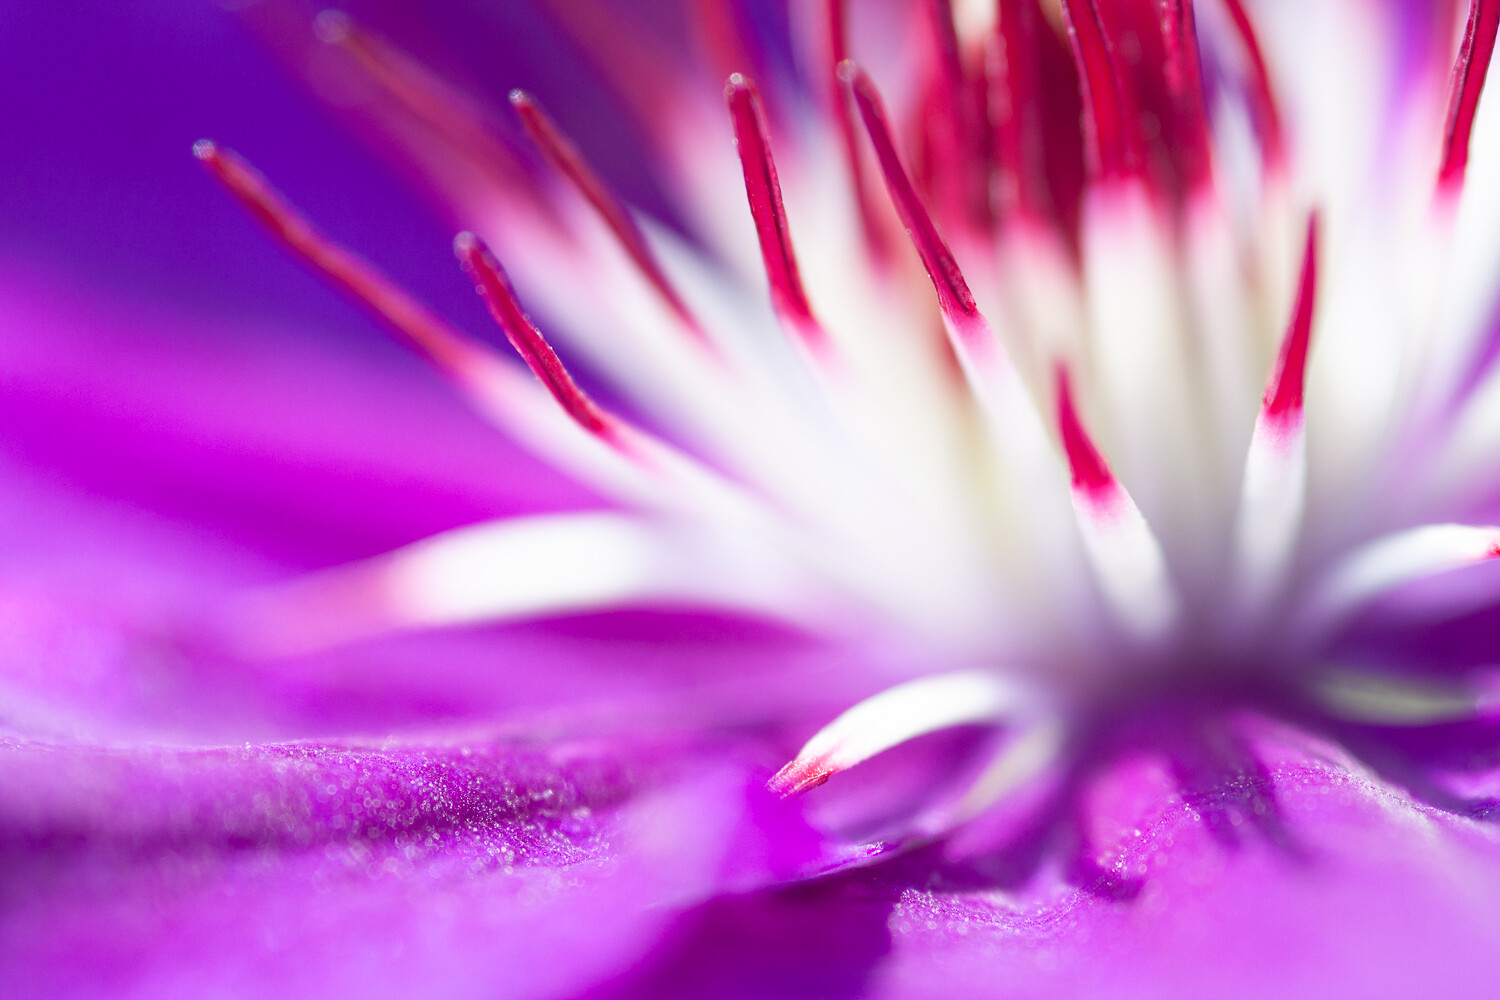
This type of abstract photograph comes amid a huge number of deleted images.

After looking through your memory card, to find that only you’ve managed to nail a single image (out of a hundred!), you may want to give up.

Don’t.

Why?

Because most of the early images you take will be terrible, and that’s okay. This is true for nature photographers of all levels. Of course, at the higher levels, the nature photographer’s standards are higher, but the tip still applies.

5 Things I Wish I'd Known Before Starting Nature Photography - flower extreme close up

This is true for me, as well.

I go on dozens of photo shoots each month and take around 600 images per shoot. Yet I’m happy if I get a single image with which I’m really pleased.

Because uncertainty, guesswork, and reaction are part of the game. This is the nature of nature photography.

So let me reiterate. Don’t get discouraged. Most of your shots will be terrible, but it’s the good ones that count.

5 Things I Wish I'd Known Before Starting Nature Photography - flower extreme close up tulip

In Conclusion

Starting nature photography can be daunting for a lot of people. It can be difficult to know how to improve. You want to take stunning images as soon as possible, but you just can’t figure out how.

5 Things I Wish I'd Known Before Starting Nature Photography - flower extreme close up

By understanding the lessons above, you’ll be well on your way to creating beautiful nature images.

Just remember:

  • Shoot every day.
  • View the type of photography you want to create.
  • Light matters more.
  • Gear matters less.
  • Finally, don’t be discouraged if most of your images are terrible.

nature-photography-flower-macro

Someday soon, you’ll be a great nature photographer.

What are some things you wish you had known when first starting out as a nature photographer? Let me know in the comments area below.

nature-photography-flower-macro

The post 5 Things I Wish I’d Known Before Starting Nature Photography appeared first on Digital Photography School.


Digital Photography School

 
Comments Off on 5 Things I Wish I’d Known Before Starting Nature Photography

Posted in Photography


8 Elementary Travel Photography Mistakes to Avoid When Starting Out

19 Aug

Starting out in photography may seem like a daunting task. There are so many things to learn and practice that sometimes it can seem like an impossible task. Unfortunately, there are no shortcuts and if you want to take better photos then you need to be willing to put the hours of practice and learning in.

The good news is that these days there are lots of resources online that can help you. To get you started here are 8 elementary travel photography mistakes to cut out when starting in photography.

temple in asia in golden light -  Travel Photography Mistakes

Mistake #1 – Setting Your Camera On Auto

It always amazes me when I see newbie photographers with the latest expensive DSLR, using the auto mode. Besides capturing better quality photos from a resolution point of view, the other main benefit of DSLRs is the amount of control that you have over the photo taking process.

Admittedly auto functions on cameras are a lot better these days. But often it means compromises which are not necessarily best for the image. For example, if your camera is setting your ISO too high you will get a lot of noise in your photo. Instead, you may decide that actually underexposing your image slightly, which you can then adjust in post-production, will be a better compromise than extra noise.

But the biggest reason you should avoid auto mode when starting out is that it will stop you from learning. You need to learn to be able to set your shutter speed and aperture. You need to learn when and how much to raise your ISO by because it’s the only way that you can have full control over the final outcome.

auto mode on DSLR -  Travel Photography Mistakes

Mistake #2 – Shooting in JPEG

I can’t see any reason why anyone would want to shoot in JPEG format with a DSLR camera. Unless you are on a specific brief that requires instant upload of the images to the client, capturing JPEGs shouldn’t be an option. The only reason that people use JPEG mode in the camera is to save disk space.

But ask yourself if it’s worth compromising the quality of the photo for the sake of buying a couple more memory cards?

If your camera has RAW files (which all DSLRs and most mirrorless and compact cameras do these days) that’s what you should use. It gives so much more flexibility when it comes to post-processing, supplying images to clients, and even printing them out.

Even if you plan to only use your images on social media you are better off capturing the images in RAW, post-processing them and then saving them as JPEGs.

raw setting on a DSLR menu -  Travel Photography Mistakes

Mistake #3 – ISO Too High

A few years ago I remember bumping into an amateur photographer in Vietnam. As we got talking it became apparent that he didn’t understand what ISO actually was and how it affected his photos. He just assumed it was a number that allowed him to take photos in most conditions. So while his ISO was at 6400, his shutter speed was 1/4000th.

For those of us who were photographing in the days of film, ISO was the sensitivity of the film to light. So if you wanted to capture photos in darker conditions you would use a roll of film with a higher ISO.

This concept is exactly the same now in digital photography. The higher your ISO the more sensitive the camera’s sensor is to light. The downside of this is that the higher your ISO is, the more noise you will get in your image.

So while the amateur photographer I met was able to capture photos in any and lighting conditions, all of his images when zoomed-in were soft and grainy. So one of the biggest tips for any aspiring photographer is to always keep your ISO as low a possible and only increase it as much as you have to in order to get the shot.

The Kremlin -  Travel Photography Mistakes

Image taken at 4000 ISO means noise and an image lacking sharpness.

Mistake #4 – Shutter Speed too Slow

One of the biggest struggles for newbie photographers is often capturing sharp images. One reason could be that the camera has been focused on the wrong part of the image. The other big reason is often that the photographer didn’t use a fast enough shutter speed.

At slow shutter speeds of 1/60th or slower, you simply will not be able to hold the camera steady enough for sharp photos. Even 1/60th for some people might be too slow so it’s worth testing this when you are starting out.

Start capturing photos of the same subject at 1/100th all the way down until the image is blurred. You’ll then know how slow you can go. But your shutter speed is also dependent on how fast the object that you are photographing is moving and the lens you’re using.

For example, you might be able to capture a photo of someone running with a shutter speed of 1/250th. But a fast-moving car would need a faster shutter speed to freeze it. If you’re using a 300mm lens you will also need a faster shutter speed (keep the shutter speed as a reciprocal of the focal length so 1/300th).

With experience you will learn what shutter speed you will need so make sure you practice photographing different moving objects.

blurry trumpet player -  Travel Photography Mistakes

Shot at 1/40th of a second. This was not fast enough to freeze the action so the image is blurred.

Mistake #5 – Photographing at Midday

For any outdoor photography, light is often the key component of turning an okay image into a great image. As such photographing at midday when it’s bright and sunny will usually mean your images will look flat as the harsh light washes out shadows. So try to avoid photographing around midday and instead build your shoot around early morning or late afternoon/evening.

 Travel Photography Mistakes - two guys by a lake

The light is too harsh and so the image looks flat.

Mistake #6 – Not Being Ready

One of the great satisfactions for photographers is capturing those fleeting moments that would otherwise be missed. But to do that you have to be ready.

That means having your camera out of your bag, turned on, with the lens cap off. You should also get into the habit of adjusting your settings as you are moving around to cater for the conditions so that you are ready to capture the image when the opportunity arises.

rural farm with pigs in Asia -  Travel Photography Mistakes

Mistake #7 – Highlights / Shadows Clipped

One of the key tools for you as a photographer is the histogram. Even if you don’t fully learn or understand how to read one, the one thing you should know is how to use it to see if your highlights and shadows are within an acceptable range.

Highlights are bright areas in your photos and shadows are dark areas. If your highlights are too bright they may actually be completely white with no detail at all. Similarly, if your shadows are too dark they will be completely black. This is called “clipping”.

The best way to check this at the time of taking the photo or in post-production is to use your histogram. If any part of the histogram is cut off on the left there are pure black areas in your image and if it is cut off on the right there are pure white areas in your image.

By spotting this on your histogram you can either adjust your settings to avoid clipping or fix any issues in post-production.

photo with clipped areas -  Travel Photography Mistakes

The areas highlighted in red are pure white and the areas highlighted in blue are pure black. In other words, those areas are “clipped” and will have no detail.

Mistake #8 – Photo Not Straight

Whether you are an advocate of post-processing or someone who doesn’t believe photos should be altered, the one thing that you should always do is to ensure that your images are straight.

Of course, it is best to get things right in-camera when you are taking the photo. Some DSLRs have various elements to help you get your image straight when you look through the viewfinder or on the LCD screen.

But if you find that your image is not straight, make sure you fix it in post-production.

grid view on a DSLR screen -  Travel Photography Mistakes

Conclusion

Most people who start out in photography will make some of these mistakes along the way. The important thing is to learn from them and move on. But if you can cut these mistakes out from the start you’ll be well on your way to capturing better photos.

Have you made any mistakes that others should avoid? Please share your experiences below.

The post 8 Elementary Travel Photography Mistakes to Avoid When Starting Out appeared first on Digital Photography School.


Digital Photography School

 
Comments Off on 8 Elementary Travel Photography Mistakes to Avoid When Starting Out

Posted in Photography


Leica will increase its prices in the US starting May 1st

05 Apr

According to a report from Red Dot Forum by Leica Store Miami, Leica will increase the price of most of its products in the US starting May 1st. The site has published a list of the 66 products that will become more expensive next month, which includes most Leica M cameras and nearly all M lenses—for example, the Leica M10 with chrome finish will increase in price by $ 400, from $ 6,895 to $ 7,295.

You can check out the full list here, but according to the report you’ll pay:

  • $ 200 to $ 500 more for Leica M cameras
  • $ 100 to $ 600 more for Leica M lenses
  • $ 100 to $ 200 more for Leica S lenses
  • $ 45 to $ 245 more for Leica APS-C gear
  • $ 245 more for the Leica Q (Typ 116) black anodized model
  • $ 200 more for the Leica X-U (Typ 113)
  • and a whopping $ 1,045 more for the Leica S (Typ 007), which will now cost $ 19,995.

You’ll notice the SL system, new Thambar 90mm and Noctilux 75mm lenses, and Leica CL camera are not affected by this price increase.

Per Red Dot Forum’s report, orders placed by April 30th will honor the current, lower prices—that includes items that won’t be in stock until May 1st or later. If you’re in the US and are interesting in purchasing a Leica product, you can browse the full list of affected products here.

Articles: Digital Photography Review (dpreview.com)

 
Comments Off on Leica will increase its prices in the US starting May 1st

Posted in Uncategorized