RSS
 

Posts Tagged ‘special’

Pre-Visualization: Ansel’s views on what made his images so special

10 Sep

Marc Silber from Advancing Your Photography continues his interview series with Ansel Adam’s son Michael in this video. Marc visits Ansel’s home and discusses the concept of pre-visualization in photography and Ansel’s writing, workshops and techniques with Michael. 

In the interview, Michael also details what made Ansel’s work so special – my favorite quote from the video comes from Michael as he paraphrases Ansel’s thoughts on his work. Ansel would always say ‘It’s not what you see, it’s what I want you to see.’ That mindset is really what made Ansel’s photos so dramatic and memorable. He processed them in a way that fulfilled his vision and conveyed the story that he wanted to tell.

This interview also offers an inside look at a few of Ansel’s favorite cameras, and even some of his color work that he completed through a partnership with Kodak. It really is a fascinating look back at some Ansel’s most profound thoughts, teachings and photographs.

Articles: Digital Photography Review (dpreview.com)

 
Comments Off on Pre-Visualization: Ansel’s views on what made his images so special

Posted in Uncategorized


Blue Light Special: Colored Streetlamps Precede Decline in Crime

20 Apr

[ By WebUrbanist in Architecture & Cities & Urbanism. ]

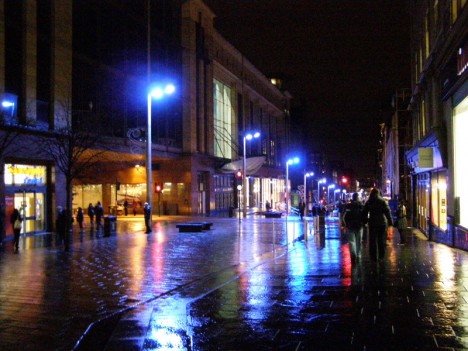
blue lights glasgow downtown

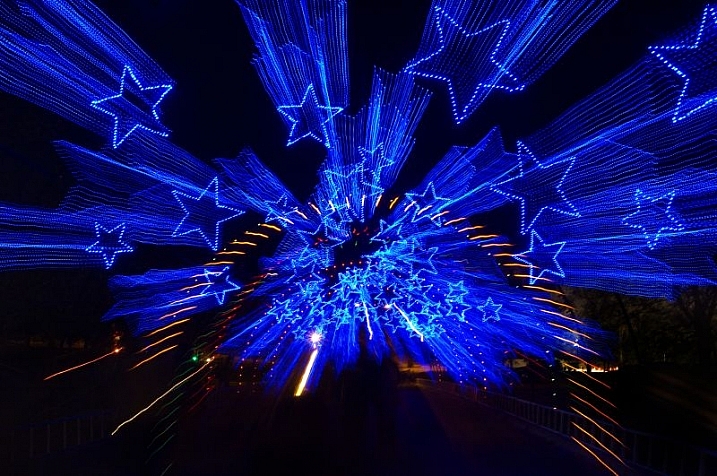
In the early 2000s, the city of Glasgow, Scotland, changed over to blue street lighting in an effort to improve the appearance of the city, but areas with the newly blue lights saw an unexpected and disproportionate decrease in crime.

blue lights street japan

No one could say for sure whether there was a causal correlation, but half a world away another city followed suit – Nara, Japan, experimentally began turning their street lamps blue. They also saw a decrease in crime.

blue light highway signs

In  the years that followed, similar deployments were tested, including the addition of over 150 blue lights to an expressway near Tokyo, aimed at reducing accidents.

blue lights underground

The Keihin Electric Express Railway Co. even changed the color of eight lights on the ends of platforms at Gumyoji Station in Yokohama, Japan, to curb track-jumping suicides. A subsequent report showed that in the years following, the station saw no suicide attempts (after previously being the site of multiple suicides per year).

There are a number of theories about why the blue light could be causing a decrease in criminal behavior.

Some argue the association of blue with police presence, except: Japanese police use mostly red lights.

Another theory posits that blue light has a calming effect, feeling more pleasant than orange or red. Indeed, studies have shown that blue lights (associated with calm waters and open skies) can reduce stress responses in fish and be used to treat SAD (Seasonal Affective Disorder) in humans.

blue light versus red

Of course, it is also possible that the new colored lights are simply different and unfamiliar enough to cause people to feel awkward engaging in illicit or dangerous behavior where they are present. And if that is the case, changing all the public lights in the world to blue might be at best temporary fix, working until people get used to the new blue lighting. Experts have warned not to read too much into the effect, regardless, since the causal mechanism or connection has not yet been definitively determined.

Share on Facebook


[ By WebUrbanist in Architecture & Cities & Urbanism. ]

[ WebUrbanist | Archives | Galleries | Privacy | TOS ]


WebUrbanist

 
Comments Off on Blue Light Special: Colored Streetlamps Precede Decline in Crime

Posted in Creativity


Tips for Shooting Through Objects to Create a Special Effect

19 Mar

Photography is as much a study of the creative, as it is a study of the technical. Often, knowing all the technical ins and outs of your camera, still does not guarantee a stellar image – an image that evokes emotion, one that makes you stop in your tracks and take a second look. Such images are created by thinking outside the box, by experimenting with new techniques and ideas that may seem crazy, ridiculous, or even somewhat unbelievable! Lucky for us, we photographers are known to be a little bit crazy, so trying new and innovative techniques should not surprise us too much.

One such really cool and innovative technique, to add a little bit of creativity and flare in our imagery, is shooting through objects. This technique is, quite literally, to have a small object between the front of the lens and your subject. This is often used to frame the subject, in order to draw attention to it/them, soften the edges of the image, or add a cool color special effect, to an otherwise ordinary image.

Memorable Jaunts DPS Article Shooting through objects for special effects 01

The whole idea of shooting through objects, is to have an out of focus foreground and be able to shoot through it, but at the same time keep the subject sharp. This effect is best achieved by placing the object close to the lens, either by hand holding it, or by resting it against the lens. Placing the foreground object further away from the actual subject and closer to the front of your lens, makes it easier to blur.

Although any lens will work, the shorter your lens focal length the closer the foreground object will need to be to the front of the lens, making it much easier to hand hold. If the object you are shooting through is large, it is easy to miss the focus on the actual subject. In these situations, it is best to focus on the subject, lock focus by switching to manual focus (MF/AF toggle buttons are located on the lens body in most cases or using back button focus) and then bringing the foreground object close to the lens for the blur effect. Sometimes it is possible to use the out of focus foreground to hide distracting things in the background.

Memorable Jaunts DPS Article Shooting through objects for special effects 06

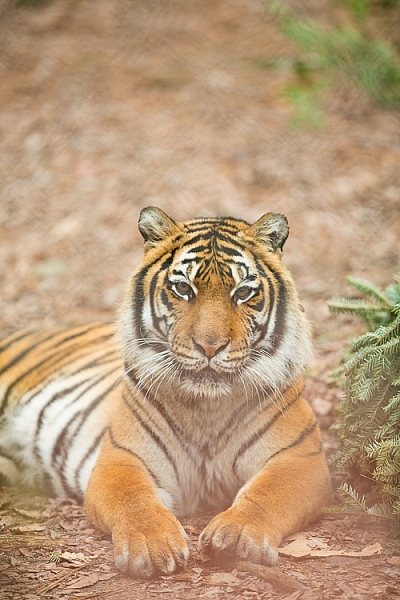
In the above image, this tiger in North Carolina’s Tiger Rescue facility, was holding a perfect pose and staring dead straight at me. Thankfully, I had a fence between me and the tiger (I am sure he was viewing me as a tasty snack!) and I loved the blur shapes seen in the top of the frame. I also handheld a piece of candy wrapper towards the bottom of the lens to give a little pink tint to the bottom of the image. The only post-processing done here, was to bring up the blacks and add a little contrast to the image.

The shoot-through technique works especially well with leaves, flowers, and even small pieces of glass. The possibilities are quite endless when it comes to finding things to shoot through. If you are feeling uninspired, sometimes bringing something as simple as a small strip of fabric, or a piece of clear plastic, can completely change the outcome of your final photograph. Look around your photography location and you are bound to find something to shoot through. Even if you often shoot in the same location, you may find something new each time. Flowers bloom at different times of year, leaves change color, and sometimes even dry twigs add an element of interest.

Memorable Jaunts DPS Article Shooting through objects for special effects-SidebySide01

Always use these effects to taste. In the side-by-side above, I initially used a pink flower to see if I could get a cool, light leak effect in the frame. But somehow that did not appeal to me. So in the next frame, I took a leaf and held it up to the top of the lens. I loved this effect, as if I was shooting through the bushes but still retaining the details in the bottom half of the image.

Memorable Jaunts DPS Article Shooting through objects for special effects-SidebySide02

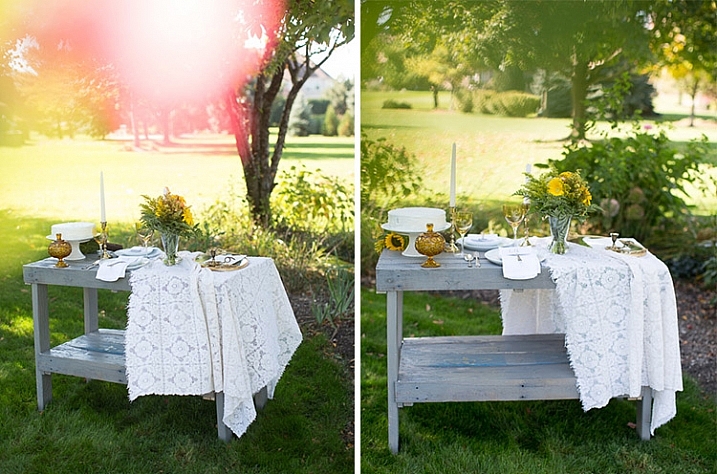
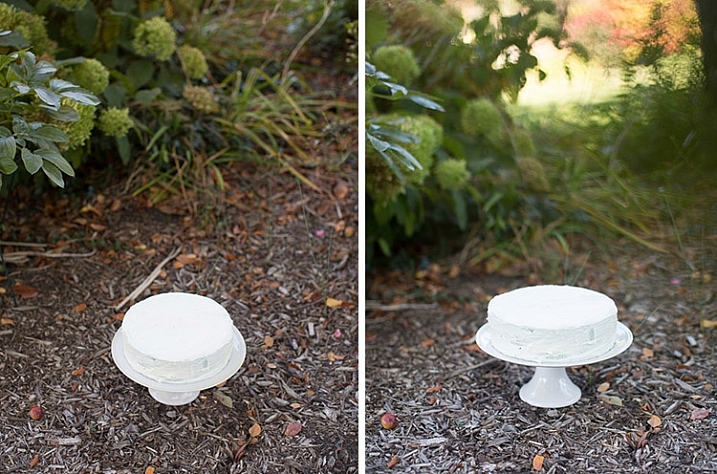
In the images of cakes above, the first is a standard, run-of-the-mill, top shot of the cake. But when I changed my angle and used a leaf to shoot through, I loved the blur effect it produced at the top of the frame.

Shooting through objects adds an element of interest to photographs. When you use colored pieces of glass or flowers, you get an effect similar to a light leak (from film days). Some photographs also appear to have been processed with unique filters, except all these effects are straight out of the camera (SOOC), not added during post-processing. When you use clear glass, plastic bags, or even sheer fabric, photographs appear to have additional texture and depth.

Memorable Jaunts DPS Article Shooting through objects for special effects-SidebySide03

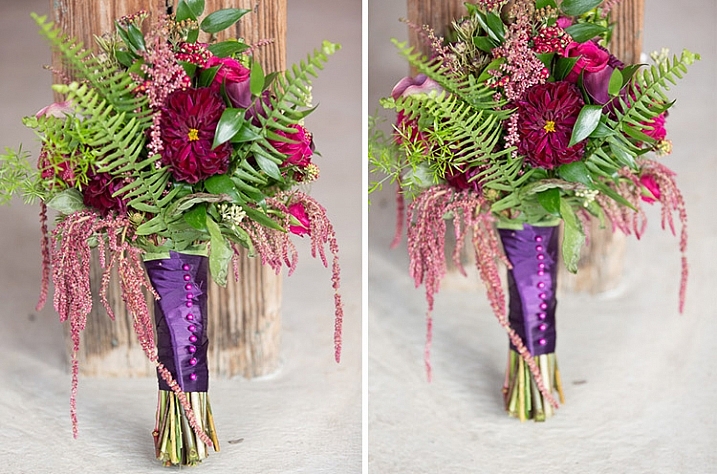
The bridal bouquet on the left is a straight shot. The one on the right has a clear piece of plastic (it was used to cover the cake topper) – I held it to the bottom on the lens to add a little texture and interest.

Memorable Jaunts DPS Article Shooting through objects for special effects 05

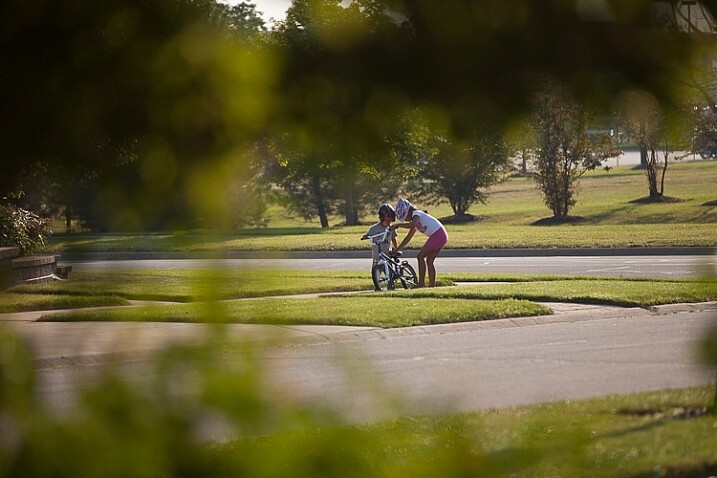
I love this image of my kids – my daughter is teaching my son to ride his bike. By shooting through the bushes, I caught them unawares, as well as used the bushes to frame the subject (in this case my kids!).

Memorable Jaunts DPS Article Shooting through objects for special effects 03

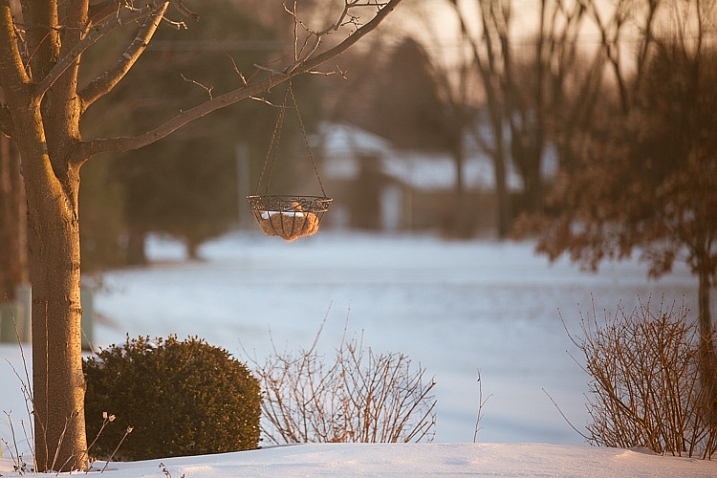
The sun was setting in my backyard, and to exaggerate its warmth, I added an orange piece of plastic (my flash gel cover). No post-processing needed!

While this is not a technique that should be used on every photograph, there are so many options for framing, introducing texture, and adding interest when you add an unexpected element into your photographs. Use this tool when you want to break free from the mundane and the ordinary, you might be pleasantly surprised with the results!

This week on dPS we are featuring articles on special effects. Check out the others that have already been published here:

  • How to Photograph the Full Band of the Milky Way
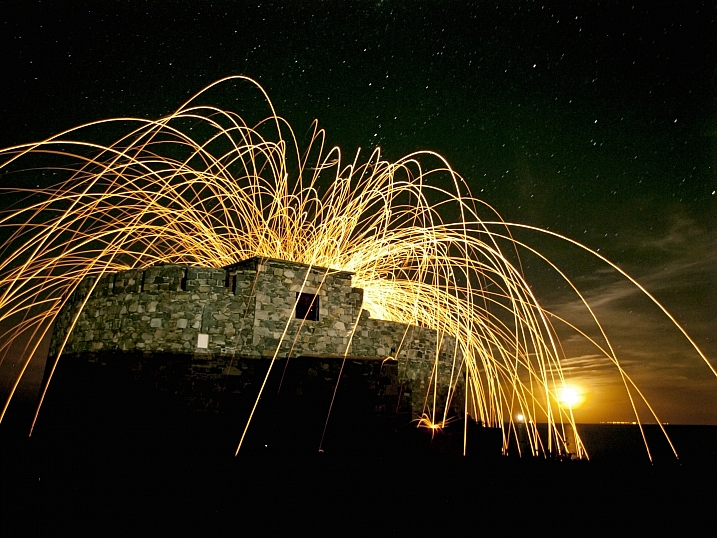
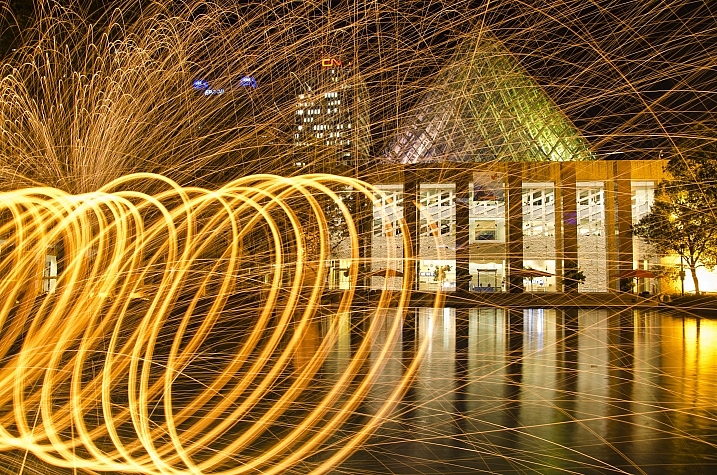
  • Fire Spinning with Steel Wool – A Special Effects Tutorial
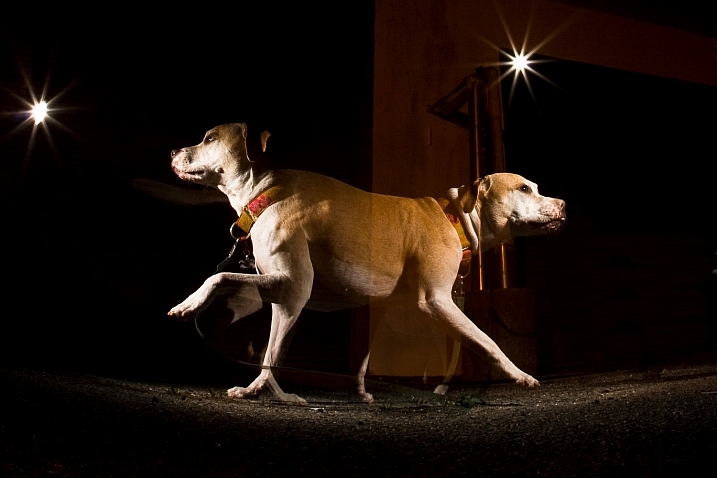
  • Special Effect – How to Create Multiple Flash Exposures in a Single Frame
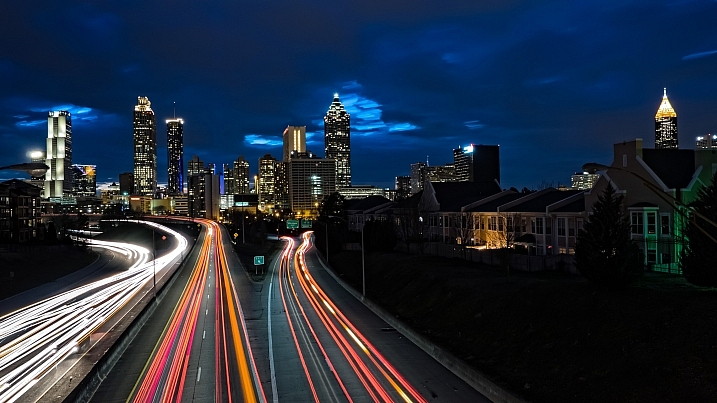
  • Stacking Light Trails for Night Photography Special Effects
  • 26 Unique Special Effects Photos to Spark Your Creativity
  • Weekly Photography Challenge – Special Effects

googletag.cmd.push(function() {
tablet_slots.push( googletag.defineSlot( “/1005424/_dPSv4_tab-all-article-bottom_(300×250)”, [300, 250], “pb-ad-78623” ).addService( googletag.pubads() ) ); } );

googletag.cmd.push(function() {
mobile_slots.push( googletag.defineSlot( “/1005424/_dPSv4_mob-all-article-bottom_(300×250)”, [300, 250], “pb-ad-78158” ).addService( googletag.pubads() ) ); } );

The post Tips for Shooting Through Objects to Create a Special Effect by Karthika Gupta appeared first on Digital Photography School.


Digital Photography School

 
Comments Off on Tips for Shooting Through Objects to Create a Special Effect

Posted in Photography


26 Unique Special Effects Photos to Spark Your Creativity

19 Mar

This week on dPS we are all about special effects. Check out the others that have already been published here:

  • How to Photograph the Full Band of the Milky Way
  • Fire Spinning with Steel Wool – A Special Effects Tutorial
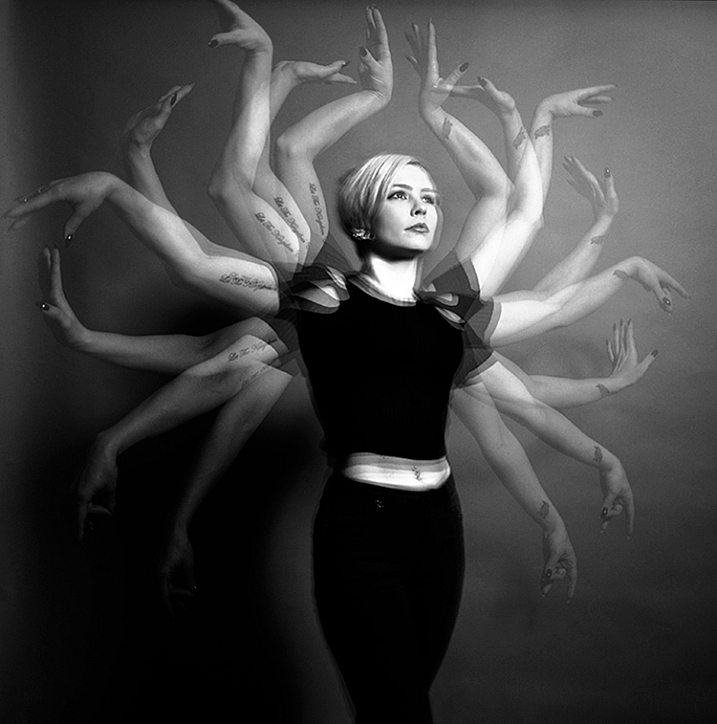
  • Special Effect – How to Create Multiple Flash Exposures in a Single Frame
  • Stacking Light Trails for Night Photography Special Effects

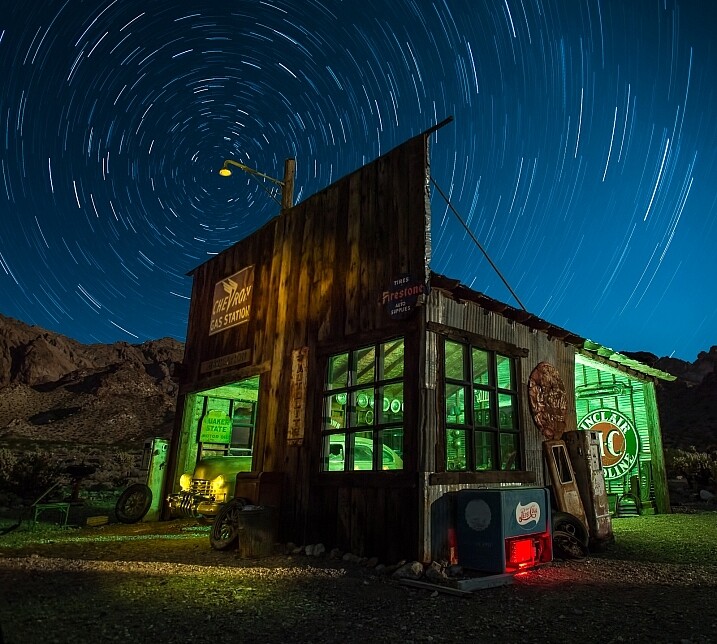
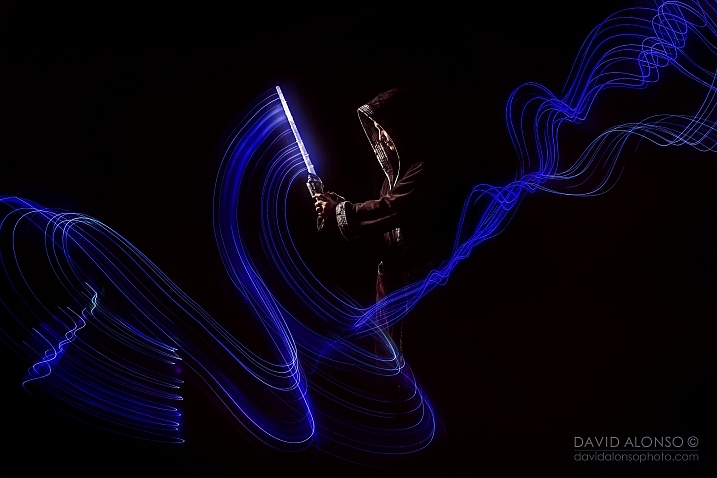
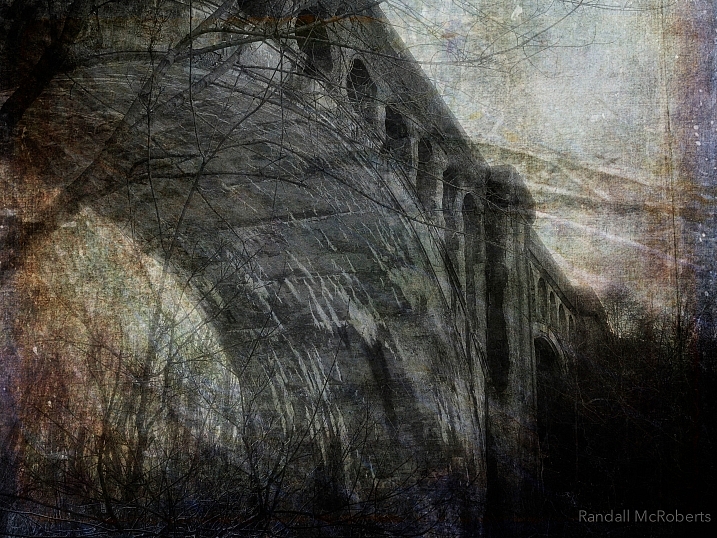
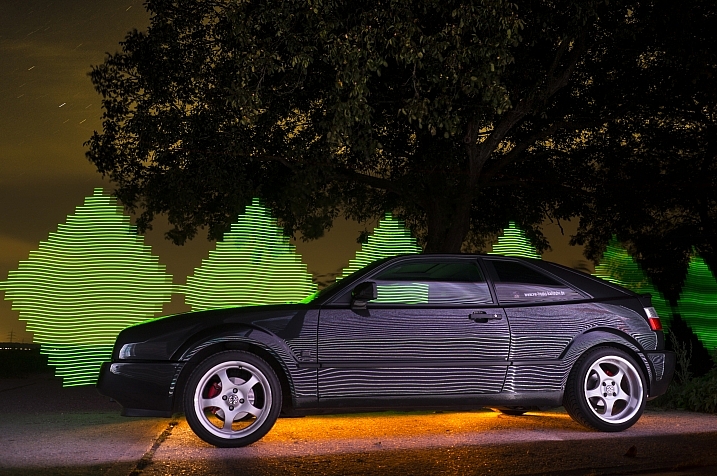
Now it’s time to look at some special effects images:

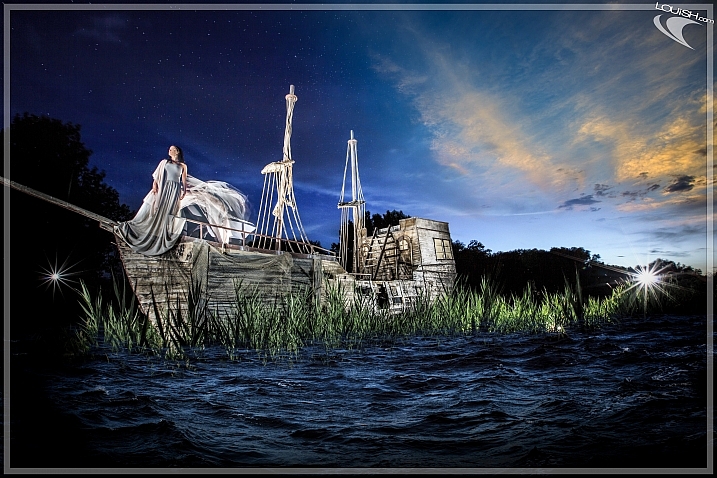
I Am Dabe

By i am dabe

Redfishingboat (Mick O)

By Redfishingboat (Mick O)

Mike Boening Photography

By Mike Boening Photography

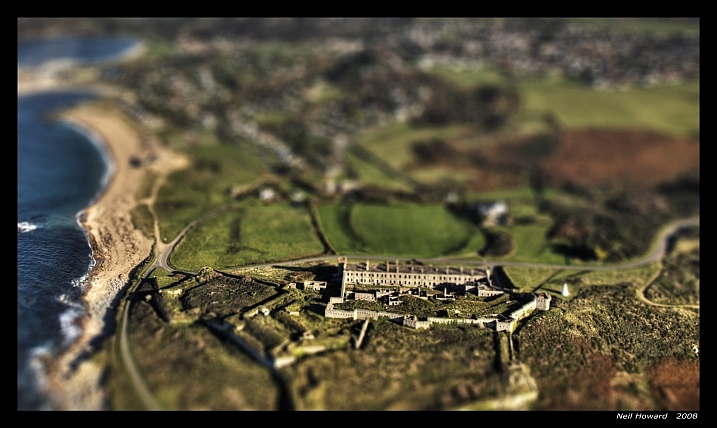
Neil Howard

By Neil Howard

Terry Lawson

By Terry Lawson

Louish Pixel

By Louish Pixel

Taichiro Ueki

By Taichiro Ueki

Thierry Marysael

By Thierry Marysael

John Watson

By John Watson

Nick Kenrick

By Nick Kenrick

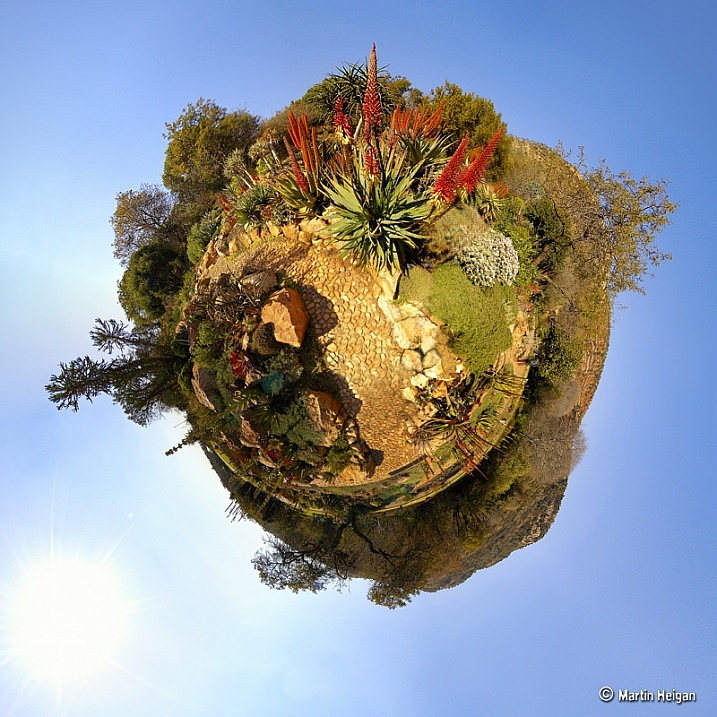
Martin Heigan

By Martin Heigan

Mibby23

By Mibby23

Mickaël

By Mickaël

Inefekt69

By inefekt69

Knowsphotos

By Knowsphotos

Disco's Place

By Disco’s Place

Dennis Crabtree

By Dennis Crabtree

Wayne Stadler

By Wayne Stadler

Liz West

By liz west

TJ Gehling

By TJ Gehling

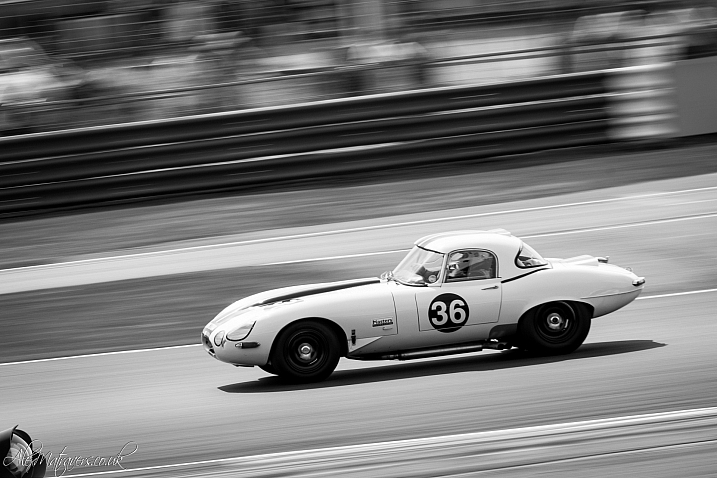
Alex Matravers

By Alex Matravers

Howard Ignatius

By Howard Ignatius

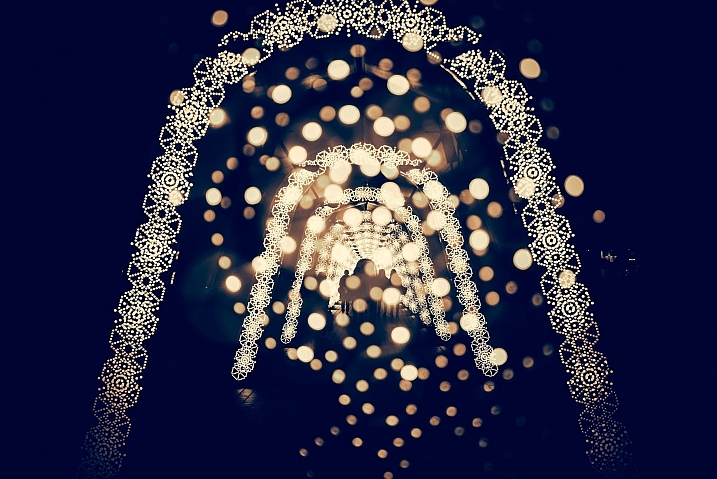
David Bokeh

By David Bokeh

Randy McRoberts

By Randy McRoberts

Manuel Paul

By Manuel Paul

Alex Matravers

By Alex Matravers

googletag.cmd.push(function() {
tablet_slots.push( googletag.defineSlot( “/1005424/_dPSv4_tab-all-article-bottom_(300×250)”, [300, 250], “pb-ad-78623” ).addService( googletag.pubads() ) ); } );

googletag.cmd.push(function() {
mobile_slots.push( googletag.defineSlot( “/1005424/_dPSv4_mob-all-article-bottom_(300×250)”, [300, 250], “pb-ad-78158” ).addService( googletag.pubads() ) ); } );

The post 26 Unique Special Effects Photos to Spark Your Creativity by Darlene Hildebrandt appeared first on Digital Photography School.


Digital Photography School

 
Comments Off on 26 Unique Special Effects Photos to Spark Your Creativity

Posted in Photography


Weekly Photography Challenge – Special Effects

19 Mar

This week on dPS we are all about special effects. Check out the others that have already been published here:

  • How to Photograph the Full Band of the Milky Way
  • Fire Spinning with Steel Wool – A Special Effects Tutorial
  • Special Effect – How to Create Multiple Flash Exposures in a Single Frame
  • Stacking Light Trails for Night Photography Special Effects
  • 26 Unique Special Effects Photos to Spark Your Creativity

how-to-multiple-flash-exposures-2781

Weekly Photography Challenge – Special Effects

As you can see from the list of articles above, there are many ways to make special effects, and have some fun with photography. We have more great ones coming your way this week, so keep reading!

This week try something different, a idea you’ve not tried before, or a post-processing technique. No idea is too crazy (just be safe!), and you never know what you get until you try – so this is a great time to experiment.

Joy_n_the_jungle

By joy_n_the_jungle

Enzio Harpaintner

By Enzio Harpaintner

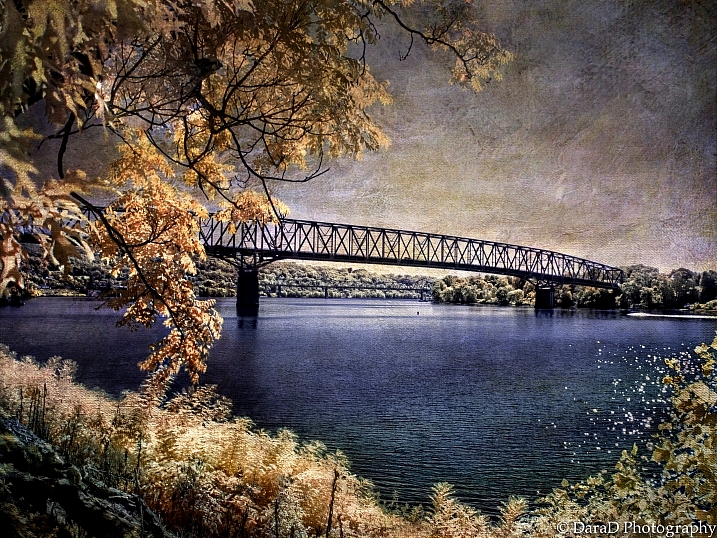
Dara

By Dara

Share your images below:

Simply upload your shot into the comment field (look for the little camera icon in the Disqus comments section) and they’ll get embedded for us all to see or if you’d prefer upload them to your favourite photo sharing site and leave the link to them. Show me your best images in this week’s challenge. Sometimes it takes a while for an image to appear so be patient and try not to post the same image twice.

SurFeRGiRL30

By SurFeRGiRL30

Shannon Dizmang

By Shannon Dizmang

Refeia

By refeia

Neil Howard

By Neil Howard

If you need more ideas watch this video from the Cooph team (Cooperative of Photography) on how to shoot the elements:

googletag.cmd.push(function() {
tablet_slots.push( googletag.defineSlot( “/1005424/_dPSv4_tab-all-article-bottom_(300×250)”, [300, 250], “pb-ad-78623” ).addService( googletag.pubads() ) ); } );

googletag.cmd.push(function() {
mobile_slots.push( googletag.defineSlot( “/1005424/_dPSv4_mob-all-article-bottom_(300×250)”, [300, 250], “pb-ad-78158” ).addService( googletag.pubads() ) ); } );

The post Weekly Photography Challenge – Special Effects by Darlene Hildebrandt appeared first on Digital Photography School.


Digital Photography School

 
Comments Off on Weekly Photography Challenge – Special Effects

Posted in Photography


Special Effect – How to Create Multiple Flash Exposures in a Single Frame

18 Mar

Many photographic techniques, rightfully, tend to focus on polished images. They vary anywhere on the spectrum from getting sharper images to capturing accurate skin tones. These techniques are important. However, sometimes they’re not very much fun. Sometimes, that’s precisely what you need to have, and exactly what photography should be – fun.

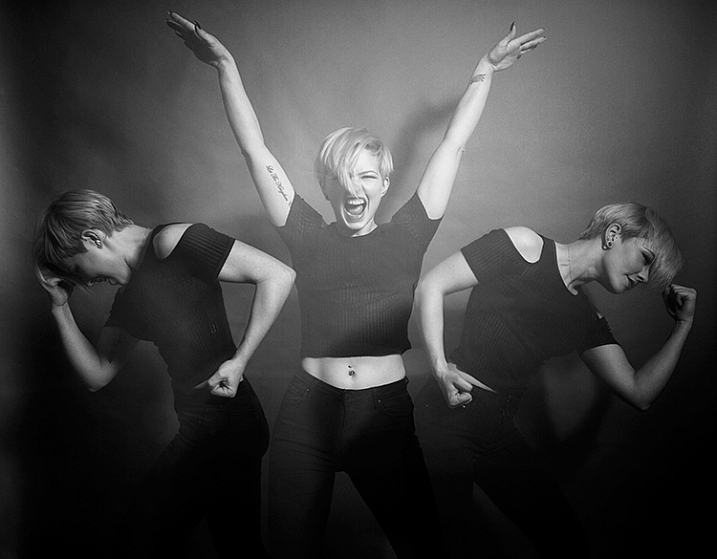
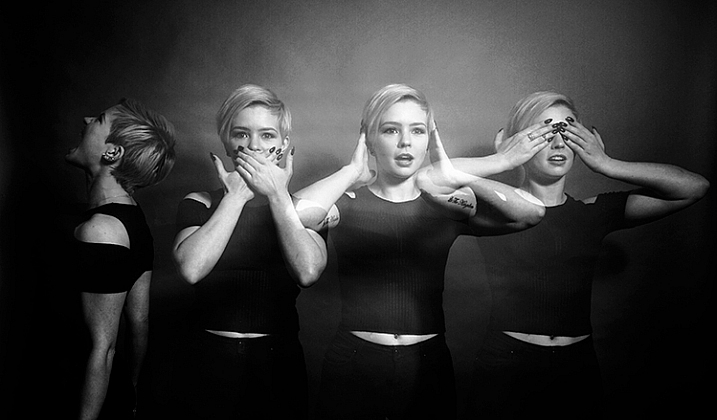
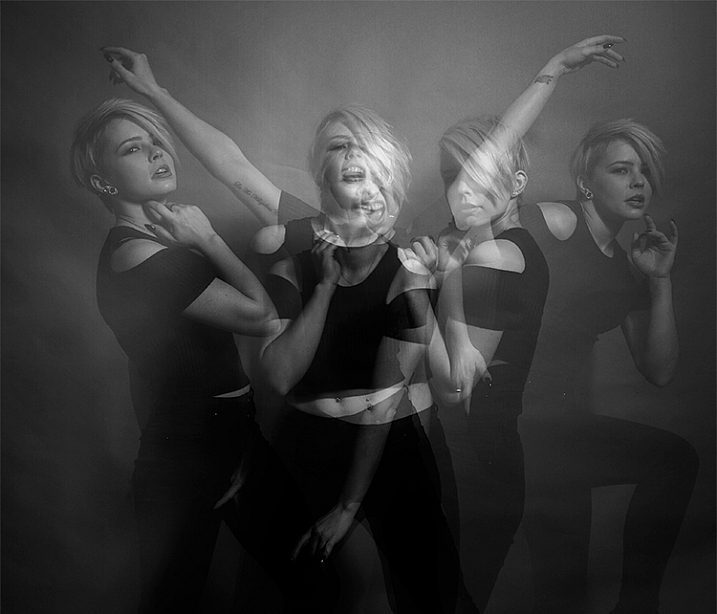
This article will guide you through a fun special effect technique that will allow you to capture multiple exposures in a single frame, using the test button on your strobes or flashguns. Using this method, you will gain a new tool to add movement, and a sense of action in your studio photography.

how-to-multiple-flash-exposures-2793

What you need

  • A dSLR on manual settings (set from 2-10″ or bulb exposure)
  • A very dark room (or nighttime outdoors)
  • A tripod
  • A human subject
  • A strobe or flashgun (speedlight) with a test button (to manually fire the flash)
  • Someone to serve as an extra pair of hands (not required but it helps a lot)

Setting it up

how-to-multiple-flash-exposures-2795

Aperture

Because you’re using flash, the aperture setting is the most important in this technique. As long as your shutter speed is slower than your camera’s flash sync-speed, aperture is what controls how the flash exposure is recorded, and it also dictates what power output to set on your flash. I suggest using an aperture somewhere between f/8 and f/16, to get the best results. A smaller aperture will also help to minimize the effect of any ambient light in your images.

Camera settings

With your camera on a tripod, set the dial to manual mode, the ISO to 100, and your shutter speed to between two and six seconds. To test if your shutter speed is suitable, take a test shot without any flash. As long as the image is completely black at the end of the exposure, it will work for this technique.

This time can be changed and extended later, depending on how many movements you want to capture.

Lighting

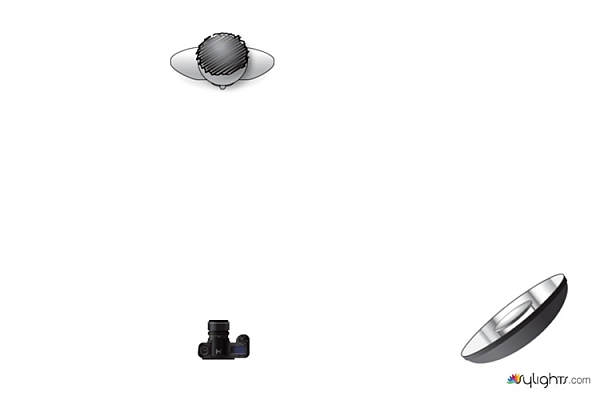
To start with, try to keep your lighting simple. A single light source will give you unlimited potential. This technique will work with multiple lights, but it is best to build up to that over time, as you get used to how the technique works.

As for lighting placement, the choice is yours. The lighting will, and should, depend on the final intent of the image you are trying to create. However, if you’re unsure, try starting with your light high above, and in front of, your subject. That will provide a good starting point to make adjustments from there.

Use a light meter, or manually calculate the exposure, to set your flash output, so it matches your chosen aperture.

how-to-multiple-flash-exposures-diagram

Simple lighting set-ups, like this one used in these images, can be the most effective.

Direction

With everything set up, you need to explain to your subject how to move. The easiest way to explain this is, “Pose, wait for the flash, pose, wait for the flash, and pose again”.

In more detail – you want to wait for your subject to adopt the first pose, set the focal point, and start the exposure. Press the test button on your strobe to fire the flash. After this first flash, your subject should move to their second position as quickly as possible, where you will press the test button again. Repeat as many times as required.

Keep trying

The hardest part of this technique is that it is incredibly hit and miss. Getting your subject to move into positions that create pleasing compositions, without be able to evaluate while it’s happening, is tricky. It takes time and patience. You will need to shoot a lot of frames, and most of them will be unsuitable. Just keeping making as many attempts as you can, until you think you have something, then take some more.

how-to-multiple-flash-exposures-2781

Tips

Here are a few things to keep in mind that will make your attempts easier.

Start small

Sometimes it’s hard judge how movements will appear in the final image. By trying to squeeze too much in, you might end up with a cluttered mess in your images. Start with two or three movements to gauge where things are and build it up from there.

how-to-multiple-flash-exposures-2787

Trying to include too many movements may result in a cluttered mess like this image.

Remote triggers

If you have a remote trigger for your strobes with a manual button on it, you can hold it in your hand and fire the flash. This is much more preferable than having to move between the camera and your light source during each frame.

Recycle rate

If you want to squeeze more than two or three movements into a six second exposure, try to ensure that your flash isn’t set to full power. By reducing the power output, you’re also decreasing the amount of time it takes your flash to refresh. This will allow you to fire the strobe more times in the short timeframe.

Clarity

There is no one way to process images from this technique, and all of that is up to you. However, if you want crisper, more pronounced outlines of your subject, the clarity slider in Lightroom or Adobe Camera RAW will help a lot.

Neutral backdrops

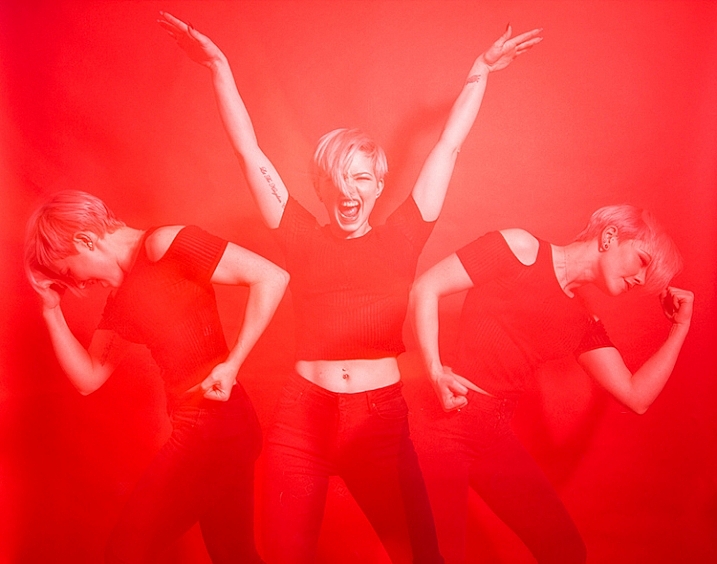
how-to-multiple-flash-exposures-2793-2

Colored backdrops will overpower images using this technique.

For color images, try and stick to a black or grey background. Because your subject is moving to different positions, the background continues to expose once your subject has moved. If you use a colored background, as I did with these images, that color will dominate your exposures. Of course, this can be used judiciously as a feature of the image should you choose.

Two second timer

If you can’t rope someone into being your assistant for the day, set your camera to use the two second timer, to give you time to move between the camera and the strobe.

Keep going

Once you’ve had a go at this technique with people, feel free to try and think of ways to use it with other subjects. For example you could use it to capture a hammer at different points in its swing, or perhaps a basketball at different parts of its arc. The choices are endless. Be creative with it, have fun, and if you give it a go please share your images below, as well as any questions you may have.

This is the third of a series of articles we will be featuring this week on dPS all about special effects. Check out the others here:

  • How to Photograph the Full Band of the Milky Way
  • Fire Spinning with Steel Wool – A Special Effects Tutorial

googletag.cmd.push(function() {
tablet_slots.push( googletag.defineSlot( “/1005424/_dPSv4_tab-all-article-bottom_(300×250)”, [300, 250], “pb-ad-78623” ).addService( googletag.pubads() ) ); } );

googletag.cmd.push(function() {
mobile_slots.push( googletag.defineSlot( “/1005424/_dPSv4_mob-all-article-bottom_(300×250)”, [300, 250], “pb-ad-78158” ).addService( googletag.pubads() ) ); } );

The post Special Effect – How to Create Multiple Flash Exposures in a Single Frame by John McIntire appeared first on Digital Photography School.


Digital Photography School

 
Comments Off on Special Effect – How to Create Multiple Flash Exposures in a Single Frame

Posted in Photography


Stacking Light Trails for Night Photography Special Effects

18 Mar

In Melbourne there is an intersection that’s iconic for taking light trails phtos. It is the corner of Flinders Street and Swanston Street, in front of Flinders Street Station.
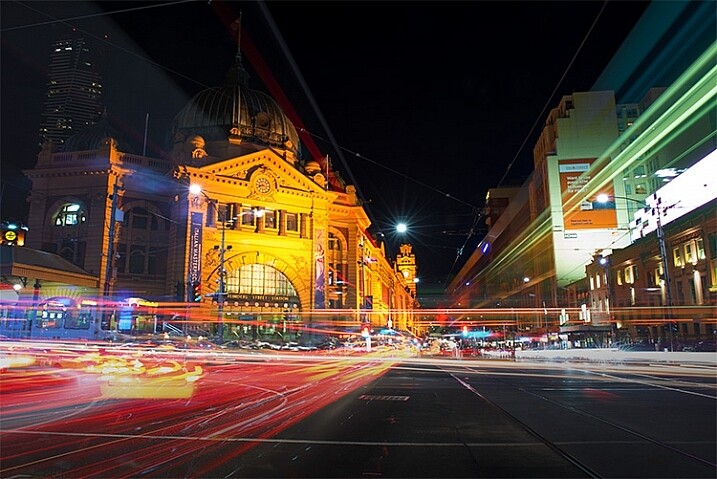
15-Leanne-Cole-Light-Trails

Light Trails in front of Flinders Street Station. There are 23 images in this stacked light trail.

It isn’t a hard image to take, you just need a camera and a tripod. To get a really good photo, you want to pick a time when there is going to be a lot of traffic. You want the traffic to be moving, as cars caught in a traffic jam will not give you the light trails you’re after. The cars need to be moving constantly, and not standing still for too long.

Pick a place that you think will give you the best advantage. Set the camera up on the tripod, and try to take as long of an exposure as you can. To get the trails, you need to have exposures for several seconds, up to 30. You could do them for longer, but you would need other equipment (like a neutral density filter to cut the light). Most of the images shot for this article had an exposure of around eight to 10 seconds.

Sounds fairly easy, but there are many things that can make it hard. The time of year can inhibit you, as daylight savings will affect when the best time for traffic is, and how busy the roads are. If you go to a place on the weekend, you might find there aren’t as many cars as there would be during the week.

To get the light trails in front of Flinders Street Station, you need to be there at dusk, or after the sun has gone down. In summer that means not many cars or trams. However, there are ways to get around that.

Stacking Light Trails

One of the best ways to get light trails, is to stack many images together.

From the intersection that was mentioned previously, the corner in front of St Paul’s Cathedral is the most popular. There are other places, but that seems to be the one that most use. You will have to work out a great place to photograph them where you live.
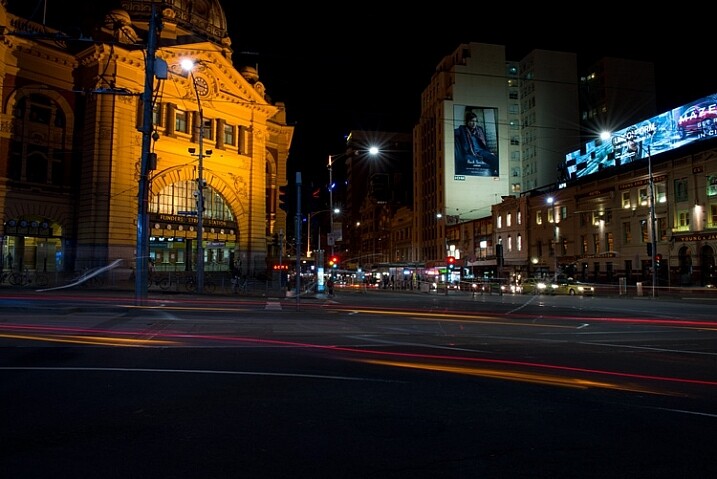
14-Leanne-Cole-Light-Trails

A single image, and as you can see there aren’t that many light trails.

Set your camera up on the tripod, this is necessary so you will get identical photos. Set the aperture to what you want. The ISO can be low, on 100 or 200, so you can get longer exposures. If you want longer, remember you can put your aperture to the smallest possible, like f/22.

Once you have a shutter speed that is several seconds, it is time to start taking your photos. Take one photo, then repeat until you have at least 10. You can do this with as many images as you like, however, Adobe Photoshop might not like you using too many. I’ve done it with four images, and as many as 23.

When you get home

Put all your photos onto your computer. You can use Lightroom to do this, but to do the actual stacking you will need Adobe Photoshop or any program that allows you to use layers.

Once you have all the images ready to use, select all the ones you want. If you are using Lightroom to begin with, go to: Photo > Edit in > Open as Layers in Photoshop. In Photoshop open Bridge and select the images you want to use.  Go up to Tools > Photoshop > Load files into Photoshop Layers.
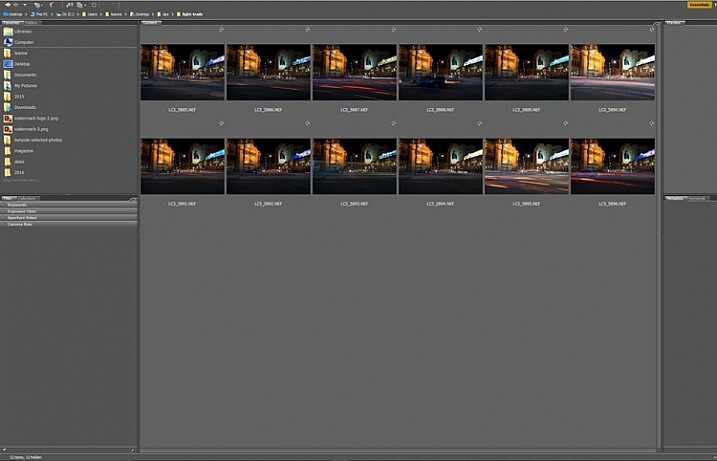
01-Leanne-Cole-Light-Trails

Select all the images you want to use for the light trails.

It can take some time for the layers to all open, especially if you are using raw files, and there are a lot of them.
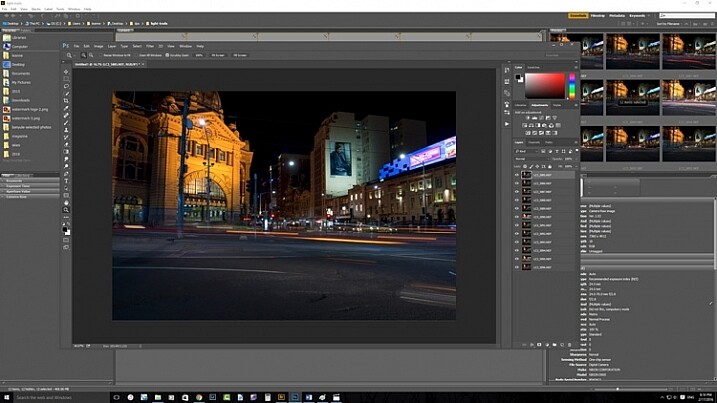
02-Leanne-Cole-Light-Trails

All the layers are opened in Photoshop.

The magic happens

Once the layers are all loaded, you need to select them all. You can do this by selecting the bottom layer, then pressing the shift key and clicking on the top layer. This will select them all.
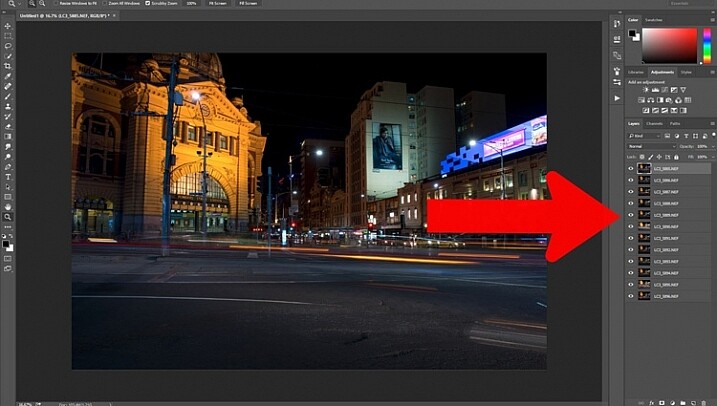
03-Leanne-Cole-Light-Trails

Select all the layers so they can be used.

Once selected, go to the Blending Mode Options in the Layers panel. The default setting is Normal. Click on it for the drop down menu, select Lighten, and click.
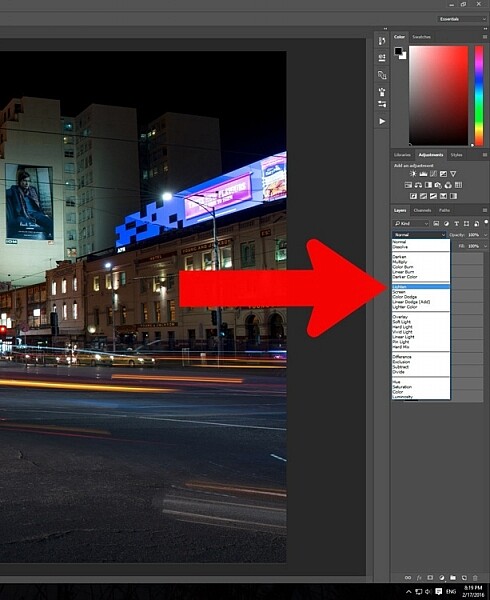
05-Leanne-Cole-Light-Trails

Select the lighten blend option.

You should notice that the image now has far more light trails. All the trails, from all of the images have come through now.
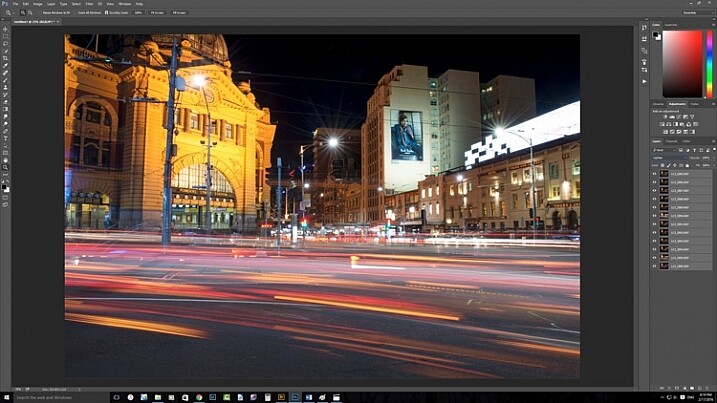
06-Leanne-Cole-Light-Trails

Lots more light trails apply.

You now have a stacked light trail image.

Getting rid of unwanted lights

Sometimes when you do this, it can change a lot more than just the light trails, it may lighten other buildings too much as well. You can correct this.

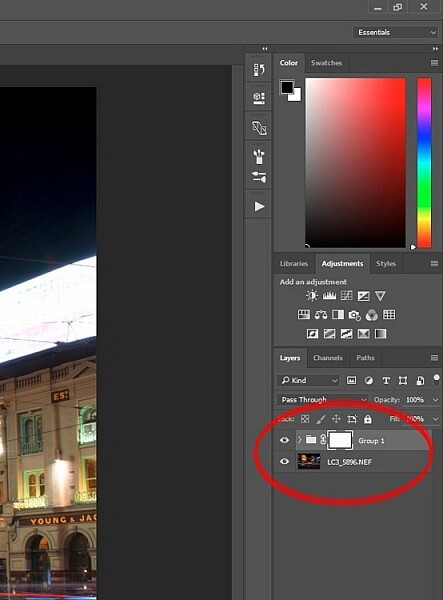
Select all the layers, except the bottom one, and put them into a group. You can do this by dragging them down to the group icon at the bottom of the panel, or right click on the select layers, and when the menu pops up click on Group from Layers.
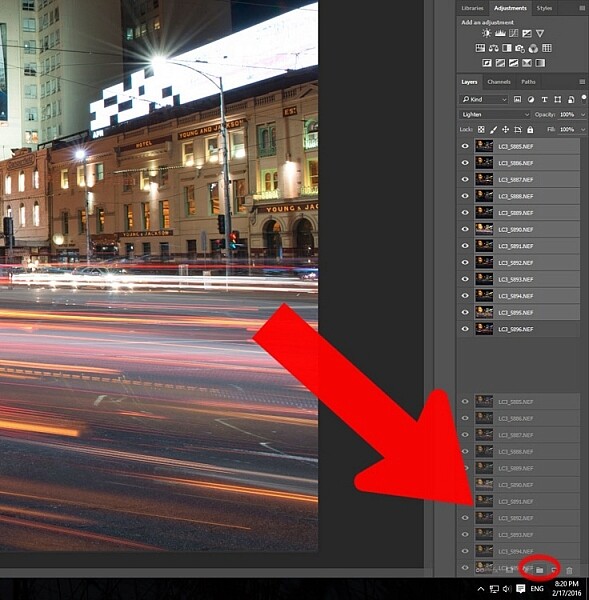
07-Leanne-Cole-Light-Trails

Put all the layers, except for the first one, into a group.

Add a mask to the group from the bottom of the Layers panel. Select the brush from the tools on the left, or press Ctrl b (just B on Mac). Make sure foreground colour is set to black. Making sure the mask is selected, paint over the areas where there is too much light to mask those areas.
08-Leanne-Cole-Light-Trails

Once the mask is added you can use the brush to remove the unwanted lights.
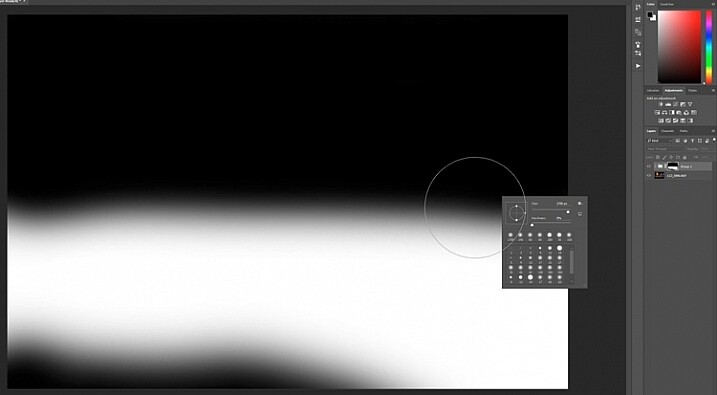
10-Leanne-Cole-Light-Trails

If you alt click on the mask you can see what you have done. The black is where you have removed the unwanted lights.

Finishing the image

The image is now completed, unless you want to do more to it. But, as far as the light trails go, you really don’t need to do any more.
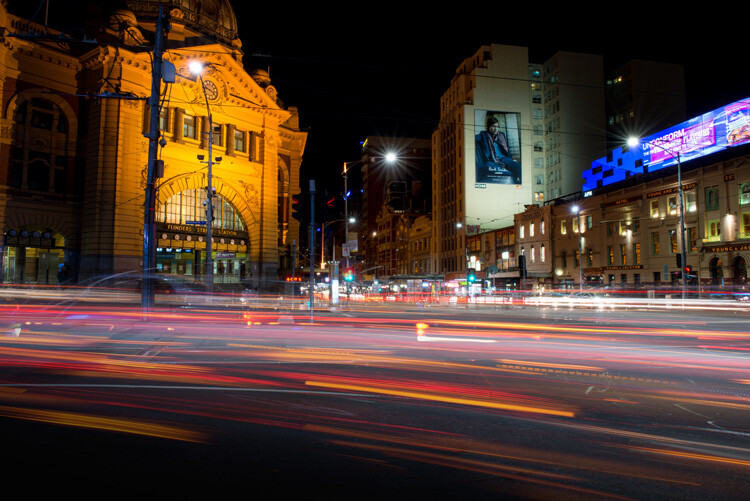
11-Leanne-Cole-Light-Trails

The final image.

This is a great technique which can be applied to many areas. You could use it for ships on the water, or trains going in and out of the city. It can also be used on waterfalls to make them seem fuller. Why don’t you try and see how else you can use this technique.

Here are some other images to give an idea of how to use this technique.
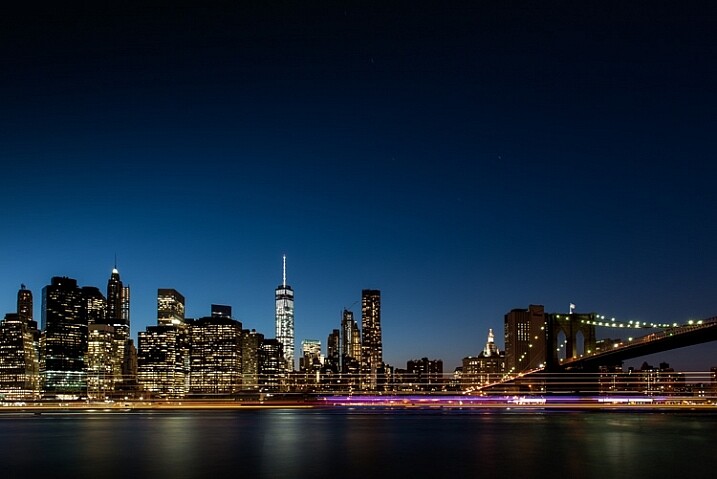
12-Leanne-Cole-Light-Trails

Boats on the water in the foreground of the Manhattan skyline. Four images.
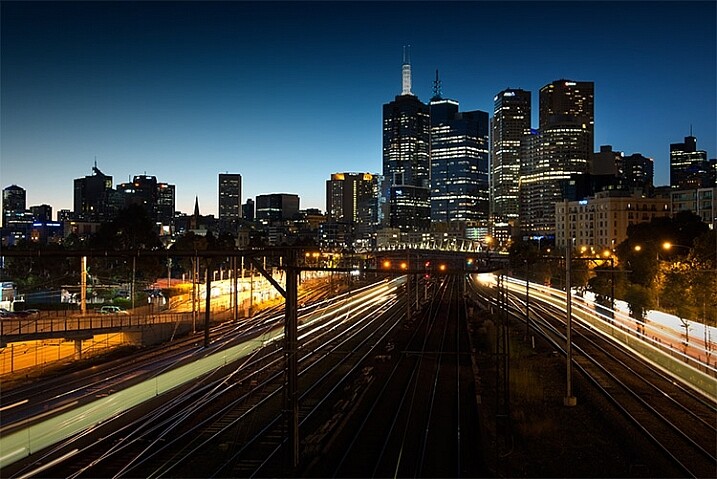
13-Leanne-Cole-Light-Trails

Trains coming into and out of the city. Three images.

This article is part of a series that we will be featuring this week on dPS all about special effects. Check out the others that have already been published here, and look for another new one every day:

  • How to Photograph the Full Band of the Milky Way
  • Fire Spinning with Steel Wool – A Special Effects Tutorial
  • Special Effect – How to Create Multiple Flash Exposures in a Single Frame

googletag.cmd.push(function() {
tablet_slots.push( googletag.defineSlot( “/1005424/_dPSv4_tab-all-article-bottom_(300×250)”, [300, 250], “pb-ad-78623” ).addService( googletag.pubads() ) ); } );

googletag.cmd.push(function() {
mobile_slots.push( googletag.defineSlot( “/1005424/_dPSv4_mob-all-article-bottom_(300×250)”, [300, 250], “pb-ad-78158” ).addService( googletag.pubads() ) ); } );

The post Stacking Light Trails for Night Photography Special Effects by Leanne Cole appeared first on Digital Photography School.


Digital Photography School
 
Comments Off on Stacking Light Trails for Night Photography Special Effects

Posted in Photography


Fire Spinning with Steel Wool – A Special Effects Tutorial

17 Mar

Sometimes you can find ways of taking amazing pictures without spending much money at all, and one of the best examples of this is a technique called fire spinning. This usually involves just a couple of basic items, available at any hardware store and grocery market, and with a little creativity you can create some pictures that are downright otherworldly.

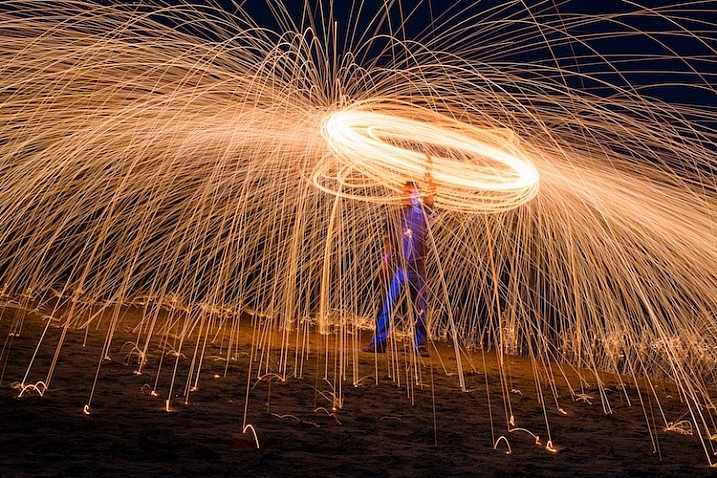
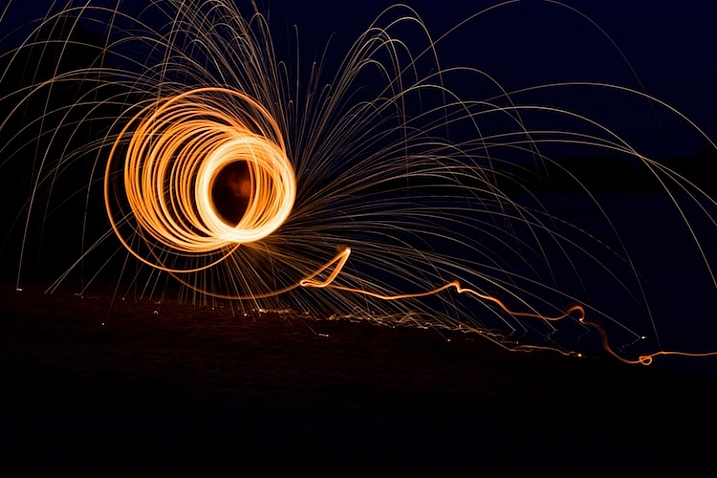
50mm, f/13, 30 seconds, ISO 200

50mm, f/13, 30 seconds, ISO 200

Safety warning – please abide:

Before I go into detail about what it takes to create an image like this, I need to make it abundantly clear that fire spinning is dangerous, not only to yourself, but the area around you, and even your camera equipment.Please follow these safety precautions:

  • Take care to only do this where you have plenty of open space, and nothing around you that will catch on fire.
  • Make sure that you wear thick clothing such as full-length pants, closed-toe shoes, a long-sleeved shirt, and something to cover your eyes (glasses or safety goggles) and hair.
  • Never do this in a field of grass or near a house, dry wood or brush, or near anything that could potentially catch on fire.
  • Also make sure to put plenty of distance between your camera and the sparks, as they fly farther than you might think!

The images you see in this article were all taken at night, on a deserted beach where nothing else could start burning, and my camera was far enough away from the subject to avoid any wayward flying sparks or smouldering embers.

What you will need

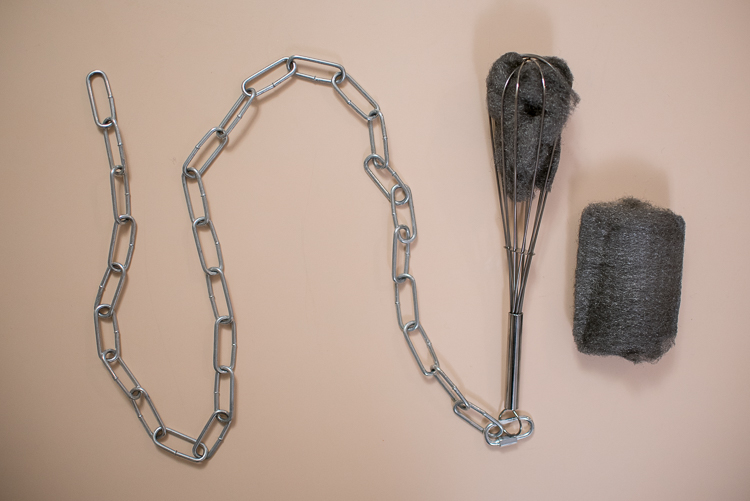
You may already have some of the items necessary for a fire spinning photo, but if not, you can easily find everything you need for only a few dollars. You can add additional things such as multiple chains and whisks to create different effects and styles, but for a basic fire spinning shoot you can start with the following trinkets:

A chain, wire wisk, connector, and steel wool are all you need to create amazing fire-spinning images.

A chain, wire whisk, a connector, and steel wool, are all you need to create amazing fire spinning images.

  • A few lumps of fine steel wool (thick stuff works okay, but the finer steel wool is better: 0-0000 grade)
  • A small chain, roughly half a meter in length (1.5′)
  • A wire whisk commonly used in baking
  • A small clasp or carabiner to faster the chain to the whisk
  • Something to light the steel wool on fire (cigarette lighter, grill lighter, etc.)

Other items necessary for the shoot include:

  • A tripod for your camera
  • A wide-angle lens (I shot the top picture at 50mm, but I would have preferred something wider like 35mm)
  • A flashlight, so you can see as you’re setting up your camera and planning the shoot
  • A friend who is willing to hold a spinning fiery object attached to a chain

Once you have all the things you need, preparing for your photos is fairly simple. Stuff a wad of steel wool into the whisk (fluff it up a bit so it gets some air), attach the whisk to the chain, and you’re all set. Fine steel wool is better (I used grade 00 for these images) because it will burn easier, and send more sparks flying around during your shoot. The basic idea involves lighting the steel wool, which will cause it to smoulder, then spinning it around in the air, which will cause sparks to shoot off in every direction.

While the steel wool won’t exactly burn like a piece of paper, twirling it in the air will cause sparks to fly all around. By using a long exposure on your camera, you essentially take a time-lapse image of the sparks, which results in an incredibly dynamic image not unlike something you might see during a fireworks display at an independence day celebration.

fire-spinning-single-spiral

50mm, f/9.5, 20 seconds, ISO 200

The fire-spinning method

After your chain, whisk, and steel wool are ready, you will need to find a location, and decide how to frame your shot, which is why it can be handy to have a friend help you out. You can do fire spinning photos by yourself, but it really helps to be able to direct someone else who’s doing the spinning, so you can get everything positioned exactly how you want in the shot. It helps to draw some lines in the sand or dirt so your helper knows precisely where to stand, and depending on how dark it is, you may need to use your flashlight to help get everything positioned just right.

The rest of the process is fairly simple, but it will probably take a great deal of trial and error to get the shots you want. Set your camera and tripod low on the ground, several meters away from your friend, and have him shine a flashlight on his body so you can lock focus (either use autofocus to lock, then switch it to manual – or try back button focusing). Large apertures should be avoided, since you want a very wide depth of field, and you don’t need to worry about gathering enough light because the sparks will be plenty bright to show up even with small apertures. Use a long exposure time of 20 or 30 seconds, and a low ISO of 100 or 200.

When you are ready to take the shot, have your friend hold the lighter under the steel wool until it starts glowing. That’s your cue to press the shutter button, then just stand back while your friend spins the chain and the sparks start flying. One final trick is to use your camera’s 2-second self-timer so your friend has a bit of time to light the steel wool on fire before the actual exposure begins.

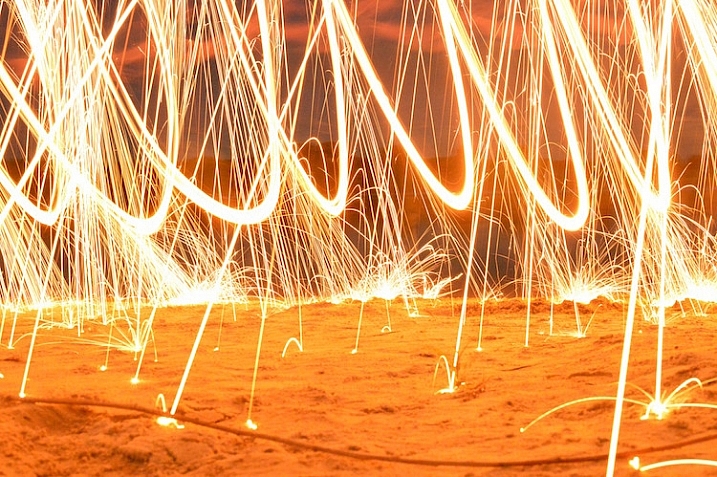
fire-spinning-beach-sparks

35mm, f/10, 6 seconds, ISO 200

Once you get the hang of the basics the rest is all about finding a technique that works, to get the shots you want. You can try lots of variations to get different photos such as:

  • Stand in place and twirl the chain in a circle
  • Stand in place and twirl two chains, one on each side
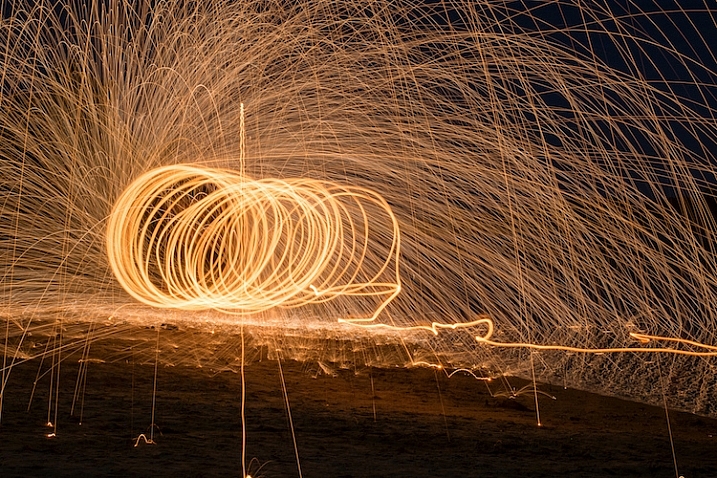
  • Walk across the frame while spinning the chain to create a giant glowing tube
  • Have multiple people in the shot spinning multiple chains
  • Flash an off-camera speedlight on rocks or other background elements to add depth to the shot
50mm, f/13, 20 seconds, ISO 200

50mm, f/13, 20 seconds, ISO 200

With a little practice you can get some astounding results, and it’s always good to shoot in RAW so you can tweak the colors, and pull some details from the shadows later on if you want. If you search online for “fire spinning photos” (or steel wool spinning) you will find thousands of images, using all sorts of variations on this basic technique. I realize it’s somewhat cliché to say this, but the possibilities really are endless.

Have you ever tried fire spinning before? What are some of your favorite tips and tricks that others should know? Share your thoughts and any of your favorite photos in the comments section below!

This is the second of a series of articles we will be featuring this week on dPS all about special effects. Check out the last one: How to Photograph the Full Band of the Milky Way

googletag.cmd.push(function() {
tablet_slots.push( googletag.defineSlot( “/1005424/_dPSv4_tab-all-article-bottom_(300×250)”, [300, 250], “pb-ad-78623” ).addService( googletag.pubads() ) ); } );

googletag.cmd.push(function() {
mobile_slots.push( googletag.defineSlot( “/1005424/_dPSv4_mob-all-article-bottom_(300×250)”, [300, 250], “pb-ad-78158” ).addService( googletag.pubads() ) ); } );

The post Fire Spinning with Steel Wool – A Special Effects Tutorial by Simon Ringsmuth appeared first on Digital Photography School.


Digital Photography School

 
Comments Off on Fire Spinning with Steel Wool – A Special Effects Tutorial
Posted in Photography


Special K? Pentax K-1 First Impressions Review

18 Feb

After years of promises and months of teasing, Ricoh has finally unveiled the Pentax K-1, a 36.4MP full-frame DSLR built around the K lens mount. It becomes the only conventional DSLR to offer a full frame sensor with image stabilization.

The camera is extensively sealed and features magnesium alloy construction. But despite its range-topping status and high-end build, it has a relatively low list price of $ 1799.

Pentax K-1 Key Specifications

  • 36.2MP full-frame CMOS sensor with no anti-aliasing filter
  • 5-axis image stabilization rated to 5 stops by CIPA standard testing
  • 100% pentaprism viewfinder with 0.7x magnification
  • 33-point AF system (25 cross-type)
  • Extensive weather-sealing
  • 1/200 sec flash sync speed
  • 14-bit Raw recording (DNG or PEF)
  • AA filter simulation
  • Multi-shot Pixel Shift Resolution mode
  • Built-in GPS with electro-magnetic compass and Astrotracer function
  • 4.4 fps continuous shooting (6.5 fps in APS-C crop mode)
  • Wi-Fi
  • 1080/30p video

Sensor-shift cleverness

As this list of spec highlights should make clear, the K-1 makes the most of its moveable sensor. As well as the image stabilization, which is rated to an impressive 5 stops, the camera offers a host of other clever features. These include anti-aliasing filter simulation which vibrates the sensor during exposure to intentionally blur high frequency detail across multiple pixels, to avoid moiré. Then there’s the Pixel Shift Resolution mode that increases color resolution by shooting four consecutive images with the sensor moved by one pixel – effectively canceling the Bayer color filter array and lowering noise by image averaging.

The other sensor-shift modes are also clever: the K-1 includes Horizon Correction, which rotates the sensor if you hold the camera slightly off-level, and the Astrotracer system that uses the sensor’s movement to cancel-out the effect of the Earth’s rotation when taking images of stars (something it can calculate using its GPS).

Upgraded AF and metering

The sensor at the heart of the SAFOX 12 AF module. It gives 33 AF points in all, 25 of which are cross type and three of which offer greater accuracy when paired with bright lenses.

The camera gets a new AF module (called SAFOX 12) which features 33 focus points, 25 of which are cross type. The central three of these offer higher precision when used with F2.8 or faster lenses and they continue to focus down as far as -3EV.

An 86,000-pixel RGB metering sensor acts to offer 77-segment metering but also aids the camera’s autofocus system, enabling scene analysis and subject detection to yield accurate exposures and automatically select the correct AF point to stay on your subject (subject tracking) when using continuous AF.

Core competence

Overall, though, it’s not the clever use of the sensor that most stands out about the K-1, it’s Ricoh’s obvious focus on the core photographic capabilities. There’s a reason we chose to list the viewfinder size so far up the list of specifications – it’s because we think it’s something users coming from existing Pentax cameras will most appreciate. Sure, there are multiple exposure modes and time lapse options, but the things that most jumped out are the high resolution sensor, the well positioned dials, the large viewfinder and image stabilization – the core things that help you to get better images. Speaking of core things: some may bemoan the omission of a dedicated AF point control, though the four way controller can be re-purposed for this.

Which isn’t to say the K-1 is entirely without the occasional flourish. Aside from clever sensor shift modes (that some – particularly landscape – photographers will surely come to love), the most obvious of these is its ‘Cross-Tilt’ LCD. The Cross-Tilt mechanism takes a tilting LCD cradle and mounts it on four legs that slide along a cross-shaped series of slots, allowing the screen to extend outwards and move in a complex manner, before the screen itself is tilted up/down.

The K-1’s Cross-Tilt LCD system has all the elegance of two deck chairs mating, but it provides a useful range of articulation.

Mounted to the back of the LCD are four white LEDs that can be used to shed light on the rear controls. Another LED, whose behavior can be set independently, shines a light on the lens mount for easier alignment when swapping lenses in the dark. The camera’s card bay and remote release port are also illuminated by LEDs.

For the most part, though, the camera’s focus is very much toward a traditional approach to still photography. Video capture tops-out at 1080/30p (which can also be encoded as 60i, if you prefer), which is a long way from cutting edge, but we very much doubt that Ricoh has would-be film makers in mind with this model.

Still shooters are likely to appreciate the camera’s Smart Function system, which adds a third command dial to the top right corner of the camera and a further control to define its function. The three dials give direct control over three of the camera’s parameters with the ability to customize one of them without going anywhere near a menu.
Pricing

And how much does Ricoh want for this twin-dial, weather-sealed, magnesium alloy, image-stabilized full frame camera? The list price is a fiercely competitive $ 1799, body only. To put that in perspective, that’s $ 200 lower than the launch price of Nikon’s more basic D610 and $ 300 less than what Canon originally expected for the EOS 6D, meaning there’s only a $ 100 premium over the list price of Sony’s image-stabilized a7 II.

This is a very similar pattern we’ve seen from Ricoh before, with the company’s models often including higher-end features (twin control dials, prism viewfinders and weather sealing) at a lower price than you’d need to spend to get them from one of the other DSLR makers.

Lens lineup

At present, Pentax offers a mixture of full-frame compatible lenses, including a handful of screw-drive FA prime lenses from the film-era and the much-loved 31, 43 and 77mm FA Limiteds from the late ’90s/early 2000s. However, the company is already starting to flesh-out a range of more modern ‘D FA’ zooms, including a 15-30mm F2.8, a 24-70mm F2.8 (both suspiciously reminiscent of certain current Tamron-branded zooms) a 70-200mm F2.8 and an 150-400mm F4.5-5.6. For now, though, those looking for modern, fast-focusing primes will be disappointed.

But that isn’t the whole story, of course. Part of the reason for all the interest in a full-frame Pentax is the vast collection of K-mount lenses that exist around the world. The K-1 lets you use the aperture rings on these lenses and can give a focus confirmation beep with the central AF point, even with manual focus lenses. When you mount an older, manual lens the K-1 prompts you to manually specify the focal length so that the image stabilization can be tuned appropriately.

 Review History
17 Feb 2016 First Impression Review based on Pre-Production camera running Firmware 0.3

If you're new to digital photography you may wish to read the Digital Photography Glossary before diving into this article (it may help you understand some of the terms used).

Conclusion / Recommendation / Ratings are based on the opinion of the reviewer, you should read the ENTIRE review before coming to your own conclusions.

We recommend to make the most of this review you should be able to see the difference (at least) between X, Y, and Z and ideally A, B, and C.

This article is Copyright 1998 – 2016 and may NOT in part or in whole be reproduced in any electronic or printed medium without prior permission from the author.

Articles: Digital Photography Review (dpreview.com)

 
Comments Off on Special K? Pentax K-1 First Impressions Review

Posted in Uncategorized


Your Last Holiday Guide and Special FREE Gift From Us!

14 Dec
GG4

It’s our *sniff* last gift guide of the season and we’ve saved the very best for last. A game-changing camera for your phone, our incredible Iris lens set and all the best selling gifts of the year. We’re also throwing a sweet enamel pin into every cart today only! So if you’ve waited until now to get all your shopping done, you clearly made the right choice.

(…)
Read the rest of Your Last Holiday Guide and Special FREE Gift From Us! (0 words)


© Erin for Photojojo, 2015. |
Permalink |
No comment |
Add to
del.icio.us

Post tags:


Photojojo

 
Comments Off on Your Last Holiday Guide and Special FREE Gift From Us!

Posted in Equipment