Whether you’re running a photography business, or sharing your photography on the web with friends, it’s important to know how to properly size your images for various uses. Generally speaking the smallest size you can share, while still retaining enough quality for the viewer to appreciate the photograph, is what you’ll want to aim for, but let’s dive into this with a bit more detail.
First rule – use the sRGB Color Space for anything going on the web
Before you even think about sizing an image for the web, you’re going to need to make sure that you’re using the correct color space. The web is standardized on the sRGB color space, which means that if you want your photography to appear accurately across the web, that’s the color space you need to use when you save your image.
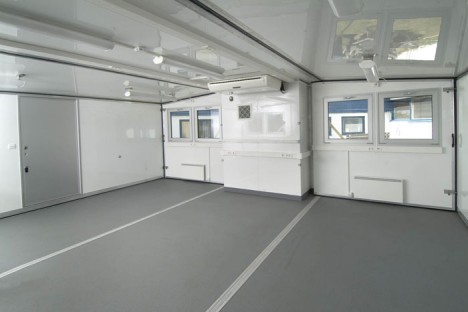
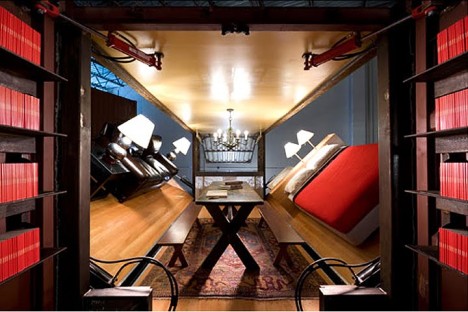
Take a look at this side by side comparison of the same photograph, saved directly from Lightroom, using the sRGB color space versus the AdobeRGB color space.
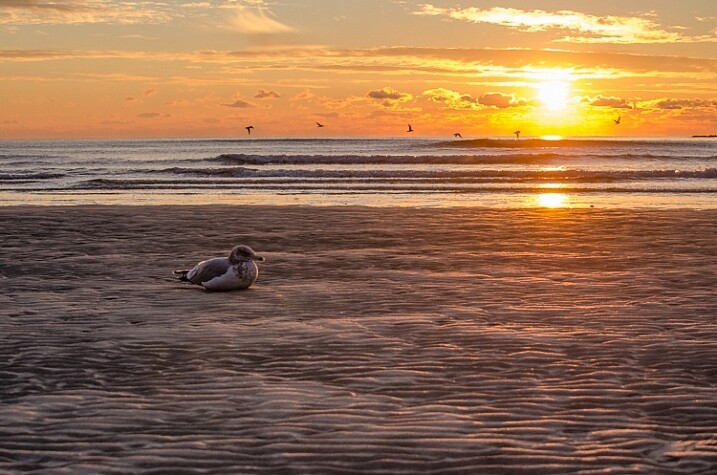
sRGB
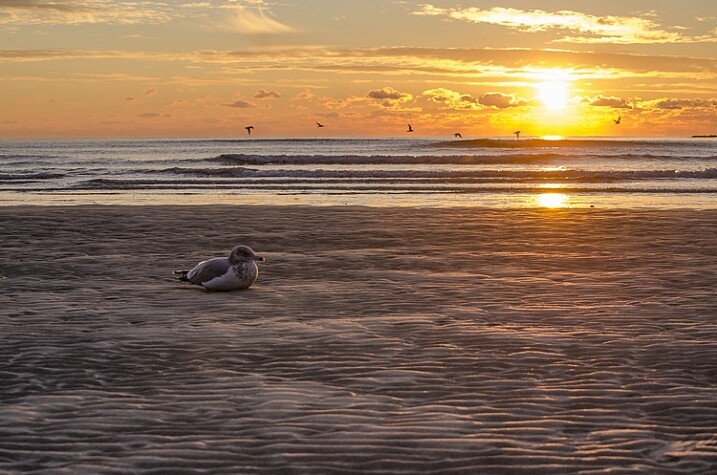
AdobeRGB
You’ll notice that the AdobeRGB color space appears slightly more muted in terms of color and it has a slightly more greenish tint when compared to the sRGB image.
Second rule – Smaller size over image quality
Even in this world of high resolution monitors, it’s still the best practice to use smaller sizes when sharing images on the web.
Here at dPS, images in the articles are sized to be 750 pixels on their longest side at an overall size of around 200kb. The reason you want to reduce the size of your images for use on the web is primarily to improve the user experience for your readers. The more data a webpage has to load, the longer it will take for the reader to be able to see content.
Social media and dedicated portfolio sites, like Smugmug or Zenfolio, are the exception to this rule as they have optimized their backends to handle large image files when necessary, and actually require the full size image for printing purposes.
How to size your images?
Knowing why to size your images is only the first piece to the puzzle, now it’s time to learn how to size your images. This article will show you two ways to size images, one with Lightroom and another with Photoshop, as they are the two most commonly used pieces of software among dPS readers.
How to size an image in Lightroom
The best thing to do with Lightroom is to set up an export preset specific for your needs. Once this preset is set up, all you’ll have to do is select it, and everything will be done for you.
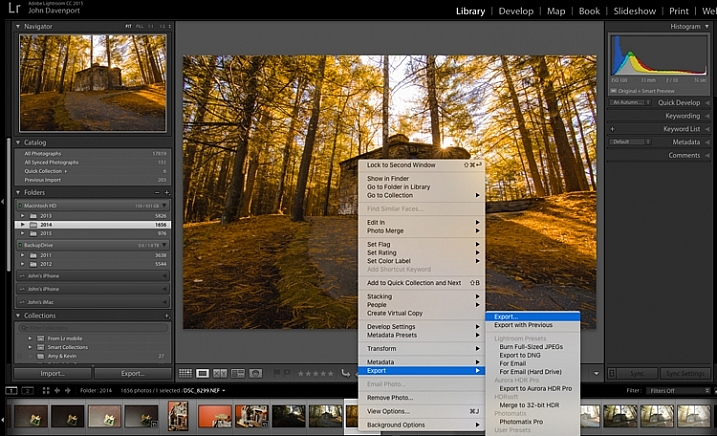
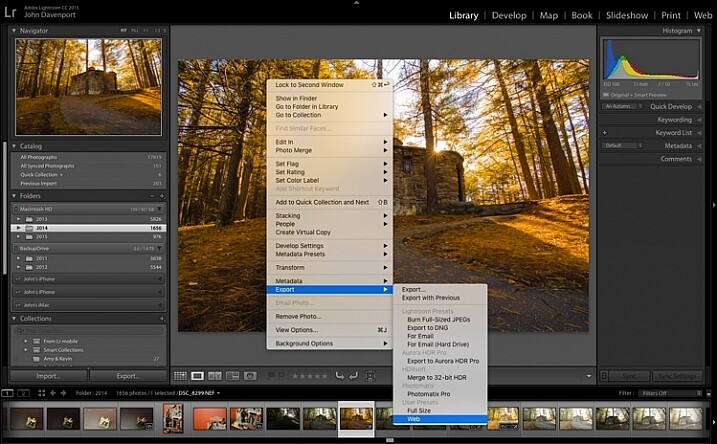
Step 1: Select any photograph and right click. Navigate to Export and select Export from the fly out menu.
Step 2: In the box that opens, after selecting your Export Location and File Naming options, you’ll want to navigate to the File Settings and Image Sizing sections.
In the File Settings Section: Make sure that Image Format is set to JPEG, and that Color Space is sRGB. You can choose to limit the file to a specific siz,e if this matters to you, but know that too much size reduction can result in noticeable quality loss of an image.
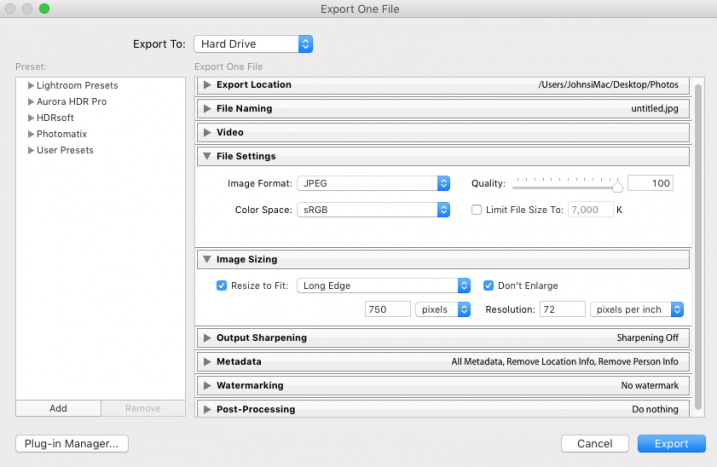
In the Image Sizing Section: You’ll want to check “Resize to Fit” and make sure that the drop down is set to Long Edge. Check the box “Don’t Enlarge” which will mean that any time you export an image smaller than your “Long Edge” setting, it won’t stretch the to fit that dimension. Finally, you’ll need to pick what size you want your image to be – here it’s set to 750px and 72 pixels per inch which is what we use at dPS.
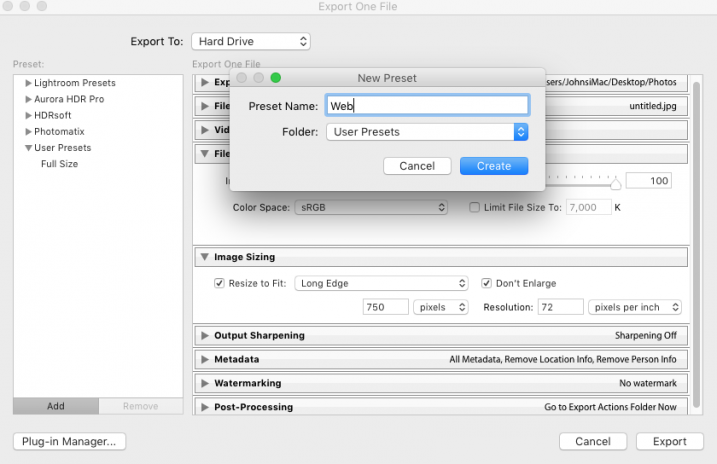
To save this as a preset that you can use over and over again, click on the “Add” button in the lower left corner, and name your preset when the dialogue box opens.
Now, whenever you want to export a photograph to the web, all you have to do is right click on the image you wish to export, and navigate to the preset you’ve just created. Super easy!
How to size images with Photoshop
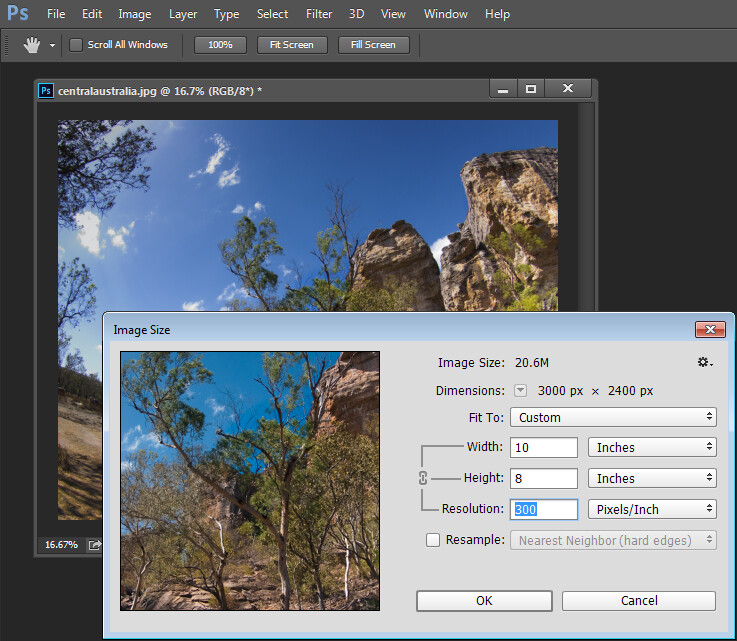
When you want to save your images for the web with Photoshop, the best option is to use Photoshop’s “Save for Web” tool. This will let you choose from various file types (in most cases you’ll want JPEG), and also allow you to convert the image to the all important sRGB color space.
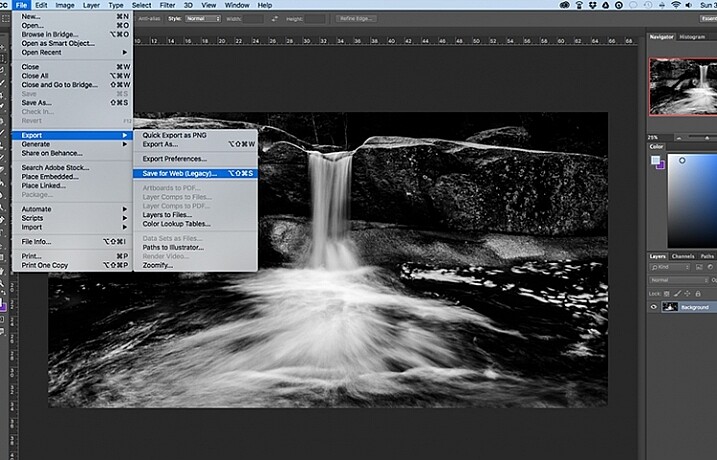
To find the Save for Web option you’ll want to navigate to File > Export > Save for Web
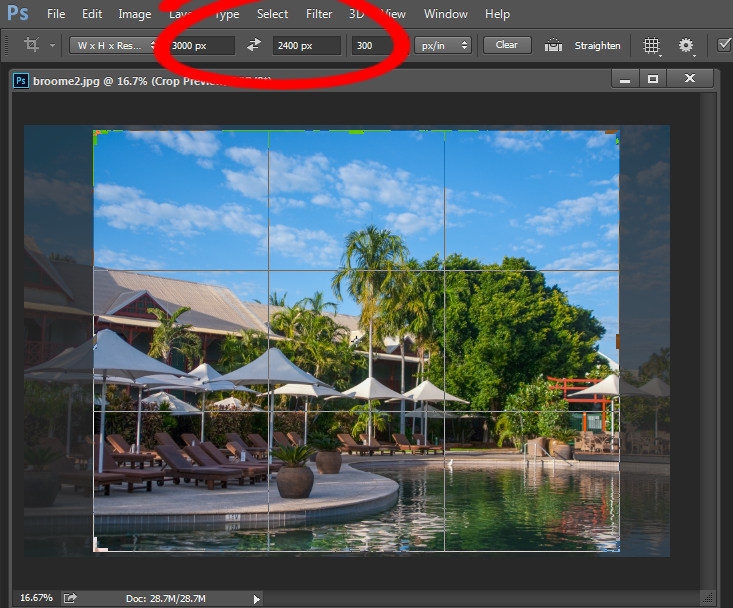
Once you select this option a new window will open, providing you with a number of options for exporting your image from Photoshop. Here you’ll want to make sure that “Convert to sRGB” is checked, and that your file format is set to JPEG. Sizing can be done by picking a width or height, and as long as the two are connected with the link symbol, Photoshop will calculate the other’s value based on the one you input and maintain the image proportions accurately.
The most important part about saving photographs for use on the web is getting the color space correct, and realizing that people browsing photographs on the web are often doing so on smaller screens, with limited time on their hands. Fast load times not only improve your user’s experience, but they also will reflect favorably on Google’s search engine’s algorithm which is used to determine if your content is worthy of being shown to people searching Google for answers.
How do you size your images for online use? Please share in the comments below.
googletag.cmd.push(function() {
tablet_slots.push( googletag.defineSlot( “/1005424/_dPSv4_tab-all-article-bottom_(300×250)”, [300, 250], “pb-ad-78623” ).addService( googletag.pubads() ) ); } );
googletag.cmd.push(function() {
mobile_slots.push( googletag.defineSlot( “/1005424/_dPSv4_mob-all-article-bottom_(300×250)”, [300, 250], “pb-ad-78158” ).addService( googletag.pubads() ) ); } );
The post How to Size Images for Online Sharing by John Davenport appeared first on Digital Photography School.

Digital Photography School


You must be logged in to post a comment.