RSS
 

Posts Tagged ‘shot’

Award-winning film shot through Hasselblad 500CM warns of photo obsession dangers

13 Nov

I think there may be more than a few of us who have been told that we spend too long looking through a viewfinder instead of experiencing life first hand. And there will be plenty of us who know that sometimes we don’t get to experience an event because we are constantly looking for the best angle and thinking photography rather than feeling the moment as everyone else is.

Filmmaker Casey Cavanaugh has made a really cool film on the subject, and has created a wooden rig that allowed him to mount his Sony a7S above the viewfinder of a Hasselblad 500CM so he could record the movie through the viewfinder of the medium format film camera. I won’t spoil the story for you, but it doesn’t end well for the Hasselblad! Cavanaugh also shared the main actress in the film, Corrina VanHamlin, tragically passed away after it was made.

View this post on Instagram

Link in bio || We all had a really amazing time making this short film for the Capital City Film Festival. Watching it now is a little more difficult for me as well as anyone who might have known the amazing lead actress, Corrina VanHamlin. She tragically passed away this year and her performance in this film is but a glimpse into the wonderful and talented person she was. I’m extremely grateful that we were able to make this piece of art together. Huge thanks to the rest of the team, @xiaoxinghan @ryanzern @danhartleyvideo @lukepline • • • • • • #cinematic #shortfilm #hasselblad500cm #hasselblad #fujiframez #framez #sonyframez #fujifilm #sonya7sii #sonya7riii #sonya7iii #fullframe #atomosshogun #groundglass #mediumformatfilm #mediumformat #mediumformatphotography #mediumformatcamera @hasselblad @hasselbladfeatures @hasselbladculture @hasselblad.japan @petapixel @phoblographer

A post shared by Casey Cavanaugh (@gxace) on

See the GxAce YouTube channel to watch Casey’s other films. Cavanaugh is the same guy behind the DIY XPan camera video DPReview shared last week.

Articles: Digital Photography Review (dpreview.com)

 
Comments Off on Award-winning film shot through Hasselblad 500CM warns of photo obsession dangers

Posted in Uncategorized


NASA shares the first 8K footage from space, shot aboard the International Space Station

07 Nov

NASA has published the first 8K footage from space on its YouTube channel.

The three minute video, filmed aboard the International Space Station, details “the in-space experience and see how the international partnership-powered human spaceflight is improving lives on Earth, while enabling humanity to explore the universe.”

Throughout the video, more than a dozen experiments and devices are shown, each of which are listed and timestamped in the video’s description on YouTube. There’s even a glimpse or two of Nikon D5 cameras and Manfrotto mounting equipment.

In order to view the video in full resolution, you’ll need to either stream it on Google’s Chrome browser or download the 3GB MP4 video directly from NASA’s Image and Video Library website.

Of course, in order to watch it in all its glory, you’re going to need a display capable of showing off 8K footage — something you might not have sitting around the house or office — so keep that in mind.

NASA specifically thanks the European Space Agency, the ISS National Lab, and astronauts Alexander Gerst, Serena Auñón-Chancellor, Ricky Arnold and Drew Feustel for their efforts in the making of the video.

Articles: Digital Photography Review (dpreview.com)

 
Comments Off on NASA shares the first 8K footage from space, shot aboard the International Space Station

Posted in Uncategorized


Upper Yosemite Falls Moonbow – Getting The Shot

27 Jul
Upper Yosemite Falls Moonbow - May 9 2017

A large moonbow arcs across the mist from Upper Yosemite Falls, Yosemite National Park

There are quite a few photos in my portfolio that I look back upon and question my sanity due to the absurd conditions I’ve endured to capture them. This particular photo is up there on the insanity scale.  This past winter has seen extraordinary snowfall levels in the Sierras and now that Spring has rolled around the water levels are quite high in Yosemite Valley due to the snow melt.  That translates to huge waterfalls and under the right conditions moonbows (rainbows at night via moonlight).

I’ve taken moonbow photos from the Upper Yosemite Falls trail several times, but this year was like none other. I took up position in a new spot this year with a good friend Brian Hawkins. Our hike started off innocently enough with a hike that started at 4:30PM and later ended at 5:30AM. The reason for the long duration of the shoot was a combination of bringing a lot of gear (3 Canon DSLRS, 2 tripods, and 4 lenses plus extra layers of clothes) and the interest in shooting multiple time lapses + stills. Time lapse sequences run a couple hours and the moonbow wasn’t going to appear until 11:30PM.

Start of the Upper Yosemite Falls moonbow hike (4:30PM)
End of the Upper Yosemite Falls moonbow hike (5:30AM)

Now that I type it all out It really is rather nuts. I, of course, don’t think this before the hike because I have selective memory issues or quite simply my elevator doesn’t go to the top floor when it should.

Hiking with a full photo backpack means slow going on a hike that is 1.5 miles with a 1250 foot elevation gain. Leaving “early” affords me the time to properly stake out the right location, set up all 3 cameras, eat and start shooting. On the way up the focus is squarely on the task at hand and making it to the setup spot early.

Waiting in heavy mist and gusty winds.

Are we having fun yet? Waiting in heavy mist and gusty winds. Only 4 hours to go.

The most painful part of the excursion is the wait. This year this was particularly true given the setup spot quickly became inundated with heavy mist from the falls when the wind kicked up (10mph gusts). Without exaggeration, we were waiting in a windy rainstorm. A sane person might consider moving to avoid the heavy mist, but once you’ve invested the time to set up multiple cameras and climb down steep side trails it quickly becomes a less attractive option. This, of course, was constantly second-guessed throughout the night as conditions remained miserable. Eventually, we called uncle and left the cameras running but took shelter a 1/8th of a mile away on the main trial to stay dry.

So what does one think during the hours of waiting for the moonbow to appear and during the moonbow sequence run? Let me tell you in order of thought.

  1. I am so freaking wet and cold.
  2. I should have brought more layers to stay warm and dry.
  3. It’s so wet I’m not sure any of this footage will come out.
  4. I don’t think I could have carried anything more.
  5. What the f*ck are you thinking that this would be a good idea!
  6. I’ve never seen conditions so good for moonbows, but it’s too good. There’s too much water.
  7. What was that noise!? F*ck it better not be a mountain lion. Crap it was just my jacket hood rubbing against my head.
  8. I can’t feel my fingers. I should use those hand warmer things. Cr*p they’re in my camera bag back in the heavy mist. Forget it I’d rather have cold hands than get wet again.
  9. I wonder if my batteries died. I better go check.
  10. Upon returning repeat all the above thoughts
  11. I am so freaking cold. I am never going to do this again. I don’t know what I was thinking.
  12. Now that it’s so wet and windy how am I going to retrieve all my gear
  13. Holy sh*t! I can’t believe I’m here at 3AM


Then after all of this, I get to my camera to see the most amazing sight, Yosemite Falls roaring full of water with the biggest moonbow I’ve ever seen. All those earlier thoughts are lost as I get more stills taken. The results, like the photo above, are like a narcotic that wipes my mind clear. With my “photo-high” in place packing up is less cringeworthy albeit still miserable. Trying to remember, pack and not leave behind gear and accessories for 3 cameras is tough enough, but particularly mentally challenging when cold and tired. Fortunately, years of experience and more importantly being a little too anal for my own good make this a little easier.

Unlike years past the extra effort of trying to dry off gear took some extra time. It also required another round of gear packing. By the time this was all complete the hike down could begin at 3:50AM.

Canon 5D Mark IV + Canon 11-24 drenched from the heavy mist off the falls.
Canon 5D Mark II + Canon 16-35mm Mark II drenched from the heavy mist off the falls.

Brian Setting Up While Nice and Dry
Brian Soaked After Retrieving Gear

The hike down was cold, but dry and thus in my mind “warm”. On the way down thoughts of mountain lions hiding in the shadows quickly subside, instead focusing on not twisting an ankle due to fatigue or carelessness. Also important is to not step on the many millipedes that crawl across the trail. In between dodging millipedes, I’m left wondering how well my footage and stills came out. Cold and tired I’m thinking it’s doubtful anything could have come out and back to questioning why I thought this was a good idea.

Millipede on the trail

Millipede on the trail

Fast forward 7 hours as I write this and it’s become apparent several shots came out, but I won’t know how much until I’m back home. Between three cameras it’s likely it worked out. I really shouldn’t do this again, but come next year I’m sure all this will be mentally blocked and I’ll be making a similar hike/moonbow shoot just like I did in 2011, 2012, 2013, 2014, 2016 and this year. Apparently, I’m a slow learner.

Authors Note: Excuse the typos if any as I typed this on my phone and I’m still very sleep deprived.

Gear Used On This Shoot

Camera 1
Canon 5D Mark IV, Zeiss Distagon T* 15mm f/2.8 ZE, Gitzo Carbon Fiber tripod (small) with canon timer remote controller TC-80N3

Camera 2
Canon Mark IV, Canon EF 11-24mm f/4L USM lens, Gitzo Carbon Fiber tripod (large) with canon timer remote controller TC-80N3

Camera 3
Canon 5D Mark II, Canon EF 16-35mm f/2.8L II USM lens, JOBY GorillaPod for SLRs with canon timer remote controller TC-80N3


The post Upper Yosemite Falls Moonbow – Getting The Shot appeared first on JMG-Galleries – Landscape, Nature & Travel Photography.


JMG-Galleries – Landscape, Nature & Travel Photography

 
Comments Off on Upper Yosemite Falls Moonbow – Getting The Shot

Posted in Equipment


Behind the scenes of Drew Gardner’s gigapixel shot of British royal family

16 Jun
Drew’s 2.3 gigapixel image is made up of more than 100 50MP files, shot with the Fujifilm GFX 50S. Click the thumbnail to launch the interactive image at www.telegraph.co.uk

Photographer Drew Gardner has been a photographer for more than 30 years, and since 1999 he’s worked mostly in the commercial world. Following a recent move into 360-degree imaging, he accepted a commission from British newspaper The Telegraph to shoot a gigapixel image of the queen’s birthday parade. Earlier this week we spoke to Drew to learn more about how the project came together.


Following a career working in local and national press, I decided to move away from newspapers and into commercial and advertising photography, in 1999. These days I shoot extensively for magazines around the world, so the commission has to be something really special to entice me to work with newspapers again.

When I was asked to shoot a gigapixel photo for the Daily Telegraph, it was a trip down memory lane for me in many ways, but with the latest technology so I leapt at the chance. I was approached about two weeks before the event, and I spent many hours working out the sequence of events and the best position to place the camera.

I work with a wide variety of gear but this occasion seemed a perfect opportunity for a medium format camera, where ultimate resolution would be very useful.

‘The final image doesn’t represent one moment, but rather many different moments’

I like shooting gigapixel photos to record events. The final image doesn’t represent one moment, but rather many different moments. This provides a better overall feel of what it was like to be there. When I say many different moments, the final gigapixel image is made up of more than 110 50 megapixel images, shot on a Fujifilm GFX 50s with a 250mm F4 lens. The result is a 2.3 gigapixel file.

Drew Gardner has been a professional photographer since 1979. Based in the UK, Drew’s work spans local and national press, and commercial photography for clients including Manfrotto and Suzuki Motor Corporation.

Check out more of Drew’s work at his website, drewgardner.com

I love the Fujifilm GFX 50S. It really suits the way I shoot medium format camera, and it weighs less than most DSLRs. Image quality is stunning and it has proven very reliable.

What I really like about the GFX is its high ISO performance. Even though the light was excellent I shot at ISO 1600 to allow me to stop down to F11-16 for better depth-of-field. To move the camera I used a Seitz VR drive motorized head – the same head that I use for all my 360 degree still images, too.

I’m a huge fan of Brian Storm of Mediastorm who is a great advocate of the use of audio and this was the perfect occasion to record ambient audio of the event with a Zoom H2N audio recorder. Audio is all too often overlooked and yet it is a very easy way of adding another valuable dimension to a gigapixel or 360 panorama image.

View the final gigapixel image at www.telegraph.co.uk

Articles: Digital Photography Review (dpreview.com)

 
Comments Off on Behind the scenes of Drew Gardner’s gigapixel shot of British royal family

Posted in Uncategorized


You can own the world’s first single shot 8×10 digital camera for $106,000

22 Apr

$ (document).ready(function() { SampleGalleryV2({“containerId”:”embeddedSampleGallery_1218001005″,”galleryId”:”1218001005″,”isEmbeddedWidget”:true,”selectedImageIndex”:0,”isMobile”:false}) });

If you’re shooting digital, the largest image sensor you will find at your local camera store is the 53.4mm x 40.1mm medium format sensors inside something like the Phase One IQ3. But if that is just not enough for you… there is one, much larger option. Meet the $ 106,000 LargeSense LS911: a large format digital camera and purportedly the “world’s first 8×10 digital single shot camera for sale.”

The LS911 is the passion project of Bill Charbonnet, who left his desk job in 2014 to start LargeSense LLC and built these large-format digital cameras. Four years later, the LS911 is his first shipping product.

According to the press materials, LS911 features a 12-megapixel 9×11-inch monochrome CMOS sensor (that translates into massive 75 micron pixels), ISO that can be set at either 2100 or 6400, 900GB of internal storage, and the ability to output files to DNG, 16-bit TIFF, 32-bit TIFF, RAW and JPEG formats. There is no CFA, but the monochrome sensor can be used to produce color images (of non-moving subjects) using an in-built 3-shot system and color filters.

Oh, and the thing can also apparently shoot 4K, 3840 × 2160 video at 26fps using its electronic shutter.

Here is a video of the LS911 in action:

And here is how the size of the LargeSense LS911 sensor compares to some of the other image sensors out there:

Note: the LargeSense LS45 is a 4×5-inch digital back Charbonnet is working on, but has yet to release.

If the LS911 seems a bit bonkers, honestly, that’s because it is. We’ve been discussing it in the office for the past couple of days, trying to figure out how to put this camera in context for our readers, and here’s our take: it’s cool, but having a sensor this large may not be as advantageous as you think.

Science Editor Rishi Sanyal explains:

One of the main benefits of going to a larger sensor is that you can get more resolution as the larger pixels place less of a burden on the resolving power of the lens, but this camera does not take advantage of that.

What it does offer is the tilting, shifting and swinging ability large format cameras are known for, and if you can give the sensor enough light, the entire image has the potential for greater ‘tonality’ because the lower relative shot noise will yield very high signal-to-noise ratio for most tones. That makes the image more amenable to extreme sharpening without accentuating noise. That said, beyond a certain signal-to-noise ratio, tones are already clean enough – particularly with modern full-frame or medium format cameras – that it likely doesn’t matter.

So, are you guaranteed a noticeable improvement in overall quality of the photos just because of the 9×11-inch sensor? Not necessarily. This is probably more about the feel of large format where you can throw most of the image largely out-of-focus by tilting the focus plane, or keep a large amount in focus without stopping down if you align the focus plane with your subject(s).

If, after knowing all of this, you’re still interested in dropping $ 106K on the LS991 (hey – it’s guaranteed to be a conversation piece at parties if nothing else), head over to the LS911 product page on the LargeSense website or check out the full spec sheet at this link.

And do let us know: what would you use it for?

Press Release

LargeSense launches the LS911

It is the first full frame 8×10 digital single shot camera for sale!

Medium format has thus far been the limit as far as sensor size because large sensors are difficult and expensive to produce. With the LS911, photographers now have an option for high quality large format images other than film. Available now. The USA price is US$ 106,000 Check www.largesense.com for more information.

LS911 Specifications

  • Single shot 9×11 inch monochrome CMOS sensor
  • High base sensitivity of ISO 2100
  • Live view for focusing
  • Compatible with any large format lens with a sufficient image circle
  • Easy to use HTML-based WiFi control with any HTML5 browser
  • 4k Lossless video with audio up to 26fps
  • 900GB internal storage, CF cards and external USB 3.1 drives
  • User-generated curves to apply to the linear files
  • Integrated 3 shot tri-color images when using color filters
  • Designed for mounting on large tripods or custom camera stands

LS911 product page: http://largesense.com/products/8×10-large-format-digital-back-ls911/

LS911 spec and feature sheet: http://largesense.com/files/3415/2348/3451/LS911-Specs-And-Features-180411.pdf

Upcoming Products

A 4×5 inch digital back, the LS45, is expected at the end of 2018.

The color version of the LS911 is expected in 2020.

LargeSense was founded in 2014 by Bill Charbonnet to manufacture single shot, large format digital cameras. Inspiration was from Mitchell Feinberg’s 8×10 digital back. The issue for a business in this tiny market is keeping costs low while delivering a specialty product. After 3 years of development, we are proud to be the first to offer such camera, the LS911!

Articles: Digital Photography Review (dpreview.com)

 
Comments Off on You can own the world’s first single shot 8×10 digital camera for $106,000

Posted in Uncategorized


Sheriff’s Deputy who shot photographer won’t face criminal charges

03 Apr

On March 22nd, a grand jury decided that Clark County Sheriff’s Deputy Jake Shaw will not face criminal charges for injuring photojournalist Andy Grimm. Shaw shot Grimm after mistaking the photographer’s tripod and camera for a gun.

The incident took place in September of 2017. Grimm was shot by Deputy Shaw in New Carlisle, Ohio, while attempting to photograph the deputy during a traffic stop. The incident made national news in part because it was captured on Shaw’s body cam, which recorded the deputy telling Grimm that he’d mistaken the photographer’s camera and tripod for a firearm.

In December, Grimm, his wife, and KBA News filed a lawsuit against Deputy Shaw, the City of New Carlisle, and the Clark County Board of County Commissioners. The lawsuit, which seeks a minimum of $ 75,000 in damages, accuses Shaw of using excessive force and violating Grimm’s civil rights. According to initial reports, the Sheriff’s Deputy allegedly failed to warn Grimm before opening fire.

Further, the legal complaint claims Grimm has suffered physical and psychological issues since the shooting, as well as loss of wages during his recovery time, and that local law enforcement agencies have “retaliated against” KBA News over the ordeal, resulting in a “loss of business profits.”

However, according to the Springfield Sun-News, Clark County’s lawyers have argued that Deputy Shaw reasonably believed Grimm’s tripod was a firearm. The statement reads:

Defendants aver that it reasonably appeared to Deputy Shaw that Andrew Grimm possessed a firearm under the conditions facing him, in the course and scope of his employment, and in good faith, to make a split-second decision to discharge his weapon in order to protect the public and himself from perceived deadly harm.

Per initial reports, the shooting happened at night during a thunderstorm. Grimm claimed to have first flashed his vehicle’s lights and waved at Shaw, who was conducting a traffic stop, in order to alert the deputy to his presence. As well, Grimm previously stated that he started to set up his camera and tripod “in full view” of Shaw, though moments later he was shot, allegedly without warning.

The county says Grimm may have some responsibility in the shooting, saying that the photographer’s “own contributory and or comparative negligence and/or assumption of the risk may have caused or contributed to cause the injuries and damages of which he complains.”

On March 22nd, a grand jury accepted the county’s arguments, ultimately deciding that Deputy Shaw should not face criminal charges for the shooting. According to local news WHIOTV7, the Clark County Sheriff’s Office is conducting an administrative review of the shooting, which has also been investigated by the Ohio Bureau of Criminal Investigation. Deputy Shaw returned to work in October under a reassignment to the county jail.

Articles: Digital Photography Review (dpreview.com)

 
Comments Off on Sheriff’s Deputy who shot photographer won’t face criminal charges

Posted in Uncategorized


This SkyPixel 2017 photo contest winner wasn’t shot from a drone… or in 2017

04 Mar
“Sun’s Up, Nets Out” by Zay Yar Lin

Drone maker DJI announced the winners of the 2017 SkyPixel aerial photography competition earlier this month, but already there’s a controversy. As it turns out, the winner of the Landscapes category wasn’t actually taken with a drone or captured in 2017.

The contest rules required entries to have been taken in 2017 using “any aerial platform,” but a recent report from PetaPixel reveals that the winning image in the Landscape category, “Sun’s Up, Nets Out” by Zay Yar Lin, was actually taken in 2014 using a Nikon D750 from an elevated bamboo stage… probably not what they meant by ‘aerial platform.’

In fact, the photograph—which has since been disqualified—was previously submitted to the NatGeo 2015 Traveler Photo Contest as well as the 2016 Sony World Photography Awards, and was a ‘top entry’ in the Amateur Photographer of the Year 2016 contest. Zay’s award bundle for the SkyPixel 2017 contest included a Nikon D850 and DJI Phantom 4 Pro Obsidian drone.

In a statement to PetaPixel, Zay Yar Lin explained that his D750 was attached to a hexacopter on said bamboo stage when this photo was shot, but that he didn’t realize the photo had to be taken in 2017. His statement reads:

I regret that I had shot with my DSLR with hexacopter on the bamboo stage to get the best angle. But to be honest, I wasn’t aware of the Photo Contest rules that all photos should have been shot in 2017. I’m a freelance and ethical photographer in the contests. Please look up my profile in any site. I really regret misunderstanding had occurred between us.

Zay didn’t mention the attached hexacopter when he spoke with Amateur Photographer about this image in 2016.

Articles: Digital Photography Review (dpreview.com)

 
Comments Off on This SkyPixel 2017 photo contest winner wasn’t shot from a drone… or in 2017

Posted in Uncategorized


Long Exposure Photography 101 – How to Create the Shot

01 Mar

It’s easy to get caught up in the fast nature of photography, technology, instant results, presets, etc. But what happens when you slow your photography right down?

This tutorial will introduce you to the 101s of daytime long exposure photography and share the exact steps you can follow to create your very own long exposure photographs.

01 Long Exposure Photography 101 How to create the shot

Long exposure seascape.

What is long exposure photography?

long exposure photography can be defined in two ways. A traditional description would class it as taking photographs with the intent to deliberately capture the effect of time and display moving objects in a different way to how our eyes are used to seeing them.

But for those of a more literal-mindset, long exposure photography is a brilliant way of photographing atmospheric landscapes, whilst being able to enjoy a cup of tea and a biscuit – all at the same time.

Now, if that sounds like your type of photography, I encourage you to settle in and read on.

02 Long Exposure Photography 101 How to create the shot

Slow down

The very nature of long exposure photography is pretty slow paced. It forces you to take your time, which is excellent practice for your framing and compositional skills. And because you literally can’t rush the shot, it makes you think about the light, your subject, and your compositional techniques before you invest several minutes of your time capturing the image.

It’s worth noting that there is no specific shutter speed that defines the crossover from “typical photography” to long exposure photography. It’s not the duration of your shutter speed that defines your image as a long exposure photograph. Instead, it’s your intention to capture moving objects using longer exposure times than necessary that makes it a long exposure photograph.

03 Long Exposure Photography 101 How to create the shot

Generally speaking, long exposure photographs will use shutter speeds that can be measured in seconds or minutes instead of fractions of seconds.

Embrace the blur – add a sense of motion

“So, why should I take a photo using a slow shutter speed? Won’t that make it blurry?”

Yes, precisely. Using a long exposure technique is typically reserved for times when you want to selectively blur objects in your images. Common examples would be to capture flowing water, like the ocean or a waterfall. It’s also used to capture the movement of clouds or stars in the night sky.

04 Long Exposure Photography 101 How to create the shot

Long exposures are great for capturing motion and stillness in a single frame.

A long exposure photograph reveals the passing of time and conveys motion in a way that your eyes are simply unable to see at the time. Long exposures turn clouds into whispers, water into silky-looking glass, and people into otherworldly ghost-like beings.

Long exposure photography allows you to capture stillness and a sense of motion in a single frame. The contrast between these elements creates a sense of mystery and adds a surreal atmosphere to your images. It’s precisely this playful mix of the fluid and the still that makes long exposure photography beautiful, strong, and mildly addictive – or maybe that’s just the cup of tea.

Anyway, here’s what you need to know to take a long exposure photograph.

05 Long Exposure Photography 101 How to create the shot

Blocking out light with Neutral Density (ND) Filters

To capture those ethereal tones and silky motions in your images, you need to use a slow shutter speed. The trouble with using a slow shutter speed during the day is that it lets in a lot of light. So much light in fact, that it will inevitably overexpose your image.

To counter this, you will need to use a Neutral Density (ND) filter to make long exposure photographs during the day.

ND filters essentially sit in front of your lens and block out the light. Think of them as a fashionable set of sunglasses for your lens. And because the ND filters reduce the amount of light that hits your camera sensor, you can use shutter speeds up to several minutes long without overexposing your images – even in bright conditions.

06 Long Exposure Photography 101 How to create the shot

Rectangular ND Filters – otherwise known as “rectangular dark glass to block out the light”.

Using an ND Filter

The exact length of your exposure will depend on the lighting conditions and the strength of the ND filter you use. ND filters are typically measured by the stops of light they are able to block out and are usually available in increments of 3, 6, 10, or 16-stops.

Nisi, Lee Filters, and Formatt-Hitech are among the popular brands of ND filters, although there are many others available for a variety of budgets. ND filters come in either a circular format (these screw onto the front your lens) or a rectangular format, which requires the use of an additional filter holder to mount them to your lens.

As a general rule, the more light your ND filter is able to block out, the longer your exposure will need to be to achieve a balanced exposure. And the longer your exposure, the more dramatic the effect will be in your final image.

07 Long Exposure Photography 101 How to create the shot

Rectangular ND Filters attached to camera lens using a filter holder.

Don’t Move

You may be aware that when you use slow shutter speeds, the smallest bit of camera movement can throw your image out of focus and cause it to look a little blurry. This is especially true in long exposure photography.

Given that your camera will be taking several seconds or several minutes (if you’re using a 10 or 16 stop ND filter) to complete a single shot, it’s crucial to ensure it doesn’t move a millimeter during the exposure.

It would be nearly impossible to achieve this by hand. Therefore, it’s a good idea to get your hands on a sturdy tripod. This not only ensures your camera will remain still throughout the entire exposure but more importantly, it frees up your hands, so you can have a sip of your tea whilst your camera is hard at work.

In addition to your ND filters and tripod, here’s a checklist of essential equipment you’ll need for long exposure photography.

Essential Long Exposure Photography Equipment Checklist

08 Long Exposure Photography 101 How to create the shot

Essential long exposure photography gear – particularly #10.

  1. Your ND filters.
  2. A sturdy tripod.
  3. Camera with bulb mode function – bulb mode allows you to take exposures longer than the camera’s default 30 seconds.
  4. Fully charged batteries – try to avoid the heart-breaking moment when your battery cuts out in the middle of an exposure.
  5. Lens – wide-angle lenses work very well with landscapes, seascapes, and architecture photography. If you’re just getting started, any lens that is compatible with your ND filters will work just fine.
  6. A shutter release cable with a locking functionality. Using a shutter release cable (remote trigger) allows you to lock the shutter open without having to touch the camera body. This reduces camera movement during your exposure.
  7. A viewfinder cover – during long exposures, light has a habit of finding its way into your camera through your viewfinder and ruining your images. You can prevent this from happening by using a viewfinder cover, some sticky-tac or even duct-tape.
  8. A dark cloth or hat – perhaps the most peculiar item on this list, however, it’s arguably one of the most important. Believe it or not, light doesn’t just find its way into your camera via the viewfinder. It also leaks in via the lens/body connection and also from the connection points on the side of your camera. Placing a dark cloth or hat over your camera works well to prevent light leaks.
  9. Smartphone – this will serve two purposes. First, it will help you to calculate your long exposure times via a handy long exposure calculator app that I’ll introduce you to shortly. Its second function will be to keep track of your exposure time using a simple timer.
  10. A flask of tea and a selection of biscuits – and you thought I was joking! By far my favorite item on the list. long exposure photography will typically have you sitting in a beautiful spot for several minutes, taking your time and soaking up your surroundings. It’s good for the soul and a creates the perfect opportunity to enjoy a well-deserved treat, particularly on cold mornings!
  11. Chargers, USB cables, and lens wipes. Ideal if you need to recharge your gear or remove your fingerprints from your ND filters when you’re out and about.

Every item on this list plays an important role in capturing a long exposure photograph. Now here’s precisely how you can capture one.

Step 1: Prepare at Home

Unlike a typical day of photography, long exposures don’t afford you the luxury of being able to rattle off 1,200 images in a few hours. Instead, you’re likely to return home with only a handful of good photographs after a day of long exposure photography.

So, before you grab your gear and set off in search of ethereal landscapes and mind-bending architecture, it’s well worth investing your time. Research the location and environment so you can make the most of your time in the field.

Weather Conditions

If you’re planning on shooting a landscape, cityscape, or architecture, take a look at your local weather forecast to see what the cloud cover will be like. Anything over 40% cloud cover should give you ideal conditions to capture a silky sky.

04 Long Exposure Photography 101 How to create the shot

The low clouds help to create a surreal atmosphere.

Creating a long exposure seascape, on the other hand, doesn’t necessarily need a lot of cloud coverage (although, cloudy conditions over water often produce great results). It’s worth researching the water conditions because – like the clouds – the greater the movement of the water, the greater the effect of your long exposure photographs.

10 Long Exposure Photography 101 How to create the shot

Cloudy and stormy conditions create dramatic long exposure photographs.

Location Scouting

Use Google Maps and street view to go for a “virtual walk” around your location. Doing so helps you to familiarize yourself with the area and scout out potential compositions for your images. Essentially, you should know precisely where you are going, how you will get there, where you will park, how much daylight you will have and in which direction you need to walk to ensure you take full advantage of your time and the conditions.

11 Long Exposure Photography 101 How to create the shot

Using Google Maps and Street View can help you with composition ideas before leaving your house.

Prepare Your Equipment

There is nothing more heart-breaking than spending the time to scout out the perfect location and setting up your camera only to realize that you have left your ND filters at home or your camera battery is at 27%. Be sure to charge up all of your batteries (including your smartphone) and pack your camera bag using the equipment checklist above.

Shoot RAW

Set your camera to shoot in RAW format. Long exposures tend to have a blue or magenta color cast caused by the ND filters. Shooting in RAW allows you to easily correct the white balance in post-processing.

12 Long Exposure Photography 101 How to create the shot

Ensure that your camera is set to record your images as RAW files.

Install Long Exposure Calculator Smartphone App

Spending your time trying to calculate what your exposure length should be with a 16-stop ND filter might not sound like much fun to you. Long exposure photography is all about taking time out to soak up your environment and enjoying the views – not solving algorithms.

Installing a “Long Exposure Calculator” app on your smartphone will save you time and make calculating your shutter speed much easier when you’re out in the field. Here are a couple of popular suggestions for IOS and Android users.

  • Exposure Calculator – Android
  • Long Exposure Calculator – IOS

It’s a good idea to install the app on your smartphone at home before heading out – just in case you later find yourself in an area with no mobile coverage to download the app.

Step 2: Work the Scene

By the time you’ve prepared your gear, researched the area, and arrived at your location, you’d be forgiven for wanting to unpack and get shooting straight away. Instead, you’ll find that holding off for just a few minutes and allowing yourself to explore the scene often produces more favorable results.

Pick up your camera (without the tripod) and work the shot. Take note of the weather, light, and direction of the water, clouds, lights, or traffic. What are the characteristics of the scene? How does the mood feel? What angle best captures all of this? What are you going to include in your frame?

Step 3: Compose the Shot

Once you have decided on the perfect angle, it’s time to set up your tripod and mount your camera (without the ND filter) to compose and frame the shot. Ensure your tripod is locked in place and your camera is tightly secured. Now is also a good time to attach your remote shutter release cable to your camera.

13 Long Exposure Photography 101 How to create the shot

Secure your camera to your tripod and attach the shutter release cable.

Step 4: Aperture, ISO, and Focus

Switch your camera into Aperture Priority mode and set your aperture to somewhere between f/7.1 and f/11. As a rule of thumb, this range will fall close to your lens’s sweet spot and provide you with a deep depth of field to ensure your image is sharp throughout.

As I’ve mentioned, noise and camera shake can be problematic in long exposure photography. Therefore, adjust your ISO to 100 to minimize the amount of noise and turn off Image Stabilization on your lens to reduce the amount of internal camera shake.

14 Long Exposure Photography 101 How to create the shot

Aperture Priority mode, ISO 100, f/8.0

Focus your lens, ensuring your subject is sharp from back to front. When you are happy with your focus point, switch your lens over to manual focus. This essentially safeguards your focus point and prevents accidental re-focusing when you trigger the shutter.

15 Long Exposure Photography 101 How to create the shot

Switch your lens over to manual focus when you’re happy with your focus point.

Step 5: Test Shot

Use your viewfinder cover (duct-tape or sticky-tac will work) to cover up your viewfinder. This will prevent light from leaking into your camera and ensure that your camera gives you an accurate metering.

16 Long Exposure Photography 101 How to create the shot

Use a Viewfinder cover, duct-tape, sticky-tac or even some cardboard block out light leaks.

With your viewfinder covered and your camera still in Aperture Priority mode, take a test shot to obtain the base shutter speed. It’s the shutter speed from this test shot that will form the basis of your long exposure calculations.

It’s a good idea to review the test shot to ensure the exposure looks good and everything is perfectly in focus. When you’re happy with your test shot, check the metadata and make a mental note of the shutter speed.

17 Long Exposure Photography 101 How to create the shot

Aperture Priority test shot – In this case, the camera’s light metering used a shutter speed of 1/60th. This shutter speed will form the basis of the long exposure calculations.

Step 6: Bulb Mode

Switch your camera mode from Aperture Priority to Bulb Mode and set your ISO and aperture to mirror the exact same settings as your test shot.

18 Long Exposure Photography 101 How to create the shot

Bulb Mode – Set the ISO and aperture to match your test shot.

Bulb Mode allows you to keep your shutter open as long as you hold down your camera’s shutter button. However, standing next to your camera and keeping the shutter button held down with your finger isn’t ideal. Not only would this cause lots of camera shake, it would also make it nearly impossible to enjoy a cup of tea on the job (it’s clear where my priorities lie).

This is precisely why you’ll need a shutter release cable with a locking function. The lock plays the role of your finger and keeps the shutter button held down until you decide to release the lock, thus minimizing the possibility of camera shake.

Step 7: Calculate Your Long Exposure

Enter the shutter speed from your test shot into the long exposure calculator app you installed on your smartphone in step 1.

19 Long Exposure Photography 101 How to create the shot

Enter the shutter speed from your test shot into your Long Exposure Calculator mobile phone app.

You will then need to set the filter density to match your ND filter. For example, if you’re planning to use a 16-stop filter, you would enter 16-stops into the app.

The app will then calculate the length of your long exposure. It’s worth noting here that this time is approximate. It doesn’t account for a change in weather conditions during the exposure or the quality of your ND filters. I use Lee Filters and from experience, I find adding approximately 25% to the app’s suggested exposure time works well.

Step 8: Set a Timer

Load your long exposure time into your smartphone’s timer. You will trigger this at the same time you commence the long exposure to keep track of timing.

20 Long Exposure Photography 101 How to create the shot

With a 16-stop ND filter and a base shutter speed of 1/60th, The Long Exposure Calculator suggested that I will need an exposure time of 18 minutes. I added approximately 25% to allow for the changing light conditions and created a timer on my phone.
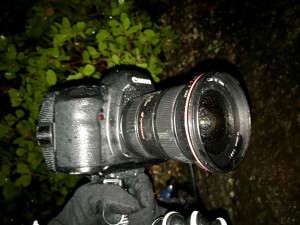
Step 9: ND Filters

Mount your ND filters to your camera. Be careful not to adjust the focus or zoom rings of your lens in the process. It’s a good idea to double check your lens is still set to manual focus.

21 Long Exposure Photography 101 How to create the shot

Mount your ND filters to the camera.

Step 10: Mirror Lock-up

If you’re using a DSLR, enable Live View or the mirror lock-up function. These features lock your camera’s mirror in the up position, which reduces internal camera vibrations when you trigger the shutter.

22 Long Exposure Photography 101 How to create the shot

Live View or the mirror lockup function will prevent camera vibration when you trigger the shutter.

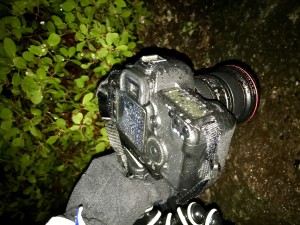
Step 11: Cover the Camera

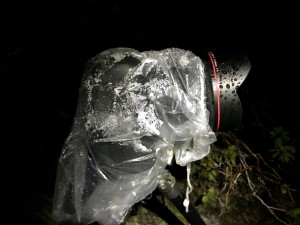
Carefully cover your camera with a dark cloth or a hat, being careful not to adjust the zoom or focus rings on your lens. This will help to prevent light from leaking into your camera during the exposure.

23 Long Exposure Photography 101 How to create the shot

Perhaps the most crucial step – use a dark cloth, hat, or an old pair of trousers to wrap around your camera to prevent light leaks.

Step 12: Trigger the Shutter

Now it’s time to create your ethereal masterpiece. The aim here is to simultaneously trigger your smartphone’s timer with one hand (this will keep track of your exposure time) and with your other hand, lock the shutter release cable to hold open your camera’s shutter. If you’re like me, and the mere thought of doing two things at once confuses you, you can simply trigger them one at a time.

All that’s left for you to do at this point is make yourself comfortable and enjoy that cup of tea! Finally! And because you set a countdown timer on your smartphone, its delightful little chime will alert you when it’s time to get up to release the lock on your shutter release cable. Thereby closing the shutter and completing your long exposure photograph.
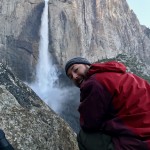
The Result

So, what do you get after spending a leisurely afternoon in front of a beautiful scene sipping from your thermos and nibbling on a cookie? Well, it’s likely you’ll return home with an image that looks something like this.

24 Long Exposure Photography 101 How to create the shot

23-minute long exposure – processed in Lightroom and Photoshop.

Recap

The very nature of creating long exposure photographs is to slow down. It encourages you to step away from the rapid-fire approach and have fun creating something that you wouldn’t ordinarily be able to see. That’s what long exposure photography is all about.

By now, I’m hoping this article has you reaching for your ND filters and checking the weather forecast – I’m sure you’ll love giving it a try. In case you need a short reminder whilst you’re out in the field, here’s a snapshot of everything we’ve covered.

  1. Research your location, charge your gear and install the long exposure calculator app on your smartphone.
  2. Work the scene to find the best angle.
  3. Set up your tripod and compose your shot without the ND filters.
  4. Switch your camera to Aperture Priority mode. Set your aperture between f/7.1 – f/11.0 and your ISO to 100. Focus in on your subject and set your lens to manual focus.
  5. Cover your viewfinder and take a test shot.
  6. Switch your camera into Bulb Mode and set your aperture and ISO to match your test shot.
  7. Use the long exposure calculator app to calculate your exposure time.
  8. Set a timer on your smartphone.
  9. Mount your ND filters.
  10. Enable live view or your camera’s mirror lock-up feature.
  11. Cover the camera with a dark cloth or hat.
  12. Lock open the camera shutter and trigger your smartphone timer.

If you have any questions, please ask. And it would be great to see your long exposure photographs, so please share them in the comments below.

The post Long Exposure Photography 101 – How to Create the Shot by William Palfrey appeared first on Digital Photography School.


Digital Photography School

 
Comments Off on Long Exposure Photography 101 – How to Create the Shot

Posted in Photography


Weekly Photography Challenge – Your Best Smartphone Shot

03 Feb

Likely you have a smartphone as well as your main camera – whether that be a DSLR, mirrorless or other. This week your challenge is to come up with the best shot you can using just your smartphone. So you can’t rely on fancy lenses or advanced settings – you’ll need to use light and composition and creativity to your advantage here!

If you need some help check out: Tips for Better Smartphone Photography

Weekly Photography Challenge - Your Best Smartphone Shot

Weekly Photography Challenge – Smartphone Shots

Simply upload your shot into the comment field (look for the little camera icon in the Disqus comments section) and they’ll get embedded for us all to see or if you’d prefer, upload them to your favorite photo-sharing site and leave the link to them. Show me your best images in this week’s challenge. Sometimes it takes a while for an image to appear so be patient and try not to post the same image twice.

So get creative, let’s see what you can do?

Share in the dPS Facebook Group

You can also share your images in the dPS Facebook group as the challenge is posted there each week as well.

The post Weekly Photography Challenge – Your Best Smartphone Shot by Darlene Hildebrandt appeared first on Digital Photography School.


Digital Photography School

 
Comments Off on Weekly Photography Challenge – Your Best Smartphone Shot

Posted in Photography


Steven Soderbergh shot his latest movie entirely on the iPhone, calls it a ‘gamechanger’

01 Feb

We’ve seen plenty of film makers shooting movies on an Apple iPhone in the past. However, director Steven Soderbergh—whose filmography includes movies such as Erin Brockovich, Traffic, and Ocean’s Eleven—is arguably the highest-profile iPhone movie makers yet.

His latest project, the psychological horror-thriller Unsane, was shot entirely on the iPhone, and Soderbergh wasn’t afraid to admit (and embrace) that fact when speaking to IndieWire.

“I think this is the future,” Soderbergh said. “Anybody going to see this movie who has no idea of the backstory to the production will have no idea this was shot on the phone. That’s not part of the conceit.”

In fact, the director was so impressed by the iPhone’s movie capabilities and the recorded levels of detail, that he is likely to also use the Apple smartphone for future projects. “People forget, this is a 4k capture. I’ve seen it 40 feet tall. It looks like velvet,” he told IndieWire. “This is a gamechanger to me.”

We don’t know which exact iPhone model(s) Soderbergh used in the production of the movie, but it’s fair to speculate that the latest iPhone X/iPhone 8 generation was deployed in combination with all sorts of professional lighting, audio and stabilization equipment.

By the way, in case you’re curious, the movie’s synopsis is the following:

A young woman is involuntarily committed to a mental institution where she is confronted by her greatest fear – but is it real or is it a product of her delusion?

You can find more information about the movie on its website and view the trailer at the top of this page.

Articles: Digital Photography Review (dpreview.com)

 
Comments Off on Steven Soderbergh shot his latest movie entirely on the iPhone, calls it a ‘gamechanger’

Posted in Uncategorized