RSS
 

Posts Tagged ‘Shooting’

Shooting the Sony a7 III around the Pacific Northwest: Sample gallery updated

24 Mar

$ (document).ready(function() { SampleGalleryV2({“containerId”:”embeddedSampleGallery_6769434587″,”galleryId”:”6769434587″,”isEmbeddedWidget”:true,”selectedImageIndex”:0,”isMobile”:false}) });

Now that we’ve gotten the Sony a7 III in our Seattle offices and are working our way through our full review, we’ve updated our sample gallery with a selection of our favorite images from our neck of the woods.

From cherry blossoms at the University of Washinton to coastal lighthouses and even a few furry friends for good measure, check out our gallery for a taste of Seattle in the springtime.

See our updated Sony a7 III gallery

Articles: Digital Photography Review (dpreview.com)

 
Comments Off on Shooting the Sony a7 III around the Pacific Northwest: Sample gallery updated

Posted in Uncategorized


Behind the scenes: Shooting Lamborghinis in the snow

16 Mar

Every year, Lamborghini puts on something called the “Winter Accademia.” It’s a week-long event wherein professional racing drivers teach clients how to drive the latest Lamborghini supercars on snow and ice—in short: one of the coolest events a motorsport photographer could cover. And this year, motorsport photojournalist Jamey Price was there to document the whole thing.

I stumbled across Jamey’s story earlier this week on Facebook, where he shared the Behind the Scenes video above. But rather than just post the video without further context, I reached out and asked Jamey for some details about the Winter Accademia and what it’s like to shoot it.

What he ended up sending us is worth publishing in full, so read on to find out what it’s like to shoot the Lamborghini Winter Accademia 2018, and then scroll through the gallery at the bottom to see some Jamey’s favorite shots from the event.


Shooting the Lamborghini Winter Accademia 2018

Every winter, Lamborghini North America organizes a driving event called Winter Accademia for existing and prospective clients to drive the latest Lamborghini models on snow and ice. Most people see a Lamborghini as an exotic car meant for driving in “normal” conditions, but in reality, with a little help from Pirelli winter tires with small metal studs, they are more than capable as performance cars on the ice too.

I’ve been fortunate to work with Lamborghini since 2013 covering races, as well as private driving events, concours and auto shows around the United States. This is simply one of the many events that is organized for the brand during the year. But as you can guess, it’s one of my favorites.

Lamborghini descended on Hotel Sacacombie on the lake that bears the same name in Quebec for a week of driving in late February and early March. The cold temperatures during the winter freeze the lake with over 30 inches of ice, which is more than enough to drive on. The track is simply a plowed section of snow on the frozen surface of the lake where we can run a drift circle, figure eights and the full track where a team of 7 professional racing drivers can teach clients the finer points of drifting a Lamborghini.

As a photographer, it doesn’t get much better than this. Yeah, it’s long days in the cold which is brutal on both the gear and myself, but it’s amazing photography chasing these high performance cars in an environment that is very contained, safe and, most of all, fun.

Especially with the professional drivers, I can put myself in places I would never consider standing under normal conditions at a track. Because everything happens in slow motion on the ice, you can get pretty close and capture lots of photos of the cars completely sideways and throwing snow and ice into the sky.

Credits: Lamborghini, Lamborghini Squadra Corse, IRIS Worldwide and the amazing team of professional drivers I’m fortunate to work with every week.


$ (document).ready(function() { SampleGalleryV2({“containerId”:”embeddedSampleGallery_3009395153″,”galleryId”:”3009395153″,”isEmbeddedWidget”:true,”selectedImageIndex”:0,”isMobile”:false}) });

A big thank you to Jamey for sharing his experience and photos with us. To see more of his work or follow along as he shoots some of the most adrenaline (and gasoline) fueled events around the world, visit his website or give him a follow on Instagram and Facebook.

Articles: Digital Photography Review (dpreview.com)

 
Comments Off on Behind the scenes: Shooting Lamborghinis in the snow

Posted in Uncategorized


My First Time Shooting Infrared Photography

11 Mar

Up until a few months ago, my only experience with infrared photography was through the work of Minor White and a few other photographers that shoot masterful infrared photographs. Their images were dreamy scenes with glowing trees that completely transformed my idea of what made a beautiful picture.

Most people I speak to about infrared photography immediately say something about the movie Predator or ask, “You mean like those cameras they use in police chases, right?” While those are in fact infrared cameras, they use thermal infrared which…hang on. I’m getting ahead of myself here.

My First Time Shooting Infrared Photography

A couple weeks ago I was lucky enough to have the opportunity to try out an infrared converted digital camera (Canon 60D) from LifePixel Infrared. Seeing as this would be my first time shooting any type of infrared photography I immediately wanted to share my experience with anyone who might be considering taking the leap and trying infrared picture work.

In this article, I’m going to take you along with me and tell you all about my first experience shooting infrared. This will not be a tutorial on how to make and process infrared but rather a real-world account from an infrared newbie. And I promise, no more Predator references.

The Camera

It might come as a surprise but all digital cameras are capable of capturing infrared images. The reason your unconverted DSLR can’t is that manufacturers add filters to purposefully eliminate (or greatly reduce) light in infrared wavelength from reaching the sensor. An infrared conversion is essentially camera surgery where the infrared eliminating filter is replaced with one that allows infrared light to pass through.

My First Time Shooting Infrared Photography

And unconverted sensor.

In reality, the images we think of as infrared are in fact near infrared. This type of light has a wavelength that hovers approximately around 700nm. Exactly how much infrared light passes through to the sensor depends on the filter and the type of conversion.

The 60D I was sent sports LifePixels’ popular Super Color IR filter which allows for a more flexible infrared experience because it also allows a small amount of visible light to pass through as well. This Super Color filter leaves lots of room for incredibly creative and downright insane post-processing possibilities for working with color and black and white pictures. The filter looks dark red (below) compared to a non-converted sensor filter (see above).

My First Time Shooting Infrared Photography

The infrared converted camera from LifePixel.

Aside from that, there’s not much to say about the external appearance of the converted Canon 60D. It just looks like a normal 60D. This is a good thing in my opinion. Given the complexity of the conversion procedure, it’s nice to see all the screws and joints of the camera remaining just as they were before.

Out and about with infrared

The entire experience of actually shooting images with an infrared camera was incredibly different than how I had imagined. Not at all in a negative or even difficult way, but the creative involvement that was needed reminded me of shooting film and also added an element of excitement you don’t always get when shooting straight digital.

I had assumed that using an infrared camera would be fairly straightforward. Meaning that the image that came out of the camera would essentially be an entity unto itself complete with weird colors and that finished infrared look. This is not the case. Have a look at a RAW infrared photo fresh from the camera equipped with the Super Color IR filter.

My First Time Shooting Infrared Photography

Shock. Panic. Gnashing of teeth. When I saw this on the LCD screen my heart sank. What had I done wrong? This wasn’t the cool looking picture I had expected. As it turns out, everything was just as it should be. So, if you’re thinking about using an infrared camera for the first time take some comfort in knowing that things are going to look downright horrible until the image is appropriately processed. We’ll talk about the post-processing of the infrared images a little later.

And seriously, I mean just look at that. They really do look horrible. Moving on…

The best thing about putting the camera into use is relearning how to visualize a photo before you actually snap the shutter. As I said, this is something that has been lost in translation during the digital age. Shooting infrared brings in a fresh feeling of involvement when shooting because you can make all the creative choices but still not know what you have until the photo has been processed.

What’s more is that infrared photography loves being shot in harsh midday light that would normally be absolutely fatal to most sorts of photography. Which is actually really cool. Something I would recommend is to make use of your camera’s Live View mode if it is so equipped. This allows you to see what your sensor sees in real-time.

Also, note that with infrared converted DSLR cameras there can be a slight focusing inaccuracy when shooting at wider apertures unless it is corrected (which LifePixel offers). The Canon D60 I tested out was focused corrected before it was sent to me. Now, let’s talk about the completely incredible way (but not the only way) I processed some of the photographs I made with the infrared converted 60D. You’re not going to believe this.

Post-processing the IR images

My First Time Shooting Infrared Photography

Let me start off by saying that post-processing infrared photos is not difficult. The biggest help you can give yourself is to remember these images are just photographs, but they are photographs that include nearly infrared light.

I feel as if I entered into the post-processing phase of my newly shot IR photos with a certain timidness, which was completely unfounded. While we’re about to briefly talk about the biggest hurdle I had to overcome with the processing the overall concept of editing an IR photo is really no different than any other picture.

The Magical Realm of White Balance

If you’ve ever heard someone say “always shoot RAW” and doubted the truth of it – let me tell you now that when it comes to post-processing your near-infrared images, shooting in RAW format is essential. I made the mistake of not switching the camera from JPG (my fault, I should have checked) to RAW and the resulting images were completely unusable.

Why? Because JPG files simply do not have the information to effectively set an accurate White Balance in post-production. If there’s one thing that is completely 100%, definitely, totally essential, and inescapable it is that White Balance is key to a successful infrared photograph.

My First Time Shooting Infrared Photography

The challenge with IR converted cameras is that the influx of IR light confuses the camera so that Auto White Balance is completely inaccurate. You can set a Custom White Balance in camera and the easiest way is set it off of green foliage (chlorophyll reflects infrared and is thusly white or close). But if you want to do it all in the editing phase, here’s a quick run-through of how to get it done.

Using Adobe’s DNG Profile Editor

This goes back to what we talked about earlier in this section. Don’t assume that there is a secret to IR photography processing. They are no different from normal photos in that you should have a desired White Balance and exposure. That’s it.

The problem with setting a White Balance for IR images in post-processing is that the color temperature can’t go low enough to correct the image. This is where an often neglected section of Adobe Lightroom called “Camera Calibration” will quite literally save you from pulling out clumps of your hair in frustration.

Using an even lesser known piece of Adobe wizardry called the DNG Profile Editor, you can create a custom White Balance profile and place it in the Camera Calibration section of Lightroom. This is what will allow you to accurately color correct your IR photos.

My First Time Shooting Infrared Photography

Never heard of the DNG Profile Editor? Don’t worry, I wrote a book on Lightroom and I had no clue about it myself. Firstly, it’s a free download from Adobe that allows you to create custom profiles based on your camera, and save those so that they appear in the Camera Calibration section of Lightroom.

Read more here: How to Use Adobe’s DNG Profile Editor to Make Custom Camera Profiles

My First Time Shooting Infrared Photography

My First Time Shooting Infrared Photography

It’s easy, actually kind of fun, and it doesn’t take much time. We’ll skip the particulars but if you want to learn more about the entire IR process, check out this excellent video from B&H Photo by Vincent Versace.

Once you’ve created your custom camera profile it can then be applied to any image you make with your IR converted camera. Then you can go back and make detailed White Balance selections based on the particular image you happen to be editing at the time. Here’s that RAW image again from earlier as it looked straight from the camera.

My First Time Shooting Infrared Photography

My First Time Shooting Infrared Photography

With the White Balance corrected using the custom profile from the DNG Profile Editor.

My First Time Shooting Infrared Photography

With a color channel swap (blue/red) in Photoshop and some basic editing back in Lightroom.

The possibilities really are endless and include black and white conversions, color swaps in Photoshop, selective color, as well as any other edits you feel like trying out!

Here are a few more images I shot with the IR converted Canon D60 from LifePixel.

My First Time Shooting Infrared Photography

My First Time Shooting Infrared Photography

My First Time Shooting Infrared Photography

My First Time Shooting Infrared Photography

Final Thoughts on My First Infrared Experience

Often times I talk about the importance of stepping outside of your comfort zone when it comes to your shooting. It’s essential to be bold and extend your creative reach which will, in turn, help you grow technically, professionally, and creatively.

My first time shooting infrared is a classic example of how refreshing it can be to try something completely new with your work. I learned so many new things and reminded myself of how much I truly love this thing that we all do, called photography. Needless to say, my time shooting infrared was immensely positive. Here are a few tips that will help avoid some pitfalls should you decide to try IR photography for yourself:

  • Shoot RAW.
  • Use your camera’s Live View mode.
  • Remember plants and foliage generally reflect IR light.
  • Accurate White Balance is a MUST!
  • Use Adobe’s DNG Profile Editor to create a custom color profile for your camera.
  • Remember there is no set way to edit your IR photographs.

Check out LifePixel Infrared at their website. Not only are they a group of super nice people who do awesome camera conversions but they also offer a treasure trove of educational information about infrared photography and post-processing infrared images.

I hope you enjoyed taking a trip with me during my first time with IR photography. Next on the agenda? Deciding which of my cameras to have converted to IR.

The post My First Time Shooting Infrared Photography by Adam Welch appeared first on Digital Photography School.


Digital Photography School

 
Comments Off on My First Time Shooting Infrared Photography

Posted in Photography


Major ON1 Photo RAW update adds tethered shooting, better noise reduction and more

10 Mar

ON1 just released a major update to its photo editing software ON1 Photo RAW. The update, version 2018.1, brings with it a host of feature upgrades, including: better auto-alignment for the HDR mode, improved high ISO noise reduction, and more detailed image sharpening. The update also includes a new tethered shooting function for certain Nikon and Canon DSLRs, as well as a new import utility that allows metadata to be added as images are sucked in from the camera.

Video files can now be seen in the browser, and new sort features allows user to browse imported images in a number of ways, such as by file type, date, file name or rating. Users can also batch rename groups of images, and a date-and-time editing function lets you adjust the recorded moment an image was shot.

Finally, the company has also made some changes to the way images are debayered to improve the amount of micro detail preserved in the final render.

ON1 says its priorities are image quality and processing/handling performance:

“Version 2018.1 isn’t just about the new features, although there are many powerful new additions,” says ON1 Director of Product Dan Harlacher. “Image quality and performance are the top priorities in every update, and we are very excited for our customers to experience these improvements for themselves in this update.”

New users can take advantage of a free trial, or purchase the software in its entirely (usually $ 120) for a special limited-time price of $ 80. If you’re already using Photo Raw 2018, the new version is free.

For more information, visit the ON1 website.

Press Release

ON1 Photo RAW 2018.1 – New Update Available

Portland, OR – March 1, 2018 – ON1, Inc. is pleased to announce the immediate availability of the new ON1 Photo RAW 2018.1, the first major free update to Photo RAW 2018. Version 2018.1 includes image quality enhancements, performance improvements, and key features to optimize the photographer’s workflow.

“Version 2018.1 isn’t just about the new features, although there are many powerful new additions. We’ve been very focused on image quality and the results customers get from using ON1 Photo RAW. Image quality and performance are the top priorities in every update, and we are very excited for our customers to experience these improvements for themselves in this update,” says Dan Harlacher, Director of Product at ON1.

New Improvements

  • Debayering – The algorithms have been improved to increase the amount of micro detail while reducing aliasing, yielding photos that are noticeably crisper with less color artifacts.
  • HDR – HDR alignment and deghosting have improved, yielding sharper results with less ghosting, noise, and color fringe. Users now have the ability to select which frame is used for deghosting and can also adjust the amount of motion visible in water and clouds.
  • Faster Cataloging – The thumbnail and preview generation of images is now faster. Searching photos has also been improved.
  • Noise Reduction – Improvements to reduce large noise from very high ISOs. Automatic hot-pixel removal has been added, and green and purple color aberration reduction has improved.
  • Sharpening – The sharpening algorithms have been improved to enhance micro details and provide sharper initial results.
  • Panorama – The panorama merge dialog now does a better job with vertical panoramas as well as really large ones. It can now stitch together up to 25 photos at a time. Blending of photos to compensate for differences in exposure and white balance have been improved.
  • Preview Quality – The preview window has been improved to more accurately reflect the details and sharpness in photos at different zoom levels.

New Features

  • Import – Get photos from your camera to your computer, choose where you want the photos to go, assign metadata, and more.
  • Tethered Shooting – Get your photos to your computer instantly and apply import settings. Currently supports Canon and Nikon.
  • Soft Proofing – Simulate what your photo will look like when it’s printed.
  • Metadata Templates – Add metadata to a group of photos using presets. This allows you to choose and save only the information you want applied to your photos.
  • Video Browsing & Organizing – Now supports viewing video files so you can organize those as well. Copy, move, name, add metadata, and more.
  • Custom Sorting – This option in Browse allows you to put your photos in any order you choose.
  • Batch Rename – Rename all of your photos in a batch to add unique information to filenames.
  • Edit Capture Date – Adjust date and time on your photos so they match the actual date and time they were taken.
  • Auto Advance – Automatically switch to the next photo during the culling process when rating or tagging photos.
  • Additional Camera & Lens Support — Added support for several new cameras and many new lenses. See the full list here.

About ON1 Photo RAW

ON1 Photo RAW 2018.1 is the only photo editor designed by photographers for photographers. ON1’s unique community-driven development approach via The Photo RAW Project gives customers a voice in how it’s designed, allowing users to submit ideas and vote on new features. With fast photo management, hundreds of customizable photo effects, powerful masking tools, HDR, panos, layers, and other Lightroom and Photoshop-like features, Photo RAW 2018.1 is the ultimate all-in-one photo editor and raw processor with no subscription.

Craig Keudell, CEO of ON1 says “Our vision for Photo RAW has always been that it would the fastest, most flexible, and easiest-to-use raw processor and photo editor on the market. A single photography centric photo editor with powerful Lightroom® and Photoshop®-like features photographers can own and enjoy for many years. Photo RAW has come a long way in a short time and we are both excited and very busy building new exciting technologies for our next update.”

ON1 Photo RAW 2018.1 isn’t just for raw files. Supported file formats include JPEG, TIF, PSD, PSB, PNG, and DNG are supported and benefit from the speed, performance, and abundance of editing tools in the app. Photo RAW 2018.1 continues to work seamlessly within current photography workflows. The app integrates as a plug-in for Adobe® Lightroom® Classic CC and Photoshop® CC and further builds its case as a complete standalone photo editor or alternative to the Adobe Photography Plan. Version 2018.1 also integrates with the major cloud services to allow for uploading, managing, and editing photos across multiple computers. This allows users to sync photos and their edits across multiple computers or in a studio setting.

Price and Availability

ON1 Photo RAW 2018.1 is available now for an introductory price of $ 79.99 for a limited time (Reg: $ 119.99). A free and fully functional 30-day trial is also available on the ON1 website. A single purchase of ON1 Photo RAW 2018.1 will include both Mac and Windows installers and activation for up to five computers. It comes with a 30-day money-back guarantee, world-class customer support, hundreds of free video tutorials, and free ON1 Loyalty Rewards every month.

For More Information

* ON1 Photo RAW 2018.1 Introductory Special
* Free 30-Day Trial
* The Photo RAW Project
* About ON1

Articles: Digital Photography Review (dpreview.com)

 
Comments Off on Major ON1 Photo RAW update adds tethered shooting, better noise reduction and more

Posted in Uncategorized


Announcement: Strobist Full-Day Shooting Workshop, June 7th in Washington, DC

10 Mar

Just a quick heads-up that I’ll be teaching a small-class lighting workshop in Washington, DC this June 7th. It is part of the Focus on the Story International Photo Festival being held June 7-10.

This class is small — a maximum of 16 people — and we will be shooting all day. It is designed for people who are new to intermediate in their lighting skills. If you are comfortable with shooting in manual mode, you will not be out of place. If you already have some experience, we will happily stretch you out a bit.

If you have your own lighting gear (small flash only, please) feel free to bring it. But you need not, as lighting gear will be provided for the class. Just bring a camera, normal range lens (a kit zoom would be fine) a storage card and batteries and you are good to go.

I teach this class a lot; it’s my favorite course. But oddly, almost never in the U.S. In fact, this is the only time I am scheduled to teach a small shooting workshop in the U.S. this year.

Here is my promise: if you show up as an “available light” photographer, you will leave as a lighting photographer. Period. I guarantee it. (In fact, I won’t let you leave until you understand it. So if you are intimidated, maybe… bring a sleeping bag.)

The class, which includes lunch, is $ 230. You need not sign up for the whole festival to take this class. (But the festival has a really strong speaker lineup, and a 40% off early bird discount until March 18.)

Links below, hope to see you there. (Hit me on Twitter if you’re coming!)
__________

FOTS International Photo Festival
My Lighting Workshop
Strobist

 
Comments Off on Announcement: Strobist Full-Day Shooting Workshop, June 7th in Washington, DC

Posted in Photography


Pros an Cons of Shooting Alone Versus Being a Group Photographer?

06 Mar

An age-old question in life, not just photography, is are you a pack animal or a lone ranger? Everyone reading this will have their own answer to this question, it’s not even a black and white answer. In this article, the question posed is whether you shoot alone or are more of a group photographer?

Let’s take a look at the two different approaches to doing photography, and then compare them to see which one is better. Whether one is better is really just subjective, but depending on your favored form of photography you’ll certainly have a preference.

Do you Shoot Alone or are you More of a Group Photographer?

Joining other photographers is great, although they sometimes get in your shot!

Photographing solo

The preference for many photographers is to photograph alone. There are a lot of good reasons why this is best, so let’s take a look at a few of them:

  • Get into the zone – To achieve the best photos, being distracted by others is rarely a recipe for success. Photographers will often get into a zone where a heightened sense of the environment around them will lead to better photos.
  • Set your own schedule – When you visit a place, and how long you spend there are very important factors in photography. Whether you’re a street photographer waiting for that perfect moment, or a landscape shooter photographing blue hour, the schedule matters.
  • Choose where to visit – Equally important, and related to the point above is where you choose to visit and shoot. Even if you travel with a fellow photographer, they may well want to visit a different place to suit their style of photography. Shooting alone allows you to be totally focused on your goal.
Do you Shoot Alone or are you More of a Group Photographer?

Photographing alone is the favored choice of many photographers, it helps you get more in the zone.

  • Get your own angle – There will never be another photographer standing in the way of your composition when you photograph alone. Equally, you don’t need to worry about getting in the way of someone else, or getting to the best angle second.
  • Curate your own photo –  Those who do portrait photography will know that creative control of the pose and position of your model are key. As is forming a close working relationship with your model. When photographing without other photographers these things are easier to achieve.
  • Learn from your own mistakes – You’ll make mistakes along the way, even those with experience do. It might mean adding to your knowledge after you have made your mistake, but the next time you photograph this self-improvement will take you up a level.
Do you Shoot Alone or are you More of a Group Photographer?

The chance to work one to one with a model means you can work on your own concepts and ideas.

Photographing with a group

Of course, sharing your photography with others has some drawbacks, but there are also a lot of positives to photographing with other people. So whether you’re a solo or group photographer take a look at this list, and decide for yourself if you can benefit from joining a group, even if only occasionally.

  • Share your experience – The act of exploring and seeing a new place is often more pleasurable when you have company. You may even be able to model for each other if the location would be better enhanced with a person in the scene.
  • Pool your resources – Photography can be expensive when it comes to equipment, model hire, and location rental. These costs can be cut considerably by joining forces with other photographers.
  • Share knowledge – One of the very best ways to learn about photography is from other photographers, that’s why you’re here right? Whether you’re experienced or new to photography you’ll find everyone can offer advice or tips that could improve your work.
Do you Shoot Alone or are you More of a Group Photographer?

Joining a group of photographer allows you to dip into their pool of knowledge.

  • Safety – Carrying an expensive piece of camera gear? Heading out late at night for some photography? Having a few people with you when you photograph makes it a lot safer.
  • Collaborations – To create a group project, you need a group! So getting to know some fellow photographers will facilitate this. Likewise, photographing a model often takes more than one person, sharing duties to hold the light stand helps a lot.
  • Share your photos – Groups of photographers often share their work either each other. Sharing your photos is a great way to improve your photography, as you often get feedback on the photos you have shared.
Do you Shoot Alone or are you More of a Group Photographer?

This group of photographers was on a photo walk which I organized.

Do you Shoot Alone or are you More of a Group Photographer?

This is a photo taken on that photo walk, it was later shared with the participants through social media.

Being a solo or group photographer, which is best?

There are lots of pros and cons for shooting alone or with a group of photographers. The best answer is to make time to do both. Join a group perhaps once a week, and photograph by yourself on other occasions.

The genre of photography you do will also have a big impact on your choice, portrait photographers using strobes often need a team. On the other hand, if you’re a landscape or street photographer photographing alone may be best.

There is a middle solution though. The group doesn’t have to be large, perhaps only two or three. When all the photographers share the same interest, it can be just like photographing alone, only you have a group.

Do you Shoot Alone or are you More of a Group Photographer?

Are you a solo or group photographer? Why not be both? My friend and fellow dPS writer Pete DeMarco is someone with whom I’ve often photographed. We allowed each other enough space to photograph “alone” but then meet later after we’re done shooting.

Do you Shoot Alone or are you More of a Group Photographer?

Myself and Pete enjoy taking cityscape photos, so meeting up to do the same style of photography makes sense.

What kind of group should you join?

There are plenty of types of groups that you can join if you’re interested in meeting some new people. Not all of them even require you to meet other photographers in person, we do after all live in a digital global age. So let’s take a look at a few possibilities.

  • Attend a photo walk – These are often one-off events and can involve large crowds. They’re great for meeting a lot of new faces, not always so good for taking the best photo. A very well known event like this is Scott Kelby’s worldwide photo walk, held once a year. An alternative idea to a photo walk is a potluck photography party, why not try it out?
Do you Shoot Alone or are you More of a Group Photographer?

This steel wool fire spinning photography event was organized by a photography club.

  • Join a photo club – A great way to meet other photographers on a regular basis, and therefore learn from them. Groups like this often organize photography outings or perhaps hire a model for the club members to work with and photograph.
  • Online communities – In reading and participating with this website you are part of a photography community. Even though not in person, participating online is a great way to gain knowledge. There is always the possibility of travel as well, you can meet people on a trip perhaps.
  • Take part in a workshop – Meeting other photographers on a workshop is a great way to socialize, and learn at the same time.
Do you Shoot Alone or are you More of a Group Photographer?

Joining a group of photographer allows you to share the cost of hiring a model. It also means you lose control of pose and position. You also need to avoid getting into each other’s photos.

Are you a solo or a group photographer?

So which kind of photographer are you? A solo or a group photographer? Are there any other reasons why you like to photograph alone, or in a group?

If you photograph alone, why not reach out to a group and become part of a community. Although it’s nice to photograph alone, there is a raft of benefits to joining up with others. You’ll likely make some new friends, the type you can form a close friendship with through a shared interest.

The post Pros an Cons of Shooting Alone Versus Being a Group Photographer? by Simon Bond appeared first on Digital Photography School.


Digital Photography School

 
Comments Off on Pros an Cons of Shooting Alone Versus Being a Group Photographer?

Posted in Photography


How to Refresh Your Creativity by Shooting Digital with a Film Mindset

26 Feb

There exists a strange and long standing line drawn in the weird sands of the photo world. On one side of that line you have those who shoot only digital images and on the other, you have those who still swear by analog film. Then there’s a hazy gray area (probably 18% gray) where people like myself reside.

Do you shoot film or digital? Seeing as this is Digital Photography School, I assume the answer to that question likely leans towards the latter. I started out on my photographic journey with a 35mm SLR, then moved to a DSLR and mirrorless, until I now strike a weighted balance between digital and large format film photography.

Why am I telling you all of this? The reason is simple; we all want to make better images and we all want to grow as photographers.

How to Refresh Your Creativity by Shooting Digital with a Film Mindset

Stay with me here….Consider for a moment that instead of choosing sides on that imaginary line between film and digital photography, while pointing out the perceived benefits of digital over film, that there are many lessons to be learned from the film shooter’s mindset.

In this article, we’re going to look at some ways shooting film, or at least with the mentality of film, can help you with your digital photography skills. And no I won’t try to persuade you to jump from one side of the line to the other.

Shoot like it isn’t free

If there’s one thing that has both illuminated the field of digital photography while at the same time stamping out the classical mental focus involved in the craft it is this…

How to Refresh Your Creativity by Shooting Digital with a Film Mindset

This little piece of plastic and silicon cost me about $ 13 and holds well over a 1000 images when used in my 36.4-megapixel camera. That’s a lot of photographs. What’s more is that it doesn’t end there. I can hypothetically erase and reuse this contraption an unlimited number of times.

My camera will wear out (knock on wood) before this memory card does. Now, compare that memory card to this:

How to Refresh Your Creativity by Shooting Digital with a Film Mindset

This is a box of one of the 4×5 sheet films that I use with my large format camera. It cost me around $ 40 after it was all said and done. That’s 25 sheets of film that I will have to load into holders under complete darkness, put into my view camera, expose for about $ 1.60 each, and then bring back home to develop in my darkroom. And that’s just the first phase.

If I want to print images from those negatives I have to either scan them into the computer or print them myself in the darkroom using light-sensitive paper and even more chemicals and equipment.

Which causes more pause before shooting?

So, here we have two entirely different mediums to record what is essentially the same thing. Which one do you think I am more careful with when shooting? The $ 40 box of film or the $ 13 memory card?

If I make a mistake in exposure, composition, or anything else when I’m shooting digital there is virtually instant feedback and the error usually costs nothing. With film, the result is hidden and any “Uh-ohs!” are only evident after the fact.

How to Refresh Your Creativity by Shooting Digital with a Film Mindset

I urge you to shoot as deliberately as possible when using your digital camera. Sure, even a well thought out photo can go bad regardless of planning but the more you think about what you’re doing the fewer variables there are in the equation.

Pay attention to what you’re shooting and why. Photograph as if every frame costs you money and I promise that you will begin seeing better results with your digital photos.

Choose an ISO and stick to it

Something that we take for granted with digital photography is the quick application of ISO changes. Usually, a prompt turn of a dial can take you from ISO 100 to ISO 6400 and back again in a few seconds.

How to Refresh Your Creativity by Shooting Digital with a Film Mindset

This is not a bad thing. Changing ISO on a digital camera opens up astounding creative possibilities and lets you get shots you would have otherwise missed when the light changes suddenly.

That being said, it can also spoil us to the point where we crank up the ISO at times when we might possibly find more creative alternatives. Try this to practice – choose an ISO for the day and shoot at only that ISO setting.

Granted, I wouldn’t try this on a wedding shoot…but go out with your camera set to say, ISO 400, and force yourself to think through difficult lighting conditions. You might find you gain a better understanding of the relationships between shutter speed, aperture, and ISO that will help you immensely in the future.

Make a set number of exposures

Before I moved into digital photography I used 35mm film. Most rolls were of the twenty-four exposure variety with some being extended to thirty-six. That seems like a million frames when compared to the two sheets carried in each large format film holder or the eight with my Polaroid SX70.

How to Refresh Your Creativity by Shooting Digital with a Film Mindset

As much as I love my film cameras, I still use digital for over 80% of my “professional” work. Each time I switch back and forth between film and digital I notice a strange change in the way I shoot particular scenes. It goes back to our first point about how film actually costs money with each click of the shutter.

I tend to essentially overshoot a scene with digital. I may take 10 or 12 images of a frame whereas with film I might only make one or two. Why is that? When you think about it, making consistently solid photographs isn’t a matter of firing off a bunch of frames and hoping for the best, though that does work sometimes. Usually, the best images come from the careful execution of each snap and with film you only have a certain number of those snaps in the bank before you have to change things out.

How to Refresh Your Creativity by Shooting Digital with a Film Mindset

In an effort to strive for quality over quantity with your digital work, begin thinking in terms of keeping your shot count for a scene in the single digits. No, of course I’m not saying to sell your digital camera short and only shoot 20 or 30 photos at a time all the time.

What I’m suggesting is that you limit yourself to a focused group of purposed photographs instead of firing off a hoard of shots and hoping for the best. Try to shoot no more than 10 images of the same scene and then move on to something else. Make 10 images of that, and then move on again. The key outcome of this exercise is to train (or retrain) yourself to produce a smaller number of total images but a larger amount of usable ones or keepers.

Some final thoughts…

The real conclusion and the true lesson to be gained from all this is for you to learn how to become more deliberate with your photography. Use your camera with purpose, and most importantly remember to slow yourself down from time to time. Slowing down is key.

Being both a film and digital photographer I find the complete flop of my creative mindset changes drastically between the two mediums. Obviously, digital cameras have extraordinary capabilities and offer many benefits over their analog cousins. At the same time, the true nature of photography can be lost when we suddenly find ourselves with limitless shooting capabilities that are often only capped by a camera’s battery life and our own enthusiasm.

Try putting some of these lessons from the world of film to use the next time you find yourself deleting more and more images and finding fewer quality pictures. It just might be that you begin shooting better and get more enjoyment from your digital photography.

The post How to Refresh Your Creativity by Shooting Digital with a Film Mindset by Adam Welch appeared first on Digital Photography School.


Digital Photography School

 
Comments Off on How to Refresh Your Creativity by Shooting Digital with a Film Mindset

Posted in Photography


Tips for Shooting Landscape Photography Towards the Sun

21 Feb

Avoid photographing towards the sun is one of the most common tips you’ll hear for landscape photography. In fact, it’s a tip that I’ve shared previously myself.

While it’s not without a reason that’s it’s a well-known tip, it might not be as relevant today as it was several years ago. Today’s sensors and post-processing opportunities are much more forgiving and what once was a bad idea can now be an opportunity.

In this article, I’ll show you how including the sun in the frame can enhance the atmosphere and add an extra dimension to your images as well as sharing my best tips for doing so.

Why you should include the sun in your images

I’m sure that many of you are ready to jump straight into the comment section right now and tell me how much of a bad idea it is to shoot towards the sun. But give me a minute to explain a few reasons why it’s something you might want to consider doing with your landscape photography.

Tips for Shooting Landscape Photography Towards the Sun

The greatest benefit of adding the sun in the frame is that it adds depth to the image. Take the image above as an example. Remove the sun and the image becomes flat and much less interesting. With the sun included, the image comes to life and drags you into it.

Tips for Shooting Landscape Photography Towards the Sun

Compositionally it can also be beneficial. Of course, this depends on where you place the sun. In the example above, the bright sun serves as a focal point. Naturally, the viewer’s eye is guided along the cliffs and up towards the bright area.

Keep in mind that our eyes are naturally attracted to the brighter parts of the image.

Another benefit of shooting towards the sun is that you often get beautiful shadows striking towards you. This serves as additional leading lines and benefits the composition.

Tips for including the sun in your images

Now, there’s one thing I need to make clear; including the sun in an image won’t always be beneficial. There are certain conditions or methods you should take advantage of for this to work. Here are some tips.

The time of day matters

While there are exceptions, the best images come when the sun is low on the horizon. The sun then creates a soft glow and gives a nicely balanced light.

Tips for Shooting Landscape Photography Towards the Sun

During midday when the sun is positioned higher in the sky, the light is harsh and less pleasing to the eyes. Generally, this is something you want to avoid.

Consider the sun’s placement within the frame

I’ll start by saying this, there’s no one single correct spot to place the sun within your image. Sometimes it’s beneficial to place it in the center, while other times it’s better to place it on the side.

This is where trial and error, and experience come into play.

Tips for Shooting Landscape Photography Towards the Sun

In the image above, I chose to place the sun at the very edge of the frame. Partly obscured by the clouds, it doesn’t take too much attention but instead, you’re drawn to the beautiful light hitting the landscape.

If you are familiar with semi-advanced post-processing techniques, you might be aware of a processing style called light bleed. This is a technique that involves heavy dodging and enhancing/creating a light source that strikes through the image. However, this is an effect you’re able to get in-camera as well by placing the sun at the corner or edge of your frame.

Tips for Shooting Landscape Photography Towards the Sun

Other times, you want to place the sun in the center of the image. In the image above, placing the sun in the center adds a light source that your eyes naturally go toward. Had I instead placed the sun to the side, this image would be less balanced.

Obscure the sun

In my opinion, one of the most efficient ways of including the sun in your image is by partly obscuring it. Combining that with a narrow aperture, you get a nice sun-star or sunburst.

Tips for Shooting Landscape Photography Towards the Sun

Use a Graduated ND Filter

Since the sun is so much brighter than the surrounding landscape, it can be hard to capture a well-exposed image when including it in the frame. By using a Graduated ND Filter you’re able to darken the sky in your image – meaning that you can capture a well-balanced image even with the sun in the frame.

Unfortunately, a Graduated ND Filter is not always ideal. Since the transition between darkened and transparent parts of the filter is a straight line, it can create some unwanted effects if you’re photographing a scene where something is projecting above the horizon.

Graduated ND Filters are better to use when the horizon is flat, such as the image below:

Tips for Shooting Landscape Photography Towards the Sun

… Or bracket multiple exposures

Another more flexible method of capturing well-balanced images with the sun included is to bracket multiple exposures and blend them in a photo editor. This is the better choice when the sun is at the highest position in the sky, as the contrast is even greater.

For the image below, I captured three images; one exposed for the landscape, one exposed for the sky and one even darker to balance out the brightest parts.

Tips for Shooting Landscape Photography Towards the Sun

Your turn

Hopefully, I’ve been able to convince you that shooting towards the sun isn’t a complete no-no anymore. Have you captured any images that are shot towards the sun for your landscape photography? I would love to see them in a comment below!

The post Tips for Shooting Landscape Photography Towards the Sun by Christian Hoiberg appeared first on Digital Photography School.


Digital Photography School

 
Comments Off on Tips for Shooting Landscape Photography Towards the Sun

Posted in Photography


More than a speed light: Shooting with the Rotolight Neo 2

18 Feb

Introduction

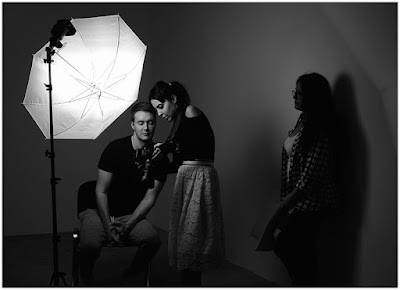
One Neo 2, lit by another Neo 2.

Artificial lighting falls into two categories: Continuous and strobe. Continuous lighting is a great option for beginning photographers, because you can see your results before tripping the shutter (also, they’re handy for the whole ‘video’ thing). Unfortunately, the continuous lights of yesteryear were very power hungry and put out a ton of heat to get light levels that even approached a small, battery-powered strobe.

The advent of LED lights changes this somewhat, offering users a more convenient means of entry into the world of continuous lighting. But their power output still pales in comparison to even a low-end hotshoe flash. Plus, even basic studio strobes come with modeling lights to help with setup, and many on-camera flashes now have LED lights for video shooting in dim conditions.

But Rotolight has come from the other direction; instead of a strobe that happens to include a continuous light source, the Neo 2 is a continuous light source that happens to be capable of strobing at a respectable power output.

The Neo 2’s high-speed sync feature allowed me to get some nice fill-light on Allison’s face at a wide aperture while still exposing for the direct-sun highlights in the scene.
Nikon D5 | Nikon 105mm F1.4G @ F2.8 | 1/1000 sec | ISO 100
Photo by Carey Rose

Designed to be versatile for both on-the-go photographers and videographers, the Neo 2 packs a ton of neat features into a truly portable package. Let’s take a closer look.

Key features

  • Continuous light power of 2000 lux at 3 ft
  • Strobe power of F8, ISO 200 at 3 ft (AC power – roughly half this on batteries)
  • Zero recycle time for strobe work
  • Built-in Elinchrom Skyport receiver for remote high-speed sync triggering (up to 1/8000 sec)
  • Battery or AC power
  • 85,000 full-power flashes or 1.5 hours continuous light on battery power
  • Color temperature adjustable from 3150 – 6300K

Of particular interest to me was the ability to control color temperatures without using gels, the wireless triggering with high-speed sync (HSS) capability, and the lack of any sort of recharge time, even on batteries.

I’m primarily a stills photographer, so I brought along a set of Neo 2’s to a few situations where I’d ordinarily be tempted to use a speedlight. In some ways, they’re hugely impressive, but in others, well, there’s a little ways for Rotolight to go.

Getting started with continuous light

The Rotolight Neo 2’s controls – two clickable rotary dials and a power switch.

As a continuous light, the Neo 2 is really straightforward. You hit the power button on the back of the light; one rotary knob controls the brightness, and the other controls the color temperature. Because the color temperature is varied depending on a ratio of brightness between cool and warm LEDs on the panel, a mix of the two – around 4100K – will give you maximum light output.

When I was wrapping up our iPhone X review, I wanted to take a photograph of the phone being splashed with water, but I wanted to be able to fire the fastest bursts I could to catch just the right moment. That’s tough with a traditional strobe, but perfect for continuous lighting.

Sony a9 | Sony 90mm F2.8 Macro | ISO 6400 | 1/1000 sec | F5.6

I took this shot in an office building lounge area, with some ambient light, the Neo 2 directly behind the subject and firing back at the camera at full power, and my cell phone LED giving a bit of kick to the corner of the phone closest to the camera.

I set a Sony a9 to shoot at its maximum rate of 20fps (which uses an electronic shutter, and therefore is incompatible with traditional strobes anyway), and fired away as my coworker nervously emptied the cup of water from an exaggerated height. The end result, though a little noisy because of the shutter speed I wanted, has all the drama I was envisioning.

Here’s another example of using the Neo 2 in continuous mode in the same room, but with a different subject.

Fujifilm X-H1 | ISO 200 | 1/100 sec | F1.4
Photo by Jeff Keller

Part of what makes a continuous light so fun and easy to use is the instant feedback of how the image looks, and with the Neo 2, it’s small enough and powerful enough to be great for product work. This could be particularly valuable for those who aren’t necessarily comfortable with flash photography, but are looking to up their production value for an eBay or Etsy store.

Then I took our Neo 2 set into the studio for some macro shots, and things weren’t so straightforward any more.

Strobe time

This is the time where I advise you to do what you really should do anyway: read the manual. While the Neo 2’s are perfectly intuitive just as constant lights, using them in flash mode is a little tricky at first, particularly if you’re using the optional Elinchrom Skyport radio controller.

But after some reading (and re-reading) of the manual and a healthy dose of trial and error, I was able to consistently control each of the Rotolights independently in terms of flash output, color temperature and modeling light output right from the transmitter.

Fujifilm X-T2 | Fujifilm XF 80mm F2.8 Macro| ISO 200 | 1/250 sec | F5.6

Though the HSS capability of the system is limited to whichever system you choose at purchase, our Nikon transmitter worked perfectly fine on a Fujifilm X-T2 up to that camera’s maximum sync speed.

For the above image, one Rotolight was behind the subject to the right, with one of the included diffusion panels on the front so that individual LEDs aren’t discernible, and I set the color temperature to the cooler side. There’s an additional Rotolight off camera left providing some fill, and the extra highlights you can see in the reflections off of the iPhone’s lenses are non-dimming ceiling lights.

Overall, it’s a nice system for macro work, but if you require really deep depth of field, your ISO will climb quickly (a later shot with this same setup at F22 required ISO 3200). But at the very least, for macro work, you can place the lights very close to your subject.

Balancing with daylight

One of the main issues with using continuous LED lights as a one-stop shop solution for lighting became apparent anytime you took them outdoors. Without a huge panel and accompanying huge battery, overcoming sunlight or even bright overcast conditions was a non-starter, and you really were just better off with a strobe. The Rotolight Neo 2’s, it turns out, split the difference nicely.

Rotolight Neo 2
Nikon D700 | F4 | 1/125 sec | ISO 200
Ambient Only
Nikon D700 | F4 | 1/40 sec | ISO 200

Although I tend to like each of these images for different reasons, you can clearly see that the single Neo 2 off to camera left changes the feel of the scene entirely. By raising my shutter speed to take the background brightness down, I can ‘shape’ the light effectively with the Rotolight, while still maintaining context. Plus, with high speed sync, I could use the Rotolight to overpower the ambient entirely in this situation, if I wanted to.

Let’s look at how the Neo 2 copes with a much brighter scene involving direct sunlight.

Ambient only
Nikon D5 | F2.8 | 1/1000 sec | ISO 100
Rotolight Neo 2
Nikon D5 | F2.8 | 1/1000 sec | ISO 100

In this situation, I exposed for the brightest highlights in the scene while still maintaining a fairly shallow depth of field. Then I brought in the Neo 2 at maximum power to see if it could keep up – I really like the effect it has here. It’s soft, but the added fill light looks almost like it could be a reflection off of another building.

But for this situation, I needed to place the Neo 2 pretty darn close to my subject. This was necessary because, over the course of using our Neo 2’s, they would completely synchronize with our Nikon’s all the way up to 1/8000 sec – but between 1/1000 and 1/2000 sec, I started to notice a reduction in the light’s intensity.

A mediocre BTS photo, courtesy of my cell phone, shows how close the Neo 2 was to the subject.

As it happens, this 1/1000 sec shutter speed made for a good exposure for the ambient in this scene while still allowing the Neo 2 to operate optimally. But it should be pretty apparent that in bright conditions, you’ll struggle with framing your subjects wider than just head-and-shoulders with the Neo 2, to say nothing of trying to get a second evenly lit person into the scene.

The recycle time

Instant recycle time means 11fps bursts with flash are as easy as it is for Andrew to juggle this soccer ball.
Nikon D5 | Nikon AF-S 14-24mm F2.8 G | ISO 6400 | 1/1000 sec | F2.8
Photo by Carey Rose

For the above casual demo, I wanted to see just how effective and reliable the Neo 2’s were when shooting bursts. With zero recycle time and 85,000 full power flashes per battery charge, sports and action could be a really neat use case for these lights.

I cross-lit Andrew with two Neo 2’s – one upper camera left, one lower camera right. Check out the illumination on the grass in the lower right to see just how consistent the output is, even as the stadium lights caused some flicker at these shutter speeds.

ISO 6400 | 1/800 sec | F2.8
Photo by Carey Rose

It should be noted, though, that the D5 was set to 11fps instead of its maximum of 12fps – with the current setup, the Neo 2’s would occasionally fail to fire during the D5’s highest burst speed. That said, having 11fps at my disposal as Andrew went through a few penalty kicks still gave me lots of options to choose from.

Thoughts and takeaways

The Rotolight Neo 2 is a really clever device, and the more I use them, the more I enjoy them. I can envision myself really taking advantage of their versatility in a previous job of mine; I could use them as indoor interview lights for an on-location video, and then bring them outdoors to get a nice portrait of the subject to go along with the video. Two uses, one solution, and my bag is that much lighter.

Again, a Neo 2 lit by another Neo 2.
Nikon D750 | Micro-Nikkor 55mm F2.8 AI-s | ISO 100 | 1/125 sec | F8

The quality of the light is nice and soft, and the instantaneous recycle time and long battery life (for strobing) are appealing. The consistency of color accuracy, even during burst shooting, impresses further.

There’s also a litany of features that are far beyond the scope of this experience; impressive lighting simulations, like the glow of a fire or flashes of lightning, are built-in. The CRI (color rendering index) is very high, good enough for broadcast television.

And yet, I can’t help but feel that these are a bit of a niche product, that their appeal will be limited. For people that are primarily stills shooters, smaller, cheaper, battery-powered flashes will offer you far more power (you may need to get some light modifiers to approach the softness of the Neo 2’s).

For dedicated video shooters, you may find you need more power if you’re in bright conditions. For beginners just getting into artificial lighting, there are basic LED light panels all over the Internet for less than the cost of a tank of gas.

Despite all of this, I think that the Rotolight Neo 2’s have their place as a high-end, portable and versatile lighting solution, admittedly for a very specific type of customer. And more than anything else, I’m excited to see how Rotolight continues to develop this technology into the future.

Articles: Digital Photography Review (dpreview.com)

 
Comments Off on More than a speed light: Shooting with the Rotolight Neo 2

Posted in Uncategorized


Behind the scenes: Shooting a motion time-lapse in the Canadian wilderness

17 Feb

Back in summer 2017, I went on a six week adventure to British Columbia and Alberta in order to capture Canada’s beautiful landscapes in the most impressive way possible. I wanted to make a time-lapse film that raises more awareness of our planet and our environment.

Planning

When it came to logistics, I tried to be as prepared as possible for this 6-week trip, and did tons of research ahead of departure. I knew I probably wouldn’t have a whole lot of internet (or time to waste on the internet) in the Canadian wilderness, and wanted to be prepared to just take things as they came. So I collected locations that I discovered on Google, on Instagram, or on other photographers’ portfolios, and created a long list of spots that were worth checking out.

I didn’t have a specific shot list. I just tried to capture the most beautiful scenery and moments that I could find along my adventure. However, I paid a lot of attention to interesting details around me instead of going for spectacular vantage points only. That’s how the whole moody intro sequence was conceived. By stepping closer to the subject, I tried to approach time-lapse in a slightly different way than you see in your typical, ‘epic’ time-lapse films online.

Challenges

I guess my biggest challenge with shooting this project was my own safety—doing all of alone, in an area packed with grizzly bears, was pretty scary.

Hiking alone comes with a risk that I always had to bear in mind. I carried bear spray at all times, and tried to let the bears know that I was there by creating a lot of noise on the hiking trail (they can get really dangerous when they’re startled). When I set up a time-lapse shot, I always had to have an eye on my surroundings and make a lot of noise by singing or talking to myself. Over the course of my trip, that risk was something I got used to.

Being all alone also didn’t make it possible for me to camp out on location. Obviously because it is very risky, but most of all because I simply couldn’t carry camping gear along with my camera gear and slider all by myself.

As a result of this, I had trouble getting to the best possible location at the best times of day. In order to shoot at sunset or sunrise, I either had to find a location that was fairly close to the parking lot, or take the risk of hiking up or down in the darkness with my head lamp as the only light source.

This is all of the gear I brought with me into the Canadian wilderness

Gear

Since I was all alone on this mission and wanted to hike out to locations a lot, I had to keep my gear package as compact and efficient as possible. I packed my Sony a7S II and Nikon D5100 (as backup camera) together with a newly purchased Canon 16-35mm F4 and Rokinon 14mm F2.8, as well as two cheap vintage lenses: an SMC Pentax-M 50mm F1.7 and an SMC Pentax-M 100mm F2.8.

As you might have noticed, my camera package was pretty humble. That was all I had and all I could afford, and honestly—that was all I needed.

A great Sony camera with only 12 MP paired with a sharp Canon wide-angle lens that could almost do anything on location. This lens is my absolute favorite due to its great flexibility for wide three-dimensional time-lapse movements. The Rokinon lens is well-known for its night- and astrophotography abilities, as it has just little amount of coma and is wide enough to capture almost the whole night sky. The Pentax lenses are actually my first lenses I’ve ever bought. Obviously, they’re old, cheap, and not the sharpest; they’re also small, light, and capable of projecting an image onto my sensor I was totally happy with.

In contrast, my time-lapse gear was downright extravagant thanks to a sponsorship from the innovative company eMotimo. They gave me a loaner for a great package for the duration of my whole trip: The spectrum ST4 is a newly designed 4-axis motion control system that, combined with the iFootage Shark Slider S1, simply can do it all—slide, pan, tilt and even pull focus in video or time-lapse shooting mode.

Using a Playstation Controller, I could easily set up literally any shot I wanted, and the ability to set keyframes in between the start and end point of my programmed shot gave me ultimate control over my composition. Additionally, an innovation that I’ve never seen before is a mountable extra motor to automatically pull the focus as the time-lapse is running. There are many ways to mess around with that: one I used was to shift focus from an interesting foreground to the revealing scenery in the background.

Another great feature worth mentioning is the ability to repeat a programmed movement at different speeds. This allowed me to record shots at different frame rates, but still have the exact same camera movement in each.

Since I couldn’t get the idea out of my head to combine a moving time-lapse shot with a real time video, with both shots having the very same camera movement, I did exactly that in the final shot of ALIVE. I recorded the whole scenery in dynamic time-lapse except for the person (me) being recorded in real-time video 25fps. Even though it took a lot of time perfectly masking out the person in post production, this shot probably wouldn’t have been possible without the spectrum ST4.

With all the flexibility of the motion control devise I felt an enormous freedom as a time-lapse photographer and could explore further ways to creatively make use of its features. However, this turned out to be a weakness as well, as I often found myself tempted to design way too sophisticated time-lapse shots. In this case, the inorganic/mechanical camera motion often drew way too much attention when watching the processed time-lapse sequence making the scenery appear surreal.

So in the process of my trip I learned that less is more in this case. It is way more important so be at the right spot at the right time—which is ultimately what I was seeking for my whole adventure.

Editing

In the editing process of ALIVE it was certainly very hard to come up with an edit as I had to choose the best among 149 time-lapse shots I recorded on my trip. Since I wanted to keep my film under 4 minutes, I forced myself to make some hard decisions. That turned out to be a pretty emotional process because every shot has a background story that connects to me personally.

It just often felt super frustrating to kick out a shot for which I woke up at 4 a.m. and hiked up a mountain for two hours in order to be there for sunrise.

A Story

Let me conclude my little behind the scenes tale with a story from Lake O’Hara, one of the most captivating landscapes I have ever experienced in person, and the final shot of the film. I decided to hike up to this incredible viewpoint for sunset and kept shooting until there was no light left to work with. That was the moment when I found myself alone in the darkness on the edge of a cliff.

The final shot of the film, captured above Lake O’Hara at sunset.

Should I take the risk of hiking down the steep and forested trail in the darkness potentially ending up as grizzly bear food? Or should I rather just stay up here all night and do another time-lapse of the milky way? Without camping gear and food, I stayed and spent another 5 hours in the cold darkness until the sun came back up.

Even though this shot of the milky way didn’t even make it into the final film, there is nothing I regret about staying up on this mountain all night all alone without a tent in bear territory… simply because it was one of these adventures that made my trip so unique.

Articles: Digital Photography Review (dpreview.com)

 
Comments Off on Behind the scenes: Shooting a motion time-lapse in the Canadian wilderness

Posted in Uncategorized