Whether you’re just getting into photography, or if you’ve been at it for years; you can keep yourself rejuvenated, and keep the creative juices flowing by always trying new things.
If you’re feeling uninspired photographically, that’s a sign that you need to shake things up by trying something completely different, or at least something that isn’t your usual style. You might be surprised at how small exercises can boost your creativity while teaching you new techniques and solidifying old principles in your mind.
Who knows, you might even discover a new passion!
To give your brain a little kick in the butt, challenge yourself to try some of these photography exercises. Even if they aren’t new to you, going out shooting with a new purpose feels refreshing and may lead to something completely new.
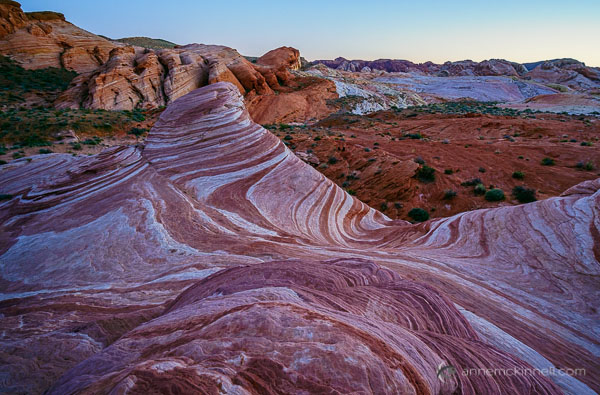
Fire Wave at The Valley of Fire State Park, Nevada, taken from a high perspective on an opposite hilltop
1. Change your perspective
Photographers often get in the habit of shooting at eye-level which tends to make photos repetitive and somewhat common. We know this, and so we take the odd shot on our knees or even occasionally lying on the ground.
But is this really enough? Aren’t there other vantage points?
Challenge yourself to go out shooting and never shoot from eye-level for a whole day. Instead, find a new vantage point any time you take a picture. Get yourself up high above your subject, and crouch and shoot from a low angle. But that’s just the beginning. Ideally, you should try shooting your subject from a variety of angles.
Take one shot from below and one from above. Then, take one even lower, and one even higher, if possible. Then, step back a bit. Then step forward. Move to your right, and move to your left. Taking the same picture from many positions adds variety and will help you understand it better. Plus, you may discover a way of seeing something that you didn’t expect.
If you resolve to do this with every picture you take, you’ll begin to really understand the subtle effect that perspective has on an image, which points of view work for which subjects, and how this can inform your shooting style from here on out.

Another perspective on Fire Wave, this time taken up close, from a low angle.
2. Create a story
Rather than trying to capture your subject in one single image, try doing a series instead. Create what LIFE Magazine coined a “photo essay” – a series of images surrounding a single subject or group of subjects, each of which pinpoints a different aspect of its nature. This can be as simple as zooming in on its finer details, or photographing it in different contexts. This method of doing things defines the subject not only by how it appears in a single moment, but also by the way it changes (and the way it stays the same) over several moments. It also helps to craft your visual storytelling abilities.
Choose one subject and cover it completely, the way a journalist would. Do this either by photographing every aspect of it you can think of, photographing it through the course of a day, or by revisiting it over and over throughout a week. Include shots at different distances and using different focal lengths – include some close-up details and some wide compositions – and whittle all the shots down to around ten final images, making sure that no two photos are alike. When you have your picks, try to organize them in an order that tells a coherent story, whether it’s narrated or implied.
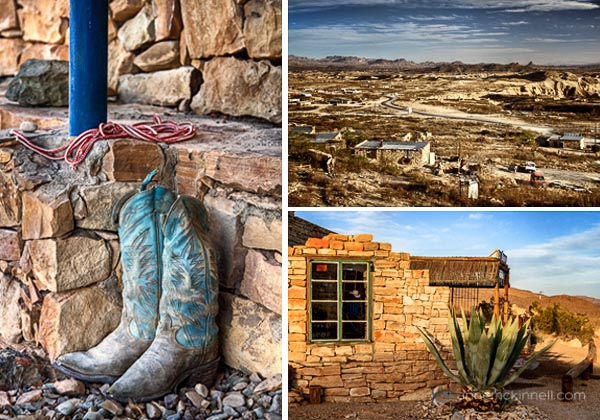
These three photos are from Terlingua, a ghost town in Texas.
3. Shoot in Black and White
For a whole day, turn your camera to Black and White mode and don’t take it off. Of course, you can convert your RAW images to black and white after-the-fact in post-processing, but as an exercise, try shooting them in Black and White.
At first the limitation may seem frustrating, but Black and White photography requires a completely different way of seeing the world in terms of shape, form, and contrast, rather than through the common visual cues that you’re used to. Composing your photos in this way will invariably improve your compositions in colour photography, too. You can play with contrast settings in-camera or in post-processing to perfect the highlight to shadow ratio which defines a good monochrome image.
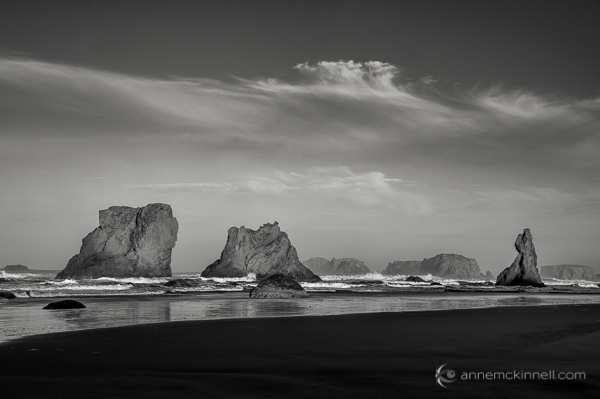
Bandon Beach, Oregon.
4. Make manual long exposures
For this exercise, you’re going to take full advantage of digital photography’s instant feedback, and use it to play with making manual long exposures.
With your DSLR mounted firmly on a tripod, set the ISO to 100, set the aperture to the smallest opening (the largest f number like f/22 for example), and set the shutter speed to Bulb mode. When the camera is to Bulb mode, the shutter will stay open for as long as the shutter button is held down, but it’s a better idea to attach a wired remote shutter release to prevent camera shake.
Once you have your composition and your focus set, press and hold the button on the remote to hold the shutter open for a few counted seconds. Just guess how many seconds will be required based on the light level. Then, check your results. If the image is too bright, try again, but count half as many seconds. If the image is too dark, count twice as many seconds – or more, if necessary. Do this over and over again, in different scenarios and lighting situations. This practice will hone your ability to read the levels of light present at any given time.
You’ll get the most interesting results if there is a certain amount of movement in your frame, such as drifting clouds in the sky, crowds of people, or running water. The longer your exposure is, the more blurred that movement will appear to the point where water may seem like nothing more than mist, and people will disappear from the image altogether. If you have a solid neutral density filter your exposures can be even longer, creating more extreme effects.

Folly Beach Pier, Charleston, South Carolina – 2 second exposure.

Folly Beach Pier, Charleston, South Carolina – 30 second exposure.
Don’t wait until you start feeling uninspired to try these exercises! Keep your photography energized and creative by trying something new on a regular basis. Even if it doesn’t turn out to be your “thing”, it’s fun and you’re bound to learn something.
The post Don’t Know What to Shoot? These 4 Photography Exercises Will Keep You Motivated by Anne McKinnell appeared first on Digital Photography School.

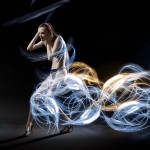
 Last time FashionPhotographyBlog.com spoke to Linh Le from Hong Linh Photography she had informed us that she had finished a photo shoot over a weekend that involved UV paints. The results resulted in a beauty shoot inspired by African tribes. From the feedback that we received about that post, we asked Linh if she could tell us more about the technical aspects of putting a shoot together for our readers. Linh shares with us her top tips for photographers who are thinking about taking on a shoot with UV paints and the key things to look out for.


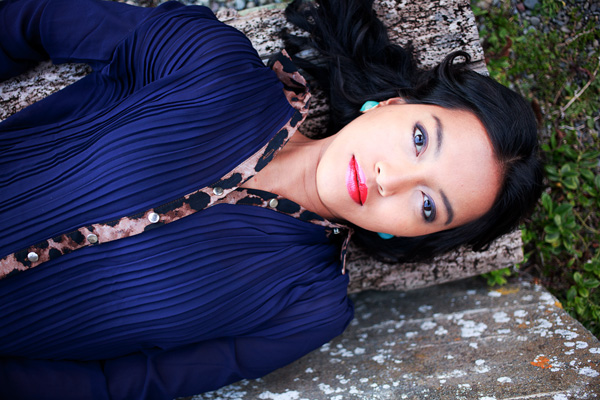


 The Natural Portrait


You must be logged in to post a comment.