RSS
 

Posts Tagged ‘REVIEW’

Nikon D5600 review: making connectivity a snap?

01 Mar

The D5600 is the company’s mid-range DSLR and it’s the smallest and best-connected, yet.

Nikon has been on something of a roll, making solid DSLRs with good ergonomics, dependable metering, some of the best image sensors, often very good (often industry-leading) autofocus and a JPEG engine that gives results that lots of people like.

However, falling camera sales and rivalry both from smaller mirrorless models and the convenient, perpetually available smartphone means that producing a really good little DSLR isn’t quite enough. The D5600 aims to address this by making it as painless as possible to get the images from the camera to your phone, meaning that you get the huge benefit of a large sensor camera but with as small an energy barrier as possible.

As such, the addition of SnapBridge is virtually the only change between this and the older D5500. It may sound like a minor change but, to us, we feel it’s likely to be the making or the downfall of this model and perhaps it makes more sense than adding an array of clever but bewildering additional features and modes, as many rival makers seem to do.

Key Features:

  • 24MP APC-S CMOS sensor
  • 39 point AF sensor with 9 central cross-type points
  • 2,016-pixel RGB sensor assists AF tracking and metering
  • Up to 5 fps continuous shooting
  • ‘SnapBridge’ Bluetooth/Wi-Fi communication
  • 1080/60p video capability
  • Time-lapse movie feature

SnapBridge

At its heart, SnapBridge is primarily a Bluetooth-based system which uses a low-energy connection to stay connected to your smart device (and sidestep the hurdles that mobile OSs might otherwise place in your way) and to transfer images. Although the camera is Wi-Fi capable, that capability is used solely for remote live view operation and video transfer.

We weren’t very impressed the first time we encountered SnapBridge: it seemed unfinished and not very well suited to the D500 where it first appeared. The high likelihood of the photographer wanting full resolution files and the camera’s propensity for generating lots of images made it a poor fit for that camera. However, on the mass-market D3400 it seemed much more likeable: you take the photos and 2MP versions appear on your phone shortly afterwards.

The needs of the D5600’s users are likely to lie somewhere between these two extremes, so we’ll see how well it does.

Review based on a camera running firmware v1.0. All SnapBridge commentary amended to reflect the behavior of firmware v1.1 and both iOS and Android app version V1.20

Articles: Digital Photography Review (dpreview.com)

 
Comments Off on Nikon D5600 review: making connectivity a snap?

Posted in Uncategorized


Review of the Wine Country Camera Filter Holder System

28 Feb

In this article, I will go over why I switched to using the Wine Country Camera filter holder system from others I’d previously used. As well I’ll cover some of the system’s key features so you can decide if it’s right for you as well.

Since the late 60s and early 70s photographers have been using drop-in (slide-in) filters in front of their lenses. The holders which accept such products are usually used for neutral density filters, polarizers, color filters, and sometimes effect filters.

But there has been a problem with this type of holder, even since its inception.  They’re usually poorly made with cheap plastic or mixed aluminum materials. And that’s just the holder’s materials. Other problems are the placement of the polarizers which can cause vignetting, manufacturing errors, and much more.

Review of the Wine Country Camera Filter Holder System

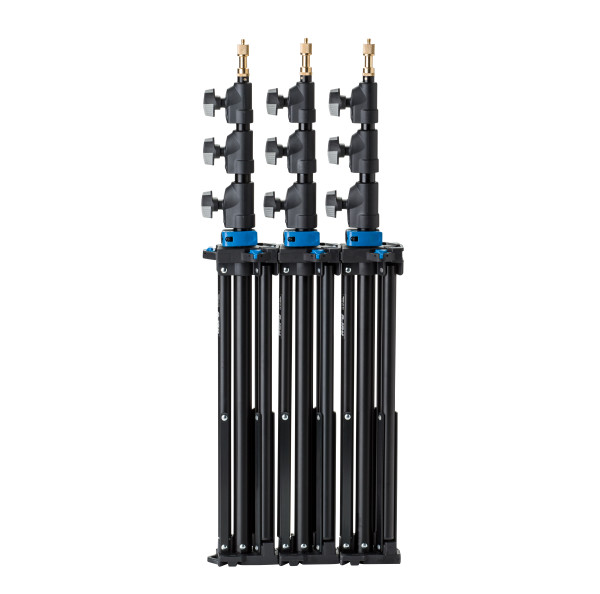
The Wine Country Camera filter holder and vaults.

Although I inherited a Cokin filter kit from my grandfather, my first self-purchased kit was a Lee Filter Foundation Kit. The product is made of plastic, which makes it light weight. But it also makes it vulnerable to bending and breaking.

Eventually, Formatt Hitech released their newer aluminum filter kit, and I made the switch and used it for a couple of years… until now.

Wine Country Filter Holder Materials

Review of the Wine Country Camera Filter Holder System

One of the many tactile points of contact on the holder.

Wine Country Camera was born out of the need for quality filter systems and ongoing standards. Every aspect of the filter kit has been deeply considered and well thought-out from the bottom up, or backward to forward.

Instead of plastic or aluminum, premium materials are used, with purpose. For example, instead of a standard dial, a wooden dial is used, so your fingers don’t freeze in cold weather. That can also be said for the wooden grips on the front of the holder. Every part of the holder is tactile so you know when you’re turning, rotating, and pushing. It’s so tactile that you can even maneuver the holder and filters while wearing gloves.

How It’s Unique

By now you likely already recognize that the holder system from Wine Country Camera is unique. But to reiterate why I thought so, I wanted to point out some of the features that are unlike any other holder on the market.

googletag.cmd.push(function() {
ruleset_slots.push( googletag.defineSlot( “/1005424/_dPSv5topic-rhs(300×250)”, [300, 250], “pb-ad-0” ).addService( googletag.pubads() ) ); } );

Coin locks

Many locations around the system carry the Wine Country Camera logo, a wine glass. At first, you might think it’s about branding. While that might be true, the more important reasoning is so that you know when items are right side up. For example, the filter vaults have this beautiful coin which is turned to lock or unlock the filter. When the wine glass is upside down, the vault is unlocked. When it’s standing on its stem, the vault is locked.

Review of the Wine Country Camera Filter Holder System

The coin which locks and unlocks filters from the vaults.

Vaults

Speaking of the vaults, these are a new concept, already mastered. The vaults are made of a polymer, similar to that found in a Glock. They’re extremely strong. No joke – they can’t be bent. The moment I filled one of my vaults with a filter, I dropped it (I got it on video too). To my surprise, there was no damage to the glass filter inside. The vault serves multiple purposes.

  • The vault seals the space between filters and the holder so that you do not need those annoying foam gaskets.
  • Makes it extremely easy to insert and remove filters from the holder with or without gloves.
  • Protects the filters from normal wear and tear and minor dings.

Vaults are available for 100mm square filters as well as graduated filters. Along with the vaults are two red buttons on the holder. The buttons are designed to remove the friction holding the two outer filters in place. That way you can safely move graduated filters up and down with ease, safely.

Review of the Wine Country Camera Filter Holder System

The red buttons which help adjust how the filters sit in the outer two slots.

Customer service above and beyond

It’s worth noting that due to the high-quality standards of Wine Country Camera, they have identified a flaw of other manufacturers. Although there are so-called standards among filters, they’re not always followed precisely while making the filters. Here is what they said:

Service Advisory: We are noticing that some Lee grads have been produced at a thickness outside of their specification. If you experience difficulty installing your grad, contact us immediately and we will resolve it for you.

As you can see, Wine Company Camera is replacing their filter vaults with new ones, for customers experiencing an issue of their filters not fitting. It’s not their fault, but they’re correcting the issue for their customers. Lots of thumbs up for that customer service decision!

Using the filter holder

The holder allows for three filters to be used at any given time. The reason for this is that the Wine Country Camera filter holder uses an internal polarizer. Because the holder keeps the polarizer in the back, instead of the front like most filter holders, it opens the doors for a third filter.

googletag.cmd.push(function() {
ruleset_slots.push( googletag.defineSlot( “/1005424/_dPSv5topic-rhs(300×250)”, [300, 250], “pb-ad-1” ).addService( googletag.pubads() ) ); } );

Typically when a Circular Polarizer is placed in front of the Neutral Density filters, you lose a slot and have a giant 105mm ring to attach a Circular Polarizer (CPL) too. But with the Wine Country Camera system, the polarizer is easily removed with two red clips and turned using the beautiful wooden dial.

Review of the Wine Country Camera Filter Holder System

The wood dial which turns the internal polarizing filter.

Last, and not least is that because of the extremely low profile of the filter holder, and the polarizer being in the back, there is a reduced the risk of vignetting. The system has been tested as wide as 17mm without any vignetting. That’s a huge jump from the 24mm limit I had with the Formatt Hitech and Lee systems (even with the wide angle adapter rings). I photograph at 20mm quite often and have always experienced vignetting, although minor. Until now.

Is it worth the price?

I’ll be the first to admit when the Wine Country Camera filter holder system was initially announced I was shocked by the price. Especially when compared to systems from other manufacturers. But after getting my hands on it, I understand why.

The amount of pride, thought, and effort that went into every millimeter of the product is the highest possible quality. It’s not cheap plastic. It’s not cheap metal. But for the curious minded, I thought I would include a price comparison on my kit before and after. I will leave out my Neutral Density filters for right now I’m still using my Formatt Hitech Firecrest ones in the Wine Country Camera holder. (I’ll likely switch to WCC once they have their own ND filters)

Wine Country Camera System

  • Holder with internal polarizer, two vaults, and one Adapter Ring: $ 449
  • Two extra 100x100mm square vaults (I have four square filters): $ 75
  • One 150x100mm rectangular vault: $ 35
  • Three Adapter Rings: $ 150
  • Total: $ 704

Formatt Hitech

  • 100mm Aluminum Holder: $ 47.99
  • Four Wide-Angle Adapter Rings:
  • Polarizer Ring: $ 19.99
  • 105mm Firecrest Circular Polarizer SuperSlim: $ 229.99
  • Total: $ 481.92

As mentioned, the price for the Wine Country Camera system is more. But keeping in mind the advantages of the system, the materials used, and that you have the vault advantage, it’s worth the extra money up front. The $ 257.08 savings on a different system might save you up front but could cost you in the long term. Maybe on parts falling apart, lower quality materials breaking, light leaks on your photographs, and potentially more.

But I know that not everyone can afford the kit, so it may not be for you. But if you are like me and want the best of the best when it comes to your photography, then you’ll save up and take the plunge when it’s right for you.

Review of the Wine Country Camera Filter Holder System

Bonus for high megapixel cameras

googletag.cmd.push(function() {
ruleset_slots.push( googletag.defineSlot( “/1005424/_dPSv5topic-rhs(300×250)”, [300, 250], “pb-ad-2” ).addService( googletag.pubads() ) ); } );

Something else to keep in mind, for anyone with a high megapixel camera, like a D810, A7RII or a medium format camera – is that many polarizers have an issue with reflections on higher resolution sensors. The one from Wine Country Camera does not have this issue. The polarizer fits inside the holder body, eliminating reflections and allowing geared rotation. Wine Country Camera worked with a high-end optics manufacturer to develop the highest possibly quality polarizer. Their polarizer uses 2.5mm thick Schott optical glass that is fire polished, and free of surface aberrations. Considering their CPL is less expensive (when purchased alone) than the previous one I was using, it’s nice to know my optics are protected.

Keeping it together

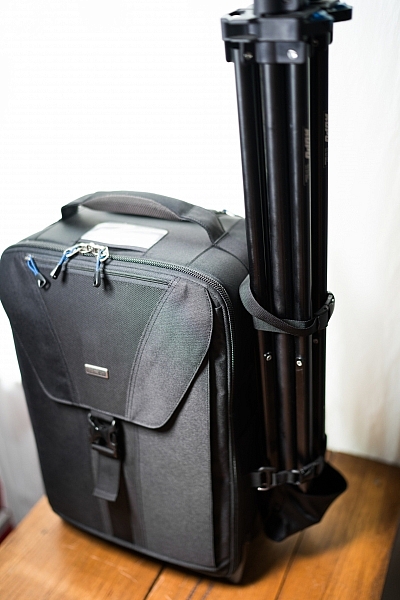
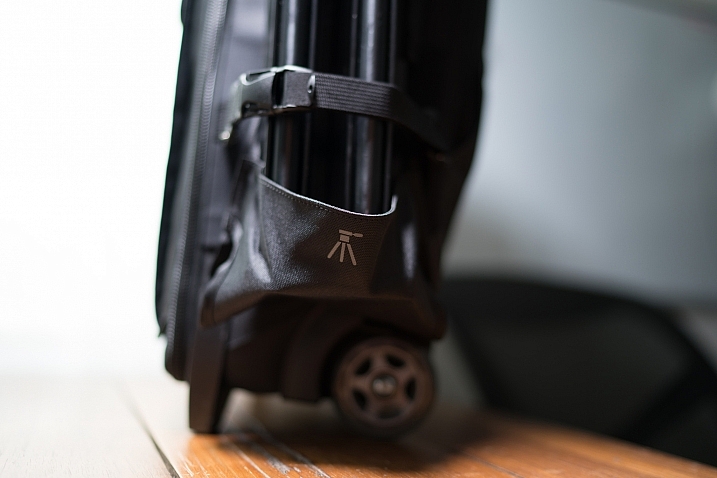
Before theWine Country Camera system, I was using the Mindshift Gear Filter Hive to hold everything in one place. The small bag is incredible, can be stored in a backpack, clipped to a belt, or hung from a tripod.

I was happy to find the Wine Country Camera system almost completely fits in the same bag. Everything but the holder itself fits inside. But fortunately, Wine Country Camera provided a very protective case for the holder and its attached polarizer.

Review of the Wine Country Camera Filter Holder System

Final thoughts

As I mentioned earlier, I was originally a skeptic for the Wine Country Camera system. But I have fallen in love with it. I am so gratefully that this company has now taken steps to improve the lens filter system, as the industry has needed this change for a long time.

I love that every adjustment possible on the holder can be done with the left hand.  That way the right hand can be kept on the camera. To me, the price is worth it, the features are worth it, the quality in craftsmanship is worth it. I hope you recognize the same.

Have you taken a look at the Wine Country Camera filter holder yet? What are your thoughts?

googletag.cmd.push(function() {
ruleset_slots.push( googletag.defineSlot( “/1005424/_dPSv5topic-rhs(300×250)”, [300, 250], “pb-ad-3” ).addService( googletag.pubads() ) ); } );

The post Review of the Wine Country Camera Filter Holder System by Scott Wyden Kivowitz appeared first on Digital Photography School.


Digital Photography School

 
Comments Off on Review of the Wine Country Camera Filter Holder System

Posted in Photography


Lenovo Moto G5 Plus camera first impressions review

27 Feb

Lenovo has launched the latest model of its Moto sub-brand at the Mobile World Congress. The Moto G5 Plus is the successor to last year’s Moto G4 Plus and, like its predecessor, an upper mid-range device that puts a lot of emphasis on camera performance. For the new model’s camera resolution has been reduced from 16MP to 12MP and, with a 1.4µm pixel size, on-sensor phase detection and very fast F1.7 aperture, the main camera specifications look very similar to the Samsung Galaxy S7’s minus the optical image stabilization.

On the video side of things the camera is capable of recording clips with 1080p Full-HD resolution and front camera specification remains unchanged with a 5MP sensor and F2.2 aperture. Compared to the predecessor the size of the IPS display has been reduced from 5.5″ to 5.2″, making the G5 Plus a little more compact, but the 1080p Full-HD resolution remains unchanged. The metal frame is a little more sturdy and gives the entire device more of a premium touch than its predecessor.

The fingerprint sensor at the front now also serves as a touchpad, replacing the Android function buttons. Android 7.0 is powered by a Snapdragon 625 chipset and 2GB of RAM. 32 or 64GB of onboard-storage can be expanded via a microSD slot. The non-removable Li-Ion 3000 mAh battery supports fast charging and, unlike Lenovo’s high-end Moto Z models, the G5 Plus still features a 3.5mm headphone-jack.

  • 12MP CMOS sensor with 1.4µm pixel size
  • F1.7 aperture
  • On-sensor phase detection
  • 1080p video
  • 5MP / F2.2 front camera
  • Manual control over shutter speed
  • 5.2″ 1080p IPS display
  • Android 7.0
  • Qualcomm Snapdragon 625 chipset
  • 2GB RAM
  • 32/64GB storage
  • 3000 mAh battery with fast charging

We have had the chance to use the Moto 5G Plus for a few days before launch and were impressed by the speedy general operation and how solid the new model feels in the hand. We have also shot a good number of sample images with the camera in a variety of situations. 

Image Quality

In our brief test we found the Moto G5 Plus to capture good detail, especially in lower light, good exposures and pleasant colors across the ISO range. In the ISO 50 image below some slight smearing of fine detail is noticeable at a 100% view but overall fine textures are rendered nicely and luminance noise in the blue sky is very well under control. Some highlight clipping is visible in bright areas of the frame but it’s well within acceptable limits for this class of device.  

 ISO 50, 1/1622 sec

In sunlight colors are pleasant with a slightly warm touch. At close subject distance, like in the image below, the combination of a 1/2.5″ sensor with a very fast F1.7 aperture allows for some blurring of the background.  

 ISO 50, 1/2240 sec

Thanks to its fast aperture the Moto G5 Plus can keep the ISO low in indoor scenes like the one below. That said, in low light the camera is slightly more prone to camera shake than models equipped with optical image stabilization.

 ISO 160, 1/30 sec

The camera’s white balance system deals well with artificial indoor lighting. In the ISO 250 image below fine detail is starting to suffer a little bit but both luminance and chroma noise are very well under control. 

 ISO 250, 1/30 sec

The indoor portrait below shows good detail and natural skin tones. The 1/30 sec shutter speed usually still gets you shake-free images.

 ISO 400, 1/30 sec

For low-light shots like the one below, shutter speed is reduced to 1/15 sec and the camera engages a multi-frame night mode. There is now noticeably more noise in the image, especially the shadow areas, but the overall tonality is very pleasant and edge detail is still very well defined. The Moto G5 Plus is performing well in these light conditions.

 ISO 500, 1/15 sec

The night shot below shows very good exposure, color and detail, considering the low light levels. Edges are very well defined and fine textures are still visible as well. Noise is noticeable when the image is viewed at a 100% magnification but finely grained and overall very well controlled. 

 ISO 640, 1/15 sec

Special modes

Panorama mode remains a bit of a weakness in the Moto camera app. The images tend to show good exposure and color but, compared to some competitors, are pretty small. In scenes with several moving subjects ghosting artifacts are almost unavoidable.

Panorama 2704 x 920 pixels

As you can see in the samples below, HDR mode is capable of maintaining better highlight detail than standard exposures. It also slightly lifts the shadows, making for a more balanced overall exposure in high-contrast scenes.

 ISO 50, 1/3763 sec, HDR off
  ISO 50, 1/3618 sec, HDR on

First impressions

We are hoping to spend more time with the Moto G5 Plus soon, but after our first brief test the new model looks, like its predecessor, like a great option for mobile photographers who don’t want to spend iPhone or Galaxy S money. The Moto G5 Plus offers responsive operation in all situations and very decent image quality across the ISO range. We especially liked the textures and low noise levels in low light scenes. 

In terms of build quality the new model is a step up from last years G4 Plus as well and the touchpad-style fingerprint reader is an interesting touch. At its retail price point of $ 299 the Lenovo Moto G5 Plus looks like a great package for mobile photographers and general users alike. 

Articles: Digital Photography Review (dpreview.com)

 
Comments Off on Lenovo Moto G5 Plus camera first impressions review

Posted in Uncategorized


Kamerar Lens Zoom Kit for iPhone 7 Plus review

24 Feb

Kamerar Zoom Lens Kit for iPhone 7 Plus review

If you’re shopping for accessory lenses, for most iPhone models the choice can be overwhelming. The lenses on offer range from cheap plastic variants for very little money to hefty high-quality glass in metal bodies that require a three-figure investment. However, the situation is slightly different for Apple’s current flagship, the iPhone 7 Plus. Because of the unique design of its dual-camera there are currently still very few attachment lenses on the market. That said, we’ve had a chance to have a closer look at one of the first available options, the Kamerar Zoom Lens kit. 

For $ 50 the kit includes a protective case for the iPhone, two lens modules that slide into the case and two small protective lens-cases. The first module combines a fisheye-adapter for the iPhone’s wide-angle lens with a tele-converter for the longer lens in the dual-cam. The fisheye offers a 160 degree angle of view and the converter comes with a 1.5x zoom factor, giving the 7 Plus tele lens a total zoom factor of 3x when compared to the wide-angle. The second module has two macro lenses that apply a 10x magnification to both iPhone camera lenses. 

The complete kit consists of the phone case and two lens modules with a little protective case for each.

Operation and build quality

Apart from the little plastic rails that the lens modules slide on, the Kamerar-case looks like most plastic phone cases and offers access to all ports. The case’s slightly shiny tile design is pretty much a matter of taste, but with its understated gray tones should work for most. 

Build-quality is pretty much in line with the price point. The plastic material looks a little cheap but the construction of the individual pieces is solid. Attaching and removing the lens modules is very easy but moving them in position in front of the iPhone camera and back requires a little bit of force. When not in use the lens modules can be stored in their cases, protecting them from scratching.

One important thing to consider when shooting with the Kamerar kit has nothing to do with the lenses but with the iPhone camera. As we found in our review, below a certain brightness threshold the iPhone 7 Plus camera switches from its tele lens to the wide-angle and applies digital zoom. When shooting with just the phone this switch is hardly noticeable and you usually only find out when looking at images on a big screen or checking EXIF-data.

However, the impact is much more noticeable with the Kamerar lenses attached. If you are using the tele-converter in low light and the iPhone camera switches to the wide-angle, you end up with a 2x digitally zoomed version of the fisheye image, which isn’t really what you want. To avoid this it’s best to use the kit with a camera app that lets you force the camera to use the tele-lens, even in lower light, for example Camera+ or Manual Camera.

Image Quality

Image quality varies between the conversion lenses. The tele-converter is capable of producing surprisingly sharp images, but photos taken with the fisheye look noticeably softer when viewed up close. All pictures are perfectly usable for social media and similar purposes though. The macro converters produce decent results as well, though as you would expect, the tele-version offers visibly better magnification.

When using the macro lenses the challenge mainly lies in keeping the device as still as possible. You have to get very close to the subject for the lenses to focus and motion on any axis will lead to camera shake and/or focus shift, and therefore blurry images. Overall the Kamerar Zoom Lens kit offers good image quality, especially when considering the affordable price point. 

The two samples below illustrate how the fisheye allows you to capture large objects or the interior of small rooms when there is no space to go further back. The fisheye images look a little soft up close, but color and tonality hardly change compared to the standard image without attachment lens.

 iPhone 7 Plus wideangle, ISO 20, 1/2660
 iPhone 7 Plus wide-angle with Kamerar fisheye, ISO 20, 1/3546

The tele-converter only offers a 1.5x zoom factor over the iPhone’s built-in tele lens. The difference in terms of angle of view is not massive but the lens is certainly useful when photographing objects further away and the image output is surprisingly sharp. Again, the attachment lens doesn’t noticeably alter tones and color. 

 iPhone 7 Plus tele lens, ISO 20, 1/595s
 iPhone 7 Plus tele lens with Kamerar tele-converter, ISO 20, 1/736s

The Macro lenses allow you to get really close to your subjects and, with the right subjects, for some interesting shots. Just make sure you have plenty of light and / or hold the camera very still, otherwise you’ll inevitably end up with shaky images. If the focus plane is in the right place, the macro lenses are capable of capturing detailed images though.

 iPhone 7 Plus wide-angle with Kamerar 10x macro converter, ISO 40, 1/17 sec
  iPhone 7 Plus tele lens with Kamerar 10x macro converter, ISO 320, 1/50 sec

With the macro module, the fact that the the iPhone camera switches lenses in lower light can actually work in your favor. The wide-angle has a shorter minimum-focus distance and combined with a 2x digital zoom captures the subject larger in the frame than tele + macro. 

iPhone 7 Plus wide-angle with Kamerar 10x macro converter and 2x digital zoom, ISO 32, 1/25 sec

Conclusion

The Kamerar Zoom Lens Kit is currently one of the few options for mobile photographers who want to use attachment lenses on the iPhone 7 Plus dual-camera. It’s entirely made out of plastic but feels solid and is very easy to use. As far as smartphone accessory lenses go, the image quality is decent across all four lenses. The kit is currently available for $ 35 on Amazon.com. Whether attachment lenses have been part of your arsenal for a long time, or you just feel like trying them out, at this price point you can’t go wrong with the Kamerar Kit. 

What we like:

  • Easy to use design
  • Affordable kit
  • Relatively good image quality

What we don’t like:

  • Unexpected results when iPhone camera app switches to wide-angle in low light
  • A little force is needed to move lenses into position
  • Macro lenses require a very steady hand

Sample Gallery

There are 14 images in our Kamerar Zoom Lens Kit samples gallery. Please do not reproduce any of these images on a website or any newsletter / magazine without prior permission (see our copyright page). We make the originals available for private users to download to their own machines for personal examination or printing (in conjunction with this review), we do so in good faith, please don’t abuse it.

Unless otherwise noted images taken with no particular settings at full resolution.

$ (document).ready(function() { SampleGalleryV2({“containerId”:”embeddedSampleGallery_9473139005″,”galleryId”:”9473139005″,”isEmbeddedWidget”:true,”standalone”:false,”selectedImageIndex”:0,”startInCommentsView”:false,”isMobile”:false}) });
Articles: Digital Photography Review (dpreview.com)

 
Comments Off on Kamerar Lens Zoom Kit for iPhone 7 Plus review

Posted in Uncategorized


Leica SL Review

22 Feb

Introduction

The Leica SL is a high end 24MP full-frame mirrorless camera that has an astonishing ‘EyeRes’ high-resolution viewfinder, an incredibly high level of build quality and weather sealing, and unconventional though effective controls. Perhaps most significantly, this is the first non-rangefinder 35mm full-frame digital camera Leica has made, and the company’s first full frame mirrorless camera in the modern sense.

Key specifications

  • 24MP full-frame CMOS sensor
  • 0.8x magnification electronic viewfinder with 4.4 million dots
  • 11 fps continuous burst shooting
  • Maestro II image processor
  • Native ISO range of 50-50000
  • 49-point contrast-detect AF system
  • Dual SD card slots
  • 4K video recording with 4:2:2 10-bit HDMI out
  • Sturdy, weather-sealed construction

Leica, for all its cachet, mystique and eye-watering price points, has been consistent in its manufacture of somewhat unconventional digital cameras. There’s the X-U, which is the only camera with an APS-C sized sensor that’s designed to be submersible right out of the box. There’s the T and TL, which, at the time of its release anyway, was unique in its heavy reliance on touch control. And then there’s the M Monochrom, the only digital camera on the market that only shoots in black and white.

Enter the SL. Priced body-only higher than an M10 but (far) less than the company’s S line of medium-format bodies, the SL is aimed squarely at professionals and advanced amateurs with deep pockets. The SL is a blend of the S, M and Q cameras in terms of specifications, overall design aesthetic and controls.

The sensor performance of the SL isn’t quite class leading, but the native lenses are lovely. Out of camera JPEG, Leica Summilux-SL 50mm F1.4. ISO 500, 1/100 sec, F2.2. Photo by Carey Rose

Although the SL shares a lens mount with the T (whose lenses are now designated ‘TL’ while the SL’s are, predictably, ‘SL’), you’ll really want to use full-frame lenses to get the most out of it. At the time of this writing, that means you’re limited to just three native autofocus lenses, which include two variable-aperture zooms and a fast fifty. You can, of course, adapt M-mount glass to it, and though you’ll be potentially slowed by manual focus, the incredible viewfinder makes that process about as easy as can be.

Let’s take a look at how the SL compares with the Sony a7R II, the only other full frame mirrorless camera out there currently.

   Leica SL Sony a7R II
MSRP (Body only) $ 7450 $ 2899
Pixel Count 24MP 42MP
ISO Range (native) 50-50000 100-25600
AF Point control Joystick/touchscreen Four-way controller
Card slots

Dual SD, 1x UHS II

Single SD, UHS I
EVF (magnification/resolution) 0.80x / 4.4M dots 0.78x / 2.36M dots
Continuous Shooting rate 11 fps (7 fps with AF) 5 fps
Rear screen Fixed touchscreen Tilting
Autofocus 49-pt contrast-detect 499-pt on sensor phase-detect
Image stabilization In-lens In-body
Video Up to 4K/30p Up to 4K/30p
Battery life

400 shots

290 shots
Weight 847g 628g

So who is the SL for? It shoots nearly as fast as a Nikon D5, but with focus locked and a much more limiting lens lineup. It has rugged, go-anywhere construction and weather-sealing, but with the native lenses, it makes for a heavy and bulky companion. You could lock it down as a studio camera, aided by its 1/250 sec flash sync, but then you’re stuck with ‘only’ 24MP of resolution.

So far as I can tell, there just isn’t a strictly rational reason to recommend this camera to any particular type of photographer, but when has purchasing a Leica ever been a strictly rational decision? The Q, M and even the T to a certain extent are ‘special’ in some way, particularly in the eyes of their owners. So the question really is, is the SL ‘special?’ It’s certainly less limiting than any of Leica’s other cameras, but in many cases its those other cameras’ very limitations that contribute to their distinctiveness.

The SL is the ‘cost-no-object’ all-rounder for people who want the most practical camera that Leica currently makes. People will notice it. People who know what a Leica is may know just how expensive and exclusive it is. But practicality and luxury don’t always go hand-in-hand, and using the Leica SL as an all-around photographic tool brings it down to Earth more than its Leica stablemates. To see if its exclusivity and luxury appeal can transcend its utilitarian leanings, let’s dig in.

Can the capabilities of the SL justify the Red Dot premium? It’s a tall order, but let’s find out. Leica 24-90mm F2.8-4, image processed and cropped slightly to taste. ISO 50, 1/200 sec, F5.6. Photo by Carey Rose

Articles: Digital Photography Review (dpreview.com)

 
Comments Off on Leica SL Review

Posted in Uncategorized


Review of Moments Designer

22 Feb

What do you think is the one thing that people treasure the most after they have cut their birthday cake, completed a wedding ceremony, or had their first baby? Well, for most photographers, the answer is rather simple. These are the photographs taken by our fancy gadgets capturing those precious shots so that they remain a part of our clients’ Continue Reading

The post Review of Moments Designer appeared first on Photodoto.


Photodoto

 
Comments Off on Review of Moments Designer

Posted in Photography


Review of the Polaroid PL-190 TTL Flash

22 Feb

Review of the Polaroid PL-190 TTL FlashPopping open the generic black carrying case of the Polaroid PL-190 TTL flash is an unimpressive endeavor. Not that these things ever are of course. The flash which slid smoothly out into my hand looked unremarkable as well; an LCD screen and a series of buttons below. The lens had the typical integrated bounce card and diffuser. But when I slid the sizeable flash onto the hot shoe of DSLR, the un-remarkability ended. In use, the PL-190 TTL was far more impressive.

Equipped with an 18-180mm zoom, swivel/bounce head, TTL, and wireless remote capability, and it started to look pretty comparable to the high-end flashes available from Canon and Nikon (though much, much less expensive).

Note: the Polaroid PL-190 TTL flash is available for both Nikon (PL-190N) and Canon (PL-190C).

Review of the Polaroid PL-190 TTL Flash

Brand comparison

As a largely Canon shooter, I’ve always been a bit disappointed by my brand’s flashes. Designed to be so closely integrated into the operating system of the camera, they can produce great results. But making swift changes to settings, power, and TTL exposures can be a slow, button-pushing, menu-searching process. Then, of course, there is the cost of the Canon flashes. The higher end can run close to $ 500, which is almost five times the cost of the Polaroid PL-190 TTL flash, which I held in my hand.

Review of the Polaroid PL-190 TTL Flash

On-camera, the PL-190 TTL is as large as Canon or Nikon’s high-end flashes. And it’s just about as powerful.

In part due to the fiddly nature of Canon flashes, I’ve often defaulted to using basic, inexpensive, manual control lights. Plus I can buy two, three, or even four for the price of a Canon 600EX. So I was excited about this new offering. The specs of the Polaroid PL-190 TTL flash are similar to that of Canon’s high-end ones (the Speedlite 600EX II-RT), though perhaps not quite as capable, and as a third party offering, the integration with my standard operating system is not quite as smooth. This flash is capable of TTL, but also easily adjustable through manual power settings. Basically, the flash seemed like a great compromise, and much more affordable.

Using the flash

In using the flash, that pleasure continued. Frankly, I love this thing and didn’t want to return the demo I’d received on loan from Polaroid.

The controls on the back are simple, a pleasant change from the various wheels and menus required to Canon’s 580ex. It’s powerful too, lighting up distant objects even under fairly bright conditions. The zoom capability, which was automated, to correspond with the focal length of the camera’s lens reached to nearly 200mm, throwing a light cone that worked nicely with my 70-200mm (one of my favorite lenses).

Review of the Polaroid PL-190 TTL Flash

Straight flash, is typically direct and bright, mostly lacking shadows and textures. (True of any camera when used on-camera.)

Review of the Polaroid PL-190 TTL Flash

Using the built-in diffuser, you lose about two stops of light (this is the same flash power and camera settings as the previous, straight-flash shot). The light does soften somewhat but is still direct and harsh.

Review of the Polaroid PL-190 TTL Flash

This image shows the same camera setting and flash power as the previous two images but is using just the bounce card with the flash aimed straight up. It creates a softer, top-light look, though you lose about three or four stops of light.

Here, I increased the flash power three stops and used the bounce card with the flash aiming up. The result is brighter but retains the softness and directionality of a top light.

TTL and Manual Settings

Since the TTL functionality worked well with my camera, I could take advantage of that one shot then quickly switch over to full manual functionality the next. I could zoom manually as well, allowing me to focus the beam narrowly while shooting with a wide angle lens on the camera, highlighting a single portion of a much larger frame.

Review of the Polaroid PL-190 TTL Flash

Off-camera the Polaroid PL-190 TTL flash was easy to use. Manual settings are easy to control, providing a great deal flexibility when creating the proper exposure.

Review of the Polaroid PL-190 TTL Flash

Another off-camera image. When used with the bounce card and placed close the subject, the light was surprisingly soft.

Now I want to note, that since I was primarily interested in the basic functionality and usability of this flash, I tried it only briefly off-camera, making a few images of flowers. Off-camera, I used the manual settings. As I noted earlier, the simple adjustment of power makes this a breeze. With a simple radio trigger on board, I was set to go. The Polaroid PL-190 TTL flash does have wireless slave capability and although I did not test this, given the smooth operation of the flash in general, I’m sure this too would work well.

Review of the Polaroid PL-190 TTL Flash

With a 1/200th sec flash sync speed the PL-190 TTL is easily capable of images like this. Fast moving subjects like flying birds retain sharpness, with little motion blur.

Summary

In short, I think the Polaroid PL-190 TTL flash is a great lighting tool. It worked flawlessly in the brutal cold of an Alaska winter day when I played with it outdoors, and it has easy to use controls with some helpful camera integration. In fact, I liked its simplicity and ease of use so much that as my Canon 580ex ages, this Polaroid flash may be the replacement. With a $ 109 price tag (at major online retailers) I can buy four with change for the price of one Canon 600ex. Guess that means I can quadruple my creative lighting options…now, where did I leave my credit card?

Shop for the Polaroid PL-190 TTL flash on Amazon.com (Nikon PL-190N or Canon PL-190C ) or B&H Photo (Nikon PL-190N or Canon PL-190C ) .

googletag.cmd.push(function() {
tablet_slots.push( googletag.defineSlot( “/1005424/_dPSv4_tab-all-article-bottom_(300×250)”, [300, 250], “pb-ad-78623” ).addService( googletag.pubads() ) ); } );

googletag.cmd.push(function() {
mobile_slots.push( googletag.defineSlot( “/1005424/_dPSv4_mob-all-article-bottom_(300×250)”, [300, 250], “pb-ad-78158” ).addService( googletag.pubads() ) ); } );

The post Review of the Polaroid PL-190 TTL Flash by David Shaw appeared first on Digital Photography School.


Digital Photography School

 
Comments Off on Review of the Polaroid PL-190 TTL Flash

Posted in Photography


OnePlus 3T camera review

12 Feb

$ (document).ready(function() { SampleGalleryV2({“containerId”:”embeddedSampleGallery_0539296174″,”galleryId”:”0539296174″,”isEmbeddedWidget”:true,”standalone”:false,”selectedImageIndex”:0,”startInCommentsView”:false,”isMobile”:false}) });

OnePlus is a relatively new player in the mobile device market, but following the launch of the OnePlus One in 2014 it has very quickly gained a lot of momentum through a simple strategy: offer high-end hardware at mid-range prices.

The latest model, the OnePlus 3T, is no exception. At a current price of $ 439 you get Qualcomm’s top-end chipset Snapdragon 821 and a whopping 6GB of RAM in the processing department. Add 64GB of internal storage in the base model to the mix and the 3T does not have to worry about comparisons to the flagship models from Samsung, Sony, Apple and the rest of the bunch.

On paper, the camera module is not quite on the same level as the powerful processing components but still looks very promising. A 1/2.8″ 16MP sensor is combined with an F2.0 aperture, phase detection and optical image stabilization. DNG Raw support, 4K video and manual control over shutter speed are all on board as well and selfie-shooters will be interested in the front camera that offers a whopping 16MP resolution.

Key Photographic / Video Specifications

  • 1/2.8” 16MP CMOS sensor with 1.12µm pixels
  • F2.0 aperture
  • AF with on-sensor phase detection 
  • Optical image stabilization
  • LED flash
  • 4K video at 30 fps
  • 720p slow-motion at 120fps
  • Manual controls and Raw-support
  • 16MP front camera, 1.0 µm pixels, F2.0, 1080p video

Other Specifications

  • 5.5″ 1080p Full-HD AMOLED screen
  • Qualcomm Snapdragon 821 chipset
  • 6GB RAM
  • 64/128GB storage
  • 3,400mAh battery
  • Fingerprint reader

DPReview smartphone reviews are written with the needs of photographers in mind. We focus on camera features, performance, and image quality.

Articles: Digital Photography Review (dpreview.com)

 
Comments Off on OnePlus 3T camera review

Posted in Uncategorized


Has a new champion been crowned? Sigma 85mm F1.4 Art lens review

08 Feb

The Sigma 85mm F1.4 Art hasn’t been on the market long, but it has already begun to make some serious waves. Lenstip and DxO have rated it the sharpest 85mm lens ever created, beating out even the legendary 85mm F1.4 Zeiss Otus, which isn’t something that we take lightly. We were lucky enough to get our hands on the lens back in mid-November and we were very impressed to say the least, so much so that it took top honors for the ‘Best Prime Lens of 2016’ as chosen by our staff.

It has, without a doubt, been a pretty big topic of discussion not only amongst our staff members, but also amongst portrait photographers around the world. With that said we just had to get our hands on it to see how it really performs and to see how it holds up next to some very stiff competition at 85mm. The Sony FE 85mm F1.4 GM is a very formidable competitor and arguably the best modern 85mm F1.4 on the market (behind the manual focus Zeiss Otus, of course). With that in mind, the question is; can the Sigma hold its own? Our review will answer that question and more.

APS-C   

With an equivalent focal length of 136mm and an equivalent aperture of F2.2, this lens can be usefully used on an APS-C camera. Even with its slightly longer focal length, it does still fit into the focal range that’s often used by portrait photographers and the fast aperture does allow for it to be used in low-light situations as well. However, its size, weight and price makes it worth considering 85mm F1.8 lenses instead.

Sigma 85mm F1.4 DG HSM Art headline features

  • F1.4 maximum aperture
  • 85mm max fixed focal range
  • 2 FLD glass elements (low-distortion glass with fluorite-like performance)
  • 1 Aspherical SLD element
  • Canon EF, Nikon (FX) and Sigma SA Bayonet mounts

Specifications Compared

  Sony FE 85mm F1.4 GM Sigma 85mm F1.4 DG HSM Art
 MSRP $ 1800.00  $ 1199.00
 Lens Type Prime Prime
 Focal Length 85mm  85mm 
 Filter Thread 77mm 86mm
Image Stabilization No No
Lens Mount  Sony FE Canon EF, Nikon (FX), Sigma SA Bayonet 
Aperture Ring Yes (w/ d-click feature) No
Maximum Aperture  F1.4 F1.4
Minimum Aperture F16  F16
Minimum Focus  0.80 m (31.5?) 0.85 m (33.46?)
Diaphragm Blades  11 9
Elements  11  14
Groups  8 12
Special Elements/Coatings  1 ‘Extreme Aspherical’ element, 3 ED elements and ‘Nano AR’ coating 2 FLD glass elements and 1 Aspherical SLD element
Autofocus  Yes Yes
Motor Type  Ring-type Supersonic Wave Ring-type Hypersonic
Full Time Manual  Yes Yes
Focus Method  Internal Internal
Distance Scale  No Yes 
DoF Scale  No Yes
Full Weather Sealing  Yes No (dust and splash proof)
Weight 820g (1.81 lb) 1131g (2.49 lb) 
Dimensions  108 mm (4.23?) x 90mm (3.52?) 126mm (5.0″) x 95mm (3.7″)
Hood  Yes ( ALC-SH142) Yes

As you can see the lenses are fairly different in terms of build and design. The Sony 85mm has a manual aperture ring that can not only function on its own, but the aperture can also be adjusted with the camera by switching the ring to ‘A’. This ring also features a special de-click feature for smooth, silent aperture changes while shooting video. The Sigma 85mm lacks the weather sealing that the Sony has and there’s also a fairly substantial difference in size and weight as the Sony 85mm is a fair bit smaller and lighter. The price point is one area of the where the Sigma really prevails over the Sony, on paper, at least.

Specifications are fun to look at, but the real question is how do these lenses perform? Read on, to find out.

Articles: Digital Photography Review (dpreview.com)

 
Comments Off on Has a new champion been crowned? Sigma 85mm F1.4 Art lens review

Posted in Uncategorized


Quick Review of the Kupo Click Stackable Light Stand

02 Feb

I’ve recently started using a pair of Jinbei HD600 studio lights for my photography and what I love about them is that they are self-contained units. They don’t have any requirements for power cables, etc., as they’re battery powered, wireless studio lights. What was starting to bug me, though, was that I only had heavy light stands to mount them on. Not a problem when you’re working in a studio, but when you have to visit a client to do a headshot or a quick portrait of someone, having to take a C-Stand along isn’t always ideal (especially if you’re on public transport).

I wanted to stick with Kupo gear as I’m very happy with the quality and innovation of their products, so I asked the crew at ProTog what my options were. They suggested I hold out for the Kupo CLICK stackable lighting stands. I did and I’m very happy I did. Here’s my review…

Check out the Kupo Click Light Stands on Amazon or on B&H Photo’s website.

Kupo click light stand

My wish list

I had a few simple ideal specs for the stands that I was after:

  • I wanted them to be light enough to sling over my shoulder when I was on the go.
  • They need to not suffer from bad build quality due to being light weight.
  • I wanted to be able to quickly use them for either a well-placed strobe on an outdoor shoot, a quick portrait in an office or studio, and maybe even to mount a GoPro on to run a quick timelapse of a session.

Features of the Kupo Click

The Kupo Click had everything I wanted in a portable light stand. Let’s take a look through the feature list.

  • Coming in at 1.3kg (2.9 pounds), the weight was just fine, easily able to attach a pair of stands to the side of my ThinkTank Airport TakeOff roller.
  • In terms of load, the diminutive stands were capable of holding a 5kg (11 pounds) payload, more than I’d need to place atop the aluminum light-weights.
  • The tubes are also double pinned to the threaded ends, this makes them a lot less likely to fail when compared with my old stands, after a few months of heavy use, the stands haven’t loosened up in the slightest.

Kupo click light stand

Kupo click light stand

The Click

The Kupo Click light stands allow you to click them together either side by side or on top of each other. So you can essentially have one of them flat on each side of your bag with some little attachment straps, or you can have them side by side (above) and sitting in the tripod cup on your rolling camera bag, or you can use a strap (sold separately, I didn’t get one as I used a regular strap with a clip attached to sling mine over my shoulder, see below)

Kupo click light stand

Kupo click light stand

Kupo click light stand

The stands have a sweet built-in air damper that prevents damage to your lights if you accidentally undo the locks by cushioning the column on release. I have tested this and it works. The midsection is better than the top section at slowing descent, but it certainly does slow down the inevitable crash and ultimately a replaced flash tube!

Attaching your lights

The stands are equipped with a 5/8″ top stud with a 3/8″ threaded, plus a removable 1/4″-20 threaded top, this lets you mount a whole raft of lighting gear, as well as Sony ActionCam / GoPro mounts (The 1/4 20″ adaptor) which I like to use often on a shoot, or just to pop a camera up high for some reason or other – you can attach a regular ball head and mount your camera on that.

Kupo click light stand

Kupo click light stand

Kupo click light stand

Bottom line

I’ve had these stands a few months now and have had many chances to use them and abuse them. They pack away well, they’re all the things I was after in a light stand. I can’t fault these stands and for the price, I’d say they’re one of the best on the market and well worth your hard earned coin. Five stars.

googletag.cmd.push(function() {
tablet_slots.push( googletag.defineSlot( “/1005424/_dPSv4_tab-all-article-bottom_(300×250)”, [300, 250], “pb-ad-78623” ).addService( googletag.pubads() ) ); } );

googletag.cmd.push(function() {
mobile_slots.push( googletag.defineSlot( “/1005424/_dPSv4_mob-all-article-bottom_(300×250)”, [300, 250], “pb-ad-78158” ).addService( googletag.pubads() ) ); } );

The post Quick Review of the Kupo Click Stackable Light Stand by Sime appeared first on Digital Photography School.


Digital Photography School

 
Comments Off on Quick Review of the Kupo Click Stackable Light Stand

Posted in Photography