RSS
 

Posts Tagged ‘Reflector’

How to Use a Reflector and Diffuser to Enhance Flower Photographs

26 Jun

Photograph Flowers 2016-05-11at15-41-06

cover-fill-card

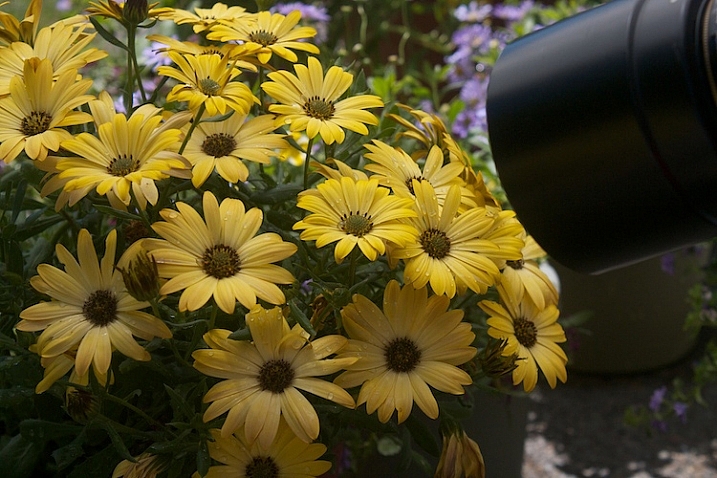
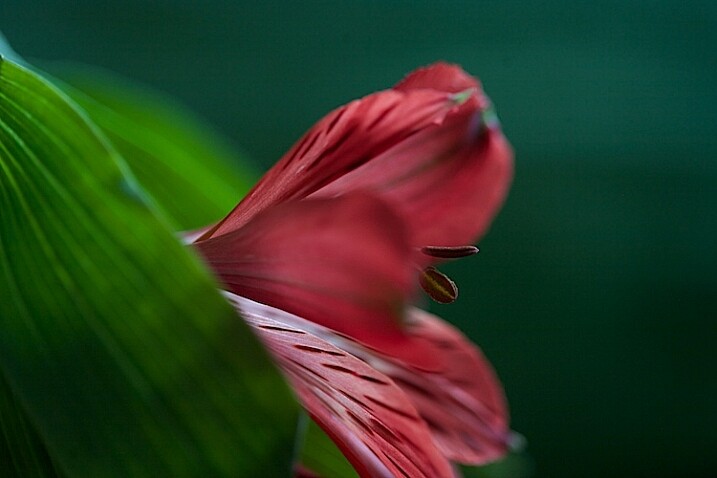
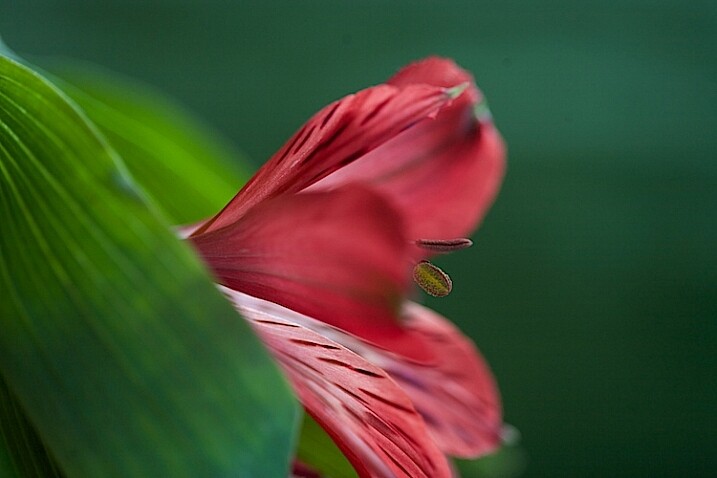
Learning to see and use light is one of the most important steps to creating great photographs. As you become more aware of what nice light really looks like, you can start to manipulate even the harshest conditions with some simple tools. The photo above was shot in bright sunshine using both a diffuser and a reflector.

full-sun-overview

Practice

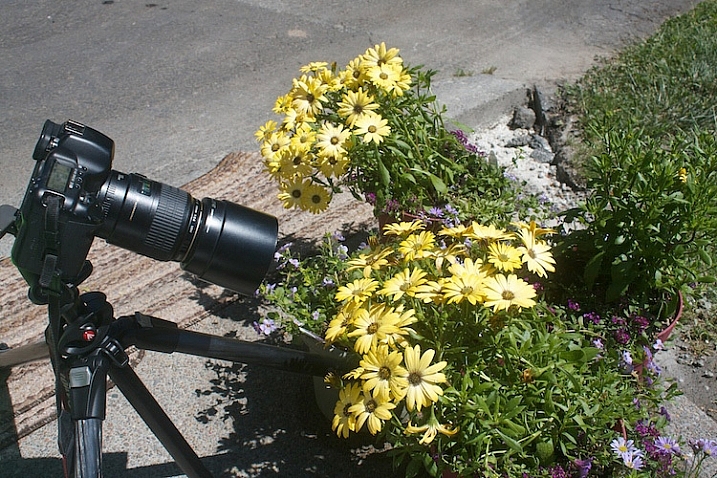
To practice this exercise, find some flowers in bright sun. You can photograph flowers that are planted in your garden, or in pots.

Photograph-Flowers-in-sun-3

Photograph-Flowers-in-sun-2

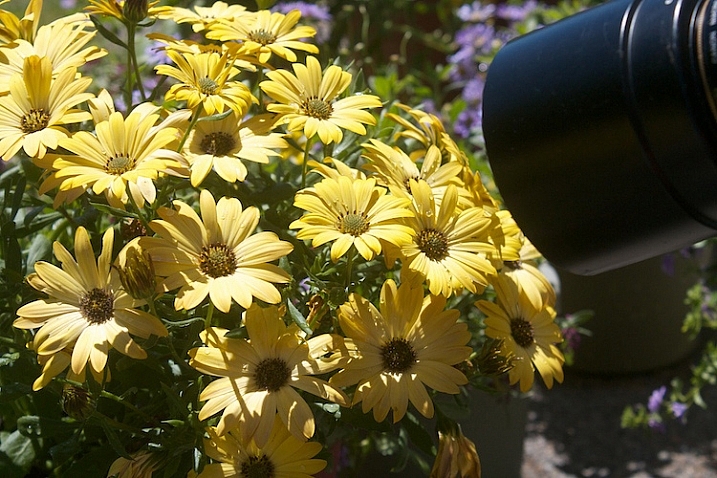
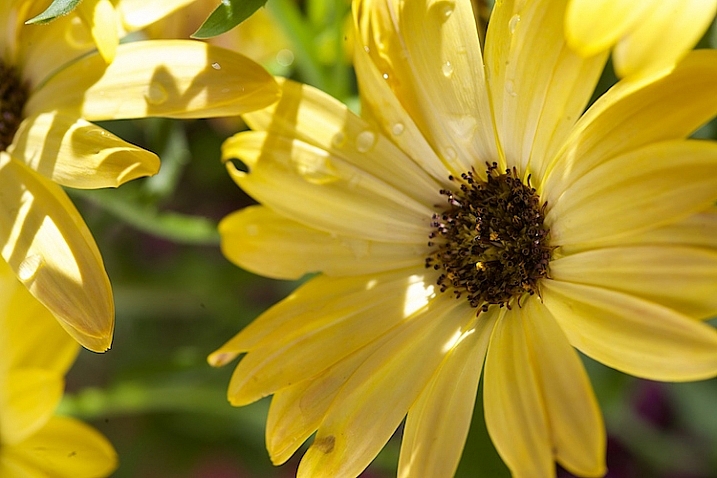
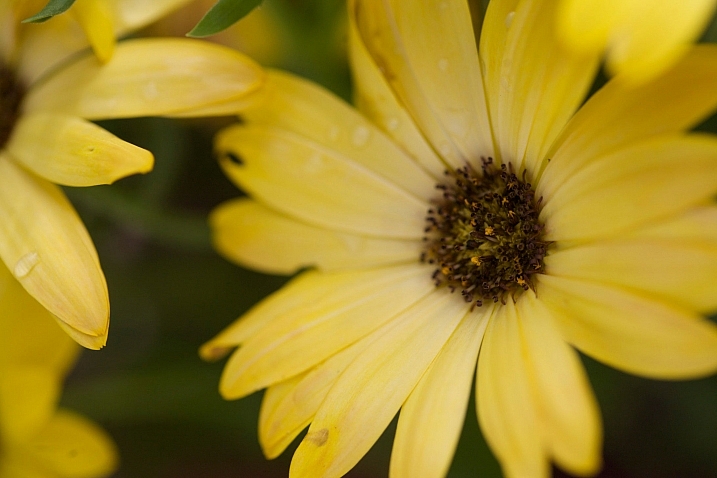
Notice the quality of light on the flowers. In bright sun, there are strong highlights and deep shadows. There is lot of contrast, which comes through in the image.

Photograph-Flowers-2016-05-11at15-34-44

Notice how you lose detail in the highlights. The bright spots caused by the sun don’t add anything to the photograph, in fact, they are very distracting. Our eyes tend to go toward the brightest spots in a photograph and in this situation, the highlights are drawing our eyes away from the center of interest – the flower.

Photograph-Flowers-2016-05-11at15-09-23

Add a reflector

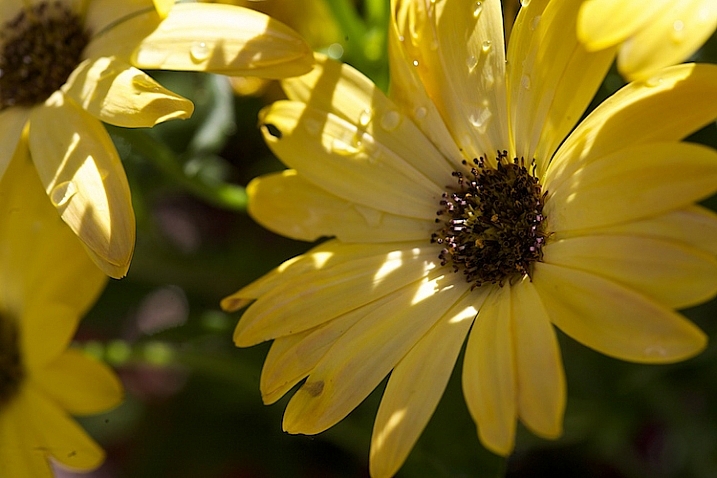
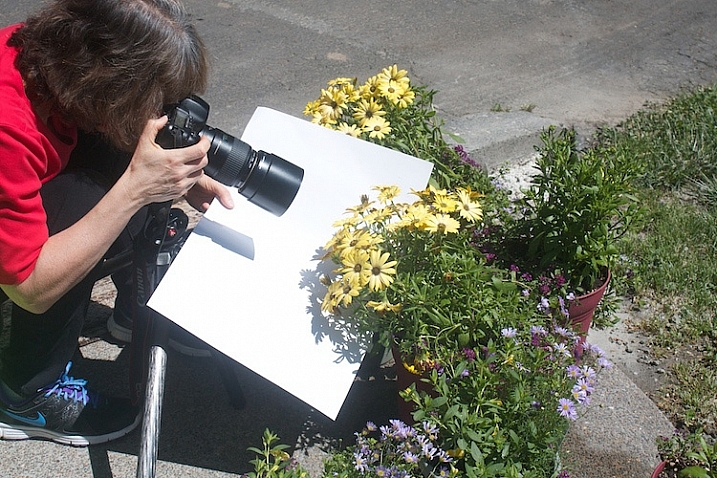
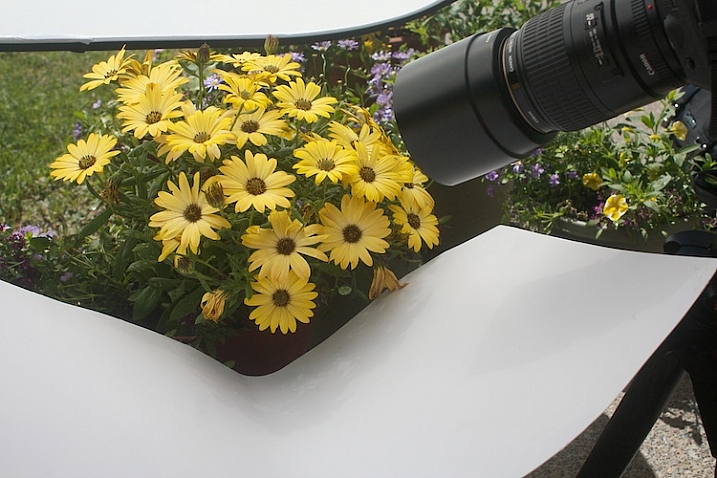
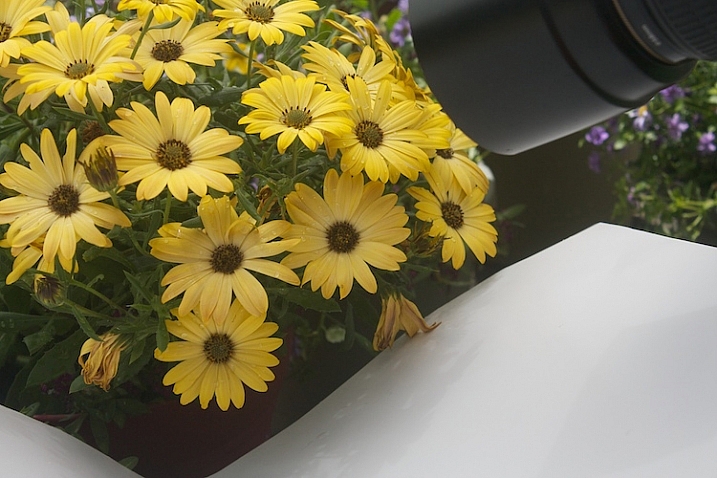
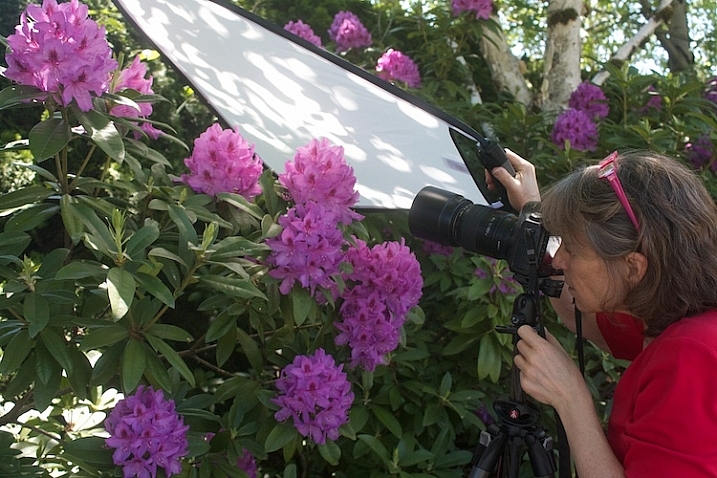
Now, try using a reflector. Light bounces just like a billiard ball. By placing a light colored, reflective surface opposite the light source, you can bounce light back into the subject. In this instance, our light source is the sun, so I placed the reflector under the leaves to bounce the light back into the shadows. You can use almost anything as a reflector. In this example, I’m using a piece of white poster board.

Read DIY How to Build and Use a Reflector to Take Better Portraits and 10 Ways to Use a 5-in-1 Reflector for more help on using reflectors.

Just-below-full-sun-using-fill-cards

Notice the difference in the image above, compared to the one without the reflector. Can you see how bouncing the light back in brightens up the flower? The exposure settings haven’t changed. The only difference is the reflector (also called a fill card) in the second shot.

Photograph-Flowers-2016-05-11at15-08-06

Diffuse the light

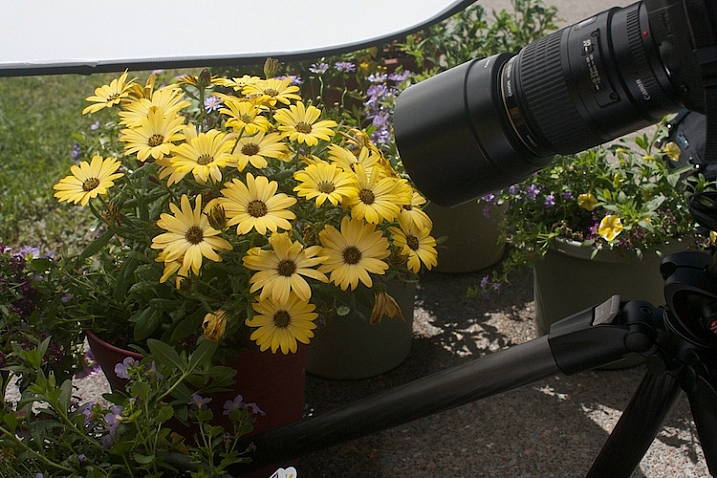
Now, we are going to use a diffuser to soften the light.

Photograph-Flowers-reflector-above-better2

Here we are starting to see some really beautiful, soft light. Notice how even the light is and how much softer the flowers feel. The highlights and shadows are not as severe and harsh, and more detail is retained in both areas.

Photograph-Flowers-reflector-above

Use a reflector and diffuser

Take it a step further.

Photograph-Flowers-2016-05-11at15-09-41

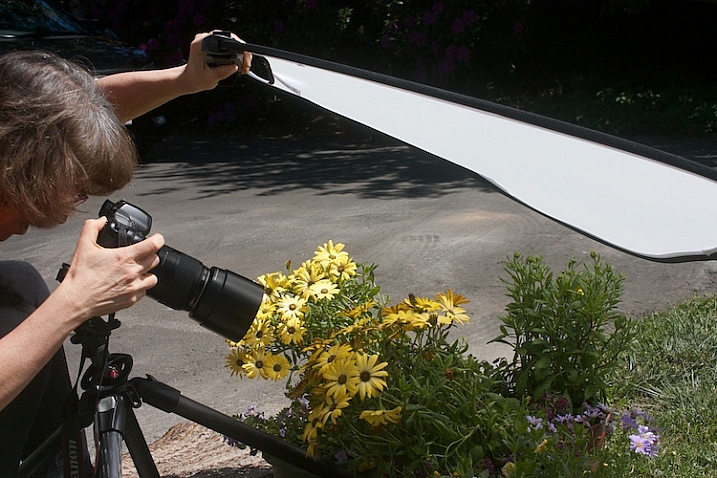
Let’s use a diffuser with a reflector, and see how that looks. Here’s a tip for you: If you can’t prop up your reflectors and diffuser and press the shutter button, you can use the 2-second self-timer on your camera to free up an extra hand.

Photograph-Flowers-reflector-above-and-below

With the diffuser above and a reflector below, the flowers start to take on a magical feel.

Photograph-Flowers-2016-05-11at15-12-20

fill-card-reflector-top-and-bottom

cover-fill-card

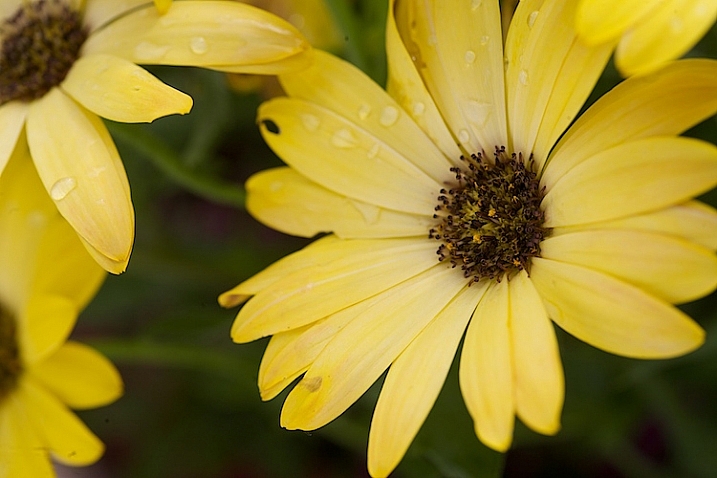
Now you can see how using a reflector and diffuser can drastically improve your flower photographs. I also want to add that none of these photographs were manipulated in Lightroom or Photoshop in any way, other than a little sharpening. The dramatic difference in the photographs was created entirely by manipulating light.

Please share you comments and questions below, then try this exercise at home and post your photos in the comments below. I’d love to see them!

googletag.cmd.push(function() {
tablet_slots.push( googletag.defineSlot( “/1005424/_dPSv4_tab-all-article-bottom_(300×250)”, [300, 250], “pb-ad-78623” ).addService( googletag.pubads() ) ); } );

googletag.cmd.push(function() {
mobile_slots.push( googletag.defineSlot( “/1005424/_dPSv4_mob-all-article-bottom_(300×250)”, [300, 250], “pb-ad-78158” ).addService( googletag.pubads() ) ); } );

The post How to Use a Reflector and Diffuser to Enhance Flower Photographs by Vickie Lewis appeared first on Digital Photography School.


Digital Photography School

 
Comments Off on How to Use a Reflector and Diffuser to Enhance Flower Photographs

Posted in Photography


Rogue FlashBender 2 XL Pro Frank Doorhof Edition features ‘Super Soft Silver’ reflector

16 Jun

Rogue has introduced a new FlashBender 2 XL Pro reflector designed in collaboration with photographer Frank Doorhof. The reflector uses ‘Super Soft Silver’ fabric, a material that produces an effect that falls somewhere between the soft lighting created by white fabric and the harsher, more contrasty reflections of sliver fabric.

The FlashBender 2 XL Pro is the largest FlashBender model at 13in x 16in / 33cm x 41cm; it includes a belt and buckle for attachment to a flash, and an adjustable shape for altering the direction of light.

The Rogue FlashBender 2 XL Pro Super Soft Silver Reflector is available now from Rogue for $ 59.95.


Press release:

ExpoImaging, Inc., creator of the patented FlashBender shapeable light modifiers for off-camera flash photography, today announced availability of the new Rogue FlashBender 2 XL Pro Super Soft Silver Reflector, Frank Doorhof edition.

“Photographers looking for more contrast in their images while shooting flash on location will love this new Super Soft Silver FlashBender 2 XL Pro,” said Erik Sowder, ExpoImaging CEO. “Highly reflective shiny silver fabric is prone to hot spots and is often too bright and too contrasty for portraiture, especially in brighter light. Our custom Super Soft Silver fabric falls between harsh shiny silver and soft white fabrics. It is brighter and more “edgy” than white fabric while producing a softer and more even light than shiny silver fabric.”

Professional photographer and lighting instructor Frank Doorhof is a master of using edgy light and contrast to create remarkable images. “I love more edge in my images,” said Frank, so when he first saw Rogue’s Super Soft Silver fabric, he knew he wanted a version of the Rogue FlashBender 2 XL Pro Reflector incorporating the fabric. Thus, the Rogue FlashBender 2 XL Pro Super Soft Silver Reflector, Frank Doorhof edition was born.

Designed for portability to pack flat in most camera bags or laptop compartments, the 12” x 16” (30.5cm x 40.5cm) FlashBender 2 XL Pro reflector is the largest FlashBender. Building on the success of the popular Rogue FlashBender light modifiers for speedlights, FlashBender 2 reflectors can be shaped to control the direction of light from an accessory flash, and FlashBender 2’s improved belt and buckle design provides a faster and more secure attachment to your flash.
With the control, versatility and portability of all FlashBenders and a Super Soft Silver reflective surface, the Frank Doorhof edition FlashBender 2 XL Pro Reflector represents a unique new photographic tool to create spectacular images.

Pricing and Availability

The Rogue FlashBender 2 XL Pro Super Soft Silver Reflector is available from ExpoImaging’s distribution partners worldwide or online at RogueFlash.com. The Rogue FlashBender 2 XL Pro Super Soft Silver Reflector retails for $ 59.95.

About Rogue Photographic Design

Created by ExpoImaging, Rogue Photographic Design develops innovative lighting equipment for speedlight enthusiasts. Compact, versatile, and durable, patented Rogue light modifiers offer unparalleled lighting control in portable and light weight designs. More information about Rogue Photographic Design is available at RogueFlash.com, or ExpoImaging.com. Rogue FlashBenders are patented: see http://www.ExpoIP.us.

About ExpoImaging, Inc.

ExpoImaging, Inc. markets, designs, manufactures and distributes innovative camera accessories to the photographic market. ExpoImaging is the pioneer in white balance filters and manufactures ExpoDisc White Balance Filters, Rogue FlashBenders, Rogue Diffusion Panels, Rogue Grid, Rogue Flash Gels, and Rogue Safari. ExpoImaging is also the exclusive U.S. distributor of CapBuckle, and Ray Flash: The Ring Light Adapter. These unique products are available at select photography dealers worldwide or online at RogueFlash.com, or http://www.expoimaging.com.

Articles: Digital Photography Review (dpreview.com)

 
Comments Off on Rogue FlashBender 2 XL Pro Frank Doorhof Edition features ‘Super Soft Silver’ reflector

Posted in Uncategorized


How to Create Gorgeous Flower Images using a Flashlight and a Reflector

31 May

1-Light-painting-flowers-orchid

In this tutorial, I’m going to share with you some simple and inexpensive ways to create beautiful flower images. You will learn to add light by using a flashlight and a reflector. If you add in some imagination and patience, you will soon be creating gorgeous flower images of your own.

In addition, you will gain insight about seeing light, and how and recreate it on your own.

The techniques I am going to share are reminiscent of light painting and burning (from film days printing negatives), but in this tutorial we are going to take advantage of the ambient light, combined with light from flashlights to create some great effects.

Setting up

You will need to put your camera on a tripod, and find a nice surface near some window light to photograph your flower. Set up to shoot using a shutter speed slower than 1/15th of a second, and it’s much easier if you use a cable release or use your camera’s self-timer feature.

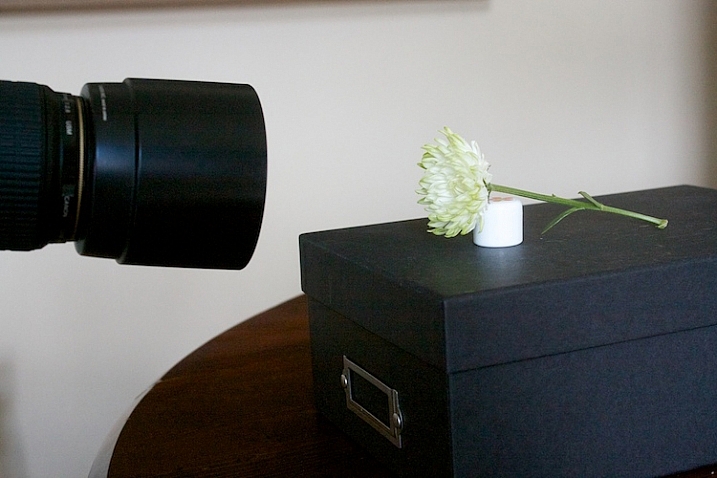
1s-Light-Painting-Flowers-2016-05-19at13-10-21-behind-scene

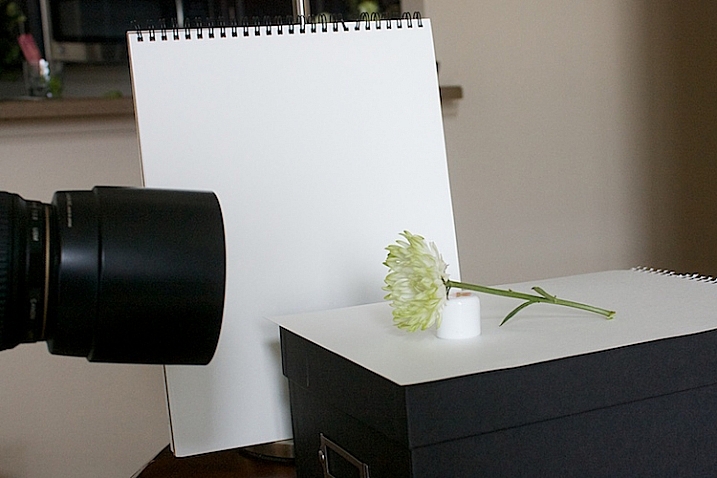
Here’s my set up, above. I chose an easy location, perpendicular to a window, providing some nice light. I used a prop to hold the flower up.

2s-Light-Painting-Flowers-2016-05-19at13-30-24

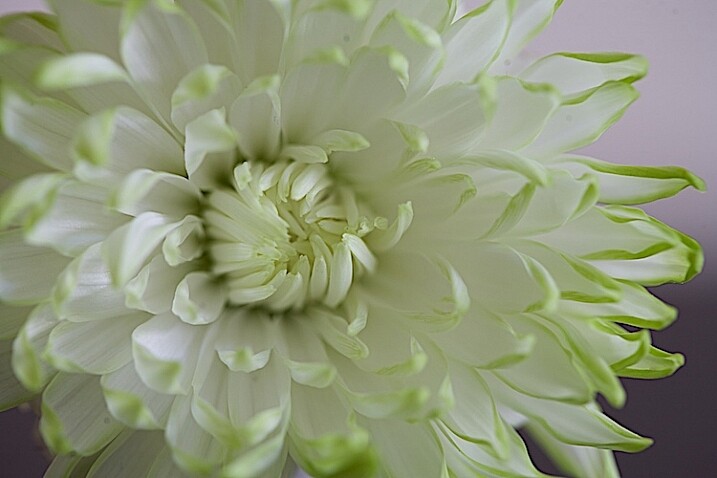
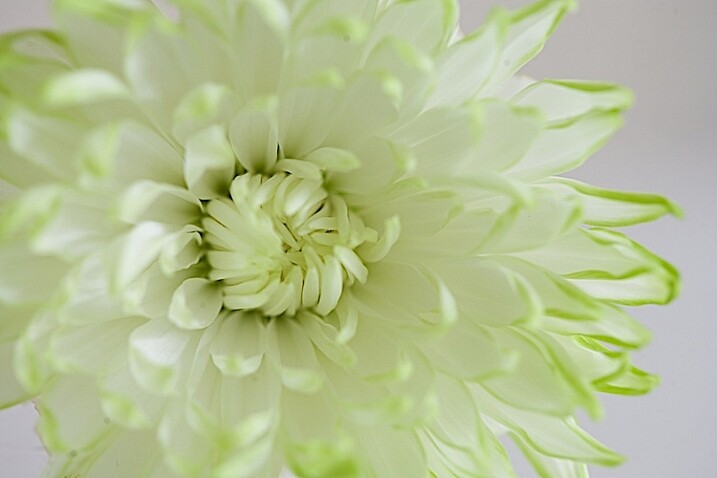
Window light only. Exposure was f/4 at 1/4.

I did a test shot, above, to determine my exposure using just ambient light. I slowed the shutter speed down just a little bit to see what results I would get.

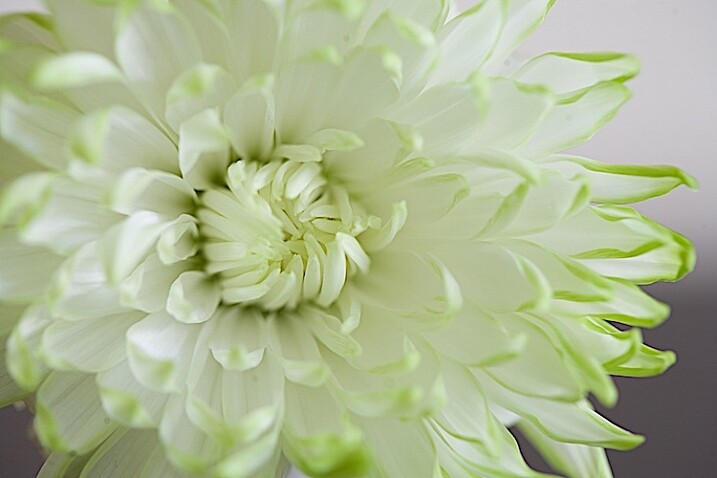
2.s-Light-Painting-Flowers-2016-05-19at13-29-53

Window light only. Exposure f/4 at 0.40 seconds.

Add a reflector

It’s a little brighter at this exposure, but notice that the shadows are still quite strong.

3s-Light-Painting-Flowers-2016-05-19at13-15-39-behind-scene

To soften the light, I added a white fill card below, and to the side of the flower. It’s also called a reflector. Almost anything white can be used as a reflector. The idea is to fill in the shadows, and to make the light feel softer.

4s-Light-Painting-Flowers-2016-05-19at13-36-59

Window light with fill card. Exposure f/4 at 1/4.

This exposure above was taken with the fill cards in place. Compare it with the two above, and notice that the lightness/darkness is similar to the longer exposure. It’s pretty amazing how much light can be added to a photo just by using reflectors.

More importantly, note the quality of light. By that I mean, notice how the shadows are still present to the left of the center of the flower but are not as prominent. Also be aware of how  nicely the shadows are filled in from the bottom.

Create a feeling that matches your subject

Flowers are soft. They are feminine. When we tell stories about our subject, we want to convey that feeling. One of the ways we convey feelings in photographs is in how we use light. Notice how the feel is different in the photos with the fill card and without. The second exposure feels softer and more feminine, and thus, supports the story of a feminine flower.

Add light from a flashlight for more drama

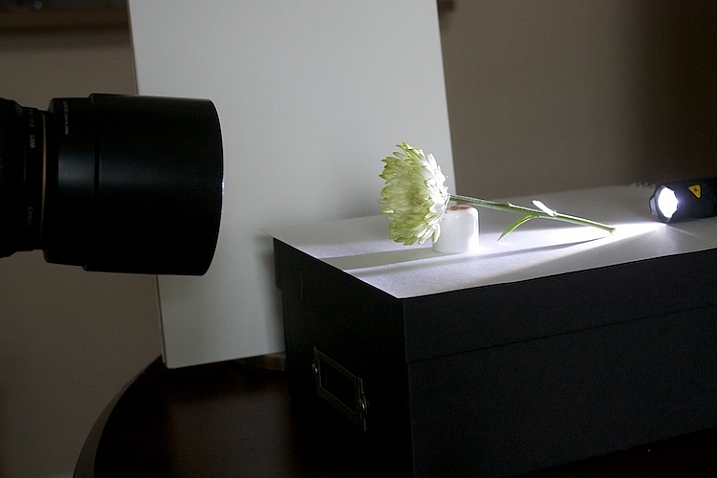
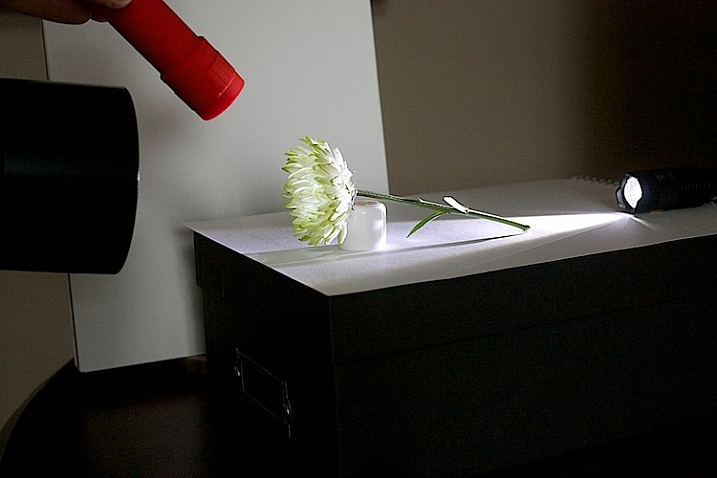
Now, to add a backlight with a flashlight. Make sure to position the flashlight in such a way that it doesn’t cause lens flare (the light isn’t hitting the lens directly). Make sure the light is pointing entirely at the flower, and not reaching your camera lens.

5s-Light-Painting-Flowers-2016-05-19at13-18-08-behind-scene

5bs-Light-Painting-Flowers-2016-05-19at13-51-46

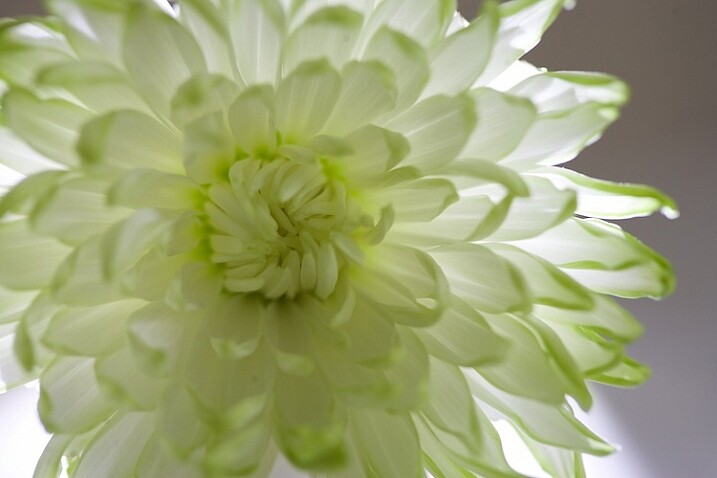
Flashlight with backlight, no fill cards or reflectors. Exposure f/4 at 1/4.

This is with a strong backlight. Notice how dark the center of the flower seems.

6s-Light-Painting-Flowers-2016-05-19at13-41-23-behind-scene

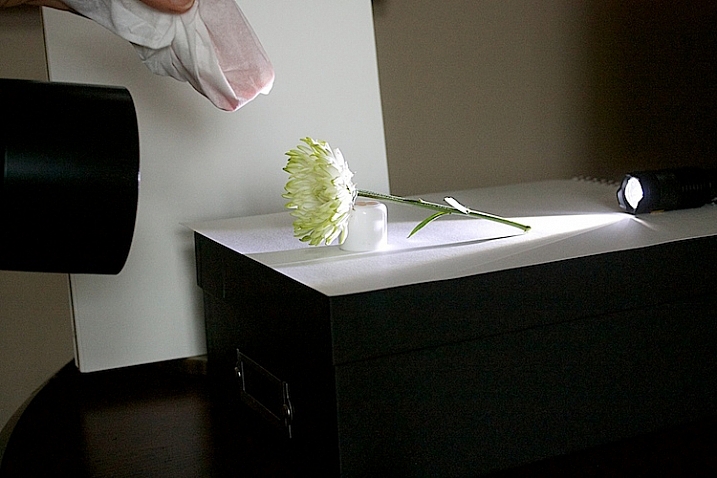
We can use a second light to fill in the center of the flower. I recommend using a slower shutter speed, 1/15th or less, and moving the flashlight while the exposure is made. If you don’t move the light, it will appear too strong and create harsh shadows.

7s-Light-Painting-Flowers-2016-05-19at13-41-03-behind-scene

If the light appears too strong and too direct, use a diffuser over your flashlight. I used a kleenex to soften the light.

8s-Light-Painting-Flowers-2016-05-19at13-38-27

Flashlight as a backlight, with a second flashlight as a fill light in the front. Exposure f/4 at 1/4.

How does this feel to you now? Notice how I brought the exposure of center of the flower up, just by doing a little light painting. If you ever worked in a darkroom, you will notice this is similar to manipulating an image in an enlarger called, burning, but we are doing it live at the capture stage.

9s-Light-Painting-Flowers-2016-05-19at13-20-12-behind-scene

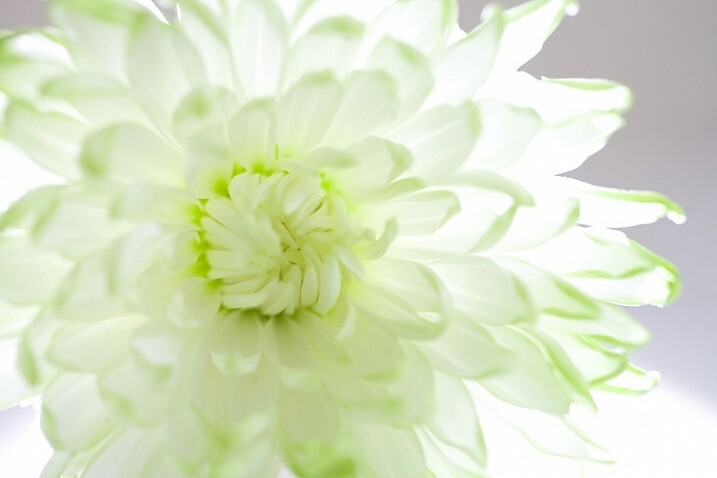
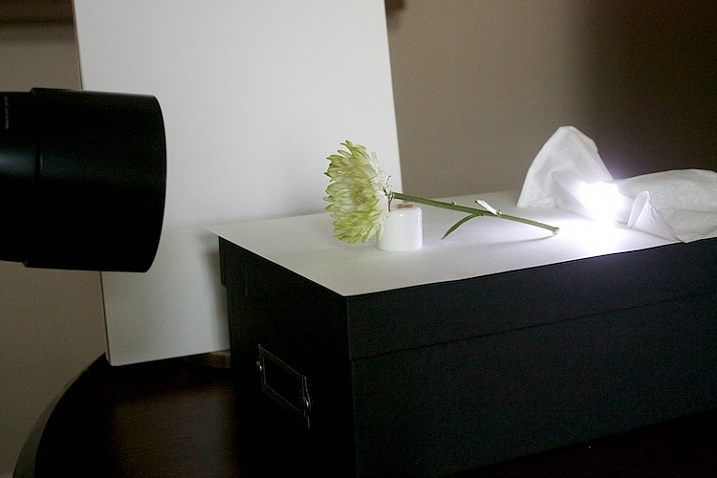
Let’s see what our flower looks like with a backlight that isn’t as strong. I used a kleenex diffuser on the flashlight in the back.

10s-Light-Painting-Flowers-2016-05-19at13-41-36

Using a softer backlight by diffusing with tissue.

Can you see how much softer the backlight is?

11sLight-Painting-Flowers-2016-05-19at13-42-54

In this image, I added a little bit of fill with a flashlight and kleenex diffuser.

This is very, very subtle. But move your eye back and forth between the two. Can you see the one directly above is a little bit softer? The difference isn’t huge on a computer screen, but makes a big difference in a large print.

Get creative with light and composition

11s-Light-Painting-Flowers-2016-05-19at14-07-29

At this point, it’s time to get creative with your framing and play with light.

In composition, you want to decide what your center of interest is in the photograph, and draw the eye to that point. Notice how dark the center of the flower is in the top image, so let’s add some fill.

12s-Light-Painting-Flowers-2016-05-19at14-06-32

The center of the flower is lighter now (above). Which image do you like better?

20.s-Light-Painting-Flowers-2016-05-19at16-10-27

Notice the stamen of the flower above. Can you see it’s just a black blob? What happens when we add just a little bit of fill with a flashlight?

21.s-Light-Painting-Flowers-2016-05-19at16-11-21

The center of interest becomes more pronounced.

Let’s try another one.

22.s-Light-Painting-Flowers-2016-05-19at16-30-03

Dark stamen.

23.s-Light-Painting-Flowers-2016-05-19at16-29-04

A little bit of fill.

25.s-Light-Painting-Flowers-2016-05-19at16-33-56

A new angle with no fill.

26.s-Light-Painting-Flowers-2016-05-19at16-36-40

A little bit of fill light, highlighting the center of interest.

A few more examples

Let’s go back to this simple lighting setup.

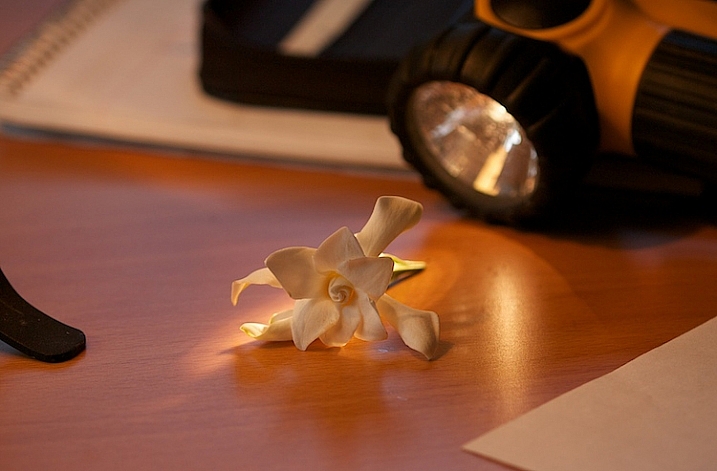
2-Light-painting-flowers-gardenia-1

I used this setup on several different kinds of flower and I likde this white rose the best.

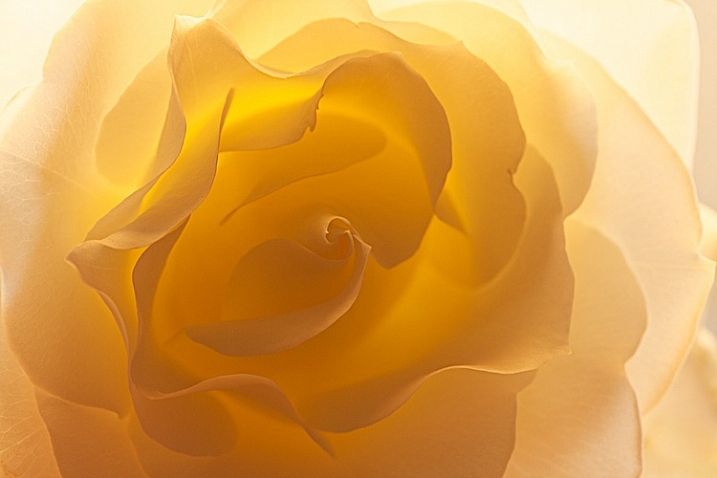
3-Light-painting-flowers-White-Rose-no-fill

Can you see the beautiful light and how translucent the rose looks?

I like the overall feel to the image, however, there is a lot of contrast between the center of the flower and the outer petals. You want your viewer’s eye to go toward the center of interest, which is the middle of the flower, so I placed a reflector right in front of the flower.

4-Light-painting-flowers-White-Rose-fill

You can see how the light reflects back in, and brightens up center of the flower. I also like this frame better because it feels softer.

This technique can work outdoors, too. Just use your reflector and your flashlight, and see what works.

7-Light-painting-flowers-no-fill-pink-3

There is no right or wrong when deciding where to put your light, but it’s usually best not to shine your main light from the camera angle. In this photo, the light is to the right and it feels to harsh to me. There are strong shadows on the flower that don’t add to the feel of the photograph. I moved myself in order to move the position of the light source, the sun.

8-Light-painting-flowers-fill-pink-3

I added a fill card, and see how the stamen starts to stand out. This is much better, but I decided to play with camera angles to see what that would look like.

11-Light-painting-flowers-no-fill-pink-2

I liked this better, especially how the light created patterns on the petals of the flower, but I wanted my interest in the center of the flower. It still just seemed to dark.

10-Light-painting-flowers-fill-pink-2

In the photo above, I used a reflector to fill in the shadows and used my flashlight to add a little bit of light.

5-Light-painting-flowers-no-fill-pink

Then, I changed the angle just a little bit. This is with no fill (above).

6-Light-painting-flowers-fill-pink

Here is the same flower with a reflector and flashlight filling in the dark areas.

There is no science to this. It’s all about playing to see what works. Here are a few more example that I shot, these images have no corrections. They are straight from the camera to help you see my process better.

16Light-painting-flowers-no-fill-orchid

Without a fill.

17-Light-painting-flowers-fill-orchid

With a fill.

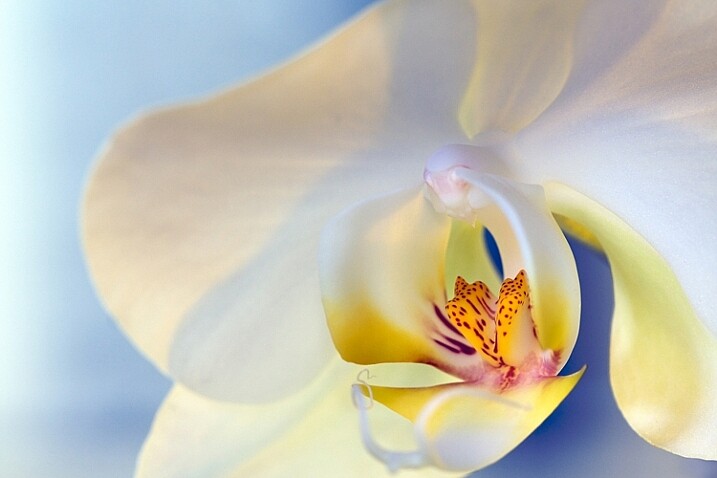
1-Light-painting-flowers-orchid

This final photo used several reflectors, as well as using a flashlight in the center of the flower.

Now you have some great tips, and inspiration to create a gorgeous floral photo of your own. You’ve seen how you can use simple fill cards to add light and soften an image. You’ve learned how light impacts the story you are telling, and you’ve learned how a simple flashlight or two, plus a kleenex, can take your photos to a new level.

Let’s see your floral photos, please share in the comments below.

googletag.cmd.push(function() {
tablet_slots.push( googletag.defineSlot( “/1005424/_dPSv4_tab-all-article-bottom_(300×250)”, [300, 250], “pb-ad-78623” ).addService( googletag.pubads() ) ); } );

googletag.cmd.push(function() {
mobile_slots.push( googletag.defineSlot( “/1005424/_dPSv4_mob-all-article-bottom_(300×250)”, [300, 250], “pb-ad-78158” ).addService( googletag.pubads() ) ); } );

The post How to Create Gorgeous Flower Images using a Flashlight and a Reflector by Vickie Lewis appeared first on Digital Photography School.


Digital Photography School

 
Comments Off on How to Create Gorgeous Flower Images using a Flashlight and a Reflector

Posted in Photography


Review: Lastolite 6×4 Foot Panelite Collapsible Reflector with Translucent Diffuser

12 Apr

review-lastolite-panelite-diffuser-0803

How many times have you heard that there are certain times of day you shouldn’t photograph people? For example, at midday in harsh sunlight. The logic is pretty sound. Direct, hard light can lead to unflattering shadows and ultra high contrast, which can result in unsatisfactory portraiture. However, if you follow this advice blindly, and only wait for the golden hours each day, you’re missing out on an enormous amount of time that could be spent photographing people.

There are several options to combat this problem, but one of the easiest and most effective, is a piece of gear called a diffusion panel.

What is a diffusion panel?

At its most basic, a diffusion panel is a piece of translucent material that allows harsh direct light to pass through it, so it effectively becomes a light source of its own. This softens the light and can allow you to obtain great, flattering, natural light portraits, in unfavorable conditions.

review-lastolite-panelite-diffuser-2745

There are many types of diffusion panels available ranging from very small, handheld ones, to giant ones that are many meters across and require dedicated stands.

When size matters

Small diffusion panels are useful, and if you happen to have a 5-in-1 reflector, you probably already have one. These are indispensable for still-life and tabletop work; however, in terms of portraiture, their small size often limits them to closely cropped images and headshots.

This is where the Lastolite Panelite Reflector comes in. At 6×4 feet (1.8m x 1.2m) it’s large enough to cover enough area for full length portraits. At $ 128 retail, its price also means that it isn’t way out of reach for the serious portrait photographer.

Putting it through its paces

To test it out, I took the Lastolite Panelite Reflector out on location, at mid-afternoon on clear days. The sun was low at this point, but still very harsh, and the high contrast would have been difficult, if not impossible, to manage without a modifier.

review-lastolite-panelite-diffuser-0385

By Diffusing the sun back lighting the scene, you can even out the exposure of the highlights and shadows which is far more pleasing for portraits.

review-lastolite-panelite-diffuser-0569

On the left, the bottom half of the image is shaded by the diffuser. You can see the two stop difference in exposure. In the image on the right, you can see how the hard directional sunlight has been softened (note that more exposure was needed overall so the background was also brightened in the process).

review-lastolite-panelite-diffuser-2621

Apart from the unflattering shadows in the left hand image, the direct sun made it painful for the model to look into the camera. With the diffusion panel (right image), her eyes were shielded from the harsh light.

review-lastolite-panelite-diffuser-2734

In the left hand image, the extreme contrast from the back lighting made exposing for the rest of the image a nightmare. By diffusing the back light, the exposure was evened out, but still allowed for a pleasing rim light (image above right).

Let’s look at some of the pros and cons of using this light panel.

PRO: Two stop diffusion

review-lastolite-panelite-diffuser-2737

By reducing contrast, the loss of two stops of light can be a huge help in some scenarios.

When working with the extremes of bright sunlight, it can be difficult to get away from small apertures like f/16. This is a problem because these settings won’t allow for a shallow depth of field. By reducing the light on your subject by two stops with the diffuser, that hypothetical aperture of f/16 becomes f/8 and makes background blur much easier to control.

PRO: Size

review-lastolite-panelite-diffuser-2656

This thing is huge. It’s not the biggest on the market, but it’s big enough for full length portraits, which is a major plus. I did not yet have the opportunity to test it on groups of people, but I believe it should work well for up to four people, with careful control.

review-lastolite-panelite-diffuser-0734

The ability to diffuse a large enough area for 3/4 and full length portraits is a big plus.

PRO: Portable

Like a lot of Lastolite’s product, the diffusion panel is collapsible, and folds up to a tiny fraction of its size. Packed in its case, I would compare it to the surface of a medium sized cafe table. Combined with its light weight, it’s easy enough to throw in the back of a car, and carry along on location with you, without strain.

PRO: Price

At $ 128, this is not a budget tool. However, for photographers serious about location based portraiture, the Lastolite Panelite Reflector comes in cheaper than lighting modifiers of moderate quality and unlike those, this doesn’t require lights to go with it.

CON: Extra hands

The Lastolite Panelite Reflector is large, and you will find it very difficult to manage without an assistant to hold it for you. If it needs to be held much higher than ground level, you may well need two people. It may be possible to rig it to some stands, but this leads into the next point.

CON: Be wary of wind

review-lastolite-panelite-diffuser-2695

A small gust of wind sparked a several minute struggle to regain control over the panel.

The only real problem I came across while testing the Lastolite Panelite Reflector was that the slightest gust of wind will send it flying, and folding in on itself. Whoever is holding it for you needs to have a sure grip on it, and even then the whole process is still irksome.

If you’re into slapstick, this can be hilarious to watch, but any time spent trying to get the diffusion panel to play along, is time not spent taking photographs.

CON: Dirt

Like white reflectors, softboxes and white umbrellas, the Lastolite Panelite Reflector is really, really white and will be hard to clean when it inevitably gets dirty.

Overall thoughts

review-lastolite-panelite-diffuser-0640

If nothing else, when used head on, the Panelite Reflector creates some interesting catch-lights.

To sum it up easily, the Lastolite Panelite Reflector does exactly what it says on the tin. It’s portable, creates a beautiful diffused light, and is relatively affordable. Although, it can prove tricky to handle under some conditions, I found the results to be well worth the extra logistics and effort, and I am looking forward to a long an extended relationship with it in my photographic arsenal.

googletag.cmd.push(function() {
tablet_slots.push( googletag.defineSlot( “/1005424/_dPSv4_tab-all-article-bottom_(300×250)”, [300, 250], “pb-ad-78623” ).addService( googletag.pubads() ) ); } );

googletag.cmd.push(function() {
mobile_slots.push( googletag.defineSlot( “/1005424/_dPSv4_mob-all-article-bottom_(300×250)”, [300, 250], “pb-ad-78158” ).addService( googletag.pubads() ) ); } );

The post Review: Lastolite 6×4 Foot Panelite Collapsible Reflector with Translucent Diffuser by John McIntire appeared first on Digital Photography School.


Digital Photography School

 
Comments Off on Review: Lastolite 6×4 Foot Panelite Collapsible Reflector with Translucent Diffuser

Posted in Photography


10 Ways to Use a 5-in-1 Reflector

27 Feb

ten-ways-to-use-reflectors-1803

In photography books, magazines, and websites, references to reflectors are often and many. They’re a quintessential tool for modifying light in just about every genre, and they’re an indispensable part of many photographers’ toolkits.

If you’re new to the idea of using reflectors, or new to photography in general, the problem with reflectors is that, although they seem self-explanatory in use, their effects can often be too subtle to be noticed if you lack experience using them. To combat this, and make the learning process easier, this article will give you examples of 10 common uses for a 5-in-1 reflector. It will also show you what the reflector is doing in each instance, as well as provide diagrams for you to repeat the exercise in your own time.

The best way to take full advantage of the information in this article, is to duplicate all of the following setups, using your own equipment and subjects. Once you understand the basics outlined here, you can start experimenting, and altering variables, to see how small changes can affect your images.

What is a 5-in-1 reflector?

5in1reflector


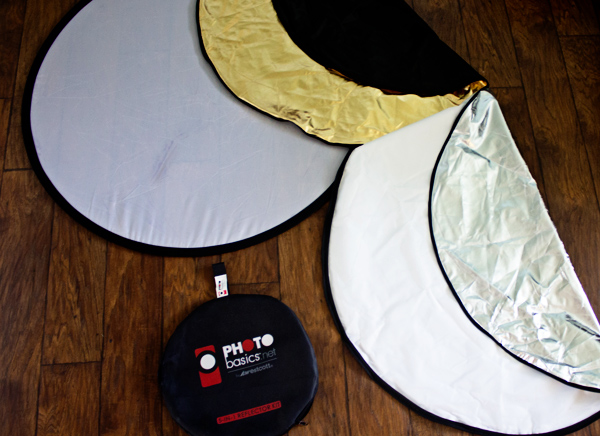
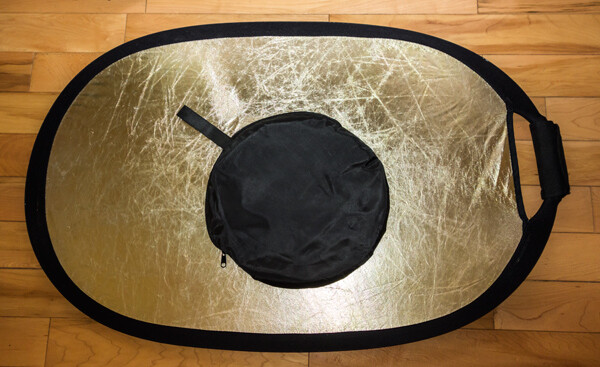
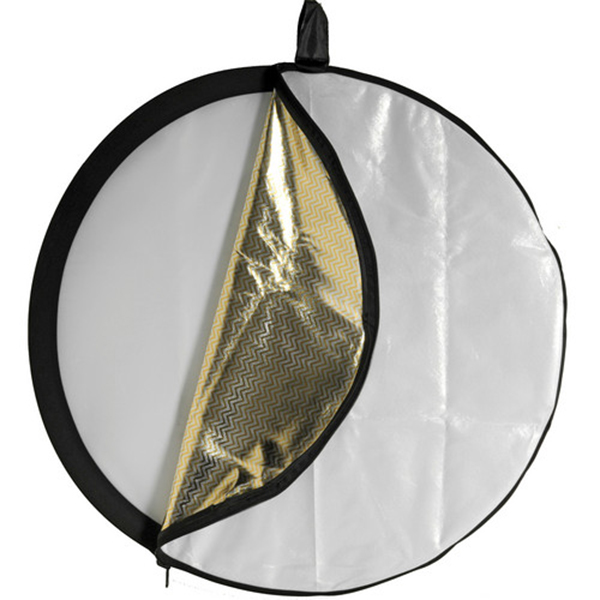
A 5-in-1 reflector is a nifty gadget that incorporates several different types of reflector, into one portable and easy to use package. These include white, silver, gold, black reflectors (or flag), and a diffusion panel.
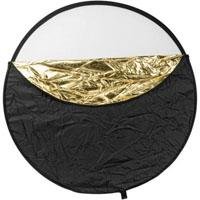
05-westcott-photo-basics-reflectorThe way they are put together is that the four reflector sides are sewn into a sort of pouch, that fits around the diffusion panel; making a change to a different color as simple as unzipping it, removing the diffusion panel, turning the pouch inside out, and replacing it over the diffusion panel.

Clarifications

This article focuses on practical uses for 5-in-1 reflectors, but to use and understand them most effectively there a couple things to keep in mind.

Quality of light

When referring to the quality of light, this term has nothing to do with whether light is good or bad. The word quality refers to the physical properties, traits, or characteristics of the light. These properties include the softness or hardness, the shape, the color, and the intensity of the light.

A little confusing, I know, but it’s just one of the many quirks of the English language. If it helps, try to remember there is no such thing as good or bad light; only light more suitable for a different subject.

Softness, hardness and intensity

In terms of reflectors, it is important to understand how they modify your light.

Softness and hardness are affected by the apparent size of your light source. If you move your reflector closer to your subject, you get softer light. If you take it further back, you get harder light. The same applies to different sized reflectors. A larger reflector, at the same distance from the subject as a smaller one, will produce softer light, while the smaller one (in the same position) will produce harder light. However, if you put the larger one farther away from the subject, and the smaller one closer – they may become equal.

When swapping between the colors on your 5-in-1 reflector, from white to silver for example, the properties of the light you are altering are the color and the intensity. Providing that the reflector hasn’t moved, a silver and a white reflector will give the same softness/hardness of light. However, a silver reflector will reflect more light than a white one, thereby providing more intensity. Because of this, anytime you change out your reflectors, you will also need to alter your exposure settings.

Additionally, using a different colored reflector will change the color of the light and you may need to alter your white balance settings. The exception to this is when using a gold reflector which is often done to intentionally add a color cast to the image.

Exercises

Exercise One – white/silver on the side
ten-ways-to-use-reflectors-diagramA

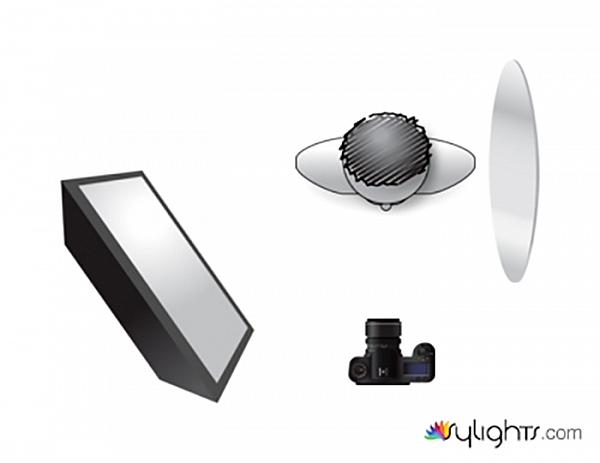
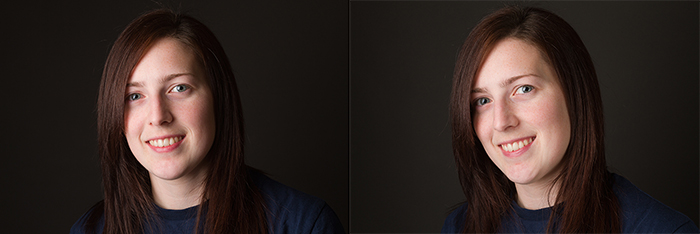
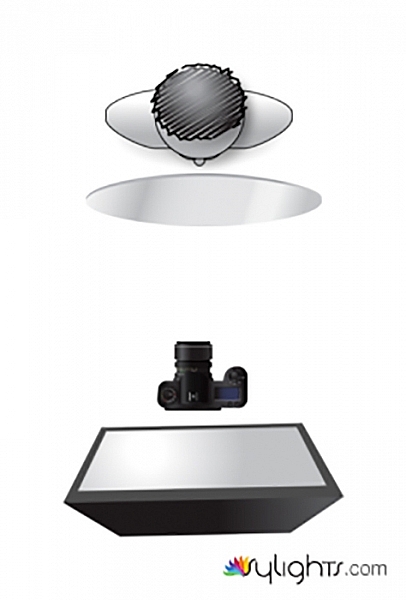
This first example may be the most common way to use a reflector. The light is illuminating the subject from camera left. This is causing dark shadows on the subject’s face at camera right. While these shadows can often be pleasing and acceptable, at other times you may choose to fill them in with additional light. This is where the reflector comes into play.

To do this, place your reflector, either silver or white, to the side and close to your subject, facing the light. This will fill in the shadows, brightening up the frame.

Note: You can also vary the intensity of the light reflected by moving the reflector toward, or away from the subject. Move it closer to brighten the shadows more, move it away to have less fill-light and darken the shadows.
ten-ways-to-use-reflectors-A

Left: without reflector. Right: with reflector

Exercise Two – white/silver from below
ten-ways-to-use-reflectors-diagramB

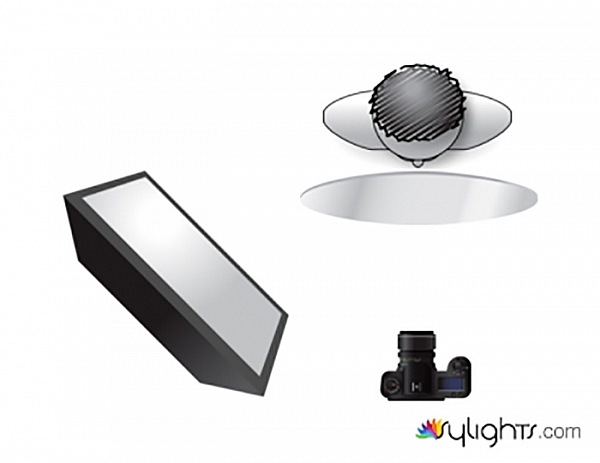
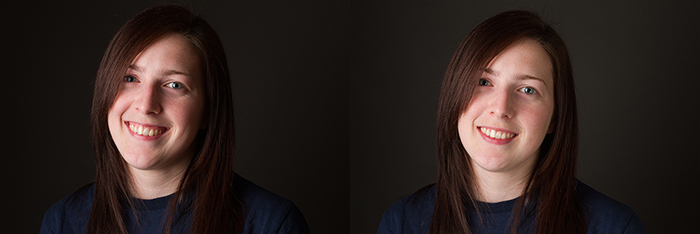
This setup is also very common, and is a slight variation on exercise one above. Here, the reflector is placed underneath your subject, and is filling in shadows from below.
ten-ways-to-use-reflectors-B

Left: no reflector. Right: with reflector.

Note: be very careful doing this on a subject that is heavy-set or has a double chin, as it will highlight that and make it stand out more – not overly flattering for them. You could also light up the nostrils so be conscious of that as well.

Exercise Three – white/silver bend it

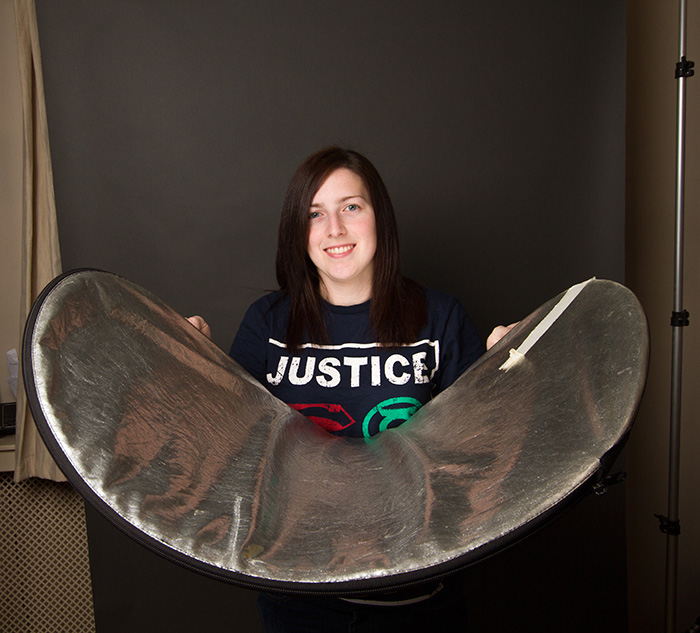
You can also take advantage of a 5-in-1 reflectors lack of rigidity, by shaping it. This will allow you to mould your light, to fill in shadows that may not have been affected by a flat reflector. To do this, simply hold two opposite sides of your reflector and bend it inwards, thus creating a curved surface that will fill in shadows that a flat surface could not reach.
ten-ways-to-use-reflectors-diagramG

ten-ways-to-use-reflectors-1817

ten-ways-to-use-reflectors-G

Left: no reflector. Right: reflector in place bent to fit.

Exercise Four – white/silver

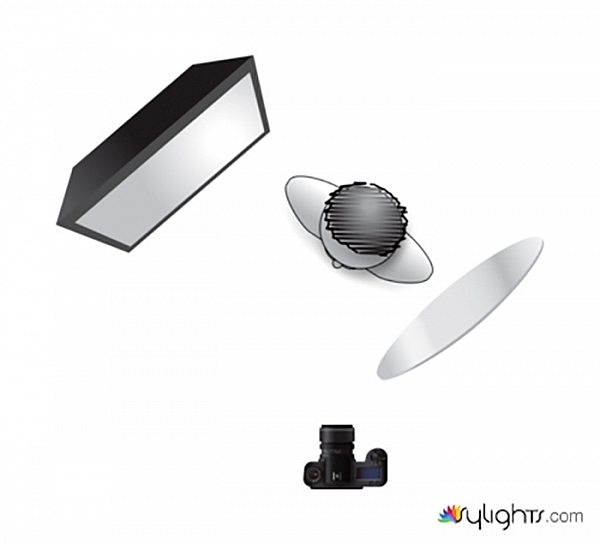
In this example, the light source is coming from behind the subject. The reflector is used parallel to the light source in order to bring detail into the heavy shadows caused by the backlighting technique. While it is possible to use this technique for portraits, it can be tricky. However, it comes into its own in food photography and other still life situations.
ten-ways-to-use-reflectors-diagramC

ten-ways-to-use-reflectors-C

Left: no reflector with strong backlight. Right: with reflector.

Exercise Five – white/silver

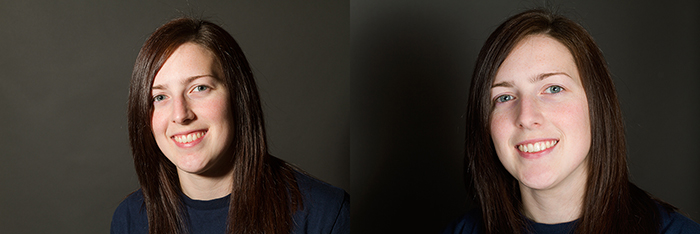
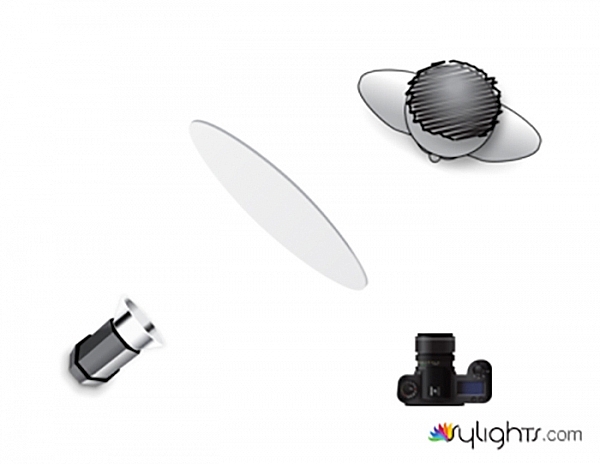
If your light source is small, and the light is too hard for the effect you are trying to achieve, 5-in-1 reflectors offer a few options to help you soften the light.

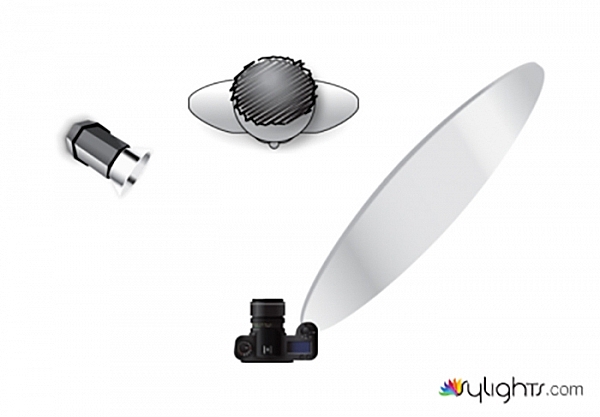
Here, instead of lighting your subject directly with the light source, bounce the light off of the reflector. Doing this effectively increases the size of your light source, thereby softening it. You will lose some of the intensity of the light doing this, and you will need to meter for the reflected light, rather than the output from your flash.
ten-ways-to-use-reflectors-diagramJ

ten-ways-to-use-reflectors-J

Left: direct, small light source. Right: light bounced off white reflector.

Diffusion

Exercise Six – diffusion panel

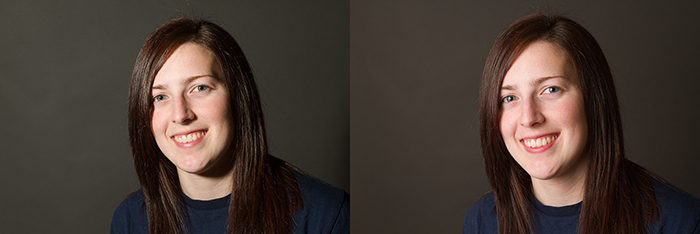
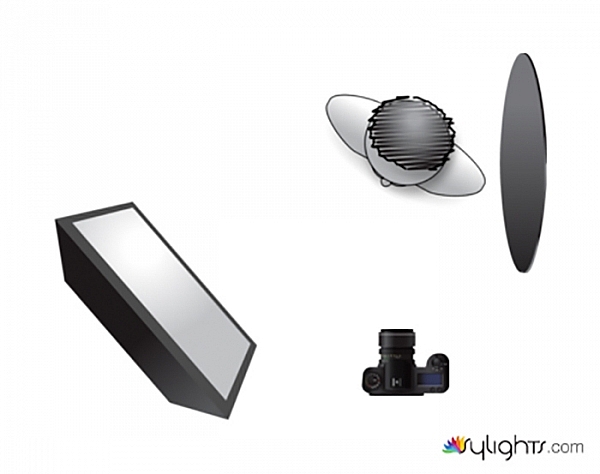
Another way to soften hard light with a 5-in-1 reflector, is to use the diffusion panel. Simply place the diffusion panel somewhere between your light source and subject, making sure that all of the light is hitting the reflector. Diffusion panels do come with an inherent loss of light. Many are designed to cut down two stops of light, but this will depend on your exact reflector. As such, you will want to calculate your exposure with the diffusion panel in place, before taking any images.

Where this technique really comes into its own, is that you can move the diffusion panel anywhere between your light source and the subject, without altering your exposure. This allows you to manipulate the shape and quality of your light in moments, without having to further alter your settings.
ten-ways-to-use-reflectors-diagramI

ten-ways-to-use-reflectors-I

Left no diffusion, small hard light source. Right with diffusion panel in place, softens the light.

Black reflector

Exercise Seven – black reflector or flag

For the first use of your flag, use it as you would a white or silver reflector, as in example one above. Doing this with the black side of your reflector will help to deepen, and intensify the shadows on your subject. This technique isn’t as common as the others, but it can be used to great creative effect.
ten-ways-to-use-reflectors-diagramE


ten-ways-to-use-reflectors-E-700

The difference is subtle but look at the shadows.


Exercise Eight – black reflector or flag

Instead of reflecting light, you can also use your flag to block, and shape the light in your scene. With the black side of the reflector facing your subject, hold it so that it obscures a large portion of your light source. This technique can be use in lieu of time consuming modifier changes, and can allow for some dramatic lighting effects without a great deal of equipment.
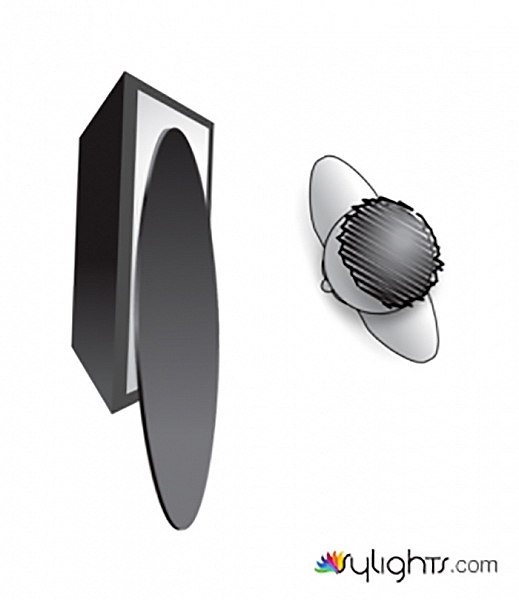
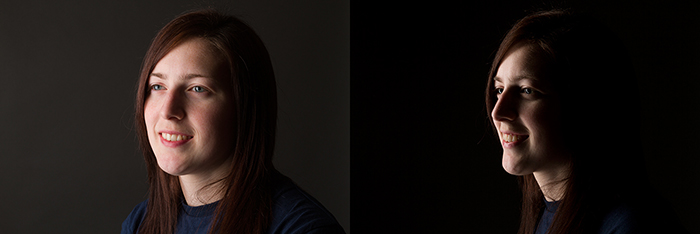
ten-ways-to-use-reflectors-diagramF

ten-ways-to-use-reflectors-F

Left: before. Right: after.

Exercise Nine – black reflector or flag
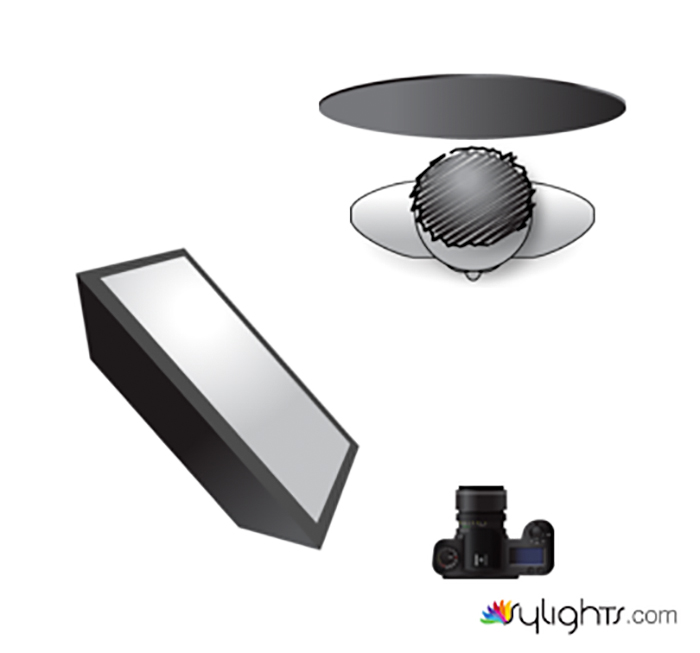
ten-ways-to-use-reflectors-diagramD

Another use for your flag is to use it as a background. You probably won’t do this very often, as it isn’t an ideal solution in most cases, but in a pinch you can get rid of messy backgrounds with ease.
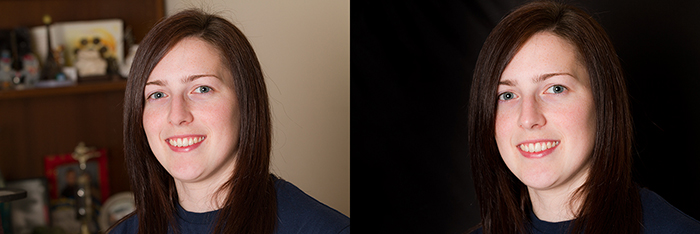
ten-ways-to-use-reflectors-D

Gold reflector

Exercise Ten – gold

To be honest, you will probably never want to use a gold reflector. The effect, and the color cast they provide are often far too intense for most purposes. However, with judicious care, they can be used to provide a warm colored rim light. Here, the reflector is placed behind the subject and is reflecting light back onto her hair.
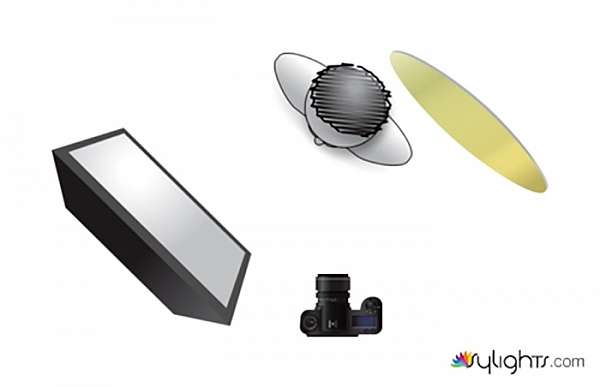

ten-ways-to-use-reflectors-diagramH

ten-ways-to-use-reflectors-H

Left: before. Right: after. Notice the warm tone added to her hair, it’s very subtle.

Just the beginning

These 10 examples barely scratch the surface of what can be accomplished with a 5-in-1 reflector. However, by going through these exercises a number of times, with a variety of subjects, you will quickly begin to notice how reflectors modify light in a given situation. From there you will be able to employ them effectively in your photography. Do you have any other uses or tips for using one? Please share in the comments below.

googletag.cmd.push(function() {
tablet_slots.push( googletag.defineSlot( “/1005424/_dPSv4_tab-all-article-bottom_(300×250)”, [300, 250], “pb-ad-78623” ).addService( googletag.pubads() ) ); } );

googletag.cmd.push(function() {
mobile_slots.push( googletag.defineSlot( “/1005424/_dPSv4_mob-all-article-bottom_(300×250)”, [300, 250], “pb-ad-78158” ).addService( googletag.pubads() ) ); } );

The post 10 Ways to Use a 5-in-1 Reflector by John McIntire appeared first on Digital Photography School.


Digital Photography School
 
Comments Off on 10 Ways to Use a 5-in-1 Reflector

Posted in Photography


Tip for Using a Reflector for Portraits

24 Sep

When it comes to portrait photography, one of the simplest and easiest things you can do to improve your images coming straight out of the camera, is using a reflector. There are many different sizes and shapes of reflectors, and the type of photography that you do most often will often dictate which size and shape you should purchase. For example, if you like to practice street or travel photography, it may be most beneficial to consider a round reflector that’s about 20″ wide so that you can hold it with one hand, and shoot with the other, without being intrusive in a small location like someone’s home. On the other hand, if you think you’d like to use a reflector for wedding photography, it is best to go for something rectangular and much larger (such as a 48×72″) so that the light you’re reflecting can reach everyone in the bridal party during portraits.

Reflector Kit

What kind of reflector should you buy?

I suggest a 5-in-1 round reflector that’s between 40-43″ across because I have found this size reflector to work exceptionally well for individual or small group portraits. Do keep in mind that with this size reflector, you will probably need either an assistant or a stand to hold the reflector during portraits.

5-in-1 reflectors typically come with a pop-up diffuser, and then a reversible zippered pouch to fit over the diffuser that includes white, silver, gold, and black sides. When you’re first beginning to use the reflector, the most difficult part can often be deciding which color reflector is best to use. As is often the case in photography, although there are some rules about when exactly to use each color reflector (my first photography professor in college used to tell us that a gold reflector was for indoor, studio portraits ONLY), the reality is that which color you should choose will vary based on your own style of photography and personal preference, and may or may not always follow the rules. I have found it most helpful to practice frequently with my reflector in a variety of settings so that I’ll have a better idea of a starting point when it comes to a real session.

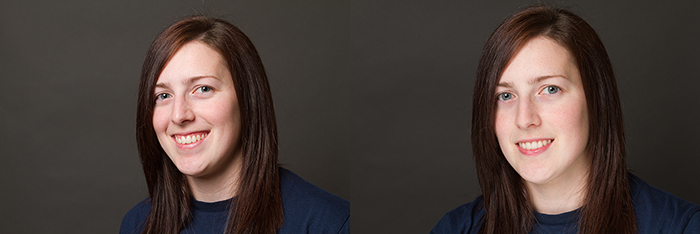
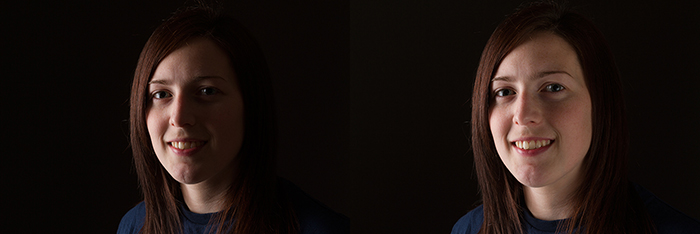
All that said, I’m a visual learner, and need to actually see something in order to understand it best. So yesterday afternoon, I borrowed my sister Courtney and went to the backyard to take some photos so that you can see what each color reflector looks like in a portrait setting. Each photo was shot in manual mode with exactly the same settings, and every image in this post is straight out of the camera so you can really see the difference a reflector makes without any post-processing. These photos were taken at about 2 p.m. I live in Oregon and we perpetually deal with smoke from forest fires in the summer, so that was the case here as well, but this is also a good example of the difference that a reflector can make on a slightly overcast day.

Reflectors do just what they say—they reflect the light. So, because the direction of light will change depending on the time of day and the objects around you, you will want to experiment with placing the reflector in front of your model, as well as at head-height (often angled up slightly) on either side of your model. In this example, I had my model hold the reflector at chest-level in order to bounce catch-lights into her eyes and eliminate green color casting from the grass below. However, angling the reflector to bounce light from below can draw attention to the neck and chin and may not always be the most flattering way to light every subject. So, experiment with holding the reflector at different heights and angles in order to see what is most flattering on your particular model with your particular source of light.

First up, here’s Courtney with no reflector (below left). It’s not a bad photo, but it also isn’t a very dynamic photo either. I can absolutely add some “boost” in post-processing, but let’s make it better in camera, if we can.

Reflector 1 Reflector 2

White reflector

I started by having Courtney hold the white side of the reflector under her face, about chest-high (above right). As you can see, this really bounced a lot of neutral light up into her face. If you like this look but find that it’s a bit too much light (as I think it is here), you can have your model continue to lower the reflector away from their face until you achieve a more natural light.

Gold reflector

Then we flipped the reflector to the gold side, and had Courtney hold the reflector at waist-height under her face (below left). You can see that this option brought a significant amount of warm light into her face, compared to the image with no reflector. The gold side of the reflector can be tricky, as it can easily make people look a bit radioactive if the reflector is placed too close to the model. I find that I use the gold side of the reflector almost exclusively in backlit sunset portraits, but if you tend to prefer a warmer look to portraits, you may want to reach for this one more frequently.

Skin tone is also particularly important when it comes to the gold side of the reflector, and you will generally find the most success when using the gold side of the reflector on olive skin tones or people who are very tanned. Conversely, the silver or white reflector may be most flattering on people who have blue undertones in their skin.

Reflector 3 Reflector 4

Silver reflector

Next, I unzipped the reflector, flipped it inside out, and turned it to the silver side. I had Courtney hold the reflector under her face at waist-height (image above right). I tend to prefer the coloring here best, but I also need to say that the silver side of the reflector is by FAR the most difficult to work with, as the sheer brightness can essentially be very difficult for a model to look at, resulting in portraits that look like this:

Reflector 5

So, even though I personally tend to like the coloring of the silver side best, I most often elect to begin with the white reflector, simply because the silver side tends to be very difficult for my clients unless they have had lots of modelling experience.

Reflector 6

Black reflector

The black side isn’t a reflector at all; rather than reflecting light, it eats it up. I don’t use the black side of the reflector very often, but it can be useful for increasing shadows in very dramatic images. Can you tell where I was holding the black reflector in the image above? For more on how to use a black reflector to block light readt this dPS article: How to use a Gobo to add Depth to Your Portraits with Subtractive Lighting.

Diffusion part of the reflector

The part of the reflector that I end up using more than any other is actually the diffuser. The diffuser comes in handy when you’re in situations that may have mottled light, or direct sun overhead.

Do you see here how the tree is creating mottled light on Courtney’s face (below left)? In other words, some parts of her face are very light while other parts tend to be shadowed. The easiest thing to do to avoid mottled light is to put the light behind your subject. But, since that’s not always possible, a diffuser is a great thing to have in your bag of tricks as well.

Reflector 7 Reflector 8

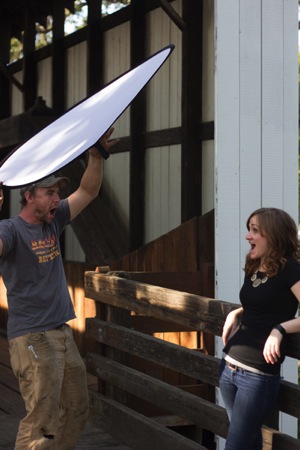
The image above right is a pull-back of my husband holding the diffuser over Courtney’s head (and both of them just generally being silly). Notice the shadows on the diffuser – without it, they would be on her face. Instead, the diffuser blocks those shadows, creating more even light and a much more pleasant portrait overall.

Reflector 9

I hope that seeing examples of different colored reflectors used in the same setting has been helpful. I’d love to know, do you own a reflector? How (and which color) do you find yourself using it most often in your favorite style of photography?

The post Tip for Using a Reflector for Portraits by Meredith Clark appeared first on Digital Photography School.


Digital Photography School
 
Comments Off on Tip for Using a Reflector for Portraits

Posted in Photography


DIY How to Build and Use a Reflector to Take Better Portraits

09 Sep

Photography is essentially capturing light. Beginners to photography can find the learning curve quite steep. To start with, there is the technical side. You need to understand what the camera can do and its limitations. Then there is the theory aspect, simply put you need to know what exposure is and how to achieve this with your camera if you want to get that creative shot.

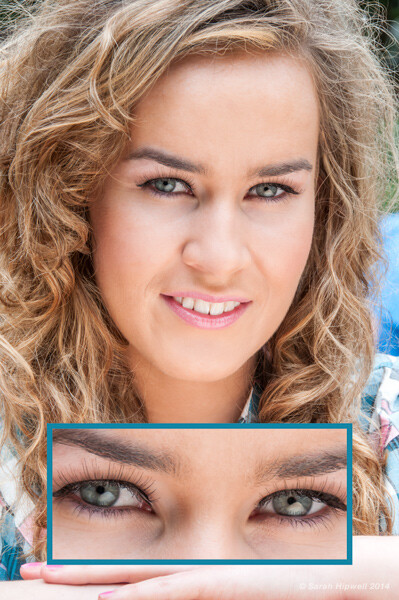
About four years ago, I was shooting a couple of models in my city of Dublin outdoors with a few fellow photographers. The day was overcast and I was just hoping it wouldn’t rain. Thankfully, it didn’t. One of the photographers had this big reflector, a 52 inch, translucent one. I was amazed at how effective it was, especially as it added these wonderful catchlights in the model’s eyes.

Model with catchlights

Think in terms of directing the light when photographing your subject or object. This is why a collapsible reflector is an excellent piece of additional camera gear. They are relatively inexpensive to buy, so portable, and lightweight. They do come in various sizes but a 42″ 5-in-1 collapsible reflector can be bought online for under $ 40 USD.

Collapsible Reflector 36x24 GoldSilver

Recently, at a family get together, my sister wanted me to take some headshots of her. We were outdoors, it was early in the evening around 6 p.m., and the sun was a ball of amber. I positioned her with the sun behind and it had created a wonderful rim light on her hair. But I didn’t have enough fill-light on her face.

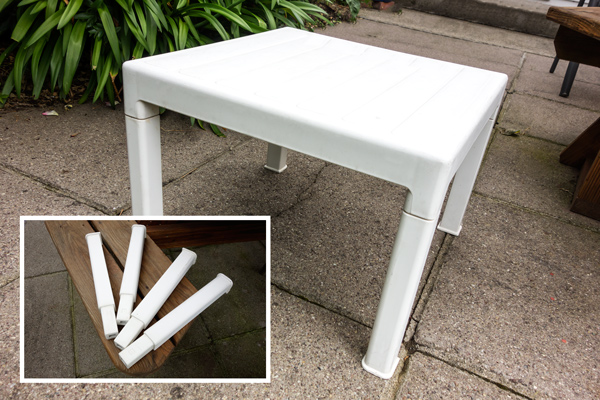
Then I realized, I didn’t have my reflector with me. On this occasion I had simply forgotten to bring it with me. After all, I wasn’t on a professional assignment. Anyway, I saw the small white plastic garden table. I grabbed it, turned it upside down and yanked the legs off. I got my youngest daughter to hold the table top slightly to the right and below my sister’s face.

Small white plastic garden table

Technology is speeding along at a very fast pace. The latest DSLR/mirrorless camera of today is fast becoming yesterday’s news in a relatively short time. As a newcomer to photography, it can be difficult to choose what gear and accessories to buy.

The basics of exposure havn’t changed with technology, nor has light. So practice with the camera that you have and learn to shoot with it in available light, and low light. Learn to see the different ways light can make a difference to your imagery.

I came up with five DIY options to serve as a reflector and tested them out. Here are some tip on how to use a reflector to take better portraits:

  1. White mount card from an art or hobby craft shop, size A1(33.1 x 23.4inches) 300g
  2. Kitchen aluminum foil crumpled up before fixing it on the back of the white card using spray
    adhesive
  3. Radiator reflective foil
  4. White plastic garden table
  5. Silver car mats

I still have, and use, the white card for demo purposes when I give workshops for beginners. It is so simple and affordable ,and the impact is quite dramatic. This option is the easiest to buy for a few dollars(USD). This piece of card can enhance your shots whether you are inside or outside. It’s great.

A simple indoor set-up for a portrait shoot using the white card

Have your model or subject seated (or stand) beside a large window. The model will be facing the camera, so one side of his or her face will be in shadow. Take a shot. Then have someone hold the white card near the model’s shadow side, at an angle so that a nice even light is cast across your subject’s face. Take numerous shots as you will need to direct your assistant on how close or far they hold the card up to the model. When you have taken a number of shots, you will get a clearer understanding of how to reflect the light upon your subject in a more pleasing manner. When you have uploaded your images to the computer, you will have the initial shot as your frame of reference to see the difference.

Tip – if the surface of your card starts to get grubby, I have covered up dirt marks using white interior matt paint.

Using kitchen aluminum foil is really simulating a silver reflector, which adds a cool light on your subject.

Becky silver reflector

If you don’t have spray adhesive or photo mount, an alternative method would be to water down a little PVC glue and paint this on one side of the white card. Then lay the aluminum foil (crumpled first) on top and smooth it out. This needs a good 24 hours to set. Also be careful when reflecting the light onto your model. Keep your distance as it reflects a large amount of light.

This roll of radiator reflector foil was inexpensive to buy. I can’t remember exactly but I think it was less than ten dollars (USD). Similar to above, this option works in the same way.

Becky radiator reflector foil

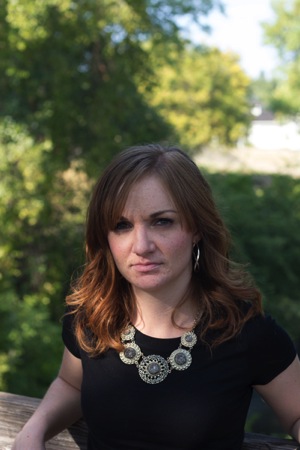
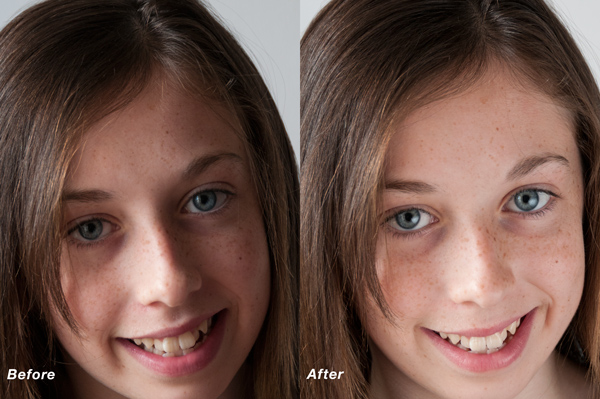
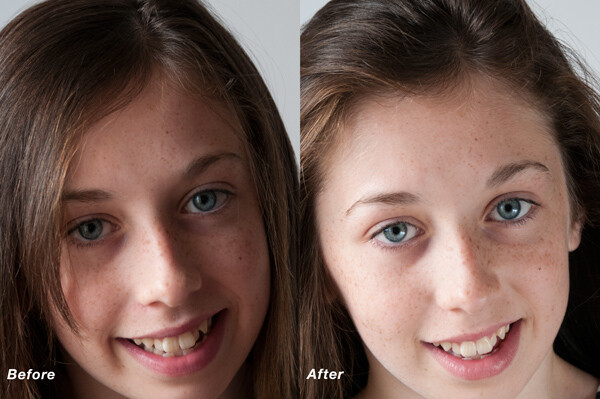
I recreated a similar test of my daughter in my Mum’s back garden using the small white plastic table. Unfortunately, I didn’t have the wonderful sun shining in the background, like I had for my sister’s shot. This was a quick test but as you can see there is an improvement in the after image. The light was cast more evenly across her face. Catchlights were created in the eyes which are key to good portraiture and shadows were eliminated under the chin.

Amy before and after small table

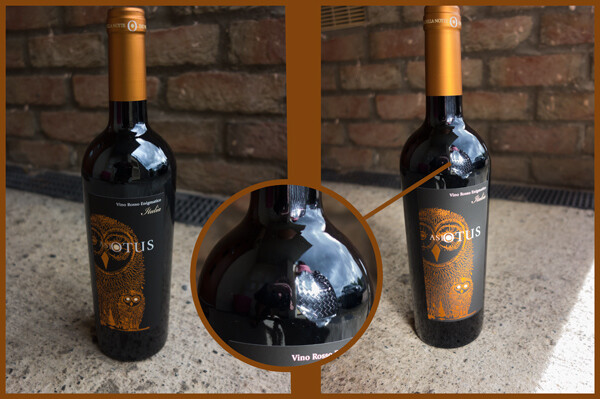
I included the silver car mats more as a tongue-in-cheek test! However, I decided to test them out to see would they actually work. I chose a bottle of wine so that you could see the silver car matt reflected in the bottle.

Wine bottle

Have you tried using a reflector before? What are your thoughts? Please give it a try if you haven’t and share your results and comments below.

The post DIY How to Build and Use a Reflector to Take Better Portraits by Sarah Hipwell appeared first on Digital Photography School.


Digital Photography School
 
Comments Off on DIY How to Build and Use a Reflector to Take Better Portraits

Posted in Photography


Choosing the Right Color Reflector for Your Photography

27 Oct

Of all the portrait lighting tools at our disposal, none are quite as versatile as the the five-in-one reflector. The concept itself is extremely basic. In the hands of a photographer comfortable with common lighting principles, the reflector helps us bounce light into or onto those areas that aren’t getting enough light, regardless of whether we are using natural, ambient, or studio/strobe lighting.  A reflector placed directly opposite a main light can act as a hair light, creating separation between the subject and background. Placed in front of a back-lit subject, we can negate the silhouette effect, using available, natural light to balance the exposure between our subject and background. Held at a ninety-degree angle to a subject’s chest, we can toss some light up on the subject’s face and neck, eliminating troublesome shadows caused by foreheads and chins when using overhead or mid-day lighting.

The possibilities really are nearly endless, and– just as importantly– affordable. While there are many options available, at about $ 40.00, The Westcott 40″ 5-in-1 Reflector meets (and often exceeds) my needs, in terms of price, size, durability, and versatility. But dropping $ 40 on a reflector and adding it to your bag of tricks is only half the battle. Like the name says, you’ve got five-in-one. While technically not all five are actually reflectors, knowing which of the five to use and under what circumstances is essential to successful photographs.

gold-reflector-guyer-photography

5-in-1 Reflector surfaces are attached to or removed from the outer ring with zippers.

Silver

The silver panel is one of the most useful, and is best for beginners first getting their bearings with reflectors. Since the silver reflects the most amount of light of the five, it is a great choice for low-light situations or those scenarios where you need a strong fill light. Since it  doesn’t change the color of white-balanced flash or studio lights, it is perfect for both indoor and outdoor portraits. Another reason it works so well for beginners is that most first-timers make the mistake of not placing the reflector close enough to their subject. The silver reflector’s ability to shine more light than the gold, for instance, allows it to be placed further away from the subject than we typically want, without sacrificing results. One word of caution, though– the fact that the silver is the strongest of the five is an advantage, but it can also be too strong in already bright light unless it’s feathered. Take some time to experiment with proper and effective placement.

Gold

The gold reflector is great for outdoor portraits because it matches the warm color tones of sunlight. The gold reflector is actually at its best when it is reflecting sunlight, casting a warm glow on the subject. It’s easy to turn normal skin tones overly yellow, however, if you aren’t careful. This is also why the gold reflector is also not recommended for studio or flash work. It not only changes the color of the white light that hits it, but can cast uneven color tones on the subject.

White

Under most circumstances, this one is my favorite. The white panel may not reflect quite as much light as the silver or gold, but when used properly it can still bounce just enough light onto the subject to overcome shadows and add subtle dimension opposite larger light sources. Since it is soft, clean light, it works well both in the studio and outside when there is ample light. While effective, the white reflector won’t do you much good at all in low-light situations.  It is also important to remember, though, that for the white reflector to do its job, you’re doing to have to get it very close to your subject. Wedding photographers love the white reflector because it doesn’t change the color of the light– or the dress.

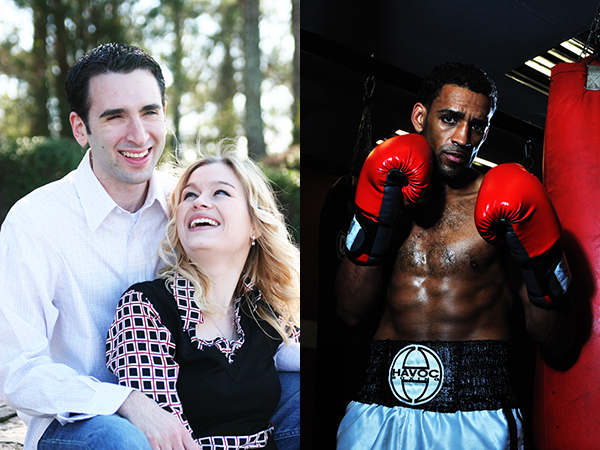
reflector-examples-guyer-photography

In the outdoor portrait on the left, a white reflector adds just enough light to open up the shadows, while a silver reflector casts some dramatic light across the boxer on the right.

Black

This one is pretty much the “anti-reflector.” Black, as we know, absorbs light, which helps to cut down on the reflections from shiny, reflective surfaces– one of the reasons it is used so often in jewelry photography. When placed properly, the black panel also creates shadows when light falls too evenly across the subject. The benefit of this “negative fill” is that it allows you to create shadows rather than overcome them.

split-light-guyer-photography

Using the black “reflector” in a small space helped me achieve split lighting, which I usually create with a silver reflector in a larger area.

Translucent

When all of the other reflection panels have been removed, the translucent is left. While technically not a reflector, this panel works great as a shoot-through diffuser for flash or location lighting, or as a diffusion panel between the sun and your subject. Since larger light sources provide softer light, using the translucent panel as a large diffuser gives you a very large, easily portable light source. While a large enough translucent reflector can also be used as an impromptu background for a head shot, the translucent panel will almost always be between your subject and the light source.

translucent-guyer-photography

Using the translucent panel above the subject’s head, we spread the light and softened it.

Conclusion

The 5-in-1 Reflector can one of the most versatile lighting tools in your entire workflow. Taking full advantage of its capabilities, though, won’t be possible until you know what color reflector to use for which lighting scenario. Remember, though, that photography rules were made to be broken once you’ve learned them, so be sure to experiment with color and placement.

Post originally from: Digital Photography Tips.

Check out our more Photography Tips at Photography Tips for Beginners, Portrait Photography Tips and Wedding Photography Tips.

Choosing the Right Color Reflector for Your Photography

The post Choosing the Right Color Reflector for Your Photography by Jeff Guyer appeared first on Digital Photography School.


Digital Photography School
 
Comments Off on Choosing the Right Color Reflector for Your Photography

Posted in Photography


Hello Sunshine! Meet the Pocket Reflector and Inkodye Photo Fabric Dye Kit

09 Jul

Extra photos for bloggers: 1, 2, 3

It’s summer! Time to make some photos with a little help from your pal, Mr. Sunshine!

The bright summer sun can lead to backlighting and harsh shadows, ick.

But, with a little help from the Pocket Reflector you can bounce Sunster’s rays onto your subject for bright even lighting.

Then grab the Inkodye Photo Fabric Dye Kit and paint sun-sensitive dye onto fabric. Expose it in the sun under a photo negative or object (lace! leaves!) for brilliant blue prints.

Now that’s solar power!

Check Out The Pocket Reflector
$ 15.00 at the Photojojo Store

 Tweet it!      Share

Meet The Inkodye Photo Fabric Dye Kit
$ 30.00 at the Photojojo Store

 Tweet it!      Share

Related posts:

  1. Photo Fabric Dye: Make Multicolored Sun Prints! Extra photos for bloggers: 1, 2, 3, 4 What do…
  2. Lighten Up! (Your Photos)
    With The Pocket Spotlight Extra photos for bloggers: 1, 2, 3 We have seen…
  3. Fotoclips and The Electric Pocket — Picture-Perfect Stocking Stuffers Seeing as it’s December, you’ve been good all year, and…


Photojojo

 
Comments Off on Hello Sunshine! Meet the Pocket Reflector and Inkodye Photo Fabric Dye Kit

Posted in Equipment


Portraits on an Overcast Day? Use a Reflector

02 May
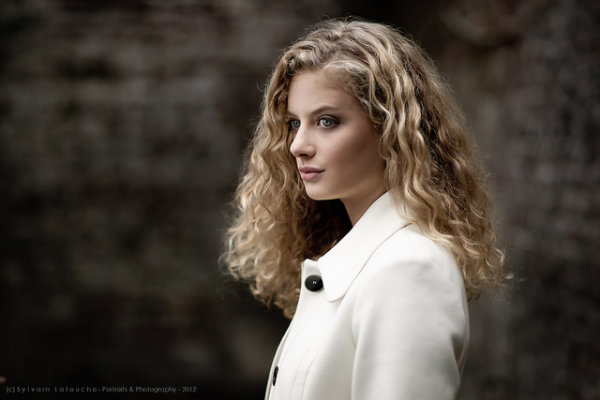
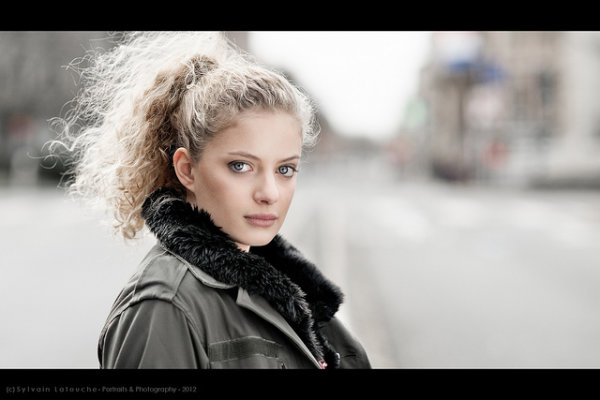
Photographer: Sylvain Latouche. Shot with a Sony A850 and a 105cm silver circular foldable reflector.

Photographer: Sylvain Latouche. Shot with a Sony A850, 85mm lens and a 105cm silver circular foldable reflector.

As we head into Autumn here in Australia the days are becoming shorter and we’re seeing more and more overcast days. While some might say the weather is poor – this is one of my favourite times to shoot portraits out doors.

Overcast cloudy days present photographers with some beautiful soft and even light with the loads acting as a big natural diffuser.

This also means you can position your subjects almost anywhere as there’s little direct light which can open up great creative possibilities.

One of the key tools to have at your disposal on these kinds of days is a reflector (they come in all kinds of shapes, sizes and colours – grab one of the affordable 5-in-1 sets here if you’re just starting out) to help to bounce some of that lovely soft light up into the face of your subject.

This adds more light into the scene to help with exposure but also fills in any shadows that may be cast (often under the chin, nose etc).

In general you’ll want to position your reflector below and angling the reflected light back up towards the subject to fill in what shadows their may be – but do experiment with positioning the reflector at different distances and angles from your subject to see what impact that has.

Check out some of the following examples – all shot on overcast days with nothing more than a reflector (click the photos to be taken to the photographers page).

Photographer: Sylvain Latouche. Shot with a Sony A850, 85mm lens and 105cm silver circular foldable reflector.

Photographer: Sylvain Latouche. Shot with a Sony A850, 85mm lens and 105cm silver circular foldable reflector.

wondering...

Photographer: Marcin Sowa. Shot with a Nikon D300, 85mm lens and reflector.

Photographer: Casey Lee. Shot with Canon EOS 30D, 50mm lens and a Gold Reflector.

Photographer: Casey Lee. Shot with Canon EOS 30D, 50mm lens and a Gold Reflector.

Senior Portrait 1 - Tamara (Color)

Photographer: Paul Ryan. Shot with Canon EOS 5D, 24-70mm lens and a Silver Reflector.

Post originally from: Digital Photography Tips.

Check out our more Photography Tips at Photography Tips for Beginners, Portrait Photography Tips and Wedding Photography Tips.

Portraits on an Overcast Day? Use a Reflector


Digital Photography School
 
Comments Off on Portraits on an Overcast Day? Use a Reflector

Posted in Photography