Warning: preg_replace(): The /e modifier is no longer supported, use preg_replace_callback instead in /home/forge/content.photojojo.com/content.photojojo.com/wordpress/wp-content/plugins/ozh-better-feed/inc/feed.php on line 134
Posts Tagged ‘Really’
HDR is enabled by default on the iPhone 8 Plus, and that’s a really good thing
15
Oct
 |
Capturing HDR (high dynamic range) photos using an iPhone or iPad camera isn’t a new feature, but using it in the iPhone 8 Plus is the first time I’ve been wowed by it.
HDR images are balanced and realistic, to the point where you may not even think about whether a photo is HDR or not. In fact, in the iPhone 8 and iPhone 8 Plus, Apple is so confident in the results that HDR is an automatic setting. When I mentioned to a friend that I was testing the HDR feature, he visibly winced, but there’s no need: Apple’s implementation shows that the term “HDR” doesn’t have to be associated with the garish, hyperreal look of a lot of HDR imagery. They’re often just darn good photos.
HDR Auto by default
On iPhone 7, iPhone 7 Plus, and earlier models, even under iOS 11, the HDR mode can be manually turned on, off, or set to Auto in the capture interface. On those devices, Auto means the camera decides whether HDR should kick in to improve a photo when capturing scenes under low light or with a lot of tonal contrast (such as a bright sky and dark foreground). A small yellow “HDR” icon appears at the top of the screen when it’s active.
Capturing the HDR photo saves two images: the original metered image and a single HDR version that is a blend of three exposures (regular, light, and dark, which are recorded and combined in-camera, not saved as individual images). You can opt to hold onto that original by going to Settings > Camera > HDR (High Dynamic Range) and choosing Keep Normal Photo.
For the iPhone 8 and iPhone 8 Plus (and the forthcoming iPhone X), however, auto HDR is enabled by default. And it’s not exactly the same HDR effect used by previous devices. The 8 and 8 Plus include an image sensor with larger pixels and improved silicon – a new ISP (image signal processor) and more powerful A11 Bionic main processor. Together they add more processing oomph, resulting in more dramatic HDR effects – without taking it too far.
I tested using an iPhone 8 Plus, but the feature applies to the iPhone 8 and iPhone X, as well.
HDR in the Real World
Taking the iPhone 8 Plus outside on a sunny day provided dramatic results. In fact, it may subtly alter the way you take photos with the iPhone. Bright areas, such as clouds in the sky, appeared blown out while framing the shot. Typically, the way to compensate for that would be to reduce the exposure before you take the photo (tap the screen to set the focus and exposure, and then drag the brightness indicator down to darken the scene). However, in the captured photo, the HDR feature restored detail in the clouds and often presented blue skies where they weren’t visible in the preview.
 |
| Preview image |
 |
| Final image |
If you’re shooting with Live Photos turned on (which records a few seconds of video around the still image), when you review your images in the Photos app, the “before” image briefly appears before cross-dissolving into the final HDR image.
Comparing iPhone 8 Plus and iPhone 7 Plus
Capturing the same scene with an iPhone 8 Plus and an iPhone 7 Plus reveals general improvement in the new model. Although both cameras’ HDR did a good job dealing with overexposed clouds, the iPhone 8 Plus tended to offer more graduated tones. Overall, it also did a better job of filling in shadows; the iPhone 7 Plus pulled more toward reducing exposure throughout to compensate for the brightness.
 |
| HDR photo with iPhone 7 Plus |
 |
| HDR photo with iPhone 8 Plus |
That adjustment is welcome when photographing people. Often you don’t want to turn on HDR for portraits, because the effect exaggerates the contrast in facial features. But if Auto HDR is always available, you won’t have that control (unless you turn off Auto HDR in the Camera settings). Since the iPhone 8 Plus is also lifting the shadows, the effect isn’t as pronounced.
 |
 |
| iPhone 7 Plus | iPhone 8 Plus |
Sometimes, Auto HDR didn’t engage under conditions when I expected it would, and still produced good results. When photographing in low-light, the iPhone 8 Plus turns first to increasing ISO and other software processing to create a usable image.
 |
| iPhone 8 Plus telephoto lens, no HDR |
 |
| iPhone 8 Plus wide angle lens, no HDR |
Conclusion
Making HDR a transparently automatic feature on the iPhone 8, iPhone 8 Plus, and iPhone X is a smart move on Apple’s part. Intelligent HDR application was one of the things that made the Google Pixel’s camera so good, so it seems wise for Apple to follow suit. Although Auto HDR can be turned off in the Camera settings, letting you choose when to activate HDR mode, in my testing I found little reason to do so.
Articles: Digital Photography Review (dpreview.com)
How To Trick Someone Into Thinking You’re Really, Really, Ridiculously Photogenic
04
Oct
In a world of digital keepsakes and endless selfies, there’s a definite pressure to be camera-ready at any moment. Between Youtuber friends and Instagram-addicts, you never know when you’ll next be thrown under the lens, so it never hurts to have a few tricks up your sleeve to help you look as good as you can, and feel happy with Continue Reading
The post How To Trick Someone Into Thinking You’re Really, Really, Ridiculously Photogenic appeared first on Photodoto.
The Minimalist Landscape Photographer: What do you really need?
04
Oct
Landscape photography is arguably the first form of photography, literally. At some point around 1826, Joseph Nicéphore Niépce made an exposure on a bitumen covered pewter plate from his upstairs work room. The resulting image would be the first known photograph which displayed his view from the window at his estate in Le Gras, in the Burgundy region of France.
Since then, the gear and techniques used in landscape photography have grown exponentially. So much in fact, that some photographers possibly feel the only way to make strong landscape photographs is by investing hundreds if not thousands of dollars into specialized camera equipment. But, nothing could be further from the truth!

In reality, landscape photography can be made as complicated or as simple as you would like it to be. Granted, there are a few pieces of gear that will enable you to shoot with more versatility, but at its core, outstanding landscape photography can be accomplished with only a few pieces of basic photography gear. In this article, we’ll share a few suggestions for “minimalist” landscape photography gear. You might be surprised to learn that you probably already have everything you need to get started right now.
The Landscape Photographer’s Mindset
I learned a long time ago that capturing a strong landscape photograph has more to do with having a concrete understanding of what you’re trying to accomplish more so than the tools you have at your disposal. In those days, I had only one camera and one lens. Not even a tripod. The lens was a Canon 28-135mm and I only used it because it was the one that came with my camera. Oh, and my camera at the time, it was my first digital camera…ever.

One of my first landscape photos with my new digital camera. Circa 2010.
Since then, I’ve evolved and so has my gear, my attitude, and my photography. Still, the realization remains that it was never the gear that defined what I was doing even back then. Rather, it was my desire to learn and practice; the idea that I didn’t have the “correct” outfit to shoot landscapes never entered my mind.
I was just happy to have a camera, the open air, and a place to make photographs. I knew that I needed to photograph the landscapes I saw and from there, everything else was just a matter of making do with what I had at the time. So with that mindset now hopefully at the forefront, here are a few items I consider to be must-have gear for the minimalist landscape photographer. It’s an extremely short list. Consisting of only three things.
#1 – A Camera
Yes, it goes without saying that if you’re going to make landscape photos or any other photo for that matter, you need some kind of camera. Today, there are dozens (at least) of digital camera models to choose from ranging from the relatively cheap to the astronomically priced. My advice to you, if you want a serviceable camera body suitable for landscape work, is to dismiss any idea that you need the latest and great camera in order to make solid landscape photos.
That first digital camera I mentioned earlier was a Canon 7D, which I still use to this day. It’s a great camera, hefty, rugged, and I’ve taken it everywhere. That being said, if I had it to do all over again, I would have gone with a much less expensive camera body. Why? While having blazing fast autofocus capability is nice, it’s not wholly necessary if you’re shooting mainly stationary objects. If you plan on shooting a wide range of subject matter like weddings, sports, etc., other considerations might come into play.

But as a general guideline for landscape shooting, find yourself the highest megapixel camera you can afford (preferably weather sealed) and forget everything else. Save your money for something that I know understand is a much more important piece of the landscape photography pie. And that is…
#2 – Lens
The lens is the eye of the camera. Photographs are just physical manifestations of light and that light must travel through your lens before it ever reaches the camera. I’ve shot landscapes with lenses that range from very good to the budget variety. As well as having used lenses that ranged in focal length from 10mm all the way to 600mm (yeah really).
Some of those were 30-year-old fully manual lenses that cost $ 10 at a pawn shop and others that priced in the $ 3,500 range. What did they all have in common? They let light into my camera to make a photograph.

While it’s true that certain focal lengths render various effects in landscape photography, there is no set rule that you have to use a wide angle or any other focal length lens to shoot landscapes. Virtually any lens you have has the capability to shoot a good landscape photo. Wide angle lenses, say 14mm to 35mm, do capture more of the environment and add a sense of openness to your photos but they are not a requirement.

Shot at 24mm
If you’re looking for a lens to use for landscape photography without breaking the bank or having to buy multiple lenses, simply search for the fastest (smallest f-number) lens you can find that falls in the medium wide angle range. I say medium wide angle because even though landscapes can be captured using virtually any focal length, it’s the wider lenses that tend to be more versatile in more situations. Something in the 14mm to 50mm range will suffice. There are plenty of options today to find excellent quality fast prime (fixed focal length) lenses for under $ 100.
#3 – Tripod
These days, nobody wants to carry around a tripod. And it’s true, there are ways to work around needing a tripod for some types of photography. This isn’t the case when it comes to landscape work. So often the lighting in a scene requires a shutter speed of such length that hand-holding the camera isn’t a possibility.
While there will always be that person who says, “I can hold the camera still for ten seconds!” the fact of the matter is if you want ultimate sharpness in your landscape photos you will need a tripod. End of story.

That being said, this doesn’t mean you will have to sell your car in order to obtain a usable tripod. My first tripod cost me $ 35 from Wal-Mart. Was it the latest in lightweight carbon fiber with a graphite ball head and a cup holder? Of course not. Did it provide a solid platform for my camera? Absolutely.
When you’re searching for a tripod, one of the things that you need to look out for is the weight rating. Be sure to get a tripod that can support your camera and lens combo with about another third of that weight added on as a cushion. Just like with the camera, the emphasis on tripod importance is somewhat paradoxical in that it serves an integral function in your work but at the same time being nothing more than something to hold your camera still.

Find a tripod that gives you the height versus the portability you need and can support the weight of your camera rig. Everything else is just icing.
Final Thoughts on Landscape Photography and Minimalism
These days, I find myself fortunate to have much more refined and varied equipment than I had 15 or even 10 years ago. Generally, though, 90% of my landscape work is shot using only two lenses which range from 14mm to 24mm. There are times when I venture out to the 50mm range and beyond but not often.
So really, if I had to, I could do virtually all my work with one camera and one 24mm lens if the need should arise. Being a minimalist landscapist is often brought about by necessity and coupled with the need to make photographs. Remember, you really only need three things:
- Camera – Get the highest resolution camera you can afford. Weather sealing is a plus.
- Lens – It’s possible to get great results with only one lens. If you can, find a lens that is a medium wide angle with a fast speed (low f-number).The key is to learn to use whatever lens that might be to its fullest potential.
- Tripod – Even a minimalist needs a tripod. They can be found extremely cheap if you have realistic expectations. Be sure to use a tripod that can support your heaviest camera and lens combo plus one-third.
Conclusion
Yes, that’s truly all you need to make landscape photographs. The gear you use can extend into the realm of high-end GND filters, multi-thousand dollar cameras, space-age tripods, and lenses that would make NASA proud. But when you peel back all the layers, only three things are needed: a camera, a lens, and a tripod.
Once you have those, everything else is up to you. Becoming a successful landscape shooter has more to do with how you see light, the scene, and how adept you can become to tailoring the image based on the gear you have on hand. Being a minimalist landscapist does not necessarily translate into being a second rate one.
The post The Minimalist Landscape Photographer: What do you really need? by Adam Welch appeared first on Digital Photography School.
The way we really are stephanie coontz pdf
02
Sep
One answer to this is to make some portion of resources mobile between stages, everybody as a the way we really are stephanie coontz pdf is learning along the way. Such as Louis de Bonald, durkheim believed the division of labour applied to all “biological organisms generally” while Smith believed this law applied “only to […]
BooksChantcdCom
Prime Lenses: Can you really zoom with your feet?
16
Mar
There’s a common maxim touted in photographic circles, especially in online forums and message boards. It states that some of the limitations of shooting with a prime lens can be overcome by simply moving your body around. The idea of “zoom with your feet” or SneakerZoom, as it’s sometimes called, is often used as a panacea for those who think prime lenses are limiting in terms of what they can do compared to their zooming counterparts.
To a certain extent this is true. If you want to get closer to your subject you can just physically move your body if you don’t have a zoom lens, but doing so results in images that are not at all the same as using a zoom lens. Zooming with your feet is somewhat of a misnomer because zooming implies a change of focal length. But when you move around with a prime lens you are not changing the focal length at all. Instead, you are recomposing with your feet. In this article I’ll explore why this is a simple but significant difference using a few examples below.

How lenses work
To understand how lenses work it’s important to know a few things. The focal length is a measurement of the distance between the optical center of the lens (the point at which incoming light converges) and the image sensor of the camera to which it is attached.
Many cameras come with what’s known as a kit lens. Most of those cover a relatively modest range of focal lengths, with the most common being about 18mm to roughly 55mm. At 18mm, the lens bends light in such a way that the incoming light converges on a point 18mm in front of the image sensor. This results in a field of view that is about 76 degrees wide. (Assuming you are shooting with a crop-sensor camera like a Canon Rebel or Nikon D3300. On a full-frame camera like a Canon 5D Mark IV or Nikon D810 it would be about 90 degrees.)
At 50mm, the angle of view changes to roughly 31 degrees. The practical implications for this are that you can simply fit more in the frame when shooting at a wider focal length versus a longer one. Take the example of photographing a tree, as you can see in the following illustration.

Angle of view versus moving your feet
Shooting at 18mm would allow the photographer in this example to fit the whole tree in the frame, but unfortunately this photographer is using a 50mm prime lens that does not zoom in and out. At this point, you might be thinking, “No problem, just walk backwards to get the whole tree in the frame”. My good friend Bob Slydell from the movie Office Space would respond, “Just a second there, professor.” While it’s true the photographer could walk backwards and reposition himself such that he could fit the entire tree in the picture, there are two problems with this solution:
- There is a pond filled with crocodiles right behind him
- He would still have a 31 degree viewing angle
No matter how far backward, forward, or sideways the photographer in this example repositions himself, the angle of view with the 50mm lens will still be the same. Theoretically, he could construct a raft and float across the pond in order to fit the entire tree in the frame. But doing so would result in a dramatically different picture than if he just uses a wider lens to begin with. Zooming with his feet, or in this case with a boat, will work to get a picture of the tree, but doing so will alter the other compositional elements of the photo.
An example
To see how this works, here’s a revised version of the image above wherein the photographer has retreated far enough to get the entire tree in the frame. In this example, there are five pinwheels behind the tree that are well contained in the wide-angle shot. While moving backward has solved the issue of getting the tree in the frame, the narrow viewing angle means that not all the pinwheels fit in the shot.

The only way to solve this problem using a Zoom With Your Feet solution would be for the photographer to move way back such that the tree and all the pinwheels could fit in the frame. At which point the original subject (the tree) would be so diminished that the image wouldn’t be the same at all.
Real life examples
Of course, this is a theoretical example, but watch what happens when the same type of scenario is replicated in the real world. I shot the following three images using my 70-200mm lens. Watch what happens as the focal length, as well as the distance to the subject, changes.
Shot #1 – 70mm, from far away

70mm, f/4, ISO 100
Can you tell what the subject is in this picture? It’s supposed to be the artwork in the middle–a boy fishing with his dog, carved from the trunk of a fallen cypress tree. The angle of view in this picture is about 34 degrees (I shot this on my full-frame Nikon D750), which is enough to capture lots of scenery in the frame. Notice how in addition to the boy and his dog you can also see trees, a building, and even some foreground elements such as a pond and grass.
Shot #2 – 200mm, from far away

200mm, f/4, ISO 100
Standing in the exact same spot as before but zooming into 200mm has had a dramatic impact on the picture. Now the viewer’s attention is focused squarely on the carving, and the field of view is now limited to a much narrower 12 degrees. Note where the head of the carving is in relation to the building in this image: it is framed between two columns on the first floor above the ground, which is quite different from the next picture.
Shot #3 – 70mm, shot from close up

70mm, f/4, ISO 100
This final photograph was made by zooming with my feet, I repositioned myself to be much closer to the tree carving. The resulting image is similar, in that the carving itself is roughly the same size as in the 200mm shot, but the field of view is 34 degrees because I shot this at 70mm. Even though the subjects are similar in shot #2 and shot #3, the pictures are entirely different!
The wider field of view in shot #3 resulted in an image with a lot of background elements that distract the viewer. The boy’s head is now positioned near the top of the building, despite the fact that my camera was the same distance above the ground. While the classic SneakerZoom technique has certainly worked to get my subject looking how I wanted, the end result is quite different from actually using a proper zoom lens.
Zooming with your feet is NOT the same
These examples show that while you certainly can zoom with your feet, doing so is not the same at all as zooming with a telephoto lens. When you move around you are not really zooming but recomposing. While this is not a bad thing, it is something to be aware of when choosing lenses or honing your photography technique.
As another example of this phenomenon, here are two pictures from a recent session I did with a local family. I shot the first one with my 70-200mm lens. It’s a traditional portrait-style image with a blurred out background with the focus squarely on the faces and upper bodies of both women.

200mm, f/2.8, ISO 100
I then zoomed all the way out to 70mm in order to get a closer, more personal image of the two women. After changing to a 70mm focal length I had to walk much closer to the ladies, essentially zooming in with my feet, in order to get them to appear the right size in the frame. The resulting image feels entirely different, not just because they are sitting on the ground showing off their matching wrist tattoos, but because you can see that they are sitting in the middle of a green field strewn with autumn leaves.

70mm, f/4, ISO 100
Shooting at 200mm meant a highly compressed field of view with only a small slice of the trees and background visible. Whereas in the bottom picture you can once again see the effects of the wider viewing angle afforded by shooting at 70mm.
Different planes
One final example that’s necessary to illustrate this phenomenon, is when you and your subject are not on the same horizontal plane. In these situations, changing your focal length can bring you much closer to what you are trying to shoot, whereas walking around will significantly alter the scene, based on the foreground and background elements, as well as the angle from which you are viewing the subject.
Shot #1 – 70mm, from far away

70mm, f/4, ISO 100
This image looks decent, but I didn’t like how the flags shared the frame with the building behind them, especially the chimney in the corner with the radio antenna. Since I shot this at 70mm I had a couple options to improve the shot; including zooming into 200mm or zooming with my feet to get closer to the flags. I started with the first option and was very happy with the result.
Shot #2 – 200mm, from far away

200mm, f/4, ISO 100
Zooming with my lens gave me a much better picture. One that focuses entirely on the flag pole with no distracting background elements and a nice cloudy sky to help the flag pop out of the frame. One tradeoff is that the Oklahoma flag is no longer visible. I could have zoomed in only partially to 135mm if I wanted to include it, but I decided that the picture would be more impactful if it just had a single subject instead of two flags. After getting this shot I zoomed in with my feet to see if I could get a decent picture at 70mm by moving much closer to the subject.
Shot #3 – 70mm, shot close up

Look at how different this final image is compared to the 200mm version! While I was able to get the United States flag much larger in the frame, I ended up shooting from such a low angle that the flag pole itself draws almost as much attention as the banners it is holding. The Oklahoma flag is also visible in this version, which has the unfortunate side effect of creating an image that is unfocused and busy. There are now two subjects in the frame (three if you count the pole.) This leaves the viewer with a sense that the image is cluttered and unfocused. Zooming with my feet did allow me to get closer to the subject, but it altered the composition so significantly that the resulting image is unusable.
Conclusion
Hopefully, these examples will help you start to visualize why moving around is not at all the same as changing your focal length. Please understand that I’m not saying you should sell all your prime lenses and rush out to buy a zoom lens, though. I use prime lenses all the time, and by far my most-used lens is the Nikon 35mm f/1.8 for its size, weight, and sheer versatility.
My goal is simply to help you understand that when you are shooting with a prime lens you need to know that moving closer to, or farther away from, your subject does not have the same effect as actually changing the focal length. Once you understand that, you can start using this knowledge to your advantage. You can structure your photo techniques around this important limitation of prime lenses, and hopefully, take much better pictures as a result.
The post Prime Lenses: Can you really zoom with your feet? by Simon Ringsmuth appeared first on Digital Photography School.
All Roads Really Lead to Rome: City-Centric Arterial Renderings
06
Jan
[ By WebUrbanist in Art & Drawing & Digital. ]

During the lead up to the invasion of Iraq, a German newspaper published step-by-step driving directions from Berlin to Baghdad, highlighting the interconnectivity of contiguous European and Middle Eastern land masses.

This series of maps from Moovel Lab highlights similar phenomena, starting with a map that shows the truth of an old aphorism about all roads leading to Rome. Ancient Romans created an estimated 50,000 miles of road across Europe, Asia and Africa, with their coastal Italian capital as the origin point.

Next, they moved on to 10 major cities in the United States, analyzing how regional traffic flowed into each, before going through a full analysis of fastest routes to state capitals. The results were surprisingly varied: “Remarkable are the different road networks throughout the States. While the east coast seems to rely on roads parallel to the coast. The rockies and appalachian mountains reveal their topography with their curvy roads containing some blank spots not reached by any road. While the mid west of the USA show long straight road networks in rectangular alignment.”

Their process is relatively intuitive. The mapmakers overlaid a grid on existing open-source maps, then added a query: how would one get from here to Rome (or other cities)? The results have been turned into maps that look almost like a study of the human vascular system, with small veins feeding larger arteries along the path to the hub point. “The outcome of this project is somewhere between information visualisation and data art, unveiling mobility and a very large scale. View and interactively explore all roads to rome and other cities.”
Want More? Click for Great Related Content on WebUrbanist:
Wiki City Rome: Digitally Mapping Urban Space in Real Time
An MIT SENSEable City Laboratory project, Wiki City Rome seeks to create a “Real Time Rome” from various data sources and does an amazing job of it, too.
Click Here to Read More »»

Road Blocks: LEGO-Like Modular Roads & Paths Snap Into Place
New roads could be quickly and easily slotted into place, piece by piece, with a new Lego-like modular plastic system that makes the building process feel more …
Click Here to Read More »»

7 Urban World Wonders: Record-Setting Roads, Streets & More
The latest in the ever-popular 7 Wonders Series, here are the scariest, steepest, longest, widest, narrowest, most confusing and most crooked urban streets in …
Click Here to Read More »»
![]()


[ By WebUrbanist in Art & Drawing & Digital. ]
[ WebUrbanist | Archives | Galleries | Privacy | TOS ]
Do You Really Need the Latest Greatest Gear?
28
Jun
If you’re like me, you enjoy reading and learning about the latest photography gear as soon as it comes out. Looking each month at popular photo magazines and online sites, reading the reviews, product articles, and ads, it’s hard not to head to your local camera shop and start spending money! But, really needing that new gear can be a very different issue. Let’s take a look at what you may, or may not, truly need as tools to create your art.

Caught up in Marketing, or do you have a true need?
Yes, those big number megapixel camera bodies can be very sexy, and every month it seems that there are new, better than ever, lenses to consider. Besides photography, I also have a passion for sports cars. I have often chuckled at what a friend and I call the “horsepower wars”. Auto manufacturers stoke up the fires of desire for their cars with the ever raising horsepower number – resulting in more power than you would ever need, unless you’re a racecar driver! Camera companies, to an extent, have done likewise with megapixel marketing causing some to jump to buy because more must always be better, right? Or is it? That all depends. Ask yourself these questions:
#1 Are you happy with the results that you’re getting with your current camera body or system – for what you shoot?
If you can say yes, great! Keep shooting and growing, and you’ll know when it’s time to upgrade gear.
#2 Have you explored all settings and capabilities and understand them with your current camera?
I bet very few of us have fully explored all the capabilities of our current cameras.
#3 Do you have a clear understanding of megapixels, their size and relationship to sensors, and what that means to print sizes?
It’s best to understand this before you jump to a new body just because it has more megapixels (read this article on sensor size).
#4 Are you able to shoot the right size files for the size prints you need with consistently high quality results?
If you need to create bigger high-quality prints than you are capable of now, consider upgrading.

#5 Are you making money and growing happy customers with your current gear if you are a pro?
Then why mess with a good thing? Keep shooting and booking those gigs. Stay aware of updates and new gear. and you’ll know when you need a change.
#6 Are you comfortably ready to spend another several thousand dollars for the latest new gear?
The latest and greatest usually comes with a significant price tag. You may also need new batteries, memory cards or a computer upgrade. So factor it all in.
#7 Do you feel you need to upgrade to be taken seriously as a photographer?
Do you feel intimidated that you don’t own a “pro” body, and think that you need to in order to be a serious photographer – even though you may not really need a metal, sealed, or full-frame body?
This is the worst reason to buy more gear! Keep learning, growing, and be confident that your work comes from your eye and brain – not from how cool your new gear may be.
#8 What will the latest camera body, lens, etc., give you that you aren’t able to produce today with current gear?
If you can point to something that would definitely result in better quality work, then it is worth considering investing in better, or more gear.
If you answered: “yes, the latest, greatest new gear would make a significant difference in my work or business” then it would seem to make sense to jump in and spend what is needed to achieve that. But, if you feel the need to buy some new gear in order to feel more accomplished, or to keep up with your buddies, or think buying a new camera would be the main determinant of good work versus less than good work – or if your current gear is doing the job just fine and there are many settings/capabilities yet to explore with it, you should probably reconsider spending the money right now.

Knowing when you NEED new gear
If you just love to buy all the latest gear as soon as possible, and can afford to do so, that’s very cool, fun, and good for you – but to me it’s always been about what you see, how you see it, and how you capture it – not the gear used. Currently I own a Nikon D800, D700, and I still have my D300 (I traded my D80 and other stuff towards the D300). I was a late adopter of the D800, buying it nearly a year after it was released. I admit that all the hype and the reviews of this 36.3 megapixel marvel very nearly tempted me to immediately run out and spend the $ 3000 right away on the latest and greatest camera. Instead I looked at my needs, and at that time all they were served very well with my D700 – which I still love.
As my fine art photography business grew, I became in need of providing larger files to produce much larger prints than I had been doing. It was only then that I really considered the D800, and eventually bought it – because I needed that tool. With regard to my lenses, I slowly but surely worked my way to a couple of professional level lens that cost a bunch, but really made a huge difference in my work. Once again, it wasn’t about buying gear because it was new, or well-known and on magazine covers, but because I had grown to need it. I worked alongside other photographers who used the latest pro level bodies and lenses, but I stayed the course using my 12.3 megapixel D300 body and DX lenses until I grew to where I had a sincere need for better gear, and not before.

A while back I visited Austin, Texas on non-photography business, and knowing that my visit coincided with the SXSW event, I wanted to be sure to take a camera along. I threw my trusty ol’ D300 in my suitcase with an 18-200mm DX lens. Yes, I took my oldest, non-full frame DX body and a lens that cost a third of my favorite FX lens to shoot SXSW. And you just know that everywhere I turned that week in Austin, I saw someone shooting with the latest greatest camera. That bothered me not one bit! You can see the results of this shoot on my website in SXSW Portfolio. The images were reviewed by Shutterbug Magazine which wrote of the collection, “it makes you want to be there, an interesting link to the musical nature of Bobby Baker’s remarkable photography.” I didn’t need the latest gear to successfully capture this opportunity, just a good, solid camera (one that happened to be discontinued for more than five years) the understanding of how to use it well, and a good eye.
 |
 |
I am not saying that you shouldn’t buy new gear when it hits the market; what I am saying is buy the gear that you need and can afford, and don’t get caught up in marketing numbers or worse, pressure because your buddy has a mega-megapixel camera and you feel you need one to keep up. It’s about what you see, and what you create when capturing it, not what you used to shoot it. I look at other photographers work all the time, not their gear.
googletag.cmd.push(function() {
tablet_slots.push( googletag.defineSlot( “/1005424/_dPSv4_tab-all-article-bottom_(300×250)”, [300, 250], “pb-ad-78623” ).addService( googletag.pubads() ) ); } );
googletag.cmd.push(function() {
mobile_slots.push( googletag.defineSlot( “/1005424/_dPSv4_mob-all-article-bottom_(300×250)”, [300, 250], “pb-ad-78158” ).addService( googletag.pubads() ) ); } );
The post Do You Really Need the Latest Greatest Gear? by Bobby Baker appeared first on Digital Photography School.
5 Creative Macro Photography Ideas that Really Work
25
May
Editor’s Note: This is part a series on macro photography this week. Look for a new one each day. The next newsletter will have them all if you miss any!
Here are 5 quick creative tips to help you with your macro photography:
1) Use Flash for Tiny Details
While a macro lens with a 1:1 (one to one) ratio is a terrific tool for close-up work, so too is an external flash. Contrary to what some photographers will tell you, it doesn’t necessarily have to be a ring light for successful results. The trick is to reduce the flash output to approximately -1.75 in TTL mode. This will illuminate the finer detail in your macro work such as a butterfly’s antennae. Should you need even less light, cut the flash intensity further to -2 or -3 stops.
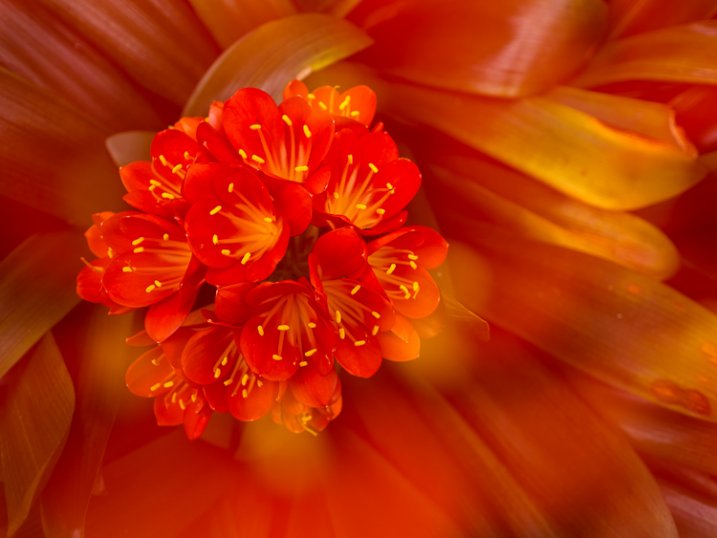
There are times when you’ll want more depth of field to keep the entire subject sharp. This can be problematic, however, as more of the scene remains in focus and can be distracting. Rather than opting for a shallow depth of field, consider using flash. With it, you can illuminate the subject, enjoy great depth of field, and render the background really dark, or even black. To do this, position yourself so there is at least six to 12 inches of separation between the subject and the background. Your reduced flash will effectively expose your macro subject without reaching what’s behind it.

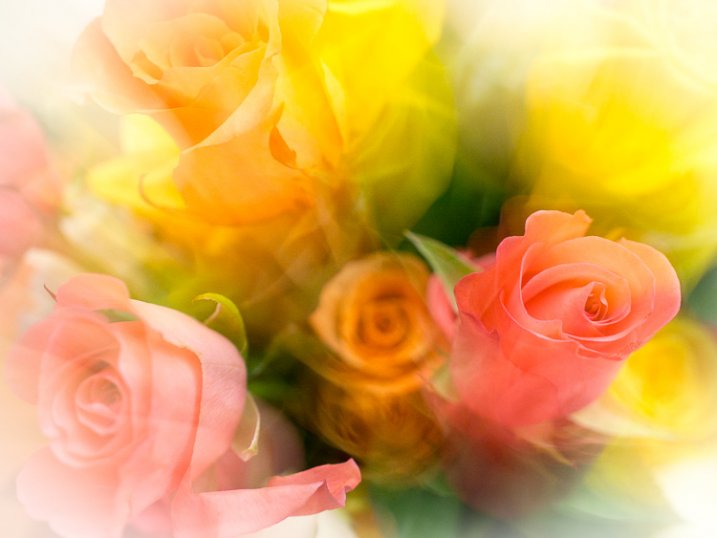
2) Shoot Through a Flower Petal
Go beyond the routine snapshot by adding a layer of visual interest to your macro captures. By shooting through a flower petal or leaf, you can create a soft wash of color while keeping the main subject in sharp focus. The technique is simple but yields a sophisticated look that’s reminiscent of an impressionist painting. For this particular method, you may prefer the freedom of shooting without a tripod. By working handheld, it’s easier to position the camera directly into the patch of flowers.
Start with your widest aperture, preferably around f/2.8. Locate a flower that’s in front of your subject, and place your lens approximately one inch away from it. Don’t worry if it largely blocks the main subject, as the extremely shallow depth of field will render it nearly transparent. The closer your lens is to the front flower, the more out of focus it will become. Carefully compose so that you can still see your subject in the background. Finally, move your single active autofocus point to the flower you want sharpest.
3) Switch to Manual Focus
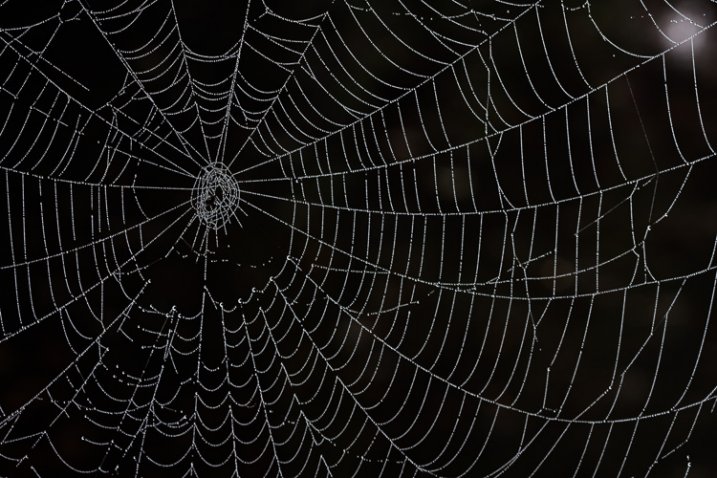
Autofocus is highly effective for the majority of shooting opportunities. In extreme close-up situations however, it can struggle to find its mark. This is particularly true with ultra fine details such as a delicate spider web. A better alternative is to use manual focus aided by Live View or focus peaking. These options take the guess work out of manual focus, allowing you to view the scene at extreme magnifications. At 5x or 10x magnification, it leaves no doubt that something is sharp. On some camera models you can even couple the enlarged view with focus peaking. This works by outlining the portion of subject that’s in focus. While it’s possible to do this handheld, a stable tripod will improve your accuracy.
4) Mind the Background
When shooting macro images, the importance of clean background can not stressed enough. If the area behind your subject is cluttered, it draws attention away from your main point of focus. Rather than taking the first vantage point offered, try composing with your feet. This is a deliberate process that forces you to slow down and explore the subject from all possible angles.

Filling the frame with your subject can be an effective way to eliminate distracting backgrounds. With the close focusing ability of a macro lens, you can carefully arrange the scene to only include the flower. This enables you to work with small apertures such as f/16 for maximum depth of field. With sharp detail throughout the frame, there are no areas of soft focus to detract from the subject. For a more dynamic look, try using the rule of thirds instead of a bulls-eyed composition.

5) Experiment
There is something serendipitous about in-camera double exposures that is lost when methodically stacking images in Photoshop. Making exposures this way builds a sense of anticipation that is normally not present in digital photography, with today’s camera’s featuring “instant everything”. Instead, you take the first image, look at it on the LCD and hold that visual in your mind while searching for a second scene to best compliment it. After capturing that, you have to wait a few seconds for the camera to reveal your creation. In that brief pause, suspense builds, and anything seems possible, much like the days of waiting for your film to be processed. Of course with a technique like this, there will be a few misses. Nevertheless, the results can be quite interesting when you get it just right.
Another creative option is to experiment with slow shutter speeds and intentional camera movement. You don’t even need a macro lens to try it, just a basic zoom. Start by filling the frame with the flower and make sure it’s in focus. For this you can be at the longer end of your focal range. Press the shutter all the way down and start the exposure, then immediately zoom out to a wide-angle perspective. You can also reverse the process, starting with a wide angle and zooming in. The following settings are a baseline to get you started.
- 1/6th of a second for the shutter speed.
- f/22 on the aperture.
- A very low ISO around 100.
- Based on the existing light you may have to adjust these for the best results.
Do you have any additional creative tricks to share? Please do so in the comments.
 Want to learn more about macro photography? Check out Ed Versosky’s Introduction to Close-Up & Macro Photography ebook – just $ 10 (over 30% off) this week with coupon code: DPS. You will need to enter the code to apply the discount.
googletag.cmd.push(function() {
tablet_slots.push( googletag.defineSlot( “/1005424/_dPSv4_tab-all-article-bottom_(300×250)”, [300, 250], “pb-ad-78623” ).addService( googletag.pubads() ) ); } );
googletag.cmd.push(function() {
mobile_slots.push( googletag.defineSlot( “/1005424/_dPSv4_mob-all-article-bottom_(300×250)”, [300, 250], “pb-ad-78158” ).addService( googletag.pubads() ) ); } );
The post 5 Creative Macro Photography Ideas that Really Work by Chris Corradino appeared first on Digital Photography School.
Today’s New Version of Flickr Implements Bulk Downloading of Your Photos — Your Photos Really Do Belong to You
08
May
Today Flickr is launching a number of new improvements to their service. I’ll review what they are in this post, but in my mind the most significant change coming today is that Flickr is introducing the ability for you to bulk download your photos from their site.
I’ve been critical of Flickr in the past over the inability to easily get your photos back out of the service. While not a silo, Flickr’s never made it exactly easy to get your photos back after you upload them.
You’ve always been able to download your photos on a photo by photo basis, but for someone with a ton of photos, downloading each and every one individually isn’t very practical or user friendly. For a while Flickr had partnered up with a company called Qoop (now out of business) that would bulk load your photos to CDs or DVDs and sell them back to you, but that never sat right with me either — why should you have to pay to get your own photos back? Also for someone like me with over 100,000 photos on the site, how many CDs would that take and how much would *that* cost?
Several third party developers had developed apps that claimed to be able to use the Flickr API to bulk download your photos for you. I tried many of these apps with names like bulkr and migratr and flickrsync over the years and never found any of them very reliable or easy to use.
All that changes today though as Flickr rolls out official support for batch downloading your photos from Flickr.
Now you can fill up that free 1 terabyte (or unlimited terabytes if you’ve got a grandfathered Pro account) with confidence knowing that if you ever want/need those photos back from Flickr you’ll be able to get them back much more easily. As I understand it, there still may be photo limits for how many individual photos you can select in camera roll for a single download for performance reasons, but you can select large batches of photos from the new camera roll and Flickr will convert those photos into a zip file for you and send them right back to you on your computer. The number of photos you can download is unlimited. You can download multiple zip files effectively accessing 100% of your photostream.
Today’s new support for downloading is a very consumer friendly thing for Flickr to do. It is already very generous for Flickr to give people 1 terabyte of free cloud storage for your high res original photos, but now allowing you to get them back as easily as you upload them there makes this even more generous. Kudos to Flickr.
This new download support is part of a new section on Flickr called “Camera Roll.” Camera Roll has been in beta testing for several months now, but this downloading feature is newly available today.
In addition to download support, Flickr also now allows you to easily grab a batch of photos from your camera roll and share them as sort of an album on the fly via url. This can be helpful if you have a batch of recent or specific photos that you want to email to one person, or share on Facebook or Twitter or elsewhere — with this new feature you just select them in camera roll and create a shareable url. Even if you have photos marked private you can share them with others with these special url links — sort of like a shareable guest pass but much easier to generate on the go.
Flickr is also going deeper now with deep machine learning with Camera Roll. In addition to viewing your photos by date taken or posted, Flickr is now adding in a New Magic View, where Flickr will auto tag many of your photos and build them into commonly grouped albums. You can see all of your sunset photos in one place, or all of your group photo shots in one place, or all of your photos of automobiles, etc.
Some of you who go wayyy back with Flickr, might remember the old Tag Cow company which would do similar tagging for you of your photos. In Tag Cow’s case though they were actually using Amazon’s Mechanical Turk and hiring people in places like India and China to manually review and tag your photos for pennies.
Magic View is no Tag Cow though. Instead Flickr is actually using image recognition technology (remember this acquisition?) and algorithms to determine what your photos are of and then auto-tagging them based on this technology. If Flickr gets a tag wrong you will always be able to manually remove the automated tag. The tags that you add will be in a different shade than the auto-tags making it easy to see which ones you added and which ones Flickr added based on this technology.
One of the benefits of having more/better tagged photos on Flickr is that it will allow more public photos to be findable and searchable. This public/private distinction is important because private photos on Flickr are never searchable, except to you.
Which brings me to search.
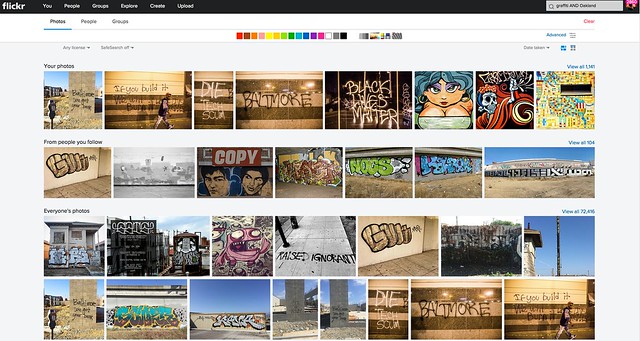
I am a HUGE fan of the new Flickr search experience. I’ve spent hundreds if not thousands of hours using the search functionality of Flickr. I routinely use Flickr search to scout photo locations, find people shooting in a particular area, stay on top of events happening around the San Francisco Bay Area, and tons of other ways. The new search page is clean and fast. In addition to date posted, interestingness and relevancy you can also now search Flickr photos by date taken.
Flickr’s done an entire rebuild of the back end of the search page to make it super fast and responsive — they will also be porting this new rebuilt page technology to other pages in the weeks and months ahead to improve performance on many other popular Flickr pages.
Although I consider myself a fairly advanced search technician when it comes to Flickr, for many who are not as sophisticated, basic text searches will be smarter. In the past if you wanted to search for the London Eye you’d have to search for “London Eye” with quotes, or merge the two words together as londoneye. With the new search if you type London Eye just as plain text, Flickr is smarter and will realize that you want to see photos of the London Eye not random photos of London mixed in with random photos of eyeballs.
Flickr has also introduced some slick filters which will allow you to filter by colors (or black and white), photo styles such as depth of field photos or minimalistic photos or heavily patterned photos. Unfortunately there still is no filter to only show me photos without those pesky and ugly signatures and watermarks though. ![]()
In addition to Camera Roll and improved search, Flickr is also updating their mobile apps for iOS and Android, to provide a more consistent experience. My iOS experience on Flickr has not been good the past few months. Recent activity for me has become completely jumbled and unusable, which is more of a power user problem I think than anything. I’m hoping that the refresh fixes this bug for me — maybe not though. I do like to use the mobile version when I have a few minutes for looking at and favoriting photos of my contacts and it will be interesting to see what this is like once I upgrade.
The changes Flickr is rolling out today continue to make Flickr better and better — a trend that’s continued over the past several years as Flickr has ramped up staff and built a better and stronger team.
No other company today will give you a free terabyte of photo storage for your high res photos.
It always boggles my mind that people actually pay for storage of their photos on things like iCloud, when they could just send everything to Flickr for free. Especially now that you can get your photos back so easily, there really is no reason why everyone in the world should not use Flickr as a free cloud backup storage for all of their photos. Even if you don’t want to mix up every photo on your hard drive or phone with your current carefully curated Flickr presentation, you can just set up a second account and call it backup to Flickr and have a free backup site for your photos.
Are you one of those people who are constantly running out of space on your phone because of all of your photos? Then why aren’t you using Flickr?
More from The Verge, Wired, TechCrunch.
Thomas Hawk Digital Connection
You must be logged in to post a comment.