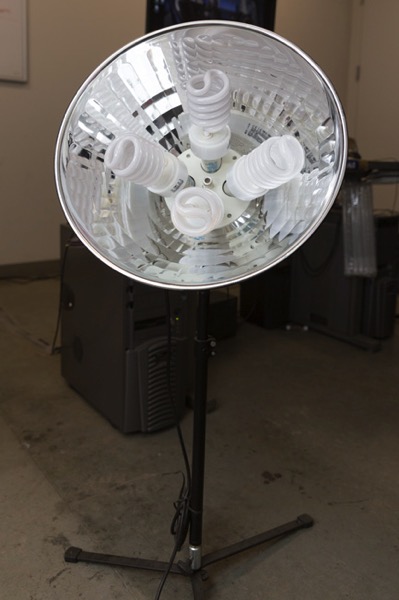
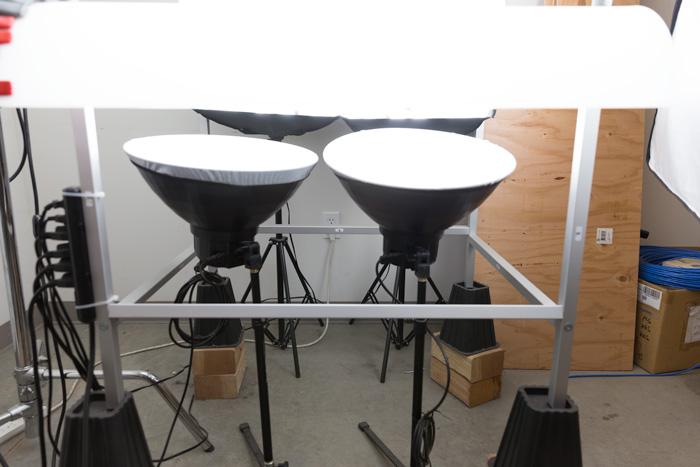
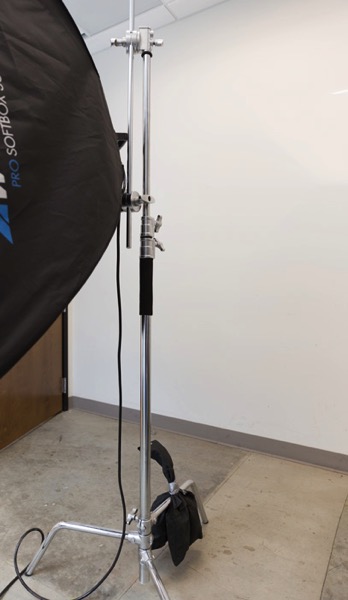
RSS
 

Posts Tagged ‘quick’

Quick Review of the Kupo Click Stackable Light Stand

02 Feb

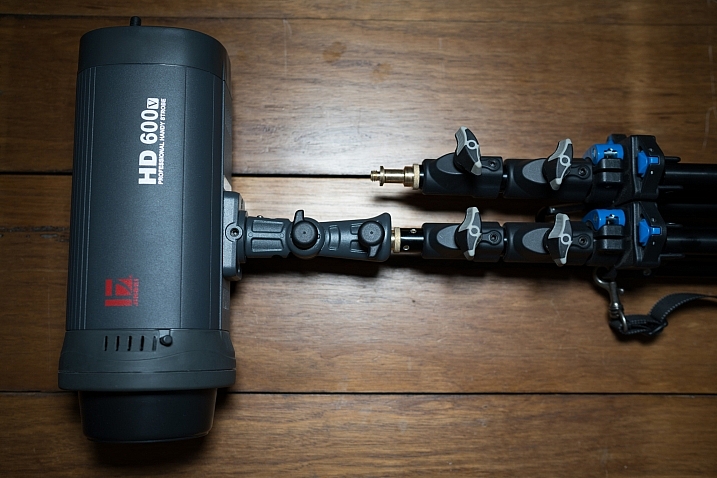
I’ve recently started using a pair of Jinbei HD600 studio lights for my photography and what I love about them is that they are self-contained units. They don’t have any requirements for power cables, etc., as they’re battery powered, wireless studio lights. What was starting to bug me, though, was that I only had heavy light stands to mount them on. Not a problem when you’re working in a studio, but when you have to visit a client to do a headshot or a quick portrait of someone, having to take a C-Stand along isn’t always ideal (especially if you’re on public transport).

I wanted to stick with Kupo gear as I’m very happy with the quality and innovation of their products, so I asked the crew at ProTog what my options were. They suggested I hold out for the Kupo CLICK stackable lighting stands. I did and I’m very happy I did. Here’s my review…

Check out the Kupo Click Light Stands on Amazon or on B&H Photo’s website.

Kupo click light stand

My wish list

I had a few simple ideal specs for the stands that I was after:

  • I wanted them to be light enough to sling over my shoulder when I was on the go.
  • They need to not suffer from bad build quality due to being light weight.
  • I wanted to be able to quickly use them for either a well-placed strobe on an outdoor shoot, a quick portrait in an office or studio, and maybe even to mount a GoPro on to run a quick timelapse of a session.

Features of the Kupo Click

The Kupo Click had everything I wanted in a portable light stand. Let’s take a look through the feature list.

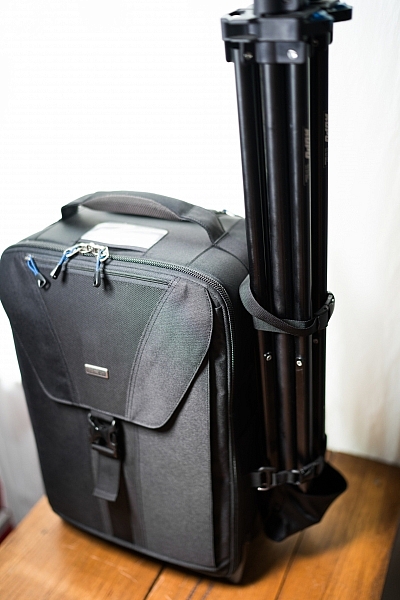
  • Coming in at 1.3kg (2.9 pounds), the weight was just fine, easily able to attach a pair of stands to the side of my ThinkTank Airport TakeOff roller.
  • In terms of load, the diminutive stands were capable of holding a 5kg (11 pounds) payload, more than I’d need to place atop the aluminum light-weights.
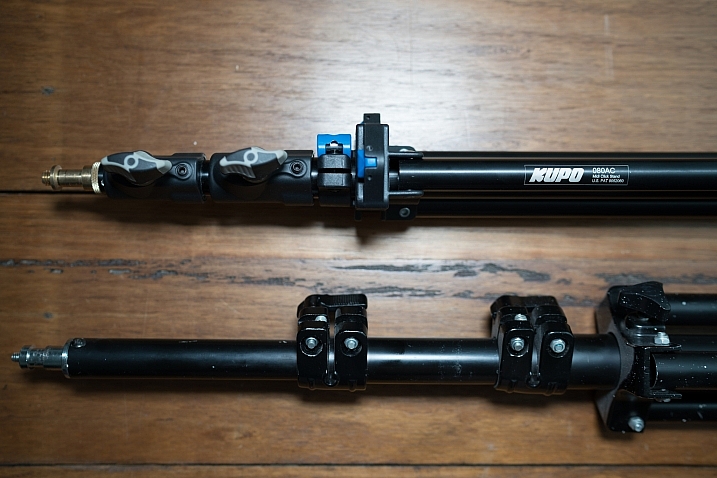
  • The tubes are also double pinned to the threaded ends, this makes them a lot less likely to fail when compared with my old stands, after a few months of heavy use, the stands haven’t loosened up in the slightest.

Kupo click light stand

Kupo click light stand

The Click

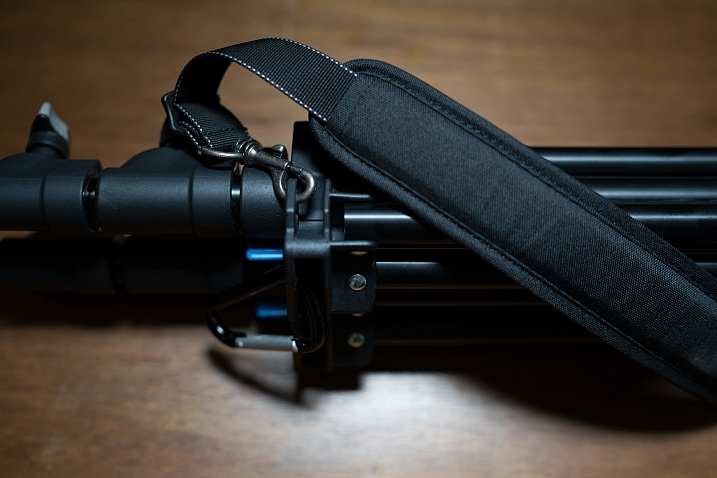
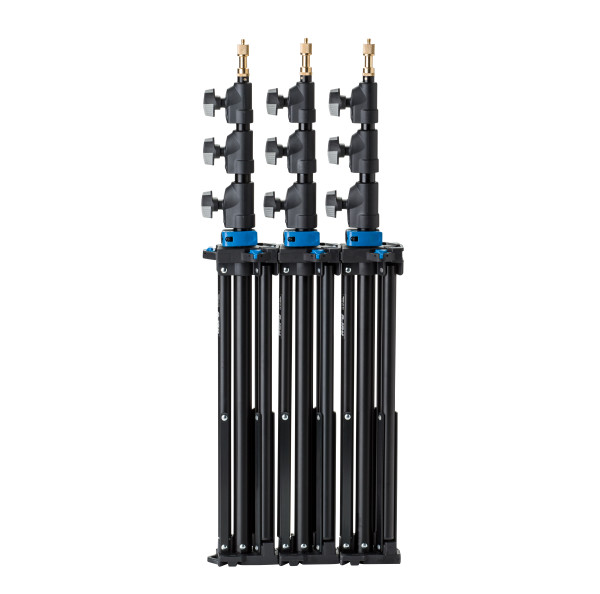
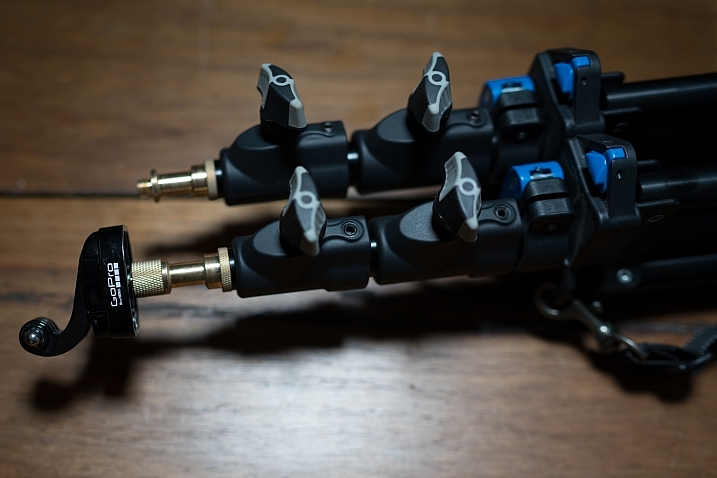
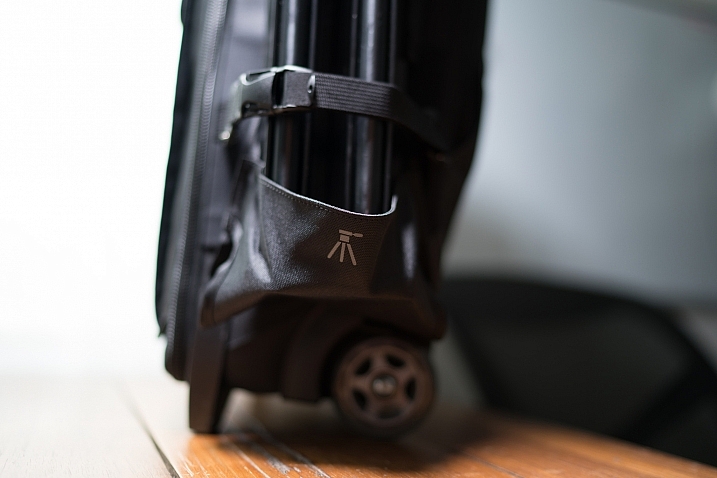
The Kupo Click light stands allow you to click them together either side by side or on top of each other. So you can essentially have one of them flat on each side of your bag with some little attachment straps, or you can have them side by side (above) and sitting in the tripod cup on your rolling camera bag, or you can use a strap (sold separately, I didn’t get one as I used a regular strap with a clip attached to sling mine over my shoulder, see below)

Kupo click light stand

Kupo click light stand

Kupo click light stand

The stands have a sweet built-in air damper that prevents damage to your lights if you accidentally undo the locks by cushioning the column on release. I have tested this and it works. The midsection is better than the top section at slowing descent, but it certainly does slow down the inevitable crash and ultimately a replaced flash tube!

Attaching your lights

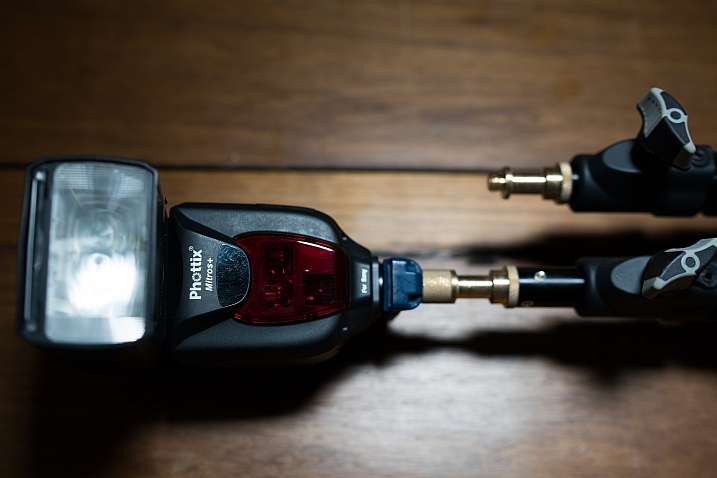
The stands are equipped with a 5/8″ top stud with a 3/8″ threaded, plus a removable 1/4″-20 threaded top, this lets you mount a whole raft of lighting gear, as well as Sony ActionCam / GoPro mounts (The 1/4 20″ adaptor) which I like to use often on a shoot, or just to pop a camera up high for some reason or other – you can attach a regular ball head and mount your camera on that.

Kupo click light stand

Kupo click light stand

Kupo click light stand

Bottom line

I’ve had these stands a few months now and have had many chances to use them and abuse them. They pack away well, they’re all the things I was after in a light stand. I can’t fault these stands and for the price, I’d say they’re one of the best on the market and well worth your hard earned coin. Five stars.

googletag.cmd.push(function() {
tablet_slots.push( googletag.defineSlot( “/1005424/_dPSv4_tab-all-article-bottom_(300×250)”, [300, 250], “pb-ad-78623” ).addService( googletag.pubads() ) ); } );

googletag.cmd.push(function() {
mobile_slots.push( googletag.defineSlot( “/1005424/_dPSv4_mob-all-article-bottom_(300×250)”, [300, 250], “pb-ad-78158” ).addService( googletag.pubads() ) ); } );

The post Quick Review of the Kupo Click Stackable Light Stand by Sime appeared first on Digital Photography School.


Digital Photography School

 
Comments Off on Quick Review of the Kupo Click Stackable Light Stand

Posted in Photography


Fotodiox LED100WB-56 quick review

11 Jan

The LED100WB-56 is a wall-powered, dimmable LED light source with that should be a little bit different. Fotodiox has done quite a bit, not just to negate the issued of using LEDs for continuous lighting but also to address some inherent issues of using continuous lighting in general. This is enough to warrant a closer look, as it could make these more useful for a wide number of users.

Included with the 3-light kit that we tested are three lights, reflectors, slip-on diffusion covers, ballasts/power adapters with XLR cables (not pictured), and a set of remotes. The kit also includes a set of light stands as well (not the short one pictured above), making the 3-light kit an entirely complete set for those getting started, as you are given more flexibility with three lights for a key, fill, and hair light, than you are with two.

One inherent issue with LED lights is the source itself. Bright LEDs are never a single diode: they’re often an array of diodes arranged closely together. At first we saw LED panels grow in popularity, which spread single individual diodes in a grid to create a big and bright source. The issue is the individual diodes when spread out act like a series of point light sources, with each diode creating its own set of shadows. These complex shadows get distracting very quickly, and the bare bulbs are tough on the eyes.

As time has moved on, the diodes have shrunk down to a tight grid on a wafer, much like the chips in our cameras, just not quite as dense. Fotodiox has taken a panel like this and then put it back behind a glass lens with a frosted back. The back of this lens becomes the single light source instead of the hundreds of individual LED spots, creating an even light source with a single shadow, much like a classic tungsten source. 

Speaking of ‘classic’ tungsten sources, one of the biggest advantages of LED lights over these sources is heat production. Anyone who has used even a120-watt modeling light knows these things get extremely hot. So hot, in fact, that any skin contact with the bulb will leave behind oil residue that creates a hotspot – eventually resulting in the bulb’s failure. While the Fotodiox does produce some heat, a small quiet fan keeps inside temperatures steady. During use, no outside part of the light becomes hot to the touch.

Another historic issue with the LEDs as a photographic light source is color – or lack thereof. This handy YouTube video dives a bit more in to the issue:

The Fotodiox is rated at 95+ CRI, which is quite a high rating for the price. This is also a drastic improvement over Fotodiox’s own LED100WA, which is only rated at 85 CRI. CRI isn’t a perfect way to assess color output but the spectrum Fotodiox shows for the lamps shows a fairly consistent output across most colors, with the only significant spike being in the blue region, meaning there shouldn’t be any nasty surprises.

So these lights promise to take care of the light source and color issues, what else? How about flicker? All lamps flicker to some degree if they’re powered by the alternating current of mains electricity but different lighting technologies have different dimming characteristics during the ‘off’ half of the power cycle. Tungsten bulbs stay fairly hot (and hence bright) throughout the cycle while poorly-designed LEDs abruptly switch on and off as the power cycles. You won’t always notice this with the naked eye but set your shutter speed faster than the frequency of the lights and the difference can become apparent.

This effect can be seen with the Sony a7R II in ‘low light’ mode with ‘electronic shutter’ and maximum ISO in our studio scene – the line-by-line readout of the sensor happens at different parts of the light’s power cycle, resulting in exposure differences that render as bands across the frame, despite the use of a tungsten bulb.

Fotodiox claims its LED100WB lights are flicker free, so we tried it out for ourselves by shooting some super slow-motion with two of the lights and a Sony RX10 III.

In these clips, the lights were at full power with their intensity controlled by their distance from the subject. When the lights are partially dimmed banding does begin to happen at 960fps/1000sec shutter speeds, but at full power there was no banding to be seen.

So, these lights are looking pretty good so far right? They also work quite well for portraits, especially when diffused or modified. The mount is the classic Balcar type, better known as the Paul C. Buff mount. This mount not only has a lot of affordable modifiers from Paul C. Buff, but also has adapters made for mounts like Bowens (which is what we own).

In use:

You’ll find this shot on the back of Dan’s debut bestseller novel (if he ever writes one). Olympus E-M1 Mark II, 75mm F1.8 lens, 1/200 sec, F2.2, ISO 200

This portrait of Dan was lit with just one LED100WB shot through an adapted Bowens mount beauty dish and two sheets of foam core: black for the background, and a white ‘fill card’ to the left of the camera. The light was at full power, and wasn’t placed very far from Dan’s head. That short distance meant the light was intense enough for a short shutter speed and soft enough to be flattering and smooth. However, the requirement for the short distance means that a lot of the light’s output was being lost in the beauty dish, so those hoping to use existing light modifiers may find the LED100WB lacking in power in certain scenarios.

Using the lights outdoors on a dim day can also be an interesting experience, especially when a camera is left in any sort of priority mode where it can control either shutter speed or aperture automatically. Here’s why: It essentially makes the ‘B’ button on the light’s remote an overall exposure control. Let’s look at this shot of Carey to explain further:

The lights can easily balance with lower light conditions, and the 5600K temperature balances relatively well with daylight and overcast conditions. Sony a6500, 50mm F2.8, ISO 100 1/60sec F4

What I wanted to achieve with this shot was to combine an F4 portrait (where this particular lens is very sharp) while also bringing attention to the shape of ‘bokeh’ balls in the background. After putting one of the LED100WB’s with its diffusion sock where I wanted it relative to Carey (just over my head and a little to the left), I let the camera control shutter speed as I adjusted the light with the remote and watched the exposure change through the viewfinder.

When the lights were dimmed the camera’s evaluative metering was mostly reading the brightness of Carey’s face, and as the light was turned down the background got brighter. As the lights were brightened, the background got darker as the camera shortened the exposure time to keep Carey’s face from over exposing. I ended up somewhere in the 25-50% power area to brighten up the ‘bokeh balls’ in the background.

While these lights can be used in limited cases for stills, the best application for the 3-light kit is for video. A 3-light kit gives photographers or videographers a key, fill, and hair light ready to go. Plus, their extremely quiet operation means they don’t get in the way of a simple sound setup. We ended up using them when shooting our Game Boy Camera video a few months back:

One frustration we encountered was with the remotes. Having them was extremely handy but the implementation is a little clunky: each light has its own dedicated remote, which can make using multiple lights at once a bit fussy to use. Also, the buttons are just labeled alphabetically, with no indication of their function. The ‘A’ button works as on/off. The ‘B’ button cycles through 25%, 50%, 75%, and 100% power levels. The ‘C’ and ‘D’ buttons act as an incremental adjustment up and down, with ‘C’ being brighter and ‘D’ being dimmer. That said, they’re better than nothing, and came in handy several times while using the lights.

Conclusion

At the end of the day these lights are some of the easiest to use continuous lights we’ve encountered. Their nearly flicker-free output allows use of extremely high shutter speeds. Their lack of heat output means they can be used with any Balcar mount light modifier, not just special expensive ones made to withstand the heat of a tungsten bulb. Plus, the remotes make it easy to adjust power level, even when the lights have been placed out of reach.

For beginners, continuous light is a great option for mastering studio work, as you get to see the light as you shape it, and with mirrorless cameras you get to preview the results constantly. For photographers that need to match or even overpower bright ambient light, these lights aren’t always powerful enough, so strobes would be a better choice. However, in the studio where ambient light can be controlled, these LED lights find many uses quite quickly, and for photographers looking for a set of lights to accompany them on a foray in to the video world, this 3-light kit is a great place to start.

Articles: Digital Photography Review (dpreview.com)

 
Comments Off on Fotodiox LED100WB-56 quick review

Posted in Uncategorized


5 Quick Tips to Help You Make a Fashion Photography Shoot Like a Pro

15 Nov

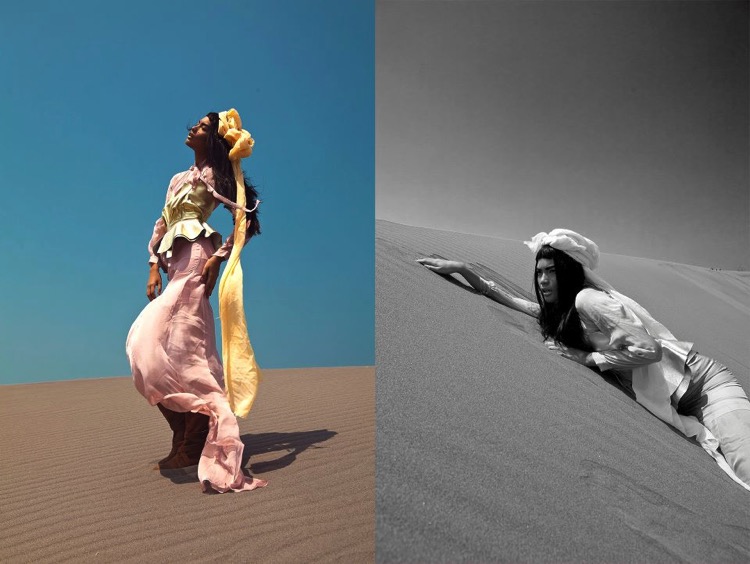
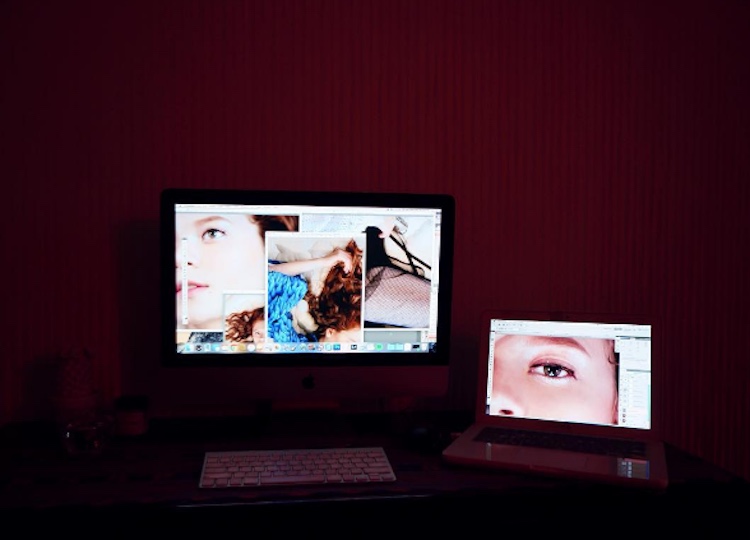
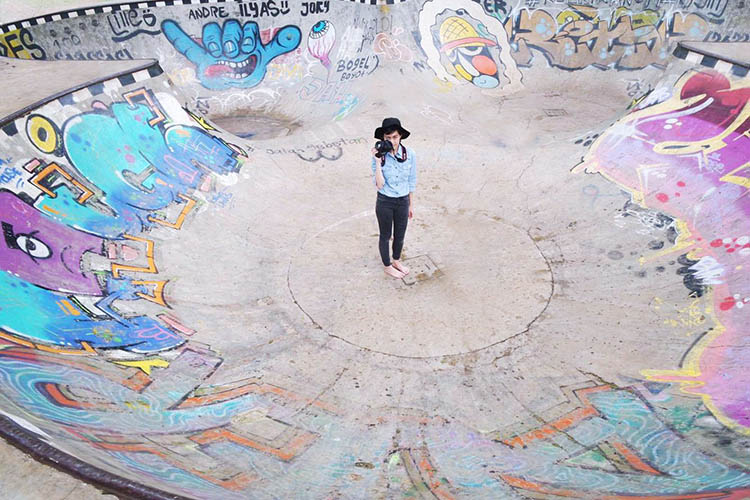
It might be the fabulous pages of magazines or it might just be that urge to create something chic. Either way, we are now living in this digital era where fashionable shoots are just around the corner. Hashtag #OOTD (outfit of the day). But that’s where the similarity ends. Planning and executing a fashion photography shoot takes more than that.

Fashion shoot photography

I hate to break it to you, but placing all your good looking friends in front of your camera, and purchasing the latest mirrorless technology probably won’t make you the next Guy Bourdin. From my personal story as a fashion photographer for over five years now, your biggest learning experience comes from learning through your own team, fellow creatives, photographers, stylists, models, and make-up artists. So, here are some tips I’ve learned through my years of trials and tribulations on how to produce a fashion shoot like a pro.

1. Inspirations 101

“Nothing of me is original. I am the combined effort of everyone I’ve ever known.” or so the saying goes. Nowadays, let’s challenge the concept of people stating there’s no such thing as originality anymore. Is that true? But truthfully, the best ideas may not be the first ones.

Find Inspiration fashion shoot

Creativity is a limitless concept. You can always start developing your ideas by sourcing inspirations from practically anywhere. When you start noticing the littlest things in your life, it will do wonders as your source of inspiration. This is fundamental because it is the ground work before every shoot. To develop a concept that is strong and authentically yours is the key to the next step of creating the perfect frame in a fashion photo shoot.

Find Inspiration fashion shoot 2

2. Team Work is Everything

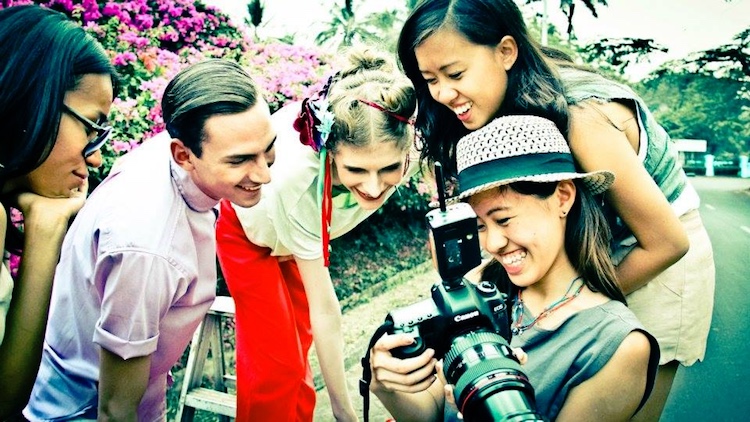
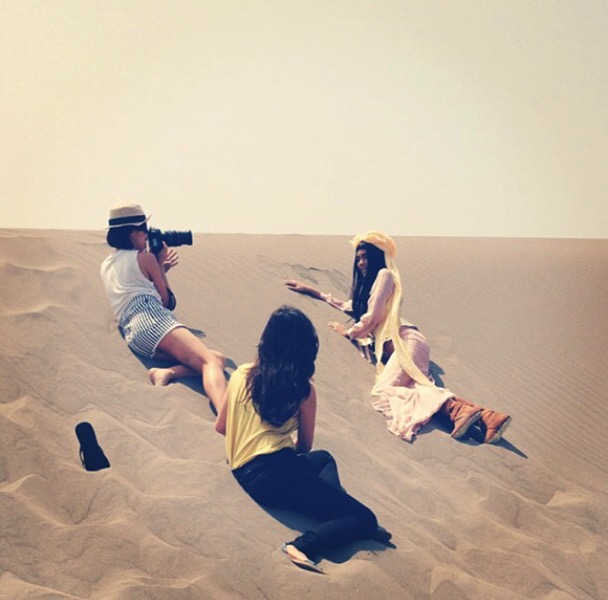
Create your perfect squad. When you meet someone you are comfortable working with, continue to develop a great relationship with them. Because at the end of the day, the perfect frame is not just in the hands of the photographer. Everyone needs to be equally involved and the greater the chemistry ultimately leads to the perfect picture.

Make sure you succeed in getting everyone on the team on the same page, from the vision for the shoot to work ethics. A solid team of creatives that gel well together is really ideal because in the end, it’s all about teamwork.

Team Work fashion shoot 02

Team Work fashion shooot

3. The Look

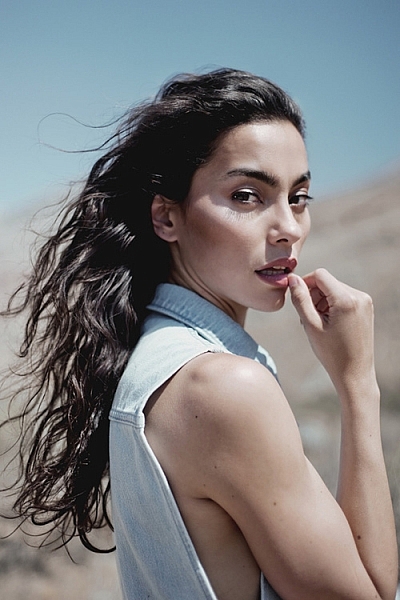
A fashion shoot is never complete without the right model. You need to find a model who has the right look for the concept. Whether it’s height, hair color, skin tone, eye shape, etc. Bonus points if you get to know the model first beforehand. Good chemistry between the photographer and model is also very important to create a comfortable shooting environment.

When you are shooting, there’s only the photographer, the model, and a camera. Putting on a music that’s enjoyable to everyone can also help the model get into character.

result-fashion-shoot

4. Scouting Locations

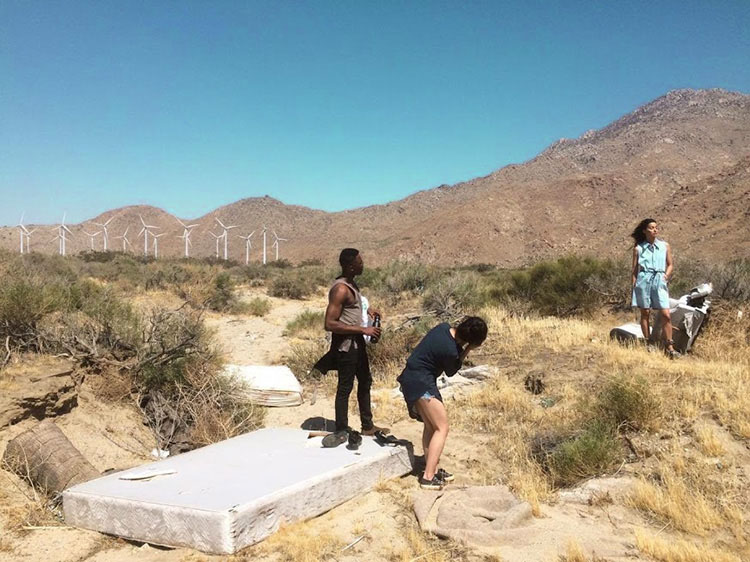
Outdoors or indoors, it’s crucial to prepare everything beforehand. You don’t want to be stressed out on the big day right? When it comes to studios, the physical environment has to be a positive working environment. Think about how much space you need, equipment, facilities, etc. An outdoor fashion shoot are tad trickier. Always double check if you need to have permission beforehand if it is a private area, and always, always check the weather! The sun can be your best friend or your enemy in this case.

Location Scout fashion shoot

Locations Locations fashion photography

5. Hair, Makeup and Wardrobe

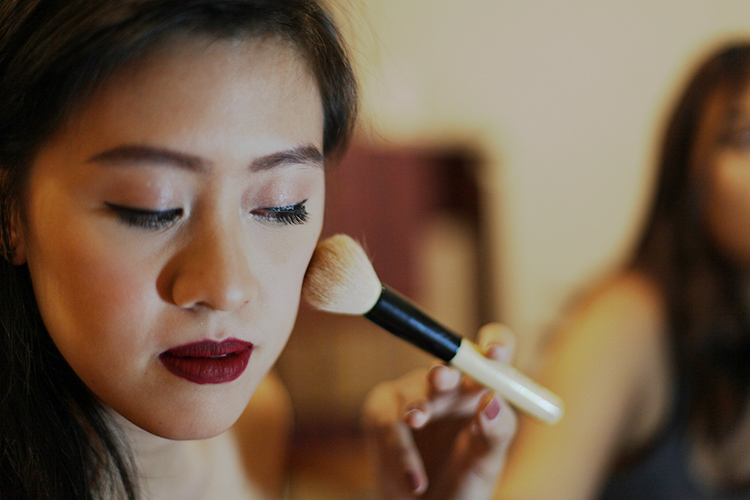
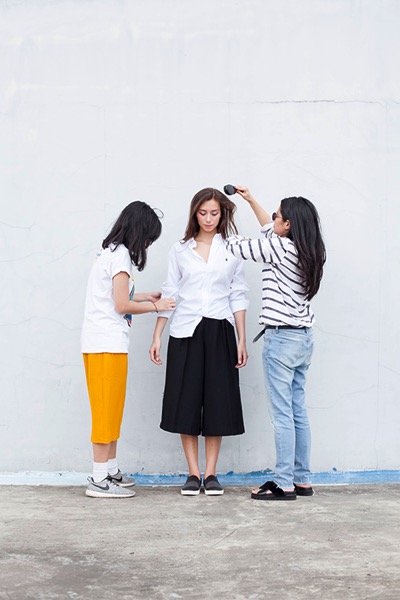
This is where the good team work really shows. I personally think it is important to get everyone on the same page for the vision and mood of the shoot. Also, don’t be afraid to voice your opinion if something can be altered. Such as the hair is too big, the model needs more mascara, the button’s falling off, etc. Don’t be afraid to speak up, it’s team work after all.

Make Up fashion photos

Hair Make Up fashion shoot

Lastly, never forget to have fun! It’s always a blessing to be able to work passionately. Enjoy your ride along the way, stay curious, and bring positive vibes. Good luck.

Please share your fashion photography tips and photos in the comments below.

googletag.cmd.push(function() {
tablet_slots.push( googletag.defineSlot( “/1005424/_dPSv4_tab-all-article-bottom_(300×250)”, [300, 250], “pb-ad-78623” ).addService( googletag.pubads() ) ); } );

googletag.cmd.push(function() {
mobile_slots.push( googletag.defineSlot( “/1005424/_dPSv4_mob-all-article-bottom_(300×250)”, [300, 250], “pb-ad-78158” ).addService( googletag.pubads() ) ); } );

The post 5 Quick Tips to Help You Make a Fashion Photography Shoot Like a Pro by Sally Ann and Emily May appeared first on Digital Photography School.


Digital Photography School

 
Comments Off on 5 Quick Tips to Help You Make a Fashion Photography Shoot Like a Pro

Posted in Photography


Xiaomi Redmi Pro quick review: dual-cam on a budget

08 Nov

Xiaomi Redmi Pro quick review: dual-cam on a budget

Dual-cameras are all the hype in 2016 and we have seen several high-end smartphones with the technology being launched in the past months, including the Huawei P9, LG G5 and, most recently, the Apple iPhone 7 Plus. While each device uses the dual-camera technology in different ways, one thing is common to all of those devices: a high price tag.

In the mid-range bracket of the market dual-cameras are still a rarity, but with the Redmi Pro, Chinese manufacturer Xiaomi has recently launched a dual-camera smartphone that is suitable for smaller budgets. The standard version with 3GB RAM and 32GB of internal memory is currently available for approximately $ 300. Not only is the dual-camera unusual at this price point, but its very solid metal body, deca-core chipset and 5.5″ OLED display make the Redmi Pro look and feel like a much more expensive device. 

The dual-camera setup combines a 13MP Sony IMX258 1/3.06″ sensor with a 5MP Samsung depth sensor. The system does does not offer any optical zoom capability, as on the LG G5 or iPhone 7 Plus, nor does it combine the captured image information from both sensors for improved image quality, ala the Huawei P9. Instead, it uses the dual-camera to simulate the bokeh of a fast lens on a large-sensor camera, something we first saw on the HTC One M8.  There is also a dual-tone LED flash and at the front the Xiaomi comes with a 5MP selfie-camera.

Thanks to retailer Gearbest.com that ships Xiaomi devices worldwide, we’ve had the chance to try the Redmi Pro and its dual-camera, shoot a wide range of samples and see how it generally performs as a device for mobile photography.

Key Specifications:

  • 13MP Sony IMX258 1/3.06″ sensor
  • Secondary 5MP Samsung depth sensor
  • F2.0 aperture
  • Dual-tone flash
  • 1080p video
  • 5MP front camera
  • 5.5-inch 1080p OLED display 
  • Mediatek Helio X20 Deca-Core processor
  • 3GB RAM
  • 32GB storage
  • MicroSD support
  • 4050mAh battery
  • USB Type-C port with quick-charging

Camera App

The Redmi Pro’s camera app is intuitively structured and easy to use.

The Redmi Pro’s camera app comes with a pleasantly simple and intuitive design. Above the shutter button you can find the button for switching to video mode. Other controls on the main screen let you activate HDR capture and the dual-cam’s Stereo mode. Swiping up opens the camera mode screen where you can enter Panorama and Manual modes among others. The latter only offers manual ISO and white balance, though. There is no manual control over shutter speed. Swiping down on the main screen opens up a thumbnail preview array of 12 simple filter effects. 

Image Quality

In bright light the Xiaomi Redmi Pro camera captures 13MP images that show very pleasant colors and good exposure in most conditions. For a smartphone in this price category the Redmi deals well with higher contrast scenes, keeping highlight clipping pretty well under control. 

Things don’t look quite as good when you start zooming into the image, though. At the center of the frame, image detail is decent for a mid-range device and luminance noise is kept at bay as well. However, our test sample’s lens shows strong softness on both the right and left edges of the frame, which is quite noticeable when viewing the image at screen size.

ISO 101, 1/834 sec
ISO 103, 1/1273 sec

In low light situations the Redmi Pro uses a maximum ISO setting of 2050 and slowest shutter speed of 1/15 sec, which in combination with the F2.0 aperture, allows for usable exposures even in pretty dark interiors and night scenes. There is no optical image stabilization, so holding the phone steadily when shooting in dim conditions is recommended, but overall camera shake is not too much of an issue. 

As you can see in the samples below, the Redmi Pro is capable of capturing nice exposures and colors, even in pretty dim light. Lens softness aside, detail is pretty good for this type of device at lower ISO levels, but things start falling apart at ISO 800 and above. On the plus side, luminance noise is well-managed and chroma noise is hardly visible, even at the highest sensitivity setting. Overall, the Redmi Pro’s low light images look nice at web and typical social network size, but at larger viewing sizes the smearing of detail and strong lens softness don’t make for a good combination. 

 ISO 155, 1/30 sec
 ISO 405, 1/30 sec
 ISO 841, 1/30 sec
 ISO 1413, 1/15 sec

Dual-camera Stereo Mode

Stereo mode is The Redmi Pro’s feature highlight. Thanks to the secondary depth-sensing camera, the Redmi can distinguish between foreground and background. Applying digital blur to the latter simulates the shallow depth-of-field you can achieve with a DSLR and fast lens. In the camera app you adjust the ‘virtual aperture’ between F0.95 and F5.6 to control the degree of background blur. Alternatively you can change the focus point and the aperture after capture in the gallery app.

As you can see in the samples below, the feature works reasonably well, but under closer scrutiny it becomes obvious that Stereo mode is not too precise at distinguishing the focal plane, and the transition of blur is often too abrupt to look natural. Generally things look better if you choose a smaller aperture setting and make sure there is some distance between the foreground subject and the background. Stereo images are captured in 16:9 format and are 5.3 MP large.

 ISO 434, 1/30 sec, F2.4 virtual aperture
  ISO 101, 1/1445 sec, F2.0 virtual aperture
  ISO 101, 1/896 sec, F3.5 virtual aperture

In addition to refocusing and controlling the background blur you can apply a range of effects to your Stereo images in the gallery app. Again, the foreground/background separation is not too precise, but the modes can be fun to play with. 

 In the gallery app several effects can be applied to Stereo images.
Blackboard effect

Conclusion

In its price bracket the Xiaomi Redmi Pro can score a lot of points with its premium look and materials, a bright and sharp OLED display and very good battery life. The 13MP camera delivers good color and exposure across the ISO range but our test sample suffered from strong lens softness away from the center of the frame.

The dual-camera does not offer the same zooming or image quality improvement functions we have seen on some recent high-end models, but the effects can be fun to play with. Close-up the results of the shallow depth-of-field simulation do look a little artificial but they are good enough for social sharing.

Overall, the Redmi Pro looks like a good choice for those who want a high-end look and feel for little money and want to try out the dual-camera as a bonus. However, if image quality is your number one priority, and you can live without the dual-cam and metal body, the Motorola Moto G Plus might be a good alternative at a similar price point. The 32GB version of the Xiaomi Redmi Pro is currently available at Gearbest.com for $ 299.

What we like:

  • Premium look and feel
  • Very god battery life
  • Bright and sharp OLED display
  • Good exposure and color across the ISO range

What we don’t like:

  • Lens softness
  • No manual control over shutter speed
  • Imprecise background separation in Stereo mode

There are 22 images in our Xiaomi Redmi Pro gallery. Please do not reproduce any of these images on a website or any newsletter / magazine without prior permission (see our copyright page). We make the originals available for private users to download to their own machines for personal examination or printing (in conjunction with this review), we do so in good faith, please don’t abuse it.

Unless otherwise noted images taken with no particular settings at full resolution.

Review sample gallery

$ (document).ready(function() { SampleGalleryV2({“containerId”:”embeddedSampleGallery_1116046053″,”galleryId”:”1116046053″,”isEmbeddedWidget”:true,”standalone”:false,”selectedImageIndex”:0,”startInCommentsView”:false,”isMobile”:false}) });
Articles: Digital Photography Review (dpreview.com)

 
Comments Off on Xiaomi Redmi Pro quick review: dual-cam on a budget

Posted in Uncategorized


SpiderLight Holster offers quick access to lighter cameras

19 Oct

Spider Camera Holster has launched three new products on Kickstarter: the SpiderLight Holster and Plate, SpiderLight Backpacker, and Single Camera System. The SpiderLight Holster is a reworked version of the company’s Pro holster, one designed for smaller and lighter cameras like mirrorless models, while the Backpacker is an adaptor designed for backpack straps rather than belts. 

The SpiderLight Holster is a two-part device with a holster that attaches to a belt or backpack strap (via the backpack adaptor) and a plate that attaches to the camera. Sliding the plate into the holster enables photographers to carry their camera on their hip or chest when not in use, and to quickly draw it when needed. The holster is made of stainless steel and hardened aluminum, and features a two-position lock, one that secures the camera in place and another that enables quick-draw.

Joining the Holster and Backpacker is the Single Camera System, a dedicated belt onto which the holster can be attached, as well as Spider’s lens pouches and various other belt accessories. The belt can accommodate a second SpiderLight Holster for a dual-camera setup. Spider is also hawking a couple other products, including a GoPro Plate for clipping a GoPro to a backpack strap, the Spider Web Tether camera strap, and the SpiderPro Memory Card Organizer.

Spider is seeking funding for the new products on Kickstarter, where it is offering an early bird SpiderLight Box Set at a $ 75 or higher pledge rate. The box includes a Holster, camera plate, and access to ‘Backerkit add-ons.’ Shipping is international and estimated to start in December.

Via: Kickstarter

Articles: Digital Photography Review (dpreview.com)

 
Comments Off on SpiderLight Holster offers quick access to lighter cameras

Posted in Uncategorized


Photokina 2016: Canon EOS M5 quick look video

22 Sep

The Canon EOS M5 launches the M line of mirrorless cameras into greater significance than ever before. With abundant external controls, a mature touchscreen interface and extremely impressive Dual Pixel autofocus, it’s a camera we can’t help but like, even if we wish it had turned up to the mirrorless party a little earlier. And sure, it may not have headline features like 4K or high frame rate video, but Canon clearly knows how to make a camera that is both comfortable to hold and pleasing to use.

We stopped by Canon’s stand at Photokina 2016 and talked with Canon product specialist Hin Pang to talk a little more about what makes the EOS M5 so likeable.

Articles: Digital Photography Review (dpreview.com)

 
Comments Off on Photokina 2016: Canon EOS M5 quick look video

Posted in Uncategorized


Quick review: Apexel 8mm fisheye lens for smartphones

02 Sep

Fixed focal length lenses are one of the key limitations of smartphone cameras. So it’s no surprise that add-on lenses, which allow you to vary the focal length, are among the most popular smartphone accessories.

We have had the chance to test one of the more extreme variants, the Apexel 8mm fisheye lens, which provides a whopping 238-degree field-of-view. The lens comes with a clip that makes it very easy and quick to attach to most mobile devices – Apexel claims it is compatible with 98% of all smartphones – but we’ve found it to work best with the latest generation Apple iPhones, as the back of the lens slots onto the iPhone’s lens protrusion, where it is firmly held in place. On other devices, without a protruding camera-module, things can get a little more difficult and you might have to optimize the position of the lens by moving it around very slightly until you find a position that gives the best image quality. 

The provided clip makes lens attachment very easy and quick. Lens construction features six elements in five groups.

The lens construction features six elements in five groups and a multi-layer coating. The glass is housed in an aluminum body and the clip is made from very robust ABS plastic. Apart from the lens and clip you’ll find a lens cap, storage case and lanyard in the box.

In use

Image quality does of course vary depending on the smartphone camera you are using, and can be a little hit and miss. We tested the lens on the iPhone 6s Plus and the Lenovo Moto Z Force. On the iPhone, the lens clips neatly onto the protrusion of the phone camera but still, many images are very soft across the frame. During our testing the iPhone’s AF system clearly found it more difficult than usual to find a lock and, so it seems, sometimes simply did not focus correctly before the shutter was triggered. Other images are relatively sharp at the center of the frame and only show softness around the edges.

$ (document).ready(function() { SampleGalleryV2({“containerId”:”embeddedSampleGallery_1546006066″,”galleryId”:”1546006066″,”isEmbeddedWidget”:true,”standalone”:false,”selectedImageIndex”:0,”startInCommentsView”:false,”isMobile”:false}) });

In general, sharpness was better on the Moto Z Force but you’ll have to make sure the lens lines up perfectly with the smartphone camera. That said, even in a best case scenario vignetting is much more pronounced than on the iPhone – in sunny conditions lens flare is visible and again the AF occasionally takes much longer to lock than without the clip-on lens. With the Apexel’s extreme angle of view it can also be difficult to keep fingers and other body parts out of the frame, so check the preview image carefully before pulling the trigger.

Of course, the lens also works in video mode. The sample below was recorded in the Lenovo Moto Z Force’s 1080p video mode. It shows most of the same imperfections as the still images but thanks to the lower video resolution they are not quite as intrusive. 

Conclusion

The Apexel 8mm fisheye lens for smartphones is a nicely made accessory lens that is very easy to clip onto most phones (as long as you don’t use a case). The fisheye effect is extreme and can be an interesting additional weapon in your creative mobile imaging arsenal. However, image quality purists won’t be happy with the strong softness, vignetting and some lens flare we’ve seen in our sample pictures. Not that we were expecting Zeiss quality from a smartphone accessory lens, but the Apexel is generally quite a bit softer than we’d like.

That said, the lens can be fun to use and capture image results that are different from your usual smartphone pictures. The Apexel 8mm Fisheye is currently available for approximately $ 44 on Amazon.com*.

Pros:

  • Extremely wide angle-of-view
  • Nice fisheye effect
  • Solid build quality
  • Easy and quick attachment
  • Compatible with most smartphones (although works best with iPhone 6/6s generations)

Cons:

  • Strong image softness
  • Varying degrees of vignetting (depending on smartphone camera)
  • Some lens flare in sunny conditions
  • Slows down camera AF
  • Exposed front element prone to scratching and fingerprints
  • Clip not compatible with many phone cases
 
 
* dpreview.com is a wholly-owned subsidiary of Amazon but is editorially independent of our parent company.

Articles: Digital Photography Review (dpreview.com)

 
Comments Off on Quick review: Apexel 8mm fisheye lens for smartphones

Posted in Uncategorized


8 Quick Tips to Produce Better Forest Photography

21 Jul

As my nation (USA) celebrates 100 years of the National Park Service, renewed interest in our untouched landscapes is growing, and that’s a great thing. Even with the selfie-crazed tourists crowding our parks and national monuments, it’s a positive point that more of us are getting out into the great outdoors and connecting with this land of ours.

A side benefit of this movement is a renewed interest in nature and the outdoors in general. Even 58 national parks in the U.S., it may not be possible for all of us to get to them as often as we’d like. Luckily, we can enjoy nature in our own backyards, as there are state parks, forests, and trails for us to explore almost everywhere you turn in America (and likely wherever you live also).
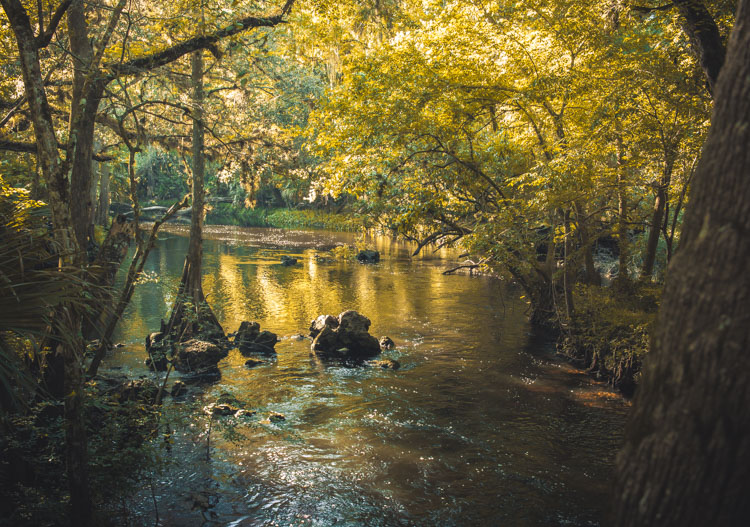
040916_-2

As with any environment, forest photography brings its own unique challenges to the table, but at the same time offers an almost unlimited array of subject matter, due to the variety of flora and fauna in these locations. Add in the side benefits of experiencing the fresh air and sunlight of the outdoors (which our bodies were built for), and you have all the reasons you need to snap some photos in the woods!

Let’s cover a few tips and recommendations when heading for the trails, then get out there and enjoy!

1 – Safety first

As with any outdoor photography project, you need to consider the environment you’re going into. Be sure to bring a camera bag or backpack to store items in, and to keep your extra gear and accessories out of the weather. Items to bring could include snacks, a compass, a map (a topographical map is always best if available), sunscreen, bug spray and a dry towel or rag to remove moisture, dirt, or rain from any exposed gear.

2 – Gear up

As always with shooting landscapes, a tripod is a must. Both wide-angle and narrower primes lenses, such as a 50mm can come in handy. I personally use a 24mm prime lens to capture wider forest shots, to get many trees in the frame at once, but then switch to my 50mm to get closeups of things like leaves, insects, or flowers.
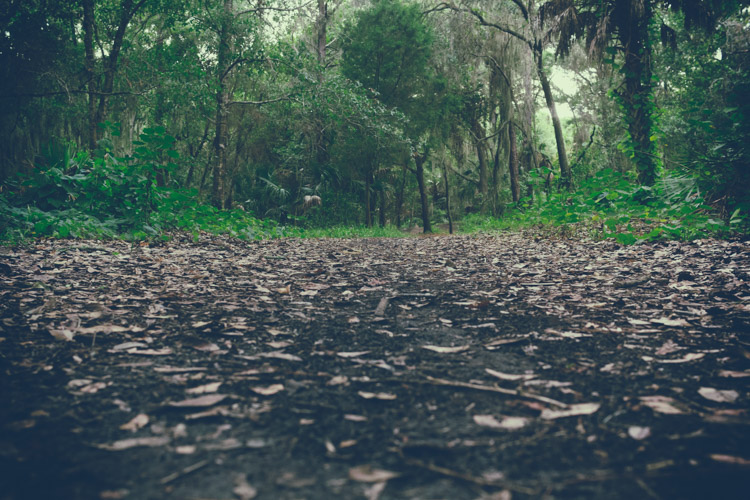
HauntedWoods

Though there are cases for and against using them, a clear ultraviolet (UV) filter can be useful to keep dirt and grime off of your lens element. I don’t use them myself, and find if I’m careful with my lenses I can keep them clean without needing a protective filter. Always use a microfiber cloth for cleaning your lenses, not rags or towels of any type, especially if you take one for other purposes while you’re out in the forest.

Finally, a polarizing filter can come in handy, as it will help cut reflections in any body of water such as a river or stream, and also deepen and enhance colors in the scene. Keep in mind that you’ll be reducing the amount of light coming into your camera when using a filter like this, so plan accordingly (just bring your tripod).

3 – When to get out there

As outdoor or natural light photographers, we know that the best times to shoot are early mornings or late evenings, and to do our napping at noon. But forest environments are one of those places that can still work well during bright, more direct sunlight.

This is due to the canopy above that you’ll usually have, which filters out some of the harsh light, and gives you more of a lighting situation you’d expect to find at the edges of the day. As in many situations, if you can’t avoid the light from directly overhead, you can always switch over to black and white, and take advantage of the sharper shadow edges, and higher contrast.
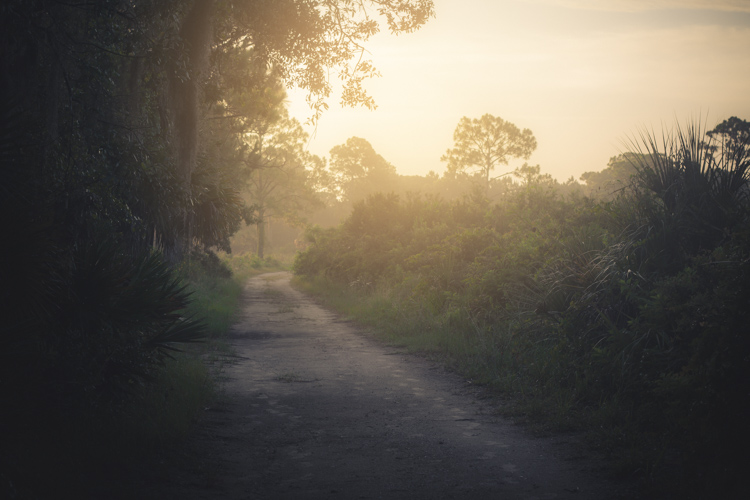
062814_

With that being said, your subject will almost always be more magical if you head out during the early hours of the morning, or late in the evening. If you’re near water, you may experience some ground fog, which can add serious mood to your images, and the sunlight will be dramatically cooler or warmer than in the middle of the day, depending on what time you decide to go.

In short, plan your excursion for the first two or three hours after sunrise, or before sunset, for the best results.

4 – Try vertical orientation
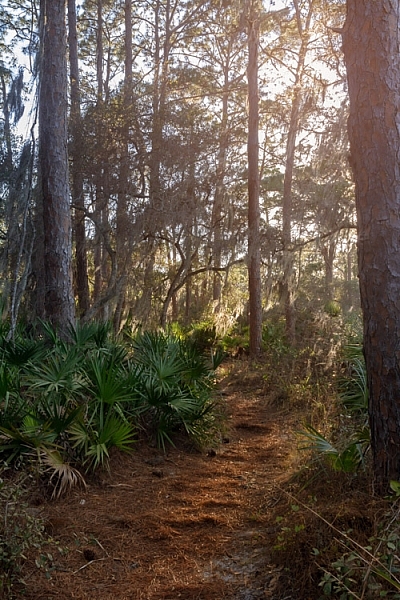
Primeval

Landscape shooters are used to primarily using horizontal or landscape orientation for the majority of their images, but when you’re in the forest, portrait orientation can sometimes work better. Since you’re dealing with tall trees as your primary environment, wide-angle shots can capture more of a scene when shooting vertically, and give the image a sense of grandiose scale and height.

5 – Color contrast is key

One drawback to shooting in a forest environment (unless you’re in the northeast United States during the fall, or any area where foliage changes near the end of the year) is the lack of color contrast. The majority of your environment will most likely be composed of green leaves and brown tree trunks.

Flora can help break up the monotony by adding color to the scene. Look for patches of brightly colored flowers of yellow or red; even white flowers can change the contrast profile within the frame.
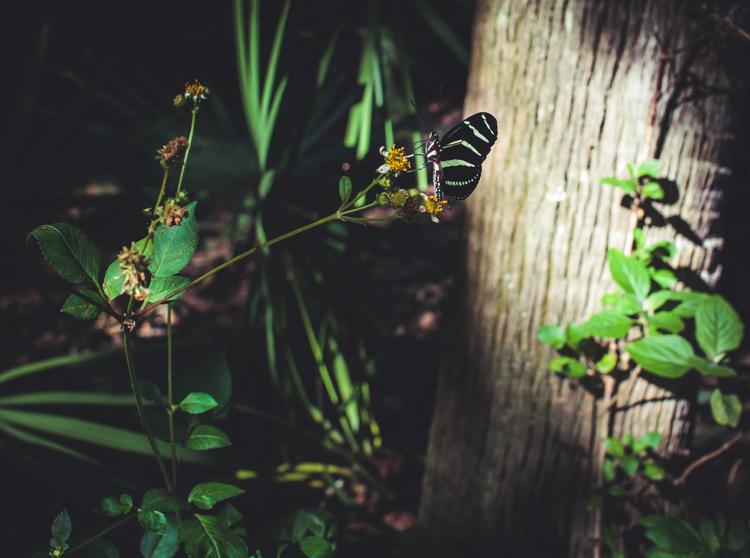
040916_

Playing the sun off of the environment can also add color, without needing a physical object. Golden-hour light and sun glare placed in your photo by composition, can inject the warmth of oranges and reds, and give your image a more vibrant look.

6 – Use Black and White

Sometimes when you’re shooting, nothing seems right. The light isn’t hitting the way you’d like, colors are off, or you just don’t get a sense of drama from your photo. This can happen in a forest environment, sometimes due to the general consistency of color from scene to scene; a lot of greens and browns can make it hard to highlight a subject.

Shooting in black and white (or processing the images later as monochrome) can let you concentrate on what the light is doing in your scene, by removing the element of color that can sometimes distract you from how varying levels of light affect the image.
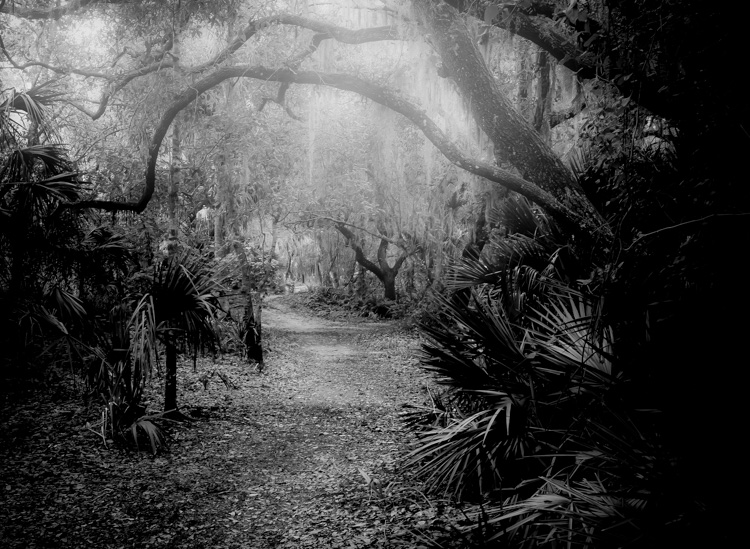
Forest

If you’re going to shoot the photo itself in black and white in-camera, be sure to switch over to RAW + JPEG in your camera settings, that way you’ll have an unprocessed RAW file and a black and white JPEG for each frame you take. Or simply shoot in RAW mode so you’ll still have the full range of color data, in case you’re not happy with the results. But you’re shooting in RAW anyway right?

7 – Post-Processing the results

Photos taken in wooded areas benefit from many of the same post-processing workflow you’d normally do with other images, but there are some additional things you can do to give these images a bit more pop.

Lighting tends to be a little more dramatic in the forest, since you usually have a canopy of trees to filter some of the sun, and can result in gorgeous rays hitting the forest floor, or leaves and plants highlighted by shafts of light. You can enhance these by using a bit of contrast, specifically on these areas. You can also add a bit of vibrance to the image overall, and play around with the hue/saturation of the individual colors of green and brown, to bring out the natural feel of the shot.
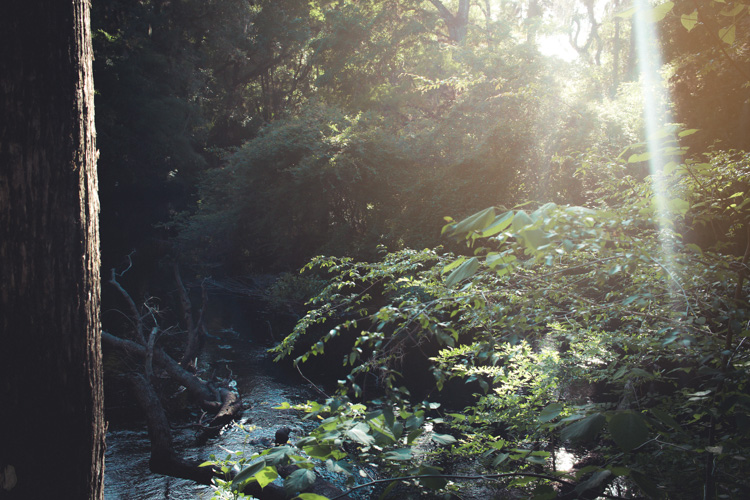
040916_-3

For my own images, I like to soften the image overall via the Clarity slider in Lightroom (to give it a dreamy or magical feel), and then target the subject or other important areas of the photo and add clarity and sharpness back in with a local adjustment (+Clarity plus -Clarity balances out, for example:  -30 Clarity plus +50 Clarity equals net +20 Clarity on the area targeted, use the Adjustment brush tool to apply this).

8 – Leave the forest as you found it

I love the planet we’re on, and it angers me to no end when I see evidence of people not caring about the effect they have on the natural surroundings. Beer can rings and cigarette butts at beaches, plastic bags on roads near the forest, and the list goes on.

We should consider it a privilege to document this incredible world we live in, and the most important thing we can do is also the simplest; leave the area as you found it. This means many things including; not littering the woods or forest with any traces of man-made products such as trash, as well as not interfering with nature by getting too close to wildlife, or disturbing sensitive plants or trees.
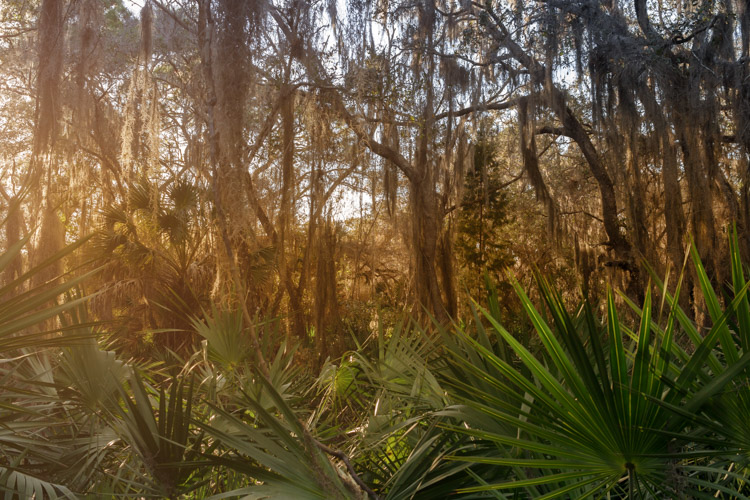
030616_

Little things like this may seem trivial, but if we all participate in this practice, we could have a positive effect on our natural world and keep it a little more serene for generations to come. As photographers, we have an even greater responsibility to be conscious about what impact our actions might have on our environment.

Conclusion

Most of us have access to forest areas, fortunately, so it’s easy to try out this kind of photography. While this type of nature photography presents a few challenges, as long as you’re prepared with the right gear and a little knowledge, it can be an enjoyable experience, will help connect you with our natural world, and maybe even enlighten you a bit.

Do you have any stories or images of your adventures in the wild woods or forest that you’d like to share? Engage with us by commenting below, and get out there and have fun!

This week we are doing a series of articles to help you do better nature photography. See previous articles here:

  • 3 Habits Every Outdoor Photographer Should Develop to Avoid Missing Shots
  • 5 Tips for Better Nature Photography
  • 27 Serene Images of the Natural World
  • Weekly Photography Challenge – Nature
  • 10 Ideas for Photographing Nature in your Backyard
  • 6 Tips for Capturing Character and Personality in Wildlife Photography
  • 5 Tips for Setting the Focus in Your Landscape Photography
  • 7 Tips for Better Marine Wildlife Photography
  • Tips for Processing Landscape Photos – from Basic Edits to Artistic Interpretation
  • 5 Tips for Avoiding Boring Photos of Mountains

googletag.cmd.push(function() {
tablet_slots.push( googletag.defineSlot( “/1005424/_dPSv4_tab-all-article-bottom_(300×250)”, [300, 250], “pb-ad-78623” ).addService( googletag.pubads() ) ); } );

googletag.cmd.push(function() {
mobile_slots.push( googletag.defineSlot( “/1005424/_dPSv4_mob-all-article-bottom_(300×250)”, [300, 250], “pb-ad-78158” ).addService( googletag.pubads() ) ); } );

The post 8 Quick Tips to Produce Better Forest Photography by Tim Gilbreath appeared first on Digital Photography School.


Digital Photography School
 
Comments Off on 8 Quick Tips to Produce Better Forest Photography

Posted in Photography


3 Quick Photoshop Edits You Need to Know

08 Jul

For many photographers, spending time behind a computer editing images, can be annoying. I personally enjoy the editing process, but I often hear photographers saying that they wish they didn’t have to spend time editing images. Of course, the image editing process has become the photographer’s responsibility since the advent of digital photography. In the past, the editing process was the domain of the lab that developed and printed your roll of film.

If you are one of the photographers that does not like the idea of spending hours editing your images, then this article might help you get out of the editing blues.

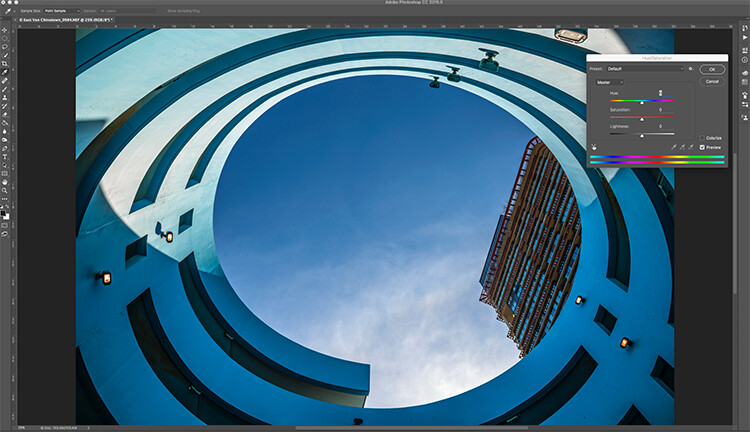
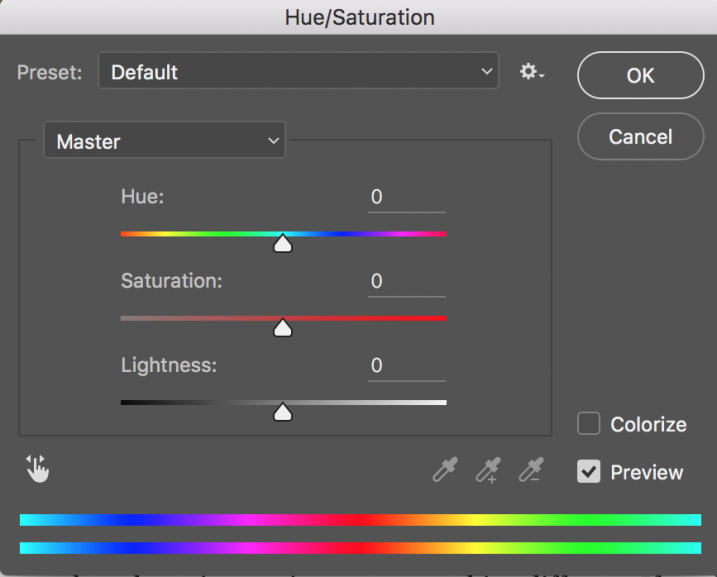
Image open in Photoshop with the Hue and Saturation tool open

Image open in Photoshop with the Hue and Saturation tool open

Of course, you will always need to spend some time editing, but you don’t want to be spend hours trying to make an image  look good. There is a quick way to get some good results from your images in Photoshop. But, before we talk about that, first there are some things that you need to do in-camera, which will save you time in post-production.

  1. Make sure your lenses are clean, you don’t want to spend time cleaning up dust spots on your images.
  2. Make sure your sensor is clean, get your sensor cleaned when you start to notice sensor spots on your images.
  3. Use a tripod, straightening images in Photoshop or Lightroom wastes your time.
  4. Make sure your image is in focus and sharp. Zoom in on your LCD screen to be sure, if not, retake the shot.

From there, you can be sure that your images are coming out of your camera in an edit-ready state. You don’t want to spend your time fixing photography mistakes made in-camera. The main goal with image editing is to take your good images, and make them look spectacular. So, here are some very quick edits you can do to your images (assuming the image is in good shape) in Photoshop, and in turn, spend more time behind the camera.

Quick Edit #1 – Levels or Curves?

This is something of an ongoing debate among photographers. Some have a preference for one or the other, the reality is that they are very different tools, and you can (and should) use both.

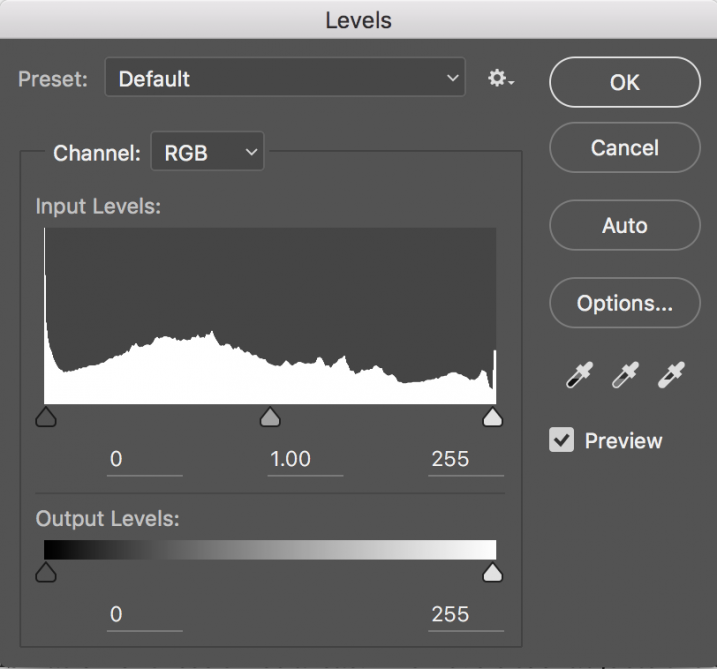
Screen Shot 2016-06-30 at 3.52.50 PMLevels is a great tool to quickly make exposure adjustments to your image. Curves gives you the same ability, but in much more detail. It also has some very powerful abilities in terms of specific adjustments. For a quick edit though, Levels is your tool of choice: IMAGE > ADJUSTMENTS > LEVELS, the keyboard shortcut is CMD>L on a Mac and CTRL>L on a PC, OR add it as an adjustment layer for non-destructive editing.

Levels can really make a difference to your image. Take a look at this article to help you with levels: 5 Photoshop Tools to Take Your Images from Good to Great, as well as some of the other tools available. The levels tool looks deceptively simple, but it has some really powerful functionality. It is best to adjust your image using Levels first, as this tool affects exposure on three areas of your image: the highlights, shadows and midtones.

All images are made up of a combination of these three areas. The Levels tool adjusts the exposure in each of them separately. The reason why this is important, is because exposure affects colour. For example, if you make your exposure in a scene darker, your colours will become more saturated, if you brighten the exposure, your colours will desaturate. So, making levels adjustments first, will also help your image’s colour.

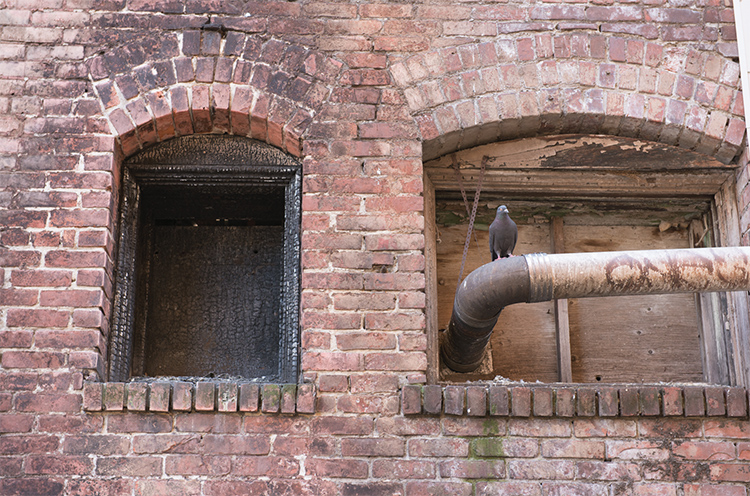
Image straight out of camera, no adjustments

Image straight out of camera, no adjustments.

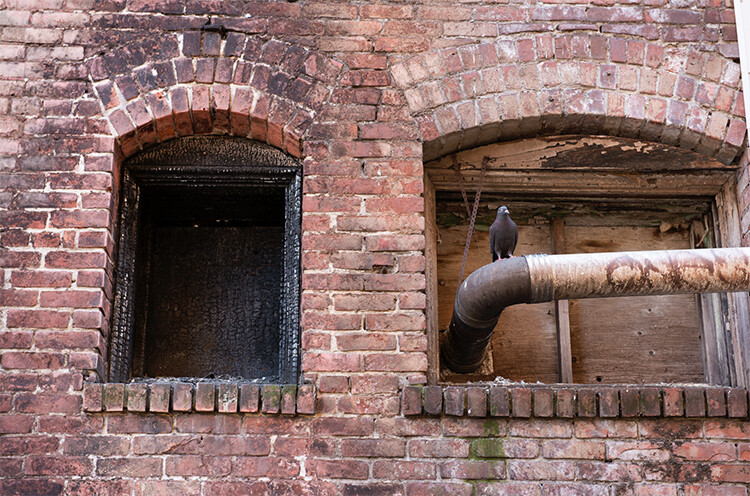
The same image after adjustments in Levels

The same image after Levels adjustments

Quick Edit #2 – Hue and Saturation

Screen Shot 2016-06-30 at 3.54.30 PMThis tool is the next one in order. Start off with Levels and then move onto Hue and Saturation  (IMAGE > ADJUSTMENTS > HUE AND SATURATION or the keyboard shortcut is CMD>U on a Mac or CTRL>U ON A pc). This also looks like a simple tool on the surface, but there is a lot more depth to it.

First of all, you will see three sliders, the top one is Hue, the middle one is Saturation, and the bottom one Lightness. You will also notice a pull-down box above the three sliders, it is set to Master as the default.

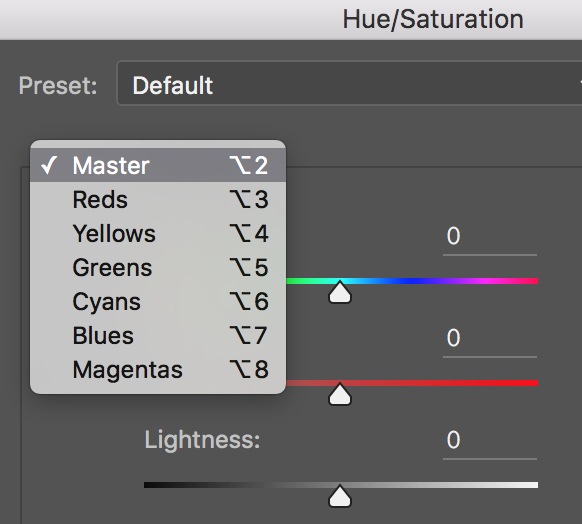
Screen Shot 2016-06-30 at 4.02.56 PMThe Hue slider is used if you want to change the colours in your image to something different. If you leave the box at the top on Master and adjust the Hue slider, all the colours in the image will change, making your image look a little funky and weird, but this could be fun too! The real power of the Hue slide comes into play when you select a colour channel from the drop down box. If you click on the arrow next to Master, all the colour channels will drop down (see screenshot left). This is really useful if you want all the reds to look a little more orange in your scene. Bear in mind, this is a universal adjustment, it will select all the reds in your image and make an adjustment to them all.

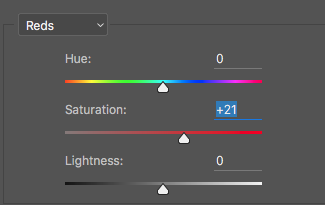
Screen Shot 2016-06-30 at 4.06.31 PMThe second slider is Saturation which affects how rich your colours are in your image. If the reds in your image seem to be light or weak, you can select Reds from the list, and simply move the Saturation slider up (see screenshot right). Also, if some of your colours seem too bold, you can select the appropriate colour channel and move the Saturation slider to the left. You can select each colour individually and make the necessary adjustments.

The last slider is Lightness. I have almost never used this one. If you have done a good job on your levels adjustment, there is really no reason to use the Lightness slider, so I would recommend not using it.

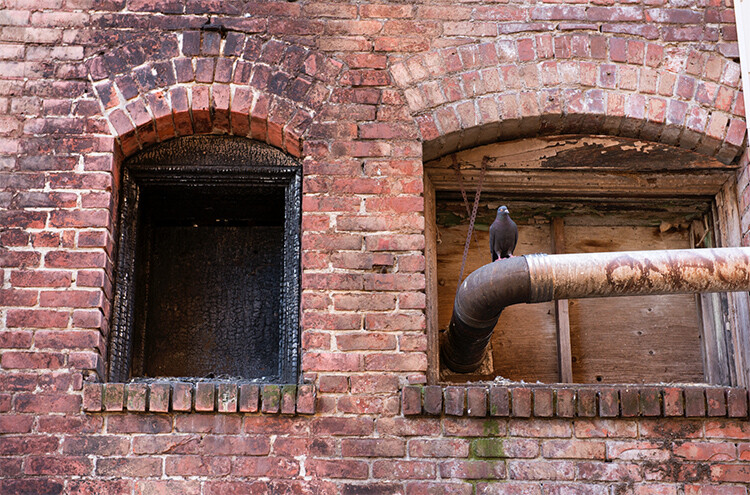
Image after Hue and Saturation adjustments have been made

Image after Hue and Saturation adjustments have been made

Quick Edit #3 – Brightness and Contrast

Once you have made your colour adjustments using Hue and Saturation, you might need to boost the brightness a little. The Brightness and Contrast tool (IMAGE > ADJUSTMENTS > BRIGHTNESS AND CONTRAST, there is no keyboard shortcut to this one) should be used sparingly, do not make big adjustments using it.

You can simply nudge the Brightness slider to the right and give some pop to the image, then do the same for the Contrast slider. If you don’t feel that you need to use this tool, then don’t, it is only necessary if your image looks a little dark after your colour adjustments.

Note: if you’ve done each of these as an adjustment layer you can go back and tweak your levels again, after doing the others.

Final quick edits made in Brightness and Contrast

Final quick edits made in Brightness and Contrast

That’s it, you are done, in a manner of speaking. These quick edits may be good enough for you to get your image to a satisfactory point. If you are happy with your image, then great – you have not spent too much time editing it.

You can do these three quick Photoshop edits on images that you think might be printed. Then if you see that the edits give them the boost you want, you can then spend more time on each image. This cannot replace a good workflow and a good understanding of what is possible in Photoshop, but these three tools will give you the ability to quickly edit your images and get them into a print-ready state really quickly.

If you need to do some further edits, then take a look at this article about more detailed post production techniques or check out all the articles dPS has on image editing in Photoshop. 

googletag.cmd.push(function() {
tablet_slots.push( googletag.defineSlot( “/1005424/_dPSv4_tab-all-article-bottom_(300×250)”, [300, 250], “pb-ad-78623” ).addService( googletag.pubads() ) ); } );

googletag.cmd.push(function() {
mobile_slots.push( googletag.defineSlot( “/1005424/_dPSv4_mob-all-article-bottom_(300×250)”, [300, 250], “pb-ad-78158” ).addService( googletag.pubads() ) ); } );

The post 3 Quick Photoshop Edits You Need to Know by Barry J Brady appeared first on Digital Photography School.


Digital Photography School
 
Comments Off on 3 Quick Photoshop Edits You Need to Know

Posted in Photography


Equipment Tips for Quick and Efficient Studio Product Photography

05 Jul

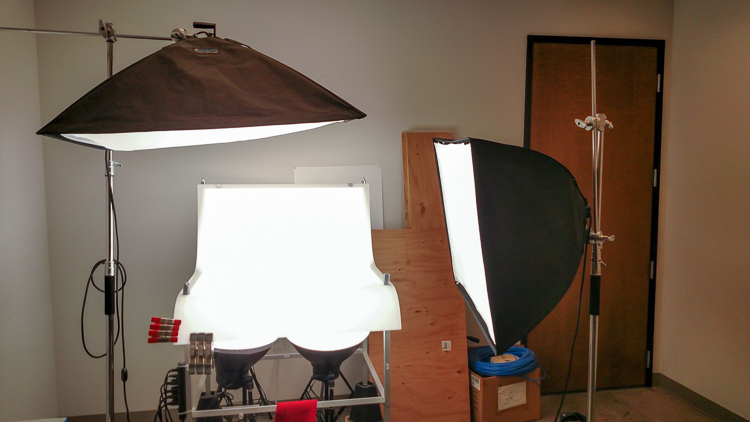
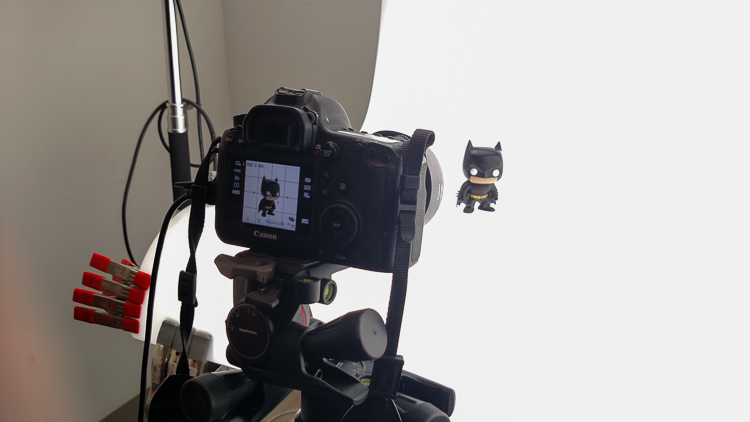
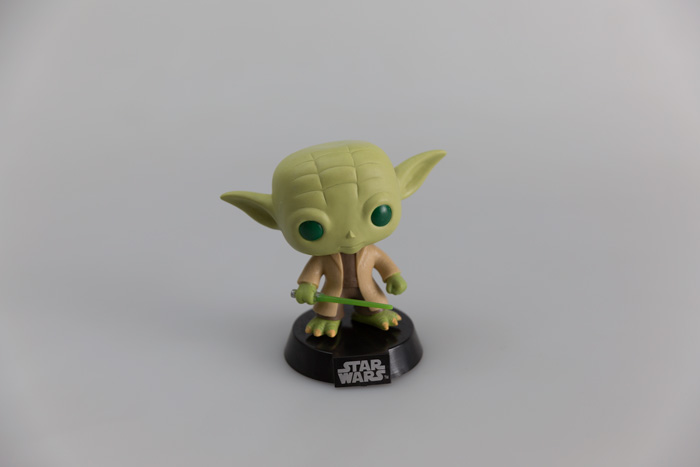
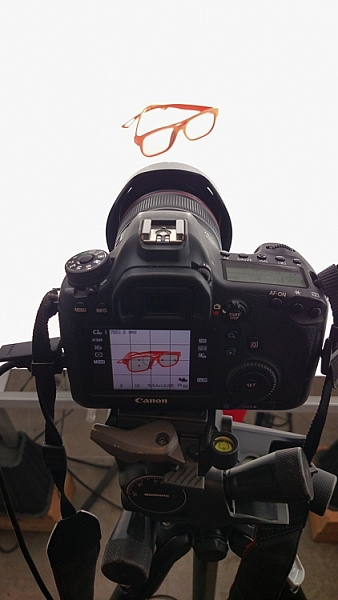
In this article I’m going to discuss the equipment you will need to create great product photography. I built my setup to provide great versatile lighting, speed, and the ability to cut out the product in post production very quickly and accurately. This setup can be used for still life, food, fine art and even some macro work.

Article Example_03

When I first started doing product photography I was hired by a company to reshoot their entire 3200 piece inventory. Needless to say that was a HUGE job, and speed and efficiency was paramount. I had previously not done more than a few dozen parts at one time for a client, so I really was not set up to undertake a job of this scale. I was going to have to rethink a lot of things, and I knew I was going to need additional studio equipment. The words, “Not going to happen” were not going to come out of my mouth, as I wanted the challenge and the learning experience. Many of the things I implemented for that specific job are still in use for my product photography today. This tips in this article are a good base to start if you are an aspiring product photographer.

Requirements of a product setup

Article Example_04

Here is what I felt were the most important things to plan for to make this job happen.

  1. Speed – to be able to quickly move through multiple angles of a single product, and to adapt quickly to the next product.
  2. Versatile light – lighting that can stay constant for similar groups of products, but remain flexible enough to quickly shift to get proper exposure.
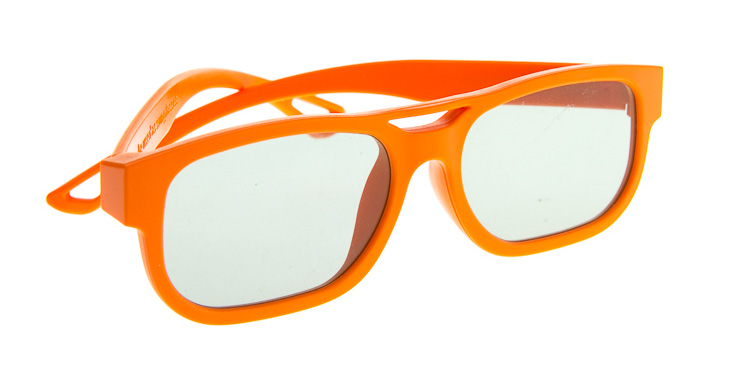
  3. Cut-out ease – the ability to knock out a product from the background quickly in post-production, and place a product on pure white without having to open the image in Photoshop.

With this list in mind you find yourself smack dab in the crosshairs of a shooting table. There really is no other way around it. This is why a shooting table works so well for this type of setup.

1. Speed

Article-Example_01b

A platform is needed when you want to quickly move products in front of your camera and then off the set. Why not make it a platform that is specifically made for photography? The seamless background of a shooting table means less fussing around with intersecting lines that is typical with most background setups, and you won’t have to spend much time with product placement within the scene. That alone will speed up your shoots.

2. Versatile light

You can bounce light off the white shooting table, or better yet light the table from below, causing it to glow. Another great thing about a shooting table is that it’s white. White is a great way to control the shadows of a product. If I had it my way I would have the product completely enshrouded in white light or reflectors, then introduce shadows that add shape and dimension via black cards for the ultimate control. That unfortunately isn’t going to happen, but a white table is a great start.

ShootList4

Table with light coming from below.

ShootList5

Table with light from above.

3. Remove background quickly in post-production

Article Example_05

Article-Example_02b

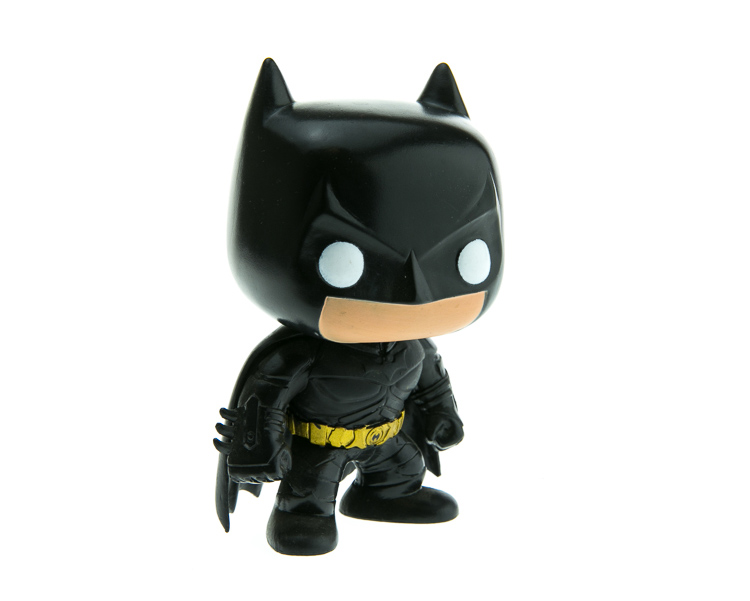
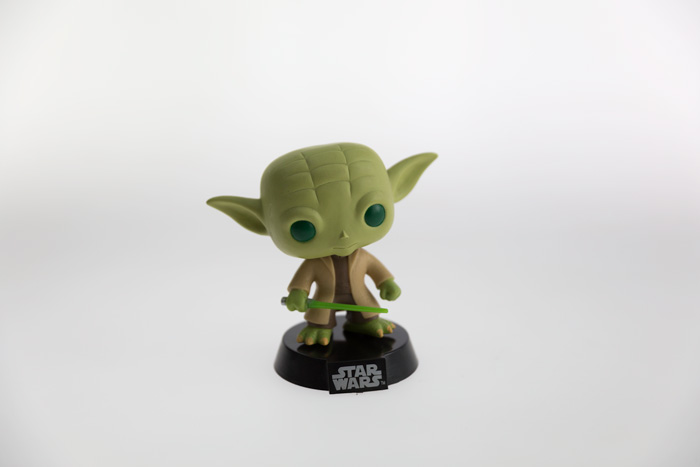
Nice clean light, easy to cut-out product shot.

No one wants to sit around using the Quick Selection tool in Photoshop, refining the edge, seeing the horrible job that tool does, and then finally having to use the much more labor intensive Pen tool to mask out the background. It’s far easier to get this done in camera, or at least give yourself a huge head start. The time you will save with this method will add up very quickly, and will give you a more natural look.

A shooting table

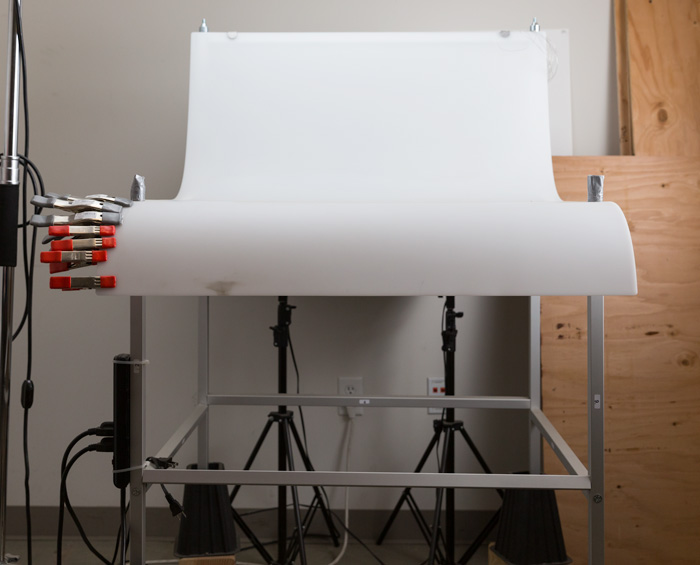
A shooting table is the first place to spend your money. There are many different tables out there but after all my research I found the Foba DIMIU shooting table to be the perfect solution for me.

ShootList3

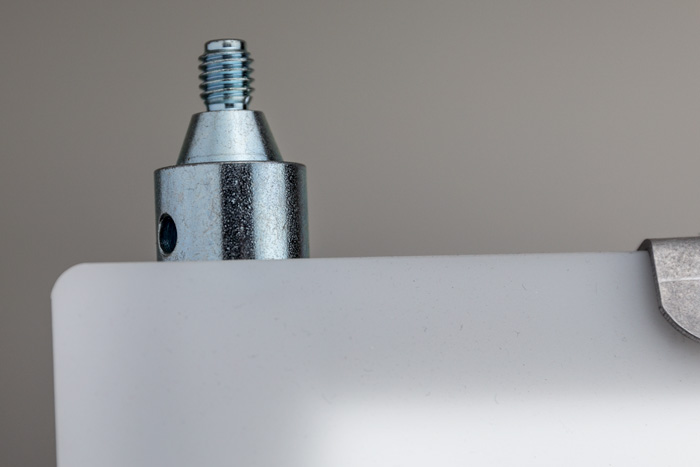
It is a large shooting area, a long sweeping seamless Plexiglas surface that allows you to light from above or below it, the table frame features 4 – æ inch studs at each corner that can be used for various attachments such as arms and brackets to hold cards, product or lights.

ShootList1

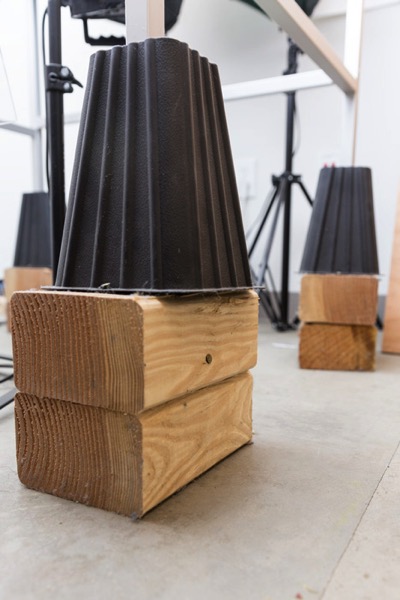
The table is lightweight, can be moved around the studio with ease, and is easy to assemble. I raised the height of my table by using 6×4 lumber cut into blocks, and some bed risers.

ShootList2

At $ 1,544 I realize that the price might keep it out of a lot of hands. But, don’t fret, a more affordable option can be found, like the Manfrotto large still life table for $ 811. If you’re planning on shooting only small products, the Manfrotto mini table at $ 480 is an option as well. Keep in mind, if you think you might have large products in the future, spend the money now and get the largest table you can afford.

Lighting

Lighting is the next thing to consider. The type of system you choose is going to make a pretty big difference when it comes to shooting your actual products. You will ultimately be choosing between two main types of light; a constant (continuous) light system or a studio strobe (flash) system.

A constant light setup is going to be much easier if you’re just starting out with product photography. With a constant light system the learning curve is exponentially smaller. The benefits of What You See Is What You Get (WYSIWYG) light cannot be overstated. I am going to go out on a limb to make a broad statement and say that if you are reading this article for help with your product photography, then you likely do not have the experience needed to employ studio strobes as your light source.

Article Example_03

Even if you have some experience with strobes, unless you have two to three years or more of shooting strobes in a product environment, do yourself a huge favor and get continuous lights. You will be amazed at how much, and how quickly you will learn when you use constant light. Plus there are some added benefits of using a constant light:

  • No tether equipment. You do not have to control the lights with a radio transmitter, by placing the light in optical slave mode, or by a cable like you do with studio strobes. They will always be on, ready to make pictures.
  • You can use them as video lights if you want to get into motion for product shots.
  • They are a far superior light learning tool, even for more advanced photographers. In my opinion this reason alone is why you want go with constant light.

ShootList9

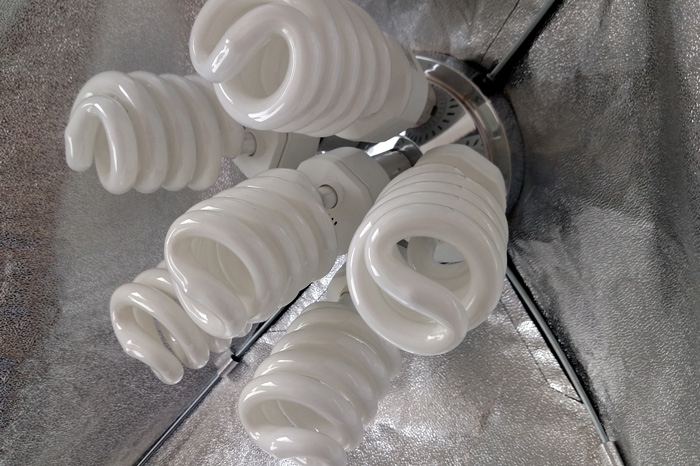
Okay great, you are going to take my advice and get some constant light. My recommendation would be the Westcott Spiderlite TD6 system for the following reasons:

  • They are bright.
  • The fluorescent bulbs stay cool. A huge deal when you are stuffed in a studio with no windows.
  • The included bulbs are daylight balanced and can be mixed with light from a window.
  • Option to use tungsten halogens (not sure why you would because those bulbs run so hot).
  • Westcott has plenty of light modifiers for shaping your light.
  • Light output is controllable in 33% increments with three switches.
  • Solid build, with all metal heads and quality light modifiers.

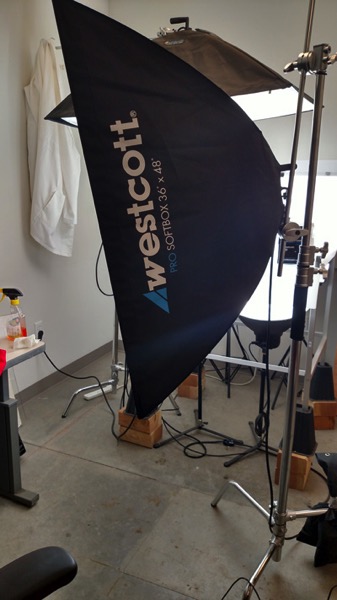
When I bought the kit from Westcott it came with the Spiderlite TD6 head, six 50w fluorescent bulbs, a tilter bracket, and the 36×48 softbox. I paid $ 700 per light, and bought two of those kits for a grand total of $ 1400.

ShootList10

There is some good news though. At the time of writing this article, there is a Westcott promo kit that comes with two of everything, two heads, two brackets, two sets of bulbs, and two softboxes, one is the 36×48 the other is a strip 12×36. The kit is going for $ 799. A fantastic buy for this lighting system.

If that is still a little more than you want to spend, then there are some other options for lighting. Impact has a kit that has light heads, stands, bulbs, and modifiers for about $ 265. But as my grandfather always said, you can’t afford to buy something twice. If product photography is something you are going to do, pay for the quality of Westcott. It will last, day in and day out.

My TD6 lights are used primarily as my key (main) and fill lights. I still need to be able to light my shooting table. For that I turned to some reflectors.

ShootList6

I went with two 16″ reflectors from Flashpoint, for $ 70 a piece. These sit under my raised shooting table and shine straight up through the bottom to blow out my table top.

ShootList7

Light stands

Now is a good time to talk about support. Supporting your lights should be carefully considered, and you need to ensure you don’t skimp here. I have a story to help illustrate this point. While doing a product shot for a client I was moving about the studio, and I brushed past my lights on my way back to my camera. Before I could turn around and look at the scene I heard a crash. My light had toppled over, hit the table, knocked the product off balance, and it hit the floor and broke. It was a bottle of wine. I was left with a huge mess to clean up, a broken bottle that needed to be replaced, and a bill from the client for the unreturned product. It could have been worse, but not by much. Invest in your light stands. Get good ones and weigh them down properly with sandbags.

You are going to want to use some sort of a C-Stand. Whether it be a turtle base (removable legs from the center column) a rocky mountain C-stand (a stand with one leg that can go up and down the center column) or a super C-stand (extra heavy duty) invest in a C stand for your large lights. Also, always have sandbags handy to weigh the C-stands down once you bring them onto your set.

ShootList8

For the price of $ 129 per stand from Adorama, for their Flashpoint C-stand with turtle base is pretty great, I couldn’t be more pleased. It has been a fantastic solid stand for my large TD6 lights.

The other stand that I bought was a lot less mission critical, it was for my reflectors. I bought a few Manfrotto Nanopole stands which bottom out at 20″, and can go as high as six feet. They are not meant for anything too heavy, but they do the small stand job perfectly.

So, we touched on all the main equipment needed to make a successful product photography set. Do you have any other tips to add? What do you use for product photography? If you have any questions please ask in the comments below.

googletag.cmd.push(function() {
tablet_slots.push( googletag.defineSlot( “/1005424/_dPSv4_tab-all-article-bottom_(300×250)”, [300, 250], “pb-ad-78623” ).addService( googletag.pubads() ) ); } );

googletag.cmd.push(function() {
mobile_slots.push( googletag.defineSlot( “/1005424/_dPSv4_mob-all-article-bottom_(300×250)”, [300, 250], “pb-ad-78158” ).addService( googletag.pubads() ) ); } );

The post Equipment Tips for Quick and Efficient Studio Product Photography by Jacob Macias appeared first on Digital Photography School.


Digital Photography School
 
Comments Off on Equipment Tips for Quick and Efficient Studio Product Photography

Posted in Photography