RSS
 

Posts Tagged ‘portraits’

5 Tips for Photographing Street Portraits

16 Apr

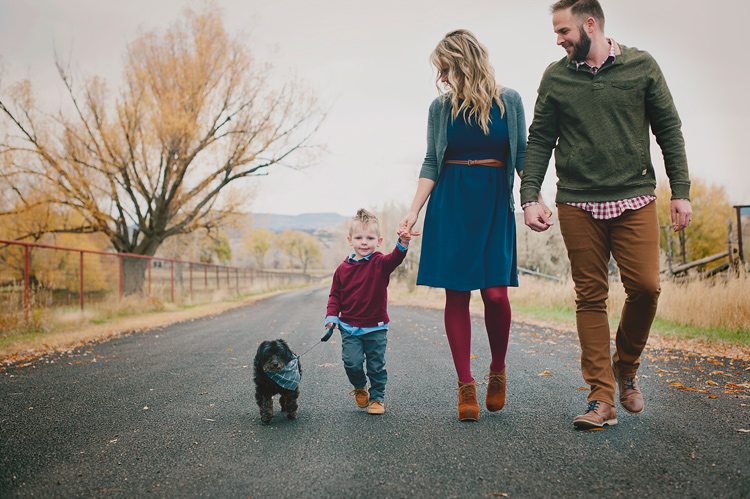
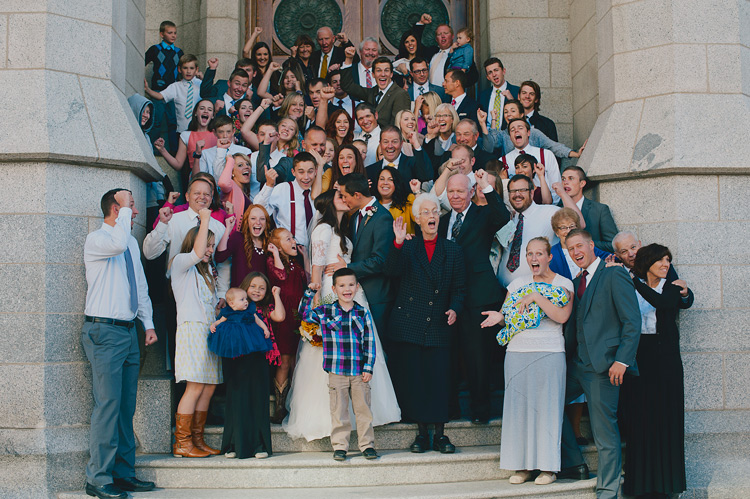
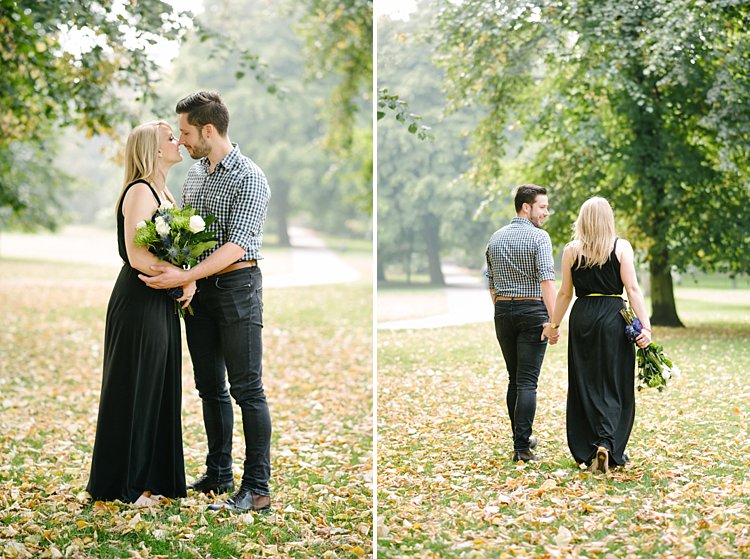
Isn’t it always the way that the most daunting things in life are usually the most rewarding? It takes a certain amount of backbone to shoot street portraits. Whether it’s walking up to a total stranger and asking their permission, or taking a more candid, reportage style approach, many photographers get put off through lack of confidence.

It’s a great shame because there is no more fascinating photographic subject than people.

Street portraits Thailand

If you follow the Humans of New York project, you’ll know that every single person has a story to tell; sometimes uplifting, often heartbreaking, occasionally hilarious. The very best street portraits give us a glimpse at those stories in a single frame.

If you’ve always wanted to give it a go but have yet to summon up the courage, hopefully, the following tips will give you all the motivation you need.

The approach

The first time you approach a potential subject is going to be the hardest. It can sometimes feel like an insurmountable hurdle. But try and think about it from your potential subject’s point of view. He or she is going about their daily routine, possibly doing the same thing they have been for years and finding it all a little boring. Then, out of nowhere, someone has judged them interesting enough to want to take their picture. Chances are, you’ve just made that person’s day. At the very least, you’ve given them an anecdote to tell their friends.

He or she is going about their daily routine, possibly doing the same thing they have been for years and finding it all a little boring. Then, out of nowhere, someone has judged them interesting enough to want to take their picture. Chances are, you’ve just made that person’s day. At the very least, you’ve given them an anecdote to tell their friends.

street portraits photography China

Different methods

So, what’s the best way to approach someone? Different photographer’s stand by different techniques. Some just come straight out and ask if they can take a picture. Others want to try and make a connection first in a more roundabout way, striking up a conversation or asking questions.

One psychological technique favored by many salesmen is to first ask for a small, unrelated favor, such as directions or whether they have the correct time. Studies have shown that once someone has done you one favor, they’re much more likely to say yes to another, bigger one. Don’t ask me why—people are complex!

In any approach, confidence is obviously vital, but enthusiasm is just as important. Enthusiasm is contagious. Be genuinely interested, listen carefully to what they’re saying and be respectful. Also, if you can make them laugh, or at least smile, you’ll find all their barriers will start to lower.
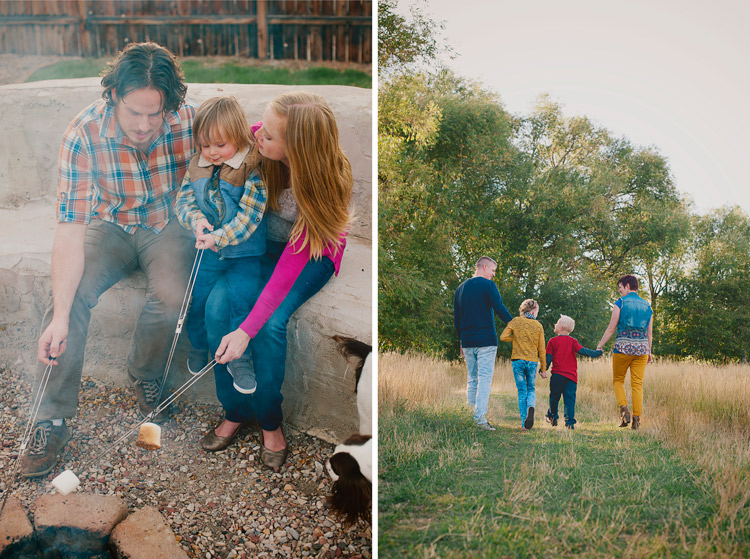
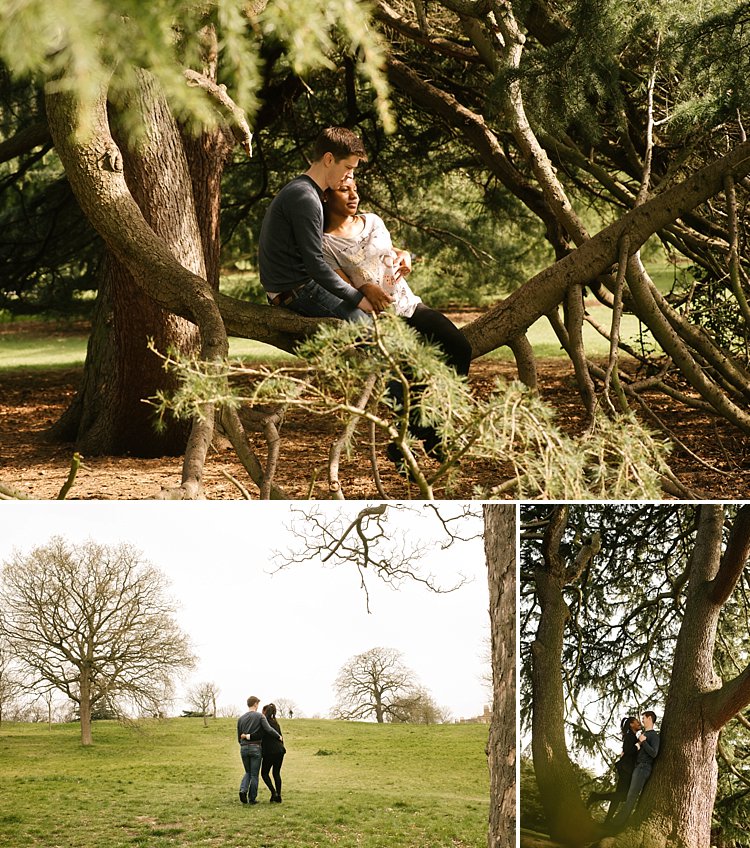
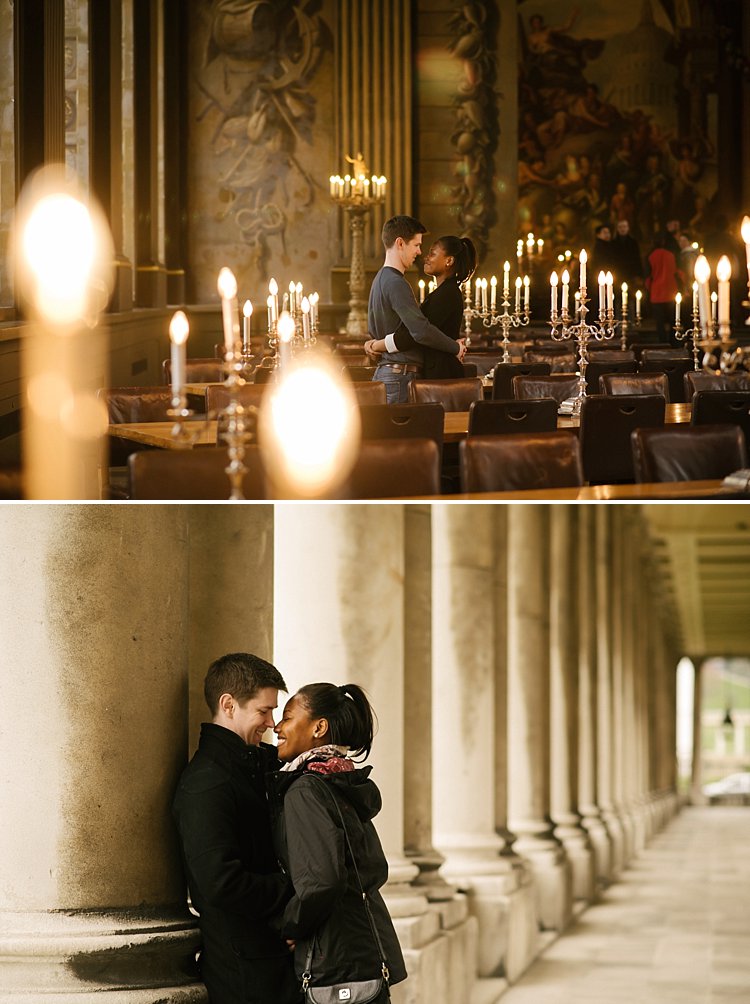
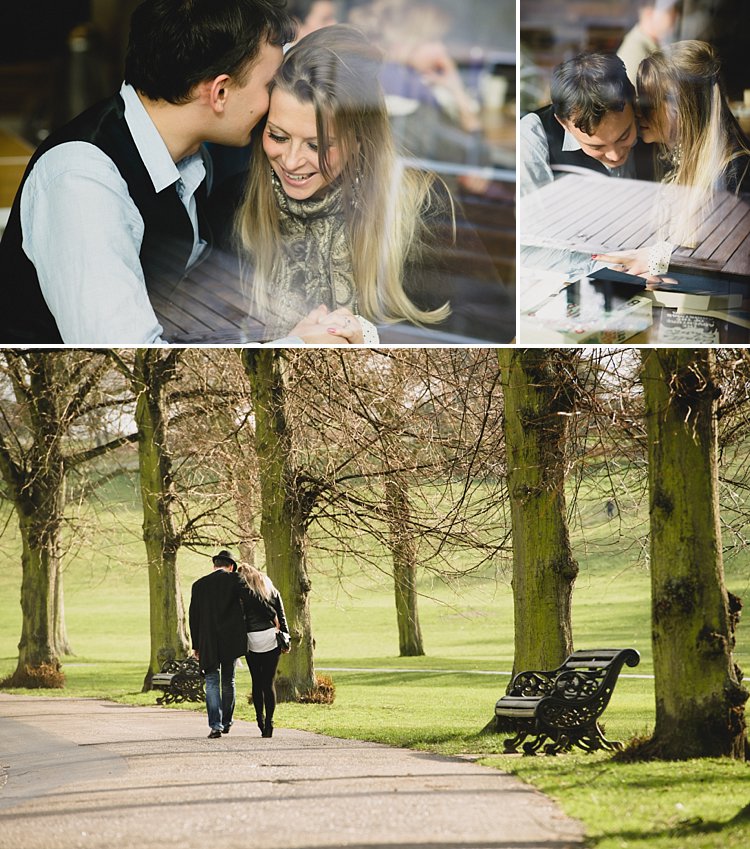
The environment

Street portraits market London

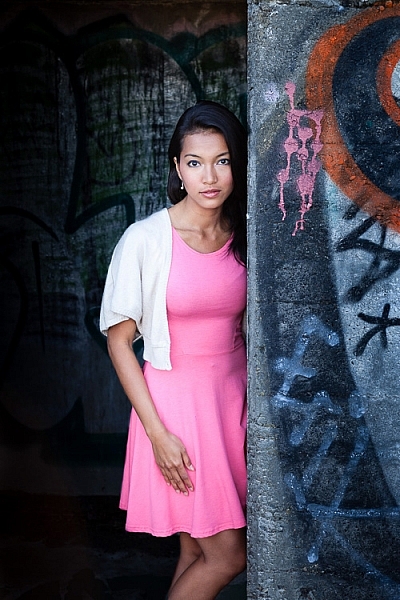
Where you find your subject (i.e. their environment) can sometimes tell you as much about them as what they look like.

Finding an impeccably groomed city trader striding around the financial district is to be expected. But finding him in a crowded flea market hints at a story. If the environment adds to the portrait, include as much of it as you need to enhance the photograph.

If you want your portrait to be all about the person, if they have an interesting face or you want to highlight the way they dress, try and find a background that won’t distract from them. A busy background can confuse the eye and take away from the impact you’re trying to make. If you need to, open up your aperture to throw the background out of focus and bring attention back to where it should be.
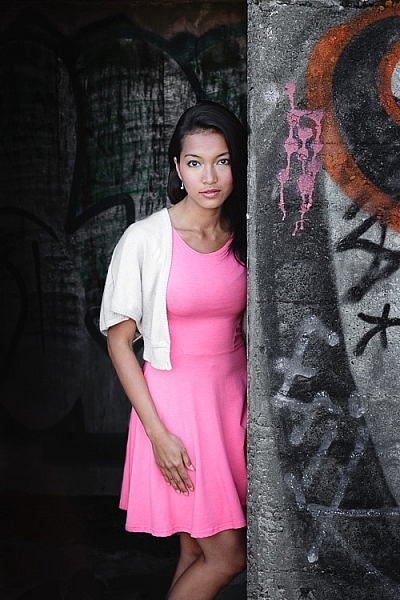
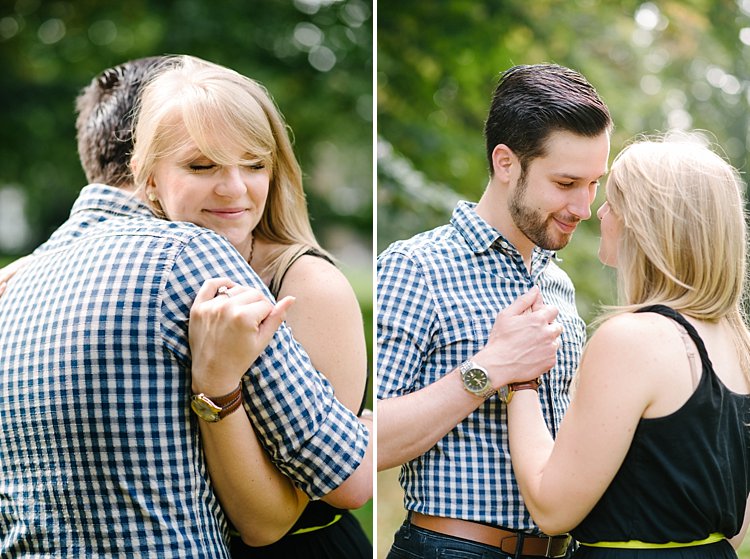
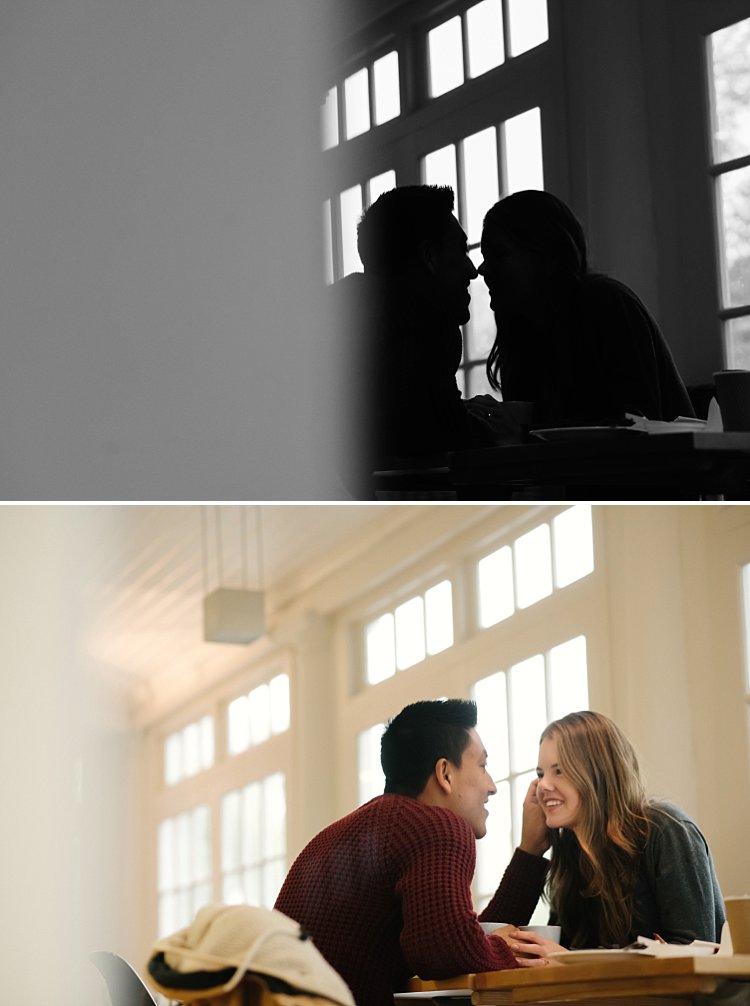
Street portraits photography East Timor

The eyes have it

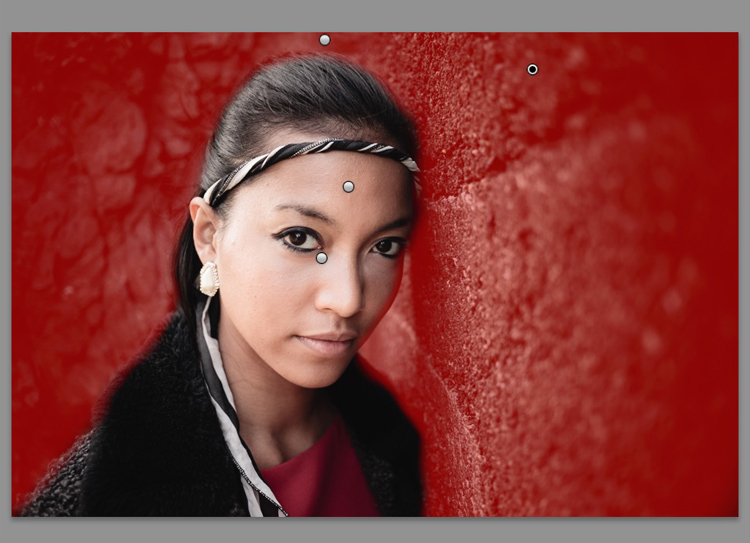
The most important part of your portrait will always be the eyes. The eyes tell us everything; how the person is feeling, what they’re thinking, if they’re happy or anxious, and even if they would rather you stopped taking their picture.

street portraits photography China

Eye contact

Eye contact is incredibly powerful in real life. If you’re talking to someone and they maintain a natural, unwavering eye contact, there’s something primeval that makes you trust them and creates a connection. It’s the same with a portrait. You need that eye contact to make a successful shot.

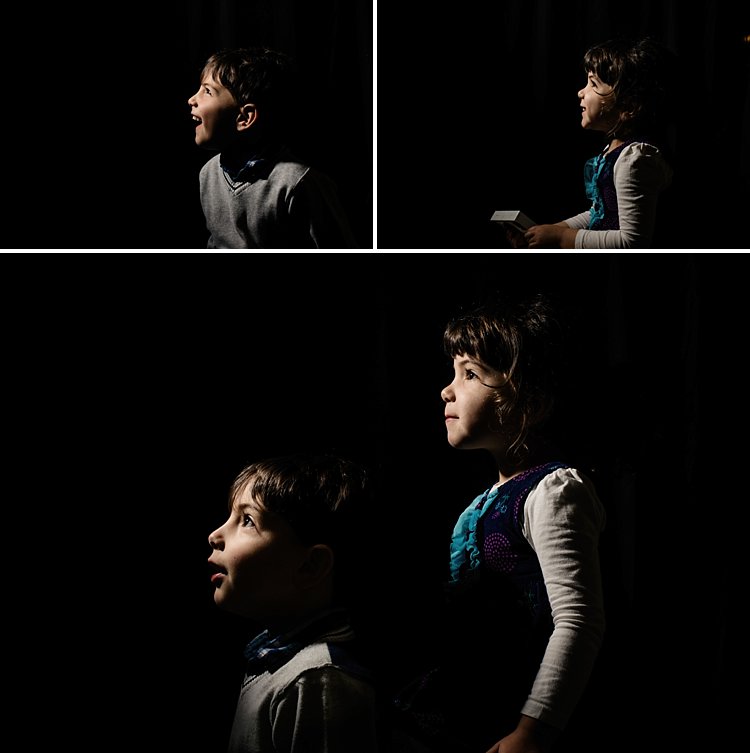
If you photograph a subject who’s not looking directly back at you, the natural instinct is to follow their gaze to see what they’re looking at. You can sometimes use this to your advantage to draw the viewer’s eye towards an element of the picture you want them to focus on. For example, in this shot of a man carrying baskets full of rabbits, the eye line of the two children always brings us back to the cages.

street portraits candid photography China

On a technical note; as I’m sure you’ve noticed, people tend to blink. Try to take a quick burst of shots of your subject to ensure you capture at least some with their eyes open. Autofocus systems can also tend to hunt around, and taking more shots increases your chances of grabbing a pin sharp image.

The candid street portrait

If you’re looking for a way to ease yourself into this genre, shooting candid street portraits holds some definite advantages. You do away with the whole nail-biting business of asking permission and perhaps suffering a rejection. You capture people as they really are rather than the front they put up when a camera’s pointed at them.

But that’s not to say candid street photography is easy. If anything, it’s more difficult (or, at least, a different kind of difficult) and can be just as nerve-wracking.

street photography portrait candid Jerez

Your timing has to be split second in order to capture the spontaneous moments that occur all around you. You need to know your equipment inside out in order to be able to frame a great composition and adjust settings as needed quickly.

Capturing great candid street pictures takes a great deal of practice and a lot of luck. Whatever your personal feelings are on the ethics of taking someone’s photo without permission, there are people who really don’t appreciate it.

It would be very unlikely you’d get into any serious trouble, but it’s worth using your street smarts and common sense. As a personal rule of thumb, if a certain person looks too mean for me to even consider asking permission to photograph them, there’s no way I’d try and sneak a shot.

The technicalities

Whatever type of street portraits you’re taking, the one thing you don’t usually have on your side is time. With candid shots, you’re constantly reacting to the world as it unfolds in front of you at its usual breakneck pace, and with the more posed approach, you’re still cutting into someone’s, probably busy, day.

You need to be able to work quickly, without fussing over settings or lens changes or tripping over bags. Keep your equipment as simple as possible—a single camera body and a zoom lens that covers all eventualities. I put a lot of trust in my Canon 24-70mm f/2.8L. It might not have the widest aperture in the world, but I’m happy to trade that for the versatility.

I generally shoot in Aperture Priority as well. So I only really need to think about the depth of field I want in a shot and let the camera’s far superior brain work out the rest of the details for me.

street portrait photography China

One area where you do need to stock up is memory cards. Make sure you have plenty of storage space with you, you’ll be taking a lot of images—especially if you’re heading out for a day of sneaky candid shooting. Throw in a couple of freshly charged batteries as well, just in case.

Conclusion

Like every area of photography, shooting street portraits has challenges all of its own. By far the most difficult thing to overcome is finding the courage to approach your subjects.

The good news is, if you’ve always felt too intimidated to attempt this genre of photography, you’re in esteemed company. Legendary names such as Diane Arbus and Elliott Erwitt have said they’ve used their cameras as both a kind of license to take photos and to act as a barrier between them and their subject. There’s still something mysterious about a camera that intrigues people—even more so these days when most photos are taken on phones.

street portrait photography candid Jerez

All it takes is a little daring, a projected air of confidence, and you can capture some unique moments and great street portraits.

The post 5 Tips for Photographing Street Portraits by Andy Callan appeared first on Digital Photography School.


Digital Photography School

 
Comments Off on 5 Tips for Photographing Street Portraits

Posted in Photography


How to Create Portraits with a Black Background

07 Apr

Who does not love a crisp, deep black background for a portrait? You can achieve this with the application of just two ideas, and just a little post-processing too.

black background

We are talking about a couple of techy things in hopefully, a non-techy way. These two ideas will give you tips for how to make black backgrounds for your portraits.

No calculations necessary

As an erstwhile teacher of Mathematics, I should not apologize for numbers, should I? There is quite a lot of Mathematics in photography. However, you may be pleased to know that I think you can achieve everything, without thinking much beyond the basics. If you have a broad understanding of the concepts you will be absolutely fine.

These techniques are not just applicable to portraits.

Two Tips for Making Portraits with a Black Background

Banana palm leaf

Firstly, please think of stops of light as units. Using the term stop is like saying that something weighs 12 kilograms or that it is 10 miles away. As photographers, we tend to talk about stops and stopping down, but it is just as valid to say units. The thing is not to get bogged down in technicalities, the term stop is only a unit of measure.

The falling off of the light

The first concept might be stated simply as light falls off rapidly. Fleshing that out just a little, the amount of light available decreases greatly as you move away from the source of the light. But we are photographers and we do tend to think that a picture is worth a thousand words, so look at the diagram below:

In the example above, one unit of light arrives at our subject, one meter away from the window. If she moves two meters away, just one-quarter of a unit of light will now be arriving at her. Then, if she moves three meters away from the window, which is the source of light, there will be only one-ninth of a unit of light. The available light disappears very quickly.

It might suit some if I illustrate the same point with a graph (which, in the past, I have tended to introduce to students as a Mathematical picture).

Two Tips for Making Portraits with a Black Background

A mathematical picture tells a story?

How does that affect the background?

When trying to achieve a black background, you are interested in the amount of light hitting it. Again, pictures tell the story best. Both these photos had only white balance and very small adjustments to balance exposure done in post-processing.

Two Tips for Making Portraits with a Black Background

Not happy

The image on the left has the background close to the subject, about three feet (one meter) behind her. Then, on the right, the white background is about thirteen feet (four meters) back. You do not need me to do calculations, quote some nice formulae, to prove what is happening above. It is obvious, isn’t it?

In these photographs, the subject hasn’t moved and the exposure does not change. The background moves farther away, and the amount of light reaching it reduces rapidly. Even when the background is white, rather than the desired black, it gets much darker the greater the distance it is positioned from the light source.

In the practical world, there may be limits to what you can do, perhaps by the shooting space you have available. However, the message is simple, push the background as far away as possible, and even a seemingly small distance will help make it appear darker.

Two Tips for Making Portraits with a Black Background

Young Filipino.

The background for this photograph was the inside of a room. The teenage Filipino boy was standing in a doorway, getting full benefit from the light source. The background, the far wall of the room, might be only eight feet (just over two meters) away, but it is getting very close to the blackest of blacks, isn’t it?

Combine this reasonably straightforward science, the way light falls away, with the science of the dynamic range of camera sensors and you will be a long way towards achieving black backgrounds for your portraits.

Dynamic Range

Please understand that the numbers I am using here are approximate. They do vary from camera to camera, and from the conclusion given by one source to another. But I am going for using what is easy, what is really needed to make the point so you understand.

Dynamic range is the measurement from the darkest to the lightest item which can be seen. Your camera has a great deal less dynamic range than the human eye. It is much less capable of seeing into dark and light areas at the same time. That is why, when your camera produces an image with blown out highlights, and blocked up shadows. But your eye can still see the detail of a bird, which sat in bright sunlight, and you can also see the black dog which sat in the darkest shadows. Your camera simply cannot see both at the same time.

Two Tips for Making Portraits with a Black Background

Light the subject, not the background

It might be stating the obvious, but it needs to be said – the first step to getting a black background is to use a black backdrop. Then, if you can get the subject lit more brightly than the background, that will push the background into the underexposed, dark areas, outside the camera’s more limited dynamic range.

Portrait setup

If you can throw some extra light onto the subject and have them exposed correctly, in the brighter end of the dynamic range, that will help to send the rest of the image into darkness. The brightly lit subject should be properly exposed. Then there is a good chance that the background will be outside of the part of the dynamic range for which you are exposing. It will, at the very least, be heading towards black.

Portrait setup

Here is the setup for a portrait, with only natural light hitting the subject. It is not as obvious in this reduced jpeg as in the original RAW file, but the background is rather muddy, certainly getting towards black, but not the pure black you are looking for. In the original, you can clearly see folds in the cloth.

Two Tips for Making Portraits with a Black Background

Still not happy – most people would describe the background as black, but it is not the blackest of blacks, is it?

Here is the same set up again, with some extra light on the subject.

black background

I think the point is illustrated. Is it clear that the background is worthy of the classic description “inky”? Other things could be improved with a few post-processing tweaks. They are presented to show the backgrounds, not as finished portraits, and I’ve only changed color balance and tried to balance the exposures.

Use the natural law (it is called the Inverse Square Law) which dictates that light falls away rapidly from the source, and the limited dynamic range of your camera and you are a long way to getting a good, deep black, background. Next, you can help complete it further in post-processing.

Post-processing

I am referring to Lightroom here, but there are equivalent tools in other software.

Two Tips for Making Portraits with a Black Background

A bit of a muddy RAW file.

This is the photograph from the top of the article, as it first appeared out of the camera. You do not want to hear my excuses, but I did not get it as completely right in-camera as I would normally like to do. However, it turns out that is lucky, as it makes a good example for a post-processing in this case. Because the file was produced with the application of the ideas talked about above, it is very workable.

Most of the way to being processed in just a very few steps.

Edit intuitively

One of the best bits of advice I ever received, which I sometimes manage to apply, is to ignore the numbers. You should move those sliders till they give the look which you think suits the picture. Look at the photo and see what happens, take a breath, pause for a moment, and make some judgment as to whether it gives you what you’re looking for. Often this involves going a bit too far (whether it be with sharpening, or exposure, shadows, or whatever) and then dialing back a little.

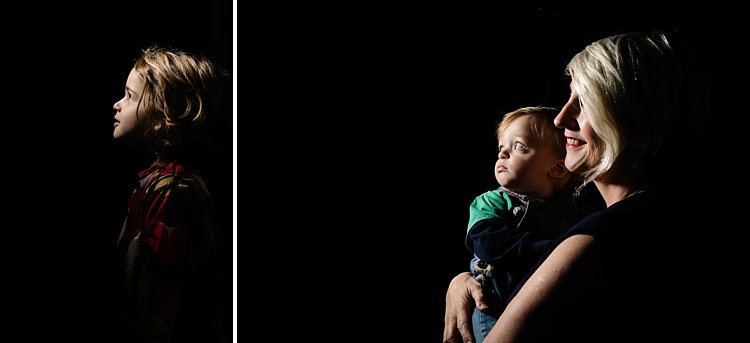
I managed to do just that with this image. It makes me smile when I look at it now, a few weeks later, as I am slightly surprised at how far I went. I adjusted the color balance, brushed some negative clarity onto mom’s face, rotated the image counter-clockwise a little, but the exposure was not adjusted at all as the faces looked fine to me. Then I started pushing the sliders around.

Push the limits

It was a bit of a surprise to see just how far towards the negative I had moved the contrast slider. This may be counter-intuitive when you are trying to make parts of the image darker, but because we have got a reasonably well-produced file, we can get away with reducing the contrast, and this has the pleasing effect of lightening the hair and separating it from the background.

Of most significance to this exercise is the shadows slider which was moved in the opposite direction to usual. It was moved to the negative, to block up the shadows, rather than to the right, to try to pull out some detail.

I was also a bit surprised at how far I moved the black point. It seemed to work, though. As I say, I think it often works best if you move the sliders, without too much concern for the numbers they represent. Try to look at each photograph individually, rather than apply some sort of formula.

The final image had only a couple more, tiny, detailed tweaks.

black background

Extra Tips

A couple of other things.

How you decide to throw some light onto the subject of the photograph is for other articles. There are many other great Digital Photography School articles, which offer a huge number of suggestions for illuminating subjects. I thought you should know that I do very much like my LEDs, as I like being able to see the light. I also use reflectors. However, the first source of light in all the photographs above is natural light. You do not necessarily need a fancy kit.

In respect of the black cloth, most advice will suggest that you buy black velvet. I am sure it does an excellent job of absorbing light from all directions. But it is expensive, and with careful technique, it seems to me that another dark, non-shiny cloth can do the job too. One thing to pay a little attention to is making sure that you stretch the background cloth out a little. Try to get it as smooth and even as possible, with no creases, as any imperfections are liable to catch the light.

black background

Conclusion

The power of photography! 25 years after the event, I paid a bit of homage to Annie Leibowitz’s photograph of Demi Moore. I was not trying to replicate it as such, just nod in the photograph’s direction. But I did manage to get a really black background, didn’t I? Please give it a go yourself.

Share your images and questions in the comments below. I’m happy to try to help further if I can.

The post How to Create Portraits with a Black Background by Richard Messsenger appeared first on Digital Photography School.


Digital Photography School

 
Comments Off on How to Create Portraits with a Black Background

Posted in Photography


Six Ways to Capture Character in Portraits

31 Mar

Broadly speaking there are two types of portraits. The first is where you try to make the model look as beautiful as possible. You may need a make-up artist or stylist to do it properly. Most commercial photographers are paid to make their models look beautiful, and there are many links with the world of fashion photography.

Six Ways to Create Character Portraits

The other is where you try and capture somebody’s essence, create character portraits. One interesting thing about this style of portraiture is that it opens up your range of models beyond people that are considered conventionally beautiful. It’s less complex because you don’t necessarily need make-up artists, stylists, or complex lighting.

Capturing character is a more simplistic, honest approach to making portraits. The techniques and principles behind it are simple but may take a lifetime to master.

1. Focus on the eyes

This applies to all types of portraiture but even more so when trying to capture their character. This idea goes beyond focusing your lens on your model’s eyes and making sure they are well lit and have a catchlight.

Six Ways to Capture Character Portraits

I made this character portrait of an elderly lady in Bolivia. Her eyes and the wrinkles around them convey so much about her life.

Eyes should be a focus conceptually as well as literally. They tell you a lot about a person. Eyes convey emotion, vitality, and life. The saying, “The eyes are the windows of the soul” has a lot of truth to it. Older people have wrinkles around their eyes that speak of experiences lived and wisdom gained.

2. Ask the model to wear their own clothes

Choice of clothing can say a lot about an individual, particularly if they have a quirky fashion sense. This is the opposite approach to fashion, where the model often wears clothes that don’t belong to them. When capturing character ask the model to bring along clothes that are meaningful to them.

Character portraits

The model in these portraits is a circus performer, she wore the costume she uses while performing. The close-up portrait draws more attention to her dreadlocks and tattoo, the other to her costume.

3. Shoot the model in their environment

A common component of the type of portrait photography where you try to make somebody look beautiful is to place the model in an unusual or striking environment.

When capturing character you should try and do the opposite. Look for links between your model and the environment. If your model is the outdoorsy type, look for a place to take the portrait that reflects that. Or maybe their home or garden are decorated in a way that reflects their character. Or perhaps they have an interesting hobby or profession.

Think about how you can use these elements to create a portrait that tells a story about the model’s character.

Character portraits

The man in these portraits makes wooden flutes, so I photographed him in his workshop. Hands often reveal character so I took a close-up photo of his hands at work.

4. Use prime lenses

Prime lenses are the secret weapon of the portrait photographer. Part of that is because of the practical advantages. We all know you can select a wide aperture to blur the background and create compositions with bokeh. But you can also set the aperture to f/2.8 or f/4 knowing the results will be sharp (compared to the softer performance expected from zoom lenses at those apertures).

Being restricted to a single focal length means you have to get creative with your compositions. You can create variety by changing the distance between you and your model, and by utilizing different points of view.

But most of all, the minimal approach to gear enforced by prime lenses lends itself to a more honest approach to portraiture. I often take just one camera, one short telephoto lens, and no lights to a portrait shoot. I prefer to rely on natural light (and reflectors). Eliminating distractions helps me concentrate on the next step – making a genuine and meaningful connection with the model.

Character portraits

I used an 85mm prime lens set to f/2.5 to create this portrait. The wide aperture blurred the background, making the model the center of attention.

5. Build rapport

The success of the shoot depends on the relationship you create with your model. You might only have a short time to do this. I’ve turned up for shoots with people who I’ve never met before, having communicated only by email or text message. It helps that I’m a naturally curious person and enjoy learning about other people and their lives.

Part of building rapport is getting the model genuinely interested in the photo shoot. If it is part of an ongoing project (and it should be, because projects are the best way to help you develop creatively as a photographer) let the model know about it so they can take pride in being part of your project.

Use conversation during the shoot to provoke animated expressions. Read the story about Yousuf Karsh photographing Winston Churchill for an extreme example of this!

Character portraits

I made this portrait as part of a project photographing musicians. The violinist enjoyed being part of the project.

6. Post-process appropriately

Think about your style of post-processing. For example, a portrait that expresses character probably needs far less retouching than a portrait that is trying to make the model look as physically beautiful as possible. A light touch is often best, when working in color.

You should also consider converting your best portraits to black and white. There is something timeless and special about a good black and white portrait. It’s ideal for expressing character and emotion.

Character portraits

The strong eye contact and black and white conversion turn this portrait into one that expresses the character of the model.

Conclusion

Capturing character, rather than (but not necessarily instead of) beauty poses a challenge to the creative photographer, but the results are often more satisfying.

I find that an interest in capturing character rather than beauty marks an evolution in a photographer’s thinking, a shift from photographing the superficial to looking for deeper themes and human connections. But what do you think? What techniques do you use to capture character? Let us know in the comments below.


If you enjoyed this article and would like to learn more about portrait photography then please check out my ebook The Candid Portrait.

The post Six Ways to Capture Character in Portraits by Andrew S. Gibson appeared first on Digital Photography School.


Digital Photography School

 
Comments Off on Six Ways to Capture Character in Portraits

Posted in Photography


Wedding Portraits – 5 Tips for Getting Out of a Creative Rut

16 Mar

As a professional photographer, it is normal to take a fair amount of pride in your work. In an ideal world, everyone would take pride in their work; but photographers in particular are usually people who own their business, who are doing something they love and who are creative by nature.

It can be particularly frustrating when you feel that you aren’t doing your very best work. Even if the customer is happy, you want to keep doing your best and you want to keep growing and learning in your craft. Getting compliments or rave reviews are great, but that feeling when you take your latest and best image is unforgettable.

Wedding portraits creative rut 03

Wedding portraits is something that is particularly challenging in this regard. Your job is to capture the newlywed couple on the happiest day of their lives, which usually means photographing them face-on while they grin into the camera. Maybe you’ll ask them to embrace, to hold hands, or to stand in front of one another. But ultimately, you’re essentially doing the same thing in every photo. There is less freedom to be creative and to have a vision; which makes it easy to get into a creative rut.

How can you grow and expand when all these photos are essentially the same thing? As they say, the devil is in the details. Actually, it is precisely the limitations that this type of photography places on you that will allow you to challenge yourself to become even more creative.

Wedding portraits creative rut 08

Here are five pointers that will help you get out of that creative rut and take some truly memorable wedding portraits.

#1 – Look for Inspiration

Wedding portraits creative rut 09

Tip number one is to look for inspiration on the web. Social media like Instagram and Pinterest are excellent for this. Just take a look at the ways in which other photographers have handled their wedding portraits and see if there is anything you can learn or borrow from them.

As Steve Jobs famously said, “Good artists copy, great artists steal.” Don’t be afraid to try and improve on what has come before you. Save some screenshots on your phone, or print out a list or shots you’d like to go for. Trying something brand new usually means failing a few times, but that’s what makes it an adventure!

#2 – Get a Second Shooter

Our second tip is to find a second shooter. If you feel that your creative juices are running a little dry, then how about inviting another cameraman along for the day? Get them to have a go at the same shots and you might find that they give you some fresh ideas that you can try. Even if you don’t end up taking their advice directly, this will help you to step out of your comfort zone and that’s when new ideas start flowing!

Wedding portraits creative rut 04

Ask your second shooter for some advice on locations. Try and find someone familiar with the venue, or maybe a photographer that has some ideas about great locations to shoot. Let him take the lead, and if you see him start something, see if you have a finishing flourish to take your portraits to the next level.

#3 – Remember the Basics

When you’ve been doing this gig for a long time, it’s easy to forget the most basic aspects; things like composition, framing, and lighting. Our third tip encourages you to bring it back to basics and remember some of the tips you learned when you were first starting out. You’ll often find you can inject fresh inspiration into your shoots.

Wedding portraits creative rut 01

Try going for a classic or timeless look. Forget the props, crazy locations, special effects, and confetti canons. Try and see what you can do with your best lens, and most basic posing. You may find yourself asking why you’re trying to take the same photo that’s been taken by every wedding photographer before you. And the answer may just astound you!

#4 – Work With Your Resources

For our fourth tip, let’s talk about your environment. Every wedding is different, whether that is because of the weather, the dress code, color scheme, or the crowd around you. Don’t fight it – work with it! Rain or clouds can be a dramatic backdrop for a photoshoot for example. A big crowd of onlookers can make for an interesting new perspective.

Wedding portraits creative rut 11

But the biggest resource you have at your disposal during your wedding sessions is the couple! No doubt they have a lot of ideas and suggestions for their photos – after all, they’re the ones paying the bills. Don’t be the snobbish professional who knows best. Listen to your customers and you may just find they can teach you something. At the very least, it may bring some fresh new ideas to the table.

#5 – Leave Your Ego at the Door

This final tip is really the point you need to focus on here; your job is to make the subjects of your photos happy. You might be tired of taking the same old shots over and over again but if that’s what the couple wants, then it doesn’t really matter.

Wedding portraits creative rut 05

It’s an easy mistake to think that you need to be more creative and dramatic with your photography, while forgetting that the customer actually just wants a nice picture that will look good on their bedside table.

Your creativity here should serve a purpose, and that purpose is to make your customers happy. Forget about showing off what an original and inventive photographer you are – at least for the portraits. If you want to be creative, then you can always get in a few artsy shots of the bride’s shoes and the wedding rings. Letting go, and giving the client what they want should always come first.

Wedding portraits creative rut 02

Wedding portraits creative rut 07

Closing Comments

So there you have it – five tips that can help you rediscover the fun and creativity for your wedding portraits; look for inspiration, get a second shooter, get back to basics, use what you have, and focus on the customer. Let us know in the comments below what you do when you find your creative juices are running dry.

The post Wedding Portraits – 5 Tips for Getting Out of a Creative Rut by Michael David Reichmann appeared first on Digital Photography School.


Digital Photography School

 
Comments Off on Wedding Portraits – 5 Tips for Getting Out of a Creative Rut

Posted in Photography


How to Create Good Black and White Portraits

24 Feb

The most difficult question I often ask myself is, “Do I convert this image to black and white or leave it in color?” This question is particularly difficult with people, because black and white portraits look really good.

googletag.cmd.push(function() {
mobile_slots.push( googletag.defineSlot( “/1005424/_dPSv5topic-rhs(300×250)”, [300, 250], “pb-ad-124309” ).addService( googletag.pubads() ) ); } );

My go to rule is that if the colors in the image do not match, are not complementary, or simply do not look good, then I convert my image to black and white.

Tips to Making Black and White Portraits

A lot of people prefer black and white images and because of that I always send to my models/clients one black and white image and one edited image in color. I basically force myself to convert all my images to black and white, and in some cases, I get surprised because the result looks really good.

Black and white is less forgiving

Flaws in monochrome images will automatically stand out than in color ones. This is because sometimes color distracts the viewer and it can give the impression that the image is perfect even if the composition, facial expression of the model, or lighting are not the best.

With black and white portraits, you will need to pay more attention to light, composition, contrast, and the whole scene in general.

Tips to Making Black and White Portraits

Lighting for black and white

Contrasty lighting is what makes a black and white image pop. If you look at the work of famous photographers like Ansel Adams, his images stand out because of the light contrast. Fine art photographer, Joel Tjintjelaar, explains very well separation and the grey scale, tonal contrast, separation and presence and depth. Black and white is all about presence and depth. Most of the time this can be created and enhanced using the dodge and burn tools in Photoshop.

It is important to study the work of others. For example, Peter Coulson is a photographer who takes stunning black and white portraits.

When taking portraits in natural light, always use a shallow depth of field to centre the attention on the eyes and avoid slow shutter speed as the image needs to be completely sharp.

Tips to Making Black and White Portraits

Taking images during the magic hour will give a very flattering result as the light will be very soft. In studio sessions, a large softbox or window light will give you very soft light. For more contrasty results, the best solution outdoors is to photograph during the middle of the day and in studio is to use a beauty dish.

The difference will mainly play in the shadows and it will depend on how dark do you want your shadows to be.

Tips to Making Black and White Portraits

Plan for black and white

Most of the time, the best solution is to have black and white in mind for the final image because you will automatically pay more attention to light and shapes around your model. You also need to tell your model that this is your intention because the pose and facial expression will be more important and emphasized.

Black and white portraits are all about facial expression and transmitting emotions. The eyes of the model should always be the centre of attention and facing the light source to create a little sparkle of light (called catch lights), this makes the difference. You can also create a second sparkle if you use a light reflector. You don’t necessarily need an assistant to hold the reflector, you can ask the model to hold it or you can hold it yourself with one hand.

Tips to Making Black and White Portraits

Studio portraits in black and white can be much more creative because you fully control the amount of light in the room. You can control the direction and intensity of that light towards your model. Try to get creative by only lighting one part of the face, by using objects or using a black background to isolate your subject.

Post-processing

Black and white work is not only desaturating an image, it is much more complex. The work flow I usually use is I start by editing my image in color and playing around with the contrast of colors. I adjust my exposure, the sharpness, do skin work and then I do my first dodge and burn. Afterward, I convert my image to black and white using the channel mixer and it is quite simple because the different filters will give you different results.

https://digital-photography-school.com/tips-making-natural-light-portraits/

The most important part of post-processing is using dodge and burn to give life to your image. Brighting and darkening up key areas of the image is the most important step, take your time to do it well. The result will depend on you, so don’t hesitate to do it several times before you are completely satisfied. I recommend using a Wacom Tablet for full control. Finish your post-processing by creating a vignette to add another feel of dimension.

Conclusion

Black and white portraits look amazing when they are done properly. The result will depend on how good you can control and define the light around your subject. In other words, how defined is your contrast between the different tones.

Always think about black and white when the colors in the RAW image do not look good, when when your model has a very strong facial expression, and when you have good looking light whether it’s outdoors or indoors.

Please share your comments and black and white portraits in the section below.

Tips to Making Black and White Portraits

googletag.cmd.push(function() {
tablet_slots.push( googletag.defineSlot( “/1005424/_dPSv4_tab-all-article-bottom_(300×250)”, [300, 250], “pb-ad-78623” ).addService( googletag.pubads() ) ); } );

googletag.cmd.push(function() {
mobile_slots.push( googletag.defineSlot( “/1005424/_dPSv4_mob-all-article-bottom_(300×250)”, [300, 250], “pb-ad-78158” ).addService( googletag.pubads() ) ); } );

The post How to Create Good Black and White Portraits by Yacine Bessekhouad appeared first on Digital Photography School.


Digital Photography School

 
Comments Off on How to Create Good Black and White Portraits

Posted in Photography


4 Beginner Tips for Creating Dramatic Portraits with One Flash

02 Feb

In this article, I will explain how you can use a transmitter/receiver, or transceiver system to achieve simple dramatic portraits using only one flash. Below is a step-by-step guide on how to get you started.

Background

I used to fear using anything other than natural light. One of the reasons was that I had a notion that using artificial lights such as off-camera flash and strobes is too difficult and requires deep technical knowledge. Well, yes and no. To master it, you have to understand lighting ratios and learn to make mental calculations of light from various sources and suchlike. But to start using it, not really.

My first experience of off-camera flash was using the Creative Lighting System (Nikon) capability between my speedlight and my camera. Most of my early attempts were unsuccessful especially with the limitations of the line of sight infrared system. It was unreliable too, especially when shooting under pressure or caught on the hoof. I also used overexposed my light with my very untrained and inexperienced eye when I was just starting out.

4 Beginner Tips for Creating Dramatic Portraits with One Flash

Wireless triggers

Enter wireless radio transmitters and receivers (or transceivers) such as the Pocket Wizard, CyberSyncs, brand’s own (Nikon and Canon) and the super affordable Yongnous. A transmitter which is connected to your camera sends the message to the receiver which is attached to the flash unit. Transceiver units, on the other hand, can act as both receiver and transmitter so that you can use them on either the camera or the speedlight but you would still need one unit to attach to each piece of equipment.

These wireless transceivers are a game changer without a doubt. They are simple to use and are reliable most of the time as well. I use Cybersyncs for my studio strobes and Yongnous for my speedlights and find the Yongnous are incredibly reliable and user-friendly with hardly any misses. However, the Yongnous cannot be used for strobes.

#1 Choose the look and mood for your portrait

Do you want super dramatic low key portraits or the other end of the spectrum – high key, bright and airy? The mood of your picture will dictate your background and of course the camera and flash settings. I have chosen a black background for these portraits to achieve a high contrast between the brightest parts of the image and the shadows. This will keep the overall mood dramatic and the lighting low key with plenty of black areas.

#2 Set up your equipment

If you have transmitter and receiver units, attach the transmitter to the hotshoe of your camera while the receiver needs to be attached to the flash (speedlight or strobe). If you have a transceiver, this can go on either camera or flash but you still need two units, one on each piece of equipment.

It’s also a good idea to put your flash unit on a light stand. I used a studio strobe mounted on a light stand but attached it to a boom arm for more flexibility in angling the light. Note: A boom arm is not necessary at all for a simple beginner setup. Without a light stand, you can always mount your flash on a cabinet or steady surface, making sure it doesn’t topple over. Most speedlights come with little plastic feet that are handy for this purpose.

4 Beginner Tips for Creating Dramatic Portraits with One Flash

#3 Modify your light

One of my rules is to always modify the light. The only time I shoot with a bare flash is when I use it as a kicker light at wedding receptions or to light a backdrop. At all other times, I will always modify it somehow or bounce it to maximize the softness of the light or to minimize the harshness depending on the situation.

For this look, I wanted the flash to point directly at the subject, in a narrow beam and not have any spill onto the background. A gridded snoot would do the job controlling the light direction, but I didn’t have one. Plus I probably would have found that the light was still a bit harsh without further modification. I ended up McGyvering my own modified snoot using a black card and the diffuser panel of a 5-in-1 reflector. I twisted the reflector (like you would when putting it away) so that it was only a fraction of its size and I then had a 3-layer diffusion panel. This was taped to the strobe and with black card wrapped around it to direct the light onto my subject like a beam.

There are two factors that are crucial for getting soft light; the distance between your subject and the light and the size of the light. The closer the light is to the subject, the softer it is. The larger your light source is, the softer it will be. My light source was not very big at all, so to leverage maximum softness I decreased the distance to the subject. The light was positioned about an arm’s length away from the subject, quite high up at a 45-degree angle. This was to mimic natural light coming from a high window.

#4 Try various settings

I wanted to shoot at f/8 so I metered the flash. You don’t require a handheld light meter to do this, by the way, you can just start with a few trial and error test shots to find the correct setting. I started off with the lowest power on my strobe but ended up cranking it up as the 3-layer diffusion cut out quite a lot of the light. My settings for these were: f/8, 1/60th,  ISO 400 and my strobe power high at 7. The strobe settings will vary depending on the brand you are using.

4 Beginner Tips for Creating Dramatic Portraits with One Flash

This is just one of the many ways you can create portraits with one flash. Try it and experiment with other angles, moods, and light settings and you may be amazed at what one light can do!

Share your portraits here too in the comments below.

googletag.cmd.push(function() {
tablet_slots.push( googletag.defineSlot( “/1005424/_dPSv4_tab-all-article-bottom_(300×250)”, [300, 250], “pb-ad-78623” ).addService( googletag.pubads() ) ); } );

googletag.cmd.push(function() {
mobile_slots.push( googletag.defineSlot( “/1005424/_dPSv4_mob-all-article-bottom_(300×250)”, [300, 250], “pb-ad-78158” ).addService( googletag.pubads() ) ); } );

The post 4 Beginner Tips for Creating Dramatic Portraits with One Flash by Lily Sawyer appeared first on Digital Photography School.


Digital Photography School

 
Comments Off on 4 Beginner Tips for Creating Dramatic Portraits with One Flash

Posted in Photography


8 Tips for Getting Great Expressions in Family Portraits

26 Jan

8 Tips for Getting Great Expressions in Family Portraits

Sometimes as a photographer, you are lucky enough to get a family session full of models with perfect natural smiles in every photo. It doesn’t take much to get a photo that is ready to hang on the wall. However, most of the time with family portraits it isn’t that easy.

Maybe you’ve got somebody who doesn’t want to be there or little kids that have no idea what you’re trying to get them to do. And maybe, just maybe, you’d like to have some photos that show some extra personality. Everyone looking at the camera and smiling is nice, but I always love the ones that show a little more of who the family really is. I’ve got a few tricks up my sleeve to help you through the more difficult sessions, and to help you get some fun full-of-personality shots and great expressions with any family.

1. You’re in charge of the kids

8 Tips for Getting Great Expressions in Family Portraits kids

Many times during a family session, you’ll have parents that are really concerned about whether or not their kids are looking and smiling at the camera. They don’t realize that the moment their little one looks and smiles, their faces aren’t photo-ready because they’re spending all their time wondering what their kid is doing.

Remind the parents to keep their faces ready for photos at all times, and you, as the photographer, will take care of getting their kids to look and smile. If they are talking to their child, it will be hard for their child to look at you, because he’ll think he needs to be looking at mom or dad. Whether you want the parents looking at the camera or not for a particular photo, remind them to do their part for the photo and leave the rest to you.

2. Let the parents help sometimes

parents - 8 Tips for Getting Great Expressions in Family Portraits

This might seem to contradict point #1 above, but there are times when getting those genuine smiles from the kiddos requires a little bit of help from the parents. If you have a reluctant smiler and you want to get a good individual photo of the child smiling, ask the parent to make a funny face, or do something silly off-camera. If you want the subject looking at the camera, ask the parent to get right behind you. Parents often know one silly word that will get their child giggling, or the child might just need the comfort of seeing a parent smiling at them to know that it’s all okay.

You can also have photos with the parents interacting with their children in the frame. These often end up being some of my favorites. I love capturing the genuine interactions, and those expressions that the parent sees every day. Put the parent and child together, and simply ask them to smile at each other. Often this initially awkward directive gets them really giggling together, and you’ve got the perfect expressions.

3. Laugh at the silly one

laugh silly - 8 Tips for Getting Great Expressions in Family Portraits

One of my most effective prompts for natural looking family interaction and genuine expressions is to ask them to laugh at the silly one. Sometimes they all look to the same person right away, and everyone will start truly laughing. Sometimes they all look at someone different, and after a second of bewilderment, they all start laughing.

This one can backfire, though, and needs to be used with caution. Some kids automatically think that laughing means to be over the top silly, and they over-exaggerate a huge laugh that doesn’t look natural at all. Some kids think that laughing also must be accompanied by pointing, and that never looks great in a photo either. In these cases, I tell them to giggle quietly and to keep their hands down. Usually, that solves the problem. If it doesn’t, I just move on to something else and let the moment go.

4. Simply hug

hug - 8 Tips for Getting Great Expressions in Family Portraits

Oftentimes in sessions, I position everyone into a nice arrangement, take a photo of them all smiling and looking, and then I just say, “Now, everyone hug each other.” or “Put your arm around the person next to you.” When I look at the photos side by side later, I’m always amazed at how much more natural the smiles are in the hugging photos.

I think that when photos feel really formal, it’s hard to relax, and people end up with stiff smiles. When they feel comfortable, the true smiles come out. There’s just something about being surrounded and hugged by those you love that makes you feel safe. Sometimes you need to prompt them to hug each other but make sure they’re still looking at you. Occasionally you get the real huggers that will turn right around and give their mom a bear hug. Although that looks cute in real life, it doesn’t work as well for a photo.

5. Let the personalities shine

personality - 8 Tips for Getting Great Expressions in Family Portraits

Sometimes you might have a perfect photo in mind, but you just have some little guys that have big personalities. You could spend the whole session trying to get them to be somebody they’re not, or you can just go with it and laugh about it.

Let’s be honest, sometimes those expressions that just scream personality make the best photos. Families will treasure those photos and laugh about them throughout their whole lives. You can try to get that perfect family photo for mom, but don’t make everyone miserable by insisting on squelching unique poses and expressions every time they pop up. That said, I don’t encourage them in their silliness because sometimes that can make them go a bit out of control. Just simply take the photo, and don’t make a big deal out of it.

6. Big groups are fun too

big groups - 8 Tips for Getting Great Expressions in Family Portraits

Giant group photos can look very dull at times. When you have tons of people in one photo, it can be a task just to get them all arranged, and then after all that work the photo just looks like a bunch of little boring faces.

Try getting a few photos that are just for fun. Ask the entire group to hug or kiss their neighbor. (Give them the option. Nobody likes to be told they must kiss the person next to them.) If you have a bride and groom, you can have the bride and groom kiss, and ask everyone else to cheer or to react however they’d like.

When you have a big group of people with funny happy faces, it makes a photo that you want to look at for awhile, and you can’t help but smile. These photos are never perfect, but they’re fun, and end up being the photos the families really love.

7. Capture life

life - 8 Tips for Getting Great Expressions in Family Portraits

You don’t always need smiles, nor do you need all the eyes showing. Capture the family participating in an activity together, and just let their expressions happen naturally. These lifestyle photos will capture the family as they are, right now. They will be the photos that really bring back memories for your families when they come across them later. You don’t have to set up anything elaborate. It can be as involved as a picnic together with the blanket and basket and everything, or as simple as holding hands and walking together. If you do have them walking away from you, ask the family to look at each other as they walk, so you get some profile expressions, and interaction with each other.

You don’t have to set up anything elaborate. It can be as involved as a picnic together with the blanket and basket and everything, or as simple as holding hands and walking together. If you do have them walking away from you, ask the family to look at each other as they walk, so you get some profile expressions, and interaction with each other.

8. Take a lot of photos in a row

8 Tips for Getting Great Expressions in Family Portraits

When you’ve got a lot of people to capture at once, the chances of getting all of them with a great expression at the same time is slim to none. I snap a lot of photos in a row of one pose because the chances of catching smiles and open eyes for each person go up greatly when you have a lot to choose from. If all else fails, you have a lot in nearly the same position, so you can swap eyes, faces, or heads if needed.

It can be so frustrating when you have a family photo that is nearly perfect, but one family member is blinking. Trust me, even three in a row may sometimes not be enough to get every expression that you need. I don’t head swap often because I usually have one in the series that captures everything as I want, but it’s nice to have the option of swapping something if needed.

I’d love to see your family portraits in the comments! What tricks have you found to capture great expressions in your family sessions?

googletag.cmd.push(function() {
tablet_slots.push( googletag.defineSlot( “/1005424/_dPSv4_tab-all-article-bottom_(300×250)”, [300, 250], “pb-ad-78623” ).addService( googletag.pubads() ) ); } );

googletag.cmd.push(function() {
mobile_slots.push( googletag.defineSlot( “/1005424/_dPSv4_mob-all-article-bottom_(300×250)”, [300, 250], “pb-ad-78158” ).addService( googletag.pubads() ) ); } );

The post 8 Tips for Getting Great Expressions in Family Portraits by Melinda Smith appeared first on Digital Photography School.


Digital Photography School

 
Comments Off on 8 Tips for Getting Great Expressions in Family Portraits

Posted in Photography


3 Ways to Make Selective Color Portraits Using Lightroom and Silver Efex Pro 2

26 Jan

3 Ways Make Selective Color Portraits Using Lightroom and Silver Efex Pro 2
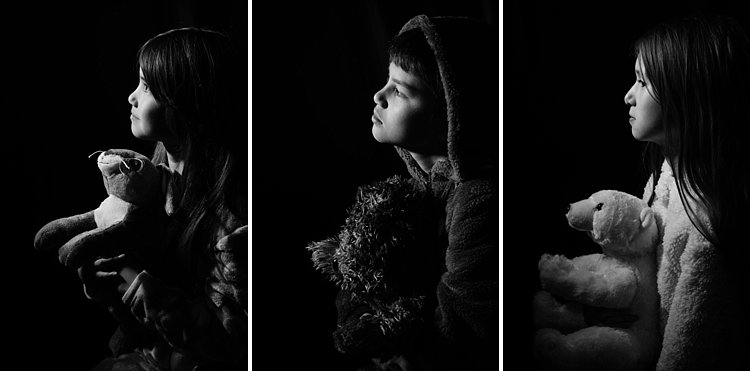
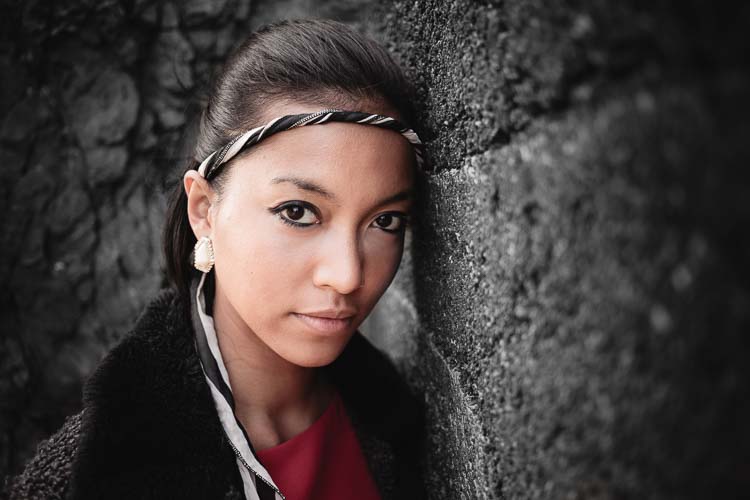
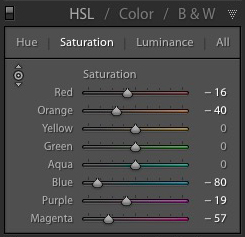
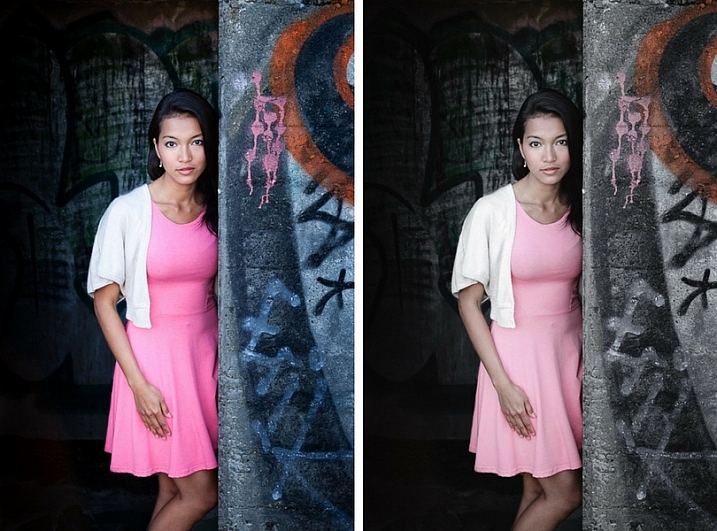
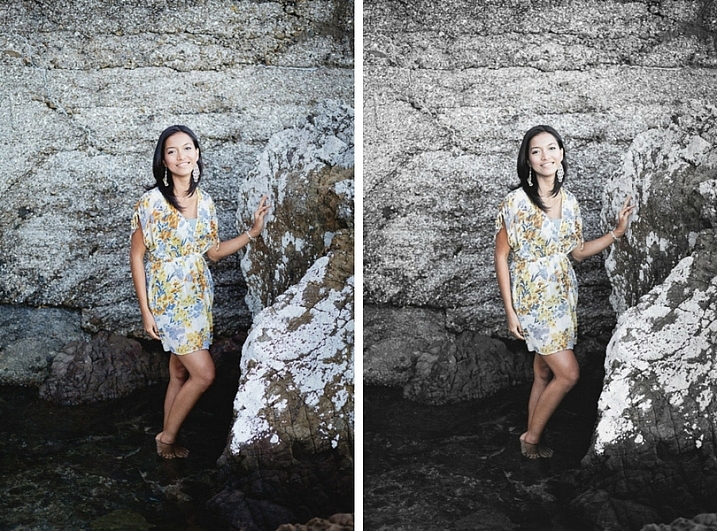
Selective coloring is a post-processing technique where you convert an image to black and white, but leave part of it in color. It has a bad reputation because it can be used to create some truly horrendous images where the only thing on display is the photographer’s lack of ability.
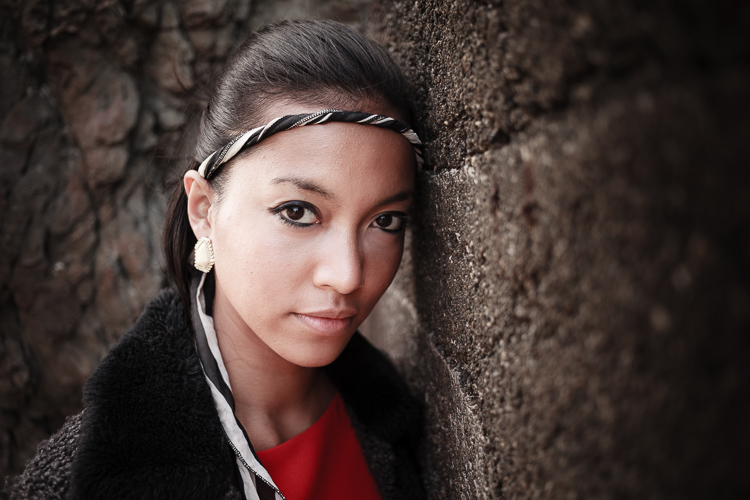
But the good news is that you can use selective coloring in a far more sophisticated way to create some interesting images. The key is to keep it subtle and to use it only on suitable photos. I like to make selective color portraits, but of course you are free to experiment with other subjects as well (but please, no flowers).

I prefer to keep my workflow within Lightroom whenever possible as it saves hard drive space and makes the entire photography workflow much simpler. The first two techniques below are for Lightroom, the third uses Silver Efex Pro 2, a free plug-in you can download from Google.

1. Selective color in Lightroom using the Adjustment Brush

The first example, below, shows what you can do in Lightroom. This is the portrait that I am going to work with for this technique.

3 Ways Make Selective Color Portraits Using Lightroom and Silver Efex Pro 2

The simple background means it’s ideal to use for a selective color portrait.

Start by going to the Develop module and activating the Adjustment Brush tool. Paint in the background to create a mask (as shown below).

3 Ways Make Selective Color Portraits Using Lightroom and Silver Efex Pro 2

The mask is shown here in red.

It may help to zoom in and use a smaller brush around the model for a more accurate mask.

3 Ways Make Selective Color Portraits Using Lightroom and Silver Efex Pro 2

View zoomed in so you can mask more accurately around the model.

Go to the Adjustment Brush sliders and set the saturation to zero.

3 Ways Make Selective Color Portraits Using Lightroom and Silver Efex Pro 2 - set saturation to zero

That removes all color from the background, giving this effect. Don’t forget you don’t have to move Saturation all the way to zero – you can simply lower it to reduce the color intensity of the background. Play around and see what works best for your image.

Selective coloring in Lightroom

It’s important that you chose the correct image for this technique to get the best effect. There are several reasons it works well with this portrait.

  • The background is monochromatic. It wouldn’t work as well with a colorful background.
  • The rocks in the background have plenty of texture, which looks good in black and white.
  • Some of the model’s clothes are black or charcoal gray, so introducing this color into the background fits with the overall aesthetic of the image.

2. Selective coloring in Lightroom using the HSL

The next portrait (below) has a more colorful foreground. I’m not going to remove the color completely, but I would like to make it more monochromatic. That will help the subtle colors in the model’s dress and skin to stand out.

3 Ways Make Selective Color Portraits Using Lightroom and Silver Efex Pro 2

Go to the HSL / Color / B&W panel in the Develop module. Click the Saturation tab, then the Targeted Adjustment tool (marked below) to activate it.

Selective coloring in Lightroom

Move the cursor over part of the image that you want to desaturate. In this case, the foreground has a blue cast that I want to remove, so I chose this spot (marked by the small cross circled in red below).

Selective coloring in Lightroom

Click and hold the button as you move the mouse downward. Lightroom reads the pixels under the cross representing the Targeted Adjustment tool and reduces the saturation of those colors across the entire image. The matching color sliders in the HSL panel move to the left. When I did this, Lightroom set Blue to -80 and Purple to -10.

Selective coloring in Lightroom

This is the result.

3 Ways Make Selective Color Portraits Using Lightroom and Silver Efex Pro 2

I took it further by repeating the technique. This time using the Targeted Adjustment tool on the pink and orange paintwork on the wall, resulted in the following saturation settings.

Selective coloring in Lightroom

This is a before and after of the final portrait showing these extra adjustments.

selective-colored-portrait-01

Notes:

One key thing to be aware of is how the colors in your photo are related. In the photo above reducing the saturation of the pink paint affected the model’s dress, which is also pink.

Reducing the saturation of the orange paint also affected the model’s skin. In this case, it worked out okay, but you should always zoom in and double check, especially when changing the color settings of Red, Orange or Yellow hues, as this can have some strange effects on skin tones.

3. Selective coloring using Silver Efex Pro 2

Silver Efex Pro 2 is one of my favorite black and white plug-ins. I’d like to show you how to use it for making a selective color portrait with a subtle effect that almost looks like an old style hand-tinted black and white print.

This is the portrait I’m going to use. It’s a good photo to use as the colors are subtle.

3 Ways Make Selective Color Portraits Using Lightroom and Silver Efex Pro 2

If you don’t have Silver Efex Pro 2 already, you can download it for free from the official Nik Collection website.

Once it’s installed go to Lightroom’s Library module and select the photo you want to edit. Go to File > Edit In > Silver Efex Pro 2 (you can also find this option by right-clicking the photo).

Select the option that says “Edit a Copy with Lightroom Adjustments” in the next window (it will probably be the only one you can select) and click Edit. Lightroom converts the Raw file to a TIFF file and opens it in Silver Efex Pro 2.

Selective coloring in Silver Efex Pro 2

Your first task in Silver Efex Pro 2 is to decide whether you want to stay with the default neutral black and white conversion or use one of the built-in presets. I selected the Soft Sepia preset (below), then made some adjustments to the tonal values until I was ready to apply selective coloring.

3 Ways Make Selective Color Portraits Using Lightroom and Silver Efex Pro 2

In Silver Efex Pro 2 you make local adjustments by going to the Selective Adjustments panel and adding Control Points. This screenshot shows seven of the Control Points that I added to this photo. Each one is depicted by a yellow dot.

Selective coloring in Silver Efex Pro 2

Using Control Points

Control Points work by analyzing the color and brightness of the pixels underneath them, then applying the selected effect to the pixels within the circle. In this photo, I moved the Selective Coloring slider (SC) to the right to bring the colors back to the model, but not the background.

You control the size of the circle by moving the top slider. Silver Efex Pro 2 displays a circle to show you the area affected by the Control Point.

3 Ways Make Selective Color Portraits Using Lightroom and Silver Efex Pro 2

Add multiple Control Points with circles that cover the model but as little of the background as possible. When you are finished, click the Save button. Silver Efex Pro 2 closes, saving the new TIFF file in the same folder as the original file and adding it to the same Collection in Lightroom.

Here’s the before and after with portrait after selective coloring in Silver Efex Pro 2. Notice it’s very subtle.

selective-colored-portrait-02

Conclusion

Hopefully, this article has shown you how to use selective color in a subtle and sophisticated way that moves on from the garish examples you have probably seen online. Do you have any questions about these techniques? Let me know in the comments below.


If you’d like to learn more about Lightroom, then please check out my popular Mastering Lightroom ebooks.

googletag.cmd.push(function() {
tablet_slots.push( googletag.defineSlot( “/1005424/_dPSv4_tab-all-article-bottom_(300×250)”, [300, 250], “pb-ad-78623” ).addService( googletag.pubads() ) ); } );

googletag.cmd.push(function() {
mobile_slots.push( googletag.defineSlot( “/1005424/_dPSv4_mob-all-article-bottom_(300×250)”, [300, 250], “pb-ad-78158” ).addService( googletag.pubads() ) ); } );

The post 3 Ways to Make Selective Color Portraits Using Lightroom and Silver Efex Pro 2 by Andrew S. Gibson appeared first on Digital Photography School.


Digital Photography School

 
Comments Off on 3 Ways to Make Selective Color Portraits Using Lightroom and Silver Efex Pro 2

Posted in Photography


Tips for Making Natural Light Portraits

26 Jan

Natural light portraits are honestly one of my favourites, they have this extra feel that studio portraits don’t. Compared to studio portraits, they are much easier – you don’t need to learn all the lighting techniques. They are also much cheaper, you don’t need to buy any strobes, flashes, or light modifiers such as soft boxes beauty dishes. Studio portraits are really fun but they are much more difficult than doing natural light portraits.

Starting off, making portraits with natural light is a first great step. It will enable you to work on your composition, your communication with your model, and help you build your confidence. Then you can decide whether or not you want to invest in studio equipment.

Article natural light image1

Camera gear and settings

There are some simple tips and tricks to get the most out of your portraits with natural light. But let’s start with camera settings and camera gear first.

Shoot in manual mode

The ideal situation is to have total control over your settings, so I would highly recommend using manual mode. I recently wrote an article about using manual mode, so you can go check it out here; How to Use Manual Mode to Make Artistic Choices for Your Photography.

Shutter speed

You need a minimum shutter speed of around 1/100th of a second (or faster). This is very important as it helps you avoid blurry images as your model will be in constant movement most of the time.

Aperture and blurring the background

To get a soft background blur, you want to use the largest aperture possible – around f/4 works but the ideal would be f/1.8. If you want a larger aperture than f/1.8 the lenses can become quite pricey.

If you don’t have that kind of lens, you can still get nice results but separation (space) between the model and the background is needed. This really helps to drag the viewer’s attention to the model and avoid any unnecessary distractions. If you want to show the background behind your model then use a smaller aperture. I have an article on how to achieve background blur, I speak about bokeh in more detail there.

Article natural light bokeh

What lens to use?

If you are using a long (telephoto) lens then a large aperture isn’t as critical because you will automatically have some background blur separation. Long lenses are the best for portraits because they compress the subject to background very nicely. Avoid wide angles lenses because they distort the subject’s face and amplify features like the nose or the forehead. Try to use lenses with a minimum focal length of 50mm with a full frame sensor and 35 mm with an APS cropped sensor.

Article natural light long telephoto lens

ISO

For the ISO, choose the lowest possible option taking in consideration that your shutter speed must be 1/100th of a second or higher. Using the light meter in your camera, you can get a fast shutter speed by adjusting your ISO if the lighting conditions are low. But, knowing that you will be using a larger aperture as well, that shouldn’t be a big problem.

Shortcut – Aperture Priority Mode

One tip I can give is to use Aperture Priority mode if you are a lazy photographer (or smart?) like me. During an outdoor shoot, the light will change frequently and you will need to adjust your settings whether it’s the shutter speed or the ISO (I usually never adjust my aperture).

When you are making portraits, you will get into the shoot very quickly and with manual mode you need to constantly change your settings. The probability of missing a lot of good photos because you forgot to adjust your settings is very high. It’s very frustrating when you get the perfect pose only to realize the image is way too dark or way too bright because your settings were wrong.

I gave up on manual mode because I always forgot, so I now only use Aperture Priority and raise my ISO to 400 to force my camera to use a fast shutter speed. Don’t make the mistake of using ISO 100 in Aperture Priority with low light and ending up getting blurry images.

Article natural light aperture priority

Use RAW files and underexpose

I recommend shooting RAW and underexpose your images slighting using exposure compensation.

This is very important because sometimes you will accidentally expose for the shadows and that will automatically overexpose your images. The problem with that is that you will lose all the information in the model’s skin tone and if those areas area burned you may not be able to recover detail there.

A RAW file also lowers the probability of losing any information in your image because you have a bigger margin of recovery. Since you are underexposing your images slightly, you will be able to correct the exposure later in post-production. It’s a bit technical but this is the best way to have all the necessary information in your image, burned-out pixels are the worst enemy a portrait portrait photographer can have.

Another solution is to turn on the highlight alert for your camera (most entry level cameras have this setting) and every time you take an image, the burned-out pixels (clipped highlight areas) will show up in red (or blink). This is very useful because every time you see this it means that there is no information in that area, it’s just a pure white point which is not recoverable.

Article natural light shoot raw underexposue

I underexposed this image to have all the detail in the skin.

Location and lighting conditions

One thing you must avoid is taking portraits with harsh light (during the day and facing the sun). This increases the features of the face (emphasizing any blemishes and flaws) with harsh shadows and the result is not flattering. One tip I can give you to help you determine if you will have good light for a portrait is to look at the shadows (on the ground) of people passing by in the streets. If the shadow is very harsh (strong outline), you will probably not get good light but if the shadow is very soft (fuzzy or undefined) then the light is perfect for making portraits.

One main aspect of natural light portraits is soft light. There are five different possibilities to get beautiful soft light on your model’s face.

Five lighting options

#1 – Use window light, it will give you a very nice soft light on your model’s face.

Article natural light window light

Portrait taking using natural window light.

#2 – Take portraits during sunset, you will have the softest light possible.

Article natural light image7

Portrait taken at sunset.

#3 – Take portraits on an overcast day, the sky will become a huge softbox with very soft light.

Article natural light overcast

Portrait taken during an overcast day.

#4 – Take portraits on a street where buildings or apartments are blocking the sun (like an alleyway).

Article natural light image9

When it’s bright outside, try to look for buildings that block direct sunlight.

#5 – Use a light diffuser in the middle of the day, this will turn harsh light into soft light.

Article natural light image10

The location doesn’t really matter because most of the time the background will be blurred, but the light is crucial so overtime you want to take a portrait make sure to have one of these different possibilities.

Conclusion

I hope that gives you some tips for making natural light portraits. Find a friend to pose for you and try it out. Please share your photos and questions in the comments section below.

googletag.cmd.push(function() {
tablet_slots.push( googletag.defineSlot( “/1005424/_dPSv4_tab-all-article-bottom_(300×250)”, [300, 250], “pb-ad-78623” ).addService( googletag.pubads() ) ); } );

googletag.cmd.push(function() {
mobile_slots.push( googletag.defineSlot( “/1005424/_dPSv4_mob-all-article-bottom_(300×250)”, [300, 250], “pb-ad-78158” ).addService( googletag.pubads() ) ); } );

The post Tips for Making Natural Light Portraits by Yacine Bessekhouad appeared first on Digital Photography School.


Digital Photography School

 
Comments Off on Tips for Making Natural Light Portraits

Posted in Photography


5 Tips for Creating Romantic Portraits of Couples

11 Jan

When I hear the word romantic, what comes to mind is a dreamy, poetic, passionate image, full of unspoken affection and sometimes, a touch of mystery. However, when it comes to romantic portraits of couples, I don’t want romantic to translate as cheesy or cliche. I think I would want something a little bit more artistic but definitely leaning more on the natural side.

romantic photography of couples

I photograph weddings and often do an engagement shoot with the couple beforehand. For many of my couples, it’s their first time being photographed together in an intimate way where they are expected to be super affectionate and loving towards each other in public. I would feel very awkward if I were in their places. As part of my job, I aim to make the whole experience pain-free for them, hopefully, fun too, and still end up with some super romantic shots without being too corny, cliche or cheesy.

The warm-up

The first 15-20 minutes of the shoot is always a warm-up. I do give them some suggestions which you can find here; Tips for Taking More Natural Engagement Portraits. I then tell the couple I’m just going to start taking photos and that there is no pressure for anything to be perfect. Instead, we will have a warm-up to get used to the camera, to feeling really silly about it all and that they can laugh as much as they like at themselves and how silly they may feel.

They are given permission to feel awkward and laugh at themselves. I encourage them to be themselves and help them throw off any self-conscious feelings. I tell them to just laugh it all off, not to mind passers-by, and to ignore any stares. After all, they will never see those people again.

romantic portraits of couples

I take plenty of shots during the warm-up for them to get used to me but I’m always intentional in what I’m looking for – that fleeting glance at each other, the split-second expression, a warm squeeze and cuddle they allow themselves to have. It’s the in-between moments that are crucial to capture. It’s that moment when they start to relax into each other’s arms after the first few seconds of feeling rather tense or self-conscious.

I also talk to them a lot and give them directions as clearly as I possibly can. Reminding them that on the wedding day they will hardly see me at all so for the engagement shoot I ask them to indulge the camera. I thank them for being very amenable having me pretty much in their face during the entire photo session.

Here are my five tips for creating romantic portraits of couples.

#1 – Find or make the perfect light

romantic portraits of couples

romantic portraits of couples

Romantic light is a poetic light that evokes that cocooning feeling. Early morning and late afternoon light is soft and dream,y so if possible schedule your shoot during those windows. I try and avoid flat light or harsh overhead light which tends to kill any romantic ambience.

By flat light, I mean a light source which is directly in front of them so that it eliminates gradations of shadows and tones of light fall-off on the sides of their faces. Look for directional light, usually coming from the side or at an angle. To achieve this, position your couple in relation to the light, or move around yourself so that you are in the best place to capture the directional light.

romantic portraits of couples

If there is no such light, especially if the location is quite dark or the lights are all overhead, I tend to use my flash. Remember to bounce it so that there is directional light coming from the flash.  The important thing is to avoid flatness and create an atmosphere of light and shadow.

Window light is one of the best natural directional light sources available. However, don’t make your couple face the window as that becomes flat light on their faces. Instead, position them at an angle or sideways where there is some light on one side of their face and the other side has shadows.

#2 – Consider the location, background, or scenery

romantic portraits of couples

The location or setting has a lot to do with how romantic a picture turns out. Sunsets, although in danger of being cliche, especially sunset silhouettes, produce strong and striking images.

Don’t forget that you can leverage location and all the elements within the setting and not completely rely on light alone. For example, what season of the year is it? If it’s autumn, take advantage of the changing colors of the leaves, use the outfits of the season that make your couple feel warm and cozy – long boots, scarfs, hats.

If it’s winter use the whiteness of the snow or the bleak bare branches of the trees to create a romantic story for your couple. Go to a cafe and take pictures of your couple having a nice hot chocolate with marshmallows by the crackling fire to keep warm. If it’s summer, find the early and late light to avoid the harshness of the midday sun or use props such as parasols, flowers, balloons, kites to celebrate the warmth of the sunshine.

romantic portraits of couples

When you are shooting in the city, wait until that light hits the buildings or some iconic landmarks, or in the country, feature the soft rolling hills or vastness of the landscape. If you are shooting in the spring, look for cherry blossoms, maybe the first bud of the season, the first crack of ice or the last of the frost. The goal is to put your couples in context and leverage that to create their romantic story.

romantic portraits of couples

#3 – Hide and use layering in your shots

romantic portraits of couples

In this article on creative ways to improve your photography, I have written about layering. Layering is a great tool for romantic images. It lets you hide behind something and makes you invisible. The great thing about it is that it puts the viewer of the photo in your place as if they are just passing by and happen to catch a glimpse of the couple.

Layering is one of my favorite tricks and can even be done without you hiding from the couple. You can shoot in a completely open space and still utilize layering. Just grab something, put it in front of your lens and pretend that the camera is peeking through a gap. Layering can be as simple as that. I often pick up a leaf and use it as a layer between the camera and the couple. A bit of fabric, cellophane wrapped around the lens, a prism dangled in front of the lens to create a sun flare all add layers…the possibilities are endless.

romantic portraits of couples

#4 – Encourage contact between the couple

romantic portraits of couples

romantic portraits of couples

To me, the epitome of romantic photographs is when it evokes total privacy – there is no one there other than the couple. In normal portrait situations, I would want a connection between the viewer and the subject. Eye contact with the camera is great for that. It draws the viewer in and invites them to have a conversation with the image. However, for romantic portraits, I prefer no eye contact, except between the couple alone.

There is no one there sharing the moment with them; it is their very own special private time. The goal is to capture the scene as if it were true and real. There must be a strong connection between the couple, whether that be looking directly into each other’s eyes, hands touching, or whispering in each other’s ears, but absolutely no contact with anyone else. This is my personal opinion of course and I’m sure it’s different for other photographers.

romantic portraits of couples

#5 – Write a story in pictures

A picture that tells no story has no soul. With practically a limitless number of photos you can take with a digital camera, you can write a novel. Go to a session with a story in mind – a beginning, a middle, and an end. That is the way I approach every engagement shoot and wedding that I photograph.

These don’t have to be very specific pictures, that would depend on where you are. Rather, it’s more of a mindset. What would be your opening scene in a novel? Is your couple walking hand in hand, having a coffee, whispering sweet nothings, or reading a book? What happens in the middle of the story? Are they shopping in a market, admiring some landmarks, doing an activity they both love?

romantic portraits of couples

How does the story end? Do they walk away from you into a tunnel or cinema? Or do they sit and relax, put their feet up on a bench after a long day? Do they kiss? Or do they have a dramatic ending like a silhouette or looking out into the horizon with the sun fading or the moon rising?

Each couple has their own unique story. When you meet them you will get a feel of their personalities, their likes, and dislikes. Soon, you will be able to piece that story together and it will be like no other.

romantic portraits of couples

I hope you find the above tips helpful. Do share other tips for capturing romantic portraits of couples in the comment section below.

googletag.cmd.push(function() {
tablet_slots.push( googletag.defineSlot( “/1005424/_dPSv4_tab-all-article-bottom_(300×250)”, [300, 250], “pb-ad-78623” ).addService( googletag.pubads() ) ); } );

googletag.cmd.push(function() {
mobile_slots.push( googletag.defineSlot( “/1005424/_dPSv4_mob-all-article-bottom_(300×250)”, [300, 250], “pb-ad-78158” ).addService( googletag.pubads() ) ); } );

The post 5 Tips for Creating Romantic Portraits of Couples by Lily Sawyer appeared first on Digital Photography School.


Digital Photography School

 
Comments Off on 5 Tips for Creating Romantic Portraits of Couples

Posted in Photography