RSS
 

Posts Tagged ‘Photoshop’

Adobe Camera Raw (ACR) as a Photoshop Filter

09 Oct

Photoshop camera raw filter opener

One feature that is new to Photoshop CC is the Camera Raw filter. Using this filter you can make powerful nondestructive edits inside Photoshop.

What the Camera Raw Filter offers

The Camera Raw filter is new to the Creative Cloud version of Photoshop – Photoshop CC – so it’s not available in earlier Photoshop versions. It gives you access to most (but not all) of the features of Adobe Camera Raw (ACR) from inside Photoshop.

You can use it on any image – even those file formats that ACR doesn’t support – and on any layer. So, you don’t have to be working on an image that is in one of the formats that ACR can open. You can also use the Camera Raw filter at any point in your workflow not just when you first open an image.

Combining the Camera Raw filter with Smart Objects also means that you can make an edit using the filter and come back anytime to revisit and change those edits, if desired.

How the Camera Raw Filter works

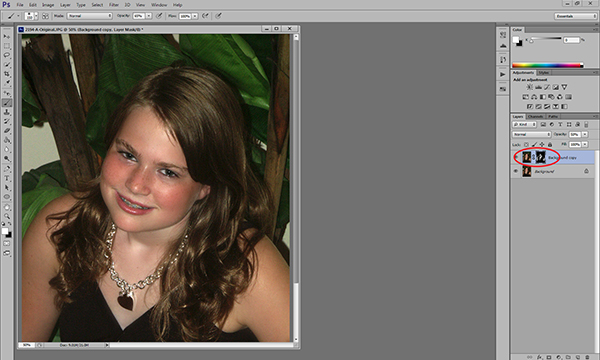
To see how the Camera Raw filter works open any image in Photoshop CC.

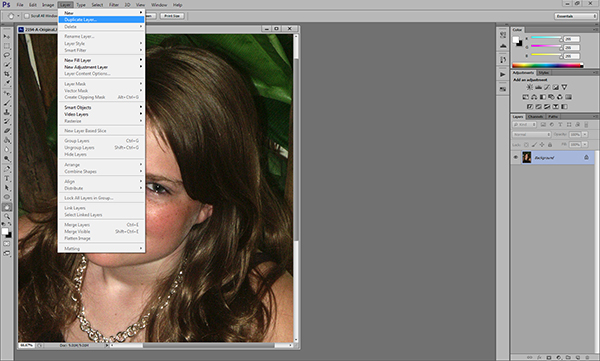
So that you can revisit and edit the changes made by the filter, start by converting the layer that you want the filter to act on into a smart object. To do this either right click the layer and choose Convert to Smart Object or choose Filter > Convert for Smart Filters.

Photoshop camera raw filter 1

Either way the result is the same and you will have a layer converted to a Smart Object. Using Smart Objects ensures that the adjustments that you are about to make can be edited later on.

If you have multiple layers that you want to apply the filter to, then select those layers in the Layers palette before converting them all to the one Smart Object.

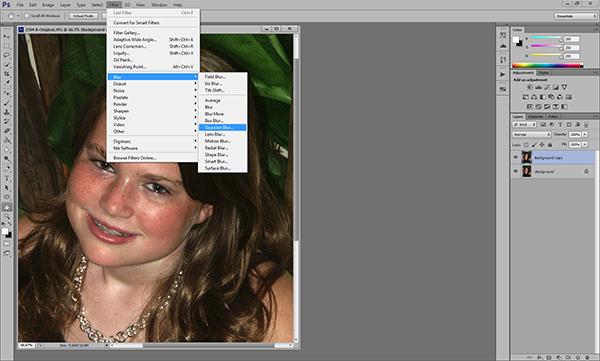
To apply the Adobe Camera Raw filter choose Filter > Camera Raw Filter. This opens the current layer inside ACR.

Photoshop camera raw filter 2

Now you can make your adjustments to the image using any of the tools in ACR.

So you can, for example, adjust the white balance by clicking on the White Balance tool and click on something in the image which should be neutral gray. This is a fix that isn’t as easy to make in Photoshop itself. Other useful adjustments you can make include adjusting Highlights, Shadows, Whites and Blacks and Clarity – settings which are easy to access in ACR and less easy (or not available in the case of Clarity) in Photoshop.

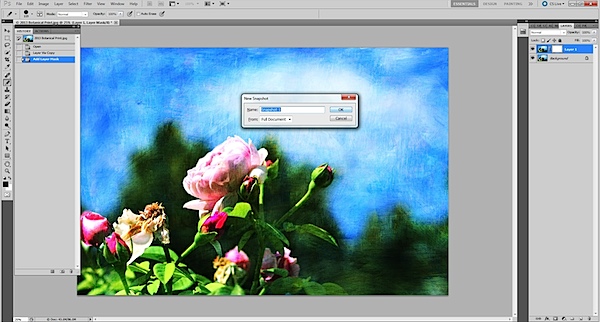
The ACR filters are also available so you can use the Gradient Filter and the new Radial Filter to adjust the image. Once you have made your changes click Ok to apply the changes to the image and return to Photoshop.

Photoshop camera raw filter 3

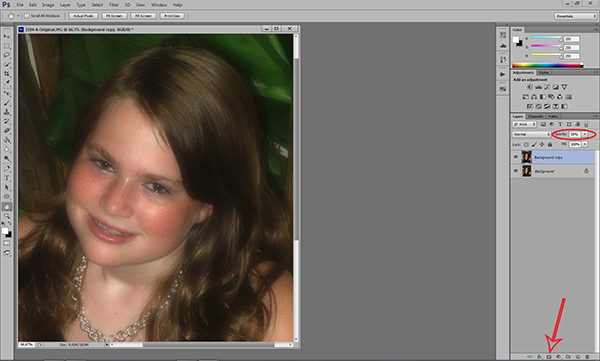
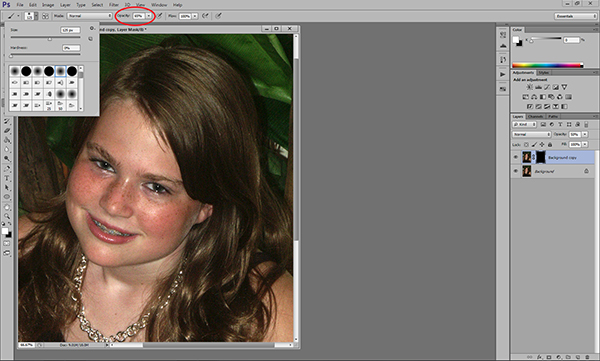
Notice that the Smart Object layer in Photoshop has its own layer mask so you can, if desired, use the layer mask to adjust the effects that you just applied to the image. Paint with black on the mask to remove them and with white to reapply them. This feature is useful for adjusting the effect of a Gradient Filter where there are objects which fall inside the area affected by the filter that you don’t want to be affected by it.

Photoshop camera raw filter 4

You can also alter the Camera Raw Filter settings at any time by double clicking on the Camera Raw Filter entry in the layers palette. This reopens the layer in ACR so you can make changes to the settings.

The benefits of using the Camera Raw filter

The Camera Raw filter offers some real benefits to Photoshop users. One is that you can use the filter to sharpen an image and take advantage of the Masking slider when sharpening in ACR. This lets you limit the areas of the image which are sharpened to just the edges in the image and not areas of flat color.

Photoshop camera raw filter 5

You also get access to tools which aren’t available in Photoshop such as Clarity, and the Graduated Filter, Adjustment Brush and Radial Filter.

The Camera Raw Filter also provides a handy way to work with a JPG image in ACR. You can, of course, open a JPG in ACR but, if you forget to do so, the Camera Raw Filter offers pretty much the same functionality at any time in your workflow.

Other options that the Camera Raw Filter provides is access to the Split Toning effect sliders, presets, the new upright correction, post crop vignette, the new chromatic aberration and defringe tools, and the noise reduction sliders.

Photoshop camera raw filter 6

Provided that you save your image in a layered file format such as PSD then you’ll be able to come back at any time and edit the Camera Raw Filter adjustment that you made.

Chances are that if you are familiar with using ACR for processing your raw images you’ll find that the new Camera Raw Filter in Photoshop CC is a welcome addition to your workflow.

Post originally from: Digital Photography Tips.

Check out our more Photography Tips at Photography Tips for Beginners, Portrait Photography Tips and Wedding Photography Tips.

Adobe Camera Raw (ACR) as a Photoshop Filter

The post Adobe Camera Raw (ACR) as a Photoshop Filter by Helen Bradley appeared first on Digital Photography School.


Digital Photography School

 
Comments Off on Adobe Camera Raw (ACR) as a Photoshop Filter

Posted in Photography


Photoshop Keyboard Shortcuts

01 Oct

By Lori Peterson

Recently I was helping a photographer who had just switched from Elements to Photoshop 6. She was looking to streamline her editing and asked about keyboard shortcuts. At that moment it dawned on me that not everyone knew about keyboard shortcuts, what the most commonly used ones are, and even why you should teach yourself to use them.

Once you learn the keyboard shortcuts that you use most, you will be able to do them without really thinking. It will speed up what you are doing in Photoshop and enable you to move effortlessly through your editing processes. There are shortcuts for virtually everything you could want to do in Photoshop.

The most used shortcut I use is one of the simplest. When you click X on your keyboard it switches your foreground and background colors. When you are working with masks this shortcut is invaluable. If you are using a mask and want to make sure that you aren’t going outside the area you want to be or want to clean it up more you can click on the mouse and hit your ALT button and that will show you where you are working and how it looks. Just click it again to go back.

Another common shortcut is for duplicating your layer and that is CTRL +J. This simply duplicates the layer you are working on. There is not a shortcut for adding a layer mask but you can easily create your own by going to Edit > Keyboard Shortcuts > Layer Mask > Reveal All and then assigning a shortcut for your layer masks to be added.

layer mask.jpg

If you hit the B on your keyboard it will take you to your brushes and then you can use your number pad to pick the opacity of the brush. If you hit the number 1 it makes your opacity 10%, if you hit 2 it makes it 20%, and so on.

When using brushes you sometimes need to fine tune them and make them larger and smaller and that’s when you use your brackets. The brackets are located just above your enter key. [ makes your brush smaller and ] makes your brush larger. You can toggle back and forth between them to keep changing the size of your brush. If you need to zoom in or out to look at what you are doing then you simply hit CTRL + to zoom in or CTRL – to zoom out.

brackets.jpg

If you make a mistake while editing you can use CTRL + Z to undo what you just did. If you need to go back multiple times then using CRTL +ALT + Z will help you undo multiple changes that you have done.

I use my history folder and take snapshots of my work as I am doing things so that if I need to go back to a point before I did a certain part of an edit that it’s easier. Using your history folder and taking a snapshot is simple and an easy way to make sure that you can get back to the point where you were happy with your image. There is a default number of history states that you can revert back to. If you want to increase those numbers just go to Edit > Preferences > Performance and then change the number of history states to fit what you want. (This is not a shortcut, but oh so helpful!)

image states.jpg

You can easily just go to your history and take a snapshot by clicking the little camera icon. But if you hold down ALT and then click the camera icon you can name the snapshot of the image that you just took. That makes it easier than going back and having to click around to figure out which image was the one you liked. It’s like learning to change the names of your Layers as you are working. It sometimes seems pointless, but when you need to know which one to go to, it’s very important!

alt and new snapshot.jpg

Photoshop is not something you can learn in one sitting. There are so many pieces and components to it that it requires a lot more than that. Finding the pieces that you need and the ones that work for you are what counts. If you don’t do any 3D animation then the tools for that particular part of Photoshop are not going to be of any interest to you. Learn your basic shortcuts and take it from there. Don’t overwhelm yourself with trying to learn everything at once. You can find links to shortcuts from Adobe and from many other places. You can even post the ones you think you will use at your desk and practice using them. Once you add a few to your editing, then learn a few more. Keeping everything short and simple and easy is sometimes what works best.

Lori Peterson is an award winning photographer based out of the St. Louis Metro Area. Her dynamic work ranges from creative portraits to very unique fine art photography. Lori’s work can be seen at www.loripetersonphotography.com and also on her blog at www.loripetersonphotographyblog.com. You can follow her on Facebook at https://www.facebook.com/LoriPetersonPhotography.

Post originally from: Digital Photography Tips.

Check out our more Photography Tips at Photography Tips for Beginners, Portrait Photography Tips and Wedding Photography Tips.

Photoshop Keyboard Shortcuts


Digital Photography School

 
Comments Off on Photoshop Keyboard Shortcuts

Posted in Photography


An Introduction to Blend Modes in Photoshop

30 Sep

This week I had a number of readers email to ask about the topic of ‘blend modes’ in Photoshop. So I thought I’d see what our friends at Phlearn have on the topic with their great videos. Here’s a great introduction to the different types of blend modes in Photoshop:

Enjoy this video? Check out the tutorials Phlearn have created on their website.

Post originally from: Digital Photography Tips.

Check out our more Photography Tips at Photography Tips for Beginners, Portrait Photography Tips and Wedding Photography Tips.

An Introduction to Blend Modes in Photoshop


Digital Photography School

 
Comments Off on An Introduction to Blend Modes in Photoshop

Posted in Photography


What’s new in Photoshop CC for Photographers

29 Sep

Photoshopcc for photographers opener

The new Photoshop CC hasn’t launched without a lot of controversy. There are some very valid reasons not to like the fact that the only way to get your hands on this new release is via the Creative Cloud. However, putting delivery methods and subscription software issues aside, let’s look at what is in the new Photoshop CC for photographers so you can see what you’ll get if you upgrade or what you’re foregoing access to if you don’t.

Photoshop CC has a few new additions and one update that will be of interests to photographers. There’s little here that you can’t live without but some of these additions you may want to live with!

Liquify as a Smart Object

In previous versions of Photoshop the Liquify filter was one of the few filters that you could not apply to a Smart Object layer. That meant that any changes that you made using the Liquify Filter were permanent changes to the image which could not be undone, and they couldn’t be easily altered or blended back into the image in a non-destructive way. Now it’s possible to apply the Liquify Filter to a Smart Object layer so that the edits that you make to the image using the liquify filter can be edited later on if desired. They can be removed by disabling the filter, they can be blended using a layer blend mode, masked and edited.

Photoshopcc for photographers 1

ACR as a Filter

New to Photoshop CC is the ability to apply changes which previously could only be made in Adobe Camera Raw (ACR) to an image from inside Photoshop. The new Camera Raw Filter lets you apply ACR edits to a layer and even to a Smart Object layer in Photoshop. This makes almost all the tools in ACR available to be used in Photoshop as an editable filter. To access this feature, choose Filter > Camera Raw filter.

Photoshopcc for photographers 2

Squaring up objects with Upright

While not technically an addition to Photoshop, the Upright feature is new to Adobe Camera Raw (ACR) for Photoshop CC. So, if you have Photoshop CC, you have access to Upright in ACR (and as a filter adjustment via the Camera Raw filter too).

The Upright tool can automatically straighten an image and remove keystone distortion which is apparent when shooting tall buildings, for example. It is found in ACR in the Lens Correction panel – click the Manual tab.

Photoshopcc for photographers 3

Fix blurry images

The new Shake Reduction filter in Photoshop CC helps deal with blurry images. It won’t fix them all and, of course it’s always preferable to get the image sharp in camera, but it can fix some burry shots particularly those captured in good light with a zoom lens and it can help sharpen text in images.

To find the tool, choose Filter > Sharpen > Shake Reduction.

Photoshopcc for photographers 4

ACR features in Photoshop CC

In addition to the Upright feature available in ACR there are other new and improved features in ACR that you can access if you have Photoshop CC. These include the improved Spot Removal tool which can be used like a paintbrush to select an element in an image to fix – this makes it easier to use where the problem area is not circular. In addition the new Radial Gradient tool lets you add a radial gradient to an image to apply fixes and creative effects.

Photoshopcc for photographers 5

A Better Upsampling algorithm

You may already know that there are problems inherent in enlarging images because Photoshop needs to make additional pixels where pixels did not previously exist. The new resizing algorithm in Photoshop CC improves the results when you are enlarging an image.

Choose Image > Image Size and enlarge the dialog so that you can see things clearly on the screen. Set the final image size, for example if you want to enlarge by 200 percent set 200 percent as the width and height. Click the Resample checkbox and from the dropdown list choose the new Preserve Details (Enlargement) option. The preview image shows the result of upsizing using this option.

This new algorithm helps you enlarge images for printing retaining the sharpness in the image and avoiding pixelated edges.

Photoshopcc for photographers 6

Updated Smart Sharpen Filter

Sharpening has been improved in Photoshop CC with changes to the Smart Sharpen filter. To see it at work choose Filter > Sharpen > Smart Sharpen and again enlarge the dialog so that you can see the effect on the image. You can now adjust the Amount and the Radius for the sharpening. Typically radius should be in the region of 0.5 to 1.5 pixels for most images. You can also choose to reduce noise as you sharpen. The shadows and highlights area allows you to fade sharpening, for example, in the shadow areas applying it more strongly to the highlights where noise will be less visible. You can also select to remove Gaussian blur, Lens blur or Motion blur if these blur issues affect your image.

Photoshopcc for photographers 7

Adaptive wide angle

The new Adaptive Wide Angle Filter helps you remove problems encountered when shooting with wide angle lenses. Choose Filter > Adaptive Wide Angle and choose the problem to correct from the Correction dropdown list. Set the sliders for the Focal Length and Crop factor to remove distortion. You can also draw on the image to add constraints. These lines should be positioned over objects in the image that you want to be straight. Photoshop will use the constraints to determine the correction to apply to the image and, as a result, you can remove much of the distortion problems with an image. This filter can be applied using a Smart Object layer so that the results will be editable.

Photoshopcc for photographers 8

Behance integration

Behance is a community where you can showcase your work so that others, including businesses looking to find creatives, can find you and examples of your work. If you use, or plan to use, the Behance online creative community then you will appreciate that you can now post images from Photoshop CC direct to Behance. To do this you choose File > Share to Behance.

Photoshopcc for photographers 9

Regular Program Updates

One benefit of the new Photoshop CC which Adobe is encouraging is program updates. Delivery via the Creative Cloud means that Adobe can now deliver program updates as they become available rather than having to wait for the next new release. This means that fixes for problems can be rolled out more quickly. Of course this can be a double edge sword – if you’re on a slow connection or you have a capped internet service – the frequency and size of these can be time consuming and expensive to download and install.

Photoshopcc for photographers 10

New Pricing for Photographers

Adobe copped a lot of flak from users over the bundling and pricing of its Creative Cloud applications. As a result, it was recently announced that users with Photoshop CS3 or later could sign up for the Photoshop Photograph Program. This limited time offer (it expires December 31, 2013), gives you access to Photoshop CC, Lightroom 5, Bridge CC, 20GB of cloud storage and a Behance ProSite. It requires an annual commitment and is USD $ 9.99 plus taxes billed monthly (check the website for the cost in your local currency).

Photoshopcc for photographers 11

Post originally from: Digital Photography Tips.

Check out our more Photography Tips at Photography Tips for Beginners, Portrait Photography Tips and Wedding Photography Tips.

What’s new in Photoshop CC for Photographers


Digital Photography School

 
Comments Off on What’s new in Photoshop CC for Photographers

Posted in Photography


Photoshop Elements 12 adds useful editing tools, without the subscription

25 Sep

PSE12_3in_boxshot_front.png

Adobe has released version 12 of its Photoshop Elements software for Mac and Windows. One of the highlights of the latest version of this consumer-friendly photo editor is ‘Mobile Access’, which uses Adobe’s Revel cloud service to let users view and retouch photos on their mobile devices, keeping everything in sync. Other new features include ‘Content-Aware Move’, guided editors, and 64-bit support for Macs. Best of all, there’s no monthly subscription fee. Read on to learn more about Elements 12, and if it may be a good substitute for its big brother.

News: Digital Photography Review (dpreview.com)

 
Comments Off on Photoshop Elements 12 adds useful editing tools, without the subscription

Posted in Uncategorized


How Good Are Your Photoshop Skills?

18 Sep

Photographers who want to improve their landscape photography, to pick up some new wedding photography techniques, or to learn how to shoot children are spoilt for choice. Search on Google for a “photography workshop” and you’ll get more than 67 million results. Whatever kind of photography you want to practice, from snapping models to capturing pets and creating portraits you can always find someone willing to teach it.

Search, though, for a “Photoshop workshop” on Google and you’ll get fewer than 19 million results. That might still make for a pretty big choice but it’s less than a third of the educational content aimed at teaching photography skills even though the size of the demand should be the same. Regardless of what you want to shoot, just about every kind of image and every photography specialty will require a good understanding of image editing and post-production.

One reason that Photoshop classes are so much rarer than photography classes may be that while the need may be the same, the apparent demand for the classes is lower. Learning to take pictures is fun; learning to improve the white balance or remove red-eye not so much. Sitting at a keyboard and choosing tones from a piece of software is certainly a lot less romantic than directing models or even swishing chemicals under the red light of a darkroom.

But the skills are just as essential. Even if they don’t want to change their pictures too much once they’ve taken them, even the best photographers and the most experienced professionals have to spend some time adjusting their images before they submit them. And if they don’t, it’s only because they outsource the work to assistants who can charge a premium for their digital skills.

Learn How to Mix Your Colors

Fortunately, learning those skills has got easier. MCP Actions is one of a number of companies that help people get to grips with Adobe’s over-complicated editing suite. The company started in 2006 providing Photoshop training and selling prepared actions to simplify the editing process, initially for online businesses that needed to upload images. Jodi Friedman, the company’s founder, soon found that photographers also wanted to learn how to edit their photos so she added the image-makers themselves to her mix of customers too.

“Now all my customers are photographers – either hobbyists or professionals.”

The classes are held online through GoToMeeting.com and take place either as one-to-one tutorials or in groups of between five to fifteen students. Altogether, Jodi believes that “a few thousand” people have taken part in her online classes, and “hundreds of thousands” have watched her video tutorials. The customers, she says, range from new hobbyists to experienced photographers and from teens to grandmothers. Although the subjects covered in the class are broad and include lessons on using curves and newborn photography, as well as workshops on elements, the most popular topic by far is color fixing. Those classes are also among the lowest priced workshops at $ 99.95 for a two-hour live session.

About 85 percent of Jodi’s students are women, though, a surprising dominance that may suggest that men are missing out. It’s possible that Jodi’s marketing is focused on women and it could be that men are more comfortable with a big Photoshop manual and self-learning. But it’s also possible that too many photographers are still seeing photography as starting and ending with the camera.

Wedding Photographers Are Really Wedding Photo Adjusters

In fact, according to at least one survey, professional wedding photographers should more accurately describe themselves as professional wedding image editors. More than 28 percent of their time is spent “editing photos” and completing “other computer tasks,” work that takes up the largest part of their day. Just 12 percent of their workday is actually spent taking pictures. Those proportions may be different in other specialties but they’re unlikely to vary by much.

Photographers who fail to get to grips with the software side of picture-taking are ignoring the work that they’re likely to be doing the most.

There are alternatives to taking online courses though. Even Jodi Friedman admits that there’s nothing wrong with learning from books. (Although she stresses that some of her customers can pick up in an hour or two what it would take them months to learn from a book or a college course.) Outsourcing is also an option. If you’re not in a position to hire an assistant, you can find plenty of freelancers — often photography enthusiasts with digital skills — willing to do the basic editing for you. ProImageEditors.com, for example, charges wedding photographers from 13 cents to 19 cents an image for adjusting exposure, white balance, highlight recovery and fill light. They say they’ll even crop and straighten if needed.

But however tedious basic image editing might feel, not all photographers are willing to outsource such an important part of the image-making workflow, especially to companies outside their own studio. Wedding photographers, in particular, tend to want to keep control of the process themselves, ensuring that the product meets the standards they want to keep and leaving room for some creativity even during image adjustment.

For today’s photographers — both professional and enthusiasts — time in front of the camera is even more important than time behind the lens. It might even take up a greater part of the day than old-fashioned darkroom development and while it’s not likely to be the most interesting part of being a photographer, it is important and it is worth knowing well.

And once you know it, not only will you be able to edit faster, cut back on the time in front of the monitor and give yourself more time at the tripod, you could also find that you enjoy it — and that you want to charge classes of students a hundred bucks each for a couple of hours of tuition.


Photopreneur – Make Money Selling Your Photos

 
Comments Off on How Good Are Your Photoshop Skills?

Posted in Equipment


3 Reasons To Keep Your Old Photoshop Version

09 Sep

By Helen Bradley

3 reasons not to delete old versions of photoshop opener

If you’re moving from Photoshop CS5 or CS6 to Photoshop CC you may be tempted to clean up your computer and remove the older Photoshop version from it. After all there’s no point leaving it there if you’re not using it is there? Well I, for one, won’t be removing Photoshop CS5 anytime soon and I suggest you think twice about removing your older version too. Here are my reasons:

1. Adobe Axed Picture Package

Adobe axed Picture Package quite a long time ago but it could be easily made to work with Photoshop CS5. For a time there I also had it running with Photoshop CS6 until an update to CS6 permanently knocked it out. So, because I like to use Picture Package for assembling images and because it works just fine with Photoshop CS5, I’ll be keeping that version. Anytime I need to assemble multiple images into a layout I only need choose File > Automate > Picture Package and I’m off and running.

If you want to know how to add Picture Package back into Photoshop CS4 there’s a DPS blog post that I wrote explaining all about it here in Multiple Image Printing in Photoshop CS4.

For Photoshop CS4 and CS5 I also created some training for Mediabistro.com which you will find here.

And for Photoshop CS6, I wrote a post on my blog about how to add it to Photoshop CS6. While many readers are finding it still works, sadly while I can tell you how to do it the actual solution no longer works for me.

3 reasons not to delete old versions of photoshop 1

2. Adobe Axed Pixel Bender

Yep, in Photoshop CS6 Adobe took the Oil Paint Filter from Pixel Bender, built it into Photoshop and promptly dumped everything else. I found that disappointing – I kind of like Pixel Bender – in particular some of the fractal effects that you can create with it. I also have a Droste filter for it that is awesome and that I use from time to time.

Since I plan to keep Photoshop CS5 I’ll still have access to Pixel Bender – thank you very much Adobe!

Just in case you’re interested – the Pixel Bender extension won’t work with versions of Photoshop later than Photoshop CS5. Again, I wrote a DPS blog post on Pixel Bender, how to install it and what you’ll find when you get it here.

And a post on Tom Beddard’s awesome Droste Filter here.

And I have a YouTube video that shows you how to use the Droste Effect filter here:

3 reasons not to delete old versions of photoshop 2

3. I Don’t Trust the Licensing Model

If you’re reliant on Photoshop for your day to day work – if you’re a Photoshop teacher, for example, then problems with the new licensing model might cause you unexpected grief. In this scenario you will start your computer one day and Photoshop will lock you out citing some issue with your license. Of course you have a paid up license, but the software won’t recognize this and it will go into lock down mode.

Until you can call Adobe Support and get them to fix the issue you won’t be able to get into your software – one more reason why I suggest you keep an earlier version of Photoshop on your computer just in case.

Now I haven’t had problems with Photoshop CC but I have had issues with a subscription license for Adobe Captive – on two separate occasions both within the last 12 months and both without warning. If I had been teaching a class, it would have meant that I simply couldn’t do what I was being paid to do. The problem with the subscription licensing is that it’s not full proof and if it fails you may be locked out of your software until you can get support to fix the issue and that’s going to take time.

In Summary

While I wholeheartedly encourage you to enjoy the new features of Photoshop CC I do recommend that you keep an earlier version of Photoshop on your computer. Then, you’ll have access to Picture Package and the Pixel Bender feature (once you install them) and a fallback position if you get locked out of your software unexpectedly.

So now it’s over to you – if you’ve installed Photoshop CC do you still have an older version of Photoshop installed? If so, what is your reason for not removing the earlier version?

Post originally from: Digital Photography Tips.

Check out our more Photography Tips at Photography Tips for Beginners, Portrait Photography Tips and Wedding Photography Tips.

3 Reasons To Keep Your Old Photoshop Version


Digital Photography School

 
Comments Off on 3 Reasons To Keep Your Old Photoshop Version

Posted in Photography


Adobe introduces cheaper Creative Cloud with Photoshop + Lightroom

05 Sep

shared:AdobeLogo.png

Adobe has added a new pricing tier to the Creative Cloud product, possibly in response to the negative response from the photography community when it announced that all Creative Suite products would require a monthly subscription. The Photoshop Photography Program gives users Photoshop CC, Lightroom 5, Bridge CC, Behance, and 20GB of storage for $ 9.99 per month. That’s not a promotional price, either, as long as you sign up by the end of this year. You must already own Photoshop CS3 or newer to be eligible for this offer.

News: Digital Photography Review (dpreview.com)

 
Comments Off on Adobe introduces cheaper Creative Cloud with Photoshop + Lightroom

Posted in Uncategorized


DEAL: 30% Off Phil Steele’s Photoshop Basics Online Course

29 Aug

NewImageOver on our sister site – SnapnDeals – we have a great offer running right now – it gets you 30% off Phil Steele’s Photoshop Basics for Photographers course.
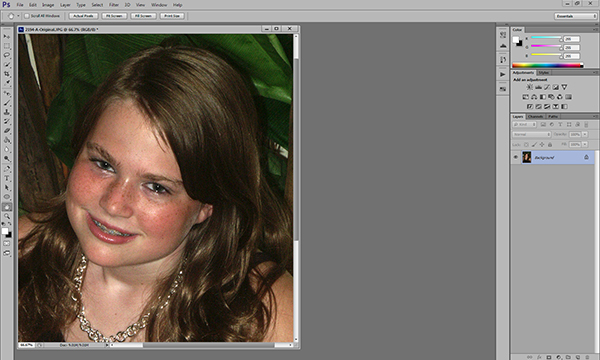
Many of your have taken Phil’s other courses and will be familiar with his helpful videos so will know that he always delivers great training for photographers.

Over 13 easy to understand modules this course will teach you how to take your photos to the next level with some simple post production techniques in Photoshop.

Normally the course is $ 47 but with this Snapn’ Deal it is just $ 33.

Check out full details of what’s included here.

PS: if you’re interested in weekly promotions like this just add your email address to the field below and we’ll send you a weekly update of all new deals.

It’s free, we don’t share your details with anyone and you’re welcome to unsubscribe any time if you don’t find the deals to be for you.

Post originally from: Digital Photography Tips.

Check out our more Photography Tips at Photography Tips for Beginners, Portrait Photography Tips and Wedding Photography Tips.

DEAL: 30% Off Phil Steele’s Photoshop Basics Online Course


Digital Photography School

 
Comments Off on DEAL: 30% Off Phil Steele’s Photoshop Basics Online Course

Posted in Photography


Basic Skin Smoothing in Photoshop

22 Aug

I’ve always said that the best Photoshop is the Photoshop you never even notice.  I encourage my students to get it right in the camera, because my belief is that imaging software is a tool, not a crutch.  To quote commercial/portrait photographer Zack Arias, “If you find yourself saying, ‘I’ll just fix that later in Photoshop,’ stop what you’re doing and slap yourself as hard as you can.”  When people look at my portraits, I want them to see the personality.  I want them to see the emotion.  I want them to remember a moment in time.  What I don’t want is for them to look at my work and say, “Wow, great editing!”

In a perfect world, the photo shoot goes flawlessly.  The photos are creatively lit and bring out my subject’s personality.  It’s an intersection where subject and photographer come together in a collaborative effort that creates images needing almost no post production.

But since I don’t live or work in anything even remotely resembling a perfect world, Photoshop has become a necessary tool in the arsenal.  A levels adjustment to tweak the blacks.  Maybe a curves layer to bump the contrast.  I try to keep it subtle.  If you are shooting landscapes, it’s easy to let the artist run amok with color and special effects.  HDR?  Sure, go for it!  As a portrait photographer, though, you have to be very careful about not taking the editing and manipulation too far.

What do I mean by “too far?”  Have you ever seen a post-processed portrait where the whites of the eyes are so white that the subject looks like something out of a sci-fi movie?  What about skin so smooth it looks like plastic, totally devoid of any texture?  Any edit that pushes the bounds of reality is– in my opinion– “too far.”  I know there are people who disagree,  but my philosophy is this: whether you are coming to me for wedding/engagement photos, press photos for your band, or a head shot for the dust jacket of your latest book, we are coming together to make a portrait– not a semblance of a portrait.

Like I noted earlier, if I’ve done things properly, my portraits shouldn’t need much processing once they come off the camera.  Usually cropping/sizing.  Maybe a contrast tweak.  And maybe just a little attention to the skin.  But skin has texture.  It has pores.  It can be tricky, so here’s how I handle it.

This is a very old test shot from just before I went professional ten years ago.  Not exactly my finest hour– the pose is a bit awkward, there are multiple hot spots, the background is a mess– I could pick this photo apart for hours.  It is, however, a great image for demonstrating a skin smoothing technique.   There are a lot of different ways of doing this.  I’m not going to tell you that my way is best, but I am going to  tell you that my way is best for me.  It’s a pretty basic, straightforward approach, so it might end up being best for you, too.

First, let’s open up our image in Photoshop.  I’m doing this in Photoshop CS6 (No Cloud yet for me!), but I’ve been using this method for years, so you should be fine, regardless of which version you are using.   Step One is zooming in on our target areas.  Any adjustments you make in Photoshop will be less noticeable if you work on an enlarged view.  You’ll be making smaller, more direct adjustments, and you’ll have a better idea of when to stop.

Zooming in lets you make more direct, subtle changes.

Zooming in lets you make more direct, subtle changes.

Once we’ve zoomed in on our target areas, we duplicate the layer and add a 20-pixel Gaussian blur in the Filters menu.  You’ll immediately see the entire image go very soft.  In the Layers palette, reduce the opacity of the layer to 50%.

Duplicate the background layer in the Layers Menu.

Duplicate the background layer in the Layers Menu.

Add a Gaussian Blur.

Add a Gaussian Blur…

...and adjust it to 20 pixels.

…and adjust it to 20 pixels.

Next we are going to add a layer mask.  Don’t be intimidated.  The only thing a layer mask does is either hide or reveal the effects of the layers below it.  More on that in a little bit.  We are going to add the layer mask by holding down the ALT/OPTION key and clicking the Add Layer Mask icon at the bottom of the Layers palette.  You’ll see your image go back to its pre-blur appearance and a small black box will appear next to the layer thumbnail.

Reduce the opacity of the layer to 50% and add a layer mask.

Reduce the opacity of the layer to 50% and add a layer mask.

Next, select the brush tool.  You can use the bracket keys to adjust the size of the brush.  Pressing the SHIFT key while using the bracket keys will adjust the hardness/softness of the brush.  You’ll definitely want a brush with softer edges.  This will allow your facial edits to blend for a more natural look.  Hard brush edges will stand out.

Select a soft, white brush and adjust the size.

Select a soft, white brush and adjust the size and opacity.

Make sure you are using a white brush.  The opacity of the brush will dictate the overall affect.  The closer you are to 100%, the closer you will be to the original Gaussian blur and we don’t want that.  I generally work with an opacity between 50%-70%.  I usually work at the higher end on female portraits and the lower end on males.  Experimenting with various opacities will show you how they affect the overall look of your image.  If you think you’ve chosen the wrong opacity, simply switch the brush color to black and go back over what you’ve done.  This will replace the part of the layer mask you’ve just removed.  Then readjust your opacity, switch the brush color back to white, and continue with your edits.

Before we go any farther, let’s take a look at what exactly is happening.  When we duplicated the layer and added the blur, creating the black layer mask only covered the blur– it didn’t remove it.  By using a white brush on the black layer mask we are removing parts of the mask, revealing the blur underneath only where we need it.  You’ll notice these areas appearing on the layer mask thumbnail.

You'll see the effects of your brush strokes on the layer mask.

You’ll see the effects of your brush strokes on the layer mask.

Be careful to not brush over features like eyes and lips.  In a good portrait, facial features– the eyes particularly– should be sharp.  You do need to make sure, however, that you are consistent in your edits.  For instance, if I’ve smoothed the forehead and cheeks, chances are that the neck and shoulders are going to need some attention, too.  One sure-fire way to bring attention to your edits is to be inconsistent.  You don’t want some sort of imaginary line between retouched and non-retouched areas drawing attention to them.

The end result is a subtle, but noticeable change.

The bottom line is that skin has texture.  If you over-smooth it you will be left with a portrait that draws attention to the edits, rather than the person.  How much is too much is subjective, but keep in mind what I said earlier about going too far.  This is a technique where a little bit can go a long way.  What I really like about it is that it lets you make these edits in a subtle way, leaving you with a natural-looking portrait.

Post originally from: Digital Photography Tips.

Check out our more Photography Tips at Photography Tips for Beginners, Portrait Photography Tips and Wedding Photography Tips.

Basic Skin Smoothing in Photoshop


Digital Photography School

 
Comments Off on Basic Skin Smoothing in Photoshop

Posted in Photography