RSS
 

Posts Tagged ‘Photos’

Turn Your Photos IntoIncredibly Large Black & White Prints

27 May

Extra photos for bloggers: 1, 2, 3

Engineer Prints are big big big (big) photo prints made on large format printers normally used for architecture and engineering plans.

The unique, lo-fi characteristics of the Engineer printing process has made it a favorite amongst the creative community, and us!

Streaked, striated and wacky black and gray tones combine to create a super unique look that’s no ordinary photo print.

Our Engineer Prints are inked on 4-feet wide (!) 20lb bond paper that’s so light it’s easy to pin or tape anywhere, no frames or nails!

We’ve made it a cinch for you to have one of your very own. No printer proofs, resolution wrangling or printer research required!

Make Your Own Engineer Print
$ 25 flat w/ free shipping, at the Photojojo Shop


© laurel for Photojojo, 2014. |
Permalink |
No comment |
Add to
Incredibly Large Black & White Prints”>del.icio.us

Post tags:


Photojojo

 
Comments Off on Turn Your Photos IntoIncredibly Large Black & White Prints

Posted in Equipment


Create Art with your Photos Using Topaz Simplify

27 May

Simplified-after-1

Topaz Simplify is designed in a way that allows you to transform your photography into something that resembles painted or drawn art. There are a ton of different styles of art packed into Simplify, from line and ink, to oil and watercolor painting; so it should provide some great creative opportunities for you. Today I’m only going to do a basic walk through on a couple of different photographs in order to introduce the product to you.

TopazSimplfiy-Beforeandafter

Before getting started I do want to mention that while I’ll be using Topaz Simplify as a Lightroom plugin today, it also works with Photoshop, Aperture, iPhoto and others so you don’t have to have Lightroom to use it. Find out all the info and get the free trial of Topaz Simplify here.

Topaz Simplify Basic Walkthrough

As you can see from the original RAW file below this photograph is in some serious need of help. It’s basically just an underexposed shot of the sun setting through the forest, without much of a focal point or anything interesting going on. Now I don’t want you to think that Simplify will solve all your terrible miss-fired shots, in most cases it won’t. But here I think it does a remarkable job at making lemonade out of lemons.

Do Lightroom basic adjustments first

TopazSimplify-Original

Original RAW file in Lightroom

Before we can use Simplify however, we do need to get the photograph into some sort of usable shape. For this photograph I’ve got to really rely on Lightroom’s power of saving an underexposed image which it handles without too much of a problem.

After some adjustments in Lightroom 5 using a combination of sliders in the basic tab, you can see that the photograph is at least now in a condition that Simplify will be able o handle.

TopazSimplify-LightroomCleanupCrop

After some basic Lightroom adjustments

To use Topaz Simplify in Lightroom you’ll also need the free Fusion Express plugin (download it here) which is what launches all of the Topaz products. Once both programs are installed launch Topaz Simplify by right clicking on your photo. Navigate to EDIT IN > FUSION EXPRESS 2.

TopazSimplify-LaunchSequence

You can see this in more detail in the video below

Next, a dialog box will open up asking you to select how you’d like the photograph to be brought into Topaz Simplify there are three options here – I always choose ‘create a copy with Lightroom adjustments’ as the other two work off the original file in Lightroom. Note: if this is an area of confusion for you, you’ll be able to see this process in more detail in the video below.

TopazSimplify-AdjustmentForest

Topaz Simplify preset and adjustment options

Next try the ready-made presets that come with Simply

Once you’ve launched Topaz Simplify you’ll be brought into a new editor screen with a bunch of prepackaged collections filled with different presets.

On the left-hand side, as you can see from the screen shot above, the Line and Ink collection is currently selected. There are a handful of other collections, each one containing a different set of presets, all of which are great when you’re just getting started with Topaz Simplify. I highly recommend just playing around with them to find out which ones suite your own creativity best, before getting to involved with the rest of the program. Here are a couple more variations on the photograph above that I achieved with just a few mouse clicks using presets.

TopazSimplify-Forest2

A couple more Topaz Simplify variations.

Customize and play

However, once you have gotten used to the presets and found the ones you like, you also have a lot of control to make the images your own through various adjustment options.

The right-hand panel offers the ability to control things like the overall intensity of the Simplify effect, the ability to determine which edges are drawn in harder or removed entirel,y and the ability to modify how much overall detail is pulled out from the scene.

You also have access to some options for basic image adjustments should you need to do some minor contrast, brightness or saturation modifications (though I’d suggest waiting on these until you get back into Lightroom).

Finally – one of the best parts of Simplify – is that Topaz decided to include bunch of great local adjustment options allowing you to burn, dodge, smooth and/or brush out the effects of Simplify in specific areas of your photograph.

Simplified-after-2

For a look at Topaz Simplify in action watch the video below where I run our second photograph from the two before and after images above through Simplify.

Topaz Simplify Basic Video Walkthrough

What do you think? Have you simplified a photo?

So after this basic walk through I’d love to hear your thoughts on the software. If you do go ahead and use it, or have done so in the past, how about a sharing one of your favorite before and after image sets in the comments below – I’m curious to see what you’re able to come up with.

The post Create Art with your Photos Using Topaz Simplify by John Davenport appeared first on Digital Photography School.


Digital Photography School

 
Comments Off on Create Art with your Photos Using Topaz Simplify

Posted in Photography


Master Easily Taking Candid Photos of Your Friends

21 May

Taking photos of your friends is an accessible way to improve your picture-taking skills. But it can be difficult to do this well and get good photographs, improve your skills, and not offend your friends. It seems simple, of course… you and every person with a smartphone these days are taking photos of your lunches like it’s the top of Continue Reading

The post Master Easily Taking Candid Photos of Your Friends appeared first on Photodoto.


Photodoto

 
Comments Off on Master Easily Taking Candid Photos of Your Friends

Posted in Photography


Stream your photos… via backpack?

19 May

hanerbackpack_0.png

It’s not that uncommon for a photographer to create a new photographic backpack. But it’s unusual for a photographer to put a high-tech photo streaming studio into one, creating a mobile photo transmission solution that shaves precious time off of submitting images to editors. But that’s just what New York Times staff photographer Josh Haner did. Learn more

News: Digital Photography Review (dpreview.com)

 
Comments Off on Stream your photos… via backpack?

Posted in Uncategorized


5 Tips to Help You Slow Down and Take Better Photos

18 May

When you go out to take photos it can be tempting to start shooting right away with the goal of getting the ideal image or capturing the perfect picture. But before you get your camera out, it might be good to take the opposite approach and slow down. Way down. Let’s take a minute to consider some lessons you can learn from the age-old tale of the tortoise and the hare. Ironically, one of the most important things you can do when inspiration strikes is to move slowly like the tortoise, rather than rush along like the hare. The tortoise might not have been the quickest animal in the meadow, but he stuck it out and made it to the finish line while the hare had long since grown weary of the race and gave up altogether. As a photographer, it’s tempting to be a hare and race to photographic perfection, but if you look to the tortoise you see a much better example to follow.

image-001-mockingbird

Here are five tips to help you slow down and take better photos:

1. Study your surroundings

One of the most important elements of a good photograph is that of framing; how is your subject positioned relative to the environment? You might have already considered the subject of your photo (your child, your vehicle, a statue, a flower, etc.) but before you start racking up those pictures on your SD card, take a few minutes or more to consider where the subject is with respect to everything else in the area. Are there buildings, houses, or man-made structures that you could use to help make your subject stand out? Are there natural elements, like trees, shrubs, or rock formations that you could use to highlight features or colors of your subject? By pausing to consider everything else aside from your subject, you will be able to make better decisions about how to get the moments you are really striving to capture.

image-002-saint-francis

When I took this picture of Saint Francis on an overcast morning I had to consider not just the bust itself, but what else might help frame the photo. The quickest and most convenient option would have been to point my camera down and snap a picture, but by slowing down and taking time to consider everything else besides the statue it resulted in a much more pleasing image. I ended up crouching down low to the ground, and using the background elements to give the viewer a sense of space and context. By considering the environment and using that to inform my choice about how to take the photo, I was able to get a much better picture than I would have otherwise.

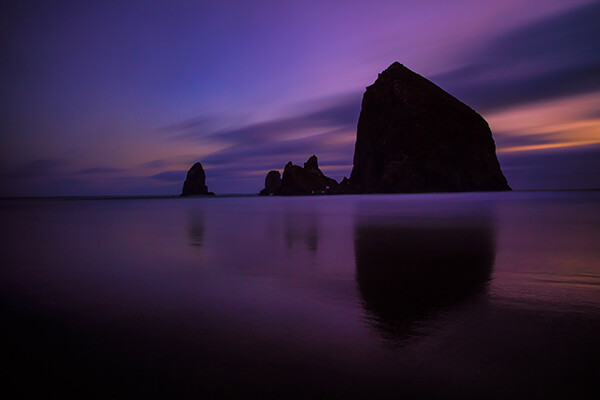
2. Wait for the light

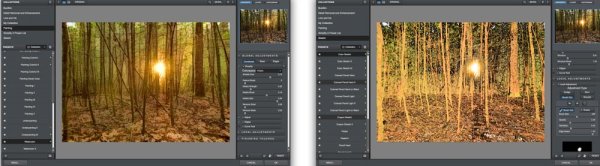
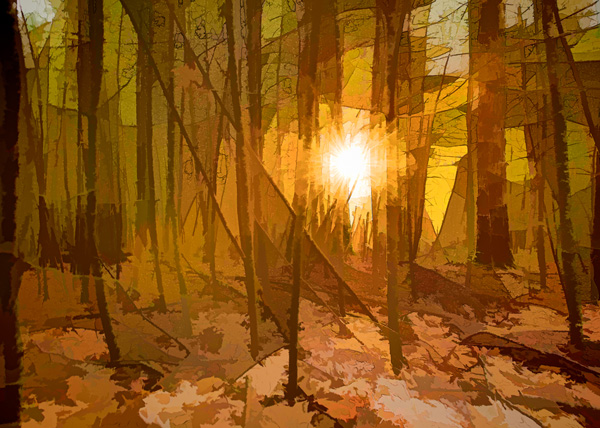
You might not have a giant flash, or studio-style strobes and softboxes, but you can still get amazing pictures by using the best source of light anywhere – the sun. The downside is, you have to be patient if you really want to use it to its full potential. It might not be easy, but one of the best techniques you can utilize to take advantage of natural light is be patient and wait until it suits the needs of your photograph. Bright daylight is often not the best time to be outside and shooting, as the sun’s direct rays can be too harsh and create too much contrast especially if there are trees, building, or other elements casting big shadows.

image-003-bronze-man


Instead, take the tortoise approach and wait until the sun is lower on the horizon. An hour or so before sunset is one of the best times to be out taking pictures, as the low angle of the sun creates a much more pleasing source of light than when it’s directly overhead. Another good time to be shooting in nature is right after sunrise, as you still get the low angle and warm colors. I had to get up early to take this picture of a bronze pedestrian whom someone had bedecked with a bit of garland. But by waiting for the sunlight to be what I needed, rather than what happened to be available, I was able to get a much better photo.  It might not have been the quickest option, but it certainly yielded a much better image.

3. Be part of nature

Taking photos of wildlife does not always require a telephoto lens, but it does require patience. If you want to get good pictures of the animals around you, whether it’s in your backyard or on a hike up the mountains, it’s often best to be patient and let nature come to you. Animals will hear you coming and quickly scamper off, but if you stake out a good spot to wait for them you can be rewarded with some compelling photographic opportunities. A few weeks ago I wanted to get a picture of a squirrel, so I started chasing this one around while he looked for nuts and acorns. I soon realized this was an exercise in futility, as he kept running away from me! So instead I picked out one spot and just waited. After a while he crept back and started poking around near me, and I was able to get a decent picture.

Image003 squirrel

Nature can be a fickle mistress, and will often refuse to comply with what might seem like quite reasonable requests (“Hold still, little birdie! No, don’t fly away!”). But if you take time to be part of nature, and even let nature come to you, you will often be rewarded with much better photos than you could get by rushing into things.

image-005-snake

4. Let kids be kids

Trying to get a good picture of children can take all the fun out of a birthday party or an afternoon at the park. For many of us, our instinct is to be in control: “Look here everyone! Now say cheese!” Inevitably one kid will be smiling, one will be blinking, one will be staring off to the side, and one might even be crying. It might seem like getting a good picture of kids is almost impossible! Thankfully, there is hope. Instead of rushing like the hare to construct a greeting-card-worthy photograph, try taking the opposite approach and just let the kids play. Keep your camera ready, and use it to capture the kids just being themselves. The catch is, you could be waiting quite a while, but you (and the kids) will have much more fun in the process.

Image004 girl

I took this photo of my friend’s daughter while she and my son were playing around in the dirt, and even though it took a while and I got myself rather muddy in the process, I ended up with a picture that was far more interesting than all the posed ones we took earlier. Another advantage of this approach comes months later when you are looking through your pictures. Posed photos of children smiling at the camera might seem like a good idea at the time, but afterwards you will often find that these are not nearly as interesting as the ones where the kids are just playing around and acting natural. But if you are not willing to be patient and wait for these moments to happen, they will often slip by and be lost forever without you ever even noticing.

image-007-kids2

No fancy studio, no special camera gear- just sunlight and patience

5. Learn one new camera function, and learn it well

Cameras today have so many options, buttons, and dials it’s no wonder so many people shoot in Auto mode, and I can hardly blame them for doing so! Learning to operate your camera can be a daunting task, and if Auto takes pictures that are generally good enough, why bother with all the menus and knobs? I have seen so many people try to learn how to operate their cameras to take better pictures, but give up in frustration because it’s so overwhelming. The trick is to pick one thing and learn it thoroughly, and in doing so the various elements of exposure and photography will slowly start to come together.

For example if you shoot in Auto, try choosing the Aperture Priority mode (Av or A on your camera) and learn how to control the aperture of your lens to get better shots. Don’t worry about shutter speed, ISO, white balance, AE-L, or anything else just yet. All that is important, but it can wait. Once you spend a few days, weeks, or even longer getting the hang of adjusting the aperture, then move on to something else like the Shutter Priority mode (S or Tv on your camera) where you control the shutter speed and let the camera figure out the rest. You will soon start to see how the various elements of exposure (Aperture, Shutter, and ISO) affect one another, and how to control them to produce the amazing shots that have somehow always eluded your grasp.

By sticking with just one new camera function at a time you might not learn everything about your camera as quick as you would prefer, but you will likely avoid the frustration and burnout that often comes with trying to learn too many new concepts at once. After all, the hare might have gotten off to a quick start but we all know how that turned out. In photography, it pays to be more like the tortoise: slowing down might not seem ideal at first, but it will help you produce brilliant results in the end.

The post 5 Tips to Help You Slow Down and Take Better Photos by Simon Ringsmuth appeared first on Digital Photography School.


Digital Photography School

 
Comments Off on 5 Tips to Help You Slow Down and Take Better Photos

Posted in Photography


Live Google+ Hangout at 10AM PST This Morning About How to Maximize Your Photos Through Social Media

11 May

Daniel Krieger
The Smoothest Dude Alive, Daniel Krieger.

My good friend Daniel Krieger (aka smoothdude), along with MacPhun’s Laurie Rubin, and I will host a live G+ hangout this morning talking about ways to promote your photography through social media. We’ll record the episode to my youtube account as well in case you can’t make it live and want to watch later.

Come join the show here if you can make it.


Thomas Hawk Digital Connection

 
Comments Off on Live Google+ Hangout at 10AM PST This Morning About How to Maximize Your Photos Through Social Media

Posted in Photography


Abstract Photos to Inspire You

10 May

This week I want to get you thinking outside the box, and looking at ordinary things differently. Earlier in the week James Maher wrote How to do Great Photography Even When Your Surroundings are Boring so continuing on that path is some abstract photography which is a great way to photograph around home to create something different. 

So here are a few abstract photos to give you some ideas and inspiration

Photograph Color Explosion 1 by Margaret Morgan on 500px

Color Explosion 1 by Margaret Morgan on 500px

Photograph Abstract Red & Blue by Miki Asai on 500px

Abstract Red & Blue by Miki Asai on 500px

Photograph layered ripples by Mazin Alrasheed Alzain on 500px

layered ripples by Mazin Alrasheed Alzain on 500px

Photograph Watercolours by Whatshisname  on 500px

Watercolours by Whatshisname on 500px

Photograph Rang Barse by Rahul Tripathi on 500px

Rang Barse by Rahul Tripathi on 500px

Photograph Jumping Colors by Markus Reugels on 500px

Jumping Colors by Markus Reugels on 500px

Photograph Hidden Sapphire by Ganjar Rahayu on 500px

Hidden Sapphire by Ganjar Rahayu on 500px

Photograph Fushimi Inari Shrine by César Asensio Marco on 500px

Fushimi Inari Shrine by César Asensio Marco on 500px

Photograph Paper by Peter Simonides on 500px

Paper by Peter Simonides on 500px

Photograph Pale love story by Shihya Kowatari on 500px

Pale love story by Shihya Kowatari on 500px

Photograph Abstract. by Santopietro  Ciro on 500px

Abstract. by Santopietro Ciro on 500px

Photograph Apart ... by Ahmed Abdulazim on 500px

Apart … by Ahmed Abdulazim on 500px

Photograph Soap Film by Markus Reugels on 500px

Soap Film by Markus Reugels on 500px

Photograph Untitled by Xavier Solé Guimerà on 500px

Untitled by Xavier Solé Guimerà on 500px

Photograph Cøøking Art by Silver Paul on 500px

Cøøking Art by Silver Paul on 500px

Photograph C6J7799 Abstract Wave #3 by David Orias on 500px

C6J7799 Abstract Wave #3 by David Orias on 500px

Photograph Bokehlism by Suradej Chuephanich on 500px

Bokehlism by Suradej Chuephanich on 500px

Photograph Garden Bubble by Ricardo  Alves on 500px

Garden Bubble by Ricardo Alves on 500px

Photograph Black Hole Abstract by Alan Borror on 500px

Black Hole Abstract by Alan Borror on 500px

Photograph Abstract by Samir Salim on 500px

Abstract by Samir Salim on 500px

Photograph Shells by Jared Lim on 500px

Shells by Jared Lim on 500px

Photograph Painting with light by Mike Pearce on 500px

Painting with light by Mike Pearce on 500px

Photograph Hola {CERO} by Uxio  on 500px

Hola {CERO} by Uxio on 500px

Photograph Painted Water ... by Ewa Frye on 500px

Painted Water … by Ewa Frye on 500px

Photograph Reflection by Yonko Dikov on 500px

Reflection by Yonko Dikov on 500px

Photograph Whirl by Shihya Kowatari on 500px

Whirl by Shihya Kowatari on 500px

Photograph 70/365 Fork((((s)))) by Mark DeCamp on 500px

70/365 Fork((((s)))) by Mark DeCamp on 500px

Photograph A Singular One by Eleonora Di Primo on 500px

A Singular One by Eleonora Di Primo on 500px

Photograph Curved Bench by Peter Crock on 500px

Curved Bench by Peter Crock on 500px

Photograph shadow of the stairs by Roberto Serra on 500px

shadow of the stairs by Roberto Serra on 500px

Photograph Where shadows go by Olga Bekker on 500px

Where shadows go by Olga Bekker on 500px

Photograph Moden Camping by Toby Harriman on 500px

Moden Camping by Toby Harriman on 500px

Photograph Shadow play by Guru Nandha on 500px

Shadow play by Guru Nandha on 500px

Photograph green tsunami by Wael Massalkhi on 500px

green tsunami by Wael Massalkhi on 500px

Photograph Warp:tree by Fahad Abdulhameed on 500px

Warp:tree by Fahad Abdulhameed on 500px

Photograph Like a mica by kazumi Ishikawa on 500px

Like a mica by kazumi Ishikawa on 500px

Photograph 50 days 50 shots - File 17 by Carlos Silva "Avlisilva" on 500px

50 days 50 shots – File 17 by Carlos Silva "Avlisilva" on 500px

The post Abstract Photos to Inspire You by Darlene Hildebrandt appeared first on Digital Photography School.


Digital Photography School

 
Comments Off on Abstract Photos to Inspire You

Posted in Photography


Sweeten Your Photos by Shooting During the Blue Hour

09 May
Montauk Point, NY. EOS 5D Mark II with EF 17-40 f/4L. 15 seconds at f/11, ISO 800.

Montauk Point, NY. EOS 5D Mark II with EF 17-40 f/4L. 15 seconds at f/11, ISO 800.

There is a period of time each day, just before sunrise and just after sunset, when the sun is below the horizon, when the light is known as “sweet light.” This period of time is known as “The Blue Hour.” This is a period of time each morning and evening when there is neither full daylight, nor full darkness. The light is almost ethereal, with a soft blue glow bathing the scene. The Blue Hour happens in tandem with the Golden Hour, making the beginning and end of the day exceptional for photography, providing two very different types of light within a single time span.

Equipment and settings

The Blue Hour is a prime time for landscape photography. Subjects that have their own lighting, such as city buildings or lighthouses, tend to look especially good, as the yellow glow of their lights cuts through the blue.  A tripod will be necessary to capture these scenes, unless you’re willing to raise your ISO to the point you can hand hold your exposures.  Setting a proper white balance is one of the keys to Blue Hour photography.  When set to AWB (auto white balance), the camera will try to correct for the blue tone the light has, which can result in flattening your image. If you shoot RAW, you can correct for this in pos- processing, to get just the right white balance for your taste. If you’re a JPEG shooter, you may want to try setting a custom white balance, or you can use your camera’s Live View setting to preview what different white balance settings will do to the scene.

Boston's Zakim Bridge. EOS-1D Mark III with EF 24-105 f/4L IS. 30 seconds, f/11, ISO 100.

Boston’s Zakim Bridge. EOS-1D Mark III with EF 24-105 f/4L IS. 30 seconds, f/11, ISO 100.

I prefer the time during the Blue Hour when the sun is close enough to the horizon that there is a soft orange glow along the horizon. This adds an extra quality to the image, especially when you consider that orange is blue’s complementary color.  You may want to bracket your exposures, as this will vary the intensity of any light in the image, be it the orange glow remaining from the sun, or artificial lighting on buildings.  Blending exposures for HDR images may not be necessary, but it will be possible if you use a tripod and decide to try some HDR.

Cannon Beach, Oregon. EOS 5D Mark III with EF 24-70 f/2.8L II. !20 seconds, f/11, ISO 640.

Cannon Beach, Oregon. EOS 5D Mark III with EF 24-70 f/2.8L II. !20 seconds, f/11, ISO 640.

The window of opportunity for Blue Hour shooting is small, and probably much shorter than during the Golden Hour. You’ll want to be at your spot ready to go well in advance of the Blue Hour. To plan your time, you can visit The Blue Hour Site to find out when the Blue Hour starts and ends at your location.  If you don’t have access to the internet, a good rule of thumb is that the Blue Hour starts about 15 minutes after sunset, and ends around an hour after sunset.  For sunrise, it will start roughly an hour before sunrise and end 15 minutes before sunrise.  When I plan to shoot landscapes, be it at sunrise or sunset, I always plan to shoot both the Golden Hour and the Blue Hour.  I tend to get a lot of variety due to the change in light, and it makes the time spent that much more worthwhile.

Pemaquid Point, Maine. EOS 5D Mark II with TS-E 17mm f/4L. 8 seconds, f/11, ISO 400.

Pemaquid Point, Maine. EOS 5D Mark II with TS-E 17mm f/4L. 8 seconds, f/11, ISO 400.

Boston Skyline. EOS 5D Mark II with EF 24-105 f/4L IS. 1 second, f/11, ISO 100.

Boston Skyline. EOS 5D Mark II with EF 24-105 f/4L IS. 1 second, f/11, ISO 100.

Cape Neddick, Maine. EOS-1D Mark III with EF 17-40 f/4L. 0.4 seconds, f/8, ISO 400.

Cape Neddick, Maine. EOS-1D Mark III with EF 17-40 f/4L. 0.4 seconds, f/8, ISO 400.

_MG_0306

Please share your Blue Hour photos and comments below.

The post Sweeten Your Photos by Shooting During the Blue Hour by Rick Berk appeared first on Digital Photography School.


Digital Photography School

 
Comments Off on Sweeten Your Photos by Shooting During the Blue Hour

Posted in Photography


Is it true? New service detects processed photos

07 May

tn_2-thumb.jpg

Fourandsix Technologies, Inc. has launched izitru.com (pronounced ‘is it true’) a new, free service and companion iPhone app that can determine whether or not an image has been processed. After uploading a JPEG file to the site, izitru runs six image analysis tests that can differentiate whether or not the image has been altered since it was captured with a digital camera. Izitru then assigns the image a ‘trust’ rating. Learn more

News: Digital Photography Review (dpreview.com)

 
Comments Off on Is it true? New service detects processed photos

Posted in Uncategorized