RSS
 

Posts Tagged ‘Photos’

The US Copyright Office is ‘modernizing’ group registration of photos

27 Jan

Photographers in the USA wishing to register groups of images for copyright protection will find the process much simpler and easier starting on February 20th.

According to the US Copyright Office, ‘modernized’ practices will let people register either published or unpublished work via a new on-line application system (no more paper applications…) that will allow you to submit up to 750 images at a time. The new rules also re-define the word ‘Author’ to include individual photographers OR groups of photographers employed by the same person or organization.

The filing process will require those submitting images to title the group and each image, and to create an Excel or PDF list of each image within the group. The group of images can’t occupy more than 500MB, but compression can be used to reduce file sizes, and the registration fee for each group will be $ 55.

Unpublished and published images can’t be registered together, and all published works in an application have to have been published within the same year (but not necessarily in the same country).

A key point about the process, according to a detailed explanation by artists’ attorney Leslie Burns, is that under the scheme, each image within the group will be registered individually, so damages will be paid in full for any single image use. Infringers won’t be able to claim that using one image from a group attracts only a fraction of a claim against the registration.

The new rules go into effect February 20th, and can be read in full on the Government Publishing Office website (PDF). Or, for a more easily digestible take on what’s changing, visit the Copyright Alliance website.

Copyright Office Summary

LIBRARY OF CONGRESS
U.S. Copyright Office
37 CFR Parts 201, 202
[Docket No. 2016–10]

Group Registration of Photographs

AGENCY: U.S. Copyright Office, Library of Congress.

ACTION: Final rule.

SUMMARY: The U.S. Copyright Office is modernizing its practices to increase the efficiency of the group registration option for photographs. This final rule modifies the procedure for registering groups of published photographs (GRPPH), and establishes a similar procedure for registering groups of unpublished photographs (GRUPH).

Applicants will be required to use a new online application specifically designed for each option, instead of using a paper application, and will be allowed to include up to 750 photographs in each claim.

The ‘‘unpublished collection’’ option (which allows an unlimited number of photographs to be registered with one application), and the ‘‘pilot program’’ (which allows an unlimited number of published photographs to be registered with the application designed for one work) will be eliminated. The corresponding ‘‘pilot program’’ for photographic databases will remain in effect for the time being.

The final rule modernizes the deposit requirements by requiring applicants to submit their photographs in a digital format when using GRPPH, GRUPH, or the pilot program for photographic databases, along with a separate document containing a list of the titles and file names for each photograph. The final rule revises the eligibility requirements for GRPPH and GRUPH by providing that all the photographs must be created by the same ‘‘author’’ (a term that includes an employer or other person for whom a work is made for hire), and clarifying that they do not need to be created by the same photographer or published within the same country. It also confirms that a group registration issued under GRPHH or GRUPH covers each photograph in the group, each photograph is registered as a separate work, and the group as a whole is not considered a compilation or a collective work.

DATES: Effective February 20, 2018.

Articles: Digital Photography Review (dpreview.com)

 
Comments Off on The US Copyright Office is ‘modernizing’ group registration of photos

Posted in Uncategorized


How to Take Better Sunset Photos

24 Jan

A beautiful sunset is one of the most desirable subjects for photographers to shoot and can be achieved any time of the year when the light is right. Most outdoor photographers will tell you that this is their favourite time of day to take photos when the landscape is bathed in golden light and the rich colours and last rays of the day can be magical. Photographing these moments can be truly satisfying so here are six useful tips to help you capture better sunset photos.

1 – Shoot into the light

Sunset photography tips 3F6A3213 HDRAB

You are more likely to snap a stronger image of the setting sun during the hour leading up to sunset, known as the golden hour. If you aim to shoot directly into the sun when it is low on the horizon you are more likely to capture a better scene than if you were to shoot into the light earlier in the day when the glow of the sun can be too strong and harsh.

That is when lens flare is likely to be present in the image due to the sun hitting the front of the lens element directly. It can sometimes, however, be used to your advantage.

Remember to take care when staring into the sun and don’t do this for too long to prevent damaging your eyes.

2 – Turn around (and shoot what’s behind you)

Have you ever been so focused on capturing the scene in front of you with the sun setting before your very eyes, to then notice that the view behind is just as spectacular? Novice photographers often make this mistake when starting out.

When you’re setting up the camera and composing for the shot in from of you, it is worth turning around to see whether the scene behind you offers any photographic potential. If it does, be sure to capture this alternative view as well.

Sunset photography tips 3F6A5279Deadvlei Namibia

3 – Hide the sun

If you have found a view you like and it is too bright shooting towards the sun, try hiding the sun behind an object to further improve the image. You can experiment by partially shielding the sun behind a tree, rock, or person, for example, to find different compositions.

This technique can result in striking images where you can create great silhouettes or even sun flares by partially masking the sun.

Sunset photography tips 3F6A3116 HDR

4 – Change focal length

Your focal length setting and choice of the composition will make a big difference to the overall picture. Experiment with different focal lengths and figure out what works well and what doesn’t.

If you want to photograph the setting sun in isolation and for it to be the main feature, zoom in and take close-ups. If you want to capture a broad and breathtaking landscape, choose a wider field of view to take in a larger area and include more elements that may provide a more visually pleasing scene.

Sunset photography tips 3F6A0444

5 – Experiment with the White Balance

You will find most cameras are set to Auto White Balance where the camera works out the color tone automatically and therefore sets the color of your photographs. This is the simple option and is great for capturing images where color shifts are not required.

However, if you want to change the color temperature of your image don’t be afraid to experiment with different White Balance settings to create a more interesting and visual image. To add warmth to your image, you will want to select a White Balance such as Cloudy or Shade, whereas if you want to create images with a cooler look and feel, try Tungsten or Fluorescent.

Sunset photography tips 4X8A4732

6 – Stick around after sunset

Once the sun disappears, don’t be tempted to pack up your camera bag and head home as you may get lucky with the light and witness a wonderful afterglow. Stay around after sunset, the sky will usually light up in color 25 minutes after the sun has set below the horizon, which can often give spectacular and colorful light.

Cloud formations can bring another dimension of beauty compared with clear skies especially when their colors start to pop and ignite.

Sunset photography tips 3F6A4514

Conclusion

Without a doubt, sunset photography can be very enjoyable. Using the techniques above may help you improve your pictures and capture a shot you like. Please share your sunset photos and tips in the comments below.

The post How to Take Better Sunset Photos by Jeremy Flint appeared first on Digital Photography School.


Digital Photography School

 
Comments Off on How to Take Better Sunset Photos

Posted in Photography


4 Tips For Better Black and White Photos In Lightroom

20 Jan

Some photographers use Photoshop for converting photos to black and white, others use plugins. But what you might not know is that you can create beautiful black and white images with Lightroom. The benefit of keeping your workflow within Lightroom is that it saves you a lot of hard drive space (as the only way to send a full-quality photo file to a plugin or to Photoshop is to convert it to a 16 bit TIFF).

The tips in this article will help you create beautiful black and white photos in Lightroom without Photoshop or an extra plugin!

4 Tips For Better Black and White Photos In Lightroom

1. Shoot Raw

The first tip is quick and simple. You need to use the Raw format to make the most out of your camera and for Lightroom to get the best out of your photo files. JPEG files have already been developed and compressed by the camera and don’t contain the information that Lightroom needs to make a good black and white conversion.

2. Learn to use the B&W tab

4 Tips For Better Black and White Photos In Lightroom - B&W panel

The B&W tab is part of the HSL / Color / B&W panel. When you click on the B&W tab, Lightroom converts your photo to black and white. At the same time, it automatically adjusts the Black & White Mix sliders (see below) to the settings it thinks will give you the best black and white conversion.

As this is an automated process, it is quite likely that you’d like to take control and override the settings. But first, you need to know what the Black & White Mix sliders actually do. They work very simply and make the tones in your photo lighter or darker according to the underlying color.

The easiest way to explain this is with examples. The color photo below has a deep blue sky which would look great in black in white.

4 Tips For Better Black and White Photos In Lightroom

When you click on the B&W tab Lightroom carries out an automatic conversion. This is what the photo looks like.

4 Tips For Better Black and White Photos In Lightroom

And these are the Black & White Mix sliders as set by Lightroom.

4 Tips For Better Black and White Photos In Lightroom

Tweak it a bit

The conversion looks good, but you can take control by moving the sliders yourself to see what happens. In this example, you could move the Blue slider left to make the sky darker, which would make the conversion even more dramatic. Or you could move it right to make the sky lighter and give a softer, more subtle conversion. It’s up to you.

You can see the difference when I move the Blue slider more to the left.


Here the blue sider is at -30.

Or move it to the right and the sky gets lighter: Blue + 25

Skin tones

The next example shows how the Orange slider makes a big difference to Caucasian skin tones. Here’s a portrait converted to black and white in Lightroom, with the Black & White Mix settings as chosen automatically by Lightroom.

4 Tips For Better Black and White Photos In Lightroom

This is what happens when you move the Orange slider. To the left makes skin darker – to the right makes it lighter.

4 Tips For Better Black and White Photos In Lightroom

Orange at -31. It makes the model’s skin darker and brings out its texture. If that is not desired – move the Orange slider to the right. 

Orange at 0.

Orange at +20

Experiment with the B&W Mix sliders to see the effect they have on your photos. Keep these points in mind as you do so:

  • The sliders always affect the underlying colors in the photo. If it helps to see the colors in your photo so you can understand which tones are affected by which sliders, click on the Color tab in the HSL / Color / B&W panel. Click the B&W tab again to return to black and white and your settings will not be lost.
  • The B&W panel is for subtle adjustments. If you move the sliders too far you’ll get strange effects like pixelation. Try not to go past +35 or -35.
  • If there are people in your photos pay attention to skin tones when adjusting the Red, Orange, or Yellow sliders. Zoom into 100% to double check your adjustments haven’t done anything odd to their skin tones.

3. Apply Clarity wisely

Clarity is a powerful adjustment that increases contrast, emphasizes texture, and adds punch to your black and white photos. But it needs to be used wisely in order to avoid an overcooked look. If you are new to Lightroom this can be hard to judge at first, but a good rule of thumb is to always add a little less Clarity than you think you need.

Another tip is that Clarity may be more effective when it’s applied locally. A good example of this is a photo taken with a prime lens at a wide aperture, with the subject in sharp focus and a blurred background. In this situation, it’s best to apply Clarity to the sharp areas using a local adjustment.

Let’s look at some examples. In the first, the entire scene is sharp. You can apply Clarity globally (using the slider in the Basic panel) to photos like these. Here, I set Clarity to +80 to emphasize the texture of the metal.

4 Tips For Better Black and White Photos In Lightroom

In the second, I applied Clarity only to the cow’s head, but not to the blurred part of the photo, using the Adjustment Brush.

4 Tips For Better Black and White Photos In Lightroom

This screenshot shows the mask created by the Adjustment Brush.

4 Tips For Better Black and White Photos In Lightroom

4. Learn from Lightroom develop presets

Follow the tips in this article and you’ll have a good foundation for working in black and white in Lightroom. Now it’s time to get even more creative. There are lots of techniques you can use, from Tone Curve adjustments to Split Toning and manipulating contrast.

One of the best ways to learn these techniques is to download Develop Presets made by other photographers. These are helpful if you are new to black and white photography by giving you a quick and easy way to convert your photos to black and white without paying too much attention to the details.

But you can also learn a great deal from those presets by analyzing the settings used. Go into all the Develop module panels and see what the photographer has done. For example, I developed the photo below using a preset.

Black & white in Lightroom

One of its characteristics is that there are no true black tones in the photo. This is confirmed by the gap on the left side of the histogram.

4 Tips For Better Black and White Photos In Lightroom

How has this been achieved? The answer is in the Tone Curve panel. The creator of the preset lifted the left-side of the Tone Curve up, which gives the effect seen in the photo.

Black & white in Lightroom

Conclusion

Lightroom is a powerful tool for black and white conversions and you’ll be amazed at what it can do when you learn how to use it properly. The tips and techniques in this article will get you started. If you have any questions about this then please let us know in the comments!


SuperBlack Presets for Lightroom

Want to get a head start with black and white? Take a look at my SuperBlack Presets for Lightroom, developed to help photographers like you create powerful black and white photos in Lightroom.

The post 4 Tips For Better Black and White Photos In Lightroom by Andrew S. Gibson appeared first on Digital Photography School.


Digital Photography School

 
Comments Off on 4 Tips For Better Black and White Photos In Lightroom

Posted in Photography


What I’ve learned after sharing my photos for free on Unsplash for 4 years

20 Jan
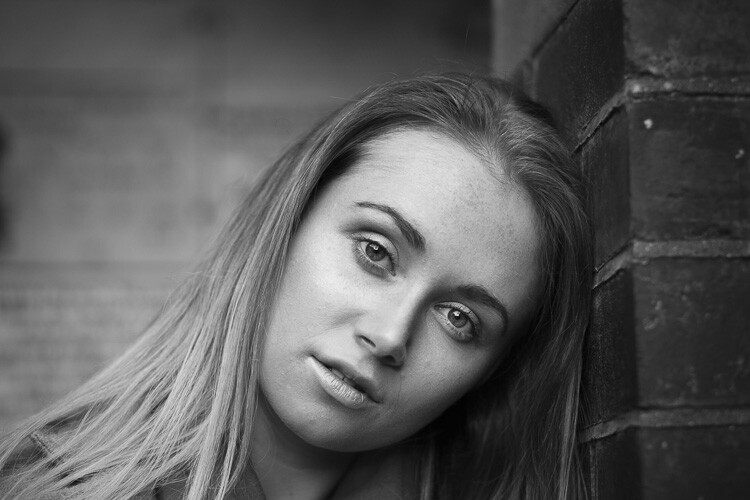
Stairs in Coimbra, Portugal?—?one of the 460 image I uploaded on Unsplash

This editorial was originally published on Medium, and is being republished in full on DPReview with express permission from Samuel Zeller. The views and opinions in this article are solely those of its author.


What is Unsplash?

Unsplash is a website where photographers can share high resolution images, making them publicly available for everyone for free even for commercial use. It was created in May 2013 by Stephanie Liverani, Mikael Cho and Luke Chesser in Montreal, Canada.

Four months after creation they hit one million total downloads, and a year after they had more than a million downloads per month. Now there are 400,000+ high resolution images hosted on Unsplash, which are shared by 65,000+ photographers from all around the world.

Last month 2,400 photographers joined Unsplash and shared 25,000 new images (not just snapshots, some really good photography).

Here are a few examples:

Visitors in the last month viewed 4 billion photos and pressed the download button 17 million times. The average Unsplash photo is viewed over 600,000 times and downloaded over 4000 times. No other social network can give you those numbers.

Unsplash is massive, and it’s (currently) one of the best place to get visibility for your work as a photographer. Some of my most appreciated images were viewed over twelve million times and downloaded a little bit more than 125’000 times.

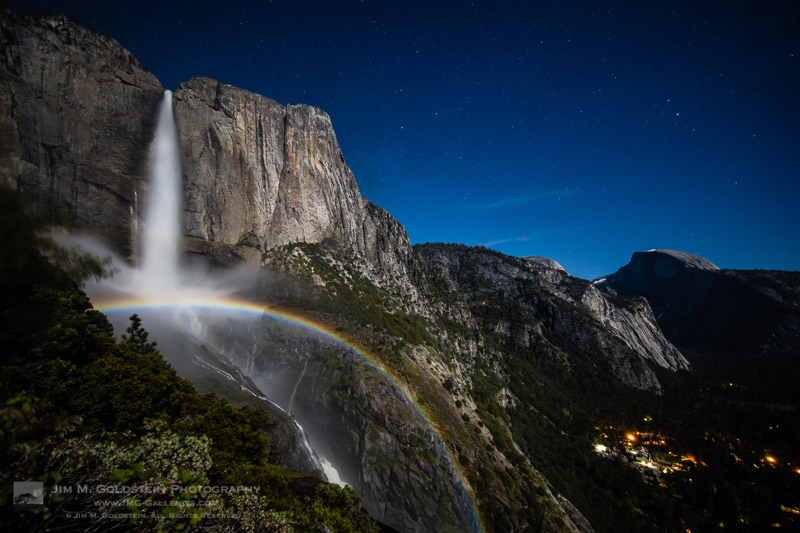
Here are the top nine below:

I receive 21 million views per month (677’000 per day) and 93’000 downloads (3000 per day). As a result, every day there’s one or two person that credit me on Twitter for an image they’ve used. I also get emails regularly and new backlinks to my website every week.

And it’s not just for old users who’ve been sharing for a long time, here’s the stats from someone who joined Unsplash just three days ago:

In total I’ve uploaded 460 images, they’ve been viewed over 255 million times and downloaded over 1.7 million times. Of course these are just numbers, but they are much more meaningful (and larger) than the likes you can get on Instagram or Facebook.

Designers all around the world have been making album covers, posters, article headers, blog posts, adverts and billboards with my images on Unsplash. Like many photographers I chose to turn what was idle on my hard-drive into a useful resource for other creatives.

Here’s a few examples:

That’s not all, one of my first client (when I started as a freelancer in 2016) found me on Unsplash. They’re the biggest bank in Switzerland and I did four projects for them.

One included spending a night at 3,571 m (11,716 ft) at the highest observatory in Europe, the Jungfraujoch Sphinx observatory to document it (full project visible here); the second one was much lower at the Zürich airport photographing below aircraft like the Airbus A340.

The reason why they reached out to me? They were already using a few of my Unsplash images in their global database and wanted more in the same style.

Fast forward to a few months ago, I landed a new client (a design firm) and at one of the meeting they introduce me to one of their designer. The guy said after hearing my name “I know you already, I’ve been using some of your images on Unsplash, they’re great.”

The problem with social networks

People, especially the new generation, are becoming incredibly lazy. Our attention span is lower than ever, and we get stuck in nasty dopamine loops—we literally need to check our phones multiple times a day.

Social networks make us think we need to post new work often to get good engagement and get noticed, but the truth is great photographers take a year or more to publish new projects (for example Nick White “Black Dots” or Gregor Sailer “Closed cities”). Good work will always take time, and it will always get noticed.

We all fight for attention, for likes, for numbers that will not bring us anything good. We are in that aspect devaluing our own craft by over-sharing—being tricked into becoming marketing tools for brands.

The rise and fall of Instagram

What will you do once Instagram becomes old school? I don’t know if you noticed, but Facebook are ruining the whole Instagram experience by bloating the UI and releasing features for brands.

Here’s the user interface in March 2016 vs today on an iPhone 5/SE screen:

Seriously, what the heck? I can’t even see the user images anymore when I land on their profile.

Before Facebook bought it, the app was a simple, chronological photo-sharing service. Now they’re rolling out “recommended posts” from users you don’t even follow right into your feed. The suggested content will be based on what people you follow have liked (and probably on how much brands are paying to shove their ads right into your smartphone screens).

By sharing on Instagram daily as a photographer you are basically expending a ton of effort to grow a following on a network that’s taking a wrong turn. It’s like trying to build a sand castle on a moving elevator—sure, it works. but it’s not the most effective use of your time.

Not only is real engagement dropping, soon your reach will crumble unless you pay to promote your posts. I’m running an account with a little bit over 50,000 followers, and for a post that reach 25,000 people, only 170 of them will visit the account—the rest will just merely glance at the image for a second (maybe drop a like) and keep scrolling.

People create accounts on Instagram, then stop using it after some time. Truth is, many of your followers are inactive by now, and most of the ones that are active don’t care enough about your work to even comment on it.

What’s even worse is that Instagram makes photographers literally copy each other’s styles because only a few type of images can get better engagement and please the masses—think outdoorsy explorers taking pictures of forests from a drone or hanging their feet off a cliff. They’re diluting their work and style by focusing on what will grow their account.

Followers are still valuable now, but in two to three years they’ll be worthless. There’s a ton more 50k+ accounts than two years ago. Brands are now looking into accounts with 100–150k to do collaborations. Instagram is a big bubble that will blow one day, and I don’t want to have all my eggs in the same basket when it happens.

Would you take someone seriously if he told you, “I’m working on my Myspace/Flickr account every day! I got soooo many followers, I’m famous!”

I have 16,500 followers on my personal Instagram account and I could close it any day. The reason why? I also have a newsletter with over 25,000 subscribers. Guess which is more valuable and long-lasting?

Too many photographers today are forgetting that a portfolio, experience, publications and exhibitions are far more important than building up their following on a social network.

There’s still a lot of good sides to Instagram, the community aspect to start with and also the fact that there’s not yet a proper contender to replace it. It’s still (to me) the best place to discover emerging photographers and get your dose of inspiration. There’s also a great deal of photography magazines that are actively curating work on it.

The culture of the new

That’s the big problem with photography online as curator and photographer Andy Adams explains, “It’s always about the new, which inevitably means the not new drops off our radars way sooner that it should.”

Social networks like Instagram and Facebook are flawed for photographers for this particular reason. They are great for brands who can afford to hire social media managers and post regularly or sponsor content.

There are other social networks that don’t rely on a feed but rather on search, for example Behance or EyeEm. Those are way better for photographers in the long term. They have a higher rate of discoverability.

The images I share on Unsplash don’t lose value, in fact there’s no difference at all between a year old shot and a week old shot. Their value are not based on time. I could stop uploading new images and still have a lot of visibility every day. Try not posting on Instagram for a month…

Here’s a real example, those two images below were shared on Unsplash in October 2014. Notice how they still gather a ton of views/download per month even after four years?

Leaving a mark

Last year in February I lost my dad to cancer—he was diagnosed just a month before in January. I wrote before on the concept of memory and digital data (See: the data we leave behind) but his sudden death made me realize how short life can be.

We always say “we need to enjoy every moment, life is fragile,” but it’s impossible to understand it fully until you have lost someone close. My father had bookmarked my website, my Instagram account and my Unsplash account on his laptop, he was checking them often, he was probably my biggest fan.

What’s left of him are memories but also his files on his computer—photos of him and his art (he was doing digital art and uploaded a lot of pieces on DeviantArt). I’m grateful to have all of this to remember him.

As a photographer and artist I feel like it’s a necessity for me to also leave something behind, because we never know what will happen tomorrow.

Having some of my images on Unsplash is one way to ensure that even if I’m gone my work will keep on living. Another way is through prints and books. Speaking of which, I’m finishing my first book that will be published in April by Hoxton Mini Press.

Photography isn’t about making money as a freelance photographer, it’s also a part of us, stories of where we traveled, visual tales of our singular experiences with life. I choose to share it as much as possible because I can.

There’s one last reason why I share photographs for free and Josh summed it up very nicely in one of his Medium article, here’s what he wrote:

“Beauty has always been free. It came in the box with sunlight and eyeballs. It was granted to us upon birth as we first laid eyes upon our beautiful mothers and then mother Earth. For those of us with extreme empathy and a wide-eyed approach to seeing the world, finding the beautiful all around us and capturing it is a deep and glorious honor. Yes, you can have that image at the top for free?—?perhaps not because it has no value, but because I simply want you to see what I can see. I want to share in the joy of this world’s beauty. The image, in that scenario, is only a document of our mutual appreciation for it. And maybe taking money off the table in that discussion is actually what helps it remain beautiful.”

Josh S. Rose

What’s next

I feel like Unsplash is just the beginning of a new era of photography. It’s thrilling to be able to grow with it.

I was born in 1990 just before the world wide web, and I’ve seen how technology evolved for the past twenty years. I’m afraid of how addicted we have become to it. How fast paced things have become. We need more generosity, community based efforts, human curation and less algorithms driven by the need of profit. We need to slow down.

Some projects are trying to focus more rewarding artists instead of advertisers, and Ello is one of them. I’ve made the decision to stop using my personal Instagram account and switch to their social network.

But that’s a topic for a different article.


Samuel Zeller is a freelance photographer based in Switzerland, an ambassador for Fujifilm and the editor of Fujifeed magazine. You can contact him here and follow his recent work on his website and Ello.

Articles: Digital Photography Review (dpreview.com)

 
Comments Off on What I’ve learned after sharing my photos for free on Unsplash for 4 years

Posted in Uncategorized


6 Tips for Better Engagement Photos

14 Jan

When doing engagement photos, it is very important both to you and to the couple that everyone feels relaxed so that you can capture them being their truest selves. When your clients are relaxed and comfortable in front of your camera, it makes a huge difference in the images you capture and ultimately the client’s experience.

Engagement photos tips 0008

Here are a few tips that can help settle your nerves and your clients’ so that you rock the session and are able to photograph them at their best.

1 – HAVE A CONSULTATION BEFORE THE SESSION

Have a simple meeting, either in person or via email, where you and the couple can talk about what the session will entail. The who, where, what, when, and how of their engagement photos. A few questions can help you narrow down the location, or locations if you’re up for doing more than one, clothing changes, and perhaps special information about the couple.


Start this conversation by asking how their wedding is coming along and how they met. This gives you great insight as to who they are as a couple. In addition, it conveys to the couple that you are interested not only in the session but in them as people. Let the conversation flow between topics and session details.

Ask questions like, “What do you envision for the feel of your engagement photos? Something more earthy or perhaps a more urban feel?” This will help you get an idea of what kind of surroundings they want for their photographs as well as where they’d feel most comfortable for their session. Another great idea is to offer shooting at a location that is special to them, so ask about that too.

Add something special just for them

Engagement photos tips 0002

Perhaps the place where they met, or where they went on their first date might be great locations if they are local and accessible. If they do reveal a place that is feasible, offer it up as one of the locations. They will love that you took interest in finding out such a place and recreating a special memory for them. If not, then go with the previous ideas and
narrow down some places where you like to shoot that go along with what they are envisioning for style and feeling.

Any additional details you can get during the consultation are key to helping you be more confident on the day of the shoot. Knowing a little more about the couple helps to have a few conversation starters as well, which will become important on the day of the engagement photo shoot.

Engagement photos tips 0017

Each couple is different, so it helps when you can get to know them on a more personal level rather than showing up at the location and having an awkward beginning. It isn’t unheard of for clients to turn into friends after photo sessions!

2 – PREP YOURSELF BEFORE THE SESSION

Now that you have the details of the session planned out and a little insight as to the personality of the couple, it’s time to begin preparing yourself for the session.

Aside from the obvious gear preparations, it’s good to go over some inspirational photos that you would like to try. Have at least 10 on your phone so that you can look at them during the session when you need a refresh or want to try something new. Having a set of images to help you with ideas for posing or lighting will make you more confident on the day of the session in the event you get stuck with a pose or need to change it up.


It’s a good idea to confirm with the couple a few days before the session and ask them if they have any questions for you. Being accessible reassures the couple that they have chosen a friendly photographer, which in turn helps them to feel more comfortable when the time comes to be in front of your camera.

Get to the chosen location early, even if it’s a place where you have shot before. Going early can help you make a plan of where you want to start shooting and move through your session. Having a plan makes the session run smoothly without losing momentum.

Engagement photos tips 0012

3 – BE A FRIEND, NOT JUST A PHOTOGRAPHER

You’ve already set the groundwork for being friendly during the pre-session consultation and the confirmation and now it’s time to really be genuine.

When the couple shows up, don’t start shooting right away. Spark up a conversation with them. You will have much more relaxed clients this way and it will also relax you a bit if you’re nervous. Which, by the way, is completely normal! Plenty of seasoned photographers still get nervous before big shoots.


During the entire session, keep the conversation going. In between locations, clothing changes, and through the entire session. It relieves a little bit of the awkwardness between the clients and the professional, you. It speaks volumes when you can give your clients more of a personal experience by finding common interests, discussing the news, or even sports, anything. When your client has a good time, especially if they are nervous during the session, talking about common interests will aid in getting genuine expressions.

4 – KEEP THE SESSION MOVING

Each session and each couple is different. It’s important to keep the session moving smoothly throughout or the couple could tire quickly or become bored. This is why getting to the location and making a plan of where to shoot is so handy. Try different places within the location to shoot, offer clothing changes when you feel you’ve got enough with what they arrived wearing.

Engagement photos tips 0014

If a pose isn’t working, don’t say so, otherwise, you could make the couple feel like they’re doing something wrong. Keep going and try a different pose. Make sure that when you get a great shot, show them! This can build their confidence quickly and help them be more engaged during the session.

5 – BE IN CHARGE BUT ALLOW YOUR CLIENTS TO BE PART OF THE PROCESS

Whether this is your first engagement session or you’re worried because sessions sometimes go in a different direction than you hope – you simply need to take charge.

Direct the couple by showing the poses you’d like for them to do by demonstrating them first. Allow yourself to direct the flow of the session.


It sounds scary, however, you are the photographer. You’re the one who knows what to do and taking charge of the session speaks to the couple that you are confident in your work. Over time, it will become natural to you.

Once your clients become more relaxed in front of your camera, they will offer ideas, poses, and locations. Always allow them to be part of the creative process, as it makes them more confident and offers up more shooting opportunities where they are just being themselves.

6- HAVE FUN


You got into photography because it was fun for you, so why not have fun during your session as well? You should enjoy the shoot as much as the couple.

If you feel nervous that the session tends to go stale, have the couple do actionable poses. For example, have them dance, walk, tell each other a secret, or whisper something funny into their loved one’s ear. This will unwind them and you’ll be able to capture their real expressions.

Conclusion


Engagement photos tips 0004

All of these tips are here to help calm your nerves and allow the clients to be themselves in front of your camera. Being prepared, friendly, having a good momentum during the session, and most importantly, having fun all contribute to real expressions and real moments. Your clients will appreciate how real and relaxed you made them feel during their session and in turn, refer you to more people!

The post 6 Tips for Better Engagement Photos by Jackie Lamas appeared first on Digital Photography School.


Digital Photography School

 
Comments Off on 6 Tips for Better Engagement Photos

Posted in Photography


Apple Photos: An Under-Appreciated Post-Processing Software Powerhouse

13 Jan

As the market for digital cameras has intensified in recent years, the options available for post-processing software has exploded as well. There are dozens of great options for casual, enthusiast, and professional image-makers who are looking to get the most out of their images.

Programs like Lightroom, Luminar, CaptureOne, Affinity Photo, GIMP, DarkTable, and AfterShotPro, are all highly capable photo editors. It can be a daunting proposition to try and pick one that’s right for you.

Fortunately for Mac users, there is a fantastic option already available to you for free sitting right on your own computer. Apple Photos is a program you might have overlooked in the past, but with steady improvements over the years, it is now a serious contender when it comes to post-processing your pictures.

Apple Photos: An Under-Appreciated Post-Processing Software Powerhouse

A Brief History

The story of Apple Photos starts in 2002 with Apple’s late CEO Steve Jobs introducing an all-in-one program to let users catalog, edit, and share their digital pictures. This new software called iPhoto was revolutionary at the time, giving casual users a way to manage all their digital imaging assets in a way that was fast, simple, and easy to understand.

I used iPhoto from the first version that was released and even now it’s kind of amazing how well that initial offering worked, though it was clearly lacking many features we take for granted today. A few years later Apple waded into the professional photo editing market with Aperture, a program that was like iPhoto on steroids and was seen as a direct competitor to Adobe Lightroom.

Merger of Aperture and iPhoto

As the decade wore on and Apple saw how much people were using their mobile phones for taking and editing pictures it decided to kill off Aperture and iPhoto and replace them with a single program called Photos. This new application offered users a way to manage, edit, and share their photos much in the same way iPhoto and Aperture functioned, but also gave people the ability to sync their photo collections and even individual photo edits across all their devices.

With Photos, it was possible to crop a picture on your iPhone and then have that same cropped version of the picture show up on your Apple desktop a few seconds later – a syncing nightmare that was virtually impossible using the panoply of programs previously available from Apple.

Apple Photos: An Under-Appreciated Post-Processing Software Powerhouse

Evolution of Photos

One significant tradeoff when consolidating apps and enabling cross-device editing with Apple Photos was a lean feature set that, compared to Aperture, was downright anemic and even came up short when compared to iPhoto. Photographers hopeful for a fresh new program with all of their favorite features were dismayed and abandoned Apple Photos in droves only to rush headlong into the welcoming arms of Adobe, Macphun (now called Skylum), Corel, and other developers.

However over time, Apple has delivered on its promise to improve Photos and with each iteration, the program becomes more capable, not to mention speedier, than ever before. It can now hold its own against many of the other post-processing software options available on the market. It’s safe to say that if you haven’t used Apple Photos in a while you might be surprised at how good the current version is, and if you have never even tried the program you are in for a real treat.

Sunflower photo processed in Apple Photos app.

Photo management simplified

The core principle of Apple Photos has always been simplicity. Even back to the original days of iPhoto, Apple’s philosophy has been to make their image-editing programs as easy to use as possible. I can personally attest to this with my dad as an example.

He is a retired railroad mechanic who prefers working on small engines in his garage instead of tinkering on the computer. But he is perfectly capable of connecting his Canon Rebel T4i to his Mac, offloading his images into Photos, and post-processing them using the tools provided. Underlying that simplicity is a powerful set of editing tools that started out all too basic but have grown to be quite competent over time.

One library

The Photos app is built around the concept of a unified photo library, such that any photos you take on your phone automatically sync with your computer and vice versa. Because of that, the interface looks much the same whether you’re on a desktop, laptop, iPad, or iPhone.

Your pictures aren’t stored in the cloud per se, but Apple does use its cloud-based infrastructure to sync all your pictures while keeping the actual image files stored on your individual devices. To enable this all you have to do is click a checkbox in Apple Photos on your desktop and flip a slider on your iPhone and the program will take care of the rest.

Apple Photos: An Under-Appreciated Post-Processing Software Powerhouse

Organization

Photos organizes your images based on time data and does its best to group pictures into what it calls Events based on time and location data. Scroll through your library and you will see images grouped by categories such as People, Places, Favorites, and Memories as well as Albums which are collections of photos that you create manually or automatically using metadata (i.e. all photos with the keyword “Vacation” and “Kansas”.)

Unlike Google Photos and some other cloud-based services, none of your images are analyzed by Apple for the purpose of gathering data that can be used in advertising. A boon to privacy advocates and others who just want to keep other companies away from their pictures.

Apple Photos: An Under-Appreciated Post-Processing Software Powerhouse

Sorting and viewing images

However, some degree of machine learning is present in Photos, as the software attempts to group your images automatically with Memories based on time and location data. It also automatically looks for faces which it uses to populate the People category.

If you have ever scrolled through your near-endless Lightroom Library you might be surprised at how well Photos handles the presentation element of photo management. You can use the options buttons at the top of the screen to organize your images by Photos, Moments, Collections, or Years. All your images are available in each view, but the Photos app groups them dynamically so as you scroll up and down you will see them grouped together in specific ways. If you click Moments your images are grouped almost like day-to-day activities, whereas Collections shows photos in larger groups and Years literally displays an entire year’s worth of images at once.

Apple Photos: An Under-Appreciated Post-Processing Software Powerhouse

Grouping options for how to display your thumbnails – Moments, Collections or Years (shown here).

All this is fairly simple and intuitive, and if you have a trackpad on your Mac you can mimic the pinch-to-zoom feature found on iPhone and iPad devices to zoom in and out of your entire photo library. Longtime Lightroom users will note several deficiencies in this design methodology, though, and a host of missing features like Compare, Survey, and fine-grained sorting criteria not to mention Lightroom’s far superior Library Filter.

This illustrates the point that Apple Photos is not intended to be a full-on replacement for Lightroom. Nevertheless, it can be a good starting point for amateurs or even enthusiasts looking to get a little more control over their image organization.

Powerful post-processing editing features

Image management is one thing, but post-processing or editing is a whole other matter entirely. Unfortunately, this is where Apple Photos has traditionally fallen flat. The first version of Photos had an editing feature set that was positively anemic and downright infuriating to longtime users of Aperture. They felt they had been hung out to dry by Apple, and it was not even worth comparing to programs like Lightroom, Photoshop, and others.

But like the fabled tortoise racing against the hare, Apple has steadily injected an ever-growing list of editing tools into Photos. It’s now not only competent but worth considering for anyone who wants to dive deeper into more professional-style editing.

Basic and advanced tools

Select a photo and click the Edit button to open up a cornucopia of editing tools. They cover all the basic options you would expect to find in any prominent image editor and even a few surprises. Of course, you can perform basic edits like Crop, Red Eye Removal, and White Balance and if that’s all you want then you’re good to go.

There are also highly advanced tools like RGB Levels and RGB Curves in which individual color channels can be edited, Selective Color that lets you adjust Hue, Saturation, and Lightness for Red, Yellow, Green, Cyan, Blue, and Magenta colors. Also present is a Noise Reduction option that allows for Luminance and Color noise, and even a Lightness tool with the freedom to adjust seven different parameters including Exposure, Brilliance, Highlights, Shadows, and Contrast.

Apple Photos: An Under-Appreciated Post-Processing Software Powerhouse

Filters

Apple Photos also has a nice array of filters. They work just like those in Instagram or other programs like Luminar, with one-click presets such as Vivid, Dramatic, Mono, Noir, and more. Add to this a pretty good auto-enhance option and the ability to undo edits one at a time or revert to the original with one click, and you can see how this program might be worth a second look. I remember using it when it first launched and was immediately put off by its overly-simplistic workflow and lack of features. But now I would honestly recommend it to anyone who is considering buying a subscription to Lightroom or investing in any other image editing post-processing software options on the market.

Apple Photos is not perfect, but it could suit your needs better than you might realize. The best part is it’s absolutely free if you own a Mac computer, iPhone, or iPad. There’s something special about editing a picture on your desktop, picking up your phone and seeing all your changes automatically synced, and then realizing it’s all happening without any monthly fee or another type of additional payment.

Apple Photos: An Under-Appreciated Post-Processing Software Powerhouse

Caveats and Limitations

All of this editing and organizational finesse comes with a rather large asterisk or two, as there are some significant drawbacks to Apple Photos that savvy photographers need to be aware of.

The most important is that this is an Apple-only program, so if you use Windows or Linux you’re out of luck. The mobile version is firmly ensconced in Apple’s infamous walled garden which means it never has been, and never will be, available for Android phones.

Also despite the lack of a subscription model, if you want to take full advantage of the iCloud-based storage options you will need to shell out some cash for iCloud Drive. Apple only gives users a paltry 5GB for free. Fortunately, iCloud plans are quite reasonable, and I am perfectly happy with my 50GB plan that only costs 99 cents per month.

Apple Photos: An Under-Appreciated Post-Processing Software Powerhouse

If you want to take full advantage of Photos’ cloud-based options, you might want to purchase additional storage. Fortunately, this is optional and it’s entirely up to you whether you want to do this, and how much storage to buy.

What’s missing

Finally, there are some notable features missing from Apple Photos that users of Lightroom, Luminar, and other apps will likely bemoan – and rightly so. There’s no history panel, no brush adjustments, no radial or graduated filters, no way to share presets, no plugin architecture for third-party expandability, no way to sync edits across multiple photos, and the list goes on.

Even simply exporting a photo can be frustrating. You only have a few options available by default like sharing to online social media sites or setting an image as a desktop background. These can be customized albeit not nearly to the same level as many other programs. It’s safe to say that if you want to give Apple Photos a chance it’s best to keep your expectations in check.

Apple Photos: An Under-Appreciated Post-Processing Software Powerhouse

Unless you want to post images directly to Facebook or Flickr, you might get a little frustrated with the default sharing options.

Conclusion

I hesitate to make a solid recommendation regarding Apple Photos because it really is dependent on the needs of each individual user. Other than to say a once low-end unimpressive program without much going for it has now been transformed to the point that I think it could really be useful for a lot of people.

While it’s still not up to par with its Aperture ancestor and continues to lag behind a lot of other options on the market in terms of features and capability, it’s a free, powerful, highly effective photo manager and editor that just might surprise and delight you if you give it a chance.

The post Apple Photos: An Under-Appreciated Post-Processing Software Powerhouse by Simon Ringsmuth appeared first on Digital Photography School.


Digital Photography School

 
Comments Off on Apple Photos: An Under-Appreciated Post-Processing Software Powerhouse

Posted in Photography


Best Photos of 2017 by JMG-Galleries Blog Readers

11 Jan

_A2A1077M-2

Get ready to start 2018 off on the right foot with some creative inspiration. The results of my 11th annual Best of Photos project hopefully will provide just that by introducing you to photographers and their work from all over the world. Get ready to travel around the world in 100+ links.

For those who are new to my blog project, photographers taking part span the gamut of photo enthusiasts to professionals. The great thing about photography is that no matter what your skill level we all can relate equally in our love for the art of photography and visually exploring. With that in mind I encourage you to reach out to photographers whose work you enjoy to keep sharing & growing as an artist.  I am incredibly thankful that this tradition has been embraced and enjoy seeing how familiar faces have evolved their work & grown over the years.  I hope reviewing your best photos of the year and comparing them to years pasts keeps you inspired and aware of your progress as a photographer.

If you’d like to take part next year and be informed when submissions open for the “Best Photos of 2017? blog project add your name to my mail list. You won’t be spammed. I send out newsletters quite infrequently.

Thank to everyone who took part!  I invite you to visit each link below as I have and introduce yourself to many of the participating photographers.

Best Photos of 2017

  1. Jim M. Goldstein – Best Photos of 2017 by Jim M. Goldstein
  2. Randy Langstraat – My Ten Favorite Photos of 2017
  3. Michael Russell – My Top 10 Photos of 2017
  4. Phil Colla – Best Natural History Photos of 2017
  5. Greg Russell | Alpenglow Images – 2017 year in review
  6. Mike Matenkosky – My Favorite Photos from 2017
  7. Khürt Williams – 2017 Favourites
  8. Carl Donohue – Expeditions Alaska
  9. Kevin Ly – Kevin Ly | Best of 2017
  10. Martin Quinn – Quinn Images – Best of 2017
  11. Robin Mayoff – RHM Images Best of 2017
  12. Craig L. Howe – On the Move
  13. Johann A. Briffa – 2017: A Photographic Retrospective
  14. Harold Davis – Harold Davis—My Best of 2017
  15. Denise Goldberg – top photos :: 2017
  16. William Bean – Bill’s Blog
  17. Greg Clure – Best Images of 2017
  18. Rick Holliday – Best Images of 2017
  19. Peter Carroll – Peter Carroll – Favourites of 2017
  20. Mike Chowla – My 10 Best Photos of 2017
  21. Wendy M. Seagren – wendy seagrens best photography 2017
  22. QT Luong – 2017 in Review, Favorites, and Seasons Greetings
  23. Jenni Brehm – Changing Perspectives
  24. Rachel Cohen – Rachel Cohen Photography
  25. Brian Knott (FMKphoto) – 2017 year in review
  26. Shikha Shrivastava – My favorite photos of 2017
  27. Dave Wilson – Dave Wilson Photography – Best of 2017
  28. Larry Millican – Millican Photography
  29. Alexander S. Kunz – My Favorite Photos from 2017
  30. Mark Duffy – 500px
  31. Stefan Baeurle – Top 10 Favorites of 2017
  32. Adrian Klein – Favorite Photos of 2017
  33. Alan Majchrowicz – Photo Highlights 2017
  34. Russ Bishop – Russ Bishop Photography | 2017 – The Year in Pictures
  35. Todd Henson – Best Photos of 2017: My Favorites of the Year
  36. Peter Tellone – My 2017 Top Ten Best Images
  37. Aaron Hockley – thisGruntled – Best Photos of 2017
  38. Tony Wu – Favorite Photos of 2017
  39. T.M. Schultze – T.M. Schultze Website
  40. Andrew S. Gibson – My Favorite Photos From 2017
  41. John Pemberton – JPSquared – Images of 2017
  42. Scott Thompson – Scott Shots Photography’s Top 10 Tahoe photos of 2017
  43. ElDuro Tuco – ElDuro Tuco
  44. The DarkSlides – The DarkSlides
  45. Jon McCormack – From Ancient Cities to Endangered Animals – 2017 in Photographs
  46. Fred Mertz Photography – Fred Mertz Photography
  47. Richard Valenti – Richard Valenti Photography
  48. Jeff Hubbard – My Favorite Photos of 2017
  49. Andrew Scharlot – 2017 Best Pictures
  50. Deb Snelson – Favorite Photos of 2017
  51. Richard Wong – Favorite Photos From 2017 – Richard Wong
  52. Caleb Weston – Dubland
  53. Gary Crabbe / Enlightened Images – My Favorite Landscape Photos of 2017 – A Year-End Retrospective
  54. Tom Whelan – Nature Diary
  55. Robert Varley – Robert Varley
  56. Kyle Jones – Favorites from 2017
  57. Neil Creek – Neil Creek – Photographer
  58. tim fiddimore – North Devon 2017
  59. Richard Murphy Photography – Best of 2017
  60. Alan Dahl – Favorites of 2017
  61. Gabor Ruff – Natural History Photography – Highlights from 2017
  62. Kevin Ebi – Living Wilderness: Best of 2017
  63. Clint Losee – 10 Best Landscape and Scenic Photos of 2017
  64. Mark Hespenheide – Best of ’17
  65. Ilias Katsouras – Okrivadas
  66. David J Grenier – 2017 Top 12 Photographs
  67. J. J. RAIA – 2017 Jim Goldstein Project
  68. Rob Tilley – Best of 2017 – My Favorite Images of the Year
  69. Björn Göhringer – Top 14 From 2017
  70. Bernt-Inge Madsen – Bernt-Inge.com
  71. USKestrel Photography (Pete Miller) – My favorite images of 2017: A Different Perspective
  72. Milan Hutera – 2017 in Pictures
  73. Fred Murphy – Fred Murphy Photography
  74. Harry Hitzeman – My Top Photographs of 2017
  75. Andrew Thomas – Best of 2017 – Aerials
  76. Dean Foster – 2017: Year in Review
  77. Simon Ng – 2017 A Year of Water
  78. Michael Katz – Michael Katz Photography
  79. Drake Dyck – Top Ten (favourite) Images of 2017
  80. Jose Manuel Santos – The Magnificent Douro Valley
  81. Gary Buzel – Gary Buzel Studios
  82. Bryan William Jones – Top Photos of 2017
  83. Peter Knott – 2017 Favourites
  84. Kamala Venkatesh – Kamala Venkatesh
  85. Jason Frye – My Top 10 of 2017
  86. Jackson Frishman – Favorites of 2017
  87. Thomas Yackley – Top Ten Landscape and Nature Photos of 2017
  88. Mark Graf – 2017 – A Year of Despair and Dragons
  89. Kurt Lawson – 10ish Favorites of 2017
  90. Jorge Ramirez – Selection 2017
  91. William Neill – William Neill’s Light on the Landscape Photoblog
  92. Daniel Leu – Favorites – 2017
  93. Derrald Farnsworth-Livingston – Top 10 Favorite Images from 2017 ~ Journey of Light
  94. Photography
  95. Mike Christoferson – 2017 Has Come and Gone
  96. Carol Schiraldi – Best of 2017 – My Top Images
  97. Robin Black – My 10 best photos (or personal favorites, anyway) of 2017
  98. Bryn Tassell – Favourites of 2017
  99. Steve Luther – SkyVista Photography Best of 2017 Images
  100. George Stark – George Stark Images
  101. Josh Meier – Josh Meier Photography Best of 2017
  102. Werner Priller – My Favorite Images of 2017
  103. Peter Krogh – Best of 2017 Photographs by Peter Krogh
  104. Under Pressure Photography by Scott F McGee – Top 10 Photos of 2017
  105. Joseph Smith – 2017 Favorites – A Year’s Review
  106. Chuq Von Rospach – 2017 BEST PHOTOS OF THE YEAR
  107. Charlotte Gibb – Twelve Months – Twelve Photographs
  108. Holly Davison – Holly Davison Photography
  109. Colleen Miniuk-Sperry/CMS Photography – Favorite Photos From 2017
  110. Anne McKinnell – Top 10 Landscape Photos of 2017
  111. Jim Stamates – My Favs of 2017
  112. Neil Corman Photography – Ten Images from 2017
  113. Eric E Photo – Analog: 2017
  114. Phyllis Whitman Hunter – Phyllis Whitman Hunter Photography
  115. Catalin Marin – My favourite shots of 2017
  116. Catalin Marin – Corporate work – My favourite client shots of 2017
  117. Simon Ponder – Sponderpoints
  118. Greg A. Lato – latoga photography Favorite Photos of 2017
  119. Paul Rosenblum – Best Shots of 2017
  120. Patricia Davidson – My Top 10 Favorite Photos of 2017
  121. Tim Aston – Favorites from 2017
  122. Yosemite and Bay Area Photography by John Harrison – “My Best Nature
  123. Sue Shuey – Best Overall 2017
  124. Ron Niebrugge – My Photo Blog
  125. Michael Frye – My Top Photographs of 2017
  126. Jao van de Lagemaat – Jao van de Lagemaat’s Best images of 2017
  127. David Leland Hyde/Landscape Photography Blogger – Best Photographs of 2017
  128. Mike Cavaroc – Free Roaming Photography
  129. Patrick Endres – 2017 Favorites
  130. Alex Buisse – Best of 2017

Have a great 2018!

The post Best Photos of 2017 by JMG-Galleries Blog Readers appeared first on JMG-Galleries – Landscape, Nature & Travel Photography.


JMG-Galleries – Landscape, Nature & Travel Photography

 
Comments Off on Best Photos of 2017 by JMG-Galleries Blog Readers

Posted in Equipment


How to Create Dynamic Photos of Car Light Trails

09 Jan

Nothing says futuristic, dynamic, and dramatic like a well-done traffic light trail photo. This is a genre of photography that almost all landscape photographers will have dipped into, it’s like a right of passage. The kind of images you can create make others want to go out and buy their first tripod.

Indeed getting a good photo of light trails will justify carrying around that heavy tripod perhaps all day long. There are lots of things to consider when taking this type of photo, and in this article, you’ll learn straight away what it takes.

How to Create Dynamic Car Light Trail Photos

This photo was taken from a residential building overlooking this amazing traffic intersection in Shanghai.

Choosing the right location

The most important thing to creating light trail photos is to go to a place where there will be lots of moving lights! This should be obvious, but some places are better than others. In all cases, the light trails will be part of the frame and either the main subject or the leading lines that direct the viewer to your main subject. In most cases your location is going to be urban, so let’s look at the options.

How to Create Dynamic Car Light Trail Photos

This light trail photo of the Colosseum in Rome uses light from a passing bus.

1 – Down on the street

A busy main road can be a good place to take light trail photos. The chances are you’ll be photographing a famous landmark from your locale, and using light trails will give the photo a more dynamic feel.

  • Position yourself so the light trails either lead up to your landmark or disappear off into the distance beside it.
  • When a safe traffic island is available, experiment with photographing from the middle of the street. This will give you both white headlights, and red rear lights.
  • It’s easier to control the intensity of the light from rear lights. So it’s often best to position yourself to photograph light trails as the traffic is moving away from the camera.
  • Photograph during blue hour as much as possible, this should be the case for all cityscape photos.
  • The best light trails are produced when buses drive past. They have lights that will fill your frame, as these vehicles are taller and lit up more.
  • The height at which you have your tripod set can dramatically affect your results when photographing at street level. The lower the tripod, the “higher” the lights will appear in your frame.
  • If you don’t want the lights to paint across the entire photo, experiment with an external shutter release, and the bulb function on your camera. Bulb allows you to open and close the shutter when you choose, so you can close it and end the exposure before the moving vehicle completely moves through your photo.
How to Create Dynamic Car Light Trail Photos

In this case, the Bulb function was used so that the light didn’t paint over the building on the right.

2 – Get up high, and photograph from above

Taking photos from a high vantage point is often a sure fire way of getting good results. This is especially true when it comes to taking light trail photos. There are two choices when it comes to this, you can go to the public area, or try for the trickier private access.

  • Public area – The easiest and safest option, though this likely means 1000’s of other people will also visit the same spot. This will commonly be a pedestrian footbridge over a road, a viewpoint from a mountain, or perhaps a viewing gallery in a tall building.
  • Private property – The best policy here is to ask permission. The other approach is riskier, more clandestine, and more in keeping with a genre of photography called urbex. At this time access to private rooftops is becoming increasingly difficult, in no small part because some people enjoy filming daredevil stunts from such locations. So do your research on a location you would like to photograph, and be respectful if you are lucky enough to get access. In some cities, rooftop bars can offer great views, but if you wish to bring a tripod in then emailing the business ahead of time is advised.
How to Create Dynamic Car Light Trail Photos

This high vantage point was achieved by contacting a rooftop bar in advance and getting permission to photograph from their location.

3 – Embrace the great outdoors

Of course, anywhere there’s a road can be a good location for light trail photography. Roads that wind their way up a mountainside will look great in a photo, you just need a good vantage point. Even photos from a lower position can look nice with a single stream of light, which can create a nice minimalist feel to your photo.

Photos taken in these locations may require very long exposures to allow the vehicle to drive through the frame. The best solution here is to take a series of 30-second exposures, and then stack the results later in Photoshop (or use an ND filter to cut the light and get longer exposure times).

How to Create Dynamic Car Light Trail Photos

This location is in Taiwan. To reach the viewpoint there were several bits of rope I had to climb up, as the side of the mountain was steep.

How to take long exposures of car light trails

Once you have settled on your location it’s time for the fun to begin! Taking these photos well does require some technical knowledge, let’s break this down here.

  • Compose your photo, and ensure the light trails complement the frame you wish to produce.
  • Arrive around 30-minutes prior to sunset. This will give you time to plan your photo and to take additional photos for digital blending if needed.
  • Ensure the camera is steady, this is challenging in strong winds. To achieve this use a heavy tripod, and where possible hook your camera bag under the center column. The heavier the tripod, the less likely it will be moved by the wind. Avoid putting up the middle extension tube on the tripod, as this introduces more instability and movement.

  • You can focus the camera using Live View. In Live View, zoom (using the magnify view button + not zooming your lens) into an area of the frame such as a sign. Now set your lens to manual focus. Choose an object to focus on that is towards the back of the mid-ground in your photo. Keep the camera in manual focus, so that the camera doesn’t change focus when you press the shutter button.
  • An additional option is to use digital blending to balance the light throughout the scene. Digital blending is a post-processing technique that requires a set of bracketed photos at -1, 0 and +1 exposure (or -2, 0, and +2).
  • Using an aperture of f/11 or smaller will create a starburst effect on any street lights that are in your frame. But the larger the aperture the brighter the light trails will be, so a balance is needed.
  • Now everything is set for you to take your photo. The light trail photo needs to show continuous light moving along the road. Make sure your exposure is long enough for this to happen, usually this is at least 15 seconds. To avoid camera shake use an external shutter release, or the camera’s self timer. If the camera isn’t in Live View, use the mirror lockup, this prevents shake on dSLR cameras when they expose.
How to Create Dynamic Car Light Trail Photos

This frame required several stacked images to enhance the amount of traffic in the photo.

Enhancing your light trail photo in post-processing

As with all photography, you can enhance your image in post-processing to get an even better result. There are two principal techniques that can be used to achieve this.

  • Digital blending – In order to use this technique you will need a set of bracketed images to work with. This technique will allow you to balance the level of light throughout the scene.
  • Photo stacking – The next option, usually done in conjunction with digital blending, is photo stacking. You can use this to intensify the light trails within your photo. The concept is to take photos of multiple traffic light streams and overlay the images on top of each other.
How to Create Dynamic Car Light Trail Photos

There aren’t many better places to photograph light streams on boats than Venice!

Other types of light trail photos

There are lots of other ways to use light trails in your photography. Here are a few other ideas you can try, that will complement your other light trail photos.

  • Boat lights – Boats on the water produce beautiful light trails, with the added bonus of reflections. The speed of boats is much slower though. This means an exposure of around two minutes or stacking several photos together to complete the light trail.
  • Create your own – You don’t need cars to create light trails, in fact, you can just use a light source and make your own. To have the most fun with this purchasing a Pixelstick is a great idea.
  • Kinetic light painting – Static lights can be turned into light trails, you just have to move your camera! Try out zoom bursts, or camera rotation to see some amazing results.
How to Create Dynamic Car Light Trail Photos

The u-bein bridge in Myanmar is a classic photograph. You won’t see light trails here unless you make your own!

Time to hit the road, and get some light trails

Now it’s time to get out there and try this amazing style of photography. I’m sure many of you have taken car light trail photos, so share your best work with the community in the comments below.

What style of photo do you like best? Are there any further tips that you use for your photos that you’d like to share? As always share your thoughts, ideas, and work below and let’s talk about car light trail photography.

How to Create Dynamic Car Light Trail Photos

Time to get on your bike, and out there taking light trail photos!

The post How to Create Dynamic Photos of Car Light Trails by Simon Bond appeared first on Digital Photography School.


Digital Photography School

 
Comments Off on How to Create Dynamic Photos of Car Light Trails

Posted in Photography


How to Make Storytelling Landscape Photos – 4 Steps

07 Jan

When we think of storytelling images, we immediately think of people doing something in a documentary type of photograph. After all, people make the most interesting stories. But landscapes have stories too.

As a landscape photographer, you can create a collection of images that tell a story about a place without having people as the main focal point in the image.

Salton Sea, California by Anne McKinnell - How to Make Storytelling Landscape Photos

The following steps will help you pull the story out of the landscape and convey it to your viewers.

1. What is the story?

The first thing you need to do is to spend some time thinking about what exactly is the story. Often we go to a place and start making images based on compositional elements in the scene without thinking about what is important to the story first.

Salton Sea California by Anne McKinnell - How to Make Storytelling Landscape Photos - 4 Steps

When I go to a new place, I often do a scouting trip first just to have a general look around and get a feel for it. Then I do some research to find an interesting story. If the place is a park, why is it a park? Who made it a park? What is the history? What interesting things happen there now and in the past? Do any animals live there, and if so which ones?

Once you have some background, you can pick a story to wrap your photographs around.

Egret at Salton Sea, California by Anne McKinnell - How to Make Storytelling Landscape Photos - 4 Steps

2. The first photo shoot – using different focal lengths

Your first photo shoot will help you bring your plan together. Go back to the places that had the most photographic potential from your scouting trip and while there look for elements in the scene that relate to the story you have chosen.

I usually start out with a wide-angle image that takes in the whole scene. Often I don’t end up using this photo in the final collection, but it helps me in my process of making the collection. When you have your photo that takes in everything, think about what are the most interesting things in the scene. Try to pick at least three things and then get closer to each one of them in turn.

Gulls Flying over Pelicans by Anne McKinnell - How to Make Storytelling Landscape Photos - 4 Steps

White pelicans by Anne McKinnell - How to Make Storytelling Landscape Photos - 4 Steps

Example

For example, when I went to the Salton Sea in California (a stunningly beautiful location that was created as a result of a man-made disaster) one feature that is most interesting is a layer of dead fish. But how do you make a good photograph of dead fish?

I started by making an image that took in the whole scene. Then I changed lenses to use a mid-range focal length and then a long focal length from where I was standing. Then I started to get closer and closer to the dead fish looking for elements of design such as lines and shapes along the way.

Salton Sea Tilapia by Anne McKinnell - How to Make Storytelling Landscape Photos - 4 Steps

Dead Tilapia at Salton Sea, California by Anne McKinnell - How to Make Storytelling Landscape Photos - 4 Steps

When I found something interesting, again I tried to use different focal lengths to see how I could convey the feeling of the place in an image.

Make sure you photograph the details of the scene as well as the overall feeling. Finally, when you find a really interesting detail, get really close to it using your wide-angle lens so you have an image with an interesting detail in the foreground that also takes the whole scene into the frame.

3. The second shoot – using the best light

The next step is to pick out your favorite images from your first shoot and think about what kind of light could make them better. Is there a subject with a great shape that would make an interesting silhouette? Is it transparent and might glow with some backlight?

Would it create interesting shadows at a certain time of day? Would it look best with warm light during the golden hour? Does it need a dramatic sky?

Sunset at Corvina Beach, Salton Sea, California - How to Make Storytelling Landscape Photos - 4 Steps

Whatever it is, plan to revisit the location when you have the best chance of getting the conditions you need to make your ideal shot. You may need to go back a number of times, if possible before you get all the shots you want.

4. Putting it together

Whether you are putting the images into a collection display on your wall, using them in a blog post, displaying them on your website, selling them to a magazine (along with your story of course), or simply showing your friends. Having an interesting set of images that are storytelling will always create a larger impact than random photos of a place that are not connected.

Salton Sea Collage by Anne McKinnell

The post How to Make Storytelling Landscape Photos – 4 Steps by Anne McKinnell appeared first on Digital Photography School.


Digital Photography School

 
Comments Off on How to Make Storytelling Landscape Photos – 4 Steps

Posted in Photography


Shutterstock bans unnatural monkey and ape photos at PETA’s request

05 Jan

Stock photography website Shutterstock has banned images showing monkeys and apes in unnatural situations following a complaint made by PETA. The complaint is made on the behalf of primates that may be exploited in order to produce the images, which may also show these animals in a state of distress even if they’re not perceived in that way.

An unnatural image, in this case, is one presenting an ape or monkey is an environment where it wouldn’t ordinarily be found, in costume or otherwise dressed up, demonstrating unnatural behaviors like dancing, interacting with humans in a way that isn’t natural for the animal, and similar scenarios.

In a post dated December 19th, PETA said, “Images of these animals in unnatural settings can harm conservation efforts and may increase the demand for these wild animals as ‘pets.'” After discussing these potential issues with Shutterstock, PETA says the company decided to ban the aforementioned content, also applying the ban to its Bigstock subsidiary.

The stock photo company’s ban is similarly applied to images that have been digitally altered to show the above situations. Other images featuring monkeys and apes are still allowed, however, including ones featuring zoos and natural habitats, as well as in cities where they’re naturally found.

Shutterstock confirmed the content ban to DPReview yesterday evening, with Shutterstock’s VP of Content Operations Paul Brennan saying:

In line with advertising industry changes regarding the use of great apes and monkeys in stock images and clips, Shutterstock no longer accepts commercial photographs or video clips of great apes and monkeys in unnatural situations.

Articles: Digital Photography Review (dpreview.com)

 
Comments Off on Shutterstock bans unnatural monkey and ape photos at PETA’s request

Posted in Uncategorized