RSS
 

Posts Tagged ‘Photos’

How to Edit Landscape and Nature Photos with the Lightroom Gradient Tool and Range Mask Features

05 Jan

The post How to Edit Landscape and Nature Photos with the Lightroom Gradient Tool and Range Mask Features appeared first on Digital Photography School. It was authored by Simon Ringsmuth.

Lightroom has always had a rich set of tools to allow photographers to get the most out of their images. However, until recently the ability to edit landscape and nature photos was a bit lacking.

While, global adjustments, like changing white balance and exposure have always worked great in Lightroom, fine-tuning edits can be problematic. Recent updates have seen incredible improvements to the Filter tools in Lightroom. An added tweak called Range Mask makes all the difference for photographers who need complete control over the precise implementation of their edits.

Lightroom Gradient Tool and Range Mask

The three most common ways to edit specific parts of an image in Lightroom are through the use of the Graduated Filter, Radial Filter, and Adjustment Brush. If you want to smooth the skin on your portraits, increase the saturation of your skies, or change the color cast of your clouds these tools can be just the ticket. But what if you have a tree that sticks up into the sky or an uneven horizon dotted with buildings and power lines?

The usefulness of the filter tools is somewhat restricting when you want to limit your edits to particular sub-parts of a picture. Until recently the Auto-Mask option was the best way to confine your edits to certain colors or locations within an image. Landscape and nature photos are especially tricky because of the uneven edges and jagged borders that exist between sections of the photo that need editing. However, the Range Mask option solves almost all of these issues with ease.

How it works

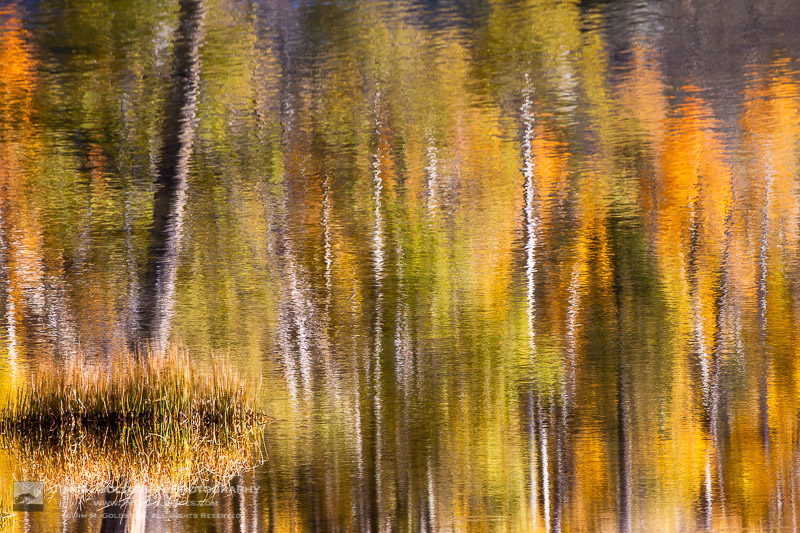
To illustrate this, I’m going to walk you through the editing process of the following image. My brother Andy took it while he was on a tour of the swamps in Louisiana, USA, with his family last summer. The initial image has a nice composition but feels dull and uninteresting, which is a far cry from the real experience.

Adjusting White Balance with a Graduated Filter

One change to punch things up is altering the white balance of the sky to bring out the bright blues and make the image more vibrant.

The first step is to click over to the Graduated Filter panel. Dial in a white balance that skews more towards the cooler end of the spectrum and reduce the exposure just a bit. Next, click and drag from top to bottom on the image to put the filter in place.

The sky is now a rich blue, however, a big problem becomes evident: the color cast of the trees has changed too. This result is not what I want. Clicking the Show Selected Mask Overlay button in the bottom left corner under your image reveals that the graduated filter has been applied to everything including the trees as well as the sky.

Fine-tuning the Graduated Filter using the Range Mask

Fine-tuning a tool such as the Graduated Filter, used to involve a series of steps. These steps included brushing out the mask in places you didn’t want it in combination with the auto-mask feature. It worked, but results were often a little sketchy. They also required a great deal of tweaking and fine-tuning. That’s not to say the brush option is useless-far from it! I have an example later in this article that shows how useful it can be.

However, all this has changed in recent versions of Lightroom. You can now use the Range Mask to apply any of the three filter tools to specific parts of an image based on lightness or color similarity.

The default value for Range Mask is Off, but with one of your Filter adjustments selected you can then choose to enable Range Mask for Color, Luminance or Depth.

  • Color applies the filter to specific parts of the image based on how similar they are to color values that you select.
  • Luminance applies the filter to specific parts of the image based on how light or dark those parts are.
  • Depth works only with cameras that record depth information and applies the filter to specific parts of the image based on how close or how far away they are. Some mobile phones have this feature but most traditional cameras do not, so Depth will often be disabled unless you are editing images taken with certain mobile phones.

Range Mask – Color

For this image, I’m going to use the Color option, though Luminance works great in many nature and landscape photos as well.

With Color selected, you can either click and drag on your image to select a range of colors or can click multiple points by shift+clicking. This selection is where the mask gets applied. I find that shift+clicking generally works better, although your mileage may vary depending on your editing goals and the type of picture you are working with.

You can click up to five spots on the image to refine your color selection. Use the slider in the Range Mask panel to fine-tune things further. This slider hones the edges of your Range Mask. If you find that the border between the edited and unedited portions of your image is a bit stark, adjusting the Amount slider will help mitigate this issue.

The result of this one Gradient Filter, along with the Range Mask, is an image that is already much improved from the original.

Looking at a 100% crop of a portion of the image reveals just how precisely the Gradient Filter has been applied thanks to the Range Mask. Here is a portion from the top-right of the original unedited image.

Here is the same portion with the Gradient Filter applied, using the Range Mask to apply the Filter to only selected color ranges. In this case, the color of the sky.

Notice how precisely the edits were applied, and how intricate the edges around the tree leaves are. This illustrates why the Range Mask option is so useful for landscape and nature photos. There are many tricky edges and small parts of the image that can take a very long time to fix without it.

Range Mask – Luminance

Another way to use the Range Mask is with the Luminance option. This option only applies the mask to the brightest or the darkest portions of the Gradient, or other Filter, that’s applied.

The overall idea here is the same, but the implementation is a tad different. Instead of selecting colors where you want the Range Mask applied, you use the Range sliders to concentrate the mask on the lightest, darkest or mid-range parts. One of the most useful things here is the Show Luminance Mask box which gives you a real-time preview of where your mask application. This helps you as you are adjusting the sliders.

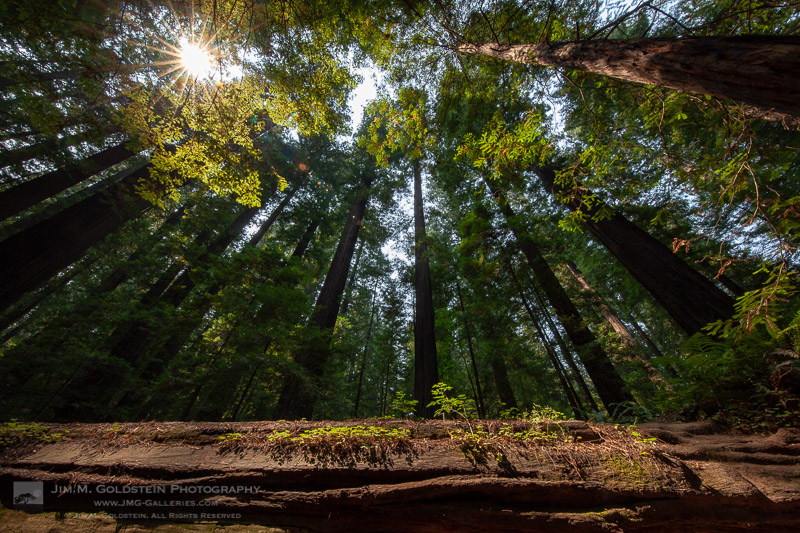
Here’s an image I shot while hiking in the mountains near Seattle. It’s not bad, but a few edits would help improve the picture. Edits may help it look a little closer to how it appeared when my wife and I were tromping around in the wilderness that day with my cousin.

I want to bring out the color in the foreground trees in this image. A Graduated Filter with Luminance Range Mask is perfect in this scenario because the edits can be applied just to the darker portions of the image. With the filter in place and the mask tweaked to be applied only to the darker parts, I can ensure my edits are going to show up just where I want them to by checking the Show Luminance Mask option.

Fine-tuning using Brush

As demonstrated above, the Range Mask is extremely useful for nature and landscape photographers. It applies the Graduated Filter to just the right portions of the image and not the entire picture evenly. If you want to customize your Graduated Filter further, click the Brush option (not the Brush Adjustment Tool) and proceed to add to, or erase, the Filter wherever you want.

In this case, I’d like to remove the Graduated Filter from the lake in the foreground. Even though I can tell from my Luminance Mask overlay that it’s not being applied too heavily to that area, removing all traces of it with the brush will help me get the exact picture I want.

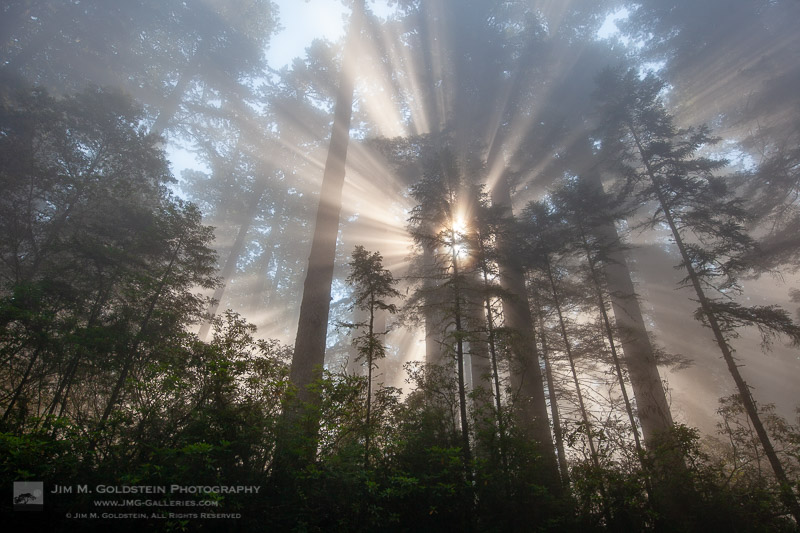
The end result is a photo with much warmer green tones in the trees and a lake that reflects the blue sky above, which is just the look I was aiming for.

Conclusion

Hopefully, these examples give you an idea of how powerful the combination of Graduated Filters and Range Masks are for nature and landscape photographers. I’m always eager to hear from the DPS community. Have you found this particular tool useful? Are there any other tips you’d like to share about using the Lightroom Gradient Tool and Range Mask? Leave your thoughts in the comment section below.

The post How to Edit Landscape and Nature Photos with the Lightroom Gradient Tool and Range Mask Features appeared first on Digital Photography School. It was authored by Simon Ringsmuth.


Digital Photography School

 
Comments Off on How to Edit Landscape and Nature Photos with the Lightroom Gradient Tool and Range Mask Features

Posted in Photography


These Inspiring Landscape Photographers will Make You Want to Take Better Photos

04 Jan

The post These Inspiring Landscape Photographers will Make You Want to Take Better Photos appeared first on Digital Photography School. It was authored by Caz Nowaczyk.

Mark Harpur

These landscape photographers are taking some inspirational photos.

We thought we’d share these with you to get you inspired to go out and take some fantastic landscape images. They are in no particular order.

1. Rach Stewart


View this post on Instagram


A post shared by Rach Stewart (@rachstewartnz) on


View this post on Instagram


A post shared by Rach Stewart (@rachstewartnz) on


2. Daniel Greenwood


View this post on Instagram


A post shared by Daniel Greenwood (@danielgreenwoodphotography) on


View this post on Instagram


A post shared by Daniel Greenwood (@danielgreenwoodphotography) on


3. Jacob Moon


View this post on Instagram


A post shared by Jacob Moon (@moonmountainman) on


View this post on Instagram


A post shared by Jacob Moon (@moonmountainman) on


4. Daniel Tran


View this post on Instagram


A post shared by Daniel Tran (@_danieltran_) on


View this post on Instagram


A post shared by Daniel Tran (@_danieltran_) on


5. Jay Vulture


View this post on Instagram


A post shared by Jay Vulture (@vulture_labs) on


View this post on Instagram


A post shared by Jay Vulture (@vulture_labs) on


6. Warren Keelan


View this post on Instagram


A post shared by Warren Keelan (@warrenkeelan) on


View this post on Instagram


A post shared by Warren Keelan (@warrenkeelan) on


7. Gergo Rugli


View this post on Instagram


A post shared by Gergo Rugli (@rugligeri) on


View this post on Instagram


A post shared by Gergo Rugli (@rugligeri) on


8. Mads Peter Iversen


View this post on Instagram


A post shared by Mads Peter Iversen Photography (@madspeteriversen_photography) on


View this post on Instagram


A post shared by Mads Peter Iversen Photography (@madspeteriversen_photography) on


9. John Weatherby


View this post on Instagram


A post shared by John Weatherby (@whereisweatherby) on


View this post on Instagram


A post shared by John Weatherby (@whereisweatherby) on


10. Tony Hewitt


View this post on Instagram


A post shared by Tony Hewitt (@tony.hewitt) on


View this post on Instagram


A post shared by Tony Hewitt (@tony.hewitt) on

Who inspires you? Let us know in the comments below.

The post These Inspiring Landscape Photographers will Make You Want to Take Better Photos appeared first on Digital Photography School. It was authored by Caz Nowaczyk.


Digital Photography School

 
Comments Off on These Inspiring Landscape Photographers will Make You Want to Take Better Photos

Posted in Photography


Best Photos of 2018 by Jim M. Goldstein

02 Jan

2018 has been quite the year. You wouldn’t know it from my blog, but it’s been one of the most hectic years I’ve had in a long time. Much of that centered around establishing a new home base for my family, albeit in the same area. Uprooting a family of 4 in the SF bay area is not for the light hearted. Luckily everyone has been quite excited about our move, but it has taken up most of my free time. I’m happy to say that I’m starting to get my nose above water and eager to do a bit more photography.

Another development this year was my acquisition of the domain calphoto.com and the CALPHOTO California photographic condition mailing list associated with the domain. Interested in real-time photo conditions across California? Then be sure to join. CALPHOTO is comprised of a great community of people who share a common interest in photographing and preserving the beauty of our state.

With limited time this year I focused on trips for my kids versus dedicated photo trips. In years past I’ve mentioned how my focus was to foster a deep appreciation of nature and the outdoors with my boys and that has firmly taken hold. I am regularly asked when our next camping trip will be and what other cool places we can visit. I also get a great deal of joy from the kids when we’re driving around town and an epiphany hits that we haven’t been to Yosemite in a while. I suppose that adds to the prospect of more photography and photo trips as they’ve been picking up an interest in taking photos too.

That should give you an idea of 2018 in a nutshell. Here are my 8 best photos of 2018…

Landscapes


Fall Color Abstract


Redwood Circle of Life


Fresh Snow in Yosemite Valley


Rays of Sun in the Redwoods National Forest

Family Fun


Someone has picked up good tripod technique by watching his dad. He started doing this on his own randomly during our trip. He was insistent he use my tripod even if he was just resting his camera on top of it without a base plate.


Fun at the Trees of Mystery


Trees of Mystery Portrait


Holiday Photo Hijinks

Thanks for looking and have a great new year!

The post Best Photos of 2018 by Jim M. Goldstein appeared first on JMG-Galleries – Landscape, Nature & Travel Photography.


JMG-Galleries – Landscape, Nature & Travel Photography

 
Comments Off on Best Photos of 2018 by Jim M. Goldstein

Posted in Equipment


Gear of the Year 2018 – Allison’s choice: Google Photos

28 Dec

At some point in elementary school my sister was required to study San Francisco, which – if you’ve only ever lived in the Midwest – is a far-off, exotic city. She took an interest in the place, and over the dinner table she’d rattle off facts about the city, like how many hills there are (seven) and how many mosquitos there are (none). In contrast to our part of the country, an extremely flat, mosquito-riddled hellscape, San Fransisco seemed like almost a mythical place.

Jumping ahead a few years, my sister was on the verge of turning thirty, and we decided to celebrate with a trip to the destination of her choice. Naturally, San Francisco was at the top of the list. At last, she’d finally get to experience the seven mosquito-free hills for herself.

In four days we covered most of the standard stuff – the bridge, the prison, the endless souvenir gift shop that is the Fisherman’s Wharf. We drank Irish coffees at the cafe that claims to have invented them (but probably didn’t), ate avocado toast at the place that claims to have invented it (and probably did), and took a lot of selfies in front of iconic things.

Our technique on this kind of shot needs work, but you get the idea.

During the course of the trip, we documented our adventure the way most older millennials do: on our phones. When we returned to our respective homes, she requested that I add my photos to a shared Google Photos album so she could show our mother over dinner. I already backup my iPhone photos to the Google Photos app, so that was easy enough to do.

I also wanted to show the Alcatraz photos to my boyfriend (disused prisons are his thing) but flipping through them on my phone clearly wasn’t going to do them justice. Then I remembered the Chromecast plugged into the back of our TV, and within a few minutes I had a good old fashioned “How I Spent my Summer Vacation at a Former Federal Penitentiary” slideshow going.

To commemorate the whole trip, it occurred to me that a photo book might make a nice birthday present for my kid sister. And at this point, the whole thing starts to sound like a commercial for Google Photos: I selected images, added a title and text, paid for and shipped the whole thing from my phone while commuting to work on the bus. I didn’t even need to get out my wallet, because Google remembers my credit card number.

Here’s the thing: having the device I use to capture the images integrated into an ecosystem designed for sharing actually is really useful. My photos from that trip didn’t die on a hard drive – they came to life. And sure, my iPhone SE takes some pretty lousy photos in low light. But you know what? They’re fine. Nobody I showed them to complained about detail retention. And I wasn’t looking to blow them up and put them on my wall, I just wanted to remember a trip that was about hanging out with my sister.

There’s still room for improvement – the Assistant feature continues to be a mixed bag of sometimes nice, sometimes ridiculous AI-generated albums, videos and “stylized” photos. At least it does a good job of auto-suggesting items to archive, like screengrabs and pictures of packaged dinner re-heating instructions. But really, it’s fine because it’s not a core feature – anything useful the Assistant does is basically a bonus.

An automatically generated “stylized” photo courtesy of Google Photos Assistant. Just… no.

I think what impresses me most is that I didn’t at any point decide “Alright, I’m going to go all in on the Google ecosystem.” It just happened organically. I didn’t think I was the kind of person who would want to play a summer vacation slideshow on her TV – until I was. When the technology is seamless and available at your fingertips, it turns out you’re more likely to use it. And if that means more people doing more to share their photos, then that’s enough for me to call Google Photos my gear of the year.

Articles: Digital Photography Review (dpreview.com)

 
Comments Off on Gear of the Year 2018 – Allison’s choice: Google Photos

Posted in Uncategorized


How to Use High-Speed Video to Capture Action Photos

23 Dec

The post How to Use High-Speed Video to Capture Action Photos appeared first on Digital Photography School. It was authored by Peter West Carey.

Sometimes 6, 7 or 12 frames per second (fps) isn’t fast enough to get the shot you want. Sometimes the action is so fast it is best to use a different concept altogether. I’m talking specifically about how to use high-speed video to capture action photos that you want.

1 - How to Use High-Speed Video to Capture Action Photos

Think of it this way; standard frame rate for video is either 24fps or 30fps. That’s good, but may not be fast enough. Most smartphones these days can shoot 120fps, which makes them a possible tool for this technique. Or you can step up to a camera with much higher frame rates, maybe 480fps or even 1000fps.

No matter the camera, the technique below opens up a world of possibilities for freezing high-speed action.

I had a request from my client Andy Suzuki & The Method to capture slow-motion burning clocks for a music video, which turned out to be perfect material for this post.

Shooting

When shooting at a high speed, lighting can be critical, as it is with any quality photography. The high frame rate should be accompanied by a higher shutter speed, which can be accomplished with more light, an open aperture and higher ISO.

There are benefits and drawbacks to increasing each of these factors that depend on your intended outcome. I find Adobe Lightroom does a good job of cleaning up most ISO noise, so I prefer to increase the ISO before anything.

Adding more light is the next variable I would adjust. Although, as you can see in my example here, it was not an option. Next, I will adjust the aperture as open as I can make it while still ensuring my depth of field is adequate for my subject.

Grabbing the frame in Lightroom

Grabbing the appropriate frame in Lightroom is incredibly simple.

Downloading your video in Lightroom, and while in the Library Module, play your video until you get to the frame you desire. When you find it, hit ‘pause’. The forward and backward arrows can be used to step your video frame-by-frame until you find the frame you need. You can run this exercise multiple times if you need or want multiple frames.

2 - How to Use High-Speed Video to Capture Action Photos

Once you have the frame you want on your screen, click on the rectangle at the bottom of the preview area.

There will be two options Capture frame and Set poster frame. Simply click Capture frame and a JPG of the frame will be stacked with the video.

3 - How to Use High-Speed Video to Capture Action Photos

4 - How to Use High-Speed Video to Capture Action Photos

The capture will be the same size as the original video. In this case, with high-speed video on a Sony RX-100 V, as demonstrated here, the image is 1920×1080. There will be some balance you need to strike in order to ensure the final image is large enough for your intended use.

Conclusion

High-speed video is an excellent way to produce images it would take hours to capture. Think of splashing on puddles, wine poured into a glass, breaking ice or any number of fast-moving subjects. The method described here does have some limitations, but it is fast, easy and just a bit of fun.

The post How to Use High-Speed Video to Capture Action Photos appeared first on Digital Photography School. It was authored by Peter West Carey.


Digital Photography School

 
Comments Off on How to Use High-Speed Video to Capture Action Photos

Posted in Photography


Google photos expands album limit to 20,000 photos and videos

20 Dec

In early October this year Google announced Live Albums for Google Photos. Live Albums is an automated way of creating albums in your Photos accounts. The system is capable of identifying specific people and pets in your images and moving them into dedicated albums, without the need for any user interaction.

However, it seems with the new feature the limit of 10,000 images and video per album was way to low. Turns out, people take a lot of pictures and videos of their favorite people and pets.

Thankfully the limit has now been bumped up and family or pet albums, as well as all other albums, can now contain up to 20,000 image and video files. The change has been confirmed by Google to Android Police and documented in the support pages.

The new limit should prevent the need to remove content for a while, but in the event space is at a premium, users can choose to exclude older photos in the album creation process to fee up a little space.

Articles: Digital Photography Review (dpreview.com)

 
Comments Off on Google photos expands album limit to 20,000 photos and videos

Posted in Uncategorized


This macOS app creates HTML galleries from your Photos library

19 Dec

A new macOS app called photos2webgallery lets you create HTML web galleries from your Photos library. The resulting HTML output can be shared in many ways, including via upload to your own web server or shared via USB-drive.

Thanks to HTML5 support photos2webgallery works with all modern browsers. An integrated HEIC to JPG image format converter makes sure even images captured in the Apple-specific format will be displayed. Videos are embedded as well.

Alongside the images and videos the output galleries also display metadata information, such as date and time as well as the capture location with a Google Maps link. In the user interface users can select the albums they want to share and a range of slideshow effects is available, too.

The app is now available for download at the photos2webgallery website for a reduced price of $ 31.99.

Articles: Digital Photography Review (dpreview.com)

 
Comments Off on This macOS app creates HTML galleries from your Photos library

Posted in Uncategorized


How to Take Great Food Photos this Holiday Season

18 Dec

The post How to Take Great Food Photos this Holiday Season appeared first on Digital Photography School. It was authored by Mat Coker.

This holiday season your Instagram feed is going to be filled with photos of people’s food. Many of those photos can look terrible – dark, blurry, and discolored. In this tutorial, I’m going to show you how to take great food photos this holiday season. The principles are simple and apply to the food photos you take all year long.

Window light - How to Take Great Food Photos this Holiday Season

The photo on the left is from a few years ago. I attempted to take a stunning food photo to post online, but the pop-up flash on my camera spoiled things. I knew nothing about light back then! The photo on the right is a combination of soft window light and the warm ambient light of the tree in the background.

1. Presentation

You may have no control over how the food gets presented. Perhaps it gets placed in front of you, and you want to snap a quick picture. However, if you do have control over how the food gets presented, then you should give some thought to it.

Consider things like what color dishes or drink wear do you have available? You could use something neutral in tone, colors that represent the season, or something that accents the food.

2 - How to Take Great Food Photos this Holiday Season

The white plate allows the cookies to stand out from the wood table with similar tones, while the red mug hints at the holiday season.

3 - How to Take Great Food Photos this Holiday Season

This scene is more colorful, mixing the traditional red and green colors of the holiday. This time the table is white to make the colors pop.

2. Light

Light can make or break your food photos. The direction of the light (overhead, front, back, side) and the quality of light (soft or harsh) dramatically changes how your photo looks.

4 - How to Take Great Food Photos this Holiday Season

This photo was taken with nothing but an overhead light. You can see by the crisp shadow that the light is very harsh. It’s good enough and is certainly better than dark and blurry, but I prefer a big soft window light.

5 - How to Take Great Food Photos this Holiday Season

The pop-up flash on my camera was used for this photo. Again, better than nothing. But certainly not as nice as the window light.

For the following photos, I used my daughter’s play food! You can practice with anything you’ve got. I wanted something with even more texture to illustrate the effect of side and backlight.

A large window lights the photos below. The light skims across the cupcake from the side or behind, bringing out texture through highlights and shadows.

6 - How to Take Great Food Photos this Holiday Season

The cookies are placed on the crate, with the window behind or to the side.

7 - How to Take Great Food Photos this Holiday Season

This cupcake is lit by a large window producing soft light. The window is to the right. Notice that the right side of the cupcake is brighter? The light coming from the side helps to bring out some texture and make the two-dimensional photo pop more.


8 - How to Take Great Food Photos this Holiday Season

This cupcake is backlit by the same window. Backlight helps bring out texture too but gives the photo a moodier look.

3. Angle

So you’ve found the perfect colored dishes and you’ve got your light source. Now consider the best angle from which to photograph your food. Generally, I recommend a higher angle, maybe even a bird’s eye view.

9 - How to Take Great Food Photos this Holiday Season

A bird’s eye view is great for food photography, especially if the food is in a deep dish. It allows you to look down from above.

10 - How to Take Great Food Photos this Holiday Season

This is a high angle, though not as high as the bird’s eye view. You are able to see what is on the plate. This photo is less about the food and more about the mood of the scene. I remember being a kid waiting for Thanksgiving or Christmas dinner while the grown-ups bustled around. Everything is so dramatic with plumes of steam rising from the dishes! Steam should be photographed with backlight to help it stand out.


11 - How to Take Great Food Photos this Holiday Season

This face to face angle brings you into direct confrontation with the pile of cookies. They don’t stand a chance!

4. Background

Finally, consider what’s in the background. Your background should be clean and simple or a little bit scenic.

12 - How to Take Great Food Photos this Holiday Season

I snapped a quick photo, only to realize afterward that the background is a mess. I never seem to pay enough attention to the background.


13 - How to Take Great Food Photos this Holiday Season

I grabbed a clipboard off the table and used it as a backdrop to block out the mess. It’s not fancy, but it will do for a quick snapshot.

14 - How to Take Great Food Photos this Holiday Season

This background is intentionally scenic, showing that it’s Christmas time. Bring together color, light, angle, and background to make your food photos look great!

Keep these tips in your pocket all year long!

I learned how to take better photos of my food through trial and error, and learning from professional food photographers.

Whenever I’m inspired by what’s on my plate I set it by the window, pay attention to the background, find its best angle and take a nice looking photo. No more harsh overhead light or pop-up flash!

The post How to Take Great Food Photos this Holiday Season appeared first on Digital Photography School. It was authored by Mat Coker.


Digital Photography School

 
Comments Off on How to Take Great Food Photos this Holiday Season

Posted in Photography


Blog Project: Your Best Photos From 2018

17 Dec

It’s that time of year again, it is time to kick off the 12th annual best photos of the year blog project. I’m proud to say over the years that hundreds of photographers have taken part (see Best Photos of 2017, 2016,  2015, 2014, 2013,  2012, 2011, 2010, 2009, 2008 and 2007).  It’s great to see the community of photographers that have developed around this blog project. As always I hope the exercise of picking your best photos helps improve your photography (10 Ways to Top Your Best 20xx Photographs).

So without any further delay here is how you take part to submit your best photos of 2018.

How to Participate (Read Carefully)

  1. Review & select your best photos from 2018.
    Note: Photo edit carefully narrowing down your results to your best 10 or 5 photos. Reference Pro Tips: Photo Editing with Gary Crabbe for pointers.
  2. Create a blog post on your website or a Flickr set containing your best photos from 2018.
  3. Complete the form below by Tuesday JANUARY 4th at 11:59PM PST to take part. The following Tuesday, or thereabout, I’ll post a link to all submitted sites and photos on my blog. Throughout the week I’ll also share the results across all my social media accounts.

Spread the Word!
Feel free to spread the word of this project on Twitter, Facebook, and Instagram, Google+ (even if it is about to die), photo forums you frequent and/or your blogs. All who are interested in taking part are invited.


Loading…

The post Blog Project: Your Best Photos From 2018 appeared first on JMG-Galleries – Landscape, Nature & Travel Photography.


JMG-Galleries – Landscape, Nature & Travel Photography

 
Comments Off on Blog Project: Your Best Photos From 2018

Posted in Equipment


Major Facebook bug exposed private photos of 6.8 million users to third-party apps

15 Dec

On its developers blog today, Facebook disclosed a major photo API bug that left the private images of millions of users exposed to third-party apps. The bug, which has been fixed, was live from September 13, 2018 to September 25, 2018. During that time, some third-party apps may have had permission to access images uploaded to the service but not posted, as well as photos shared outside of the user’s timeline.

Facebook users can grant third-party apps permission to access images they’ve shared on the platform, but that permission is “usually” limited to photos the user published on their timeline, according to the company. The photo API bug may have given some third-party apps permission beyond timeline images, however, also including ones uploaded to the platform but not published, Facebook Stories content, and images shared on Marketplace.

As of its initial disclosure on December 14, Facebook said, ‘Currently, we believe this may have affected up to 6.8 million users and up to 1,500 apps built by 876 developers.’

Facebook plans to alert users who were potentially affected by the bug. A new Help Center page on Facebook’s support website provides a tool that shows users whether they have used any apps that potentially had access to their private images. As well, the company will provide app developers with a tool “early next week” that shows whether their apps were affected by the photo API bug.

“We are also recommending people log into any apps with which they have shared their Facebook photos to check which photos they have access to,” the company said in its disclosure.

The bug is the latest in a growing number of privacy debacles at Facebook. Earlier this year, the company suspended hundreds of third-party apps during its Cambridge Analytica scandal, which had revealed that data on 87 million Facebook users had been harvested and improperly used.

Articles: Digital Photography Review (dpreview.com)

 
Comments Off on Major Facebook bug exposed private photos of 6.8 million users to third-party apps

Posted in Uncategorized