RSS
 

Posts Tagged ‘Photography’

Your Vacation Photography Packing List

26 Jun

The post Your Vacation Photography Packing List appeared first on Digital Photography School. It was authored by Simon Bond.

Andrew Neel

It’s summer, and for most people, that means a vacation somewhere nice and sunny! Now, of course, it’s nice to bring those holiday memories back home. That is why people bring nice cameras with them, and perhaps purchase new lenses to get the very best images. You’ve chosen an amazing exotic location, so this is a chance to photograph something that’s not from your regular day. The big question pre-trip is what to pack! Having read this article for your vacation photography, you’ll make the trip knowing you have the right equipment for your needs.

Going alone, or with family?

The group photo, how will you take yours?

Depending on your age and life circumstances, you will either be going alone or with a group. The equipment you bring for either of those situations will be different. If you’re with family, you won’t be able to spend the whole day out photographing somewhere, so the amount of equipment you’ll need is going to be less. This article is going to assume you are traveling with the family since if you’re traveling alone, that’s a different packing list more aimed at a travel photographer. That’s not to say you won’t get great travel photos on your trip. With the right equipment, you’ll hold your own against someone who perhaps has more time.

Landscape and portrait photos?

Landscapes and portraits are the two main areas that every photographer will focus on during a trip. There should be a balance of both of these photos. Then you’ll get a better sense of place from your album.

To get the best results, you’re going to need the following equipment.

This is a broad list which will be referenced when you think about your final packing list. The camera body and cleaning equipment are a given, so here you’ll see the other equipment needed.

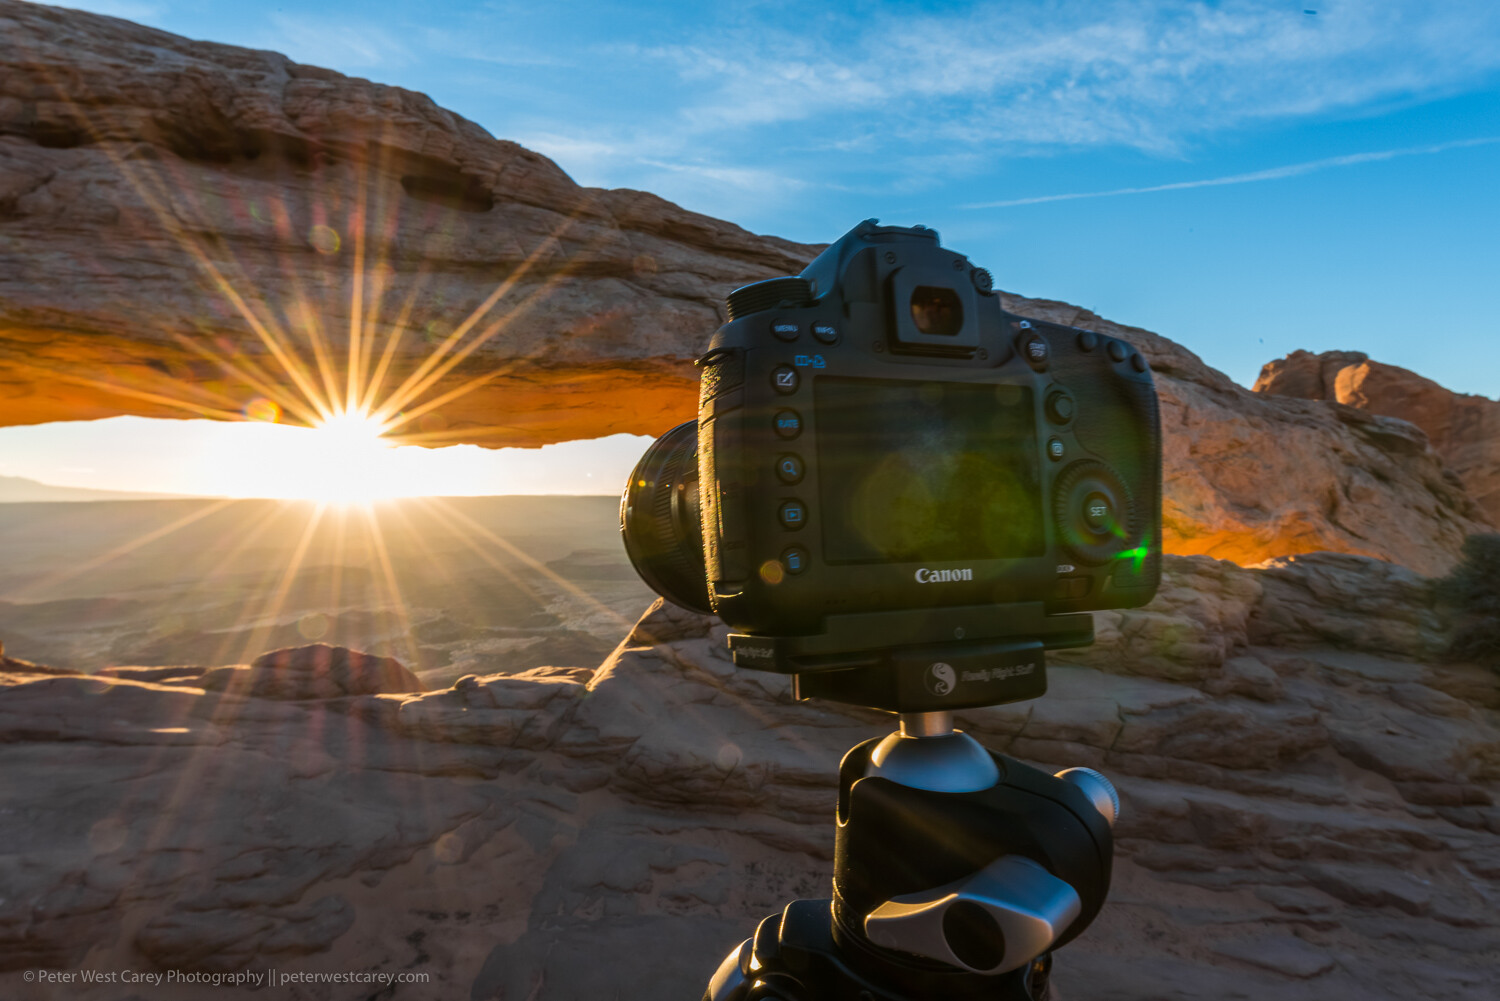
  • Landscape – The items you’ll need here will vary depending on the landscape you’re going to photograph. It’s always a good idea to bring a tripod, remote shutter release (Cable or Infra-red), ND1000 filter, CPL filter, UV filter and Graduated ND filters. To capture the scale of the scene you’ll also want a good wide angle lens. The majority of these will be 16mm or 17mm wide on a full frame camera with an aperture of f2.8 or f4. Do you need a longer focal length? Some landscape photos require compression of the background to work, with main subjects too far into the distance. That means that, yes, you do need a longer focal length. A superzoom for travel photography is, therefore, a good option here.
  • Portrait – This isn’t photos of your fellow vacationers, we’ll come to that in a minute. This is about capturing the local life in the place you’re staying. The setup here is simpler. You’ll need a good prime lens. The 50mm f1.8 is a good choice here. Should you want the most striking photos, bringing strobes, radio triggers, and light modifiers will help. However, it’s unlikely you’ll need that for most vacation portraits.

Everyone enjoys seeing a good sunset on their trip abroad.

Vacation photography of friends and family

You’re going to spend the vast majority of your time on this trip with your family. They know you’re the photographer in the family, so the expectations are that you’ll take the family photos. The equipment you’ll need here is dependent on the photography type.

  • Group photo: If you wish to be in the photo yourself you have two options; find someone to take the photo for you, or use a tripod and self-timer. You’ll want a lens with a wide angle for this as well.
  • Posed photos: A good portrait lens like the 50mm will do the job here. They are nice for bokeh background and will work well into the evening when the light begins to fade.
  • Fun moments: The candid captures are best caught using a 50mm lens, or a telephoto lens so you can capture from a distance.
  • Eating together: Eating picnics on the beach, or evening meals at the restaurant? A 50mm lens or your wide angle will work here. Don’t forget to take some photos of the food as well! In the lower evening light, you’ll likely need the 50mm lens. Alternatively, pack a strobe, but be wary of disturbing other diners with your flash. If the situation allows using off-camera flash for food photography, you will really get better results.
  • Famous locations: One of the reasons you’ll have traveled to a place is the famous attractions. Whether it’s the Eiffel Tower, the Leaning Tower of Pisa or the Taj Mahal – you’ll want the photo. In terms of equipment, you’ll most likely want a wide-angle lens. That’s so you can position both your family and the famous landmark in the same photo. Look to get creative with your photos as well, go beyond the standard group of people standing in front of a famous building.

Candid photos of those you are on holiday with are always nice.

Special events

If you’re lucky, or better still you’ve planned it, a special event may coincide with your trip. This is a great chance to make your vacation photos stand out even more. This is likely to be something like a street carnival like Carnevale in Venice, or a street performance like the Chinese opera. To best capture these type of events during the day, you’ll want a super zoom lens, one that covers the focal range of 28-300mm. If the festival is at night, different lenses will be needed. At night look to bring a fast prime lens, so your 50mm f1.8 will work well.

Getting great portrait photos from your trips abroad will balance out your set of images.

Non-photography equipment

Much of the following are sensible items that you should travel with, whether you’re photographing or not. You may not even have to pack them. In some cases, you’ll be wearing these items.

So bring these items for your vacation photography. The list here could be very long, so items such as clothing, passports, and toiletries, I will assume are packed.

  • Footwear: A special mention for the correct footwear here. In hot countries, a strong pair of hiking sandals are a good investment for walking around towns. Anything more outdoors than this, and consider bringing hiking shoes.
  • Water: Getting good photos will mean a fair bit of walking (if you have the time away from your family that is). You can always schedule your time for the morning and meet your family later. If the country’s hot, bring water bottles and water bladders to keep hydrated while you photograph.
  • Smartphone: A smartphone is useful for many photographic reasons. It can act as a second camera, and there are numerous apps to download for your photography.
  • Weather protection Being prepared for the weather for your vacation photography is a good idea. It could rain, so bring a poncho and weather protection for your camera. You don’t want to burn, so pack the sunscreen, a hat and some sunglasses. If you happen to be going somewhere cold, you’ll need equipment for that as well. Specialized clothes for the cold include a hat, hot packs, and gloves.
  • Money belt: Keep your valuables somewhere it’s difficult for them to be stolen, so using a money belt is wise. Split up your money as well, so keep some on your belt, some in your pocket, and some in your camera bag.

At night you’ll need a fast prime lens, something like a 50mm f1.8.

The final packing list for vacation photography

As you’ll have noted, there is lots of potential for great photography on your vacation. You can’t pack absolutely everything, so here is a suggested packing list to make the best of your vacation photography.

  • Camera bag – This needs to fit all your camera gear into your hand luggage, assuming you’re going to fly somewhere. Never put expensive camera equipment into your checked luggage! The Manfrotto 3N1-35PL is a great bag for this. It’s a large bag so you can probably fit non-camera equipment in this as well.
  • Camera body – An entry-level Canon or Nikon dSLR is ideal. If you want to splurge and carry the extra weight look to a full frame dSLR or the Sony Alpha 3.
  • Lens – Take two lenses with you. A wide angle and a super zoom lens if you’re more into landscapes. Or a 50mm prime and a super zoom lens if you’re more into portraits and street photography. The super zoom should go from 28-300mm.
  • Tripod – This doesn’t need to be too heavy, but it needs to be sturdy. The Sirui T120-5X is all the tripod you’re going to need. Don’t fancy a full tripod? The gorilla pod is a good alternative.
  • Strobe – This is optional, but if you do bring one, look to pack a radio trigger as well so you can use the flash off camera.
  • Filters – Each lens should have a UV filter attached. Look to have a CPL filter, and ND1000 filter, and perhaps an ND4 filter to use with the 50mm prime lens in the midday sun.
  • Storage – Bring a laptop or tablet with you, depending on your way of storing images. A blue-tooth external hard drive is also a great idea.
  • Memory card – Enough for one day worth of photography. If you choose not to bring extra storage devices then enough memory cards for your entire trip.
  • Batteries – Two camera batteries and a charger.
  • Camera cleaning – A blower and cloth to clean your lens and camera when needed.

Try and get some photos of your family eating together.

Conclusion

You’re now all set to nail your vacation photography, with a camera bag that will suit your needs.

Do you agree with everything on this list? Is there anything you’d remove, or anything you’d add to this list?

What camera equipment do you take with you on a trip with your family?

At digital photography school, we’d love to see examples of the photos you’ve taken on your family trips. So please share any thoughts or photos in the comments section of this article.

your vacation photography packing list

The post Your Vacation Photography Packing List appeared first on Digital Photography School. It was authored by Simon Bond.


Digital Photography School

 
Comments Off on Your Vacation Photography Packing List

Posted in Photography


Mastering Color Series – The Psychology and Evolution of the Color PINK and its use in Photography

25 Jun

The post Mastering Color Series – The Psychology and Evolution of the Color PINK and its use in Photography appeared first on Digital Photography School. It was authored by Megan Kennedy.

From the Renaissance to contemporary art, pink has endured as a color of emotional versatility. In this edition of the Mastering Color Series, let’s take a look into the color pink and its role within the history of visual arts.

The psychology of pink

The English word pink derives its name from flowers of the Dianthus genus. A combination of red and white, pink can be raucous and racy, or delicate and subtle. Buoyant light pinks describe playfulness, youth, kindness and affection. Darker shades of pink denote passion, love, energy, eroticism and confidence. However, too much pink can be a bad thing, influencing anxiety and claustrophobia.

Sweet foods like fairy floss, bubblegum, ice cream and lollies all embody tasty shades of pink. Associated with the smell of roses and the softness of flower petals, pink conjures ideas of tenderness and sensitivity. Evoking images of cherry blossoms, pink evokes impressions of spring, renewal and life. As a warm color, pink is drawn to the foreground of an image, cultivating intimacy and directing attention.

In the early 20th century, pink was designated the color for young boy’s clothing. The logic was that pink was a strong color and suited to boys. Blue was viewed as a lighter shade and was, therefore, more appropriate for girls. From the 1940s, however, pink came to be seen as a color for females. Products marketed at women and girls rapidly became pinker. As a result, pink has often been categorized as a color of femininity.

In China, pink is considered to be a shade of red, and comes with many of the same connotations. Indian culture sees pink as a color of youthful charm, celebration and nurture. Korean’s view pink as a sign of trust and security. In Germany, pink is considered bright and soft – a color of peace and harmlessness. In Thailand, pink is associated with Tuesday on the Thai solar calendar.

Evolution of the color pink

Ancient pinks

Although relatively rare in nature, pink may be the world’s oldest color. Compared to red, however, pink had tentative beginnings in art history. There is little evidence of a dedicated pink pigment being used in prehistoric artworks. Made by mixing whites derived from gypsum and reds made of ochres or realgar, the ancient Egyptians regarded pink as a secondary color, ranked alongside brown, grey and orange.

Despite it’s scant early use as a pigment, pink manifested in other mediums. Pink sandstone proved ideal for constructing magnificent edifices. Carved in the first century AD, AL-Khazneh is one of the most elaborate temples in the ancient Arab Nabatean Kingdom city of Petra. Furthermore, in China, the Tang Dynasty Leshan Giant Buddha, carved into a cliff face of pinkish sandstone, is the largest stone-carved Buddha in the world.

Pink can manifest in types of stone, appearing as an artistic medium for centuries

According to “Precious Colours” in Ancient Greek Polychromy and Painting, pink had a significant presence in the art of ancient Greece. Pink hues were found on fragments of the Mycenaean palace at Pylos and an examination of the Pitsa painted panels revealed pinks used in the painting of men’s skin. Pink is also seen in “small scale figures from the symposium scene on the tomb of Aghios Athanassios, where cinnabar is mixed with calcium carbonate whites and kaolinite to produce a subtle tone of pink”

Later, pink (from manganese) was used by the Romans to color glass for glassware, mosaics and decorative panels in walls and furniture.

Medieval and renaissance pigments

During the medieval period, pink pigments are thought to have consisted of a mixture of lead white or calcite and madder and cochineal. Cinnabar, a sulfide mineral, was also crushed and mixed into shades of white.

During the renaissance, Italian writer and painter Cennino Cennini described a light pink he called cinabrese. It was made by blending sinopia (sourced from hematite) with lime white (composed of calcium hydroxide, and calcium carbonate). As suggested by Cennini, cinabrese was used for filling out fleshy tones.

However, in The Book of the Art of Cennino Cennini, Christina J. Herringham observes that “what pigment was used to produce the lovely pinks and crimsons of the early Italian painters is not really known with exactness”. Contenders include “madder…kermes…[the] bodies of the Coccus illicis gum lac…and Brazil-wood or verzino“. Vermilion and carmine may also have been mixed with whites to produce pinks.

Fuchsine, magenta and quinacridone

In 1856, whilst trying to synthesize quinine, British man William Henry Perkin accidentally discovered mauvine, the first synthetic dye. The discovery prompted a surge in the industry and in 1858 German August Wilhelm von Hofmann produced a reddish-purple dye, made by combining aniline and carbon tetrachloride. Meanwhile, in the same year, Frenchman François-Emmanuel Verguin discovered the same substance independent of Hofmann and patented it. Named fuchsine by its original manufacturer Renard frères et Franc, production of Verguin’s dye commenced in 1859.

In the meantime, two British chemists, Chambers Nicolson and George Maule produced another aniline dye with a similar red-purple color. They began to manufacture the dye in 1860 under the name roseine, later changing the name to magenta in honor of the Battle of Magenta.

In 1935 quinacridone dyes were developed. A family of synthetic pigments, quinacridones are typically deep-red to violet in color. With exceptional vibrancy and lightfastness, quinacridones are often used for creating varying tones of magentas and pinks in artist’s paints.

Shocking pink

Due to the invention of color-fast chemical dyes, pinks quickly grew in application and impact during the 20th century. During 1931, a radical shade of pink was created by Italian fashion designer Elsa Schiaparelli. The pink, dubbed shocking pink was made by adding a small amount of white to magenta. Schiaparelli’s designs, made in conjunction with surrealist artists like Jean Cocteau, displayed her new shade of pink prominently.

PINK

In February of 2016, Anish Kapoor secured an exclusive contract for the use of Vantablack in his art. In retaliation, artist Stuart Semple created a fluorescent pink pigment he dubbed PINK. Declaring it to be the world’s pinkest pink, Semple released PINK for sale, but with one caveat – any artist looking to purchase PINK are obliged to agree to a legal declaration which states: “you are not Anish Kapoor, you are in no way affiliated to Anish Kapoor, you are not purchasing this item on behalf of Anish Kapoor or an associate of Anish Kapoor. To the best of your knowledge, information, and belief this paint will not make its way into that hands of Anish Kapoor.”

Despite the ban, Kapoor did get his hands on PINK. He posted a picture of his middle finger dipped in the dry pigment to his Instagram account in December 2016. Nevertheless, Semple continues to sell PINK, anti-Kapoor declaration intact.

The website where Stuart Semple sells his PINK.

Pink in visual arts

Renaissance to pre-raphaelite

Pink truly came to life from the 14th century. During the early renaissance, infant incarnations of Jesus and angels were sometimes depicted dressed in pink, as in Cimabue’s the Virgin and Child Enthroned with Two Angels. Lorenzo da Sanseverino’s Virgin and Child, with Saints Anthony Abbott, Mark, Severino, and Sebastian depicts the child Jesus in a pink robe, matching the garb of one of the surrounding saints. Later, Raphael’s Madonna of the Pinks depicts the infant Jesus and the Virgin Mary with pink carnations, a slight anachronism – the flower is said to have first appeared at Jesus’crucifixion.

Baroque artists used pink hues to convey a  broad range of subjects. The heavens and its holy occupants are grazed in soft pinks in Paolo de Matteis’s Triumph of the Immaculate. And Willem van Aelst and Rachel Ruysch used pink in arresting still life paintings. But it was during the rococo movement that pink saw a perceptible rise to fame in western art. Characterized by indulgent paintings featuring splendid pink costumes, rosy nudes and fine pink detailing, the color graduated from a secondary hue to a commanding presence in art.

Jose Ferraz de Almeida Junior’s Nha Chica and Batismo de Jesus are two examples of pink’s application in academic art. Realist painter Jean-Francois Millet’s Gleaners depicts three peasant women, one with distinctive pink sleeves, linking to the pinks hues in the overcast sky. And pre-raphaelite artists like Dante Gabriel Rossetti used intricate pinks to emphasize symbolic paraphernalia.

Impressionism to cubism

With an emphasis on the depiction of light, impressionists applied pink in a variety of contexts. Claude Monet used combinations of pink in his water lilies series. Manet painted the Plum with soft pinks verging on purple and Edgar Degas’ famous the Pink Dancers portrays figures dressed in flourishing pink ballet dresses. Paul Gauguin added depth to his paintings by filling them out with saturated fields of pink. And Vincent van Gogh painted post-impressionist pinks in his depictions of flowers, carefully detailing the blossoms of Almond Blossom.

Fauvism saw everyday settings painted in radical color. Les toits de Collioure by Henri Matisse charges a landscape with bright pink hues. In Charing Cross Bridge, Andre Derain contrasts a green and blue city skyline with a richly pink sky. As one of at least four renderings of the same landscape, Georges Braque crams a vista with active pinks in The Olive Tree Near l’Estaque. Unfortunately, the painting caught the eye of a thief, who stole it from the Musée d’Art Moderne de la Ville de Paris in May 2010.

Street, Dresden by expressionist Ernst Ludwig Kirchner is a haunting portrayal of modern public space underscored by glowering pink. Considered one of the earliest examples of cubism, The Young Ladies of Avignon by Pablo Picasso portrays five nude female prostitutes, their flesh padded out in varying degrees of pink. And abstract artists such as Robert Delaunay (Circular Forms) and Agnes Martin used color pink to convey meaning, doing away with the figurative altogether.

Pink in contemporary art

Loaded with meaning, pink is a common theme in contemporary art. Embracing ephemerality and visual abundance, Tanya Schultz works as Pip & Pop to create intricate installations and artworks from materials including sugar, glitter, found objects and craft effects. Sculpted not from icy rose-hued water but from solid glass, Roni Horn’s Two Pink Tons are deceptively evanescent in appearance. And Daniel Arsham’s Lunar Garden reflects his fascination with the familiar and the surreal, re-imagining a traditional zen garden in solid pink hues.

Known for her grotesquely intriguing representations of the human body, Mithu Sen aimed to stretch the limits of artistic language through her sculpture made of false teeth and pink dental polymer. Yue Minjun’s self-portraits depict him as bright pink-skinned characters in the throws of maniacal laughter. Anne Lindberg’s Drawn Pink culminated in an immersive gesture of movement and color and Karla Black’s weightless sculptures appear to keep themselves afloat in wispy pinks, blues and greens, exploring the nature of physical experience.

Lori B. Goodman investigates the tenuous nature of the color in her installation Pink writing, “it is said that pink is initially a calming color but that too much exposure creates anxiety.” And Anish Kapoor’s Gossamer, an elegantly carved piece of onyx, slumbers in quiet pink within gallery confines.

Pink in photography

Even before the inception of color photography, pink has had a presence in the photographic landscape. Popular in the mid-to-late 19th century, hand-colored photographs depicting pastel pink cheeks and clothing added a level of realism to the photography of the time.

Pink is now abundant and accessible. As a result, many modern photographers turn their attention to pink. One striking example of pink’s application in photography is manifested in Richard Mosse’s Infra series captured in Aerochrome. Invented for reconnaissance during the Second World War, Aerochrome registers infrared light (normally invisible to the naked eye), transforming green shades into rich pinks in the process. As a result, Mosse’s documentary of war-torn Congo is dominated by pink hues, evoking an otherworldly beauty juxtaposed with war.

Photographers like Kate Ballis and Zoe Sim also use in-camera infrared conversions and filters to capture illusive pinks. Documenting the color preferences of children, JeongMee Yoon explores the socialization of gender and identity through her Pink & Blue Project. Smothering participants in luxurious pink materials, Loreal Prystaj’s series Pretty in Pink marries portraiture and materiality. Andria Darius Pancrazi photographs architecture in a format he describes as “softserve pinkcore mulhollandwave” and Martine Perret’s series Sel Rose captures abstract aerial shots of the pink waters of Western Australia.

Manit Sriwanichpoom inserts Pink Man into photographic scenes in various ways to channel his feelings towards Thai society. Singaporean Nguan documents his home city with restrained pinks and Xavier Portela documents the pink and purple hues of cities at night.

Infrared technology and effects render green organic matter in pinks and purples

Conclusion

Pink was a latecomer to the artist’s pallet. Nevertheless, as an extremely versatile color, pink has seen extensive use in art movements over time. Sometimes underestimated, pink can be lighthearted and subtle or raucous and bold. Associated with love, kindness, tenderness, affection, intensity, playfulness and sensitivity, pink denotes emotional abundance. Palpable in depth and weight, pink is a color of visual buoyancy, conveying meaning through sensual and emotive experience.

We’d love for you to share your images with the color pink in the comments below!

See the other colors in the Mastering Color Series here.


mastering color series pink

The post Mastering Color Series – The Psychology and Evolution of the Color PINK and its use in Photography appeared first on Digital Photography School. It was authored by Megan Kennedy.


Digital Photography School

 
Comments Off on Mastering Color Series – The Psychology and Evolution of the Color PINK and its use in Photography

Posted in Photography


Weekly Photography Challenge – Food

22 Jun

The post Weekly Photography Challenge – Food appeared first on Digital Photography School. It was authored by Caz Nowaczyk.

This week’s photography challenge topic is FOOD!

Guide to Food Photography-Darina Kopcok-DPS

Photo by Darina Kopcok

Go out and capture your lovely cafe lunch, or restaurant dinner, something you have baked/made yourself. Just be sure you do it creatively! They can be color, black and white, moody or bright. You get the picture! Have fun, and I look forward to seeing what you come up with!

Photo by Nisha Ramroop

Check out some of the articles below that give you tips on this week’s challenge.

Tips for Shooting FOOD

How to Make Easy and Affordable DIY Food Photography Backdrops

The dPS Ultimate Guide to Food Photography

The Best Camera Gear for Food and Still Life Photography

Are You Making These Five Food Photography Mistakes?

4 Tips for Beginners to Food Photography


How to Take Cool Food Photos in Your Refrigerator


Weekly Photography Challenge – FOOD

Simply upload your shot into the comment field (look for the little camera icon in the Disqus comments section) and they’ll get embedded for us all to see or if you’d prefer, upload them to your favorite photo-sharing site and leave the link to them. Show me your best images in this week’s challenge.

Share in the dPS Facebook Group

You can also share your images in the dPS Facebook group as the challenge is posted there each week as well.

If you tag your photos on Flickr, Instagram, Twitter or other sites – tag them as #DPSfood to help others find them. Linking back to this page might also help others know what you’re doing so that they can share in the fun.

The post Weekly Photography Challenge – Food appeared first on Digital Photography School. It was authored by Caz Nowaczyk.


Digital Photography School

 
Comments Off on Weekly Photography Challenge – Food

Posted in Photography


6 Ways to Make Your Photography Stand Out

20 Jun

The post 6 Ways to Make Your Photography Stand Out appeared first on Digital Photography School. It was authored by Karthika Gupta.

When was the last time you googled your city and your genre photographer? I tried this the other day, and I used ‘Chicago lifestyle’ and ‘travel photographer.’ The search results returned 18.5K results. Yes, that is ‘K’ as in thousands.

Photography is an extremely competitive field and it can be difficult to make your photography stand out. Low cost of entry in terms of gear, free online tutorials and a pool of clients who want everything for ‘free’ or ‘low budget’ means there is work for anyone who wants to get into the field. Sure, some genres are harder to get into than others, perhaps. But the reality is that if you want to get paid to take photos for someone else, chances are you will be able to do that relatively easily.

branding photoshoot of an artist Karthika Gupta

Now, I am not against any of this. We all start somewhere, and I had also done the ‘free’ photoshoot when I was starting to get my feet wet. I understand all that is needed to become a photographer.

But I quickly learned that the $ 50 or $ 100 photoshoots are not worth my time, effort, and talent. As a photographer, there are many expenses such as:

  • gear insurance
  • business registration
  • taxes
  • administrative overheads including website domain name and hosting
  • travel costs etc.,

I was effectively paying people to let me take their photo.

That math did not add up and made no sense what so ever.

If you want to make it long term in the photography industry, there are several things you need to do to get yourself on the right track and stand out from the rest of the crowd when it comes to your skill, your business practices and your presence – on and offline!

1. Consistency

Don’t be a one-hit wonder. Consistently create and produce new work. Even if that work is just for you, personal projects or collaborative projects.

If you have to do ‘free’ or ‘low budget’ shoots, have a plan on when, how, and what you are going to get and give from these shoots. Spending 6 months providing free shoots or low-cost shoots to build up your portfolio is okay, but taking 2 years to do so is a bit much.

Also, realize that free/low-cost shoots tend to look very different from clients who are willing to spend $ 1000 or more on a family photo shoot. So be practical with your goals.

Styled bridal photoshoot stand out from the crowd with your photography Karthika Gupta

It took me years of practice to find a style that I liked and that worked with my personal asthetic – a clean, bright style of imagery.

2. Authenticity

A lot of photographers offer styled photo shoots and portfolio-building photoshoots. This is where a bunch of photographers walk through a styled setup and create work that they can showcase on their portfolio. There is nothing wrong with this but only if you use this as a way to build your skill.

For example, you are editing clients of different skin tones, learning how to photograph in challenging light or how to pose and interact with clients. Don’t use these images as ‘your’ work. You are better off indicating images from a styled shoot as such than you are in showcasing work/styling that isnt your own.

I love 1:1 styled shoot because they give me creative freedom and a chance to create unique images.

Instead of consistently looking for styled shoots for building a portfolio, invest in one of your own. It doesn’t have to be elaborate or fancy. Loop in a few vendors and see if you can set something up that can fit your brand and theirs. This is a win-win for all involved. That way, you create unique images and also make friends in the industry.

3. Play well with others in this space

This relates to number 2. Make friends in the industry. I belong to many FB groups and Whatsapp groups for creatives and photographers. We meet, chat, connect over business issues as well as offer advice and help as needed. I also am a part of a group with many different kinds of entrepreneurs to build a community of like-minded people and professionals. I have gotten a lot of business from these groups but have also made some life long friends and mentors. People who are always there for me because I am always there for them.

Triple exposure on film Karthika Gupta

A collaborative photoshoot with a fellow photographer to create portfolio and editorial photos. The image is a triple exposure on film.

No matter what level of business you are at or even if you are just a hobbyist, there are always people who are just like you and are looking for the same things as you – friendship, love for photography and camaraderie. Give out as much as you can, be helpful and uplift others who are on this journey with you. The more you put out there, the more you will receive from the universe.

4. Patience is key

Photography is a very competitive industry. At any given point in time, there are bound to be people who can do something better than you. And that is totally okay. Know where your strengths lie and use those to your advantage. Aim to be in it for the long haul and not just the short term gigs that are one and done deals. Build relationships with your clients so that they will refer you and come back time and time again for quality results.

Success doesn’t happen overnight. Be consistent and be patient, and things will happen in their own time.

5. Success your way

Whether you choose to be in business or not, be true to your art. Get inspiration from other photographers and daily life. There are many amazing things around us at any given point in time. Just because no-one else photographs it, does not make it boring. Similarly, think outside the box. Just because everyone photographs something a certain way, does not mean you have to follow the pack.

When you are starting out, don’t obsess over clients, getting work, and making money. Yes, they are absolutely important but take the time to perfect your art (to the point where you are confident charging money for your photography). Then, money and fame will follow.

6. Have a 360 approach to your career

When I used to work in Corporate America many many years ago, one of the companies I worked for had a 360-degree approach to annual performance evaluation. My performance was judged by how effective I was in four areas: my peers in my team and across teams, my managers, and those who worked for me. Apply this approach to your photography. No matter where you are committed to helping those just starting out, collaborate with your peers, learn from those who are where you want to be. This can be in terms of meetups, workshops, and conferences or even just meeting for a cup of coffee to connect with others.

I started teaching technique at conferences and love meeting and connecting with other photographers who have become good friends.

Your photography career and mindset around your work and your art will grow in leaps and bounds when you have a mindset of abundance instead of scarcity.

Conclusion

If you have read through this article in its entirety, you would have noticed that I talked nothing about camera brands, lens, lighting, models, posing etc.

In my opinion, the tips for making your photography stand out from the crowd focus on things that are more important. Your attitude towards yourself and others, your mindset, your willingness to get help and help others, and your long term vision for where you want to be, are far more important than your skill with the camera. After all, almost anyone can take a picture – simply point and shoot. It takes a lot more to become a successful photographer who consistently creates art.


make your photography stand out

The post 6 Ways to Make Your Photography Stand Out appeared first on Digital Photography School. It was authored by Karthika Gupta.


Digital Photography School

 
Comments Off on 6 Ways to Make Your Photography Stand Out

Posted in Photography


The 7 Nature Photography Mistakes You Don’t Know You’re Making

19 Jun

The post The 7 Nature Photography Mistakes You Don’t Know You’re Making appeared first on Digital Photography School. It was authored by Jaymes Dempsey.

Do you like to do nature photography?

Then you might be making these 7 mistakes.

And here’s the thing:

These nature photography mistakes are the kind that you don’t even know you’re making. They’re the type of mistakes that are easy to miss, but they’re absolutely critical to your photography.

To discover these mistakes (and to ensure you never make them again!), read on!

1. Shooting under bad lighting

I’m going to start with the single most critical, most common mistake I see nature photographers making:

Shooting in poor lighting conditions.

Because good light is absolutely essential to good nature photography.

In fact, I’d go so far as to say that without good light, you cannot get a good photo. It’s so easy to have the perfect setup, the perfect composition, and the perfect settings…

…only to ruin the shot with bad light.

So what counts as bad light?

Two main situations.

First, shooting under the harsh, midday sun will pretty much always ruin your shots. The midday sun just isn’t good for nature photography!

And second, shooting in low light, at any time of the day. Unless you’re shooting with a tripod, your shots will end up grainy or blurry, which you definitely don’t want.

Which begs the question:

What is good light?

I recommend that you do nature photography at two main times.

First, you can capture some great nature photography under cloudy skies. Cloudy light is especially great for photography that involves color because the clouds diffuse the light and saturate the colors.

Second, you can always rely on the golden hours, which are the two hours after sunrise and before sunset. Golden-hour light is warm, wonderful and, well, golden. It’s perfect for capturing that stunning, once-in-a-lifetime shot.

In fact, most of the best nature photography you’ve seen was probably taken during golden hour. It’s just that amazing!

2. Shooting your subject from a standing height

Here’s another common nature photography mistake:

Not paying attention to your angle!

(More specifically, photographing from a standing height, so that you’re shooting down toward your subject.)

This is especially problematic in wildlife and macro photography, where shooting downward conveys a sense of dominance and separation.

Instead of shooting downward, try to get on a level with your subject. That way, the viewer will feel much more connected, like they’re in the same world as your subject.

And don’t just shoot from a single angle. Try to experiment with different possibilities, and take note of the way a different angle results in a different nature photo.

This is a great way to get out of a creative rut: Force yourself to shoot a subject from an angle you’ve never used before. Get on the ground and shoot upward!

3. Using a (slightly) messy background

In nature photography, the background is absolutely essential.

If you don’t include the perfect background, then your photos just won’t stun the viewer.

And one of the easiest mistakes to make is using a messy background.

You’ve got to do everything you can to avoid the mess. You must avoid chaos. Instead, you need to produce a background that’s as simple as possible:

  • Uniform in color
  • No additional subjects
  • No lines or shapes

Your goal is to make your subject stand out. And to do that, you have to eliminate everything that’s unnecessary in the background. Only include the essentials.

4. Photographing low-quality subjects

Once you’ve found a subject…

…do you check to make sure that it’s not damaged, dirty, or poor quality?

It’s so easy to forget this step. And yet it’s critical to capturing a stunning nature photo.

I recommend you always do a quick evaluation of your subject.

If it’s a flower, then you’ll want to ask yourself:

  • Are there any blemishes or holes?
  • Are there any spots of dirt or mud?
  • Are there any insects in the center of the flower?

If it’s a landscape, then think about:

  • Whether there’s any litter or human-made items
  • Whether your foreground subject is damaged

Your evaluation doesn’t need to be in-depth. You should just spend enough time to be certain your subject is in good shape.

5. Not including a point of focus in your compositions

This is another quick way to ruin a great nature photo.

Because basically, every composition must have a point of focus.

By this, I mean that you must include a subject. Something that viewers can latch onto. The subject can be whatever you like (as long as it’s there!).

If you’re shooting landscapes, then try to include a subject in both the foreground and the background. Ideally, the foreground subject will lead the eye to the background.

If you’re shooting wildlife, then your subject is pretty much guaranteed. Just make sure that you emphasize the wildlife in your photo!

And if you’re shooting macro photos, then make sure that an aspect of your subject is tack-sharp, so that your viewer’s eyes go straight to it.

6. Shooting low-contrast scenes

This mistake is a bit more advanced, but still important to keep in mind.

When you’re doing nature photography, you should strive to avoid ultra-low contrast scenes.

By ‘low-contrast scenes,’ I’m referring to those with very little variation in tone (that is, lights and darks) and color.

A low-contrast scene might be almost entirely white.

Or it might be entirely red, or blue, or black.

What’s the problem with low-contrast scenes?

The lack of contrast makes every element blend in. So no single element stands out, and the photo becomes boring.

Which is exactly what you want to avoid.

Instead, look for scenes where the subject pops off the background. And look for scenes where you have some nice shadows and nice highlights.

I should note: It is possible to use low-contrast scenes for an artistic effect. But you have to do it deliberately, and it’s extremely easy to mess it up.

So I recommend you stick to high-contrast scenes. That’s how you’ll avoid low-contrast issues!

7. Not post-processing your nature photos

There are three fundamental aspects of every nature photo. They are:

  1. Light
  2. Composition
  3. Post-Processing

If you can nail all three of these things, then you’re set. Your photos will be stunning. And we’ve already talked about light, and how you should shoot during the golden hours. We’ve already talked about composition, and how you must include a point of focus.

But we haven’t talked about post-processing. And here’s the thing:

Without post-processing, your nature photos just won’t stand out. Because editing is what adds that finishing touch, that last bit of shine, to your nature photography.

Now, you don’t have to do much editing. But there are a few things I recommend you do to every photo:

  1. Check the exposure. It’s especially common to let your photos remain underexposed. So make sure that the shadows in your photo still look nice and detailed.
  2. Check the contrast. In general, I recommend boosting the contrast of your nature photos. This gives an extra bit of punch and will help your images stand out.
  3. Check the saturation. While it’s easy to overdo this step, a little bit of saturation goes a long way. You want your colors to look deep, but natural.

If you can just follow these three steps, then your nature photography will look so much better.

Nature photography mistakes: conclusion

Now you should know all about these seven deadly nature photography mistakes.

And you’re prepared to avoid them!

The key is to just keep a lookout. Maybe even create a checklist.

Then, when you’re shooting in the field, you’ll make sure that none of these happens, and your photography will turn out better than ever.

Have any nature photography mistakes that I didn’t discuss? Share them in the comments!


nature photography mistakes

The post The 7 Nature Photography Mistakes You Don’t Know You’re Making appeared first on Digital Photography School. It was authored by Jaymes Dempsey.


Digital Photography School

 
Comments Off on The 7 Nature Photography Mistakes You Don’t Know You’re Making

Posted in Photography


Managing Your Photography Process From Shooting to Editing

17 Jun

The post Managing Your Photography Process From Shooting to Editing appeared first on Digital Photography School. It was authored by Nisha Ramroop.

You spend a lot of time learning about your gear and how to use it to produce great images.  You also invest time and money into learning to improve your technique for capturing and processing your work. It is therefore fair to say that developing a consistent workflow in handling your images after (and sometimes before) they are captured is also of importance. Here are a few steps you should be taking to help you manage your photography work.

Before you shoot

1. Make a plan

What are you going to shoot today? Is it an event in a dimly lit place or is it in the middle of a sunny day and outdoors? What will be your source(s) of light? What gear will you need?

Prepare by planning for your subject and thinking through your shoot. That way you can think of possible outcomes and pack accordingly (and in some cases avoid overpacking). Weather conditions, time on your feet, length of your trek/journey and environmental constraints will also help you determine if you need to scale down your gear to the essentials or rethink how/what you pack.

2. Set up your camera

If you are used to shooting the same genre of images, you may have your settings already dialed in. This takes into consideration the creation of presets to handle different scenarios that you face. Keep a reminder to adjust your white balance for the type of light you will be shooting in. Will you need a flash or supplemental lighting and what settings will you need when you add those?

Do you want to shoot your images in RAW or JPEG? Both have their advantages and disadvantages and you need to choose what works well for your planned shoot and expected outcome.

After you shoot

1. Moving images from your card as soon as possible

A good practice is moving the images from your memory card to your computer as soon as possible. A card reader transfers images faster than using a direct connection from your camera to your computer. While recent computer card slots are comparable to card readers in speed, there is still a preference to the latter.  One school of thought is that a good quality card reader is built to minimize the chance of corrupting your memory cards.

While the objective is to move the images, it is advisable to copy the images across (as opposed to move). After you copy, compare the number of files on the memory card (and size) to what was copied. This is especially important if there was an interruption during the copy process.

Note: If you choose to move instead of copy, this comparison will not be possible. More importantly, there is a higher probability of loss or corrupted files, if there is an interruption during the move process.

2. Making a backup

Prepare for the failure of your devices. Having more than one copy of your image gives you some peace of mind that it is safe somewhere. There are many backup combinations you can use, but the most basic is to have two copies of your images. You can have a copy on your laptop/computer and one on an external drive. You can save on more than one external drive or even go with an external drive/cloud combination. An ideal backup strategy involves two copies where you have one offsite (off premises/cloud).

An essential part of having a backup is testing it from time to time to ensure that it works and can restore your images when needed.

Backup processes can be revised as your workflow progresses. For example, after a shoot, you can copy all of your images to a secondary place. After you have culled your final selection, you can replace those images with your selection. When you edit and find your best images, you can add this to your library later. Whatever system you choose to work with, they all require a level of organization.

3. Clearing your memory cards

A good rule to adopt is to clear your memory cards after you have backed up your files to two locations. In each instance, copy from the memory cards directly. After your copy, compare what was copied to the number of files (and size) of those on the memory card. This is especially important if there was an interruption during the copy process.

4. Using management software to browse your images/cull your images

A digital asset management software system is a great way to browse, preview, locate and rate your images and mark them for processing. Two of the most used asset management systems are Adobe Lightroom and Adobe Bridge. There are a few others that work similar to these, with a primary focus on browsing and rating images.

Most people do not take advantage of the rating ability of asset management software, but it is quite a useful tool to cull your work. When you browse your images, you give the highest ratings to your best images – those to keep, review or edit. The next rating is for those with potential and worth a second look. You award the lowest rating or no rating to images that do not make the cut. These would include blurry images, those that are not salvageable or ones you will never review/edit. These can be marked for discarding at a later time (when space becomes an issue) or immediately (if that is how you streamline your work).

5. Post-processing images

Many times post-processing immediately follows shooting and nothing is wrong with that. Once you develop a workflow that suits you, then there are no rules as to when to do what. Whenever you post-process, remember that your edited images need to be saved in several locations (especially if they are for a client). Saving your final images with a descriptive name/date in a sub-folder will help you easily find them later on.

Note: Post-processing also can be broken down into its own workflow, which includes processing multiple images at a time (batch processing).

Conclusion

Your images are worth protecting, thus developing a habitual photography workflow is important. Find a way that works for you, keeping in mind that you will be thankful for spending the time on a proper backup strategy.

Finally, create with the assurance that your work is organized and managed from capture to delivery.

Do you have any other tips to add here? Please share in the comments below.


The post Managing Your Photography Process From Shooting to Editing appeared first on Digital Photography School. It was authored by Nisha Ramroop.


Digital Photography School

 
Comments Off on Managing Your Photography Process From Shooting to Editing

Posted in Photography


5 Product Photography Tips to Improve Your Images

17 Jun

The post 5 Product Photography Tips to Improve Your Images appeared first on Digital Photography School. It was authored by Charlie Moss.

Product photography: you’ve probably heard that it’s hard and very specialist. But your friend who runs their own business asks you if you’ll just shoot a few product pictures for them to use on their website or social media. Or perhaps you have your own business that regularly needs new product photography. Of course, you’re happy to have a go. It could help you improve your photographic skills too by giving you some new challenges. But how do you approach this highly specialist field of photography that you have very little experience with?

When many photographers think of “product photography” they think of a certain style that often involves complicated lighting, setup, and retouching. Sometimes blending dozens of shots in post-processing, using specialized lenses or lighting equipment, or shooting on perfect white backgrounds.

These styles of photography do have their place in the world of marketing and advertising. And you may even decide that it’s the right look for the products that you’re shooting. But in recent years a more natural feeling product photography has been creeping into advertising via social media influences. This style can be easier to dabble with because it requires less equipment and specialist knowledge – although it is still incredibly tricky to master!

The most important thing in product photography is to match the look and feel of the images to the product and the brand. A shot of an exclusive fountain pen aimed at CEO’s will be photographed very differently to a vegan surf-wax aimed at Californian surfers!

Whichever style you decide to try out when you have a go at product photography for the first time, there are some simple things to keep in mind when you’re shooting. If you keep these guidelines in mind, then you should be able to shoot images that show off a product to its advantage.

1. Get your camera on a tripod

It cannot be said often enough in still life photography how great tripods are. Firstly, they protect against camera shake. If you can get your camera (or phone) on a tripod, then your shutter speed can be as long as you like without risking any blur from camera shake. A nice, crisp image is essential to product photography.

If people cannot see what they are purchasing clearly, then they will most likely move on and choose a different supplier!

Blurry pictures are never desirable for product photography. You need to make sure they are clear and crisp.

If you can’t stretch to a tripod then make sure that you use a relatively fast shutter speed to compensate for any slight movements you might make while holding the camera. You may find that you have to compromise and raise your ISO in order to get a clear, bright picture.

The other advantage of tripods is that they hold your camera in one place while you work on your composition. If you are styling your images for social media (rather than shooting flat e-commerce images), then it might take a couple of attempts to get it right.

Keeping the camera in one place leaves you free to work on the styling and composition.

There are a huge variety of tripods available, all with different features and at different price points. If you can stretch to it, then a tripod with an arm that bends over at ninety degrees is an excellent investment that will make the popular flatlay (top-down) shots for Instagram easier.

2. Use good lighting

Let’s bust a myth – good lighting doesn’t have to be expensive or time-consuming. Yes, there are certain kinds of product photographers who spend hours or even days lighting a single product and getting it perfect. Of course, many high-volume photographers prefer to work with studio lights in a closed studio. That way, they can replicate lighting time and time again when doing repeat jobs for the same client.

But you can light a product with just natural window light, or even take it outside, and still get great results. You don’t have to have expensive studio gear or even a whole room dedicated to photography. Many people photograph products quite successfully on a table pulled up to a bright window. With the right backgrounds and props, it certainly doesn’t have to look like it was shot in your living room!

Lighting can also help to make your object look three dimensional on a flat screen. Shadows and highlights help viewers to interpret the image and understand it correctly.

The crucial thing is to match the lighting style to the product and brand. For something sleek and high-tech, you might want a more artificial feel to your light. Whereas, a more natural artisan product would probably benefit from just simple window light.

3. Shoot multiple angles

If people are buying online, then they can’t pick up and touch the product. That means you have to try and convey all the small details to a potential purchaser. The best way to do this is by making sure that you capture a variety of angles of each item. Also, get in close to show the details if it’s relevant.

This is especially important if the item is handmade. Getting in close can show off the care and consideration that an artisan puts into their work. The details are what often sets handmade products aside from their mass-manufactured counterparts. So be sure to show them off!

Shooting multiple angles is also an easy way to generate lots more content for social media accounts. Many business owners struggle to find enough content to post regularly on social media, so it can really help them out.

4. Find out the platform specifications

It’s important to shoot product photographs with the final use of the image in mind. Different online platforms will have different specifications for how photographs look best on their sites.

For instance, if you are shooting for someone with an Etsy store, you’d need to consider that portrait photos look best on the product page, but the search thumbnails are landscape. That means a clever photographer would shoot images that look good when cropped to both portrait and landscape. It might mean that you need to leave extra space around products when you shoot them and crop in later in post-processing.

Instagram can be a particularly tough platform to shoot for if people are looking for images that look good on social media. Images should ideally be posted in a ratio of 5:4 to take up as much space as possible and be more eye-catching when scrolling down the feed.

However, on a users profile grid, they automatically crop to a 1:1 square format. That means you lose details in the top and bottom of the image in the thumbnails. On top of that, the “stories” feature uses images that are in a 16:9 ratio – much taller and skinnier than the news feed! When shooting specifically for Instagram, I tend to set my camera to shoot in a 16:9 ratio. Then I know I can almost always crop other ratios out of that base image.

Also, research the pixel size that each online platform uses. If you produce images that are too small, then they’re likely to look pixellated or blurry when uploaded.

5. Don’t forget the packaging

More and more people are shopping online, so the packaging of a product contributes heavily to the first impression of a brand.

Artisan companies and small businesses often spend lots of time considering their packaging and branding. So it’s undoubtedly worthwhile to shoot the packaging as well as the product.

As well as demonstrating brand values, you can also show the buyer that it’s going to help their purchase get to them safely. This is especially important if it’s a product that is breakable or if it’s likely to be given as a gift. It helps instill confidence in the brand!

Plus, on platforms like Etsy that give you multiple slots to upload images of your product, having packaging photographs can be an excellent way to show off the product styled in a new way.

Always remember…

Keep your product photographs well exposed and in focus.

As long as you’re getting these two things correct, then you’re already on the right track. All that’s left to do is practice, practice, practice until you’re shooting products like a pro.

Remember to comment below and show us the pictures you’ve been shooting using what you’ve learned!


5 Product Photography Tips to Improve Your Images

The post 5 Product Photography Tips to Improve Your Images appeared first on Digital Photography School. It was authored by Charlie Moss.


Digital Photography School

 
Comments Off on 5 Product Photography Tips to Improve Your Images

Posted in Photography


Weekly Photography Challenge – Iconic

15 Jun

The post Weekly Photography Challenge – Iconic appeared first on Digital Photography School. It was authored by Caz Nowaczyk.

This week’s photography challenge topic is ICONIC!

Martin Jernberg

Go out and iconic buildings, subjects, products, or places. Just be sure they are iconic! They can be color, black and white, moody or bright. You get the picture! Have fun, and I look forward to seeing what you come up with!

Jack Bassingthwaighte

Holger Link


Check out some of the articles below that give you tips on this week’s challenge.

Tips for Shooting anything ICONIC

5 Ways to Photograph Travel Icons

Tell A Different Story Of A Timeless Icon

Travel Photography Subjects: Icons

9 Creative Architecture Photography Techniques for Amazing Photos!

How to Tell Stories with Architecture Photography

Tips for Different Approaches to Architecture Photography


Weekly Photography Challenge – ICONIC

Simply upload your shot into the comment field (look for the little camera icon in the Disqus comments section) and they’ll get embedded for us all to see or if you’d prefer, upload them to your favorite photo-sharing site and leave the link to them. Show me your best images in this week’s challenge.

Share in the dPS Facebook Group

You can also share your images in the dPS Facebook group as the challenge is posted there each week as well.

If you tag your photos on Flickr, Instagram, Twitter or other sites – tag them as #DPSiconic to help others find them. Linking back to this page might also help others know what you’re doing so that they can share in the fun.

The post Weekly Photography Challenge – Iconic appeared first on Digital Photography School. It was authored by Caz Nowaczyk.


Digital Photography School

 
Comments Off on Weekly Photography Challenge – Iconic

Posted in Photography


10 Questions to Ask a Tour Operator Before Signing up for a Photography Tour

14 Jun

The post 10 Questions to Ask a Tour Operator Before Signing up for a Photography Tour appeared first on Digital Photography School. It was authored by Peter West Carey.

The company has an entrancing website and bedazzling photos. The itinerary looks all-encompassing and the testimonials seem positive. You’re excited and have your credit card ready for the deposit.

Slow down, partner.

Before you hand over your money, it’s a good idea to ask a number of questions of the photography tour operator.

Asking questions before paying for a photography tour is all about setting expectations – both yours and the operators. It’s also a chance to learn about the professionalism of the person or company you are signing up with.

Here then are 10 key questions to help you with your tour choice.

1. Do they have insurance? And what will it cover?

Protecting yourself is important with any tour, and it’s important to know what your tour operator has in place before you sign up. With the proliferation of photographers jumping to offering tours, it’s possible not all have put serious thought into insurance matters.

At the least, your operator should have insurance covering accidents during the trip – both ones they cause and ones out of their control.

The reason operators may skimp on insurance is simple – it’s expensive. And that cuts into profits. It’s also often the reason two operators who offer roughly the same itinerary will differ in price by 10-20%. Make sure you are covered before paying your deposit.

2. What is their guest to instructor ratio?

Everyone has their own ideal when it comes to instructor-to-guest ratios. Some enjoy one-on-one instruction all the time, and others prefer a small group of maybe five or six. Still, others may love the anonymity of a large 15-person group so they can do their own thing without interference.

I prefer groups no larger than six guests per instructor. This allows for some hands-on, one-on-one time. It also ensures the instructor is not being asked 5,000 questions while you wait for your chance.

Also, realize that an instructor may have a low ratio, but the over-group size might be larger, meaning they may bring in other instructors to help out. This is usually not a problem, but if you are hoping to hear directly from the lead instructor who attracted you to the tour, be aware you might not get the amount of facetime you’re expecting.

3. Is this a tour or workshop?

What’s the difference between a workshop and a photo tour? Susan Portnoy has a good comparison on her site, The Insatiable Traveler.

A tour is a chance to be guided through an area typically rich in photographic content. There is less direct hands-on instruction, moment to moment, and the subject matter can cover a large spectrum.

A workshop, by contrast, is usually more hands-on and directed to a specific goal. An example of this is a one day workshop on street photography. Your instructor will be close at hand to make all those small course corrections and critiques needed for improvement.

4. Do they have any other assignments during this trip or is this their only gig?

I’ve run across this myself while taking a tour. The instructors brought us to a scenic overlook and then POOF! Gone.

It turned out they had an assignment in that area. While they only headed off five minutes away, it was rather disconcerting to think I, and the other guests, were less important for that hour of ‘other work.’

It’s important to also realize that having other work isn’t necessarily horrible for you. However, it’s important to know about it up front, and then you can decide if it is acceptable. Most of us are okay with some deviation if we know about it in advance.

5. Will there be daily opportunities to review work?

Some people love to have constant feedback and need that on their tour. While others could not care less because their art is a personal endeavor.

If you want regular feedback, ask about it. Again, it’s about setting expectations, so you’re not disappointed when your needs aren’t being met.

Sometimes the reviews are just back-of-camera check-ins to see what you’re seeing and offer correction or encouragement. Or maybe you want an hour of the instructor’s time every three nights in front of a laptop so you can get more in-depth critiques. Either way, know before you go.

6. Why do they run tours to this location?

This is a big question that should be easy for any operator to answer. I believe the best answer is, “Because I love the area/region/country!” Often, the answer in the background is, “Because it is highly profitable or super popular.”

There’s nothing wrong with making a profit or leading tours to popular spots, but I feel it is important to know why the operator is running the tours they run. If it’s for the love of an area, you’re more likely to get hard-to-acquire information, background details, and unique locations. Experience certainly matters in the photography tour business for access to hidden experiences.

7. What is their cancelation policy?

This item is pretty straightforward. You should ask this for tours, workshops or any time you are plopping down a large sum of cash for a service. Do they offer full refunds? What is the deadline for canceling without a fee? Do they offer to reschedule if extenuating circumstances or family health are involved?

What about the operator canceling a tour? Will they try to rebook you with another, similar operator? How quickly will they offer a return of all funds?

8. What is a typical day like?

The advertisements and website you researched looked incredible! Beautiful images and exotic locations abound in that slick presentation.

But what will it really be like when you’re on the tour? Sure, no two days will be the same if you’re traveling all around. However, it is important to understand if you’ll be on a bus for five hours each day or if dinner is planned without thought to sunset timing each night. It’s often the difference between a photo tour and a regular tour.

In my mind, a photo tour should be a balance of exposure to opportunities with time to reflect and take a break. Food is also very important to keep energy up for shooting all day. If you’re always on the move, you won’t have time for photos. If your itinerary covers too much ground, you’ll see a lot of things through car or bus windows without many opportunities.

Pacing can be essential during a week or two-week long tour. If every day is packed with 18 hours of photography and instruction, you’re going to be exhausted by Day 3. Flexibility is also important so that one event taking extra time doesn’t make the rest of the day’s itinerary crumble.

9. How much instruction can you expect?

This question is also a chance to make your expectations known. If you want hand-holding the whole time, and have barely touched a camera, let the operator know so they can decide if the trip will be a good fit.

Perhaps you have a particular skill set you want to develop. Letting the operator know early will help them prepare, and both of you can work on a simple plan to help you improve during the tour. Everyone on your trip will have different aspects of photography they want to improve. Expressing your desires will help all involved.

10. Do they handle all logistics or work with local operators?

This is another question that has no right or wrong answer, but it’s important to know in setting your expectations. Some operators, to increase profits or because they desire more control, will want to book all the hotels, events, admissions, etc., themselves. This can also lead to a lower cost for guests. But it can also lead to the operator taking more time away from instructing.

On the other hand, an operator who hires a local guide or tour company should have more time for instructing. It can also help to have a local when things go sideways, and a deep understanding of local customs and protocol is essential. It allows for a division of labor; the local guide can go ahead and check the group into a hotel and have rooms ready while the group continues to soak up a particularly beautiful sunset.

Conclusion

Many of the questions I posed here have no right or wrong answer. However, I feel they are all important to ask in setting expectations before investing time and money in a tour. Asking them can also help expose a guide who is not organized or ready to take a group on a trip due to lack of diligence.

Can you think of other important questions to ask? We’d love to hear them in the comments section below.


photography tour questions

The post 10 Questions to Ask a Tour Operator Before Signing up for a Photography Tour appeared first on Digital Photography School. It was authored by Peter West Carey.


Digital Photography School

 
Comments Off on 10 Questions to Ask a Tour Operator Before Signing up for a Photography Tour

Posted in Photography


How to Create a Documentary Photography Project

13 Jun

The post How to Create a Documentary Photography Project appeared first on Digital Photography School. It was authored by Kevin Landwer-Johan.

We all love a good story. A tale that captures your attention and draws you in to discover more. Creating a documentary photography project can be a great way to develop your photography. It can also help hold the attention of your audience for longer.

Monk in a Saamlor tricycle taxi in Chiang Mai, Thailand.

© Kevin Landwer-Johan

Random collections of unrelated images tend to be glanced over. This is especially so when most of your photography is viewed on social media platforms. Making your photography stick in people’s minds is a constant challenge.

Developing a photography project and working on it over a period of time, be it weeks, months or even years, can help you stand out from the crowd. Your personal skills and style will evolve in a more meaningful direction. The deeper commitment you have to a documentary photography project the more you will benefit.

Have a plan and a purpose for your photography project

Charging into a project on a whim will sometimes work, but not often. Without purpose and a plan, you are more likely to lose interest. You’ll struggle to keep momentum and find it too challenging to come up with fresh ideas to keep your project alive.

Start a list. Write down ideas as they come to you. What would most like to photograph? As you start, don’t restrict yourself. Jot down whatever comes to mind, giving no thought to whether or not it’s practical. Let your list grow over a week and then review it.

Market Tricycle Taxi Ride How to Create a Documentary Photography Project

© Kevin Landwer-Johan

Give yourself some space alone with your list. Edit it down to what’s practical. What can you photograph every day, or every week? If anything on your list is not accessible to you, remove it. Add it to a list for future projects.

Concentrate on what excites you. What’s on your list that you’d most like to commit to photographing regularly? Having a passion for your theme or concept will keep you motivated. Don’t choose ideas you think will be easy. Being challenged is good for you.

Narrow your list down to two or three ideas. Mull these over before deciding on one of them. Even make a start on more than one. You can begin work on more than one project, then, if it’s too much of a commitment, pick the one you’re enjoying the most.

Now write another list of what you will do with the photos you’ll create for your documentary project. Stories are for sharing. Who will be interested in the tale you are telling? What’s the best medium or platform for you to display your images?

You might want to make a physical scrapbook with prints of your favorite photos. Instagram or Pinterest may be an ideal outlet for you, or your own website. Photo sharing sites like 500px or Flickr are also options. You could email a small selection of your project photos to one or two photographer friends each week for their feedback. Consider what you most want to achieve by sharing your photos.

Tricycle Detail How to Create a Documentary Photography Project

© Kevin Landwer-Johan

Know your subject better than anyone

Research. Dig into your chosen project idea like it’s brand new. Even if you already know a lot about it, find out more. Telling a story built on thin information will not hold people’s attention for very long.

The more of an expert you become on your subject, the better the story you will tell. You might even want to plan a narrative. What will be the beginning, middle, and end? The greater your knowledge about it, the more interesting detail you’ll be able to include. You want other experts on your topic to be surprised at what you are showing them in your photos.

Look into the history of the project idea. Talk to people who know about your topic. Don’t only rely on the internet. To touch the heart of the thing will require experience – yours and other people’s.

Tricycle Taxi Rest How to Create a Documentary Photography Project

© Kevin Landwer-Johan

Take lots of photographs

While it’s important to plan, don’t be held back by it. Make a start as soon as you have decided on what your documentary photography project will be. You might start slowly and change direction a few times, but that’s okay.

Procrastinating will not help you achieve your goals. Once you begin, you will see your story develop, and you can steer it in any direction you feel is right.

The topic for your project may dictate how frequently you can take photos. Hopefully, this will be regular, especially if you are embarking on your first documentary photo project.

Vary the images you are making. You may decide to use one prime lens. If so, push yourself to create a diverse selection of compositions with it. Or use your widest and your longest lens with the same subject on the same day for variety.

Waiting for a Ride How to Create a Documentary Photography Project

© Kevin Landwer-Johan

Use a mixture of aperture, shutter speed, and ISO settings to also help build an interesting series of photos. If there’s movement, let it blur out using a slow shutter speed. If you would normally photography a subject with a wide aperture, close it down and get as much in focus as possible. Stretch your technique beyond what you would typically use.

Photograph in a mixture of lighting situations. Take some photos in the morning and others in the afternoon or at night. Aiming for variety will give you a more interesting body of work to edit down from for the images you will share.

As you build up a body of work, you will begin to see your strengths and weaknesses. You will see the photos you like the most. Organize these into a separate folder, or series of folders so that you can compare them often.

Taxi Rider in Chiang Mai, Thailand How to Create a Documentary Photography Project

© Kevin Landwer-Johan

Cultivate a relationship with your project

Photographing a project will involve some amount of repetition. You’ll visit the same locations. Photograph the same things. Meet the same people. Experience weather and seasonal changes.

Be aware of your feelings each time you are working on your project. Make photographs that are in tune with your mood and how you are experiencing what you are doing. This will make your story more personal and interesting.

Your view of the world is unique, and your photographs should portray this. The concept may seem a little abstract, but as you are mindful of it and practice over time, you will find your photos become more expressive of who you are.

Waiting for Customers How to Create a Documentary Photography Project

© Kevin Landwer-Johan

Interacting with people who are part of your project, if there are any, will help develop the character in your photo story. You might prefer to only take candid photos of people, but the way you do this will also reflect in your pictures. Using a long lens, or a wide one, will result in very different candid images.

Engaging with people throughout your project is very interesting. At the start, people may be uncertain of what you’re doing or why. As you revisit and photograph them, your relationship with them will change. People will become accustomed to you and will be more relaxed in your presence. Others may become irritated or bored. The nature of the photos you make of them will change.

Observe the differences. What’s changed since the last time you worked on your project? Look for subtitles you may not have picked up on if you’d only photographed in that place once. Over time you will start to see things you did not pick up on before. These details can add a depth of interest to your documentary project.

Poise of the Rider How to Create a Documentary Photography Project

© Kevin Landwer-Johan

Review your photos and seek feedback

What do you think of your photos? Are others enjoying your visual storytelling?

Working on a project allows you to see your own photography developing. Because you’re photographing the same theme or concept over a period of time, you will reproduce similar types of photos. Compare them. Can you see growth in your skills and style?

Separate the top 10 or 20 percent of your photos after each session you have working on your project. This will give you a clearer idea of your progress. From time to time, review these photos and look for gaps in your story. What’s missing? What are you photographing too much?

Having a photographer friend or mentor look over your photos and share their critique on them will help you see things from another perspective. They may point out things or ask questions you have not thought of. Healthy feedback can lead to a deeper, richer story being told.

Cycle Taxi Shadow How to Create a Documentary Photography Project

© Kevin Landwer-Johan

Let your documentary photography project grow organically

Go with the flow. Don’t stick to your plan too closely if you feel a more exciting story is emerging from your project. Let it develop organically. This will help you keep interested in what you are doing. You may stretch your project out for longer than you had planned.

Start today. Begin writing your list of ideas. Don’t rush it, but don’t let the idea stagnate. Once you begin, keep thinking about your project and adding to it. Right from when you start your list, through to the taking of photos and sharing them.

Have you ever given yourself the challenge of a documentary photography project? You may find you love the more in-depth storytelling aspect of working on a body of work.

Do you already have a project which has stalled a little and needs a kickstart? Design a story for it and plan to share it. This can help you get back on track.


The post How to Create a Documentary Photography Project appeared first on Digital Photography School. It was authored by Kevin Landwer-Johan.


Digital Photography School

 
Comments Off on How to Create a Documentary Photography Project

Posted in Photography