RSS
 

Posts Tagged ‘Photography’

Essential Photography Equipment For Beginners?

03 Jul

Every photographer is unique in their own photography style and gear preference. To get you started on your photography journey, this article will help you choose the only really essential photography equipment for beginners. You will also find specific brands and explanations for why they were chosen. This photography basics bundle has everything you need to get started! I will Continue Reading

The post Essential Photography Equipment For Beginners? appeared first on Photodoto.


Photodoto

 
Comments Off on Essential Photography Equipment For Beginners?

Posted in Photography


Basics of Landscape Photography

03 Jul

Successful landscape photography is made up of multiple elements, such as location, composition, proper depth of field, lighting, equipment used and other aspects. In the guide below on the basics of landscape photography, I will attempt to shed some light on what these elements are and how they work together to make landscape photos that stand out differ from ordinary Continue Reading

The post Basics of Landscape Photography appeared first on Photodoto.


Photodoto

 
Comments Off on Basics of Landscape Photography

Posted in Photography


What Size Beauty Dish is Right For Your Portrait Photography?

03 Jul

The post What Size Beauty Dish is Right For Your Portrait Photography? appeared first on Digital Photography School. It was authored by John McIntire.

What Size Beauty Dish is Right For Your Portrait Photography?

Beauty dishes are common and well-loved lighting modifiers. They are particularly useful for portraits (beauty is in the name after all). They also tend to be a lot cheaper than decent sized softboxes. Years ago, your choice of beauty dish was quite limited. Nowadays, if you try searching for beauty dishes, you will be presented with a multitude of options that greatly vary in size and even how they set up.

2- What Size Beauty Dish is Right For Your Portrait Photography?

Although the numbers don’t seem to be that different, the actual sizes of these beauty dishes vary greatly, and they all have a distinct effect on the light in your images.

What do you do when faced with this kind of choice and how do you know what size beauty dish you should buy? This article discusses three common sizes of beauty dishes and shows you what effect they have on your images. All of the beauty dishes discussed here are silver, and none of them are collapsible. As long as they are of decent quality, the fact that a beauty dish is collapsible should have no impact on your images.

What is a beauty dish?

Three different size beauty dishes. Left: 16″ Middle: 20″ Right: 27″

Beauty dishes are bowl-shaped modifiers that are known for the contrasty light they provide. The quality of light is usually somewhere between hard and soft (when brought in close to your subject). This sets them apart from other modifiers, like umbrellas and softboxes, where the goal is to achieve the softest light possible. This allows you to achieve well-defined edges and shadows, but still retain a flattering light on your subject.

This image shows an unmodified beauty dish on the left. A gridded beauty dish in the middle, and a beauty dish fitted with a diffusion sock on the right.

Often, you will find that beauty dishes come with grids and diffusion socks to help modify them further. Grids alter and increase the directionality of the light, while diffusion socks diffuse the light further, softening it a bit and altering the shape.

What sizes are there?

Any search for a beauty dish should reveal a huge amount of results these days. You can find tiny beauty dishes that are only a few inches across that are designed for flashguns and you can find massive beauty dishes that would be ideal for lighting groups of people. This article compares three sizes that fall more into the normal sized category. These are a 27″, 20″ and 16″.

All three beauty dishes were positioned the same distance from the subject to clearly demonstrate the differences in the effect they provide.

1. 27″

At 27-inch in diameter, this beauty dish is at the upper reaches of what you can expect to find in terms of size. When it’s in close, the light it provides is really soft and is comparable to a medium-sized softbox, but with a bit more contrast to it. It also provides large catchlights in your subject’s eyes.

Because of its size, it’s easy to bring the light further away from your subject to achieve a similar effect to that of smaller beauty dishes, while giving you more room to work. This beauty dish would also be great for lighting multiple people, whereas smaller dishes might struggle.

The 27″ beauty dish provides really soft light when placed in close. Pay attention to the shadow and highlight transitions as well as to how the light wraps around the subject.

There are a couple of disadvantages to a beauty dish this big. The bigger the light source is in relation to your subject, the less bright your subject’s eyes are going to be. If you want bright, clear eyes, a smaller beauty dish may be the way to go. It is also harder to control the light fall off (without a grid) as the bigger source will cast more light behind your subject.

2. 20″

The second beauty dish we’re going to discuss comes in at 20 inches. This is pretty close to what may be considered a standard size for a beauty dish (if there is such a thing). Placed a few feet (1-4) away from your subject, the qualities of light it produces are great for all sorts of portraiture and for a wide variety of subjects.

It is great for male and female subjects, though for flattering portraits of older people you may want to consider not using a beauty dish. Instead, opt for large softboxes and umbrellas. As the beauty dish isn’t a great deal bigger than your average subject’s head (from an appropriate distance), you also have good control over the light fall off, and you have even more control when you introduce a grid.

The 20″ beauty dish also provides good, soft light but the edges of the transitions from shadow to highlight are more defined. You’ll also note the light wraps around the subject less and results in darker shadows toward the back of the subject’s head.

3. 16″

This last beauty dish is 16-inches in diameter. This is the size that I have used the most ever since I bought it well over a decade ago. You can see in the images just how battered and well-used it is.

Because it is quite small, it is easy to control and great to bring in really close to your subject. This beauty dish clearly lights and defines your subject’s eyes. The harder light source also provides clearly defined edges between shadows and highlights but in a flattering manner.

If you want to reduce light fall off as much as possible, this size is definitely the way to go. However, if you want to increase it, you are better off with a larger modifier. This is because moving this beauty dish any distance from your subject will result in really hard light that you might find unflattering to most subjects.

The 16″ beauty dish also provides excellent light. Here you can see the transitions from shadow to highlight are clearly defined. Also, the rapid light fall off means the areas towards the back of the subject’s head are more in shadow.

In terms of portability, this size beauty dish is great. It doesn’t weigh very much at all and just carrying it in your hand takes minimum effort.

When used as something other than a key light, this size beauty dish is really effective. Its small size makes it unobtrusive and easy to position anywhere you need, whether that’s for use as a hair light or fill.

What size should you get?

Left: 16″ Middle: 20″ Right: 27″

Some of the differences between these three modifiers can be subtle and hard to spot if you’re new to lighting. If you’re still wondering which you should opt for, my best advice (which is by no means gospel) would be to evaluate what you need it for.

Do you need portability? Get a small one or consider a collapsible one.

Will you be shooting groups of people often? Go for the largest one you can.

Are you shooting in a small space? Go for the small one again.

Are you shooting in a large space where you can’t get the lights very close to your subject? Again, go for the biggest one possible.

Whichever you choose, make sure that it comes with both a grid and a diffusion sock for the most control possible.

No matter which way you choose to go, you are going to find yourself with a versatile and useful modifier that will last you for years.

Have you used these modifiers? Share your thoughts with us in the comments below.


what size beauty dish

The post What Size Beauty Dish is Right For Your Portrait Photography? appeared first on Digital Photography School. It was authored by John McIntire.


Digital Photography School

 
Comments Off on What Size Beauty Dish is Right For Your Portrait Photography?

Posted in Photography


How to Get Started With Your Photography Promotions

01 Jul

The post How to Get Started With Your Photography Promotions appeared first on Digital Photography School. It was authored by Darina Kopcok.

When it comes to the world of commercial photography, print is not dead. Although the Internet and your website are great tools to promote your photography, to really get noticed by agencies and other buyers of photography, you need to make printed promotional pieces, known in the industry as “promos.”

You can get really creative with promos, like sending them out with branded gifts, but this article will focus on printed promos.

Here are some tips on creating your photography promotions and sending them out into the world.

photography promotions 2

Create a marketing plan

Before you can send out promos, you need to know whom you’re sending them to.

This necessitates doing your research and coming up a list of targeted clients that you wish to work with.

If you haven’t already done this, know that this should be an ongoing process in your efforts to attract work. You must narrow down whom you want to work with and pursue those clients to get them to notice you. Printed promos are one way of doing this.

Find out the names and contact information for the people you want to send a promo to. Keep track of them in a spreadsheet or a client management tool aimed at creatives, like Nutshell or Dubsado.

This will help you stay organized and remind you of when you last contacted them and what the outcome was.

Decide on how many promos you want to send out. Fifty is a good number to start with. You may choose more or less, depending on your niche and target market and the realities of your budget.

Come up with a concept

Before you can design your promo, you’ll need to decide what form your promo will take. Will it be a magazine? A newspaper? A poster or postcard?

I generally don’t recommend postcard promotions because they often get thrown away. However, they can be used to augment your promotions, or you can send them to smaller clients that you would be open to working with.

Printing a promo can be a costly undertaking, so you don’t want to send them to leads that are not likely to pay off.

For example, as a food photographer, I might send a promo to high-end restaurants or restaurant chains that have a marketing person or PR agency because this signals that they have the budget to hire a good photographer. I can reserve the postcards to send to smaller restaurants, such as family-run businesses who might want to hire a photographer and are more likely to keep a postcard than an art director at an advertising agency.

Browse a few websites that print promos for photographers to see what the options are and how they might best represent your photography.

You can choose someone local in the city you live. Alternatively, search nationally or even internationally, depending on what you’re looking and the value provided.

For example, as a Canadian, I have some good choices in the city where I live. However, I also regularly seek out US Sites that can give me good results for a similar price, despite postage and exchange rates. Some good options are Paperchase Press, Next Day Flyers, and Newspaper Club.

photography promotions 3

What the promo should include

A promo is a visual calling card. It should include a bio or artist’s statement, your logo and contact information.

Depending on the niche, some photographers give their images titles or captions. If you’re an assignment photographer who is submitting collected images from a trip or assignment, you might want to preface the promo with a bit of a backstory.

A food photographer may include a short recipe with one of the images.

If you choose to include text, keep it brief. The point of the promo is to focus on your photography.

Get a great printer

Don’t make the mistake of taking the time and effort to design a great promo and then hire the wrong printer in order to save money. Your efforts will be wasted.

A promo is meant to showcase your work in the best possible light. A poorly printed piece degrades the quality of your photography.

If you’re in the commercial photography world, then promos should be an important part of your marketing strategy and require investment. There is no getting around investing in marketing to grow your business and appear as a professional.

Successful and established photographers with a regular client list still send out promos.

Research printers and their offerings as you would a potential client. You may want to seek out recommendations in forums or from other photographers you know and trust before you make your decision.

In Conclusion

Promos pay off, but sometimes it can take a bit of time. We live in a world saturated with information, so it can take a few attempts on your part to get the right people to notice you.

Be sure to send out a new promo 3-4 times a year to your contacts, and don’t overlook your current clientele. They should also know what you’ve been up to. Regular promos will keep you looking fresh and relevant and busy with other clients, which always reflects well on you and your photography business.

To see samples of a variety of promos, check out @photoeditor on Instagram by Rob Haggert, a former Director of Photography for Men’s Journal whose feed is dedicated to showcasing the various promos sent to him from photographers around the world.

Do you do promotions? Share any ideas with us in the comments below.


how to get started with your photography promotions

The post How to Get Started With Your Photography Promotions appeared first on Digital Photography School. It was authored by Darina Kopcok.


Digital Photography School

 
Comments Off on How to Get Started With Your Photography Promotions

Posted in Photography


Tips for Using Negative Space in Photography to Create Stunning Images

01 Jul

The post Tips for Using Negative Space in Photography to Create Stunning Images appeared first on Digital Photography School. It was authored by Sandra Roussy.

negative space in photography 1

“I’m filling in all the negative spaces with positively everything.”
– Edie Brickell

Negative space may tend to suggest something that is not good. But negative space in photography is also often referred to as white space or minimalism photography. There’s nothing bad about it. It’s truly a unique technique to try out in your photography practice.

We sometimes tend to fill our compositions with lots of objects and color. When we talk about negative space, it’s the opposite that rules. The final image is mostly composed of blank or neutral space, and a small portion of the composition has an actual object in it.

This type of composition emphasizes the subject in the photo and also adds a unique value to it. This type of composition is powerful and, when done correctly, can take your photography from ordinary to truly impressive.

It can be a little daunting at first when you begin to do negative space photography. Not all attempts will be successful. There are opportunities to create negative space photography practically everywhere around you. You have to know how to observe and apply a few techniques to achieve amazing negative space masterpieces.

Positive and negative space explained

Positive space

This is the area in the photo that attracts the viewer’s eye. It’s the main subject that commands attention in the composition. This is usually where the eye goes first.

negative space in photography 2

Negative space

This is the space in the composition that is typically the background. It usually doesn’t attract very much attention and is, in most cases, the intention of the photographer. It is used to define or contour the positive space.

In negative space photography, the photographer uses the space that is usually not the primary focus and uses it to fill in most of the composition. The negative space commands more attention than the positive space and creates a unique perspective. It also adds definition and can create strong emotions.

negative space in photography 3

Negative space and emotions

Negative space photography can evoke a sense of wonder, mysteriousness, and peacefulness. The viewer will have a greater connection to the object if the photo has no clutter, visual distractions, and a multitude of colors.

negative space in photography 4

You may be presented with opportunities to create negative space photography more times than you think. It’s all in how you visualize or train your eye to look at things.

For example, a few years ago, I stood at a popular lookout overlooking an iconic rock sitting in the Atlantic Ocean in Eastern Canada. It was early morning, and some fog had rolled in, covering most of the impressive structure. The woman standing next to me at the lookout observing the same landscape turned to me and said, “It’s so sad, we’re driving by today, and I wanted to get a photo of the Percé Rock, but it seems like it won’t be possible.”

She left disappointed that she didn’t get her shot.

I stood there for a long time afterward examining the fog and the way it draped the rock like a heavy blanket. I thought that this was one of the most amazing things to happen that day. I felt so lucky to be there at that exact moment to capture the wonder unfolding.

negative space in photography 5

Sometimes a small shift in perspective can make a huge difference.

Balancing the shot

Negative space is absolutely not blank space. If you think of it this way, you will have difficulty seeing the opportunities that you will be presented with. You want the negative space to be the main focus of your photograph, and it will hopefully evoke strong feelings.

We are trained to follow some basic composition rules, like the rule of thirds, for example. However, with negative space photography, these rules mostly don’t apply. Your imagination is what rules the composition in negative space photography.

negative space in photography 6

© José Velasco

However, there are a few things to remember and consider if you want to achieve this type of photography.

Less is more

Fill your composition with the negative space. Try to put minimal distracting objects in your composition. Texture or solid colors are great elements to use in negative space photography. Use the texture or color to fill in most of the composition.

negative space in photography 7

Position

The object should be secondary and placed somewhere that is usually not primarily capturing the eye of the viewer. Placing the subject somewhere in the corner of your frame will frequently provide you with a good result. Try to balance the negative space with the white space so that it flows.

negative space in photography 8

Twice the amount

A good rule of thumb is to put twice as much negative space than positive space in the composition.

negative space in photography 9

Aperture

Try to avoid shallow depth of field when doing negative space photography. This is so that neither the object nor the negative space in the photograph is blurry.

Go out and explore the possibilities

When you look at things differently and step outside of the traditional rules, you will find many great opportunities to create some unique shots. Look at a scene and try to create your own story.

© José Velasco

Negative space photography is an excellent way to expand your skills and your photographic eye. So remember, less is sometimes more.

Have any negative space photographs that you are proud of? Don’t hesitate to show us in the comments section below.

The post Tips for Using Negative Space in Photography to Create Stunning Images appeared first on Digital Photography School. It was authored by Sandra Roussy.


Digital Photography School

 
Comments Off on Tips for Using Negative Space in Photography to Create Stunning Images

Posted in Photography


Review of the Nikon D500 for Wildlife and Bird Photography

01 Jul

The post Review of the Nikon D500 for Wildlife and Bird Photography appeared first on Digital Photography School. It was authored by Shreyas Yadav.

Roller with Nikon D500 and Nikon 200-500 f/5.6

Fast action is at the heart of Wildlife photography. Wildlife action is fast and unpredictable. Most of the wildlife, including predators, are active during early dawn and late dusk. During the edge of the day, light conditions are low. Having a range of focal lengths is essential to photograph distant wildlife shots.  The weather conditions are harsh in the wild. Moreover, wildlife photographers try to find a camera which is capable of capturing stunning images in every possible situation in the wild.

Nikon crafted a flagship DX-format DSLR camera – the Nikon D500, with excellent high ISO performance, a faster frame rate, and a fast and accurate focus – even in low light.

What it is?

Nikon D500 with the Nikon 80-200 f/2.8 lens mounted on Gitzo Tripod

The Nikon D500 camera body weighs around 870g (30 oz) including battery and XD card. It is a crop sensor (DX format) DSLR with a 20.9 MP CMOS sensor. The ISO range is from ISO 100 to ISO 51200. This ISO range is useful in getting better image quality even in low light. In addition to high ISO performance,  frame rate and autofocus performance of the Nikon D500 is excellent. Frames per second for Nikon D500 is whooping 10 FPS. The autofocus is fast and accurate in low light as well. Nikon D500 is fully capable of focussing up to f/8 with center focusing points. These key features make the Nikon D500 excellent for Wildlife and Bird photography.

This article is a field-review of Nikon D500 from the perspective of Wildlife Photographer. This review will help you in understanding how the Nikon D500 performs in the field.

Note: All the wildlife and bird images are photographed in the natural forest with uncontrolled light conditions and within their natural habitat.

Images are captured with the Nikon D500 and the Nikon 200-500 f/5.6 lens with a bean bag. Images are captured either from a safari jeep or from a safari boat.

Specifications

  • Sensor and processor – DX format (23.5 mm x 15.7 mm) CMOS sensor with EXPEED 5 processor
  • ISO – ISO 100 to ISO 51200 (ISO Expandable from range ISO 50 to ISO 1640000)
  • AF Modes – Single Servo (AF-S), Continuous Servo (AF-C), Manual and Full-time Servo in Live View
  • AF Area Modes – Single Point AF, Group Area AD, 3D Tracking, Dynamic-area AF with 25, 72 and 153 points, Auto Area AF
  • Power – EN-EL 15 Lithium Ion Battery with MH-25a charger
  • Storage cards – SD, SDHC, SDXC, and XQD cards. One slot for SD card and another slot for XQD card
  • Dimensions and weight – Approximate weight of the body including Battery and card is 870 g (30 oz) and dimensions are (Width x Height X Depth) 5.8 in (147 mm)  x 4.6 in (115 mm) x 3.2 in (81 mm)
  • Frame rate  (FPS: Frames per second) – 10 FPS in Continuous High Mode and for Continuous Low mode FPS Selectable from 2 to 9 FPS
  • Shutter release modes – Single, Continuous Low (2-9 FPS)  and Continuous High (10 FPS), Mirror Up, Self Timer and Quiet release
  • Shutter speed range – Slowest shutter speed is 30 s, and Fastest shutter speed is 1/8000 s
  • Metering modes – Spot metering, Center-weighted metering, and  Matrix metering
  • Exposure mode – Manual (M), Aperture Priority (A), Shutter Priority (S) and Programmed Auto (P)
  • White Balance  – Auto, Cloudy, Direct Sunlight, Flash, Fluorescent, Color Temperature (2500 k to 10000 k)
  • Flash – No Built-in Flash and External Flash is required
  • Image format – JPEG (Basic, Normal, Fine), NEF / RAW (12-bit or 14-bit with an option of Lose less compressed, Compressed and Uncompressed)
  • Lens compatibility – Full compatibility with Nikon AF lenses with G, E, D type and  DX-format lenses. Partial compatibility with PC lenses, AI-P, and Non-CPU lenses

Controls and ergonomics

AF-ON is useful in back button autofocussing. The focus area selection button is next to the AF-ON button. The Nikon D500 has a touch screen, and it can tilt up to a certain angle.

Buttons for selection of White Balance, Exposure Mode, Metering and Image Quality.

Shutter release mode dial.

Buttons for Exposure compensation, ISO selection, and movie recording.

Focus mode selection button.

Controls

Controls on the camera feel perfect for wildlife photography.

Here is why:

  • Exposure selection mode – This button helps to select the exposure modes – Manual (M), Aperture Priority(A), Shutter Priority(S) and Programmed Auto (P)
  • Frame rate setting – This dial helps to set the Frame rate as Single ( S), Continuous Low ( CL), Continuous High ( CH ), Timer and Mirror lockup
  • ISO and exposure compensation setting – the ISO button allows you to change the ISO quickly
  • Focus point selection dial – The Focus point selection dial helps select focus point
  • Focus mode and Focus area mode selection – This button, along with Primary and secondary dials ( Dials used to change the shutter speed and Aperture), is used to select focus modes as Single, Continuous and Auto. The same button is used to choose focus areas such as Single, 3D, Dynamic with 25,72 and 153 focal points, Group area and Auto-area
  • Metering selection button – You can select Spot, Center of Matrix metering from this button quickly. In Wildlife photography switching between Matrix and Spot metering is often required depending on the light conditions
  • AF- ON button – This is one of the most useful buttons on the Nikon D500 for wildlife photography. If the bird is standing on a tree branch or takes quick flight, the AF-ON button helps to capture the image with accurate focus.

Build quality and weather sealing

  • The Nikon D500 is mostly made up of magnesium alloy, carbon fiber, and plastic
  • The weight and size of the Nikon D500 are suitable for all day shooting and even hand-holding. The size of the D500 is perfect while you travel in the wilderness and it is perfectly sized while hiking and traveling in the safari vehicle.
  • Body toughness of the Nikon D500 is decent but not great as that of Nikon D5. I find the durability of earlier versions, such as Nikon D200, D300 or D700 was better than D500. However, the build quality of Nikon D500 feels slightly better than the Nikon D7100 or the Nikon D7200 but up to the standard of flagship DX body.
  • Protection against dust and water splash is decent enough
  • I have used Nikon D500 in moderately dusty environments and medium drizzle. The camera performs fine. In fact, I clean the camera after a photoshoot in the rain or heavy dust and I recommend you do so too. This type of weather sealing may be sufficient for mild dust and water splashes, but it doesn’t look good enough in extreme weather.

Ergonomics and handling

  • Ergonomically, the Nikon D500 feels just right. Important command dials for wildlife and bird photography are located on the camera body itself. This helps you to change the settings quickly.
  • Hand-holding, the Nikon D500, feels better. One caveat is the video recording button is located a bit oddly. Despite using it multiple times, I still get confused in locating the video recording button. Apart from the video recording button, you will find the buttons and dials are at the right place with the correct size.

Camera performance from the perspective of Nature and Wildlife photographer

Autofocus performance

Osprey in flight. Focus performance of the Nikon D500 for Birds in flight is excellent. Exif : 1/800s , f/8 and ISO 450

Bird action happens fast and can be erratic. Wildlife movement is also fast as it occurs at dawn or dusk. The ability of the camera to focus fast and accurate is a must. With the Multi-Cam 20K Autofocus Sensor module, Nikon D500’s autofocus capabilities are excellent. The Nikon D500 focuses accurately (provided you choose the appropriate focus mode and focus area mode).

I use back button autofocus for focusing. There is a dedicated button for back button autofocus, which is AF-ON.

Hare in the clutter. The Nikon D500 precisely acquires focus on the main object even through the forest clutter.

The Nikon D500 focusses extremely well in following conditions:

  • Daylight
  • Cloudy and rainy weather
  • Low light
  • Distant objects
  • In the forest clutter and forest canopy
  • Dusty and snowy weather
  • Birds in flight and animals in action

In terms of autofocus performance, the Nikon D500 is an absolute winner.

Deer crossing the safari track. The camera’s focus performance for distant objects is excellent. This deer was crossing the Safari road. The distance between the deer and our vehicle was around 100 meters

Image quality – Colors, details and dynamic range

Colors of the peacock. Color rendition and image quality of the Nikon D500 is great. Exif: 1/100s, f/5.6 and ISO 720

Colors, tonal range, and dynamic range of the Nikon D500 images is excellent. Metering of the Nikon D500 is fantastic. It evaluates and produces correct image exposure.

Stare of an eagle. The Nikon D500 captures the details perfectly. Exif: 1/400s, f/5.6 an ISO 500

For most of my wildlife images, I use Matrix metering. For some tricky light situations, such as harsh lights or shadows, and if the animal is dark or bright, I switch to Spot metering mode. Matrix metering will give you excellent light exposure.

Jungle fowl calling. Feather details are excellent. Exif: 1/250s, f/5.6 and ISO 450

The elephant in its kingdom. Colors and details of the elephant are accurate. Exif: 1/1000s, f/5.6 and ISO 2200

The dynamic range of the Nikon D500 is improved as compared to earlier versions of the DX format Nikon cameras. If the light is sufficient, I set the exposure compensation to +0.3 or +0.7. Exposure compensation shifts the histogram towards the right. It helps in bringing out the details and enhancing the colors in an image.

Nikon D500 review for wildlife and bird photography 7

The Dynamic Range of the Nikon D500 is wide. The camera was able to capture the eyes and feathers in the shadow. Equally, the Nikon D500 captured the highlighted crest on the head perfectly.

High ISO and low light performance

Image quality and ISO performance in low light are much improved in the Nikon D500. The camera ISO has a range from ISO 100 to ISO 51200. In controlled light conditions or lab test, the Nikon D500 Images may look less noisy. However, when you are shooting with the Nikon D500 in the real jungle and natural light conditions, you have to be realistic when you select your ISO.

Nikon D500 review for wildlife and bird photography 6

Peacock at ISO 1600

I use a maximum ISO up to 6400 in most cases, and for some rare wildlife moments, I go up to ISO 12800. In the forest, especially during the early morning or late evening, an ISO of up to 6400 helps.  With ISO 6400, I can get a sharp image with excellent dynamic range. The colors are also good. These images are perfectly usable for big prints and web-sized images.

Nikon D500 review for wildlife and bird photography 5

Bond of Nature. Family portrait at ISO 4000

Whereas, if you go ridiculously high on ISO such as ISO 51200, you will still get an image, but you will have to apply Noise reduction in post-processing. Also, the image loses the fine details. If you are going to print the image, select the reasonable high ISO at the available light conditions.

Bottom line

The Nikon D500 has improved high ISO and low light performance. Up to maximum ISO 6400, images are great. The sharpness and colors are fantastic and noise levels are low and manageable in post-processing.

Nikon D500 review for wildlife and bird photography 4

Sambar deer at ISO 6400. It was almost dark in the forest. Luminance noise is visible in the image.

Nikon D500 review for wildlife and bird photography 3

Mongoose at ISO 6400. It was almost dark in the forest.

White balance

Nikon D500 review for wildlife and bird photography 2

Fish eagle on the perch. Auto White balance for the Nikon D500 produces color temperatures and tint accurately.

The auto white balance of the Nikon D500 is accurate. The camera produces white balance without any shift in color or tint. All the color temperatures look right.

Other than Auto White balance, there are different white balances available such as Daylight and Shade. All produce good results.

For wildlife and bird photography, I recommend you choose Auto White Balance. It will help to reproduce the correct white balance for your images. If you want to add creative effects, you can always tune the raw image in post-processing.

Bonus: My D500 camera settings for wildlife and bird photography

  • Image Quality: RAW
  • NEF (RAW) Recording: NEF RAW Compression: Loose-less compressed and Bit Depth: 14-Bit Depth
  • Color space: Adobe RGB
  • Picture Control: Standard (SD)
  • ISO: Auto ISO with Maximum ISO as 6400 (It will depend on the lighting conditions, but I find 6400 is the right balance for image quality and low noise)
  • Autofocus mode: AF-C (Continuous)
  • Autofocus Area mode: Dynamic (25 points) or Group area focus
  • Exposure mode: Manual (Shutter speed and Aperture will be set based on the available light in the environment). You can also use Aperture priority as an Exposure Mode.
  • White Balance: Auto
  • Metering: Matrix
  • For autofocus, use Back button autofocus: AF-ON
  • Shutter release mode: Continuous High CH (10 FPS) or Continuous Low CL (6 FPS)

Conclusion and recommendations

Pros

  • 10 FPS (Frames Per Second)
  • Fast and accurate focus even in low light
  • Good High ISO Performance
  • Superb image quality and dynamic range
  • Excellent ergonomics
  • Perfect location of camera buttons and dials
  • Autofocus with central autofocus points up to Aperture of f/8

Cons

  • No Built-in flash and GPS
  • Location of the video recording button
  • Above average Build quality and weather sealing (Not the best in class)

In summary

The DX sensor, superior autofocus performance, high ISO performance, best in class frames per second (10 FPS), and travel-friendly size makes the Nikon D500 perfect for wildlife and bird photography.

You will love using Nikon D500 in the wild.

What do you think about the Nikon D500 camera? Please do let us know in the comments below!


Nikon D500 review for wildlife and bird photography

The post Review of the Nikon D500 for Wildlife and Bird Photography appeared first on Digital Photography School. It was authored by Shreyas Yadav.


Digital Photography School

 
Comments Off on Review of the Nikon D500 for Wildlife and Bird Photography

Posted in Photography


Is Photography Becoming too Easy?

30 Jun

The post Is Photography Becoming too Easy? appeared first on Digital Photography School. It was authored by Carl Spring.

Is Photography Becoming too Easy

The autofocus on the Sony A9 is amazing! Set it to eye AF, point in direction of the subject and let it do the rest. It’s almost too easy.

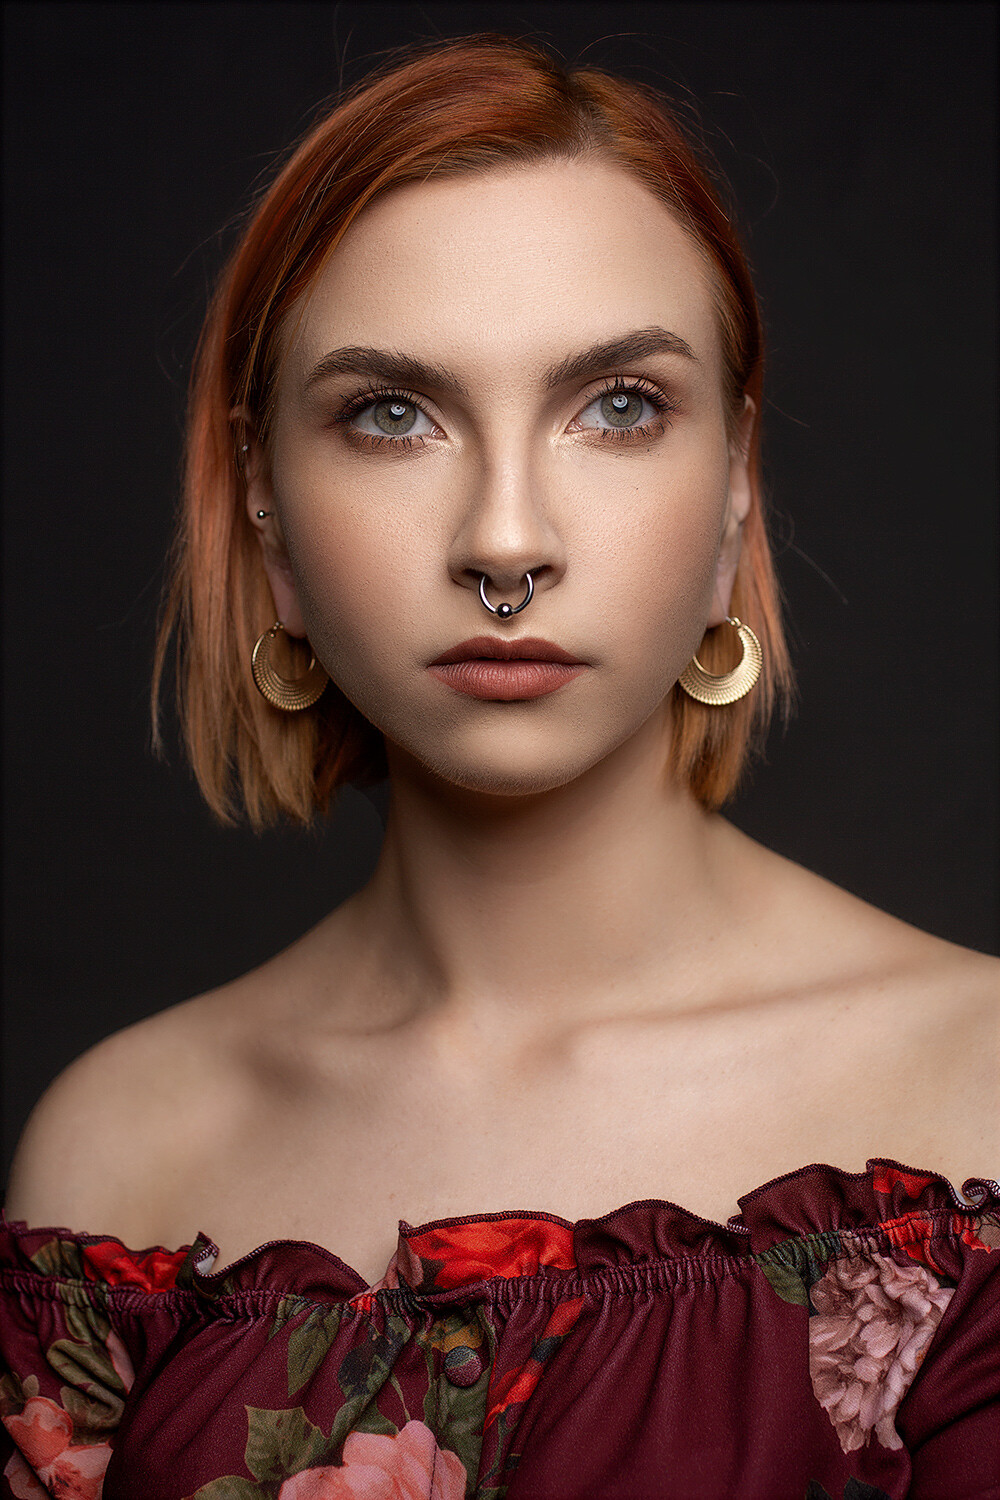
Everyone is a Photographer these days. It has never been easier or cheaper to create good quality photographs. People sincerely believe that the camera is what takes these amazing images. I am sure you have heard this as many times as I have; “You take beautiful photos, you must have a great camera.”

With the technology we see now though, I sometimes wonder, do they have a point?

We now have cameras in mobile phones, that not long ago professional photographers, paying thousands for their cameras would have dreamed of being able to use. Look at the ‘shot on iPhone’ campaign, and look at Instagram daily. People can take amazing photographs, with a couple of clicks and minimal effort.

Has modern technology democratized photography, or does it mean photography has become easy?

Technology continues to make things easier. But that didn’t start with digital!

Technology has always pushed to make things simpler. Be that the TV remote control or the digital camera. The digital camera was simply the technology industry’s answer to the market forces. Consumers wanted a camera that could take endless photographs. Businesses, noting this need, used the emerging technology to answer their customer cries. Thus, creating digital cameras and changing the face of photography forever.

Let’s get this out of the way early. There was no comparison between shooting digital and shooting film. After the first generations with their inevitable teething problems and huge price tag,  photography became incredibly easy with digital. Instant feedback told you whether you had the shot or not. You were not limited by 24 or 36 exposures (or less if you shot medium format). Lastly, after the initial outlay, photography became much cheaper as there were simply no processing bills.

Depending on whom you ask, the digital evolution is either the moment someone got into photography or the beginning of the decline. However, let’s think back a little. If you had shot wet plates, imagine how easy those punks using 35mm film had it.

Imagine when autofocus cameras meant you no longer needed the skill of manual focus? Well, that is just ridiculous! Imagine a flash that didn’t need the incredibly dangerous use of flash powder for goodness sakes. The ability to refocus after the photo is in its infancy, but I can see it being a mainstay of every camera in less than ten years.

Technology helps make life better for humans. The most common way to make things better is often making things easier. In the modern world, we adapt quickly and then quickly rely on the new tech we use. It becomes part of our lives and frees up vital brain space. Every photography innovation, from the first camera onwards, has been about making it easier to preserve a moment in time.

Remember when we only had 18 megapixels, or 12, or six! How did we manage with only nine autofocus points rather than focus points over the entire sensor? Focus points that you don’t really need to use because the camera finds the eyes of humans (or animals), locks on, and all you need to do is decide which eye you want in focus.

I mean imagine how photojournalists in the ’80s would react to a modern digital camera? Moving even further back, imagine telling painters in the 1500s that one day there would be a box that captured the image of the person in minute detail and all you needed to do was to allow light into a box?

I remember the first 0.5MP digital camera I ever used. It was like magic. You could see the photograph instantly, and you never needed to pay for the processing. I was hooked instantly. Even though I had a crappy job, I saved hard for a digital point and shoot and began capturing photos again. I occasionally shot on an SLR camera, but could rarely afford to buy film and process it. I even took a night school class to get access to a darkroom and shot everything in black and white.

The Pentax 3-Megapixel camera I had been saving for months to own, changed my world. The quality wasn’t as good. I had no control over the shutter speed or aperture, but I could take photos. Hundreds of them. All the time. It was life-changing. I had moved more into film making, but this digital camera brought me back. I got hooked again. If it were not for that 0.5 Megapixel camera I got to use in my job, I would probably not even be writing this.

Is Photography Becoming too Easy - Lancaster bomber coming inn to land

The right place, the right time, but only a phone and no DSLR. Yet I still get an image like this.

Does gear make you a better Photographer?

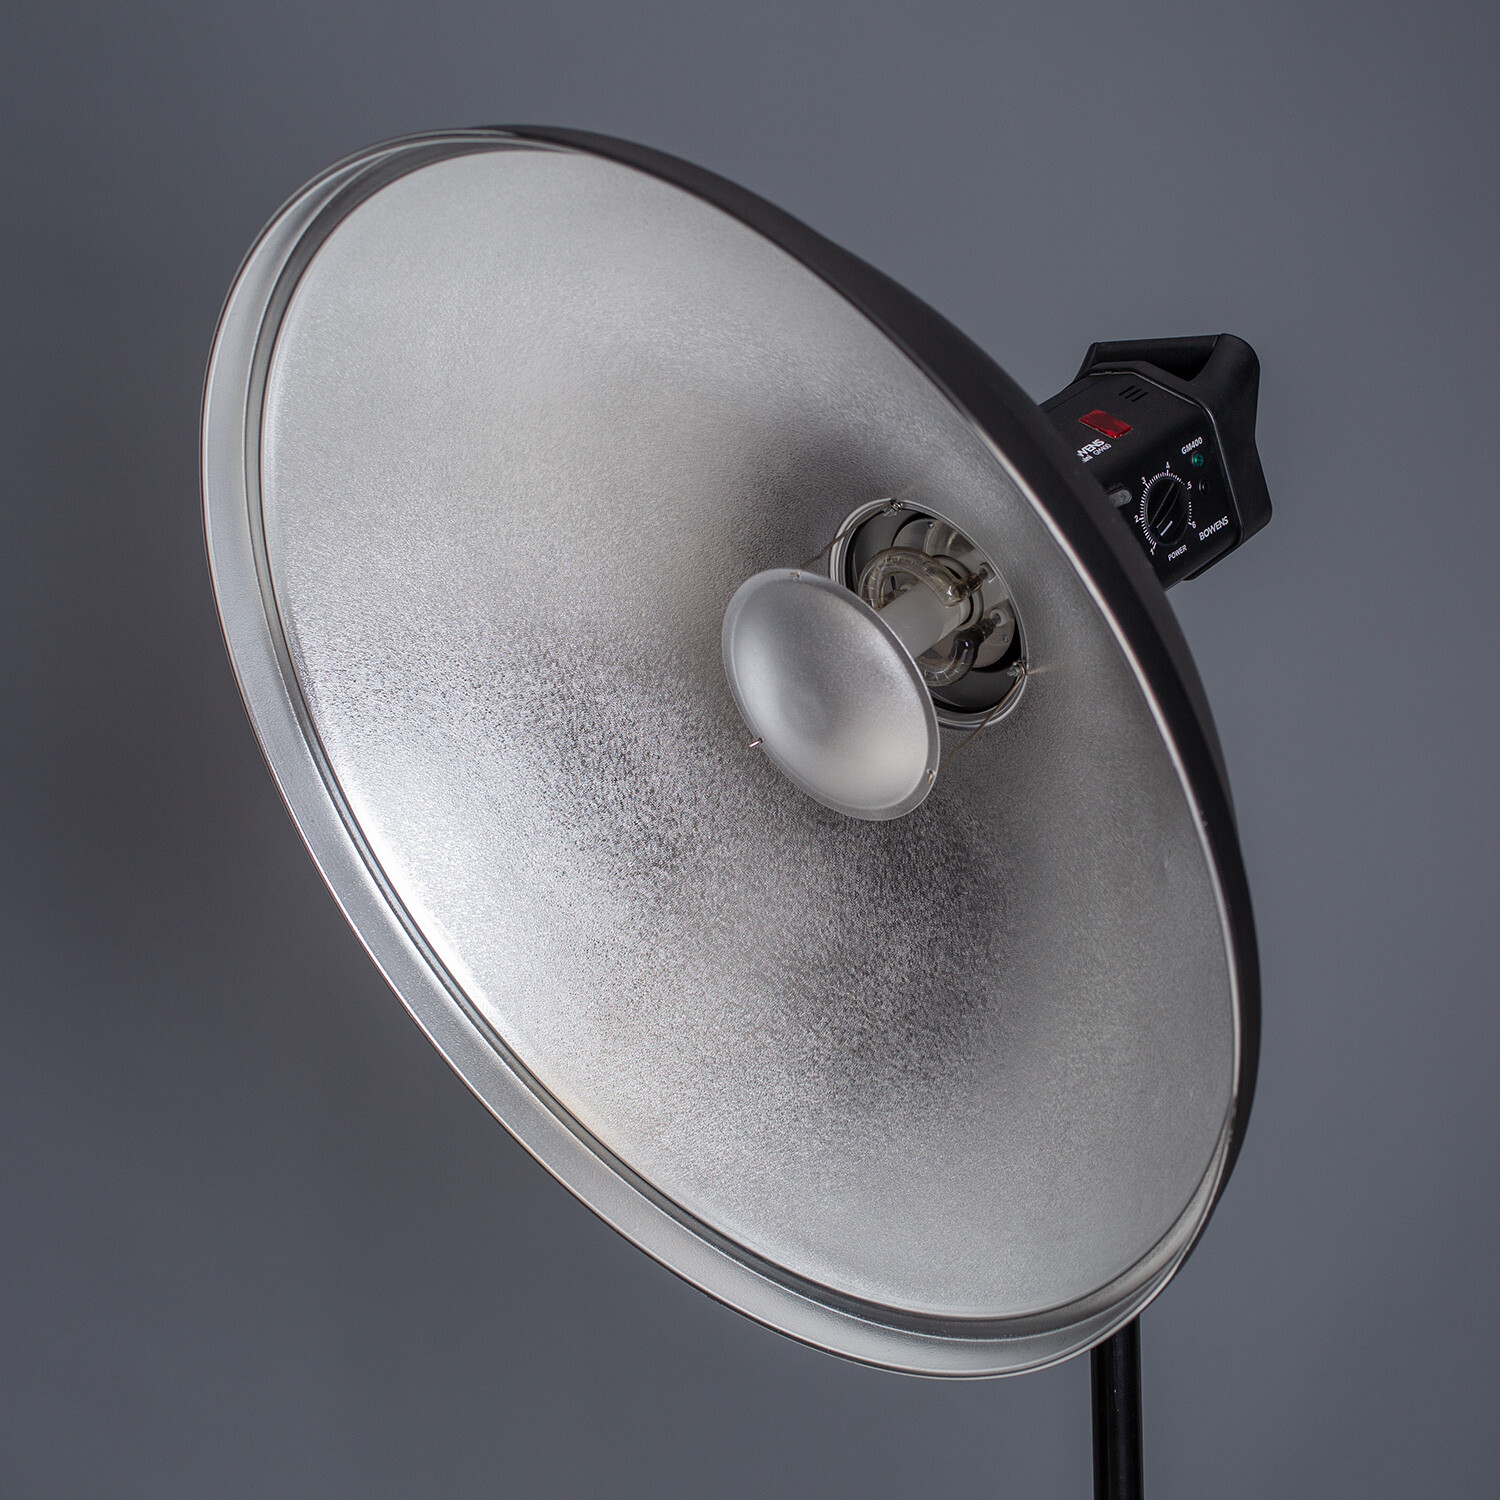
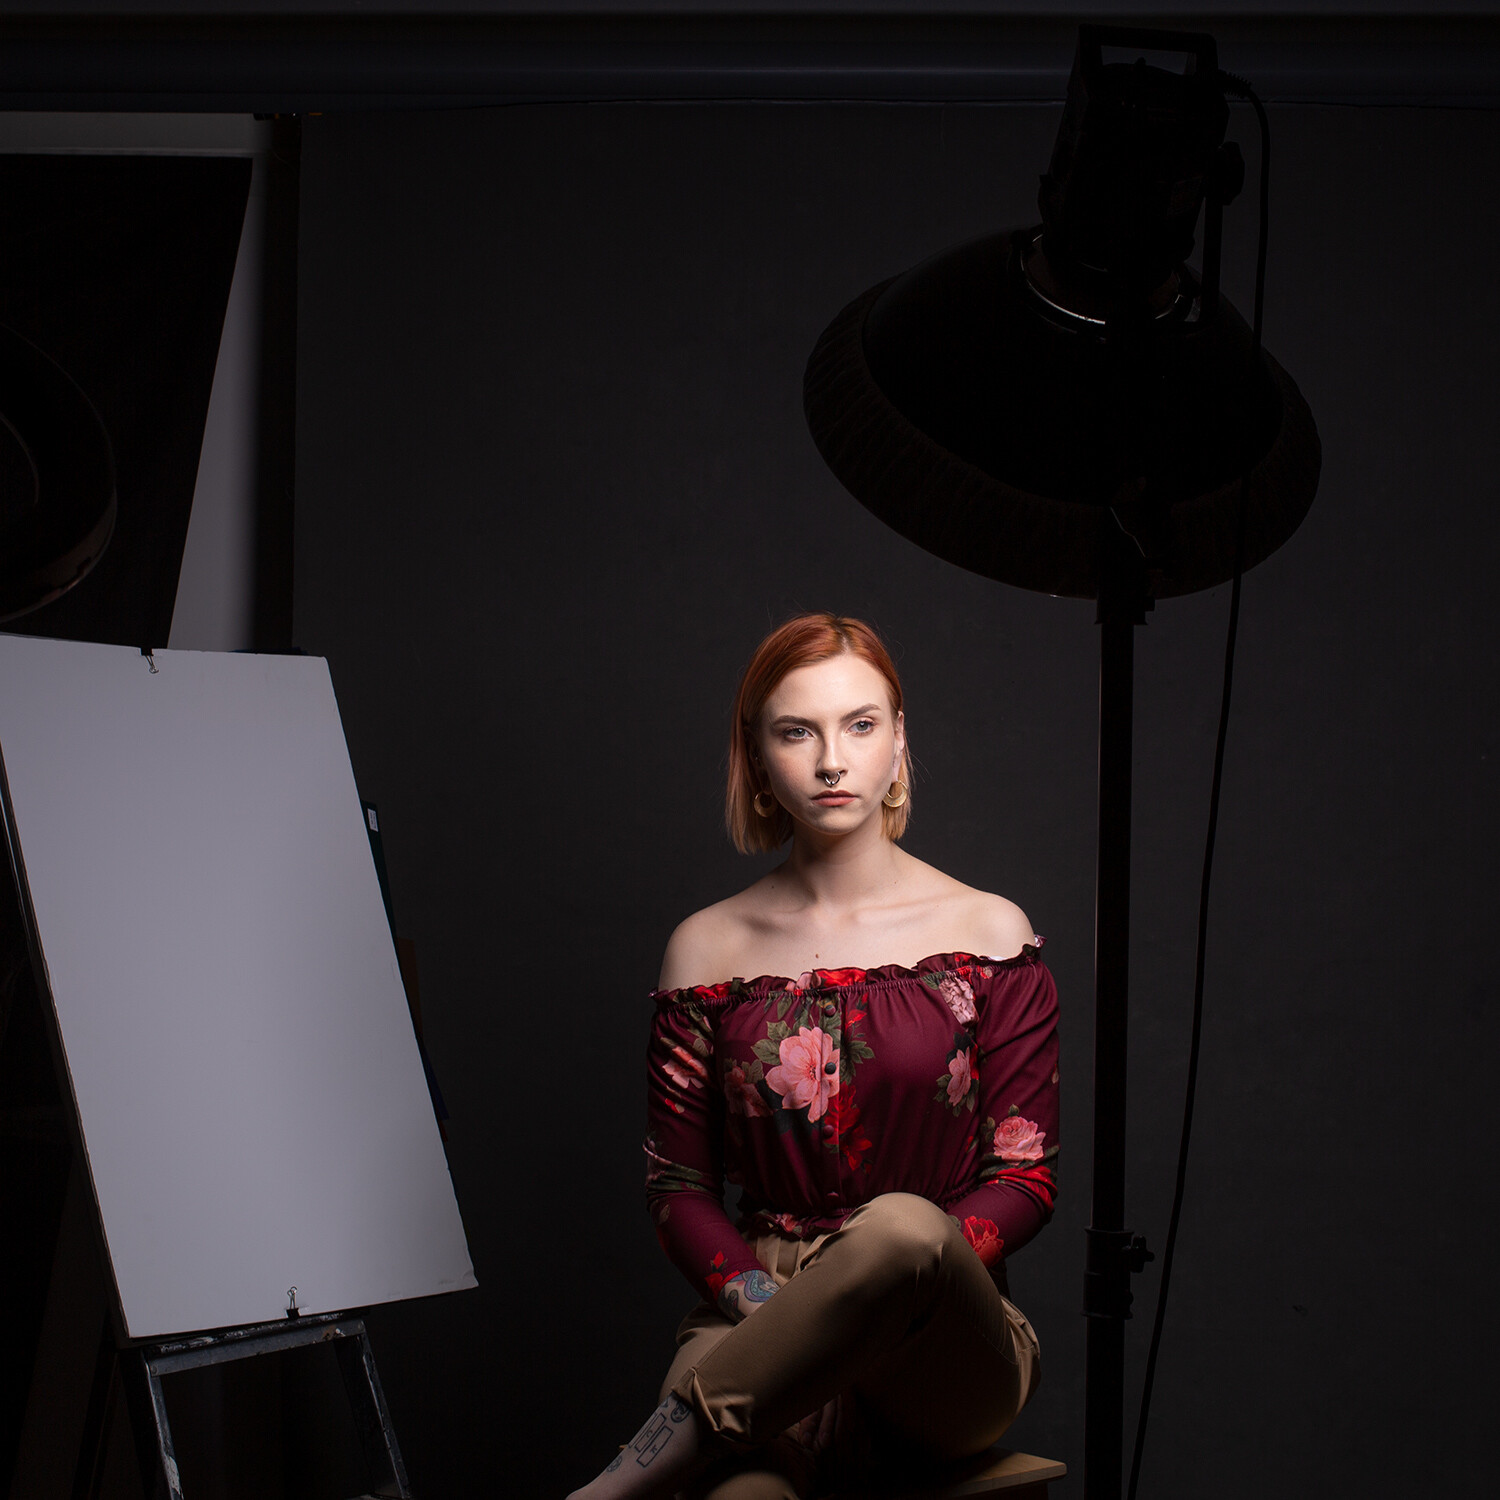
We are photographers, and we love to lust over gear. The newest this, the better that. Camera companies spend millions trying to persuade us that we need new gear. Will the latest Sony with the mind-blowing eye autofocus really make your photos better? No. Will it make them easier? Undoubtedly, yes.

But, thanks to another wonderful technological invention – the internet – many of us spend more time talking about megapixels than actually using them.

We are as guilty as the influencers who “don’t even use a real camera” because we are the opposite. Instead, we sit pixel peeping the corner sharpness at four million percent and then badmouth how a manufacturer could release such a piece of crap.

A phone camera can take the most breathtaking image, worthy of an art gallery. Conversely, a multi-megapixel medium format camera with the best lens can take a snapshot.

Is Photography Becoming too Easy 3

50 years ago this photo was shot on a modified film camera. Gear does not matter as much as you think. Image courtesy of NASA.

Digital makes it easy, but so much harder to stand out

Estimates suggest that over one trillion photographs were taken in 2018 (if you want to see the zeros, one trillion is 1,000,000,000,000). Ninety-five million photos get uploaded to Instagram every day. Add to that the three hundred hours of footage uploaded to YouTube every minute and the number of photographs and videos we are producing is simply staggering. Now whilst you cannot deny that digital made this possible, digital has also made it much harder to stand out.

Camera manufacturers are great at making people believe that they are artists – that everyone has an amazing movie. In the same way that everyone has a great novel, song, or painting inside of them begging to get out. In reality, that isn’t the truth. Photography (to me at least) is art. And art is, for better or worst, elitist.

Some people are not great artists and some are not great songwriters. And many people are not great photographers.

The problem is, with so much poor and average stuff out there, how do you get to see the good stuff? In some cases, you don’t. There are photographers out there, who are taking photographs that are simply some of the best ever taken. However, we will never see them. There are filmmakers out there creating short films that should see them breaking down the doors of Hollywood, but they don’t. Instead, our feeds are filled up with yet more cat memes and average photos we have seen thousands of times before.

We are drowning in content.

It is to the point where photography seems to be a popularity contest, rather than about artistry.

Look at how Canon treated Yvette Roman because she didn’t have 50,000 followers or more on YouTube. Let that sink in. A photographer whose style they loved for a job, who they agreed to hire, was replaced simply due to her lack of numbers. That shows you how companies want to hire photographers who can use their social channels to add to the marketing campaign.

We live in the influencer age, where amazing photographers are turned down for jobs due to not having followers. On the flip side of that, someone who only uses their phone for photography can be given thousands for merely showing that they use a particular piece of gear. They travel the world for free simply because they are popular on Instagram.

This system makes perfect sense when looked at from a marketing perspective. However, these platforms are where most of us spend our time and where we discover new content. Therefore, algorithms now control the amount of photography we get exposed to.

An algorithm doesn’t care about quality; it cares about metrics. The aim is to find popular content and put it out there for more people to find. Does this mean that photography is being reduced to likes? In many ways, yes, but it also shows the power of a story.

Is Photography Becoming too Easy 4

My 6-year-old took this photo. Sharp, well exposed and decent color. Not even a DSLR, just a compact.

A camera does not know how to tell a story yet

We live in an age where you can throw your work out for all the world to see. The level of photography has never been higher. I can give my six-year-old a camera, and he can take sharp, well-exposed photos, telling the stories of his lego figures. But a camera, in fact, no technology, can yet create an image that tells a story.

A great photograph always tells a story. It makes us want to know more about the moment. It allows us to create our own story based on what we see in the image and our world view. The story I see in a photograph will be different from yours. In fact, you may hate a photograph I love and vice versa.

This is simply not possible with even the greatest camera. There is no Ai that will pick the perfect moment for you to click the shutter button. Yes, cameras may do 20 frames per second or more, but even then, you cannot continually record every second of the day. You need to find the angle, frame your subject in the way that tells your story and then press the shutter. Really, the technical aspect (no matter how much the camera companies persuade us otherwise) is not where the photograph is made. It is not in the corner sharpness – many great photos are not sharp. It is the story you tell.

The story is what you need to learn. Telling a story is hard. It has always been hard, and technology is nowhere near being able to do it for us.

You make the decisions before you press the shutter. You use the light, the subject, and find the angle. Then you open a box and let in some light for a little bit. It has always been the same. It’s just that technology over the years has made it easier to let the light in the box and get the image sharp if that is important to you.

Is Photography Becoming too Easy - Guitarist playing solo

No matter what the camera, knowing the moment to press the shutter is still a skill that is not computer controlled, yet.

The future

I am sure you all saw it? It finally happened – a couple hired a robot to shoot their wedding! Yes, I know it is just a photo-booth style alternative for now, but it does hint to the future. Are we going to be used to weddings where drones automatically take photographs that are better than a human can capture? Photographs that can then be instantly customized by the bride and groom at the touch of a button (or voice command)? Will this mean that people will become obsolete in many photography fields? Will they only need a device; a robot?

Will my future as a photography business owner involve owning several robots? The ten-year-old version of me prays that this is true.  Alternatively, will people not need to hire anyone? Perhaps photography will be built into their daily devices? Will we become so vain that a device follows us around capturing our daily lives and then picks the best moments via an algorithm to share on social media for us? (Let’s hope not! – Editor)

What do you think? Share your comments with us below.

is photography becoming too easy 6

The post Is Photography Becoming too Easy? appeared first on Digital Photography School. It was authored by Carl Spring.


Digital Photography School

 
Comments Off on Is Photography Becoming too Easy?

Posted in Photography


Weekly Photography Challenge – Sport

29 Jun

The post Weekly Photography Challenge – Sport appeared first on Digital Photography School. It was authored by Caz Nowaczyk.

This week’s photography challenge topic is SPORT!

Travis Yewell

Go out and capture sporty photos. It can be the kids playing sport, adult sports, animals playing sports, cycling, motorsports and action shots, or even sports related items. They can be color, black and white, moody or bright. You get the picture! Have fun, and I look forward to seeing what you come up with!

Kolleen Gladden

Thomas Schweighofer


Check out some of the articles below that give you tips on this week’s challenge.

Tips for Shooting SPORT

Top 5 Tips for Extreme Sports Photography

Tips for Doing Better Indoor Sports Photography

How to Photograph Agility Events and Other Dog Sports

Tips from the Sports Photography Pros to Help You Get the Money Shots

3 Tips for Taking Better Motorsport Photos

Tips and Tricks to Help You Take Better Youth Sports Photos

Weekly Photography Challenge – SPORT

Simply upload your shot into the comment field (look for the little camera icon in the Disqus comments section) and they’ll get embedded for us all to see or if you’d prefer, upload them to your favorite photo-sharing site and leave the link to them. Show me your best images in this week’s challenge.

Share in the dPS Facebook Group

You can also share your images in the dPS Facebook group as the challenge is posted there each week as well.

If you tag your photos on Flickr, Instagram, Twitter or other sites – tag them as #DPSsport to help others find them. Linking back to this page might also help others know what you’re doing so that they can share in the fun.

The post Weekly Photography Challenge – Sport appeared first on Digital Photography School. It was authored by Caz Nowaczyk.


Digital Photography School

 
Comments Off on Weekly Photography Challenge – Sport

Posted in Photography


5 Photography Rules for Capturing Photos Your Audience Will Adore

27 Jun

The post 5 Photography Rules for Capturing Photos Your Audience Will Adore appeared first on Digital Photography School. It was authored by Jaymes Dempsey.

It’s hard to stand out as a photographer.

These days, you have so many photos to compete against; the internet is drowned in smartphone snapshots (with layer upon layer of filters).

So how do you create images that cut through all the noise? How do you create art that will truly stun your audience?

5 Photography Rules for Capturing Photos Your Audience Will Adore

In this article, you’ll discover 5 simple photography rules for capturing photos – which will ensure that your photos are truly special.

Let’s dive right in, starting with…

1. Do everything you can to emphasize your subject

If you want to capture photos that stand out, then this is your number one rule:

Pick a subject. Something that stands out in your photo. Something that acts as an anchor point.

And make that subject stand out as much as you can.

You see, it’s your main subject that actually captivates people. The rest of the scene exists to enhance that main subject.

But how do you enhance your main subject?

Start by making sure that your main subject is extremely sharp. Make sure it’s the sharpest part of the photo, in fact.

And make sure that your main subject has some color. Color draws the eye!

Third, make sure your main subject is bright and well-exposed. A dark subject (especially if it’s surrounded by a dark background) just won’t work. If you do include a dark subject, then make sure that the background is extremely bright.

On a related note, more contrast is nearly always better. If you can incorporate some ultra-dark tones and ultra-light tones in your photos, your photo will instantly improve. Ideally, your background and your main subject will contrast heavily.

Last, keep your background as clean as possible. It doesn’t have to be completely uniform but should be simple and well-organized. When in doubt, go for a monochromatic background, such as black, white, or green.

2. Use complementary colors to make your photos pop

You already know how important it is to include contrast.

But there’s a special kind of contrast that deserves its own mention:

Color contrast.

Color contrast refers to the addition of colors that sit opposite one another on the color wheel (also known as complementary colors).

You’re probably familiar with color contrast, even if you don’t know it. We see complementary color pairs all the time: red and green, blue and orange, yellow and purple.

Now, color contrast is perfect for creating stand-out photos. It catches the eye, and it practically forces viewers to look more deeply.

One thing to note, however, is that you shouldn’t use too many contrasting colors. I recommend simply including two complementary colors (and potentially a third non-complementary color). If you incorporate too much contrast, the photo will become too powerful, and the colors will start to clash.

I also recommend you limit the amount of the complementary colors that appear. If you have two complementary colors, include a lot of one color, and a little of the other. This will prevent the photo from overpowering the viewer.

Finding contrasting colors might seem difficult. But with a little effort, you should be able to incorporate a contrasting color pair.

And you’ll love the effect!

3. Use negative space to stun viewers from a distance

Negative space is emptiness in a photo.

By this, I’m referring to empty sky, empty water, or even an empty background – it all counts as negative space.

And negative space is extremely valuable, for a few reasons.

First, it gives the main subject some breathing room.

It also makes compositions feel calm and more stable (which is generally nice to have in a photo).

But the best thing about negative space is that it is a place where the eyes don’t rest – thereby directing the viewer straight to the main subject.

So here’s what I recommend:

When you’re deciding on a composition, incorporate at least some negative space into the photo. If you can, create a lot of empty space – but even a little space will go a long way.

It’s best if the negative space exists around the main subject. That way, attention is immediately directed to the focal point of the photo.

But any negative space is good!

4. Include leading lines to draw in the viewer

I’ve talked a lot about emphasizing the main subject of your photos.

This is because the most striking photos hit the viewer over the head with their subject. They pull the viewer in and direct them through the frame – right to the focal point.

That’s the mark of a powerful photo.

And here’s another great way to emphasize your subject:

Use leading lines. Include them whenever you can.

Leading lines are lines that draw the viewer through the frame. They can be anything vaguely line-like: A river, an outstretched arm, even a flower petal.

Whenever you find a photo-worthy scene, search for leading lines. And incorporate them into your composition. Ideally, the leading line moves toward your subject. But you can also include leading lines that take the viewer around the frame.

Most scenes have some sort of leading line. You just have to look hard enough!

5. Always shoot in the best light you can find

Out of all the rules in this article, I think this one will give you the biggest bang for your buck. Because it’s so easy to shoot in the best light – you just have to know what the best light is.

And once you know this…

Your photos will never be the same. Seriously.

So, what is the best light?

The best light is the hour after sunrise and the hour before sunset, known as the golden hours.

These are the times when the sun is low in the sky, and casts a golden glow over the landscape. If you shoot during the golden hours, your subject will be bathed in beautiful light. And you’ll absolutely love the images you capture.

Now, there are other times when the light is good, depending on your genre of photography.

If you’re a street photographer, you should try shooting during the middle of the day, when the light is sunny.

If you’re a flower photographer, you should try shooting when the sky is heavily overcast.

If you’re a portrait photographer, you should also try working on overcast days.

But even though these types of light do work…

…the golden hours are perfect, without fail. They’ll always get you something wonderful.

Photography rules for capturing photos your audience will adore: conclusion

Standing out in the crowded field of photography is a difficult task.

But if you apply these simple photography rules, you’ll have a much, much better chance.

So take these rules to heart, get out, and start shooting!

Excitement awaits.

Have any more rules for capturing photos that your viewers will adore? Share them in the comments!


5 photography Rules for Capturing Photos Your Audience Will Adore

The post 5 Photography Rules for Capturing Photos Your Audience Will Adore appeared first on Digital Photography School. It was authored by Jaymes Dempsey.


Digital Photography School

 
Comments Off on 5 Photography Rules for Capturing Photos Your Audience Will Adore

Posted in Photography


5 Tips for Better Travel Photography

27 Jun

The post 5 Tips for Better Travel Photography appeared first on Digital Photography School. It was authored by Jeremy Flint.

Travelling with you camera is one of the highlights of embarking on any trip at home or abroad. Whether you enjoy visiting interesting places, soaking up the sunshine or embarking on adventurous activities, here are some tips for better travel photography.

1. Do your research

Better travel photography 01

Provence, France © Jeremy Flint

One of the most fundamental aspects of travel photography is to do your research about the destination you are visiting. Finding out about a location and obtaining information about a place and its attractions will help you to plan your trip. From this information gathering process, you can learn more about your destination. Ask yourself what you most want to see. Spend your time visiting the places that interest you.

2. Decide what to photograph

Better travel photography 02

Provence, France © Jeremy Flint

There are two approaches to consider when deciding what to take pictures of when on location. Firstly, you can come up with a plan for the things you want to photograph. Alternatively, you can be more spontaneous and walk around and photograph anything you see that inspires you. The advantage of the latter is that you can be more creative with no pre-conceived ideas of what you are going to photograph.

3. Manage your expectations 

If you are visiting somewhere for a short period of time, you may not have enough time to cover all of the touristic sights and highlights. Therefore, you will need to decide in advance where you would like to visit and photograph and what your photographic priorities are.

Be realistic with your time. It will be a more enjoyable experience. Don’t try to do so much that you end up exhausted after the trip. You will often find that you won’t have enough time to cover everything on your first visit. I recommend choosing one or two places that you would really like to see and photograph. Just go there in case you end up running out of time. By visiting fewer places, you may do more justice to your photos – particularly if you can stay around to combat frustrations of travel photography such as adverse weather conditions.

Moreover, you can always visit again to cover the areas you miss.

Better travel photography 03

Palawan, The Philippines © Jeremy Flint

On a recent trip to the Philippines, I was pushed for time and decided to base myself in one place where I visited and photographed my surroundings. This made for a much more enjoyable trip. I wasn’t rushing around trying to see everything in one go, and I could take advantage of any favorable weather.

Ultimately managing your expectations depends on your goals, what you want to photograph, and how much time you want to spend at different locations.

4. Embrace the culture

Better travel photography 04

Papua New Guinea © Jeremy Flint

Visiting a new location with your camera should be about more than just taking pictures. When visiting foreign lands, you are bound to come across cultures that are different from those found in your home town and country. To make the most of the place you visit, be open to the culture that is present. Experiencing a culture first-hand is as much a part of the enjoyment and wonder of a new place as it is to photograph its landmarks.

On a recent visit to Romania, I wanted to photograph the country’s attractive landscapes. While there, I was bowled over by the kindness and hospitality of the people. By embracing the local culture, I found the trip to be so much more rewarding.

Be open and flexible. Allow time for cultural experiences to happen.  

5. Enjoy your trip 

Better travel photography 05

Palawan, The Philippines © Jeremy Flint

Whilst taking photos is all part of the fun of documenting your adventures, be sure to have some non-photography time too.

Have you ever been on your travels only to find you feel worn out after the trip from doing too much photography? Well, try not to spend all your time behind the camera taking pictures.

To enjoy your travels more, take time out from photography and enjoy the sights and surroundings without your camera. You will feel more refreshed, and your creativity may be better as a result of it.

Conclusion

Travel photography is one of the most enjoyable aspects of photography, particularly as you have the opportunity to visit places near and far with your camera.

For better results in recording your journey, research your destination in advance. Decide what you would most like to photograph. Be realistic with what you expect to capture, embrace the culture and most importantly enjoy your trip!

Share your travel photos and any other tips for better travel photography in the comments below.


Tips for Better Travel Photography

The post 5 Tips for Better Travel Photography appeared first on Digital Photography School. It was authored by Jeremy Flint.


Digital Photography School

 
Comments Off on 5 Tips for Better Travel Photography

Posted in Photography