RSS
 

Posts Tagged ‘Photography’

New forums! DIY Photo Projects and Underwater Photography

05 Jun

DPRlogo.png

We’re pleased to announce the creation of two new forums. ‘DIY and Photo Experiments’ is the place to show off your photography-related DIY projects, discuss homemade solutions to hardware problems and share photo experiments with other dpreview users. If it’s safe, legal, and you figured it out yourself, this is the place to show it off. Meanwhile, ‘Underwater Photography’ is the place to share and discuss – yes, you guessed it – all things related to taking pictures underwater. Click though for more information

News: Digital Photography Review (dpreview.com)

 
Comments Off on New forums! DIY Photo Projects and Underwater Photography

Posted in Uncategorized


Contest – Win One of THREE Photography Courses from New York Institute of Photography

05 Jun

Over the last few years here at dPS, wNYIP Logoe’ve run some incredibly popular competitions with one of our partners – the New York Institute of Photography – to give away to lucky dPS readers some of their great photographic teaching.

Due to popular demand – we’re doing it again this week.

For this competition, NYIP is giving away THREE prizes.

Each will be won by a different dPS reader. Here’s what you could win:

Complete Course in Professional Photography – worth $ 1,499

This is NYIP’s most popular course. It teaches everything an aspiring photographer needs to know about the art, technique, and business of photography. Want to become a better photographer? Then this course is for you.

NYIP spread Light Direction

All courses include comprehensive and illustrated lesson books, CD audio guides, DVD video training, photo projects, professional evaluation and personal student advisers.

How to Win

To win this competition you’ll need to:

  • Watch the video below
  • Leave a comment below and tell us why you’d like to enrol in New York Institute of Photography. Please note: there is a limit of 1 entry per person.
  • Do this in the next 8 days and on June 12th, 2014, the team at NYIP will choose the best three answers and we will announce the winners in the following days.

Deadline is June 11th, Midnight PDT. Comments left after the deadline will not be considered.

By “best” – we’re looking for people who have an understanding of what NYIP is, what the course offers, and how it suits their needs. There’s no need to write essay length comments to win – but we’re looking to hear what you like about NYIP, the course and how it would help your development as a photographer.

This competition is open to everyone around the world no matter where you live, but there is only one entry per person please. To enter – simply leave your comment below.

Don’t forget to share this post with your friends! Like NYIP on Facebook for special offers and announcements on all of the NYIP Courses!

Disclaimer: NYIP is a paid partner of dPS.

The post Contest – Win One of THREE Photography Courses from New York Institute of Photography by Darlene Hildebrandt appeared first on Digital Photography School.


Digital Photography School

 
Comments Off on Contest – Win One of THREE Photography Courses from New York Institute of Photography

Posted in Photography


Sony World Photography Awards 2015 open for submissions

05 Jun

130458532585410000_SophieGamand.jpg

The Sony World Photography Awards are now accepting entries for 2015. The contest is open to professionals and amateurs alike, from anywhere in the world. Submissions will be accepted until early January 2015 for four different competitions: Open, Professional, Youth and Student Focus with a number of categories in each group. Winners receive cash prizes and Sony gear. Read more

News: Digital Photography Review (dpreview.com)

 
Comments Off on Sony World Photography Awards 2015 open for submissions

Posted in Uncategorized


Top 10 Sports Fashion Photography Tips

05 Jun

Yannick Wolff Photoshoot Swimming with Yannick Lebherz - Fashion Photography Blog (FashionPhotographyBlog.com)

Upcoming fashion and sports photographer, Yannick Wolff has generously taken time to offer some of his tips for executing energetic action photos as seen in his Swimming story with German Olympic swimmer, Yannick Lebherz. Yannick kindly shares his best tips for those who want to be successful in sports fashion photography:

1) Be familiar with the models sporting background, he says “You really should inform yourself about your model and especially about the sport the model is doing.”

2) Get resourceful and creative to make your pictures stand out, “You have to add something special (for example smoke, water, great angle of view…) in your picture what makes the difference between your pictures and the work of other photographers, especially if you don´t have a mind blowing location.”

3) Engage with the model to capture his or her sporting spirit, “You have to capture the passion that your model/athlete is following.”

Yannick Wolff Photoshoot Swimming with Yannick Lebherz - Fashion Photography Blog (FashionPhotographyBlog.com)

4) For photographers starting out who are interested in getting into sports fashion photography, Yannick recommends that you should inform yourself about different sports to work out what you like and to be able to relate to a range of potential clients in the sporting industry.

5) Yannick suggests that you visualize and have some framework around how you want the shoot to look like. Think about what could be interesting to take pictures of. How can you make that sport look interesting?

6) Networking plays a big part in booking shoots. According to Yannick, speaking the athlete’s managers or even the athletes themselves is achievable and doable. He says, “Athletes and their management are quite cool, so just give them a call and ask for an athlete to shoot a free/personal project with.”

Yannick Wolff Photoshoot Swimming with Yannick Lebherz - Fashion Photography Blog (FashionPhotographyBlog.com)

7) Practice makes perfect. When asked how much time needs to be taken to become proficient in sports fashion photography, the photographer pondered on the question and said “That’s quite hard to say. I think it depends on how often you are able to shoot some athletes. Of course you have to try different things in lightning and other stuff. Some upcoming photographers need 8 years, some of them just 2-3”. So it’s a matter of persistence.

8) The skills that you gain from sports fashion photography can translate into other areas of photography regardless of experience in the field.

9)  Get equipped and use short flashes to capture action shots. I asked Yannick what photographic equipment he used to create his “Swimming” story with German Olympic swimmer Yannick Lebherz he answered that “We had to use a flash with a very short flash duration. The Elinchrom Ranger was the perfect equipment for this shoot. The story was shot with my Nikon D700 right before I bought the D800.”

10) Find your voice & get inspired. Yannick’s last secret to share about sports fashion photography, he imparts these last words “Be different and get yourself some inspiration of other photographers work.”

To find out more information about Yannick Wolf’s “Swimming” story check out our interview with him in this article or look up his website (www.yannickwolff.com), there is a small behind the scenes video of this shoot as well(posted above) as well as his Facebook Page (www.fb.com/yannickwolffphotography). What do you think of Yannick’s tips? If you would like to comment or include one of your own please post it in the comments section below.

Credits “SWIMMING”

Photographer: Yannick Wolff (www.yannickwolff.com)

Athlete: Yannick Lebherz (German olympic team/London 2012)

Assistant: Kai-Philipp Nosper / Roman Paeske


Fashion Photography Blog

 
Comments Off on Top 10 Sports Fashion Photography Tips

Posted in Uncategorized


Guide to Attracting Critters to Your Garden for Backyard Wildlife Photography

04 Jun

9783923464 5e8518e1f9 o
Wildlife photography brings with it some natural challenges. One of the greatest being that it is often difficult to have regular access to wild animals to photograph. Many of us are guilty of looking further afield for our subjects, but our own back gardens are prime locations for attracting, and photographing wildlife.

Live in the city suburbs? Doesn’t matter. Your area is likely to be bustling with bird life that you aren’t aware of yet. This guide will run you through a few of the best ways you can attract birds and animals to your garden for easier wildlife photography.

Provide Supplementary Food

Animals are suckers for food. They’re often hungry and looking for their next meal. The best way to get them to come to your garden is to provide nutritious, supplementary food. There are a variety of different methods you can use to feed wild animals.

Bird feeders are available in many different sizes and shapes. A normal tube system with various feeding holes is available from your local pet shop or garden centre. They’re inexpensive, and can be filled with many different varieties of seed. You can buy wild bird food from the same place, and get anything from mixed seeds to solely sunflower hearts. I use the latter, and to great effect.

For attracting mammals, you can get a variety of ground feeders. Squirrels, for example, love peanuts, hazelnuts and other nutty foods.
Robin in Snow

Don’t Forget the Ethics

By providing supplementary food to animals, you must not overfeed them. Fill the feeders maybe 2-3 times per week, so that they do not become dependent on you as a food source.

Make sure what you are feeding them is suitable. Ask a garden centre for advice if you need help. If using peanuts, they must be completely natural (not roasted) and unsalted!

If you decide to stop providing food, you must do so gradually. Slowly reduce the amount you are feeding over a month or so, allowing the animals to adjust naturally. Otherwise, you could end up unintentionally starving some individuals.

Getting Close for Photography

Many garden birds will allow you to sit quietly near the feeders, as they will eventually get used to you. However, if you want more freedom to move without scaring them away, get yourself a small tent hide (blind). These are available on Amazon at relatively cheap prices. A shooting blind will do the job perfectly.

Hide

Making an Area Photogenic

So by now you have the wildlife, but you still need to capture those stunning shots. A bird on a feeder isn’t the most attractive of images, but there are some neat tricks to avoid this.

Place some gnarled twigs and sticks around the feeders. If you need to, strap them to a pole so they are held horizontally. Birds will use these as queueing platforms for the feeders, waiting their turn to feed. You can utilize this moment to capture some lovely portraits of the birds on these photogenic branches. If you’re lucky, you may even get two birds fighting for pride of place.

You should also be wary of your backgrounds. If you are photographing with a messy backdrop, it will likely come out in the image and be distracting. If there’s no choice of positioning next to something plainer, then consider hanging a dark green sheet at a distance behind your subjects. This will create a pleasing bokeh for your photographs.

Red Poll and Siskin Fight

Be Patient

The key to wildlife photography is patience. Changes won’t just happen overnight. Provide food and wait, and eventually you’ll see results. It shouldn’t take too long, but birds don’t have a radar which tells them as soon as food is available – they have to find it first!

That’s just about it. Fine-tune your feeding stations overtime, adding or subtracting elements depending on what works and what doesn’t work. Good luck!

The post Guide to Attracting Critters to Your Garden for Backyard Wildlife Photography by Will Nicholls appeared first on Digital Photography School.


Digital Photography School

 
Comments Off on Guide to Attracting Critters to Your Garden for Backyard Wildlife Photography

Posted in Photography


Crossroad of Realities: Photography Subverts Gaming Scenes

03 Jun

[ By WebUrbanist in Gaming & Computing & Technology. ]

game photograph distant shot

As improved game graphics generate increasingly photo-realistic spaces, projects like this blur the boundaries between virtual and real in perception-warping ways. Test and see for yourself: how long do you have to stare at each picture to ascertain what elements comes from within the game and which ones are derived from everyday reality?

game photo virtual device

game photo rain image

Referencing Jean Baudrillard (of Simulacra and Simulation), gamer and photographer Benoit Paillé of Montreal, Quebec explains his aim to “overlay a material reality with a virtual one, erasing the border between the two worlds … to show that we can use a virtual space in conceptual photography and approach these areas with the same sensitivity as the physical space.”

game photo gta v

game photo device zoom

The process of making Crossroads of Realities involved carefully capturing in-game scenes from Grand Theft Auto V, then simulating the same conditions (time of day, angle of light, conditions of weather) in a real photograph of a human hand holding an image-capturing device. These images were then hybridized into finished shots representing uncanny combinations of virtual and physical reality.

game photo capture example

game photo upside down

game photo night shot

As to his inspiration: “It is a response to the proliferation of visual projects that take place in virtual spaces. It is a questioning about the notion of border and territory. A mix of two distinct realities into a single image. I ask questions about the legitimacy and the authorship of artwork created this way.”

Next Page – Click Below to Read More:
Crossroad Of Realities Photography Subverts Gaming Scenes

Share on Facebook


[ By WebUrbanist in Gaming & Computing & Technology. ]

[ WebUrbanist | Archives | Galleries | Privacy | TOS ]


WebUrbanist

 
Comments Off on Crossroad of Realities: Photography Subverts Gaming Scenes

Posted in Creativity


How to do Long Exposure Photography and Light Trails at Night

03 Jun
Gastown Light Trails

Gastown light trails, Vancouver, Canada

Before I understood how photography worked, I was always intrigued by light trails in images. I never understood how that happened. When I began to study photography, one of the first assignments I did was an advanced course on night photography. I decided I would try and capture some light trails. I set up my camera, made sure the settings were correct and waited. A few cars went past, but my timing was off and the shots were not great. I continued to wait. After about an hour of trying and experimenting, I got the shot I was looking for. It was like magic to me. The car was not in the shot but the lights seemed to float in mid air. I was hooked. This was something that mystified me for a long time and, I had managed to get it right.

What was so mesmerizing for me was that the image I saw on my LCD screen was not what I saw in real life. The camera had managed to capture a scene that my eyes could not capture in the same way. This seemed amazing to me. I soon realized that the camera was able to “see” things differently to the way my eyes saw them. I spent many nights trying to capture light trails in various locations. I was also doing lots of reading and research and came across a technique called long exposures. This too was amazing. It had the ability to alter a scene in such away that it looked totally different to the way our eyes normally see it. Again I was hooked and still, to this day, long exposures and light trails are some of my favourite techniques in photography.

Long exposure photography and light trails have similar techniques, it is the subject matter that differs, so I will discuss each technique separately and tell you how to get the best results in both.

How to do long exposure photography

Shooting long exposures effectively requires that you should be shooting in Manual mode as much as possible. If you are not sure how to shoot in Manual, take a look at Getting off Auto – Manual, Aperture and Shutter Priority modes explained to learn more about these modes. To be able to get sharp and effective long exposure images, here is a checklist of item you will need.

1. What equipment is needed to shoot long exposures?

  • A tripod – this is a good piece of equipment to have in most instance, but is a critical piece of equipment for shooting long exposures. Make sure your camera is properly mounted onto the tripod before you start shooting.
  • A camera – obviously you will need a camera, but many people assume you can only do this type of photography with an SLR. Some advanced point-and-shoot cameras can also do long exposures if they have a Shutter Priority function. Take a look in your camera’s manual to see if it has this function, you may be surprised.
  • Cable release – your camera will be on a tripod, so it should be very still, however, sometimes the action of pressing the shutter release button can cause the camera to move slightly and this movement can cause your image to blur very slightly. You may not notice this on the LCD screen, but when you open the image on your computer, it will be evident. I recommend getting a cable release (also called a remote trigger). It is simply a cable that attaches to your camera and acts as a shutter release button. Using a cable release means you can set up your camera, step away from the tripod and press the button without touching the camera. Cable releases can be wireless too. If you don’t have a cable release or don’t want to buy one, you could use your camera’s self-timer function to trigger the shutter.
  • Warm clothes and comfortable shoes – depending where you live, and the time of year you plan to be shooting, you may need to dress warmly. Long exposures work well after dark and it may get cold, so be sure to wear warm clothes. Be sure that you have comfortable footwear too as you may be standing for a few hours.

2. What subjects are best for long exposure photography?

Long exposures work well for certain types of subjects like seascapes, landscapes and cityscapes. The key to getting a successful long exposure image is to have something in your image that is perfectly still and something that is moving. Water, clouds and trees blowing in the wind all work well if the rest of the scene is stationary. This difference between the elements in the scene will create drama and will add significant value to your image. The viewer will be seeing something that cannot be seen with the naked eye. The reason why long exposure images are so compelling is that they warp time. Water looks like a soft mist, trees look like a dull blur and clouds become long and streaky. This is what makes a familiar scene more compelling.

Long Exposure scene in Vancouver BC

Long exposure scene in Vancouver, Canada

3. What camera settings should be used?

Long exposures are ideally shot on Manual mode. If you are not sure how to shoot in Manual mode, you can use one of the other semi-manual modes such as Aperture priority or Shutter priority. Here are some quick pointers on the settings:

  • Shutter speed – depending on the light in your scene, your shutter time will need to be at least a 10 to 15 seconds, or longer if necessary. If you are doing a seascape and the water is moving quickly, then a few seconds may be long enough to make the water look misty.
  • Aperture – you will want to have your aperture set at anywhere between f/8 and f/16. This again, will be determined by how much light is in the scene and how long you want to expose for.
  • ISO – keep your ISO settings as low as possible, ISO 100 is what I use for long exposures.

4. When is the best time of day to shoot long exposures?

It’s normally a good idea to shoot long exposures as the sun is setting, or just after sunset. My suggestion is to be on the scene an hour before sunset. That way you can test some shots, make sure your composition is good and be sure all your settings are correct. Then wait. Personally, sometimes I will simply sit there and enjoy the scene, other times I may listen to some music, but I like to be relaxed and ready for when the light starts to work. Normally you will want to start shooting about 15 minutes before the sun has completely set and up to an hour after it is below the horizon.

The important part is to be willing to experiment. Each time you decide to shoot long exposures will be a little different. The light may be brighter than you think, the sunset may not be as dramatic as you hoped, or the shot may not be just as you imagined. Be patient and experiment. I will sometimes go back to a location two or three times to try and get the shot I am looking for. Once I have it though, the sense of reward is fantastic and the patience and effort is paid off!

Long Exposure of Science World in Vancouver

Long exposure of Science World in Vancouver

How to shoot light trails

Much of the advice for shooting light trails is very similar to the tips above. The key difference is in the timing and location of your shoot.

1. What equipment is needed to shoot light trails?

  • Same as above 

2. What subjects are best for light trails?

For light trails to work, you need to have something with lights moving through your scene. A car, a bus, a train and even an aircraft can work. Be sure to be out of the direction of the vehicle you are photographing. Please do not stand in the middle of the road, or on train tracks. Position yourself in a safe place to make this work. Always be aware of your surroundings. It is easy to become immersed in what you are shooting and lose sight of where you are standing. Be safe, first and foremost!

A moving bus in the scene made this shot more dynamic

A moving bus in the scene made this shot more dynamic

3. What camera settings should be used?

Light trials, like long exposures are ideally shot in Manual mode.

  • Shutter speed – depending on the light in your scene, your shutter time will need to be at least 10 to 15 seconds, or longer if necessary. Make sure that your shutter speed is long enough to capture longish light trails. You don’t want to cut them off too soon as you will have some short trails in your image that may look strange.
  • Aperture – you will want to have your aperture set at anywhere between f/5 and f/11. This again, will be determined by how much light is in the scene and how long you want the exposure.
  • ISO – keep your ISO settings as low as possible, ISO 100 is what I use for light trails. If your ISO is set to 500 or higher, your exposure will be shorter and you run the risk of overexposing the highlights ESPECIALLY when shooting car headlights.

4. When is the best time of day to shoot light trails?

Light trails can be shot in the early evening, or after the sun has set. Each scene will be different, but sometimes it is too light to get effective light trails just after sunset. You may need to wait until 30 minutes after the sun has set to get longer light trials.

The important part, once again, is to be willing to experiment. Try different times after sunset and see what works for you. Spend time behind your camera perfecting your timing. Scout locations during the day that you will think will work for light trails and then go and try it out.

Steam Clock in Gastown, light trails on the road

Steam Clock in Gastown, light trails on the road

Photographing after dark can be very rewarding. It is worth the effort to learn how to use these techniques to bring new images into your portfolio, and to have new skills which will enable you to shoot under any lighting conditions. Experiment and enjoy! Happy shooting.

The post How to do Long Exposure Photography and Light Trails at Night by Barry J Brady appeared first on Digital Photography School.


Digital Photography School

 
Comments Off on How to do Long Exposure Photography and Light Trails at Night

Posted in Photography


What Life Lessons Can Teach You About Photography

31 May
family-600x400b

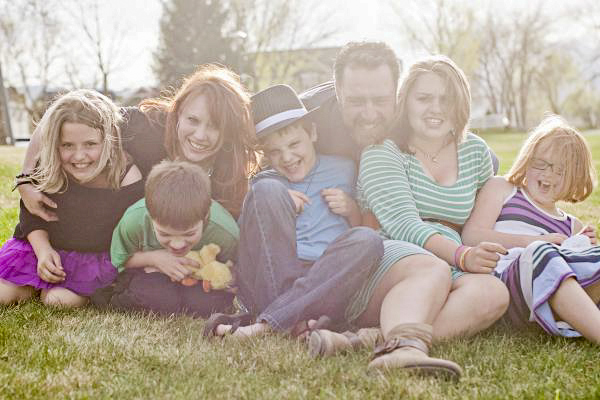
Image of my new crazy family by Mia McCloy

A few months ago I got married. (Confetti! Streamers! Cake if you have it!) In doing this, I took on a gorgeous husband and three darling stepdaughters. Add my two adorable sons to the mix and you end up with a total of seven people sharing a couple of bathrooms, a kitchen, and the lion’s share of my patience. All of a sudden things like meal planning and buying in bulk have gone from concepts I’ve heard about to the only thing keeping me out of an inpatient treatment facility. To spare my sanity and enable me to do a hundred loads of laundry each day, everything in my life has been streamlined either by necessity or default including my photography business.

While it’s a continuous progression I realized the other day, when I was folding a mountain of clothes remembering a simpler time, that I am turning-out some of my best work in over a decade of being a professional photographer. I have to assume this is partly from streamlining everything from my shooting style to my editing process, and partly because my personal life changes have forced my professional life to adapt as well. So far, all for the better if you don’t count the laundry thing. I love them madly but having five children isn’t for everyone. In the event you don’t want to take on a small army of kids as a social experiment just to see if it improves your photography, here are some lessons I’ve learned recently and how you can apply it to your own photography.

What life lessons can teach you about photography

IMG_8899b

Work is more meaningful and balanced

This sounds so lovely but really it’s just a byproduct of my continuous lack of time. In the past, any image that caught my eye for any reason at all would be subjected to editing and delivery to the client. This would add hours to each job I took on. Now only the really, really good stuff ever sees the light of day, or my client’s eyeballs. Images that once would have gotten ten minutes of editing just because I saw one tiny bit of pretty in it, are now trashed because I know they will only bring down the finished product as a whole. I shoot with more purpose because I am on time constraints I never had before.

Are my clients suffering? No. They are getting quality over quantity.

Also, hearing “BUT THAT’S NOT FAIR!” roughly a thousand times a day puts fairness in a whole new perspective. It also puts having children in a whole new perspective, but that’s another ball of wax–unidentifiable and likely stuck to my kitchen floor.

It used to be that I had no real office hours. I shot when my schedule allowed and when the clients needed. I edited late at night after kids were asleep. I answered emails when I got around to it. I took every advantage of working from home one could. Don’t get me wrong–spending all day in yoga pants is still a giant perk, but now I have office hours. I return emails as soon as possible, even if that means from my phone, while waiting in the carpool lane at one of the three different schools at which I drop-off and pick-up children. I don’t see the sunrise at the end of my workday anymore because frankly I’m way too tired to stay up past 10 p.m. now. My clients are getting every ounce of me they deserve. But my photography business is no longer claiming my very soul. It’s fair for everyone.

TIP: Don’t let photography take over your life.

This goes for hobbyists and professionals alike. The work/life balance has always been a tough one for me, but as cliché as it sounds, we all need to reevaluate honestly and often. Shoot what you can, edit when you can, deliver where you can. Contrary to every photography quote I’ve ever heard, shots can be missed–there are a million more opportunities for an amazing picture tomorrow.

IMG_8688b

Learn how to say no

It used to be that if you asked me nicely, I would take on about any assignment. Taking pictures of houses even though I don’t have the equipment, or know-how, real estate photography requires? You bet! Do some product photography for your best friend sister’s boyfriend’s cousin? Sign me up! You want a professional photographer to hang-out with on Saturday mornings for your kid’s little league games? Of course I will! Now, not so much.

Not only do I not have that kind of time, I don’t have the desire. I’m spending all of the “doing-something-I-don’t-want-to-do” time I can spare chaperoning middle school field trips and taking kids to dentists, doctors, play dates, and street corners with “Free To Good Home” signs. I don’t want to do real estate, product, sport, or a dozen other types of photography. I want to do the kind of photography I’m good, at and the kind that I enjoy doing. On the flip side of that coin, I just can’t do favors like I used to. The line for a minute of my time now starts here and goes back quite a ways. I allow people to cut the line all the time, so you’ll be there a while waiting.

TIP: Just say no!

When in your gut it doesn’t seem like a job you want or can do, when the idea isn’t exciting or fun on any level, when you have to work with people that make you miserable, say no. When you are overwhelmed, behind and feel like taking on one more thing may break you, say no. When you are asked to do something that offers you no benefit, not even warm, fuzzy feelings, say no.

IMG_1674b

Say “Thank You” more often

I’ll be honest–I have no idea where this comes from; perhaps me attempting to model good manners for five kids who are all allergic to the word “please”. Regardless it’s a great lesson. It used to be that when I was complimented for my photography I would immediately detract; it’s not that I’m a good photographer, it’s that I have really beautiful clients. It’s not that an image is exceptional, it’s that I got lucky. It’s that I have an amazing lens. It’s that I have a great camera. It’s that perfect light just happened. It’s anything but me. It has taken 10 years but I am finally able to just say, “Thank You”.

The truth is that I do have a great camera, live in a beautiful place of the world that allows for ideal background settings, and have really beautiful clients. But I’m also a really good photographer. I can find light, work a complicated camera to my every advantage, put people at ease, and edit a diamond in the rough (image) to perfection. As uncomfortable as it still is for me to say that, it must be true because I’ve been doing this a while and people continue to hire me. Lots of photographers have these same talents, and more, and it’s important that we (you as well) start realizing that they are in fact talents and not just random acts of luck.

TIP: When someone compliments your work say, “Thank you!” with a big smile, and nothing more.

If this is something you’ve struggled with, it will feel unnatural. Keep doing it anyway. Saying an honest thank you is one of the nicest things you can do in the face of a compliment. Explaining why you think you are not deserving of it is one of the rudest.  

IMG_9640b

Play to your strengths

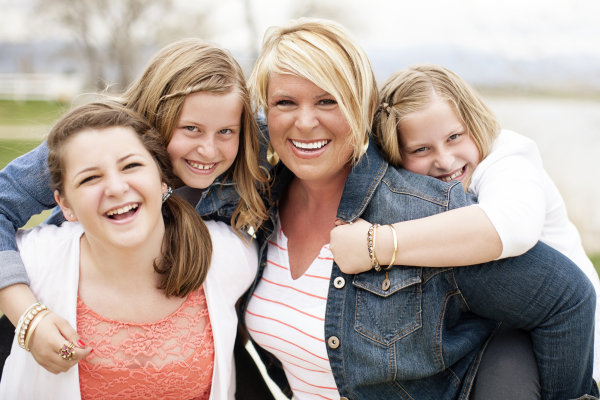
Having so many people need me (and only me) has redefined my objective. Much like saying no to photography jobs that are not well suited for my skill set, I have been pickier taking on jobs that are in my wheelhouse. Family photography falls into my lap often and most of the time it’s a perfect match for me. My love-hate relationship with weddings however has finally come to a close; weddings are no longer something I will do. Neither is endless editing to achieve fancy vintage (and similar) toning. My clients get a fun and spontaneous shooting atmosphere and final images in straightforward color or black and white. It’s my very best, and most honest work.

TIP: Try new things when it makes sense.

Challenge yourself when necessary, but play to your strengths–you’re good at them for a reason.

IMG_1010b

Charge what you’re worth

Just like having a business partner forces accountability, having a personal partner makes me look at the big picture. At the end of the day, photography is my job. It’s how I make my living. There are glamorous and fun sides (though not near as many as people think), and there are dirty and gloomy sides too, just like any job. I can’t work for free. Granted I have pro bono projects I take on (my heart, it bleeds), although I now do them much more selectively, and when I know it will benefit me in the long run either with new business or free marketing.

Gone are the days when I could take on a very low-paying project with no other benefit just because it seemed like fun. I’m finally charging what I’m worth, I’m no longer part of that deadly middle ground of charging too much to be a good deal, and not enough to be considered any good. I read a while back that as soon as you could no longer afford yourself, you were charging enough. At the time I passed it off as greedy and mean-spirited but I have to say: friends, I’ve come to the dark side and the water is fine. The clients that can afford me, do. The ones that can’t? They save up until they can, or they are careful to take advantage of my rare sales. I haven’t lost clients and bigger than that, my work has more value.

TIP: Evaluate your pricing.

Consider everything from wear-and-tear of your equipment to your electric bill that keeps your computer running into the wee hours of the morn. There’s a good chance you aren’t charging what your are worth, if only because it’s hard to make that jump and put a dollar figure on something that used to be a hobby, or something people consider art. I promise you though, if you’re not going to charge, someone else will. So while I consider my business as personal as it comes, it’s still a business. Besides, it takes a lot of laundry detergent to keep my new family of seven in clean clothes.

What other things have you experienced in life that have helped you learn something about your photography? What other tips do you have? Please share in the comments below.

The post What Life Lessons Can Teach You About Photography by Lynsey Mattingly appeared first on Digital Photography School.


Digital Photography School

 
Comments Off on What Life Lessons Can Teach You About Photography

Posted in Photography


Weekly Challenge Silhouette Photography

31 May

Earlier today I shared some stunning silhouette photography to give you some ideas. If you’ve never done any of this type of photography here’s your chance because it’s also the weekly photography challenge.

To give you some ideas on how to create a great silhouette here are some articles and tips:

  • Create Powerful Silhouettes by Telling a Story
  • 5 Tips For Photographing Silhouettes
  • How to Photograph Silhouettes in 8 Easy Steps

Here are a few images to help you get started

By Hani Amir

By Rama V

By Jens Schott Knudsen

By Easa Shamih

By Bill Gracey

By eNriKeFot?

By Joey Yee

By Geraint Rowland

By Kevin Dooley

Share your silhouette photography

Simply upload your shot into the comment field (look for the little camera icon in the Disqus comments section as pictured below) and they’ll get embedded for us all to see or if you’d prefer upload them to your favourite photo sharing site and leave the link to them. Okay, ready to impress us?

The post Weekly Challenge Silhouette Photography by Darlene Hildebrandt appeared first on Digital Photography School.


Digital Photography School

 
Comments Off on Weekly Challenge Silhouette Photography

Posted in Photography


The World of Fantasy: 40 Surreal Abstract Photography Examples

31 May

The concept of abstract photography is what appears to the eyes as random swathes of color and shapes tossed into a scene. A photographer takes an otherwise ordinary shot and takes it at just the right angle or focus to create a masterpiece of colors, patterns and textures. Abstract photography is totally based on your photographic eye. It’s when you’re Continue Reading

The post The World of Fantasy: 40 Surreal Abstract Photography Examples appeared first on Photodoto.


Photodoto

 
Comments Off on The World of Fantasy: 40 Surreal Abstract Photography Examples

Posted in Photography