With thousands of awe-inspiring and exotic places in the world, you have no shortage of places to visit and photograph. If you’re like me and have a bucket list of adventures you just have to shoot before you hang up your camera, allow me to add one more trip to your inventory. This excursion not only includes heart-pounding scenery, but also what is probably the most expensive piece of photographic equipment you’ll ever get the chance to use – all for the price of “admission”.
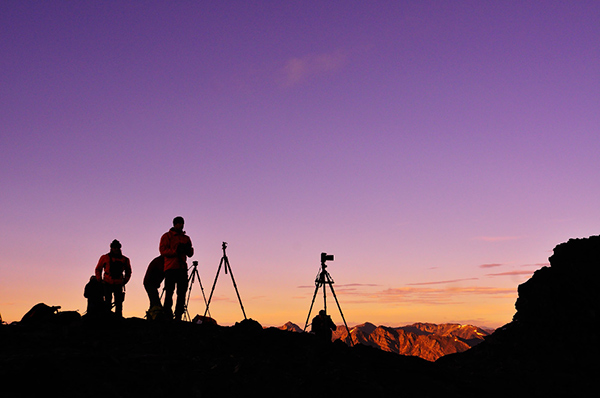
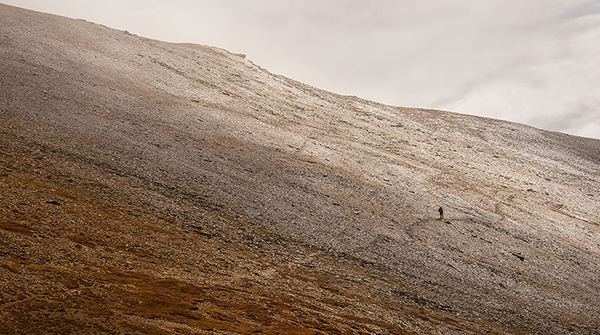
Photographers waiting for the right moment.
The adventure is heli-hiking, in the Bugaboo Mountain Range in Canada but with a twist for photographers. I signed up last September for a trip sponsored by the Canadian Geographic Society Photography Club, and I was so enchanted a friend and I are going back this year to do it again, this time with world renowned Canadian nature photographer John Marriott heading the trip. I wanted to share this photo adventure with you because it’s almost the perfect photographer’s dream destination.
This trip has it all:
- Rarely seen mountain vistas so your images won’t soon become cliches
- Soul-soothing Mother Nature everywhere to inspire and energize your imagination
- All the gourmet food you can eat
- Genuine, fun and extremely knowledgeable staff
- First class accommodations
- Yoga and massages
- Affordable budget
- And helicopters
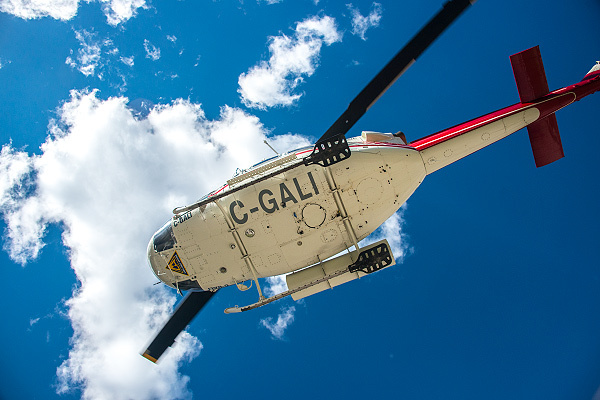
Yes, helicopters – that’s the pricy bit of equipment I was mentioning. Let’s talk about photography and the helicopters first, then I’ll go into the logistics of the trip and what you need to know if you decide to go.
Mountain Landscapes Like You’ve Never Seen Before
In the Purcell Mountains (generically referred to as the Canadian Rockies), in eastern British Columbia, Canada, just west of the famous town of Banff, is a remote mountain range known as the Bugaboos (PDF map). It’s not easily accessible, and the rugged terrain limits visits to only those die-hard outdoor adventurers. There are almost no roads into the area, and climbers and hikers are warned that it is a “wilderness area, without supplies or equipment of any kind”. Fortunately for us photographers, the helicopters allow easy travel to the most photogenic locations, and the company that runs the trips also has two first-class lodges high up in the hills, so all your creature comforts are taken care of.
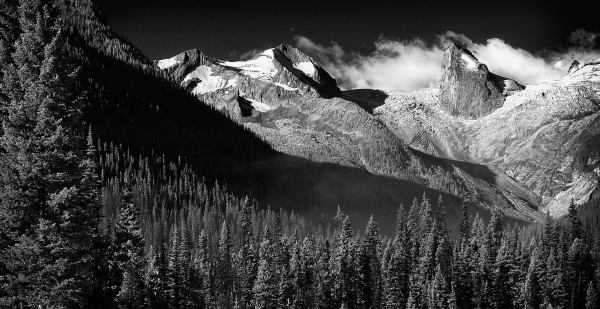
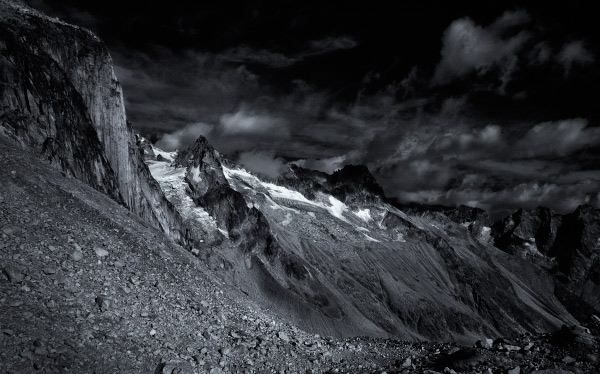
The Bugaboo Spires, as viewed from the Lodge.
Each morning the helicopter, transports you high into the alpine meadows, glaciers, hanging valleys and azure blue mountain lakes, that very few people ever get to see. I visited several locations last year that were around 9000 feet in elevation. All the views were heart-stopping! Each day is like this, the tour guides – specialists in interpreting mountain environments, safety, and photography – along with an expert professional photographer, provide advice, help and expertise in shooting mountain landscapes. From selecting the best locations for the day, to determining when to set out in the morning to get the sweet light, all the hard stuff is taken care of for you. It allows you to devote your creative energy to capturing what your imagination perceives. Imagine being immersed in beauty, with ten other photographers, and having an expert photo instructor at your side for four days – what could be better than that?
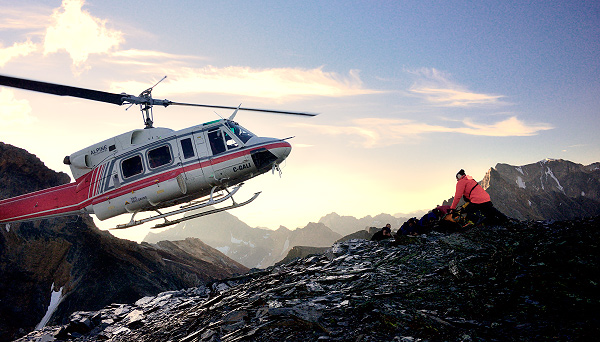
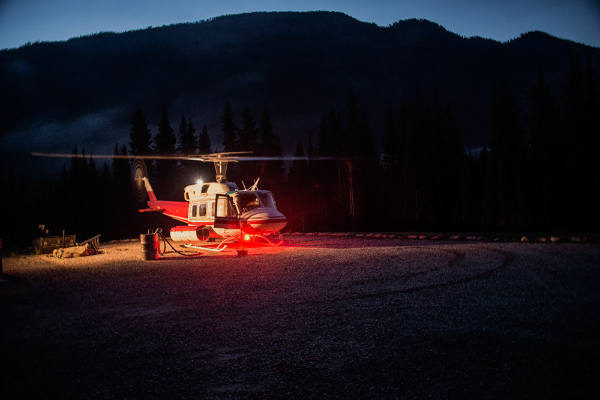
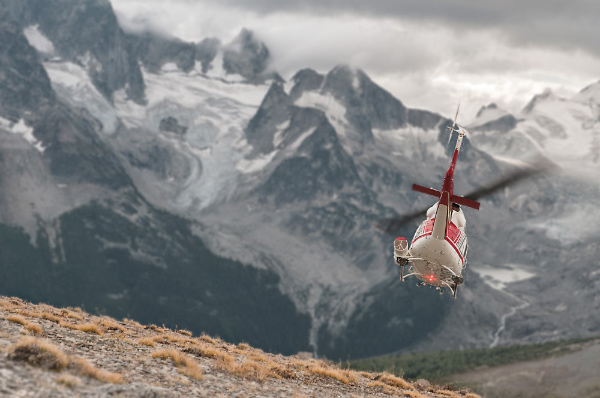
Your ride for the weekend – transporting you to the peak.
Photographic Tips and Advice from a Pro
It’s an education like no other, in a real world classroom. It’s camaraderie and fun with other photographers who think like you do. At every location, the tour photographer will help you set up, explain the best lenses to try, what settings you should start out with and generally give you some direction to ensure you shoot some great frames. But at the same time, there’s plenty of room for innovation and your own individual shooting and subject preferences. One thing that I kept having to remind myself of is that the alpine environment is also prime scenery for macro photography too. It’s not just the “big picture”. When I was there in September, the wildflowers had already finished flowering, but between craggy rocks all sorts of vegetation was making an appearance. This year I’m going back at the beginning of August – the peak of wildflower season. There are spectacular details in everything. Don’t forget to look down.
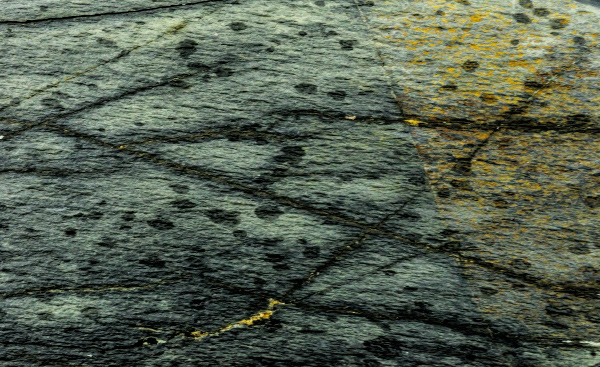
Alpine Abstract
Spend Every Minute Immersed in Your Passion
No time is wasted on a photography heli-hiking trip. At least once, you’ll be up before dawn to fly off to a place where sunrise will be dramatic. Even if no pre-dawn flight is planned on that day, sunrise from the lodge is always a wonder. The coffee is always ready for you no matter when you roll out of bed, so there’s no excuse for sleeping late. After your sunrise shots, a full breakfast will be waiting for you, hot eggs, healthy grains, whatever you could imagine is all there. Back on board your helicopter ride and it’s off to another location. You even get gourmet picnic lunches on the mountain, where you can take a break and compare notes and images with your group, or just keep shooting.
The “wh-early” bird gets the worm.
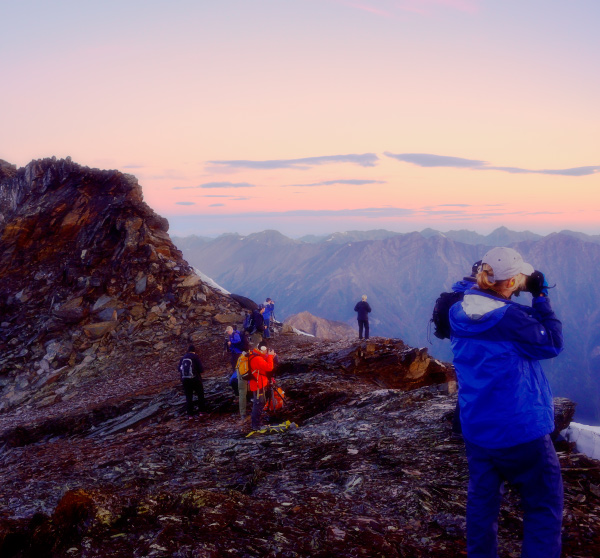
On top of the world at sunrise.
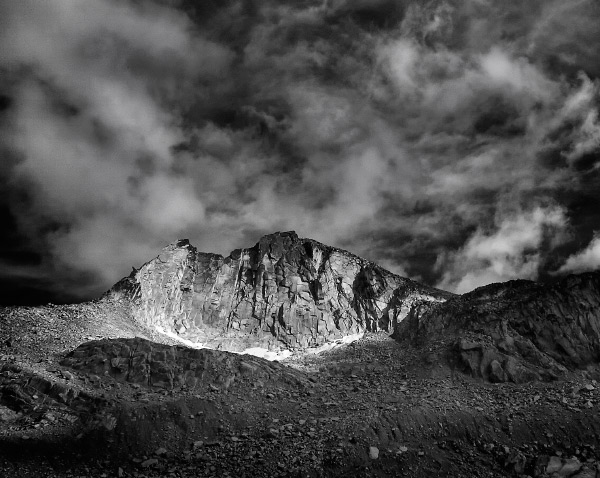
Would Ansel Adams approve?
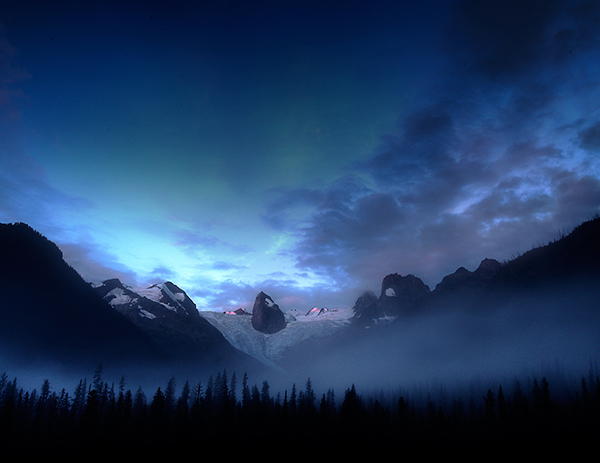
Sunrise over the Spires, view from the Lodge
More Photography, Food, and Fun
When the day is done, your helicopter will bring you back to the lodge where you can have a massage for your tired body before the gourmet dinner. Depending on your program, you may have a photo class after dinner, a show and share session, or another helicopter trip to catch the golden hour on a mountain lake or peak, for that once in a lifetime shot.
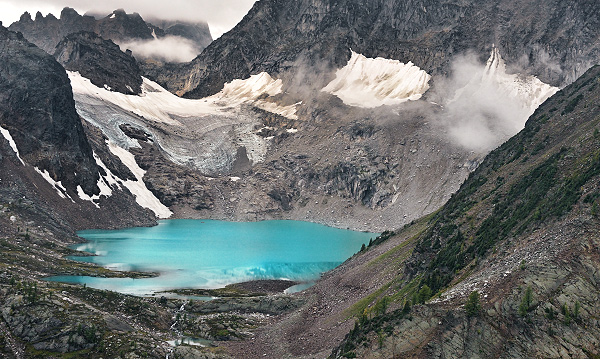
Aptly named Cobalt Lake
In fact one of the more delightful aspects of these trips happens back at the lodge. Not surprisingly, the staff are the coolest and most genuinely friendly people I have come across in any of my travels anywhere in the world. Everyone sits together for dinner, family style. Your helicopter pilot may be serving your wine, and the person who made up your room in the morning might be handing out the appetizers. Everyone pitches in where needed, although only the pilots ever fly the helicopters. The atmosphere is encouraging and supportive; informative and humorous.
Fun, whether in the field or at the lodge, is definitely a key item on the overall agenda. So besides sharing photo tales and techniques with your fellow photogs, the guides and staff will keep you more than amused with stories of their adventures in the Bugaboos (and if you’re like me, you’ll also be planning your next visit).
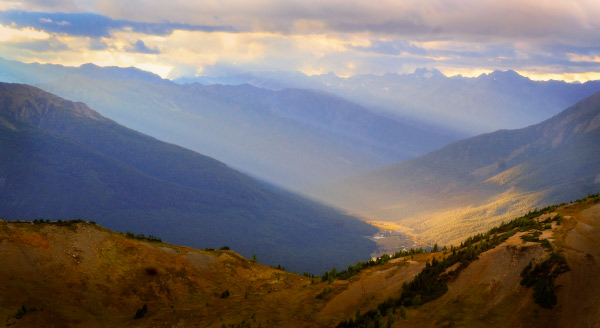
Sunset godrays
What You Need to Know
You’ll want to seize the experience up there in the mountains so a bit of basic preparation will go a long way. You don’t want to be lugging 40 pounds of gear up those trails, and despite loving the helicopter rides you won’t want to have to make an extra trip back to the lodge because of an injury. The company that runs the tours has all the info you need as far as mountain safety and fitness is concerned, and they will provide you with all the hiking gear you’re likely to need. But as a photographer who’s made this trip, I have some recommendations based on my mistakes.
Making great images on a trip like this requires that you’re fully prepared, energized, and organized. You’ll spend some time walking and perhaps hiking (depending on your group), and you don’t want to be all tuckered out before the end of your day.
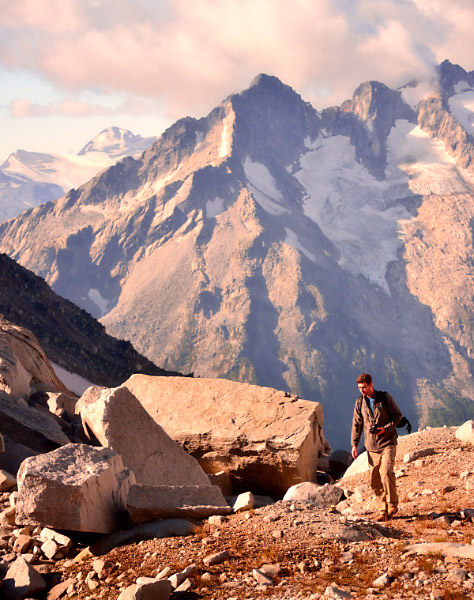
The air is thin up here. Pack light.
Pack Light
Bring the minimum amount of gear necessary, and be strategic. Remember you have to pack your lunch and water as well, and a tripod is a must. If one of your telephoto lenses has macro capability bring that one, rather than two separate lenses.
For my trip last summer, I bought a light-weight Sirui carbon fibre tripod and ball head. That was a smart move. The dumb move was bringing three camera bodies and five lenses. I’m a girl from the prairies and hiking with all that gear at 9000 ft was just plain dumb! What was I thinking? If you sign up for the John Marriott workshops, he will send you information regarding the equipment you should bring, but I recommend a wide angle, a small macro and a telephoto (70-200mm range) plus polarizers, and a neutral density filter. Less stuff challenges you to be a more creative photographer.
A little exercise before you leave home won’t hurt.
Get in Shape
Even though there is little serious hiking on the photo tours, a short uphill climb can feel like a marathon with a backpack full or gear, thin air, and an out of shape body. You don’t have to be an athlete, but again every little bit of fitness helps. My dumb move – last year I did nothing, plus I was in a car accident the week before I left and fractured two ribs. Walking to the bathroom was painful, never mind an uphill climb with too much stuff in my backpack. This year I am so far not injured, so I am running flights of stairs, walking around with my full backpack and doing the 7-minute-workout three times a week. I have five weeks to go, and I know I won’t win any gold medals, but my time in the mountains will be a little more enjoyable this year because of my preparation.
A little uphill walk can feel like a marathon.
Take a minute enjoy the moment.
Try Not be be Overwhelmed
It’s so very easy to be completely blown away the first time you get off the helicopter. You’ve never seen anything like this before, and for many, you won’t have a chance to see it again. But when you get to a location, put all your gear down. Rest for a minute. Take a few deep breaths. Snap a few iphone photos at first so you have the memories, but just sit and feel how you are feeling. Take a few minutes to let it all settle in your brain. There’s no need to rush, trying to capture everything. Relax, you’ll be at this spot for a while, and the day is long.
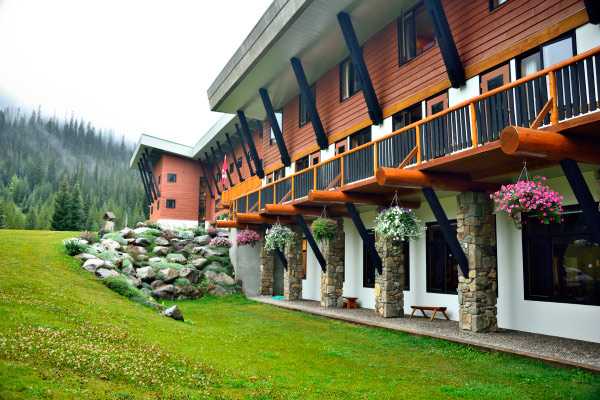
The CMH Bugaboo Lodge
The Logistics
I tend to rave about this trip for many reasons but what was outstanding was how thoroughly well organized everything was. Everything! Given all the complexities of booking and moving so many people (about 40 guests are participating in various heli-hiking tours along with the photography groups) to a remote lodge, and planning flights around weather, and light, and all those people, the fact that nothing went awry was such a huge surprise. All the details from making my reservation, taking care of answering any questions, call backs if needed, were handled so well. If someone said they’d call back they did. They send extremely detailed emails containing everything I needed to know from packing lists to travel insurance. Everything is taken care of. If you decide to embark on this adventure, you just have to get yourself to Banff, Alberta. That’s it.
You’ll need to spend at leat one night in Banff, because your trip to the helipad starts very early. Most people fly to Calgary, Alberta, and take the shuttle bus to the hotel in Banff or Lake Louise. In the morning you take a cab to the bus depot where you meet the coach that will take you to the helipad. The tour company pays your fare for the cab and the bus. Once on the bus you’re served coffee and breakfast, and you’ll get a lively and comical conversation from your bus guide. It’s about a two hour trip.
Once you arrive at the helipad, the helicopter will transport about 8-10 people at a time to the lodge, about a ten minute flight. When you arrive at the Lodge, you get lunch, a safety orientation, get fitted for your hiking equipment, and then before you know it, you’re on your first helicopter ride to the mountain tops for the perfect photography experience of a lifetime. It just gets better and better after that!
The company I went with is CMH – Canadian Mountain Holidays. They’ve been doing this for years and the founder was the person who invented heli-skiing so they know the mountains. There is one more photo trip in September this year (2014), but my friend and I got the last to spots for the August photo trip with John Marriott. The cost for the heli-hiking photo tour is about $ 3280 CAD + taxes, and it includes everything except alcoholic beverages and your massage treatments. Photography in the Bugaboos – the perfect photography trip.
What was your favorite bucket list photo trip?
There’s a good chance I’ll be back again next year – I’d love to take a group of photographers to this magnificent place to experience a real Canadian photography bucket list trip. Anyone keen on joining me?
The post Photography Trip of a Lifetime to the Canadian Rockies for Your Bucket List by Alex Morrison appeared first on Digital Photography School.

Digital Photography School


You must be logged in to post a comment.