RSS
 

Posts Tagged ‘Photography’

Cartier-Bresson and Stieglitz – Study the Masters of Photography to Become a Better Photographer

02 Sep

There is an unnervingly common trait among photographers, image makers, picture people, etc. Sometimes we forget that the reason we have access to such awesome gear and techniques, is because those who came before us in our trade figured them out, practiced them, advance them, and then left us a legacy of knowledge. The further we go back through the history of photography, the more prevalent this apathy becomes. What do you have to learn from someone who used a camera less advanced than a garage door opener? Well, as it turns out, we stand to learn a lot. Maybe not from a technological standpoint, but rather in a more intangible way that’s more difficult to appreciate, and easy to miss.

This is not to say that you can’t improve your photography from studying the methods of some of the masters. Their gear was varied and less advanced, but that only makes their work more extraordinary, and their skill even more humbling.

Henri Cartier-Bresson

Bresson

Image by Gertrude Käsebier

Even if the name doesn’t ring some little bell in your memory, chances are you most likely have viewed his work at some point. He was literally the inventor of the photojournalistic style… let that sink in for a minute or three. Before Cartier-Bresson, proper street photography as we know it and “still life reportage” as he called it was not a well practiced, or validated form of photography.

Born into a relatively well placed upper-class French family in 1908, Cartier-Bresson, like so many well known photographers, didn’t start out intending to be such. Painting was his major pursuit before picking up a camera. That all changed in 1931 when he set his eyes upon a photograph made by Hungarian photographer Martin Munkacsi. It was an image of three young boys in the surf of a lake in Africa. Cartier-Bresson said that he “couldn’t believe such a thing could be caught with a camera” and that he “suddenly understood that a photograph could fix eternity in an instant.” The photograph drove him to relinquish painting, and start making photographs. He was thoroughly a recorder of the spontaneity of human experience. There is much you can learn from Henri Cartier-Bresson to improve all aspects of your photo making.

Lessons you can learn from Henri Cartier-Bresson:

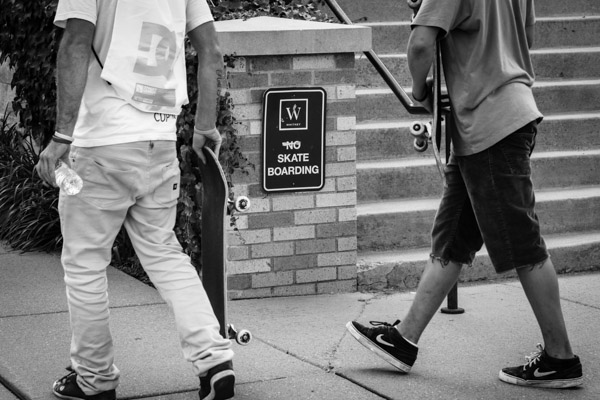
Strive to be invisible

When you’re working as a photographer it doesn’t take long to understand that humans tend to drastically change once they realize they are being photographed. Their mannerisms, expressions, and appearances all become noticeably different. Conspicuousness steals away realism very quickly if you are not careful. Cartier-Bresson understood this and moulded himself into somewhat of a photographic ninja. He shot with relatively small cameras, usually Leica 35mm Rangefinders. You have to understand that most photographers of his time were using larger format cameras which practically screamed “Hey, I’m making a photograph of you!!!” Anonymity allowed him to capture the essence of any scene in a way that was raw and unobtrusive.

Cartier-Bresson went so far as to conceal all the shiny surfaces of his gear with black paint to further decrease his footprint as a photographer. You might not want to go that far, but it will help you to capture better images if you blend into your surroundings. Plan for your sessions in a practical way. Don’t take more gear than you need, and keep a low profile. Try to wait until you’re ready to make an exposure before you raise your camera. Practice using your camera’s controls and memorize their placement. Also, avoid using a flash if it will likely interfere with your subject. Cartier-Bresson supposedly never used a flash for his images as he saw them as impolite and distracting. Photography, especially photojournalism, depends on the earnest capture of life in all its beauty, and regrettably, its occasional misery. Try to keep it real, literally.
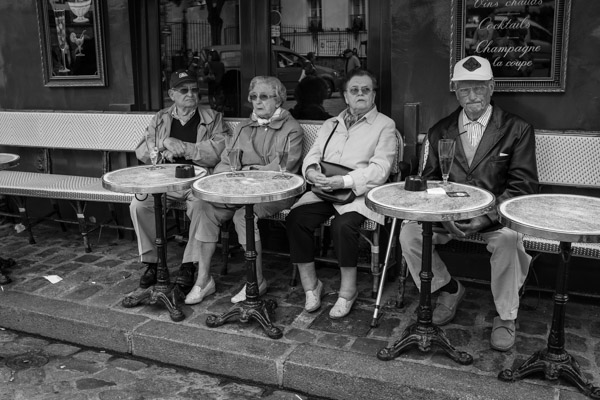
Compose in camera

I know, I know. You’ve probably heard this before, and are most likely tired of having that phrase hurled at you. I feel your pain. I would always roll my eyes any time a seasoned photographer or well intentioned writer would talk about the importance of getting things right in-camera. Let’s be real here. It’s so easy to crop an image on the computer instead of using the camera’s viewfinder. It’s so much more convenient to salvage a less than correctly exposed image than to think through your aperture and shutter combinations.

Composeincamera

Post-processing photographs is a wonderful thing. Completely changing a photograph, however, is not always ideal. Cartier-Bresson was absolutely anti photo manipulation and believed any photograph should be cropped in the viewfinder before it was captured. Nearly all of his photographs were printed full-frame and even included about one millimeter of the unexposed negative so that his finished prints sported a thin black border to further prove the absence of cropping.

Any image is only as good as the ingredients put into its making. So try to put the best possible ingredients into your work so that your finished product will be something you will be proud to display and say “I made this”.

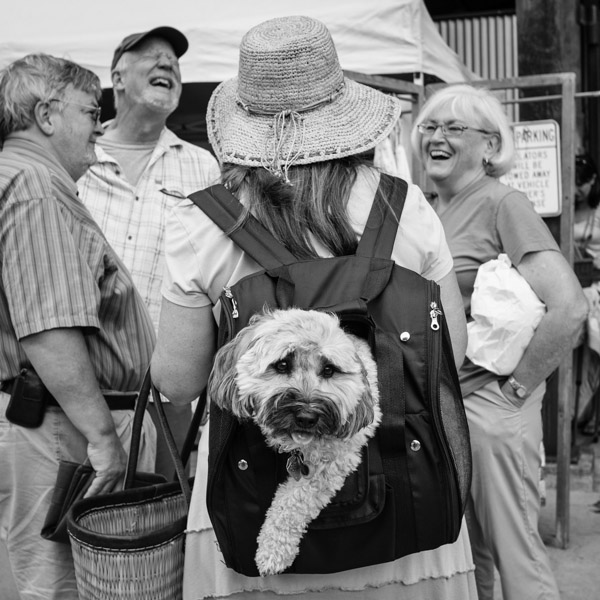
Focus as much on the art as the science

What we do as photographers would have been considered magic in an earlier time. Even at the basic level it is an amazing science. We record light that is completely unique and fleeting. You will never make the exact same photograph twice. The science of image making is an essential part of our creative process, but it must never be viewed as the only part.

Artandscience

Surprisingly, Cartier-Bresson expressed, on multiple occasions, his almost complete lack of interest in the more technical portion of making photographs. The developing and printing of his negatives, actions so carefully controlled and guarded by most serious photographers of the time, were valid only to him in the cases where they allowed more effective expression of his vision. He saw the camera as a tool, and development and printing as merely a means to a much anticipated end. He said “people think far too much about techniques and not enough about seeing”.

You can lose your direction during the of making an image. Sometimes we let technical perfectionism overshadow our initial vision. Thorough knowledge of your gear is essential to grow as a photographer. However, like Cartier-Bresson tells us, don’t allow yourself to become so focused on your tools that you forget your craft.

Alfred Stieglitz

Stieglitz

Alfred Stieglitz was born into this world on January 1, 1864 and left it on July 13, 1946. Anything else that I can tell you about the impact of man’s life upon the world of photography and creative art will fall unbelievably short of the full measure of gratitude we owe him as photographers. That’s not hyperbole. Before Stieglitz, photography was not considered a form of artistic expression. There were no real schools of photography, and it certainly was not considered high art on the level of painting and sculpture. Stieglitz gave artists an outlet to show their work to the public, and was the catalyst that helped begin the careers of many celebrated artists including the paintings of Georgia O’Keeffe, and the legendary photographs of the great Ansel Adams. Stieglitz was always open to new techniques and innovative thinking towards art.

His work is removed from our time by nearly a century, and many of the technical mechanisms he used are now obsolete. Still, there is much insight to be gained from Alfred Stieglitz, and his contributions. We can learn from his approach to the art world as a whole, to better ourselves as photographers.

Lessons you can learn from Alfred Stieglitz:

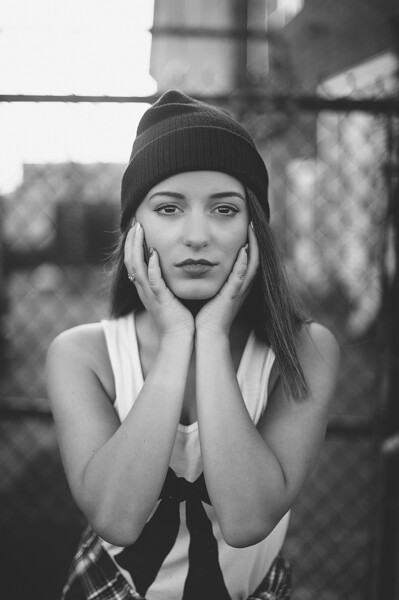
Express yourself when you can

Stieglitz created a series of images called “Equivalents”. It is a collection of photographs that show a variety of different cloud formations. Each image was a self-reflection of the thoughts, emotions, and experiences that he was feeling at the time the frame was exposed. That made each image unique to only him. He was the only person who truly understood how he felt during each release of the shutter. So go out and photograph something that makes you happy. Share it with others if you want, or just keep it for yourself. Go and make photos of something that is only beautiful, or meaningful to you. The act in itself is very freeing.

Expressyourself

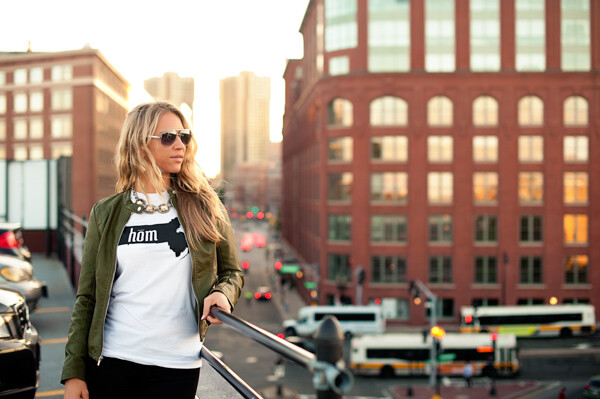
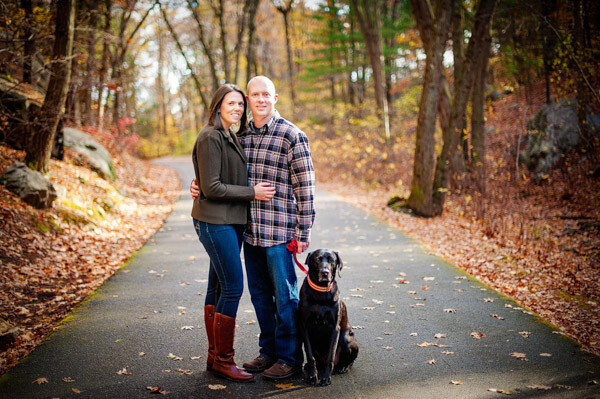
This spot has special meaning only to me. I made this photo for myself and no one else.

You might be thinking “I express myself with all my work”, but really think about it for a moment. Do you ever make a photograph and immediately consider how it might be accepted or rejected by other people? Do you sometimes share an image that you personally think is outstanding but no one else seems to care about? We have all done it more often than we might comfortably admit.

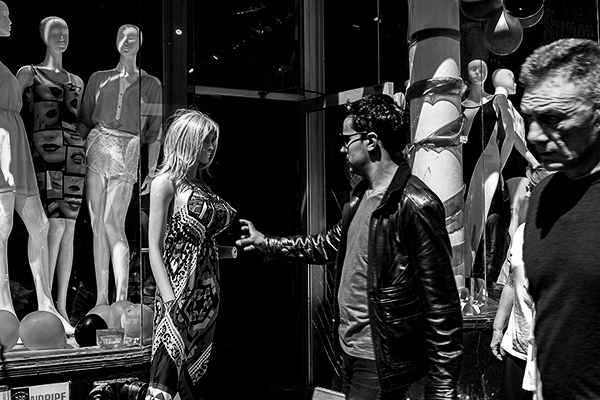
Break the rules if you want

Simply put, any photograph that has ever been produced, resulted from of a combination of the following variables: size of aperture, shutter speed, depth of field, focal length, image receptor sensitivity and composition (film, digital sensor, ect) and that’s all. The key to making a great image is putting all those pieces together in such a way that they convert what was only visible within your own mind, into a photograph. Those are the only iron clad rules in photography. In the end it’s you who make the choices and operate the camera.

Bendtherules

Don’t be afraid to think outside the box!

Some really great work has resulted from stepping outside the mainstream. There are many stunning images that completely ignore the rule of thirds, leading lines, horizons, and so forth. Never completely cast aside guidelines, but don’t convince yourself that you are permanently tied to them either. Learning, and practicing, the tested and proven building blocks of strong photography will help you greatly. Just remember that ground breaking work often arises from the bending of rules.

Look for inspiration everywhere

Stieglitz promoted all art forms. He opened galleries to display the works of painters, sculptors, and of course photographers. He didn’t limit himself to only photography, or painting or to works fashioned from stone and clay. Instead, he drank it all in. He recognized that it was all tangled together and intertwined.

As photographers we are able to almost instantly project what sometimes takes other artists days or weeks, or even months to create. However, this relative ease of creation can gradually place blinders on our creative thinking. We can reach a point when we only look at other photographs for inspiration. That kind of thinking limits our scope as artists. This mindset is especially dangerous for new photographers and can lead to frustration, disappointment and even worse, emulation that festers into plagiarism.

Don’t let yourself have artistic tunnel vision. Begin to look for inspiration everywhere to fuel your photography. Black and white sketches, paintings, wood carvings, architecture, kids finger-painting – everything has the potential to give you a smack of creativity that you can mould into photographic inspiration. The truth is that you really never know what will inspire you.

Please share your questions and comments below. Have you heard of these two masters before? Have they influenced your photography?

The post Cartier-Bresson and Stieglitz – Study the Masters of Photography to Become a Better Photographer by Adam Welch appeared first on Digital Photography School.


Digital Photography School

 
Comments Off on Cartier-Bresson and Stieglitz – Study the Masters of Photography to Become a Better Photographer

Posted in Photography


Readers’ Showcase: Black and White photography

31 Aug

While it’s easy to get swept up in the stream of product announcements at this time of year, it’s also a good idea to remember why we buy that gear – to make great photos. What better way to do it than to showcase the excellent work of our own community? This week we asked users of our Black and White Photography forum to submit their favorite shots for inclusion in our Readers’ Showcase. As usual, the photos submitted were of a very high quality. See gallery

Articles: Digital Photography Review (dpreview.com)

 
Comments Off on Readers’ Showcase: Black and White photography

Posted in Uncategorized


Weekly Photography Challenge – Black and White Landscape

30 Aug

Earlier today I shared a bunch of stunning black and white landscape images.

Now I want you to show me what  you got in this week’s challenge:

Weekly photography challenge – black and white landscape

Here are few more to get your creative ideas flowing. Keep in mind a landscape can be urban or natural.

By Wendell

more words

By Jason Mrachina

By Nana B Agyei

By Thomas Hawk

By Jason Mrachina

By Jason Mrachina

By L.

By howpin

By Jesse Clockwork

By Pam Link

By Tiago Vidal Dutra

By Mark Stevens

If you check out last week’s collection – flowers – you’ll find some good black and white ideas in there too.

Share your black and white landscape images

Simply upload your shot into the comment field (look for the little camera icon in the Disqus comments section as pictured below) and they’ll get embedded for us all to see or if you’d prefer upload them to your favourite photo sharing site and leave the link to them. Show me your leading lines using pathways and roads in this week’s challenge.

More tips – a new dPS ebook

For more tips on shooting and processing great black and white images, check out our newest dPS ebook The Essential Guide to Black and White Photography.

black-white-ebook

The post Weekly Photography Challenge – Black and White Landscape by Darlene Hildebrandt appeared first on Digital Photography School.


Digital Photography School

 
Comments Off on Weekly Photography Challenge – Black and White Landscape

Posted in Photography


Which Three Lenses do You Need for Photography?

28 Aug
Camera lenses

I used an 85mm lens fitted with a 500D close-up lens to create this photo of a Chinese Water Dragon.

Two things occurred to me When I read Phillip VanNostrand’s article The Only Three Lenses You Need for Travel Photography. One, is that his choice of lenses would not be my choice. Two, is that you cannot recommend three lenses for every photographer to use, as everybody’s requirements are different.

Imagine if you went to a showroom to buy a new car and the salesperson said “Sir, the only car for you is a Ford Focus”. Fine, if that’s the car you happen to want. But how annoying would it be if the salesperson insisted that you should buy a Ford Focus if it didn’t fit your needs?

A professional would establish your requirements first by asking you questions. How many miles do you drive a year? How many people does the car need to transport? Do you need lots of storage space? How important is fuel economy? Safety? What is your budget? And so on. When the answers to are known, the salesperson can make a recommendation.

It’s the same for lenses. My needs are different from yours because we are different people with different priorities and requirements.

Please don’t take this as a criticism of Phillip’s article (which is a great read, and the comments are fascinating). I learned this lesson when I wrote my article Buyers’ Guide – Prime Lenses vs Zoom Lenses in which I came down in favour of primes (my personal preference). Some readers quite correctly pointed out that the convenience of zooms makes them invaluable in certain situations. I realized that I was imposing my preferences on other people.

The three lenses I couldn’t do without

So here’s my question. If you could only own three lenses, which ones would they be? That’s right, three lenses to cover you for all the types of photography that you do. And, taking it further, if you could only own one lens, which one would you choose?

It’s a hypothetical question for most, as we are free to buy as many lenses as we like. But there is a semi-serious point behind it. Creativity works best within constraints, and limiting your lens collection to three is certainly a constraint. Also, it is possible to put together a good selection of three lenses that cover you for most situations on a limited budget – there is no need to spend many thousands of dollars on expensive glass if you can’t afford, or don’t want to.

Before you give your answer, have a think about your requirements, because they will drive your choice of lenses. These are my requirements:

  • My lenses must be light and relatively small. I don’t want to carry around a large, heavy bag full of gear.
  • My lenses must be good value for money. I don’t have a budget as such but when I buy a lens I need to know that I will use it a lot, it will last for decades and that I won’t have buyer’s remorse.
  • The autofocus must be reasonably quick and quiet.

To get the debate started, here’s my choice of three lenses, in order of preference. Bear in mind that I’m a Canon user so that naturally influences my choice of lens, and that I use a full-frame camera.

85mm f/1.8 lens

This is my favourite lens. I use the 85mm f/1.8 for portraits, close-up photos and landscapes that benefit from selective framing and compression. It’s light, relatively inexpensive and the image quality is excellent. The only weakness of this lens is that the minimum focusing distance is 85cm (2.8 feet), so it is not so good for close-up photography. I get around that by attaching a 500D close-up lens (this is technically a lens, although I think of it as a filter and I’m not including it in my choice of three) which gives me excellent quality for close-up images as long as I stop down to f/2.8 or smaller.

Camera lenses

The 85mm f/1.8 lens is ideal for portraits, especially those taken in low light, like this one.

Camera lenses

The 500D close-up lens that I use with my 85mm lens for close-up photography.

40mm f/2.8 pancake lens

While I love the quality and versatility of 50mm prime lenses, they are too middle of the road in terms of focal length for me to include one in my choice of three. Instead, I’m selecting the Canon 40mm f/2.8 pancake lens. I love this lens because it is extremely small and has high image quality. On my full-frame camera the focal length sits on the borderline between wide-angle and normal focal lengths, and turns out to be a surprisingly useful focal length. I use this lens a lot and I love it.

Camera lenses

The 40mm lens is ideal for scenic photos like this.

Camera lenses

The 40mm lens is also idea for photos where the composition demands a gentle wide-angle, in this case for the converging verticals effect created by shooting from a low viewpoint.

24mm f/2.8 IS lens

This is the newest addition to my lens collection and while I’m still getting to know it, the 24mm f/2.8 become one of my favourites. There’s something special about the 24mm focal length – it’s ideal for landscapes and scenic photos without being too wide. The maximum aperture of f/2.8 is a little limiting (I like to experiment with wide apertures for creative effect) but I can live with it as the lens is much lighter, cheaper and smaller than the Canon 24mm f/1.4L lens.

Another thing I like about it is the Image Stabilizer (IS). Theoretically with this engaged I can handhold the camera at shutter speeds down to around 1/2 second and still get sharp images. Yet anything moving within the frame will record as a blur – lots of creative potential there.

Camera lenses

The 24mm lens is great for environmental portraiture, where you want to show you subject and include a dramatic background.

If I had to chose just one of these lenses, what a difficult decision! If I could only ever have one lens, and it had to be one of these three, I think I would go for the 85mm f/1.8. Otherwise I would go for something like the Canon 24-105mm f/4L lens. It’s bigger and heavier than my primes but it covers a very useful set of focal lengths.

Your choice

Now it’s your turn. If you could only own three camera lenses, which ones would they be? If you could only own one lens, which would you choose?  Please let us know why. What are your personal requirements? It should make for an interesting discussion.


Understanding Lenses ebook bundle

Understanding Lenses ebooks

My ebooks Understanding Lenses Part I and Understanding Lenses Part II will help Canon EOS owners decide what lenses to buy for their cameras. They are both filled with lots of tips to getting the most out of your Canon lenses. Click the links to learn more.


The post Which Three Lenses do You Need for Photography? by Andrew S. Gibson appeared first on Digital Photography School.


Digital Photography School

 
Comments Off on Which Three Lenses do You Need for Photography?

Posted in Photography


Tips on How to Get New Photography Clients

27 Aug

Aaaaghhhh!!!! Why aren’t people knocking down my door to get me to photograph their most precious moments?!

We’ve all said this. We’ve all had those moments where we just don’t understand where the people are, or the ones that will pay us are. Or you’ve finally built a business and now it’s time to move. I get it.

MonicaDayDPSMarketing-01

I’m a military spouse. I move…a lot. I have to rebuild my business every two to four years. But I’ve done it, and so can you. You don’t have to be a military spouse to benefit from these tips. They can be applied to a new business, a new market, a new city, or a new focus of your business. I’ve implemented these and have been able to standout and be successful in the places I’ve lived.

So here are some tips on how to get new photography clients:

1. Get Involved

I’m sure you’ve heard it before, but I’m saying it anyway. Get involved. How will people know who you are if you don’t put yourself out there? Attend events, your children’s functions, community markets and festivals, and anything that’s going on in your target area. Talk about what you do.

MonicaDayDPSMarketing-02

2. Network

Networking and getting involved are close, but not quite the same thing in my book. When I network, I do so with others in the industry. This means that I seek out hair stylists, makeup artists, wardrobe stylists, designers, models, and even other photographers. These can be great sources of leads.  When I moved to Boston I hooked up with a hair stylist/makeup artist that I’ve worked with continually. I send her clients and she sends me clients. Most of the time we are working together, but I can also refer her to other photographers. This has helped her see the value in continually referring her clients to me.

Do you get your hair done? Your makeup or nails? Bring up what you do in a casual conversation with these service providers. They’ll remember…trust me.  Keep the door of communication open and use them when you can.

3. Build Your Portfolio

Portfolio building is great whether you’re brand new to photography or if you’re a seasoned veteran.  This is a great way to get people talking about what you do. It’s also a great way to find your favorite spots in the new area. I portfolio build whenever I get to a new area. I’m not shooting for free though. I will charge a very reduced price and run it as a special. Don’t give them everything for nothing but be sure to offer them a deal that can’t refuse, or won’t want to.

Whenever I’m portfolio building I have an end goal in mind. I will heavily style these shoots. I will pick out wardrobe, makeup, hair, and location. Use this time to get those key shots that will showcase your new city. Your keywording in blog posts will make much more sense when the images show the actually place you’re targeting.

MonicaDayDPSMarketing-03

4. Blog

We photographers are always trying to figure out a way to move up the search engine rankings. Well here’s a tip. Blog.  That’s right. Blog, blog, blog. Blog about your upcoming move. Blog about your new business. Blog about your preparations. Blog about your work. Be sure to keyword your images and blog posts. Learn good SEO practices and implement them. While word-of-mouth has been one of the best ways I’ve attained new clients, my blog posts bring in quite a few too. People like to search for images, and when they see one they like, they tend to look up the photographer. You want to be that photographer.

MonicaDayDPSMarketing-04

5. Creative Projects

This goes along with portfolio building but is more focused towards shooting projects for fun. The ones that your clients might not “get”, but will get great feedback on Facebook and other social media outlets. These also help you keep your creative juices flowing while you’re building your business in a new area. I love doing “for me” project because there’s no pressure. There’s no pressure to please anyone but me.

So how does this creative project get you new clients? Well, you’re most likely working with hair stylists and makeup artists for this project. You actually put in work to find them because there’s no pressure. These new connections can refer their clients to you. You didn’t seek hair and makeup professionals? No worries. Your amazing photos will be shared on social media and increase your exposure. You’ll also be posting this entire experience on your blog. Your amazing images will catch the eye of new people.

MonicaDayDPSMarketing-05

This image was taken during a photographer shoot out. This image alone brought many new people to my page and brought exposure to more new clients.

6. Maintain Relationships

I get a lot of repeat business from clients from other areas. That’s right. I get repeat business from clients in other cities. One of the most lucrative things I do is the traveling session. I will host boudoir marathons, mini-sessions, etc., in cities that have a substantial group of clients. That way I can capitalize off of all the work I’ve done, and maintain these people as my lifelong clients. Not all of your clients will wait for you, but many will. It’s important to keep those relationships positive. This world is small and your past clients can be your biggest cheerleaders.

I have photographed this family 3 times. They are even coming to visit me in my new location for another family shoot.

I have photographed this family 3 times. They are even coming to visit me in my new location for another family shoot.

Try this tips out and stay in front of your target market. Remember, people won’t know you’re around unless you put yourself out there.

You can also read these dPS articles for more tips:

  • How to Get More Referrals Than You Can Handle
  • 36 of the Best Online Tools to Boost Your Photography Business
  • The Ultimate Guide to Going Pro as a Photographer

The post Tips on How to Get New Photography Clients by Monica Day appeared first on Digital Photography School.


Digital Photography School

 
Comments Off on Tips on How to Get New Photography Clients

Posted in Photography


Using Humor In Street Photography

26 Aug

Humor may very well be the toughest assignment the street photographer will take on. It takes a keen eye to see humor in the streets and some skills to capture it in a fraction of a second. Here are a few things to consider before you head out on a quest to photograph humorous situations in the streets:

Humor can be subtle ©Valerie Jardin

Humor can be subtle ©Valerie Jardin

Story in a frame

Just like a good joke, no explanation should be necessary. A catchy caption should suffice to enhance the humor conveyed in the image. Many newspapers used to have a ‘feature’ picture in every issue. Many still do. Think of it as a visual treat for the reader. Its purpose is to provide a break from all the dreary news that fill the newspaper pages.

Cultural differences

Different cultures have a very different sense of humor. What may be funny in one country, can be interpreted entirely differently in another. What one photographer finds funny in one part of the world, can even be considered offensive in an other. Yet, thanks to the Internet, those cultural boundaries are becoming softer, as one is exposed to the world at large with the simple click of a mouse.

Tired Tourists ©Valerie Jardin

Tired Tourists ©Valerie Jardin

Funny is a personal thing

‘Funny’ is very subjective and personal. What I find funny may leave you completely unresponsive. This is not only a cultural difference, but also a personal one, based of life experiences. Age, gender, culture, education, etc., will all play a part in what qualifies something as funny.

Practice seeing first

How do you practice? Instinct and the ability to anticipate are skills the street photographer acquires with experience, and a lot of practice. The more you walk those streets with your camera, the more in tune you will be with the world around you. As a street photographer you constantly scan your surroundings. No expression or gesture escapes you, the challenge is to record that story in a frame.

Humor adds another level of difficulty to your street photography. The opportunities are there but they are often very subtle and extremely fleeting. I recommend practicing ‘seeing’ first and become proficient at telling a story in a frame, before you add a new dimension to your street photography with the element of humor.

Legs ~ ©Valérie Jardin

Legs ©Valérie Jardin

Funny versus Ridicule

Is everything that looks funny also fair game? I believe that the number one rule in street photography is respect. Humor is great, making ridicule of your subject is going too far. Turn it around. If it were you in the picture, how would you feel? Would you mind it being posted on social media for everyone to see? If the answer is yes (you would mind), then you should probably think twice about using the image.

Caption this! ©Valerie Jardin

Caption this! ©Valerie Jardin

What works

In general, contrasts will make people smile, so will extreme situations or juxtapositions. The unexpected and the unusual are also often winners in conveying humor. Sometimes several components come together in a fleeting moment and you only have a fraction of a second to record it. This requires some quick thinking and a very good knowledge of your gear so that it doesn’t get in the way. Ideally, it should become an extension of your vision. Other times, a bit of planning, a certain degree of patience and some luck will all come together and give you the shot you envisioned. Setting a stage as a way to gain some control of the situation is a great way to capture some funny situations. You can position yourself in front of a billboard that will make the situation funny when the right protagonist enters the frame.

This mannequin was the perfect opportunity for a fun shot. During my NYC street photographer workshop, one of my students managed to capture this shot. She found her stage, envisioned the shot, was prepared and grabbed the opportunity when the right subject entered the frame. Well done Yevette! ©Yevette Handler

This mannequin was the perfect opportunity for a fun shot. During my NYC street photography workshop, one of my students managed to capture this shot. She found her stage, envisioned the shot, was prepared and grabbed the opportunity when the right subject entered the frame. Well done Yevette! ©Yevette Handler

It is often better to let your camera do some of the work. Practicing street photography is not the best time to show your skills in full manual mode, you’ll probably miss the shot!

It is clearly impossible to set out with the expectation of capturing humor in the streets every time you go on a photo walk. You can certainly train yourself to see better and work at increasing your response speed to a situation. Serendipity will play a big part in the outcome of your quest to find humor in the streets. The more you train yourself to observe the world around you, the more prepared you will be to get the winning shot.

I highly recommend you check out the work of amazing photographers such as Martin Parr and Elliot Erwitt among others for some inspiration.

Now get out there and shoot! Please share your images in the comment section.

The post Using Humor In Street Photography by Valerie Jardin appeared first on Digital Photography School.


Digital Photography School

 
Comments Off on Using Humor In Street Photography

Posted in Photography


Top 5 Best Smartphones for Photography in 2014

25 Aug

In just a quarter decade’s time the cellular phone has morphed from being a novelty item like a car phone to powerful “smart” machines capable of more than anyone imagined. According to the latest Pew Research poll, 90 percent of Americans have a cell phone, and 58 percent of Americans have a smartphone. Nearly all cell phones and smartphones have Continue Reading

The post Top 5 Best Smartphones for Photography in 2014 appeared first on Photodoto.


Photodoto

 
Comments Off on Top 5 Best Smartphones for Photography in 2014

Posted in Photography


10 Tips to Improve Your Food Photography

25 Aug

Have you ever tried shooting food? If you have, then you know how hard this can be. There are so many things you have to think about while making sure your food looks as fresh as it can be at the same time. Here is a beginner’s guide to help you get the food shots you’ve always wanted.

01 Food Photography Tips

#1. Do NOT use your on-camera flash

You probably know this already, but I just have to mention this here to make sure. After all, this is Digital Photography School. Your on-camera flash looks horrible on food. You will get loads of specular highlights on any area that has moisture, and these specular highlights are not only distracting, but will make your food look greasy instead of moist. You will also get strange and unattractive shadows either on your food, on the plate, or both. On-camera flash is so harsh. Food usually looks its best with soft light. The shot below on the right has soft backlight coming from a window in a restaurant.

02 No On Camera Flash

#2. Shoot on a tripod

Ok, I just heard all the booing and hissing from this tip but, since I just told you not to use your on-camera flash, you are going to have to shoot using a tripod instead. I actually love shooting on a tripod and I use one anytime I can. Try it! It will completely free up your hands to style your dish, in order to work on your shot. I am a commercial food photographer, so I am either shooting in my studio or some other controlled environment where I can use tripods, so this tip is for those situations.

03 Use a Tripod

Notice in the image above right, there is a a nifty tripod arm extension enabling me to get the camera out over the set. If you are trying to hand hold a camera AND shoot overhead, just schedule an appointment with your chiropractor right now! Not only is it back-breaking to shoot overhead like that, but it’s impossible to line up your shot exactly the same way each time you take a shot. Lock it down on a tripod, focus your set once, then start styling your food.

#3. Or use a high ISO instead of a tripod (last resort)

Now, if you can’t shoot on a tripod for some reason, for example maybe you are shooting an event and have to gets shots of the food, then you have the option of raising your ISO setting on your camera to accommodate for the lack of light. I use this as a last resort. You must keep in mind that raising your ISO will increase the digital noise in your file. Depending on your camera, the digital noise could be very severe if you are in a very low light situation. See in the image below the difference between shooting at ISO 100 and ISO 1600 on a Canon 5D Mark II.

04 High ISO Grain2

For the most part, you can get away with digital noise when using images for the web because of the lower resolution. However, if you need to have the image printed, then this is where you might run into problems with the digital noise. It can be very hard to correct out of the image AND keep the image in sharp focus at the same time. Applications that can correct digital noise in software do so by softening the edges of the pixels creating the noise. This gives the appearance of the image being a little soft with the focus afterwards.

#4. Please use props – but not too many

I see so many food blogs with shots of food in a plate, or a bowl, with nothing else in the shot. This to me is just a documentation of a food dish. There’s no story behind the image when you have no props. I get it – it takes more time. But, if you start real simple, props can dramatically improve your photos. Notice in the shots below that all the props are secondary – meaning the first thing your eye goes to is the pasta in both shots. All the props are low key and not distracting. It’s still all about the food, but it gives the food some visual support to get your viewer to look at your photos. There is a fine balance between just the right amount and too many props that take your eye away from the food.

05 Props Pasta Dishes

You are telling a story with your props. The story of the two images above is that these are nice pasta dinners. That’s it, real simple. You need to use the placement of your props to get the viewer’s eye where you want them to look. The first thing we see in an image is text, if there is any. Second will be a blaring highlight or a very bright color. Third, we look at what’s in focus. Your props should guide your viewer’s eye to look exactly where you want, and eliminate any distractions along the way. If you have a blaring highlight on something that is catching your eye, then guess what, your viewer is going be looking at that same highlight too, so get rid of it, or put a prop in front of it. Get your viewer to look at your food.

#5. Stay away from bold patterns on plates and fabrics

Food photography is all about creating an image that naturally has the viewer’s eye looking right at your beautiful food. As I mentioned above, all the fabulous props in the shot are just the supporting actors in your story. If you have a crazy pattern on a plate, your reader is going to look at the crazy pattern first, then your food (hopefully) second. Your story is not about the plate. Your story is about your food. You might be in love with that pattern on the plate but that’s probably not what your image is about. Beloow is a shot before props have placed, to give you a sense of how the food looks on different plates.

Biscotti Plates

I will test plates with food just like this to find the right one for the photo I’m doing. The problem with patterns is there will be areas of the pattern that will be in focus and competing with the food. A colored plate can be great as long as the color is complementary or a nice contrasting color. Then, white or cream will always make your food stand out.

The same rules generally applies to table clothes and fabrics as well. We never use bold patterns on the surfaces we shoot on. I’m saying “we” here because when I am shooting a job I have a food stylist AND a prop stylist. We all work together in making a shot for our client that is all about their food. When you are shooting on fabric with a bold pattern, that bold pattern will absolutely compete with your food. It’s just human nature. Our eyes are so easily distracted and you only have a few seconds to get your point across to your viewer, don’t blow it on some crazy pattern on the table.

# 6. Get vertical!

07 Get Vertical

Many people take all their photos in a horizontal format. I understand why, it’s a lot more comfortable to work that way. When shooting vertically, all your settings are now on the side and if you’re on a tripod you have to keep cranking your head over to see them. Well, you just have to suffer through it! Shooting vertically can give you nice depth in a photo from foreground to background. This also enables you to have large photos on your blog, if you have one. Shooting vertically can give you room for text like a title. Many sharing sites like Pinterest are better with vertical shots, so think about how this image will be shared and go from there. Mix up the images on your blog. Have some vertical photos and some horizontal ones as well. If you do everything the same way it can get very boring.

#7. Go ahead, crop that plate

The other habit I see a lot of new students doing is being afraid to crop into plates. Here are two shots. One full frame and one cropped in. Now, of course it depends on how the images will be used, and sometimes you might even need two formats of the image, but play around with cropping an image to see if you like it better. It’s okY to crop the plate. You are not selling the plate, remember, so show off that food a little more.

08 Crop 1

Now for the cropped version – a lot fewer distractions and it’s all about the food.

09 Crop 2

#8 – Back up and zoom in

Every student wants to know, what is the best lens for shooting food. For my 35mm DSLR (full frame), I’m always using my 100mm macro lens. I use this about 90% of the time. You really can get great depth of field with that lens. Here is shot I took with three lenses. Many people have a 50mm lens because that is what came with their camera. The only time I use that lens is when there are several dishes on the table that I have to get in one shot. That type of shot requires a wider angle lens, like the 50mm or the 35mm. When I am only focusing on one dish in the shot, I will always use my 100mm macro lens.

10 3 lenses

When using wider lenses, like the 50mm or the 35mm lens, you will need more background in your shot. Also, the wider the angle of your lens, the harder it will be to get very shallow depth of field, unless you get real close to your food, and open up that lens by opening your aperture. Depth of field is referring to how much is in focus versus out of focus in your shot. Which leads me to the next tip…

#9. Use a small f-stop number to get shallow depth of field

The f-stop, or aperture, controls the opening of your lens that lets light into the camera. The f-stop also controls how much of your image will be in focus, and how much will be out of focus.

Here is an f-stop grid showing the most common f-stops that many lenses have. Some lenses don’t open as wide as f/1.4. It seems to be that the more expensive the lens, the wider the f-stop. For instance, the higher end 50mm lenses will go to f/1.2, but you’ll pay for that in cost.

11 Apertures

When you are just starting out, f-stops, or apertures, are very confusing to learn about. You see, the smaller the f-stop number, the LARGER the opening. It’s very counter intuitive. What I always say in class is, the smaller the f-stop number, the smaller your depth of field and the larger the f-stop number, the larger your depth of field. This gives you such creative control with your images. I always suggest you shoot your food with a very “shallow depth of field”. This means less things in focus. See the two images below:

12 Apertures examples

The image on the left has shallow dept of field because I am shooting at f/5.6 on a 100mm macro lens. This shot is all about the olive oil, so that was the only thing I wanted in focus. The shot on the right was shot at f/16 and has a much larger depth of field (more things in focus). I find this distracting. There’s too much in focus and your eye bounces all over the place (see more in my article: Using Focus Creatively with Food Photography. You use your f-stop to control what you want to show in focus. As a very general guide, the f-stops for shallow depth of field are usually from about f/5.6 and below (this can also depend on how wide your lens is as well).

Now, if I was photographing a Thanksgiving table with loads of dishes on it that I wanted in focus, then I would definitely use an f-stop like f/16 or even f/22 with a wider lens, like a 50mm or even a 35mm lens.

#10. Keep your food looking fresh on set

Here I am painting a steak with butter to make it look nice and moist. I’m using butter because when they serve this steak at the restaurant they have melted butter all over it. You can also use vegetable oil, or water and glycerin, or just water on foods. If the food has an oily or fatty content, like meats and poultry do, then use vegetable oil. If you are keeping salad moist, you can just spray it with water.

When shooting burgers, I am always painting an TON of oil on the beef to keep it looking really juicy. There is nothing worse than a dry looking steak. Yuck. Who wants to eat that?

13 Food Fresh

To keep foods that can oxidize looking fresh, use Fruit Fresh or Accent on them. You can usually find these in the spice section of the super markets. I highly suggest you do not eat the foods that you treat with this stuff. It’s actually MSG. I use it two ways. I will soak things that turn brown, like artichokes and pears in a solution of 2 cups water with a few tablespoons of the MSG. The other way I use it is by taking the same solution and painting it onto the food once it’s on set to make sure it doesn’t turn brown.

When I tell people this trick they say, “oh, you can just use lemon”. Lemon works, just know that you will have to keep reapplying it.

14 Food Fresh

This image below would not be possible without using Accent or Fruit Fresh. Artichokes turn brown right away when you cut into them. I soaked both sides in a bath of a lot of Accent and water. I soaked them for 30 minutes too. This artichoke didn’t turn brown for hours!

15 Artichoke

All right! There’s so much more I can say here but hopefully some of these tips will inspire you to try to take your food photos to the next level.

For more food related articles check these out:

  • Food Photography Tips – Some Video Tutorials
  • 5 Tips to Seriously Improve Your Food Photography Techniques
  • 8 Steps to Create Mouth Watering Food Photography
  • 11 Quick Food Photography Tips to Make Mouth Watering Images
  • Snapn Food Guide a sister dPS ebook company

The post 10 Tips to Improve Your Food Photography by Christina Peters appeared first on Digital Photography School.


Digital Photography School

 
Comments Off on 10 Tips to Improve Your Food Photography

Posted in Photography


Portfolio: Todd Bretl’s captivating underwater photography

24 Aug

Todd Bretl says he asks himself ‘Would I hang this on my wall?’ when he’s composing his photos of marine life. Challenging himself with this question has helped him produce some stunning works of art. Some of his images call to mind glass sculpture, while others capture the wildness that thrives below the water’s surface. He answered our questions about his process and gear – take a look at some of his work and find out more about how it’s created. See gallery

Articles: Digital Photography Review (dpreview.com)

 
Comments Off on Portfolio: Todd Bretl’s captivating underwater photography

Posted in Uncategorized


Readers’ Showcase: Macro photography

24 Aug

While it’s easy to get swept up in the stream of announcements over the next few weeks, it’s also a good idea to remember why we buy that gear – to make great photos. What better way to do it than to showcase the excellent work of our own community? This week we asked users of our Macro and Still Life Photography forum to submit their favorite macro shots for inclusion in our Readers’ Showcase. Unsurprisingly, we saw a lot of great work. See gallery

Articles: Digital Photography Review (dpreview.com)

 
Comments Off on Readers’ Showcase: Macro photography

Posted in Uncategorized