RSS
 

Posts Tagged ‘Photography’

SOOC Studio is a portable, foldable photography studio with LEDs

18 Jul

A group of industrial design students in South Africa has introduced SOOC Studio, a portable photography studio with integrated LED lighting sold in limited regions by their company WhiteBison. SOOC Studio folds into a compact shape with a handle and shoulder strap easy for carrying. When unfolded, it transforms into a white photography studio with integrated 6000K LED strips. Read more

Articles: Digital Photography Review (dpreview.com)

 
Comments Off on SOOC Studio is a portable, foldable photography studio with LEDs

Posted in Uncategorized


How to Get Started with Off-Camera Flash Photography – Start With One!

16 Jul

I was prompted to write this article in the hope of answering the many questions I get asked about flash photography: “I find flash photography very confusing…What do all those numbers mean at the back of the flash…What does TTL mean…What does flash-sync mean?”

This article isn’t about explaining all the technical ins and outs of flash photography, far from it. Instead, I hope to show you how to get started using off-camera flash, by using ONE flash essentially. Okay, you will need a few other items but I’ll get to that shortly.

Emmet-on-car-bonnet-with-flash

Emmet sitting on the hood of a car. Background created using one speed light attached to the steering wheel inside the car.

I like using speedlights because of their portability. When I use these small flashes, particularly outdoors, I am able to scope and think more on my feet. I am physically moving about and placing the flash, that’s on a light stand, in different positions relative to my subject or object. This allows me to visualise the type of shot I want to achieve. For the purpose of this article, I will use the same gear for all the techniques.

Camera Settings

In order to keep things simple, and not get bogged down in too much technicality, your camera settings can only use ONE aperture setting and ONE shutter speed. The flash can only use ONE power level. Flash level is stated in fractions of full power, such as on my flash: 1/128. 1/64, 1/32, 1/16, 1/8, 1/4, 1/2, up to full power, or 1/1. The camera and the flash are going to be set to manual mode.

When shooting outside, the ambient exposure, which is the available light (sun) is controlled by the shutter speed (and technically the aperture too). Just remember that the ambient light isn’t fixed (like in a studio setup with continuous lighting) so it’s constantly changing.

The flash, being instantaneous, is controlled by the aperture. I’m going to ignore ISO here. Well, I’m not quite ignoring ISO but I’m going to leave it at 100 for quality. Set your flash sync-speed to its maximum, usually 1/200th or 1/250th depending on the camera you are using (check in the manual for your camera if you aren’t sure). This will allow you to use the widest possible aperture.

Exposure

You will need to have a good understanding of exposure and how to change aperture, shutter speeds and ISO settings. See Darren Rowse’s article, Learning about Exposure – The Exposure Triangle for a refresher. Bear in mind that this article isn’t aimed at photographers who are new to photography but photographer’s who are new to off-camera flash.

What gear will you need?

  • A camera and a lens: For the following shots, I used a Nikon D750 with a 24 – 120mm f/4 lens.
  • A stand-alone flash unit that can be adjusted manually.
  • Wireless flash triggers: Nikon has the CLS system, which can fire an external flash remotely.
  • A light stand: I also used a Joby Gorilla tripod as a light stand.
  • A diffuser, or light modifer of your choice: I used a white shoot through umbrella.

Low-light conditions

Amy-no-flash

My daughter taken in low-light.

I literally grabbed my daughter and went outside our house to take the following shots. The first shot, as you can see, was taken with no flash. This was about 5:20pm in the evening.

Amy-with-flash-no-diffuser

The flash is on a light stand, 2-3 feet away on the subject’s left side. The angle is about 35 degrees set to flash level 1/8 power.

For the second shot, I set my flash to 1/8th power, which is where I generally start. I had the flash on a lightstand 2-3 feet away to the left of my model, roughly at 35 degrees angle, with no diffuser on the flash. As you can see, the shadows are too harsh. I wanted to take another shot and move the light stand further back. Unfortunately, the weather changed and it started to rain!

Amy-with-flash-umbrella

I added a shoot-through white umbrella to the flash. Umbrellas are a great modifier to create a much softer light.

This shot was taken the following day, same time and setup. But I added a white shoot-through umbrella on to the flash, to illustrate how effective this modifier is. Umbrellas are so inexpensive, and work really well to create a soft light. You can see that the shadows have become softer but they are still too strong (dark). However, my daughter’s patience ran out and no amount of bribes would make her stay for more shots!

So I took the advantage of the rain and the low light conditions. Instead of a real model, I improvised with Emmet and put him on top of the hood of the car. I attached my flash to the steering wheel inside of the car with a Joby Gorilla tripod. That way, I wasn’t concerned if it started to rain while I was shooting. I had the flash power set to ¼, as I knew the hood of the car would provide a nice bounce. I had never tried this before so it was an experiment for fun; I was happy with the end result.

Emmet-on-car-bonnet-no-flash

Emmet on the hood of a car – no flash fired in this shot.

Emmet-on-car-flash-on-wheel

Flash attached to the steering wheel on the inside of the car.

Title-Emmet-on-car-bonnet-with-flash

Overcast dull days

When days are overcast and dull, it is a good opportunity to get out and start using off-camera flash. The light is even and it acts like a big diffuser. This helps you to concentrate on balancing the ambient light with the flash.

Wilson-overcast-day-no-flash

Wilson shot on an overcast, dull day – background overexposed, sky detail is lost. No flash fired.

I placed the flash (on a Joby tripod) to the left of Wilson, roughly 4-5 feet away with an opaque plastic diffuser on. I wanted the light from the flash to be directed at the same level as Wilson. By adjusting the shutter speed, I was able to expose the background better. I had the flash set to 1/8th power, I wanted just enough fill light from the flash to give Wilson more depth.

Wilson-overcast-day-with-flash

I increased the aperture to bring back some detail in the sky. The flash acted as a nice fill-in or balance against the ambient light.

I moved to a different location but it was the same overcast conditions. This time, I wanted to change the direction of the flash and create a different shot. So I put the flash, still attached to the Joby Gorilla tripod, high up on a branch of a tree.

flash-in-tree

I still had my flash attached to the Joby Gorilla tripod from the previous shot. I then hung it upside-down and wrapped it around the branch of a tree.

Wilson-sun-dapple-no-flash

Wilson set against a backdrop of a woodland. No flash fired.

I wanted to appear as if the sun was shining down through the trees on Willson. By placing the flash high above, and behind Wilson, I was able to achieve this effect. I had the flash power set to ½ and took off the plastic opaque diffuser. I had to take a few shots before I was happy with this one. That’s the fun in this type of shooting, you are experimenting and learning as you go.

Wilson-sun-dapple-with-flash

By hanging the flash high up in the tree, it created a sun-dapple effect on Wilson.

Bright Sunny Days

I love the sun. Especially when there are blue skies and only a tiny whisper of a white cloud. However, in photography terms, this light is too harsh. In the middle of the day, the sun shines directly overhead and usually casts strong shadows on your subject (usually the face). If you face your subject looking into the sun to eliminate these strong shadows, your subject has to squint from the glare of the sun! So, by placing your subject with the sun behind them, your camera metering exposes the background correctly and your subject is too dark. Hence, you meter your subject for a correct exposure and then your background is overexposed.

This is where your external flash comes in handy. I brought Wilson to the beach. The day was sunny and it was late afternoon. I placed Wilson on the sand with the sun behind him.

Wilson-on-beach-no-flash

Wilson at the beach with the sun high and slightly behind him. No flash fired.

The flash was placed to the right of Wilson about four feet away. I had the diffusion plastic dome on the flash.

I didn’t achieve the shot I wanted when I reviewed my photos later on the computer. I noticed a slight hotspot on Wilson which is always a dead giveaway that you have used a flash. I wanted a nice balance between the ambient and the fill-in light from the flash. In hindsight, I should have experimented more by taking shots with the flash moved back or changed the direction slightly. As the day was very bright, I had set the flash power to ½, so I could have dialled it down! A good tip here, would be to take notes of your setup, so that you have a benchmark for similar future setups.

Wilson-on-beach-with-flash

Flash was to the right of Wilson, four feet away with a transparent dome diffuser on. Flash power set to 1/4.

Wilson-on-beach-rushes-no-flash

Another shot of Wilson on the beach. No flash fired.

Wilson-on-beach-rushes-with-flash

I placed the flash to the right of Wilson and the flash had to fire through the grass.

Tips:

  • Experiment with the distance of your flash relative to your subject as well as the direction.
  • If you are using an umbrella, get lots of sand bags to weigh the stand down firmly, or preferably get somebody to hold it. This is especially important on a breezy, or windy day. The light stand will take off like a kite with the umbrella attached. This happened to me. The umbrella broke but thankfully my speedlight suffered no damage. After all, umbrellas are way cheaper to replace than flashes.
  • Start with a low power level on your flash, such as 1/16 or 1/8th.
  • Put the flash sync-speed to the maximum to give you more latitude with your aperture.
  • Keep practicing before you’re ready to move on.

Conclusion

I hope that I’ve convinced you that off-camera isn’t as daunting as it may seem. However, it isn’t a one-click effect. It does take a bit of mastering. Don’t be afraid of not getting it right first time. If you can’t get a willing subject or model, go get yourself a Wilson! I chose a ball as it’s round and is a good substitute for a face. (Plus you don’t need to bribe a ball).

Do you use off-camera flash? Have any other tips for beginners? If so please share in the comments below.

googletag.cmd.push(function() {
tablet_slots.push( googletag.defineSlot( “/1005424/_dPSv4_tab-all-article-bottom_(300×250)”, [300, 250], “pb-ad-78623” ).addService( googletag.pubads() ) ); } );

googletag.cmd.push(function() {
mobile_slots.push( googletag.defineSlot( “/1005424/_dPSv4_mob-all-article-bottom_(300×250)”, [300, 250], “pb-ad-78158” ).addService( googletag.pubads() ) ); } );

The post How to Get Started with Off-Camera Flash Photography – Start With One! by Sarah Hipwell appeared first on Digital Photography School.


Digital Photography School

 
Comments Off on How to Get Started with Off-Camera Flash Photography – Start With One!

Posted in Photography


13 Great Subjects for Urban Night Photography

14 Jul

The great thing about night photography is that subjects that appear commonplace during the day take on a new, interesting appearance at night. Urban scenes are lit (or not lit) at night in fundamentally different ways that our eyes are not used to. The long exposure times required in night photography allow you to use different techniques to capture the scenes in creative and often dramatic ways. Plus you aren’t beholden to the sun’s rays and the changing daytime light.

Nevertheless, you may struggle with finding good subjects when you do have opportunities to get out and shoot at night. Further, you may not know what subjects lend themselves to great photographs at night, or overlook great scenes and subjects in your own city. Therefore, this article is designed to help you pick out some good subjects that might be right around the corner.

Obviously, the point here is not to limit your subject matter, but rather to show you things that might be nearby next time you are stumped for ideas. I hope you’ll use these subjects as starting points for your own thinking, and the go well beyond the ideas presented here.

1. Reflections

Great Subjects for Urban Night Photography - St. Paul reflection example

St. Paul’s Cathedral, London (Shutter speed: 1.3 seconds; Aperture f/8; ISO: 200).

Most cities have plenty of modern office buildings made of glass and steel. These are often not particularly photogenic subjects in themselves, but the glass and steel provide great opportunities for capturing reflections of anything nearby. At night, the glass can appear particularly reflective. The bright lights of the city at night will show up clearly in the glass of nearby buildings. The next time you are downtown, keep an eye out for reflections in those glass buildings.

Of course, water presents a great opportunity for capturing reflections as well. A very slow shutter speed will remove any ripples from the water and make the reflection show up more clearly. Using a slow shutter speed will not usually be a problem at night because your camera will be struggling to capture more light to achieve a proper exposure, but if it is just add a mild neutral density filter to your lens.

Keep in mind that the water with the reflection doesn’t have to be a lake or a river (although those often work great); sometimes just a puddle will do.

2. Streaking Lights

Great Subjects for Urban Night Photography - Arc de Triomphe example

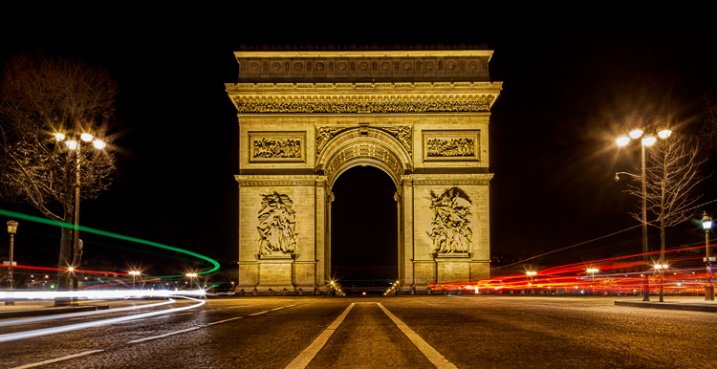
Arc de Triomphe, Paris (Shutter speed: 30 seconds; Aperture f/22; ISO: 50).

Streaking headlights and taillights from passing vehicles are a great way to deal with the problem of traffic in your picture, and as a bonus, it adds a sense of movement to your scene.

To include streaking lights, start by using a slow shutter speed. You will typically set a shutter speed of at least 15 seconds to allow enough time for the vehicles to move through your frame. Set a mid-range aperture (around f/8) and a low ISO (100) to accommodate the long shutter speed, then adjust from there depending on conditions. After that, just wait until traffic is about to enter your frame and trip the shutter. The shutter will stay open during the time the traffic moves through the frame and only the headlights and taillights of the passing vehicles will show up in your picture.

Where should you go to find good places for streaking lights? That depends. If you just want the streaking lights to accentuate a picture of something else, then you can go anywhere. If you want the streaking lights to be the cneterpiece of the photo, however, you will need to find a place where you can overlook a highway or major street. Bridges and overpasses work great for this. In addition, parking garages that are next to a highway can work great as well (if you can access them).

3. Skylines

Great Subjects for Urban Night Photography - NYC skyline example

Midtown Manhattan, taken from Roosevelt Island (Shutter speed: 10 seconds; Aperture f/8; ISO 100).

Skyline shots nearly always look great at night. In every city, the buildings will be lit, and will contrast against the black sky. Further, you don’t have to worry about a lot of things that cause problems during the day. For example, there will be no glare from front-lit buildings, or shadows from backlit buildings. For the most part, cloud conditions do not matter.

The key is to find a good vantage point. If your city has a river or bay your can shoot across, those make great spots. Another good choice is a high spot overlooking the skyline (look for overpasses of highways leading into downtown). Make liberal use of Google Maps’ street view to find good vantage points.

4. Monuments

Great Subjects for Urban Night Photography - Alamo example

The Alamo, San Antonio, Texas (Shutter speed: 13 seconds; Aperture f/16; ISO: 100).

The best part about photographing monuments at night is that they are usually well-lit. Further, the night provides a different perspective on a monument that might otherwise be commonplace.

The worst part about monuments is that, even at night, they can attract a lot of people. The long exposures required at night can help you eliminate them though. By using an extremely long shutter speed (over 30 seconds, so you will need to use Bulb mode), any people that happen to walk through your view will not show up in the final picture. Of course, if the people happen to stop walking and stand around in your frame, they will show up and you will have to use the Clone Stamp tool in Photoshop later to get rid of them.

Remember that many times the lights of monuments are not kept on all night. They seem to go out around midnight.

5. Fireworks

Great Subjects for Urban Night Photography - St. Louis fireworks example

St. Louis, Missouri (Shutter speed: 6 seconds; Aperture f/3.5; ISO: 100).

It doesn’t have to be the 4th of July or some major celebration to find a fireworks display. Many cities and towns now have fireworks displays on a regular basis as a means to draw people to local business. For example, the picture above of fireworks over St. Louis was taken on a random weekend. In addition, I live near a lake in Texas that has fireworks every weekend during the summer. See if you can find a fireworks display near you.

The key to capturing fireworks displays is to use the right shutter speed, and time the explosions. A shutter speed of around 10-15 seconds seems to work the best. That provides enough time for the fireworks to fully explode, but is not so long that the fireworks don’t show up well. Trigger the shutter when you see the dot of the firework going up. That way your picture will capture the explosion from beginning to end. After a while, you’ll develop a feel for when things are about to happen based on the rhythm of the fireworks show and you can trigger the shutter then.

6. Individual Buildings

Great Subjects for Urban Night Photography - Dallas example

Building in downtown Dallas, Texas (Shutter speed: 13 seconds; Aperture f/16; ISO: 200).

Don’t overlook shots of individual buildings. I know . . . it sounds boring. If you photographed an individual building during the day, you would end up with something really uninteresting. But you’ll be surprised at how certain buildings look at night, be on the lookout for ones with interesting lights. There is no better way to find them than to just pound the pavement.

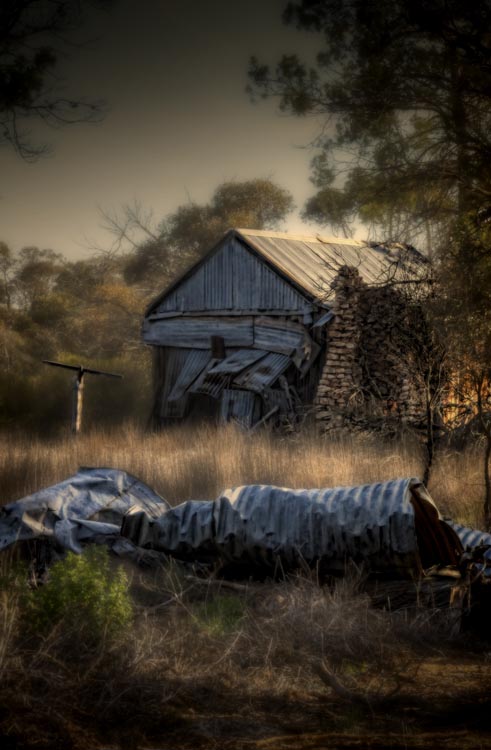
Don’t look just for brightly-lit buildings either. Industrial buildings and scenes have great shapes and textures to them, often better than anything modern. While you might not want to be trolling around in an abandoned factory, there are plenty of historical public structures or working factories you can photograph from the street.

7. Streetlights

Great Subjects for Urban Night Photography - London lights example

Gates and streetlamps between Green Park and Buckingham Palace, London (Shutter speed: 1.3 seconds; Aperture f/8; ISO: 800).

If you can find a row of streetlights, it will often make a great subject. It can also be a great way to accentuate a picture of something else.

Sometimes you will want to create a starburst effect to the lights. To do that, stop down your aperture to a very small setting, somewhere in the range of f/16 – f/22. The lights will appear to twinkle in the result.

8. Carnivals

Great Subjects for Urban Night Photography - State Fair example

State Fair, Dallas, Texas (Shutter speed: 10 seconds; Aperture f/22; ISO: 100).

Carnivals are all about bright lights, vibrant colors, and movement. As such, they can be great places for the prepared night photographer.

Carnivals don’t happen every day, so you’ll need to plan ahead. Most metropolitan areas have publications listing all upcoming events. If nothing else, you can check a guidebook for your city.

Once you are there, set your exposure so that your shutter speed is in the range of 8-15 seconds. That will capture the movement of the carnival in your shot. This will usually allow you to use a low ISO to keep noise under control and a moderate aperture so that you will have a sufficient depth of field.

9. Museums

Great Subjects for Urban Night Photography - Louvre example

The Louvre, Paris (Shutter speed: 1/8 second; Aperture f/4; ISO: 3200) Note: these settings were used because I was forced to hand hold this shot.

Museums are places that cities want to show off. As a result, most museums present dramatic facades, and are well lit at night. They are an easy way to find a good subject for night photography.

In addition, you will not have to search for museums. All museums will be listed in every guidebook or tourism website for your city. There are often several museums to choose from. Just find the most attractive one and check it out.

Once you get there, the key to success is composition. Start with the obvious frontal shot, and then work the scene from there, trying out different angles and perspectives.

10. Neon

Great Subjects for Urban Night Photography - Times Square neon example

Times Square, New York (Shutter speed: 3 exposures at .6, 1/6, and 2.5 seconds; Aperture f/16; ISO: 100).

Flashing signs are everywhere, and can be easily overlooked. Next time you are out, make a point to include the signs in your picture.

11. Overlooks and Views

Great Subjects for Urban Night Photography - Paris example

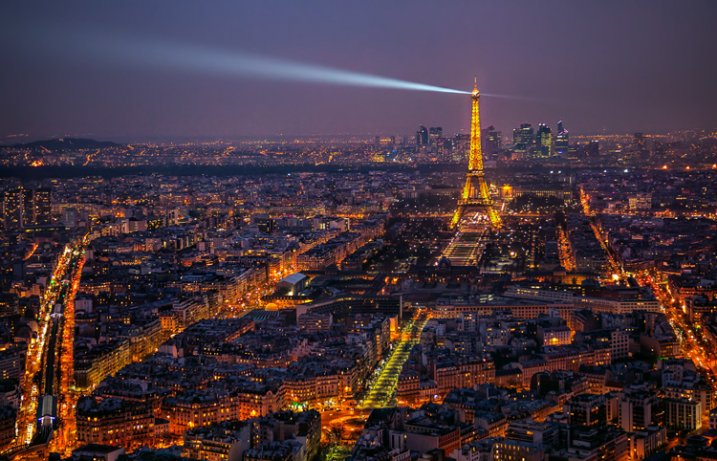
Paris at Night, Taken from the Montparnasse Tower (Shutter speed: 1/4 second; Aperture f/4; ISO: 800).

A good view can present a great opportunity for photography at any time, and nighttime is no exception. Be careful though – a great view does not necessarily make a great picture. The key to success often lies in the foreground. Make sure there is something of interest in the foreground draw your viewer into the great view.

Finding a great view can be difficult. This is particularly true at night, since often the parks or towers from which you capture the view are closed. The best way I have found to find great views is to use guidebooks for your city. Sometimes the guidebook will actually have a section on the best views. If that doesn’t work, take a look at the map on 500px to see what views others have found.

12. Bridges

Great Subjects for Urban Night Photography - Golden Gate Bridge example

Golden Gate Bridge from Marin Headlands, San Francisco (Shutter speed: 4 seconds; Aperture f/9; ISO: 800).

When in doubt, find a bridge to photograph at night. While your city may not have the Brooklyn Bridge or the Golden Gate Bridge, I can almost guarantee you that it will have a bridge, and that it will be well lit at night. Almost every city is built on a river or a bay, meaning there will be bridges. They are always lit.

The key is to find the best vantage point to view the bridge. In your quest to find this, there is no greater tool than the street view function of Google maps. Using Google maps, find the main bridge(s) of your city and then, at either end, virtually walk around using street view. Be sure you find a place to park as well, as this is often tricky around bridges.

Take special notice of the water under the bridge. There will be two effects related to the water. First, the long exposure time will smooth out the water. In rivers it will sometimes show a smooth current. Second, the lights from the bridge will often create reflections in the water. As such, if you can maneuver to use the water as your foreground, you may be rewarded.

When photographing a bridge, don’t overlook the passing traffic. You might be able to incorporate streaking lights from the cars as an element of the shot. As mentioned above, make sure you time the exposure right so that you start it right as traffic is about to enter the frame.

13. Fountains

Great Subjects for Urban Night Photography - Trafalgar Square fountain example

Fountain in Trafalgar Square, London (Shutter speed: 13 seconds; Aperture f/10; ISO: 100).

Many central plazas and squares are centered around a fountain, and these are usually brightly lit at night. They are great places to start when looking to photograph a city a night. What’s more, photographing at night works to your advantage when you find such a fountain. The slow shutter speeds that are required by the low-light scene allow the water to flow while your shutter is open. This makes the water appear smooth.

Start with a low to mid-range ISO (100-400) and a moderate aperture (around f/8). Start with these settings, then adjust your shutter speed to get the correct exposure ought to result in a sufficiently slow shutter speed to create the smooth, flowing water you want.

Conclusion

Night takes up roughly half of each day. Further, it is often easier to get out and shoot at night because most of our work and family obligations take place during the daylight hours. So get out and shoot in your town. Even if you do not live in a major city – many moderate-sized metro areas have most, if not all, of the same subject matter.

When you do start planning night photography, you’ll be surprised how many of the subjects above are near you. It just takes a little effort and advance thought. So check out the available subjects nearby and get after it.

googletag.cmd.push(function() {
tablet_slots.push( googletag.defineSlot( “/1005424/_dPSv4_tab-all-article-bottom_(300×250)”, [300, 250], “pb-ad-78623” ).addService( googletag.pubads() ) ); } );

googletag.cmd.push(function() {
mobile_slots.push( googletag.defineSlot( “/1005424/_dPSv4_mob-all-article-bottom_(300×250)”, [300, 250], “pb-ad-78158” ).addService( googletag.pubads() ) ); } );

The post 13 Great Subjects for Urban Night Photography by Jim Hamel appeared first on Digital Photography School.


Digital Photography School

 
Comments Off on 13 Great Subjects for Urban Night Photography

Posted in Photography


Pet Photography: 5 Simple Tips for Animal Photographers

14 Jul

For armature or professional photographers who use their skill for weddings, portraits, engagement, maternity or any other popular family photography, adding “pet photography” to your business card can be an added rise in business for you. How can a family photo be complete without Fido in the picture? Doing pet photography, or just understanding how to photograph a pet for Continue Reading

The post Pet Photography: 5 Simple Tips for Animal Photographers appeared first on Photodoto.


Photodoto

 
Comments Off on Pet Photography: 5 Simple Tips for Animal Photographers

Posted in Photography


4 Tips for Doing Photography on a Budget

14 Jul

Several times in the past few months people have asked me how to get into photography without spending a lot of money. I must admit the idea of emptying your wallet to get all the camera bodies, lenses, flashes, tripods, and other gear you need to do some serious photography can seem quite daunting, it certainly was for me when I first got bitten by the photography bug.

The good news is you don’t really need the latest, greatest, and most expensive gear to make some stunning images thanks to the magic of modern technology. In many cases all you need to do some serious picture-taking is the camera you probably already have with you: your smartphone. However as good as modern mobiles can be, they do have some serious limitations (particularly due to their small image sensors) like limited low-light capabilities, and non-zooming lenses. If you really want to up your game and take advantage of the bigger image sensors, larger lens selection, and incredible accessories available for DSLR or mirrorless camera without breaking the bank – here are a few options to get you started.

photographing-on-budget-beach-sparks

You don’t need a lot of money to take pictures like this. A basic camera and some creativity will do just fine.

1. Buy used gear

New cameras sure are nice, and I can certainly understand the desire to have a model with the most megapixels, best image sensor, highest ISO, fastest autofocus, and coolest bells and whistles. But, before you rush off to drop hundreds or thousands of dollars on a brand new model though, consider this – every picture you have ever seen was taken with a camera older than one you can buy today.

Think of the most famous photographs in history: A man facing down a row of tanks in Tiananmen Square. Muhammad Ali standing triumphant over a defeated Sonny Liston. The 1984 National Geographic photograph of a young woman from Afghanistan. These were all taken on film cameras, with capabilities outmatched in almost every possible way by even the cheapest digital camera today. Certainly new cameras make the act of taking pictures easier in many ways with bright screens, easy-to-use controls, and a host of other features designed to help you get the hang of your hobby. But if you’re pressed for cash buying an older, used camera can be just as good.

photographing-on-budget-cottonwood-borer

Photo of a cottonwood borer beetle taken with my old Nikon D200 that is far less capable than any new DSLR on the market today.

To put my money where my mouth is, I take most of the pictures on my weekly 50mm photo blog not with my new Nikon D7100, but with my ten-year-old Nikon D200, which can be found used online for a fraction of what a brand new camera costs today. It’s only 10 megapixels, and doesn’t have features like wi-fi, a tilting screen, or even the ability to use live view – but it allows me to take beautiful images and that’s often the only thing that matters.

Buying a camera just a few years old can save you significant amounts of money while giving you a high-tech photographic instrument that your photographic forebears from decades gone by would only have dreamed about. Older cameras like the Canon Rebel T2i, the Nikon D80, Olympus PEN E-P2 and many others don’t stack up to modern cameras when you look at marks on a checklist of features, but all of them are capable of producing amazing images, and can be purchased used for much cheaper than any new camera today. This applies to more than just camera bodies, and you can find very good prices on accessories like lenses, flashes, tripods, and other equipment too.

My brother took this shot with a ten-year-old DSLR and a macro lens he found when cleaning out his basement.

My brother took this shot with a ten-year-old DSLR and a macro lens he found when cleaning out his basement.

I prefer buying used equipment from sites that offer some type of warranty or trade-in period if you decide you don’t like what you receive. Two of my favorites in the United States are KEH.com and Adorama Used. Other sellers like B&H offer used cameras, and you can often buy refurbished equipment directly from camera manufacturers that even come with a warranty. Some photographers I know get a lot of high quality gear for cheap on sites like eBay and Craigslist as well. Be forewarned that sites like these often make no guarantees as to the quality of what you are buying, but as long as you are careful you can find some good deals.

For some buying tips read: How to buy used camera gear 

2. Make your own gear

If you’re like me you may find yourself scrolling through websites, or flipping through catalogs, dreaming of all the camera gear that you don’t have, mostly because so much of it is too expensive. While many common photography accessories can be purchased used, you can actually make your own versions for almost no money at all. These won’t stand up the the daily rigors of a professional photography environment, but most offer similar functionality as their full-priced name-brand counterparts for far less cash. From do-it-yourself tripods to homemade lighting kits, the internet is brimming with articles, videos, and tutorials for enterprising photographers looking to fashion their own equipment to save a buck or two. The end result might look the same as a professional product, but you may be quite surprised at what you can come up with to expand your photographic horizons with a bit of searching and a willingness to try making things by yourself.

Read these dPS articles for some DIY projects:

  • Creating Effective DIY Studio Lighting With Household Items
  • 5 DIY Hacks to Have in Your Camera Bag
  • How to Make a DIY Light Panel or Scrim
  • DIY Light Modifier You Can Do With Savage Translum Material
  • DIY How to Build and Use a Reflector to Take Better Portraits
  • How to Make An Inexpensive Light Tent – DIY

As an example, here’s a photo of a toy train I took with my son one morning before I left for work. It required no special equipment, and took about 10 minutes to set up.

A toy train, seen in a whole new light.

A toy train, seen in a whole new light.

You might think a photo like this would require an expensive camera, a fancy studio, and a lot of costly lighting rigs, but in truth it was quite the opposite. I shot this using my trusty D200 on our dining room table with a bit of aluminum foil taped to a board.

No fancy lighting or expensive equipment required.

No fancy lighting or expensive equipment required.

This is only one case scenario out of thousands, and just goes to show that a bit of out-of-the-box thinking, and some creativity, can net incredible results without requiring a trip to the bank. While spending money on additional gear and equipment can certainly boost your capabilities as a photographer, this is just one way to take you skills to the next level without breaking the bank.

3. Learn to use the equipment you already have

Recently I was talking about cameras with a fellow photography enthusiast who was a bit frustrated with his DSLR. He wanted to shoot in Aperture Priority but have his camera also take care of setting not just the shutter speed but the ISO as well. As he told me about the new camera he was thinking about buying and pondering how he could save enough money to get it. I asked if I could look through his camera menus a bit. A minute later I found that his camera did indeed have an Auto ISO setting which did exactly what he was hoping, and saved him hundreds of dollars right there on the spot.

This is only the most recent example of a phenomenon I have encountered many times; the camera you already have can probably do a lot more than you realize. If you’ve never sat down and read the manual for your camera, you might be in for a pleasant surprise when you find out how much it can actually do. You can almost always find online tutorials dealing with your specific camera with a bit of internet searching.

The equipment I used to shoot this was not expensive (a $ 100 pocket camera) but I did have to learn about lighting, posing, focal lengths, background compression, and other aspects of photography.

If you want to seriously enhance your photography skills without buying a single piece of new gear, one of the best routes you can take is to learn from others. Most cities have photography clubs where members meet regularly to teach workshops, share tips, or just gather to talk about their favorite hobby with fellow like-minded individuals. Often these groups and clubs require nothing of new members except a passion for photography. Those that do charge a fee usually keep it reasonable and have a good motive for doing so; membership dues give the group access to better facilities, early sneak peeks at new equipment, or even a notable guest speaker.

If you don’t have one of these groups in your area there are plenty of online forums as well, such as the ones right here at Digital Photography School. Joining a community, whether face-to-face or online, is a fantastic way to learn more about the capabilities of your gear, teach yourself about the principles of photography, and make personal connections that can help you when you need it. No new equipment is required – just a willingness to meet people, stretch yourself, and try something new.

4. Get out and shoot photos!

This might sound a bit silly, which is why I’m leaving this until the very end. I often have conversation with people who want to improve their photography skills but think they can only do it by spending money. One of the best ways to improve as a photographer is to actually go out and take pictures, and if  you already have a camera this requires spending no money at all.

It’s easy to think that buying a new camera, lens, flash, tripod, or camera bag will inspire you to get your creative juices flowing and take better pictures, but after a while all that gear will usually start collecting dust just like the camera equipment you already have. Whether you have a mobile phone, a pocket camera, or a full-fledged DLSR or mirrorless model, you are in possession of equipment that is light years beyond what your forebears had only a few decades ago. The secret to improving your photography is not about spending even more money on an ever-growing cache of equipment, but simply taking what you already have, going out into the world, and using it.

Capturing the beauty of nature with an old and relatively cheap iPhone 5.

Capturing the beauty of nature with an old and relatively cheap iPhone 5.

What about you? What are some of your favorite low-budget tips for improving your photography? Share your thoughts in the comments below.

googletag.cmd.push(function() {
tablet_slots.push( googletag.defineSlot( “/1005424/_dPSv4_tab-all-article-bottom_(300×250)”, [300, 250], “pb-ad-78623” ).addService( googletag.pubads() ) ); } );

googletag.cmd.push(function() {
mobile_slots.push( googletag.defineSlot( “/1005424/_dPSv4_mob-all-article-bottom_(300×250)”, [300, 250], “pb-ad-78158” ).addService( googletag.pubads() ) ); } );

The post 4 Tips for Doing Photography on a Budget by Simon Ringsmuth appeared first on Digital Photography School.


Digital Photography School

 
Comments Off on 4 Tips for Doing Photography on a Budget

Posted in Photography


What is Fine Art Photography and How to Do it?

13 Jul

Digital photography has changed the way people take photos, and how many are taking them. Anyone with a camera can be a photographer these days, and many of those want to be professional photographers or artists, though they can be the both. All over the internet there is a rise of those who are calling themselves Fine Art Photographers; so maybe it is time to look into what they are and how they are different to the usual photographers.

Below is what I consider to be one of my fine art images.

Fine Art Photography 5

Home built in the 30s and then abandoned only a few years ago.

I have lots of images that may be art, but they are not what I would call fine art photographs.

Fine Art Photography

The main street of a small town in Australia.

Both images would look nice framed and hanging on a wall, but if what you are trying to achieve is fine art, then only the first one would really fit that category.

Recently I heard a photographer online saying that you could go wacky on an image, add a weird curving blur, then call it fine art. That doesn’t make an image artistic, that just makes it silly.

There doesn’t seem to be a definitive explanation or definition for what Fine Art Photography is, but there do appear to be things that help define what it is.

When I was doing my fine art degree, part of what was required was to take turns putting our work up on the wall for critique. During these sessions we talked about techniques, what was working, and what wasn’t. We would also discuss the ideas behind the work and where we wanted to go with it.

On top of those we had individual tutorials with lecturers to help us discuss our ideas and how to achieve them. The idea was to get a plan together of how to go about doing the work, what we could use to support it, and looking at other artists that did similar work to see how they conveyed their ideas. These were invaluable, in that they helped us work out what we were doing and the direction we needed to go.

Fine Art Photography 3

Consumerism, everything becoming obsolete.

Artists Vision

Before work can become fine art the artist has to have a vision of what they think their work will look like.

An Idea

Fine art is about an idea, a message, or an emotion. The artist has something that they want to have conveyed in their work.

That idea or message may be something small, a single word such as abandon, or it may be a whole statement, like exploring the way the moon affects the tides. It is a start. It is like a hypothesis.

Technique

The work you create to demonstrate your vision and ideas has to have a consistency to it. When all the work is together it has to have similarities. Often artists will use the same medium and techniques for each idea.

Body of Work

In the end there has to be a body of work that shows your ideas, subjects and techniques. If you were to get your images into a gallery there would need to be a uniformity to them all.

Artist Statement

Finally you would most likely need an artist statement. A short explanation of what the work is about, why you created it and how.

When you go to a gallery you might look at the work and wonder what it is about, so you look for the artist statement. It will help you figure out what the artists intentions were, the reasons why, and how they created that work.

Fine Art Photography 8

An high school that has been closed a while the vandals have taken over, but the light still comes through the windows.

So you want to be a Fine Art Photographer?

You don’t need to have a degree in fine arts to be a fine art photographer, but you do need to think carefully about your work and what you want to achieve with it.

Getting your edeas together

Brainstorming is a great idea, sitting down and just writing ideas down.

  • What topics do you feel passionate about?
  • What messages do you want to convey?
  • What subjects do you like to photograph?
  • What techniques are you interested in?

Just write and don’t take too much notice of what you are writing, it is about getting your thoughts down on paper. It might not make any sense at first, but as you work through your ideas it will start to do so.

Fine Art Photography 4

Brain storming the idea of consumerism. It doesn’t always make sense, but it is about getting your ideas down.

Once it is done you should have the bare essentials for what you want your work to be about. You might decide to disregard a lot of it, but there should be enough there to help you work out what you want to do, and which direction you want to go.

Deciding on your topic

Topics can be anything. They don’t have to be heavy topics like ones that are really political, or socially conscientious. I used consumerism, as I’ve had a couple of exhibitions that were based on that concept, and the idea that we were turning our homes into massive rubbish (garbage) bins.

Working out your message, or the motivation behind it, can be a little bit more difficult. Perhaps for something like consumerism you might want to explore the impact it has on the environment, or what is going to happen to all the goods that we keep buying.

Finding the subject for your photos

What is your subject matter going to be? Would you photograph rubbish piles? Maybe look directly at the different brands, and all the different products they come out with. What your images are going to be of, is just as important, and should link to your topic or message.

Fine Art Photography 6

Once a home, built over a hundred years ago, now left, the outside crumbling and grass trying to cover it over.

Working out your technique

The technique isn’t so important, it just has to be the same for all the images. You can experiment to start with, to help you work it out, but once you have what you want then your body of work has to all be similar. You are looking to create a cohesive portfolio that will look great, and connect together when on display.

Creating your body of work

You should make as much work as you can. If you are planning an exhibition, then you need to know now much work you will need for it. When it is all done there are going to be pieces that simply won’t work and you will be better off leaving them out. It is difficult to work out what is best for an exhibition, and just because you made it doesn’t mean it belongs.

Your Artist Statement

Finally you need to write that artist statement. It needs to be written in what they call artspeak, or language that fits in with the art world. It has to sound good. If you are applying to galleries then your artist statement is what they are going to take notice of, just as much as your work.

Here is an example of one written about work around the theme of abandon:

It is human nature to sculpture and contour the environment into shapes and forms that we find pleasing. We live in these buildings, work in them, and find entertainment and nourishment in them. We spend time in rooms designed to help us learn through many stages of our lives. When the buildings can no longer be maintained they fall into decay quickly. My work is looking at the rate of decay and how similar it is to the human condition. How easily we can fall into the same sort of decay when we are no longer being cared for. Through photographs of old, and recently abandoned buildings, I want to explore the metaphor of the human condition with the deserted buildings.

I just made this short statement up, but I hope it gives you an idea of what an artist statement is like. If you do a google search you will find many places that can help you write one. You will also be able to find examples of them to see what other artists are doing, and how they are creating their work.

Fine Art Photography 9

The old science room in the closed school. Things are scattered and nothing makes sense.

Finally

The work should be about you, and what you are passionate about. Don’t worry about what other people think. If you know what your vision is, what your subject is, and how you want to create your work, then your statement should come easily and you will find yourself on a new path, an exciting one.

If you are just making lovely images without any of the above, then chances are you aren’t creating fine art photographs. However, if you have a vision or message, and have ideas that you want to convey through your work then you are more likely to be creating fine art. Perhaps you should think about what you want your work to be about. It is also fine to just take photos because you enjoy it.

googletag.cmd.push(function() {
tablet_slots.push( googletag.defineSlot( “/1005424/_dPSv4_tab-all-article-bottom_(300×250)”, [300, 250], “pb-ad-78623” ).addService( googletag.pubads() ) ); } );

googletag.cmd.push(function() {
mobile_slots.push( googletag.defineSlot( “/1005424/_dPSv4_mob-all-article-bottom_(300×250)”, [300, 250], “pb-ad-78158” ).addService( googletag.pubads() ) ); } );

The post What is Fine Art Photography and How to Do it? by Leanne Cole appeared first on Digital Photography School.


Digital Photography School

 
Comments Off on What is Fine Art Photography and How to Do it?

Posted in Photography


How to Make a DIY Newborn Photography Background Stand

11 Jul

Have you ever wondered how professional newborn photographers get their backdrops so smooth and wrinkle free? Are they Photoshop masters? Do they have a team of highly paid assistants pulling the fabric? No. The answer is a DIY backdrop stand that costs less than $ 20 and that you can make in less than 15 minutes.

Image 9 1

When I first started in the world of newborn photography I used the tools that I had available. I would use a traditional background stand to hold the back of my fabric backdrops. I would then ask my clients if I could borrow a vacuum, dining room chair or some other house hold object to clamp the side of my fabrics to. This, of course, was very unprofessional and delivered substandard results. I would find myself spending 30 minutes just editing the backdrop in Photoshop. I knew there had to be a better way. So, with a little imagination and $ 20 I saved myself countless hours of Photoshop madness. Now, besides some simple blemish removal and softening, the images are basically perfect, straight out of camera.

Image 8

This tutorial will teach you how to build a background stand that stretches your backdrop fabrics. This stand will help to eliminate wrinkles in your background fabric, and cut down on post-processing time. It will also help you present your newborn photography business in a more professional manner.

Supplies needed

What you will need:

Image 1

All of the supplies should be readily available at your local hardware store. You will need to look in the plumbing section. All PVC fittings are Schedule 40.

  • Four – 10 Foot lengths of 3/4 inch PVC pipe (SCH 40)
  • Four – 3/4 inch elbow joints
  • Four – 3/4 inch tee joints
  • Two – 3/4 inch 3-way joints

Step 1. Cut the PVC pipes to the correct lengths

You can use a PVC cutter, a miter saw, or a handsaw. I used a handsaw and was able to complete the entire stand in 15 minutes.

Lengths needed:

  • Three – 50 inch pieces
  • Four – 42inch pieces
  • Six – 20inch pieces

Recommended cuts:

  • Pipe 1: 50 inches + 50 inches + 20 inches
  • Pipe 2: 50 inches + 42 inches + 20 inches (discard 8 inches)
  • Pipe 3: 42 inches + 42 inches + 20 inches (discard 16 inches)
  • Pipe 4: 42 inches + 20 inches + 20 inches + 20 inches (discard 18 inches)

Step 2. Connect the bottom frame

Connect two 50″ pieces and two 42″ pieces with the four 3-way joints to make a rectangle.

Image 2

Step 3. Add the vertical leg pieces

Connect four of the 20inch pieces to the rectangle.

Image 3

Step 4. Connect the middle supports

Connect a tee joint and an elbow joint to either end of a 42inch piece of PVC. Repeat. Connect these to the backdrop stand.

Image 4

Step 5. Connect the back support

Connect two 20″ pieces to the back of the stand. Now connect the remaining 50″ piece to the top with two elbow joints. It should look like this at this stage (below).

Image 5

Step 6. Place a beanbag underneath

Place your beanbag in the center of the stand, and you are ready to stretch your backdrop fabric.

Image 6

Here is a picture of the backdrop stand in use at a client’s home.

Image 7

Here is a final newborn image using the backdrop stand.

Image 10 1

This stand is purposely designed to be wide. This allows you to take those much needed angled pictures without losing your backdrop fabric. You may however, prefer to have a square backdrop stand. This would allow you to use a smaller area in your studio or client’s home. Just keep in mind that you will need to really watch your angles.

Recommended lengths for a square backdrop stand:

  • Seven – 45inch pieces
  • Six – 20inch pieces

NOTE: This stand is only to be used with a newborn posing beanbag placed under the center of the stand. The posing beanbag is what supports the newborn, not the fabric. NEVER leave a newborn baby unattended on the beanbag or on any prop. As a newborn photographer the safety of the newborn baby must be your top concern at all times.


googletag.cmd.push(function() {
tablet_slots.push( googletag.defineSlot( “/1005424/_dPSv4_tab-all-article-bottom_(300×250)”, [300, 250], “pb-ad-78623” ).addService( googletag.pubads() ) ); } );

googletag.cmd.push(function() {
mobile_slots.push( googletag.defineSlot( “/1005424/_dPSv4_mob-all-article-bottom_(300×250)”, [300, 250], “pb-ad-78158” ).addService( googletag.pubads() ) ); } );

The post How to Make a DIY Newborn Photography Background Stand by Clifton Man appeared first on Digital Photography School.


Digital Photography School

 
Comments Off on How to Make a DIY Newborn Photography Background Stand

Posted in Photography


Weekly Photography Challenge – Beards

11 Jul

Men with beards have become commonplace in my area. Guys without them are almost more noticeable than those with a beard. Have a look at this bunch of images of bearded guys as an example.

Sergio Carbajo

By Sergio Carbajo

Weekly Photography Challenge – Beards

This week’s challenge is just about having some fun with it. Go out and see if you can find some guys with beards and photograph them. If not, think outside the box – who or what else might have a beard?

Marc Dalmulder

By Marc Dalmulder

Micolo J

By Micolo J

Neil Howard

By Neil Howard

Heather Buckley

By heather buckley

Aaron Morton

By Aaron Morton

Daniel Guy

By Daniel Guy

Share your images below:

Simply upload your shot into the comment field (look for the little camera icon in the Disqus comments section) and they’ll get embedded for us all to see or if you’d prefer upload them to your favourite photo sharing site and leave the link to them. Show me your best images in this week’s challenge. Sometimes it takes a while for an image to appear so be patient and try not to post the same image twice.

googletag.cmd.push(function() {
tablet_slots.push( googletag.defineSlot( “/1005424/_dPSv4_tab-all-article-bottom_(300×250)”, [300, 250], “pb-ad-78623” ).addService( googletag.pubads() ) ); } );

googletag.cmd.push(function() {
mobile_slots.push( googletag.defineSlot( “/1005424/_dPSv4_mob-all-article-bottom_(300×250)”, [300, 250], “pb-ad-78158” ).addService( googletag.pubads() ) ); } );

The post Weekly Photography Challenge – Beards by Darlene Hildebrandt appeared first on Digital Photography School.


Digital Photography School

 
Comments Off on Weekly Photography Challenge – Beards

Posted in Photography


Get Inspired: Try Adding a Little Occultish Mystery to Your Photography

10 Jul

It’s not unusual for photographers, both pro and amateur, to find themselves stuck in a creative rut. Nor is it uncommon for photographers to want to try something new. If you find yourself occupying your own rut, or if you’re just looking for some sort of new inspiration, consider trying some unconventional means. I’m not suggesting you try invoking some ancient Continue Reading

The post Get Inspired: Try Adding a Little Occultish Mystery to Your Photography appeared first on Photodoto.


Photodoto

 
Comments Off on Get Inspired: Try Adding a Little Occultish Mystery to Your Photography

Posted in Photography


Q&A With TOAST:Urban Photography Fun

10 Jul

San Francisco is the most gorgeous city on this planet (sorry, New York.)

But if we’re being honest, the postcard views of the City are getting a little – dare we say it – boring.

Combating that is TOAST, a self-proclaimed urban explorer. We spoke to him on what he sees in between the lines and what draws him to beneath the city surface.

Learn his tips and pick up a few urban exploring tricks of your own!

Urban Photo Tips From TOAST

(…)
Read the rest of Q&A With TOAST:
Urban Photography Fun (692 words)


© Taylor for Photojojo, 2015. |
Permalink |
No comment |
Add to
Urban Photography Fun”>del.icio.us

Post tags:


Photojojo


Comments Off on Q&A With TOAST:Urban Photography Fun

Posted in Equipment