RSS
 

Posts Tagged ‘Photography’

Complete Step By Step Wedding Photography Workflow

01 Apr

You may have spent months planning a wedding with your client. After countless emails, meetings, and the actual wedding day itself; it’s time for the lengthiest part of your work to begin, the post-processing. Your wedding photography workflow is the part of the job that clients never see (and most never think about) after the event is over. Post-processing for digital photography starts from the moment you return to your home or office up until the clients receive their final images.

Wedding photography workflow

Every photographer has their own speed and style to post-processing and most will have their own aesthetic or editing programs they prefer to use. However, after owning a busy wedding photography studio for the past five years, I have created an efficient workflow that works well, while giving images a personal aesthetic. In this article you’ll find what to do after the wedding day is over, to delivering the final product to your clients using an efficient workflow.

Complete Step By Step Wedding Photography Workflow

Step 1: Back Up

You may have been shooting for eight or more hours, but when you get home, don’t crawl in that sweet, comfy bed just yet – your night isn’t over. It’s imperative that you back your client’s images up in several places as soon as possible. Not only did your client pay a lot of money for your time and expertise, but for the safety of their images as well. Until their images are backed up safely in several locations, no naps allowed! Don’t learn the hard way, back those things up.

Part one – download

On your computer, create a folder with the client’s name, and a sub-folder called “RAWS” (assuming you shoot in RAW, which you should. More on that later). You will need to copy the images from all of your memory cards into the new “RAWS” folder on your computer.

Note: RAW files are huge, s,o you will probably need to upgrade the amount of storage space on your computer, and get some more RAM while you’re at it to run your computer programs efficiently. If you’re using a Mac, make sure your computer is scheduled to back up using Time Machine as well.

Step1 BackingUp

Part two – make a copy

After all the files are on your computer, back them up again to a client folder on an external hard drive. When not in use, the external hard drive should be kept securely in a place like a fireproof safe. Some photographers back up on more than one external hard drive.

Part three – backup online

Lastly, when you don’t think you can stay awake another second, you need to start your RAW file back up to an online or cloud location. I use Zenfolio for my RAW storage, although there are other storage sites available. The good news? You can go to sleep while the files upload overnight (and maybe the next few days if you have a slower internet connection).

Step1 BackingUp1

Step 2: Importing and Culling

The most exciting part of your job – not!

I’m going to be honest here, culling, or going through every image you took of a wedding, rating them, and deciding which to keep and which to trash, is the most tedious, eye-bleeding part of your job. This is why it’s not a good idea to “spray and pray” throughout a wedding day with your cameras. The more selective you are with the photos you take, the faster your post-wedding workflow will be. Alternatively, there are companies you can use to cull your images for you if that is within your budget.

In Lightroom, create a new Lightroom catalog for your client in their client folder: File>New Catalog. Then import your RAW files from the client folder you created while in the Library module.

Step1 5 Importing

Once all the images are imported, make sure all cameras are set to the correct time, and do a “sort by capture time” so everything from the wedding day on all cameras is in chronological order.

Culling

Next, start to cull your photos by lens. I have found this is the quickest way to make a decision on which images to keep. You can do this in the Library Module, going to Metadata (or hitting the / key), and selecting the lens you want to cull (see below). Rate your images on what to keep (hit P for picks or keepers) and what to toss (hit X for rejects). Repeat your rating process with each lens, and after they are finished filter by “all lenses” in the Library module to see the images all together. From there, do a second (or third) round of culling in the Library module until you have your final number.

Step2 Culling

For the step above, you’ll need to choose a rating system that works well for you. My rating system is 1 stars are rejects, 2 stars are keepers, and 3 stars are keepers that need Photoshop retouching. I often find that if I took a series of photos at once (like I do for the family formals to ensure no eye blinks) the last ones in the set are usually the best, so I will look at those images first for my 2-star keepers.

For more on rating and flags in Lightroom read: How to Organize Your Photos in Lightroom OR Organizing Images in Lightroom.

Step 3: Basic Edits

This is where the magic happens!

You have your final number of culled images, and can now begin your basic Lightroom edits. This is where your cropping, straightening, and adjustments for exposure, contrast, shadow, highlights, etc., come into play. This part is very personal to each photographer and this is where your style begins to emerge. This is also why shooting in RAW is so important, as you will have greater flexibility in editing as compared to a JPG. Many photographers may stop after this step, and that’s A-Okay if you’re happy with your result! However, if you want to push your images further – there are a few more steps involved.

Quick tip! If you have a series of photos in the same lighting situation taken with the same camera, edit the first photo in the set, select the rest of the photos that match, then hit the “Sync” button to apply your edit to all of the photos in that set at once.

Step3 Basicedits

Step 4: Polishing

Making your images sparkle using Alien Skin or Presets.

Many photographers may polish their images (a.k.a. color tone) with a chosen preset after the basic edits are done. You can buy Lightroom presets from a plethora of sources online or create your own. I found the Alien Skin program years ago and fell in love. For me, Alien Skin gives me the pop, sharpness, and great skin tones that I absolutely adore. It also has beautiful lens flares and light leaks that I use for enhancing natural sunlight. If you choose to try Alien Skin, see the steps below, otherwise skip to Step 5.

  1. Choose your favorite images (or all of them) to put through Alien Skin by selecting them in Lightroom, right-clicking and choosing “Edit in Alien Skin” (once the program is installed, this will be an option).
    Step4 Polishing
  2. You can create your own presets in Alien Skin for a faster workflow and a likely favorite will emerge. Select your most used preset and apply to all. Then deselect all.
  3. Go through each photo individually, and make sure that’s the Alien Skin preset you want to use and see what tweaks are needed for each image.
    Step4 3 Polishing
  4. When you’re finished, click save and your images will automatically import back into Lightroom (as copies) with the filters applied. Hit the 1 key, to discard the originals that you’re not going to use. (Occasionally, I end up liking my Lightroom edit better than my Alien Skin edit, so it’s nice to compare them side-by-side).

Step4 5 Polishing

Step 5: Photoshop – Retouching Your Images

Now that your images have all your basic edits and color toning, select the images that need to be retouched with Photoshop by filtering for the 3-star rated images. Retouching can include editing out acne, stray hairs, doing head swaps or editing out any distracting objects in the image. On a Mac, you can hit command+E (Window is Control+E) in Lightroom to open your image in Photoshop. After retouching is complete, you can select CMD/CTRL+S (or File>Save) to return your retouched image to Lightroom.

Step5 Retouching

Step5 5 Retouching

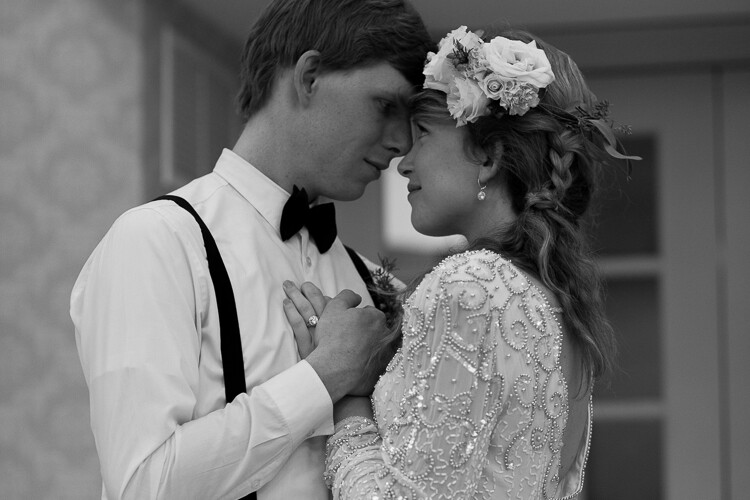
Step 6: Black and White Images

This is the quickest part of my post-production and one my favorites, as well, because I love black and white images so much. Many wedding photographers provide a mix of color and black and white photos, with the color versions of each black and white as well. This where Alien Skin comes into play again. Not only are the black and white filters so dreamy, but they automatically make a copy for you, making your job really easy.

  1. In Lightroom, select the images you want to be in black and white by using CMD/CTRL+click to individually select them.
  2. Right-click and select “Edit in Alien Skin”. From there, all the selected images are uploaded to Alien Skin.
  3. It’s easiest if you already have a black and white preset that you love saved, and apply that to all images, then deselect all. Go through each image individually using the color sliders (especially the reds and yellows) to edit and ensure each black and white image is perfect.
  4. Save all black and white images back to Lightroom where the edited color version and the edited black and white version will be side by side.

Step6 BlackandWhite

Step6 5 BlackandWhite

Black and white images can also be made in Lightroom by creating a virtual copy, Photo>Create Virtual Copy (or CMD/CTRL+’). Then select “Black and White’ in your Basic Edits box, and adjust the color sliders until they’re perfect.

Step 7: Exporting. The Home Stretch!

Hooray! All of your images have been backed-up, culled, edited, polished, retouched, and you have your black and white copies. Now you just need to export the final versions to your client’s folder on your computer (I create a folder called “Edited:).

Step7 Exporting

Select all of your completed images in Lightroom, go to File>Export. Choose your file location, file name (I have mine set to custom name and sequence), file settings (Mine is set to jpeg, sRGB, quality 100), and then select export when you are finished.

Step 8: Importing to an Online Client Gallery

Once all of your high-resolution JPGs are exported to the Edited client folder on your computer, you can then upload to the online gallery of your choice. Some online galleries allow you to upload your high-res JPGs directly from Lightroom using a plug-in, letting you skip a step in the process. I use Pixieset for my galleries, as I like the modern look, ease of use, and their customer service.

Step8 Uploading

Step 9: At Long Last…

After you upload your images to an online gallery, copy your final edits to your external hard drive in their client folder. Once your edited files are safely online and on an external hard drive, you can delete the RAW files from your computer, because they take up a lot of space and you already have them safely backed up online and to an external hard drive (or two). If you ever want to use that Lightroom catalog again, it’s easy to sync the RAW files on your external hard drive with the Lightroom catalog that’s stored on your computer. I like to leave the edited JPGs on my computer for easy access.

Conclusion

This entire workflow process time will vary for every photographer. For me, I need 4-5 full days of nearly uninterrupted work. As you know, photographers are humans too. With life and other weddings/shoots in between – delivery time can take weeks or months after the event, depending on how busy your season is, how many photos you have, and how much retouching is required. You may need to mail prints, albums, USB drives, etc., as well, so keep that in mind for your total post-production time.

With a lot of practice and knowing your style, you’ll see your post-processing time get shorter and shorter. If you’re lucky enough to find a post-processing company that fits your style and budget, you’ll have extra time in life for the things you love, like photography. Until then, get to work!

The post Complete Step By Step Wedding Photography Workflow by Misti Marquette appeared first on Digital Photography School.


Digital Photography School

 
Comments Off on Complete Step By Step Wedding Photography Workflow

Posted in Photography


5 Things I Wish I Knew When I First Started Wildlife Photography

31 Mar

I first started photography almost 10 years ago, and I sometimes wonder where I would be if I knew what I know now, back at the start. I feel like I’ve learned the most important things about wildlife photography in the last 4-5 years, with the time prior to that being spent juggling schoolwork alongside my hobby.

The hardest part about getting really good at something is at the start. It can feel impossible to take a decent image when you’re comparing yourself to the stunning work you see online all the time. Maybe you’re even taking lessons, but feel like there’s some kind of barrier that you can’t bust through to photographic greatness above.

While we’re all still learning, whatever stage we’re at, I hope that some of these tips will help you fast track your photography. Hopefully, you can avoid some of the mistakes I made early on when I first started doing wildlife photography.

#1 Single-point focus is a must

There are few situations, other than perhaps birds in flight, where you would want to use anything but the single-point focus mode on your camera. If you allow the camera to select the best focus point itself, you’ll easily have an image of an animal with its body sharp but eyes out of focus. This kills the shot – instantly.

5 Things I Wish I Knew When I First Started Wildlife Photography

When you’ve switched to single-point focus, you can dictate exactly where the camera will look to focus. Point that little black square at the eyes of your subject and the rest will start to fall into place. Just be extra sure that you aren’t focusing on the nose, or beak, of an animal rather than the eyes. It’s an easy mistake to make in a small viewfinder. After that, no longer will you need to trash that super cute shot of a squirrel just because the eyes are not sharp.

#2 Semi-automatic modes are your friends

I want to address a common misconception I hear again and again. This is that anything other than full manual mode is cheating and not proper photography. While I insist that everyone should learn how to use their camera in full manual, there is no reason to add extra obstacles in your way to a great photo.

With wildlife photography, everything is moving so quickly and the light is constantly changing. Most of the time when shooting in full manual, you’re just introducing a load of unnecessary wheels to spin and adjust to account for the tiniest change in light.

5 Things I Wish I Knew When I First Started Wildlife Photography

Photo: Mario Calvo / Unsplash.com

But, that’s also not to say that photographers using semi-automatic modes aren’t capable of shooting in full manual. Having to continuously adjust settings in a fraction of a second will most definitely make you miss opportunities. Plus, when you really understand how full manual works, it takes only a little thought to adjust and perfect the exposure. It just adds time to the process.

Semi-automatic modes take away this chore, meaning you can focus more on composition and other, arguably more important, ingredients that make up a great photo. You can still have control over your exposure, fine-tuning it using exposure compensation. I have lost count of the number of shots I missed when I insisted on solely using full manual mode at the start of my photographic journey.

The shooting modes I’m referring to are Shutter Priority, Aperture Priority, and full Manual with Auto-ISO. Take a look at this article I’ve written about which of these is best for certain situations: Why Semi-automatic Mode is the Best Choice for Wildlife Photography

#3 Organization is key

By alborzshawn

My biggest regret is never properly organizing my photos. I only started to do this vigorously back in 2015, which I am quite ashamed to say! I use Adobe Lightroom, and it just makes life so much easier. Creating a catalog of my images, I can keyword and easily find them all. Collections allow me to sort through specific shoots quickly, and the delete button is never too far away either with a tap of the X key on my keyboard.

Deleting images is something that we all need to do, but it’s never easy. But be brave, and if a shot isn’t up to scratch then make sure to haul it out of your catalog and into the trash. If you don’t, you’ll end up with hard drives full of thousands of pictures and you’ll never be able to find the good ones hidden within them.

It’s good practice to make sure you dig through all the photos from a shoot fairly quickly. Remove the blurred and rubbish frames so that you don’t procrastinate and find down the line that you still have to prune the images from a shoot a few years ago. Whoops!

#4 You don’t need to fill the frame

I always thought that a good wildlife photo filled the frame with the subject. If it was too far away, then there was no shot to be had. How wrong I was! The style of minimalist wildlife photography, having the subject small in the frame, is becoming increasingly popular nowadays. Perhaps styles and tastes have changed in the field since I first started out, but either way, it is something I wish I had experimented with more when I was younger.

5 Things I Wish I Knew When I First Started Wildlife Photography

This is great news for those of you who don’t have access to large telephoto lenses, too. It means you don’t need to go and shell out thousands for a 500mm prime lens when you can get shots that are just as good with a shorter telephoto (or even a wide lens).

Keep the subject small and introduce the environment around it into the scene. You might need to adjust your aperture to increase the depth of field, depending on what you’re trying to achieve. Since the surroundings will become a larger part of the shot, perhaps you want them to be more in focus than usual.

#5 You don’t need to stick to a normal aspect ratio

One thing that I’ve only started to do within the last year or so, is to play with the aspect ratio of my photos. You don’t need to stick to the standard that pops out of your camera. Try cropping into a square, or even creating a panoramic shot, to make long photos that capture a wider view than normal.

5 Things I Wish I Knew When I First Started Wildlife Photography

A colony of guillemots on the Farne Islands, Northumberland. One individual is attempting to land and squeeze into the group.

Experimenting with the aspect ratio of your photo makes them stand out too. Immediately people notice that the photo doesn’t fall into normal ratios, and pay attention to the shot. I really like these long, snaky frames. I feel they tend to work well with scenes that have a large number of focal points within them. For example, this image of the guillemots has so many different birds that you can look at in detail. The long frame creates a sense of a large colony of birds, and works well to get rid of the unnecessary sky above that would be there with a standard ratio.

In Conclusion

We can’t all be experts from the word go, I still have loads to learn about wildlife photography. But hopefully, some of these tips will help you to buck the trend and let you benefit from some of the things I wish I knew when I first started clicking wildlife photography.

The post 5 Things I Wish I Knew When I First Started Wildlife Photography by Will Nicholls appeared first on Digital Photography School.


Digital Photography School

 
Comments Off on 5 Things I Wish I Knew When I First Started Wildlife Photography

Posted in Photography


8 Reasons to Revisit the Same Photography Location Again and Again

31 Mar

It’s good to keep moving forward and trying new things all the time. There are times when going back to an old photography location can be a great idea, though. Even if you have a stellar photo from that location it doesn’t mean you can’t get an equally good image that has different characteristics.

The easiest places to make return visits to are of course those local to you, but heading back to that far-off exotic destination is also rewarding. Let’s take a look at those eight reasons to revisit a photography location, and why this will improve your work.

8 Good Reasons to Revisit the Same Photography Location Again and Again

This is a great vantage point in Busan. I returned to this location to take this photo.

1 – Conditions are never the same!

The earth is a constantly changing and dynamic entity, that means you’ll almost certainly get a different image if you go to the exact same spot and photograph it again. There are even projects that show the same location photographed every day, with the intent of showing subtle changes. You don’t need to go every day, of course, but you might take a shot of the location in the snow, and one in the sun.

The following is a list of variables that should ensure you can return to a photography location, and get something different from it each time.

8 Good Reasons to Revisit the Same Photography Location Again and Again

A different angle of the bridge in Busan. This time photographed from the coast.

  • Season –  Provided you live in a temperate area that sees a change of the seasons, you can make the most of this with your photography. Taking shots of the same location in spring, summer, fall and winter is a classic photography idea.
  • The tide  If you’re in a coastal location the change in the tides can alter the scene you photograph dramatically. You can check the state of the tide at this website, and remember to stay safe in coastal areas.
  • The sun position – This is similar to the seasonal change, though the position of the sun could make or break the photo more than if there is snow or not. The position of the sun can be planned before you go back using the suncalc website.
  • Astro-photography – You may have photographed a place by day, but how about photographing it at night? You could try photographing star trails, or even the Milky Way. As with the sun, the position of the Milky Way shifts in the sky throughout the year, so prior planning is needed when shooting the night sky.
8 Good Reasons to Revisit the Same Photography Location Again and Again

Everything looks great with snow! Snow is one of the best weather conditions in which to shoot.

2 – Revisit a photography location with brand new gear!

New photography equipment can really open up other creative angles that you’d never thought of before. One of the best pieces of equipment any new photographer can purchase is a tripod, which will then open up the door to lots of long exposure photography.

The addition of a new lens to your camera equipment will open up yet further possibilities, especially if you’re trying a wide-angle or fisheye lens for the first time. Those who like light painting should look at the pixelstick, a great tool for this type of photography.

8 Good Reasons to Revisit the Same Photography Location Again and Again

New gear is a great reason to revisit a photo location. In this photo I used a glass ball, it’s one of the first photos I took with it.

3 – New photography techniques

New gear often means learning a new technique. There are plenty of techniques you can learn with your existing gear.

As a landscape photographer, you may have photographed a location before using a technique like digital blending. Of course, once you know this new technique you’ll want to revisit a photography location and see if you can improve on your old shots. Equally, if you’re a portrait photographer learning to use

Equally, if you’re a portrait photographer learning to use off-camera flash will really enhance your work. This would give you a good reason to go back and shoot a place again.

8 Good Reasons to Revisit the Same Photography Location Again and Again

A new technique such as steel wool spinning can lead you to revisit a photography location.

4 – A special event is happening

There really is no better reason to revisit a photography location than some kind of event happening there. A big cultural event can give a location much more context and story, enriching your photo. The potential for unique photos that other photographers won’t be able to replicate also exists at these kinds of events.

Photographing an event also presents a good test of your skill, there are no second chances with these type of photos. Lastly, it’s great to experience a place at its vibrant best, which will be the case during a festival or event. It’s always worth running a google search on a particular location to see what yearly festivals they have, this way you can plan to be there during that time.

8 Good Reasons to Revisit the Same Photography Location Again and Again

A fireworks festival will often show a location in a different way.

5 – Improvement as a photographer

The longer the gap between revisiting a photo location, the more your photography will have changed. This can be a great way to gauge your improvement as well.

Lay out your best five photographs from the first trip you made, and then your best five when you return this time. Are there differences? How have you improved as a photographer? Is there something you wanted to improve that you still need to work on? It is typical for a photographer to first improve by making their photos more minimal. After a period of learning the next step is to add story and context to a more minimal scene, this is a step-by-step process.

8 Good Reasons to Revisit the Same Photography Location Again and Again

As you develop as a photographer the angles you use will change. You should be able to look back and see your improvement.

6 – Revisit a photo location until you get the best weather

If you know a good landscape photographer they’ll likely tell you they revisit the same spot until they get the photograph they want. The truth is you never know whether you will get the perfect sky. This can be especially frustrating if you need to travel several hours to reach the location. Weather can change fast, and these days pollution can also be a factor.

The need to make repeat journeys then is important if you wish your photo to be striking. Even once you have that perfect shot going back can be fun. Can you take this scene with different weather conditions and make another striking image?

8 Good Reasons to Revisit the Same Photography Location Again and Again

This is what happened the first time I visited this spot. The day was nice, then dust and smog rolled in.

7 – Previous experience of a location

As a photographer, it’s always a good idea to have some stock locations you know about. These are places you’ve been before, and you will know very well. The big advantage here is you will automatically know the best location and shooting angles.

That means no losing the shot because you’re scrambling around looking for the best perspective. Landscape locations very often work well for portraits as well, and prior knowledge of a place will help you choose a good spot for this. It’s always good to have a killer location in your back pocket.

8 Good Reasons to Revisit the Same Photography Location Again and Again

I’d shot this bridge several times before. I used my prior knowledge of this location to choose a new angle.

8 – Visit with friends

When friends come and visit, and especially if they’re photographers, it’s great to show them a nice place. They’ll appreciate the local knowledge passed on to them. The chances are one day you’ll benefit when someone takes you to a great location that they know about, so sharing is always a good idea.

The other benefit of going with another photographer is they’ll have fresh eyes. They may spot something you missed, and give you further ideas about how you can photograph that location.

8 Good Reasons to Revisit the Same Photography Location Again and Again

Infrared is another photography technique that opens new creative possibilities.

Get out there and play it again!

Do you really need any of the above reasons to revisit a photography location? Those areas of natural beauty or the cool festival you went to the year before are always great to see again.

Let’s see your favorite photography location in the comments below. What draws you back to this place, and do you have more than one favorite photo from there? Is there anywhere you’ve been to that you’d like to visit again? We’re all looking forward to hearing your stories in the comments below!

This was one of the first photos I took at this location. Return visits have meant better photos.

8 Good Reasons to Revisit the Same Photography Location Again and Again

This bridge in Busan is photogenic. It’s fair to say one of my first photos of it isn’t that dynamic.

8 Good Reasons to Revisit the Same Photography Location Again and Again

This bridge at Seonamsa in South Korea was a favorite photo when I took it. I have since photographed this place several more times.

The post 8 Reasons to Revisit the Same Photography Location Again and Again by Simon Bond appeared first on Digital Photography School.


Digital Photography School

 
Comments Off on 8 Reasons to Revisit the Same Photography Location Again and Again

Posted in Photography


Using Juxtaposition for More Compelling Landscape Photography

30 Mar

Juxtaposition – it’s one of my favorite words, and also one of the most important aspects of successful photography. It’s used in portraiture, outdoor adventure, and frequently in travel photography. In images of the landscape, however, juxtaposition is often overlooked.

I say overlooked because many photographers integrate juxtaposed elements in their landscapes without even being aware of them. You see, juxtaposition, or the way different elements conflict and contrast, is a key feature in most good landscape photographs.

Though there are a dozen or more different ways juxtaposition can occur in an image, in this article I’m going to concentrate on three; color, texture, and subject matter.

Using Juxtaposition for More Compelling Landscapes

Juxtaposition – Color

You are probably familiar with the color wheel. Likely you were introduced to the concept in grade school when you learned the difference between primary and secondary colors. More recently, if you have selected a new font color on your word processing program you’ve likely seen some form of the color wheel.

Simply, a color wheel shows the three primary colors (red, blue, and yellow) occupying three slices of the circle with all the mixing iterations of color blending together between them. The result is a continuous blur of colors, encompassing just about everything on the visible spectrum.

Using Juxtaposition for More Compelling Landscapes

Many landscape images will have multiple juxtapositions. In this case, color is foremost with the warm tones on the salt mounds against the deeper blues of the water and sky. But the shape and texture also stand out. (Salar de Uyuni, Bolivia).

Colors that are opposite from one another (complementary) on the wheel like; blue and yellow, red and green, or orange and purple, for example, will juxtapose. That is, they will stand out from one another; some in a pleasing way, some in a conflicting way. Both can work in photography, depending on your goal, but you need to be aware of the way colors communicate in an image to assure your final result is what you intend.

Using Juxtaposition for More Compelling Landscapes

In this aerial image of the Baird Mountains in northwest Alaska, the turquoise tarn in the foreground stands out as the brightest patch of color in the frame, juxtaposed from the muted grays and browns of the mountains.

Reds and blues, for example, are very commonly blended in landscape photography; blue water with sunset sky, red flowers on a bluebird day, autumn colors against a dark backdrop, etc. Color plays an important role in landscape photography, and we recognize pleasing color combinations as soon as we see them. But recognizing WHY they are pleasing, is different from seeing that they are. Look for those relationships in your compositions, and concentrate on their placement. Some colors, red for example, are extremely effective at drawing the eye. But to be most effective, red needs to be counteracted by cooler tones, balancing the image. Mind how the colors are distributed in your image. It matters.

Juxtaposition – Texture

Using Juxtaposition for More Compelling Landscapes

A long exposure softened the water which creates a juxtaposition with the rough stones of the cliff. (Grand Canyon National Park, Arizona.)

Using Juxtaposition for More Compelling Landscapes

In this image, both the color and the rounded texture of the autumn Bearberry in the foreground creates a juxtaposition with the blue sky and the sharp, upright trees in the background.

Juxtaposed textures are abundant in any landscape; spiky bushes against a smooth landscape, water flowing over rough rock, or just a jagged boulder in the middle of an otherwise soft, grassy meadow, etc. Textures, as like color, are easy to observe in the field. Like bright colors, aggressive textures too need to be used in moderation. Like reds and oranges, sharp, rough, textures will dominate an image if used too liberally.

Using Juxtaposition for More Compelling Landscapes

The antlers of this caribou skull and the bright white against the dark tundra make the subject leap out from the image.

Overwhelming textures, just like overwhelming colors, might be exactly what you want. Just be aware of that decision when you make the image. Make the harsh textures the point of your image, because the wrong balance, or aggressive textures placed too dominantly by accident, can ruin the balance of an image. Consider how they relate, the story you want to tell with their use, and place them in the frame accordingly.

This is a tough one to put to use because there are no clear rules about texture. You may not always realize when you’ve gotten this balance right, but you’ll definitely know when it’s wrong.

Using Juxtaposition for More Compelling Landscapes

In this image of Denali, in Denali National Park, Alaska, the two rounded forms, one green and spiky, one blue-white and more smooth echo one another, while providing wildly different textures, colors, and implications for the image.

Juxtaposition – Subject

Using Juxtaposition for More Compelling Landscapes

Bright flowers on a gray day on a barren dune. Few things can create more juxtaposition in this image.

Using Juxtaposition for More Compelling Landscapes

Without context, this image would not have an obvious juxtaposition, it’s just an image of a lightning strike. But, when I tell you this photo was made on the arctic coastal plain of northern Alaska where thunderstorms are as rare as unicorns, then the juxtaposition of location and lightning are more clear.

The first two examples, color and texture, are more nebulous and tougher to apply in the field than the subject of the image. In landscapes, juxtapositions within the subject matter are easier to apply, and will almost always add interest to your images.

Using Juxtaposition for More Compelling Landscapes

A rare rain storm in the Altiplano of Bolivia catches the last rays of sunlight. Both color and subject juxtapose here.

As I sat down to write this article, the first thing that came to mind was the weather. Storm light, that rare sunlight that appears despite the dark clouds, is a perfect example of subject juxtaposition. Few things contrast as much as a stormy day, and sunlight.

Using Juxtaposition for More Compelling Landscapes

Rainbow in the dry desert, another clear example of the way juxtaposed subject matter can add interest to an image.

Tying weather to elements of the landscape is another way to create juxtapositions. A few years ago, I was hiking in the Chisos Mountains of Big Bend National Park, Texas when I was treated to a rare thunderstorm. As the very brief storm cleared the mountains, a rainbow appeared. The desert landscape, topped by a rainbow against a blue sky, leads to an undeniable juxtaposition.

Similarly, last summer I was leading a wilderness photo tour in the Brooks Range of northern Alaska. On the summer solstice, it snowed four inches overnight, and the following morning the blooming flowers were covered in snow. Summer flowers and fresh snow juxtapose nicely.

Using Juxtaposition for More Compelling Landscapes

Summer flowers the day after a snow storm.

Summary

Juxtaposition, the way elements compare and contrast each other, is as important in landscape photography as it is in any other discipline of the art, even if it is more difficult to use. Pay attention to the way color, texture, and your subject interrelate within your image and you’ll find greater success with your landscapes.

Have you explored juxtapositions in your landscape photographs? Tell me about it in the comments, and share some of your successes.

The post Using Juxtaposition for More Compelling Landscape Photography by David Shaw appeared first on Digital Photography School.


Digital Photography School

 
Comments Off on Using Juxtaposition for More Compelling Landscape Photography

Posted in Photography


Sony World Photography Awards Open categories and National winners announced

29 Mar

$ (document).ready(function() { SampleGalleryV2({“containerId”:”embeddedSampleGallery_9794723210″,”galleryId”:”9794723210″,”isEmbeddedWidget”:true,”standalone”:false,”selectedImageIndex”:0,”startInCommentsView”:false,”isMobile”:false}) });

The winners of the ten Open categories of the Sony World Photography Awards have been announced alongside National Award winners from 66 countries. The Open competition consists of ten themed categories so there are ten winners in total, each receiving a Sony a7 II kit, who will go on to compete for the overall prize of $ 5000 and a trip to the awards ceremony in London next month.

$ (document).ready(function() { SampleGalleryV2({“containerId”:”embeddedSampleGallery_3685180831″,”galleryId”:”3685180831″,”isEmbeddedWidget”:true,”standalone”:false,”selectedImageIndex”:0,”startInCommentsView”:false,”isMobile”:false}) });

Once the 105,000 entries to the Open section had been judged in their themed categories the total entry was re-judged according to nationality so the best images from each of 66 countries could be found. The names of the photographers in the best three from those countries have also been announced today. Winners from these awards will be displayed alongside the Open winners and the winners of the Professional categories at an exhibition to be held in London’s Somerset House from the 21st April to 7th May.

The winners of the Professional categories, and the overall winner of the Open section, will be revealed on April 20th at the awards ceremony. Martin Parr will be presented with the Outstanding Contribution to Photography prize at the event and will be exhibiting a collection of images in the main exhibition.

For more information and to see all the National Awards winners visit the Sony World Photography Awards website.

Press release

The world’s best single photographs revealed by 2017 Sony World Photography Awards 

  • World’s largest photography competition announces winners of its Open categories and National Awards programme
  • Open category winners competing to win trip to London and $ 5,000 (USD) cash prize

28th March, 2017: Ten extraordinary photographs from across the globe are today revealed as the winners of the Open categories of the 2017 Sony World Photography Awards, the world’s largest photography competition.

The winners were selected from more than 105,000 entries to the Awards’ Open competition, with the expert panel of judges looking for the best single photographs across ten categories.

The ten Open category winners are:
* Architecture – Tim Cornbill (UK)
* Culture – Jianguo Gong (China)
* Enhanced – Lise Johansson (Denmark)
* Motion – Camilo Diaz (Colombia)
* Nature – Hiroshi Tanita (Japan)
* Portraits – Alexander Vinogradov (Russia)
* Still Life – Sergey Dibtsev (Russia)
* Street Photography – Constantinos Sofikitis (Greece)
* Travel – Ralph Gräf (Germany)
* Wildlife – Alessandra Meniconzi (Switzerland)

Each of the ten winning photographs display huge photographic talent and creativity, from a stunning wildlife shot of flamingos in Walvis Bay, Namibia (Alessandra Meniconzi) to the ice blue and white of winter (Hiroshi Tanita) and a beautifully simple portrait (Alexander Vinogradov). Scale is used to stunning effect to capture more than 1300 people practicing Tai-Chi in China (Jianguo Gong) and architecture in Berlin (Tim Cornbill) while a crucial goal-scoring moment in an underwater rugby match is photographed by Camilo Diaz. A subtle palette of color is used in both the Enhanced (Lise Johansson) and Travel (Ralph Gräf) category winners while black and white photography is the choice for the Street Photography winner (Constantinos Sofikitis).

Each winning photographer receives a Sony ?7 II with lens kit and will now compete to win the prestigious Sony World Photography Awards’ Open Photographer of the Year title, a trip to the winners’ awards ceremony in London in April and $ 5,000 US dollars in cash prizes. The overall winner will be announced on the 20th April alongside the winners of the Professional competition (judged on a body of work).

Chair of the Open competition, journalist and photographer Damien Demolder, said of the winning Open images: “It has been a pleasure and an inspiration to be exposed to such a volume of great work, and a privilege too that I could share in the personal moments, the joys, tears, life and losses of photographers from all around the globe who recorded their experiences through their pictures.”

National Awards
The winners of the Sony World Photography Awards National Awards, a global program to find the best single photographs taken by local photographers in 66 countries, were also announced today.

Now in its fourth year, the National Awards is unique in both scope and reach and opened up to photographers from Cambodia, Nepal, Pakistan, Qatar, Saudi Arabia, Sri Lanka and the United Arab Emirates for the first time this year.

Winners and runners-ups across all 66 National Awards were announced today, and can be viewed here.

Exhibition
The winners of the Open categories and the National Awards will all be shown at the Sony World Photography Awards & Martin Parr – 2017 Exhibition at Somerset House, London which opens on the 21st April and runs until the 7th May.

The exhibition will include all the winning, shortlisted (top 10) and commended (top 50) photographs drawn from more than 227,000 entries from 183 countries to the 2017 Sony World Photography Awards. It will also feature a special dedication to British photographer Martin Parr, recipient of the Awards’ Outstanding Contribution to Photography prize.

Sony World Photography Awards
Produced by the World Photography Organisation, 2017 sees the 10th anniversary of the Sony World Photography Awards and a decade-long partnership with its headline sponsor, Sony. The Awards recognise and reward the very best contemporary photography captured over the last year, and incorporate four competitions – Professional, Open, Youth and Student Focus. The overall winners of the 2017 Sony World Photography Awards will be announced on the 20th April.

About World Photography Organisation
The World Photography Organisation is a global platform for photography initiatives. Working across up to 180 countries, our aim is to raise the level of conversation around photography by celebrating the best imagery and photographers on the planet. We pride ourselves on building lasting relationships with both individual photographers and our industry-leading partners around the world. We host a year-round portfolio of events including: the Sony World Photography Awards (the world’s largest photography competition, marking its 10th anniversary in 2017), various local meetups/talks throughout the year, and PHOTOFAIRS, International Art Fairs Dedicated to Photography, with destinations in Shanghai and San Francisco.

About Sony Corporation
Sony Corporation is a leading manufacturer of audio, video, imaging, game, communications, key device and information technology products for the consumer and professional markets. With its music, pictures, computer entertainment and online businesses, Sony is uniquely positioned to be the leading electronics and entertainment company in the world. Sony recorded consolidated annual sales of approximately $ 72 billion for the fiscal year ended March 31, 2016. Sony Global Web Site: http://www.sony.net/

Articles: Digital Photography Review (dpreview.com)

 
Comments Off on Sony World Photography Awards Open categories and National winners announced

Posted in Uncategorized


Weekly Photography Challenge – Music

21 Mar

Sing, play that funky music, listen and look at these 21 images of all things music.

Weekly Photography Challenge – Music

Think of all the things you can photograph related to music:

  • An individual instrument
  • Musician with this instrument
  • Full band
  • A concert or show in a bar
  • An orchestra or quartette
  • A singer
  • A sheet of music
  • Speakers or a stereo

googletag.cmd.push(function() {var gpt_slot = googletag.defineSlot( “/1005424/_dPSv5in-post-mobile(300×250)”, [300, 250], “pb-ruleset-mobile-ad-0” ).addService( googletag.pubads() );ruleset_mobile_slots.push( gpt_slot );});

googletag.cmd.push(function() {var gpt_slot = googletag.defineSlot( “/1005424/_dPSv5in-post-mobile(300×250)”, [300, 250], “pb-ruleset-desktop-ad-4” ).addService( googletag.pubads() );ruleset_desktop_slots.push( gpt_slot );});

By Freaktography

By Gia Willow Alexa Annermarken

So get out and find something musical to photograph this week for the dPS challenge. Here are some tips to help you get started.

  • 5 Tips for Portraits of Musicians That Will Help You Hit All the Right Notes
  • 10 Must-Have Camera Settings for Concert Photography
  • Concert Photography: Choosing the Best Camera Settings
  • How to Shoot a Sequence of Photos That Capture a Story

googletag.cmd.push(function() {var gpt_slot = googletag.defineSlot( “/1005424/_dPSv5in-post-mobile(300×250)”, [300, 250], “pb-ruleset-mobile-ad-1” ).addService( googletag.pubads() );ruleset_mobile_slots.push( gpt_slot );});

googletag.cmd.push(function() {var gpt_slot = googletag.defineSlot( “/1005424/_dPSv5in-post-mobile(300×250)”, [300, 250], “pb-ruleset-desktop-ad-5” ).addService( googletag.pubads() );ruleset_desktop_slots.push( gpt_slot );});

By Geoffrey Froment

By Ignacio Bernal

By K ~ The Eternal Spirit

By kennysarmy

googletag.cmd.push(function() {var gpt_slot = googletag.defineSlot( “/1005424/_dPSv5in-post-mobile(300×250)”, [300, 250], “pb-ruleset-mobile-ad-2” ).addService( googletag.pubads() );ruleset_mobile_slots.push( gpt_slot );});

googletag.cmd.push(function() {var gpt_slot = googletag.defineSlot( “/1005424/_dPSv5in-post-mobile(300×250)”, [300, 250], “pb-ruleset-desktop-ad-6” ).addService( googletag.pubads() );ruleset_desktop_slots.push( gpt_slot );});

Share your images below:

Simply upload your shot into the comment field (look for the little camera icon in the Disqus comments section) and they’ll get embedded for us all to see or if you’d prefer, upload them to your favorite photo-sharing site and leave the link to them. Show me your best images in this week’s challenge. Sometimes it takes a while for an image to appear so be patient and try not to post the same image twice.

Share in the dPS Facebook Group

You can also share your images on the dPS Facebook group as the challenge is posted there each week as well.

googletag.cmd.push(function() {var gpt_slot = googletag.defineSlot( “/1005424/_dPSv5in-post-mobile(300×250)”, [300, 250], “pb-ruleset-mobile-ad-3” ).addService( googletag.pubads() );ruleset_mobile_slots.push( gpt_slot );});

googletag.cmd.push(function() {var gpt_slot = googletag.defineSlot( “/1005424/_dPSv5in-post-mobile(300×250)”, [300, 250], “pb-ruleset-desktop-ad-7” ).addService( googletag.pubads() );ruleset_desktop_slots.push( gpt_slot );});

The post Weekly Photography Challenge – Music by Darlene Hildebrandt appeared first on Digital Photography School.


Digital Photography School

 
Comments Off on Weekly Photography Challenge – Music

Posted in Photography


15 Photography Ideas to Boost Your Creativity

21 Mar

Doing photography exercises brings forth new opportunities to improve your skills, hone in on your craft and who knows, even guide you in the direction of finding a new genre that you love more than anything in the world! Here are 15 creative ideas to take you out of your comfort zone, and guide you in your quest to boost your creativity.

Get out there and put your own spin to each of these prompts. Bonus points if you have never tried any of these before. When you push yourself to get comfortable being uncomfortable, to step outside your comfort zone, to try new things, and to give yourself the permission to fail – you also give yourself the chance to figure out who you want to be when you grow up!

#1 – Add emotion to your images

15 Photography Exercises to Boost Your Creativity

I absolutely adore this image. There’s nothing like laughing with unabashed happiness on your wedding day!

Choose to evoke emotion in your images – either in the eyes of the beholder or in the eyes of the beheld (a.k.a your subjects). When you want emotion from your subjects, ask for it. There is nothing more uncomfortable for your clients than a photographer who is silent behind the camera while continuously clicking the shutter.

Most clients are not professional models and generally, they are quite camera shy and self-conscious. It is our responsibility as the photographer to direct, educate, and interact with our clients to make them comfortable in front of our lens.

If you are shooting landscapes or still lifes, aim to create emotion in your images that move your audience to feel something. Be it a serious case of wanderlust viewing a travel photo from an exotic locale, or insane hunger when looking at your food images!

15 Photography Exercises to Boost Your Creativity

Sometimes staged photos take a turn of their own and present opportunities for different perspectives!

#2 – Try some motion blur

There are many different ways to achieve motion blur. I associate motion blur with the effect of capturing movement in a frame. You can either capture movement in your subject or by moving yourself or the camera (e.g. panning). For me, the easiest way to achieve motion blur is to slow the shutter speed and show some movement of the subject. Motion blur adds an interesting artistic element in your images if done right. One tip, use a tripod for optimal effect.

15 Photography Exercises to Boost Your Creativity

When fog was our constant companion on a beach camping trip in the pacific northwest, I chose to use it to my advantage to create an eerie effect with motion blur – in the waves and the people walking along the beach!

15 Photography Exercises to Boost Your Creativity

Panning image courtesy of dPS Editor, Darlene.

googletag.cmd.push(function() {var gpt_slot = googletag.defineSlot( “/1005424/_dPSv5in-post-mobile(300×250)”, [300, 250], “pb-ruleset-mobile-ad-0” ).addService( googletag.pubads() );ruleset_mobile_slots.push( gpt_slot );});

googletag.cmd.push(function() {var gpt_slot = googletag.defineSlot( “/1005424/_dPSv5in-post-mobile(300×250)”, [300, 250], “pb-ruleset-desktop-ad-4” ).addService( googletag.pubads() );ruleset_desktop_slots.push( gpt_slot );});

#3 – Go macro

Traditionally macro photography has been associated with floral and fauna. But resist the urge to get out into the garden to find the smallest ant to photograph. Instead, think of macro as a great way to isolate details in an image.

15 Photography Exercises to Boost Your Creativity

As a wedding photographer, I love using my macro lens to capture unique ring shots for my couples. And of course, nothing like highlighting the snow (I live in Chicago!).

#4 – Find reflections

As the name suggests, try and find mirror images or reflections, either with mirrors or with water, of your subject and shoot creatively.

Reflections of people in water image - 15 Photography Exercises to Boost Your Creativity

It really helps if your subjects are great sports and willing to get into the water for a shot like this!!

#5 – Shoot out of focus

Whether it’s an unlucky accident or intentional, I love out of focus images. Remember these creative exercises are simply an attempt to create something you are proud of. There are no right or wrongs, they are all just ways to stimulate your creative juices.

#6 – Wabi-sabi – embracing imperfection

As per Wikipedia, wabi-sabi represents Japanese aesthetics and a Japanese world view centered on the acceptance of transience and imperfection. The aesthetic is sometimes described as one of beauty that is “imperfect, impermanent, and incomplete”.

There is something innately beautiful in imperfections. That feeling of being alive and being human and living life to the fullest, versus living in the proverbial glass house where nothing is out of order. The best way to think of wabi-sabi is to look for imperfections in your everyday.

15 Photography Exercises to Boost Your Creativity

I love everything old and vintage. They always tell me stories of a different, more interesting time and place!

15 Photography Exercises to Boost Your Creativity

#7 – Double exposures

Ding a double exposure is a carry-over from the old film days and it is a super creative way to take your images from boring to wow! In its simplest form, it is a way to superimpose two images onto a single frame. The good news is that you don’t need a film camera to create double exposures. Some of

Some newer DSLRs have a multiple exposure setting as a tool for creative photography. It takes a little bit of reading but once you get the hang of it, I promise, you will be hooked. We also have a great article in the DPS archives that talks about the techniques of multiple exposures How to do Multiple Exposures In-Camera.

15 Photography Exercises to Boost Your Creativity

googletag.cmd.push(function() {var gpt_slot = googletag.defineSlot( “/1005424/_dPSv5in-post-mobile(300×250)”, [300, 250], “pb-ruleset-mobile-ad-1” ).addService( googletag.pubads() );ruleset_mobile_slots.push( gpt_slot );});

googletag.cmd.push(function() {var gpt_slot = googletag.defineSlot( “/1005424/_dPSv5in-post-mobile(300×250)”, [300, 250], “pb-ruleset-desktop-ad-5” ).addService( googletag.pubads() );ruleset_desktop_slots.push( gpt_slot );});

#8 Diptych

A diptych is a concept of placing two images side by side so that they add context to each other and tell a complete story. When choosing images to form a diptych, pay close attention to light, tones, and exposures. Typically I compose my diptychs to include a big picture image and a detail shot of an element of that image.

15 Photography Exercises to Boost Your Creativity

My focus with dyptics is to dig deeper into my stories…focus on the details along with the big picture.

#9 – Triptych

Similar to diptych, a triptych is a concept of placing three images side by side so that they collectively tell a story.

15 Photography Exercises to Boost Your Creativity

Especially with tryptics, pay special attention to the order and orientation of the images. At times this might limit the placement of the images in a certain order.

#10 – Shooting through objects

I love shooting through objects, it adds an element of interest and depth in the foreground. You can really take this up a notch by using every day elements like leaves, branches, fabric pieces and ever glass to create some cool artistic effects in your images.

15 Photography Exercises to Boost Your Creativity

15 Photography Exercises to Boost Your Creativity

#11 – Different perspective

The next time you find yourself shooting the same subject the same way, take a step back and rethink your strategy. Are you a 100% vertical shooter like me? Then force yourself to take a horizontal frame. Are you always looking at details? Then use a wide-angle lens and force yourself to take in the big picture. Do you always shoot at a narrow aperture so as to get everything in focus? Then dial down your aperture and shoot at the widest possible setting (based on your lens) to focus in on one detail of the whole image.

15 Photography Exercises to Boost Your Creativity

Personally, I tend to shoot closeup and focus on the details a lot more than I do the big picture. So I have been forcing myself to do just that…and I love when I get diversity of 50-50 in my vertical and horizontal orientation shots! Bonus point to you if you can spot the subject here!!

#12 – Burst of color

It’s a beautiful, colorful world out there. Get out and photograph it. Don’t be afraid of the bold bright colors, but definitely be aware of which colors work and which ones don’t quite translate well in imagery. Train your mind to look for certain colors and patterns and before you know it, you will have a collection of colorful images that make you happy.

15 Photography Exercises to Boost Your Creativity

15 Photography Exercises to Boost Your Creativity

I just loved the pop of color from my husband’s red jacket as he walked along the lakeshore with the Olympic mountains in the background.

#13 – Monochromatic

This is the exact opposite of #12 where your challenge is to look for and shoot a black and white image. You can either convert the image to B&W in post-processing or change the setting on your camera (depending on the make and model) to shoot monochromatic in-camera.

googletag.cmd.push(function() {var gpt_slot = googletag.defineSlot( “/1005424/_dPSv5in-post-mobile(300×250)”, [300, 250], “pb-ruleset-mobile-ad-2” ).addService( googletag.pubads() );ruleset_mobile_slots.push( gpt_slot );});

googletag.cmd.push(function() {var gpt_slot = googletag.defineSlot( “/1005424/_dPSv5in-post-mobile(300×250)”, [300, 250], “pb-ruleset-desktop-ad-6” ).addService( googletag.pubads() );ruleset_desktop_slots.push( gpt_slot );});

The key here is to look for patterns and compositions that work well in black and white. A point to note is that processing is very subjective, as is black and white imagery. There are no right or wrong images, but here are a few articles to help you take great monochrome images.

  • How to Create Good Black and White Portraits
  • 6 Tips to Help You Make Better Black and White Landscape Photos
  • Avoid These 5 Common Mistakes in Black and White Photography
  • A Guide to Black and White Conversion in Photoshop
  • A Guide to Black and White Conversion in Lightroom
  • Improve Your Middle of the Day Photos By Doing Black and White

15 Photography Exercises to Boost Your Creativity

15 Photography Exercises to Boost Your Creativity

#14 – Pattern play

Take the time to look around and see if you are able to find any natural patterns around you. These can be either man-made or natural. Facades of buildings, windows, parking lots, and landscapes all provide many opportunities to capture repeating patterns. Capture them in an interesting way to highlight those patterns.

15 Photography Exercises to Boost Your Creativity

#15 – Shadow play

Shadow play is most prevalent in situations when the sun is high in the sky creating harsh shadows on the ground, on buildings and directly unto the subject. But magic with light also happens indoors. Learn to embrace this high contrast between shadow and sun and try to capture some creative angles.

Dramatic light Images Shadow play - 15 Photography Exercises to Boost Your Creativity

Conclusion

I hope these exercises have proven to you that there isn’t any lack of creativity prompts in and around you. You just have to look for them anytime you feel stuck or find yourself creating the same or similar images again and again. Keep these prompts in the back of your mind, use them, combine them, mix them up – the possibilities are endless!

googletag.cmd.push(function() {var gpt_slot = googletag.defineSlot( “/1005424/_dPSv5in-post-mobile(300×250)”, [300, 250], “pb-ruleset-mobile-ad-3” ).addService( googletag.pubads() );ruleset_mobile_slots.push( gpt_slot );});

googletag.cmd.push(function() {var gpt_slot = googletag.defineSlot( “/1005424/_dPSv5in-post-mobile(300×250)”, [300, 250], “pb-ruleset-desktop-ad-7” ).addService( googletag.pubads() );ruleset_desktop_slots.push( gpt_slot );});

The post 15 Photography Ideas to Boost Your Creativity by Karthika Gupta appeared first on Digital Photography School.


Digital Photography School

 
Comments Off on 15 Photography Ideas to Boost Your Creativity

Posted in Photography


What are the Best Street Photography Camera Settings and Why

21 Mar

Did you ever wonder how the photographers of the past did it? All they had were manual cameras and yet somehow they had a method that beats even the latest technology in autofocus! Wonder what it was? Let’s find out first what it was and discuss what most call the best street photography camera settings.

The best street photography settings

Now, before getting into this, let’s get something straight. If you are doing something in your street photography and it works for you, then by all means, you’ve found the settings that fit you best and you probably want to stick with them. What I am presenting here are the tried and true ways that not only past photographers used, but most street photographers prefer today. But it’s not magic by any means. With that being said, let’s start with focusing on street photography.

What are the Best Street Photography Camera Settings and Why
What’s faster than autofocus?

I know you are probably wondering how something can be faster than the latest autofocus, especially when every new camera wants you to believe they have the fastest AF in the world. The answer is – pre-focusing. What photographers of the past did was to pre-focus their camera onto a certain zone and simply shot, paying attention so that their subjects were within that area.

If you look at the example below, the photographer could either pre-focus on the blue or red area. Then anything or anyone that came within the blue or red area (depending which they chose) would be in focus.

What are the Best Street Photography Camera Settings and Why

Pre-focus zones.

Autofocus also comes with certain issues, because even if you have the fastest autofocus in the world, it can only guess WHERE you want it to focus. When you have people coming at you, it will most likely focus on the person that is closest to you. You could change your focus points, put if you wanted to shoot outside of that point, you would have to focus and recompose. That is not a luxury you often have in the street. Zones eliminate that problem. They are like a forcefield that you have in front of your camera, whoever enters that force field will be in focus. Those fields usually require smaller apertures, hence street photographers usually rely on f/5.6 or f/8.

Setting up your forcefield

In order to set up your own forcefield, you will need to know what kind of shots you want. Do you want to make images of your subjects up close, or further away? That will determine where you need to focus. Let’s say you want to take a few shots with your subject at less than one meter. All you need to do is to put your lens like so:

dof

My aperture is at f/16, so I would put the marking on the left to 0.7, and look at the other marking on the right. That would tell me that everything between 0.7 to 1.2 meters will be in focus. The way aperture works, the further away you are, the larger the depth of field, so putting it at one meter would have had a lot of space in focus.

But, “my lens doesn’t have those marks”, you say! That’s where a tool like DOFmaster comes in:

Say you have a Canon 7D, for example. Select it from the camera dropdown menu and put in the lens focal length (say 35mm). If you focus at one meter, everything from 0.89m to 1.14m will be in focus. But the tool also tells you how to get the greatest zone of all, it tells you what your hyperfocal distance is. So if you focus at 8.09m, everything from 4m to infinity would be in focus at f/8.

Most street photographers I know set it to the hyperfocal distance. But when the light starts dropping, if they want some part of the image not in focus, or if they want their subjects really close, they use smaller zones (and larger apertures) and switch between them.

But what if your camera doesn’t even tell you where you are focused? Then you just need an app for that. You can download EasyMeasure (iOS) or Smartmeasure (Android). Then stand in front of a wall to get your distance to it, go back and forth until you get your desired distance, then focus on the wall and voila your zone is set!

What are the Best Street Photography Camera Settings and Why
The other settings

Once you have your focus and aperture set, what about your other settings? You’ve got a few choices. First of all, you can leave them all on manual (shooting in Manual mode) and adjust them on the fly. Or you can put the shutter speed on automatic (camera in Aperture priority mode) and deal with ISO manually.

A good choice is to keep the shutter speed above 1/125th because stuff usually happens fast on the streets and below that there is risk of camera shake. Of course the same applies for when you are shooting manually too, better to not go below 1/125th, but that might be different for you if you shoot slowly.

The other setting that is left is ISO. You could also put it on auto-ISO, but put a cap on it. I think most modern cameras that are adjustable should be okay with a cap of 1600. But you’ll have to watch out, some cameras don’t have great auto ISO and will go to ISO 1600 in broad daylight.

What are the Best Street Photography Camera Settings and Why
The Semi-automatic Settings

The settings below will help you to focus on the image and only worry about if someone is in your focus zone or not:

  • Set your aperture to f/8
  • Focus at the hyperfocal distance
  • Auto shutter speed, do not go lower than 1/125th
  • Auto-ISO set to not go higher than 1600

One of the strengths of this system is that it accounts for transition time. Imagine you are walking out of a building, from which the inside was darker than outside, which is super sunny.

If you are in manual shooting mode for your ISO and shutter speed, you may have to adjust the exposure by three stops if an image suddenly appears in front of you. While you’re changing the shutter speed you might not have time to change the ISO and may mess up the exposure. However, if at least one of them was auto, this would have been done for you automatically.

What are the Best Street Photography Camera Settings and Why

Conclusion

There you have it, the street photography settings that the photographers of the past used (sans automatic modes of course) and that many street photographers still use today. But what’s most important is to find out what works best for you and your style of shooting. Try these out. They are tried and true, but nobody said you HAVE to use them. Do what works for you! Be yourself, stay focused, and keep on shooting.

The post What are the Best Street Photography Camera Settings and Why by Olivier Duong appeared first on Digital Photography School.


Digital Photography School

 
Comments Off on What are the Best Street Photography Camera Settings and Why

Posted in Photography


Why Wireless Tethering Will Improve Your Photography

20 Mar

As a photographer, shooting tethered is one of the best ways to improve your photography skills. Tethering helps you zoom into the details of your shots on a big screen so you can make adjustments as you go. It also encourages collaboration by keeping your photo subject or client engaged if they’re on location with you. In this article, I’ll explain what tethered shooting is and why wireless tethering with an app like CamRanger is the best choice.

What is tethering?

By definition, tethering is when a mobile device shares its internet connection with another device. This can be done through Wi-Fi, Bluetooth, or a physical connection cable (e.g. USB). Many mobile phones can tether to share their Wi-Fi with laptops or tablets. Similarly, cameras can tether as well. But in the case of tethered shooting with a camera, the purpose is to transmit images from the camera directly to another device such as a laptop computer or tablet.

CamRanger Wireless Tethering 11

The cheapest and most efficient way to shoot tethered is to use a wired connection. All you need is a standard USB cable that connects to your camera and tethering software such as Capture One, Adobe Lightroom, or DSLR Controller. Wired tethering is very cheap, and it’s extremely quick. There’s practically no delay between pressing the shutter on your camera and seeing the resulting image pop up on your screen. Get more info and a detailed step-by-step guide to wired tethering here.

What is wireless tethering?

However, the main disadvantage with wired tethering is the cable. It can easily get unplugged from your camera or laptop and mess up the tethered connection. The cable can also be a hazard on set, causing you or your photo subject to trip over it. This is where wireless tethering can come in handy. If you shoot on location and can’t be bothered with a cable limiting your movement, wireless tethering is an option you may want to explore.

When you tether wirelessly, you plug a device such as CamRanger into your camera and use it to create a wireless network. Any device such as a laptop or tablet can join that wireless network and your images are transmitted wirelessly every time you press the shutter button. You can even remotely control the camera from your tethered computer or tablet.

CamRanger Wireless Tethering 10

Why CamRanger is the Best Wireless Tethering Device

There are several wireless tethering devices available, and I tried many of them out in search of the one that would work best. My devices requiring connectivity included a Canon 5D Mark III, Canon 6D cameras, Android smartphone, and Apple laptop computer. Although it’s the most expensive, CamRanger is my wireless tethering device of choice. Here’s why:

1. Minimal stuff in the box

The contents in the CamRanger box are very minimal, consisting of just a few cables, a case, simple instructions, and the unit itself. I really loved the zippered case with a carabiner that easily fit all of the items. One thing that would be nice to have is the CamRanger hot shoe mounting device, which has to be purchased separately.

CamRanger Wireless Tethering

2. Intuitive setup

After unboxing CamRanger, setup is pretty simple. Begin by downloading the CamRanger app to your tethering device of choice. Currently, you can download the CamRanger app for iOS (iPhone and iPad), Android devices, Kindle Fire, and both Mac and Windows computers.

Next, switch on the CamRanger device so that it broadcasts a Wi-Fi signal. This might take a minute or two. Then connect your tethering device, with the app installed, to the CamRanger Wi-Fi network using the CamRanger’s serial number as the Wi-Fi password. Boom! You’re ready to shoot!

CamRanger Wireless Tethering 01

CamRanger desktop app allows for wireless tethering and remote camera control.

3. Compatible with Canon and Nikon

CamRanger will work with both Canon and Nikon DSLRs. For a full list of compatible cameras, check out their website.

How CamRanger actually works

Whenever you shoot tethered with CamRanger, the device stores image previews in a cache on your device. The actual files are still written to your camera’s CF or SD memory card like usual. While the wireless transfer of images can definitely be slow, this process can be sped up if you change your camera preferences to shoot in JPG only, or RAW + JPG. Transferring JPG images goes much faster than RAW images.

Another huge benefit of CamRanger is the option to switch the app into Client Mode. This allows you to hand your tethered device over to your client to preview images created in real time, without allowing them to remotely control your camera so you can keep shooting. It’s a clever feature that really adds value.

CamRanger Wireless Tethering 11

In practice, there are a few limitations of CamRanger to be aware of. First, note that wireless tethering still has a limited range of about 100-150 feet. If your camera and connected device drift outside of this range, you risk losing connectivity. Second, CamRanger does have a decent battery life of 5-6 hours by itself, but using it in conjunction with Live View on your camera can drain your camera batteries quickly.

CamRanger Positive Features

  • Very easy to setup and start using immediately
  • Built-in features include focus stacking, bracketing, and intervalometer
  • Minimal pieces, so it is easy to travel with
  • Lets clients easily see my images and give feedback
  • Reduces time in post-processing by making real-time adjustments when shooting
  • Eliminates the long, hazardous USB cable needed for wired tethering


What about built-in Wi-Fi?

If you have a camera with built-in Wi-Fi, you can probably remote control your camera and perform some tethering functions. As an example, I have the Canon 6D DSLR which has Wi-Fi connectivity. This is great for wirelessly transmitting images to my mobile phone and for doing some remote camera control via the Canon Camera Connect mobile phone app. However, no such app exists for my laptop, so I cannot wirelessly connect to my computer without using another device and USB cable. This is why I still use CamRanger to shoot tethered from my laptop, even with my Wi-Fi enabled camera.

CamRanger Alternatives

There are a couple of other popular CamRanger alternatives that also permit you to do wirelessly tethering. I tried both of these options out and found they weren’t nearly as comprehensive or reliable as CamRanger.

  • CamFi
  • Tether Tools Case Air

In Conclusion

Do you shoot tethered? What do you think about the pros and cons of wireless tethered shooting? Let me know in the comments below!

The post Why Wireless Tethering Will Improve Your Photography by Suzi Pratt appeared first on Digital Photography School.


Digital Photography School

 
Comments Off on Why Wireless Tethering Will Improve Your Photography

Posted in Photography


Erez Marom: On causality in landscape photography

18 Mar

Causality is the relationship between cause and effect – and in landscape photography, this dynamic can help you tell a story, beyond the conventional structures of composition and color.

Considering causality in a landscape image can have a number of advantages. First of all, including a visual indication of cause and effect can provide a through-line, within the composition of an image. Imagine a light source – mostly the sun or the moon in nature photography – on one side of the frame and the light or shadow it casts on the other side. This simple visual element does a great deal to connect the different sections of the image, and the different compositional elements on a higher level than just symmetry or balance.

Causality also adds interest. Images are comprised of several levels. The basic foundational structure is the composition. Beyond that, there’s brightness, color, contrast and similar traits, which bring the compositional elements to life by articulating the more delicate visual intricacies of the photographed subject/s.

Including a cause and effect dynamic can add another level in this hierarchy: not only there are interesting elements and good colors, there’s a story. Story-telling can be hard to achieve in landscape photography, but inclusion of a cause/effect dynamic can immediately introduce a different level of content. Picture an image which includes sun rays and a glacier melting into a river. Maybe it’s just a pretty picture, but maybe you’re telling a story about the threat of global warming.

The sun, reflected on the walls of this ice cave, is what caused it to form. This image tells the story of the glacial melting, and the inclusion of the cause and its effect enriches the picture’s visual appeal.

The final way that a case and effect dynamic can contribute to an image is by what might be called imagined causality: the inclusion of elements which don’t affect each other in real life, but which are placed in such a way that the viewer is encouraged to imagine they might be related.

Take for example the image of Quiver Tree Forest, Namibia at night (above). I call the image ‘Phototaxis’, which is the movement of an organism toward a source of light. Needless to say, the Milky Way isn’t what draws the quiver trees to grow upward, but composing them in this way, using the ultra-wide angle lens to cause them to tilt toward the center of the image, all together with the image’s title, encourage the viewer to imagine the trees being drawn to it.

The quiver trees are thereby humanized, and the anthropomorphism makes the viewer identify and feel a deeper emotional connection to the trees and to the image as a whole, which is turn achieves our goal as photographers: having the viewer look at the image a bit more carefully, and take meaning from it.


If you’d like to experience and shoot some of the most fascinating landscapes on earth with Erez as your guide, you’re welcome to take a look at his unique photography workshops around the world:

Land of Ice – Southern Iceland
Winter Paradise – Northern Iceland
Northern Spirits – The Lofoten Islands
Giants of the Andes and Fitz Roy Hiking Annex – Patagonia
Tales of Arctic Nights – Greenland
Saga of the Seas and The Far Reaches Annex – The Faroe Islands
Desert Storm – Namibia

Selected Articles by Erez Marom:

  • Parallelism in Landscape Photography
  • Behind the Shot: Dark Matter
  • Mountain Magic: Shooting in the Lofoten Islands
  • Behind the Shot: Nautilus
  • Behind the Shot: Lost in Space
  • Behind the Shot: Spot the Shark
  • Quick Look: The Art of the Unforeground
  • Whatever it Doesn’t Take
  • Winds of Change: Shooting changing landscapes
  • On the Importance of Naming Images

Articles: Digital Photography Review (dpreview.com)

 
Comments Off on Erez Marom: On causality in landscape photography

Posted in Uncategorized